

Page 1
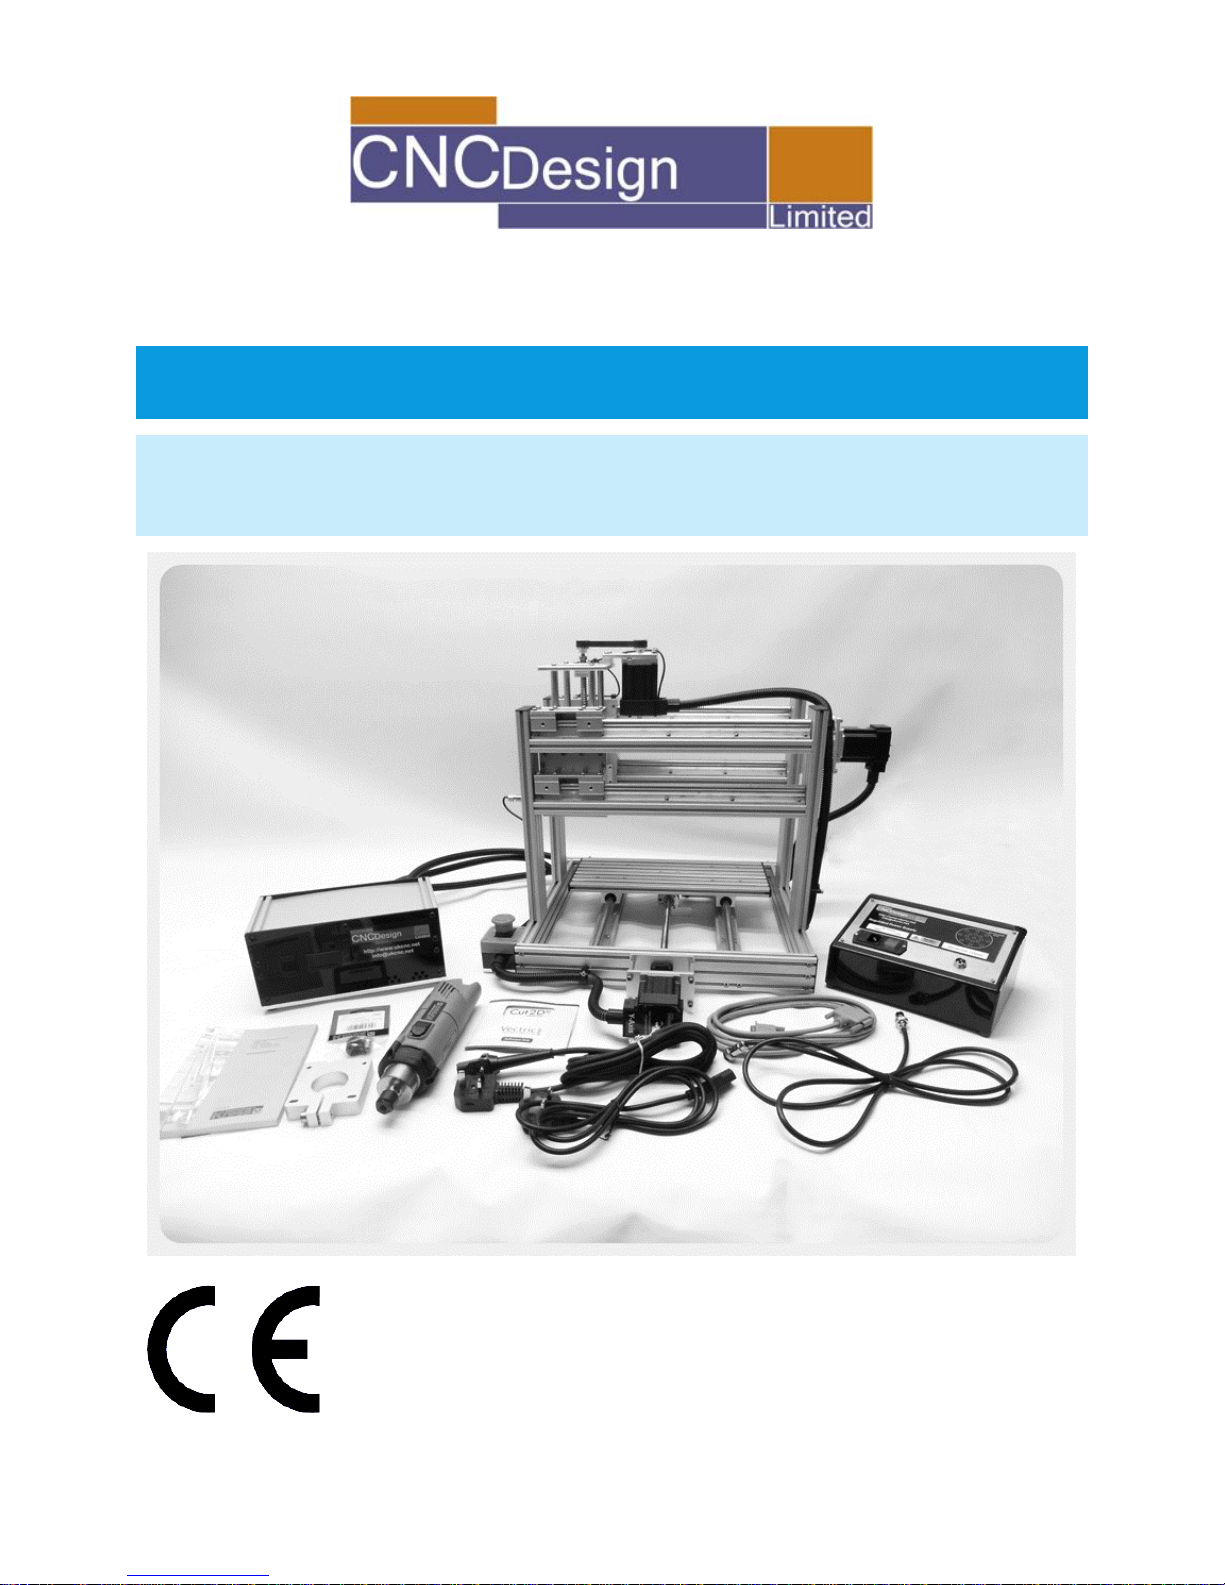
CNC MINI MUSCLE
INSTRUCTIONS
IMPORTANT: PLEASE READ THESE INSTRUCTIONS CAREFULLY
TO ENSURE THE SAFE AND EFFECTIVE USE OF THIS MACHINE.
Version 1 – 05/04/2016
Page 2

[1]
CONTENTS
Declaration Of Conformity ................................................................................. 2
Specification ....................................................................................................... 3
Warranty ............................................................................................................ 3
Safety Warning ................................................................................................... 4
Maintenance ...................................................................................................... 4
Getting To Know Your CNC Mini Muscle............................................................ 5
Unpacking your CNC Mini Muscle ................................................................... 6-9
Operation and use .................................................................................... 10 - 11
GENERAL INFORMATION
This manual has been compiled by CNC Design Ltd and is an integrated part of the product with which it is
enclosed and should be kept with for future references.
This manual describes the purpose for which the product has been designed and contains all the necessary
information to ensure its correct and safe use. We recommend that this manual is read before any operation or,
before performing any kind of adjustment to the product and prior to any maintenance tasks. By following all the
general safety instructions contained in this manual it will ensure both the product and operator safety, together
with longer life of the product itself.
All photographs and drawings in this manual are supplied by CNC Design Ltd to help illustrate the operation of
the product.
Whilst every effort has been made to ensure accuracy of information contained in this manual, the CNC Design
Ltd policy of continuous improvement determines the right to make modifications without prior warning.
Page 3
[2]
DECLARATION OF CONFORMITY
Page 4

[3]
SPECIFICATION
The CNC Design Ltd policy of continuous improvement determines the right
to change specification without notice.
Dimensions of base plate
(L x W x H)
465mm x 465mm x 410mm (approx.)
Dimensions of work area
(L x W x H)
310mm x 310mm x 90mm
Clamping Area
370mm x 160mm
Weight
31Kg
Stepper Motor Torque
3.1Nm
Drivers
4.2amp stepper drivers
Rails
12mm Quad Rails on Z-Axis
12mm Quad Supported Rails on X-Axis
12mm Dual Supported Rails on Y-Axis
WARRANTY
12 months Return to Base warranty is offered all assembled machines. This is
on a Return to Base policy which means the customer will be liable to pay for
the shipping of the faulty parts back to us and we will be liable for the cost of
replacing and shipping back to the customer.
Page 5

[4]
SAFETY WARNING
Keep hands clear of moving parts during operation.
Ensure all bolts are fully tightened before operating.
Make sure the power is switched off before connecting the power supply to
the controller box.
MAINTENANCE
The machine has been designed to be low maintenance.
Your machine has been delivered dry as such to keep the machine as clean as
we can when assembling.
Please make sure to apply grease to the Ball Screws and all the Rails before
running the machine too hard or fast.
Any moving parts such as the Axis Ball Screws and Rails needs to be lightly
greased periodically depending on use.
Check the tightness of all nuts and bolts.
Page 6
[5]
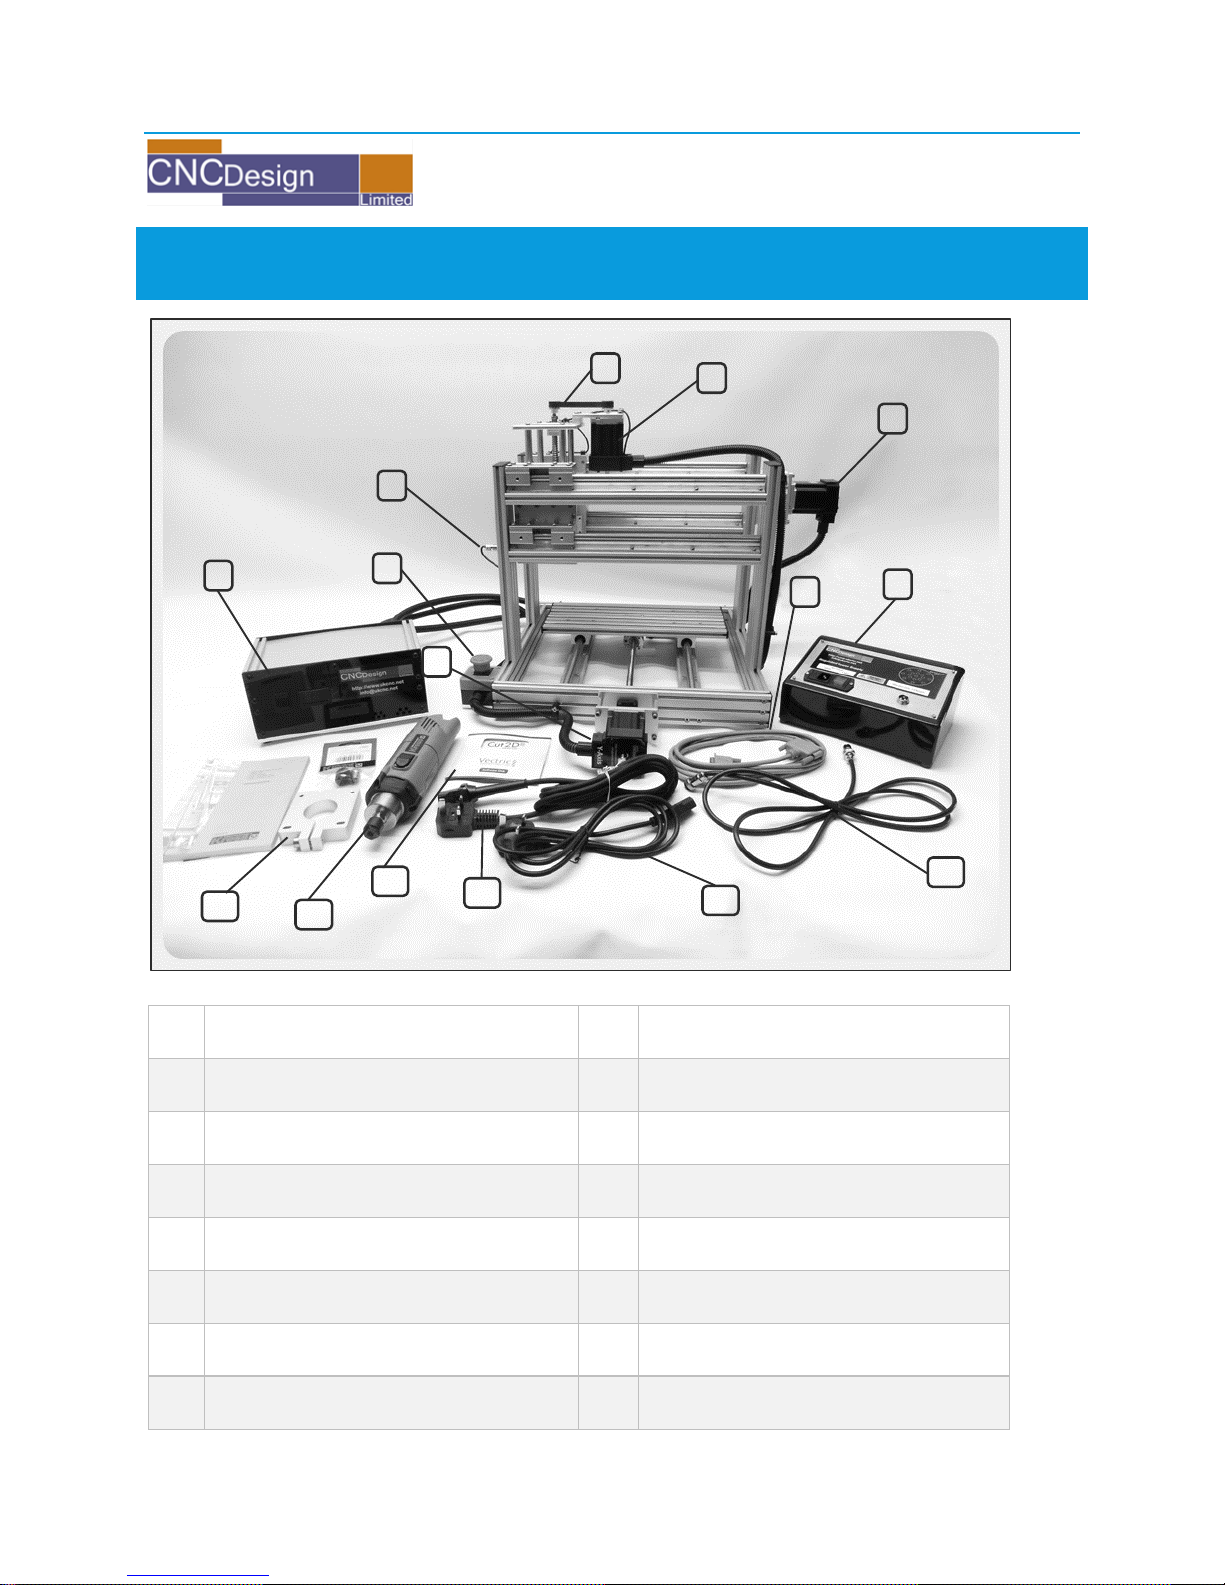
GETTING TO KNOW YOUR CNC MINI MUSCLE
1
Controller Box
9
Serial Cable
2
Limit Switch
10
DC Cable
3
Emergency Stop Button
11
Power Supply Cable
4
Y-Axis Motor
12
Spindle Power cable
5
Belt Pulley System
13
Cut2D Software
6
Z-Axis Motor
14
Kress Spindle
7
X-Axis Motor
15
Custom Spindle Holder
8
Power Supply
1 6 2
5 8 7
12
10 9 11 4 13
14
15
3
Page 7
[6]
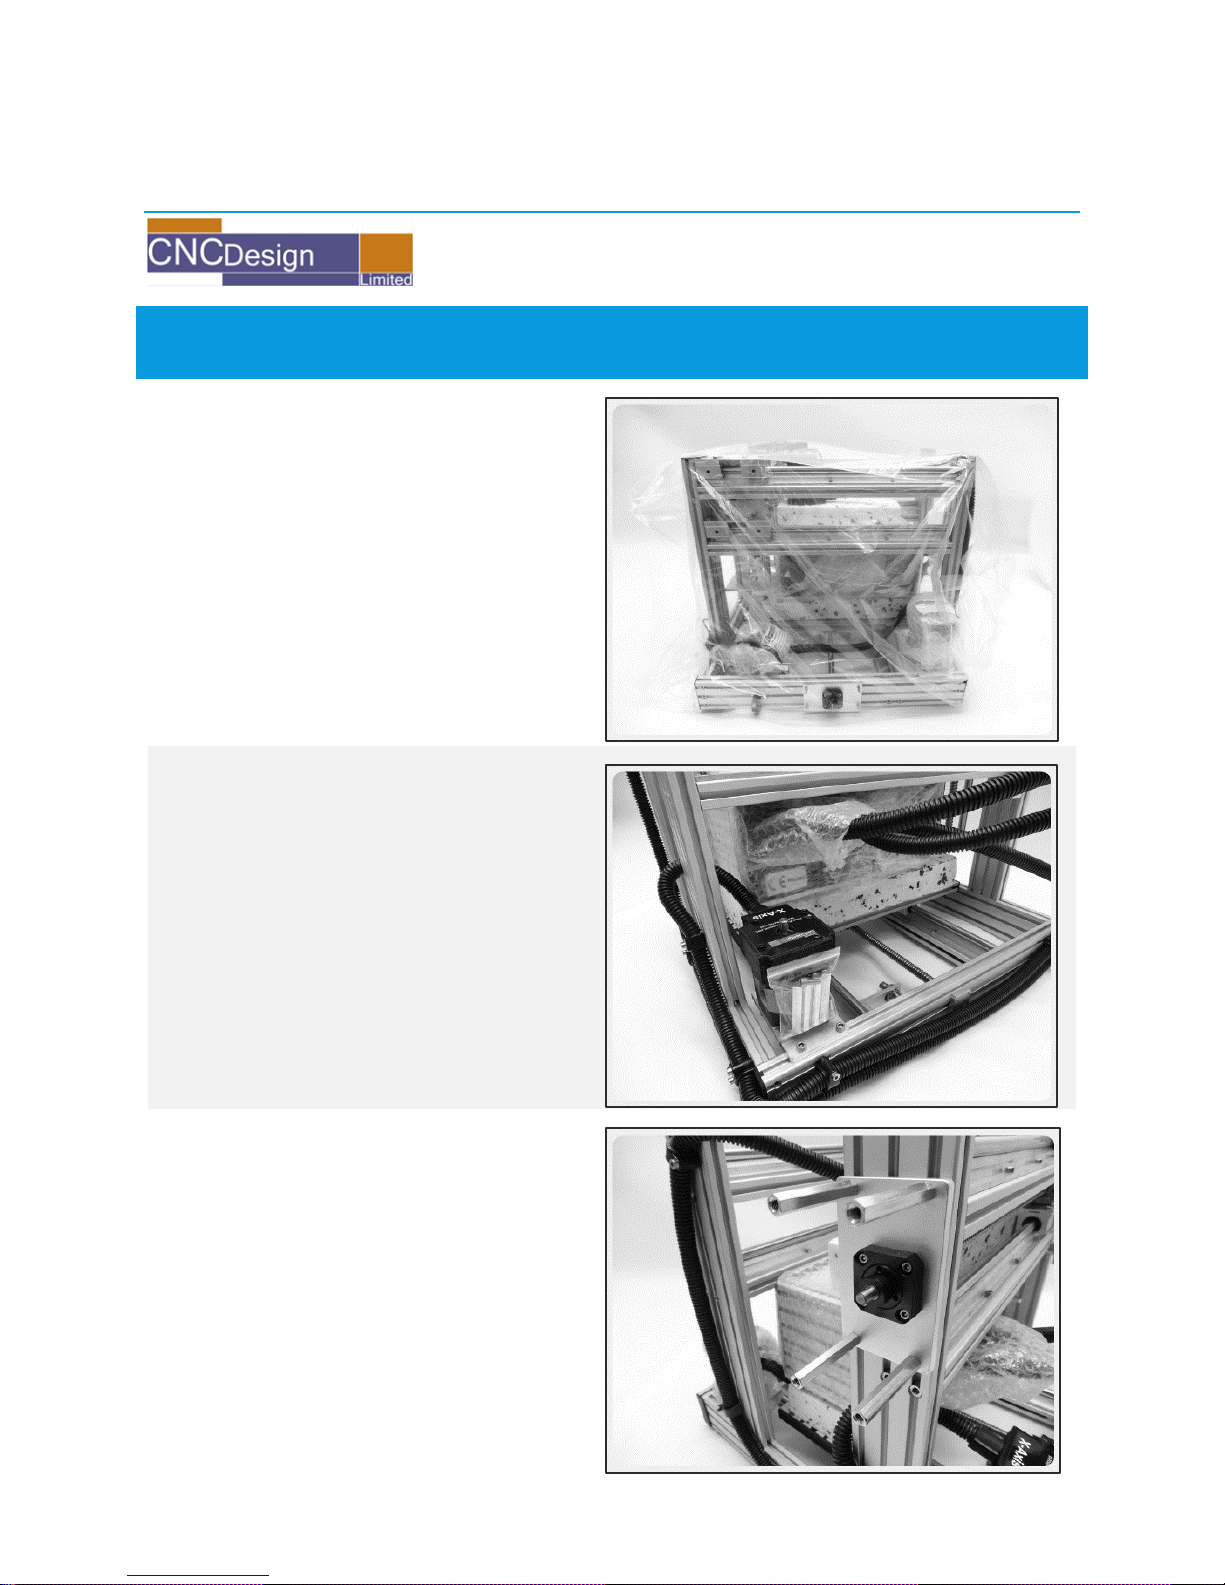
UNPACKING YOUR CNC MINI MUSCLE
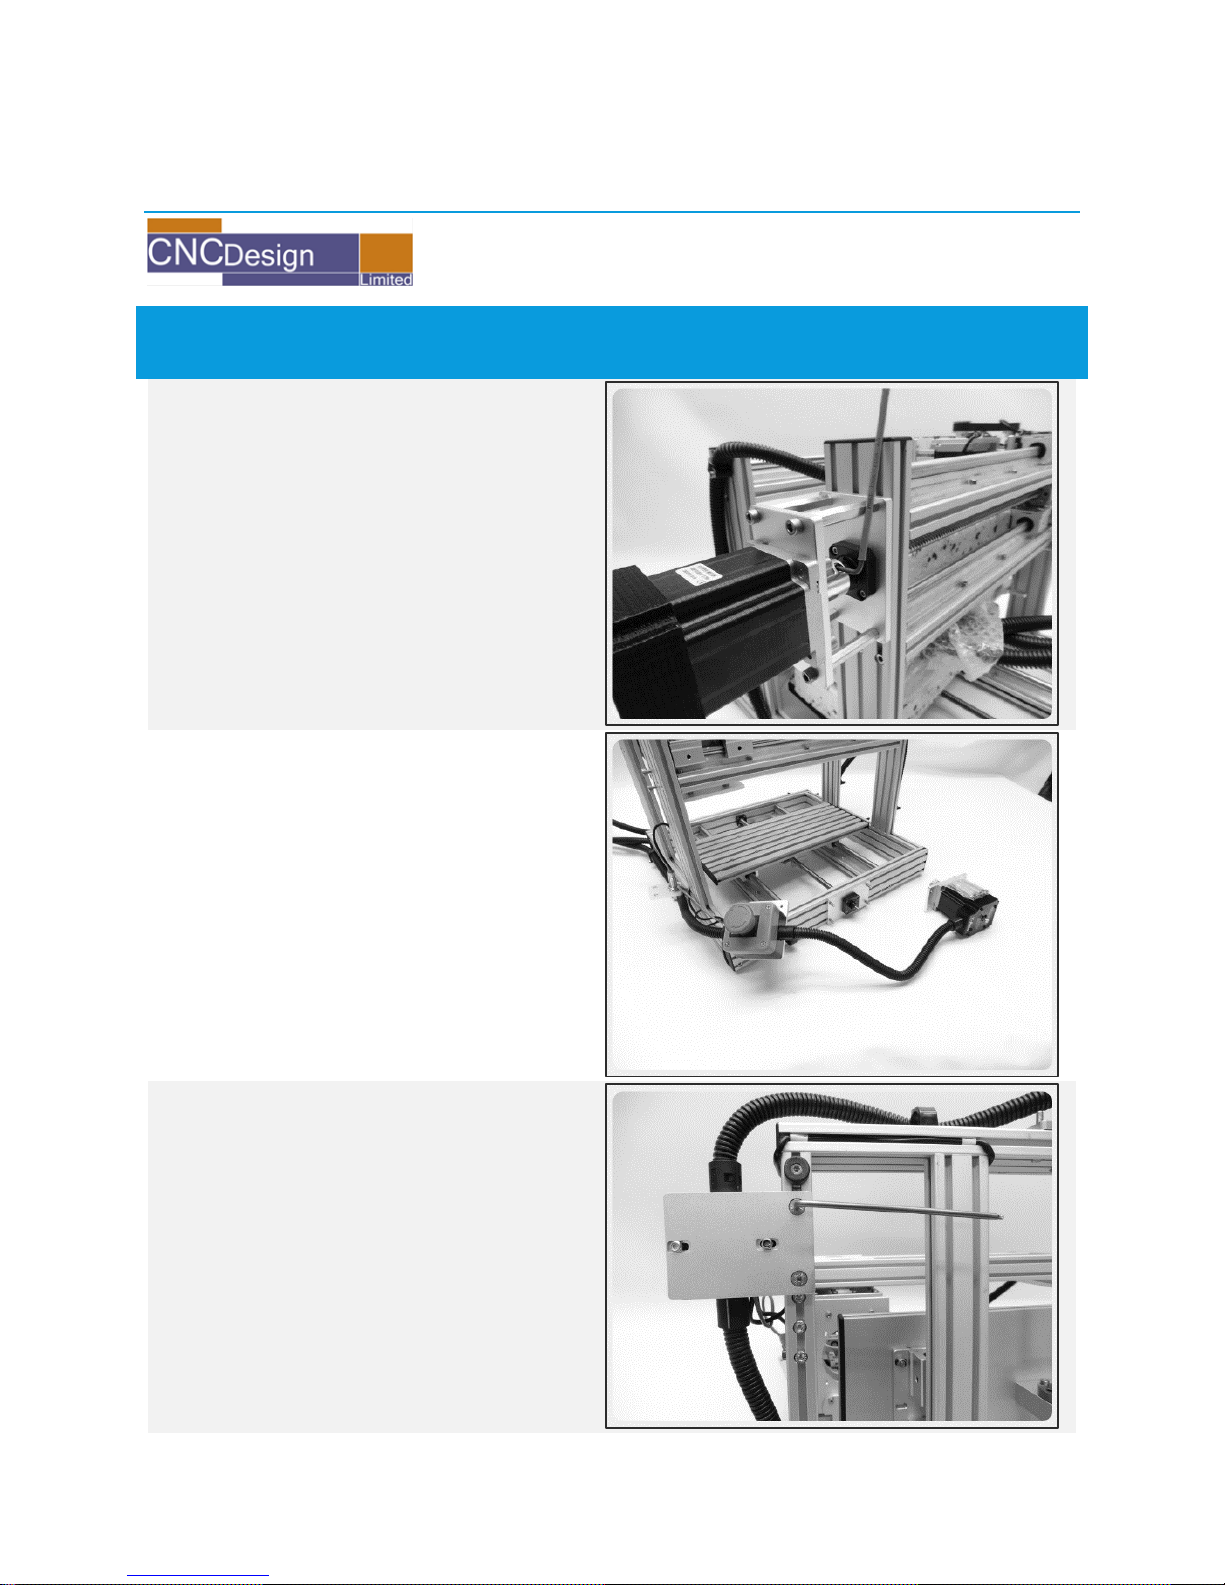
Remove Machine from box,
remove wrapping and bubble
wrap.
Unbolt the X-axis motor and
move the controller box.
Attach the 4 spacers to the X-axis
and tighten.
Page 8
[7]
UNPACKING YOUR CNC MINI MUSCLE
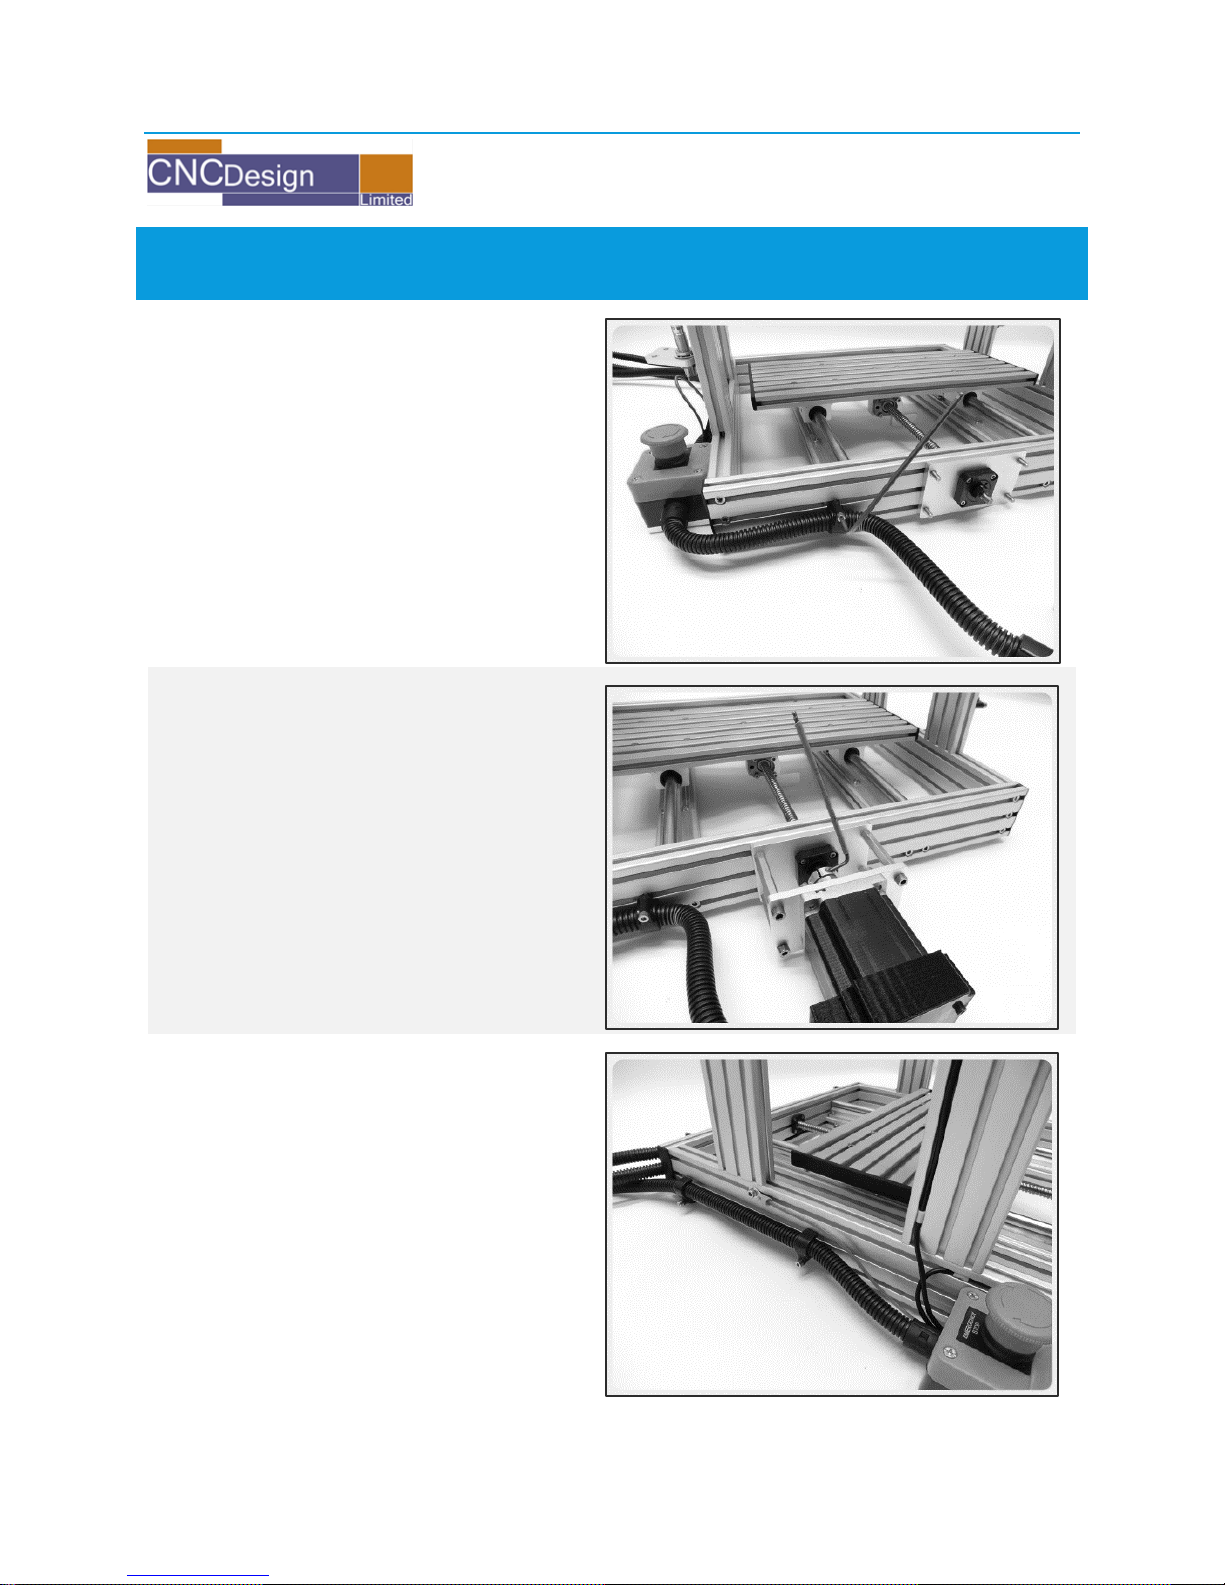
Bolt the X-axis motor onto the
spacers and tighten the coupler.
Remove the bubble wrap and
cable ties, then unbolt the Y-axis
motor.
Bolt the emergency stop button
to the bottom of the frame with
the 2 countersunk bolts.
Page 9
[8]
UNPACKING YOUR CNC MINI MUSCLE
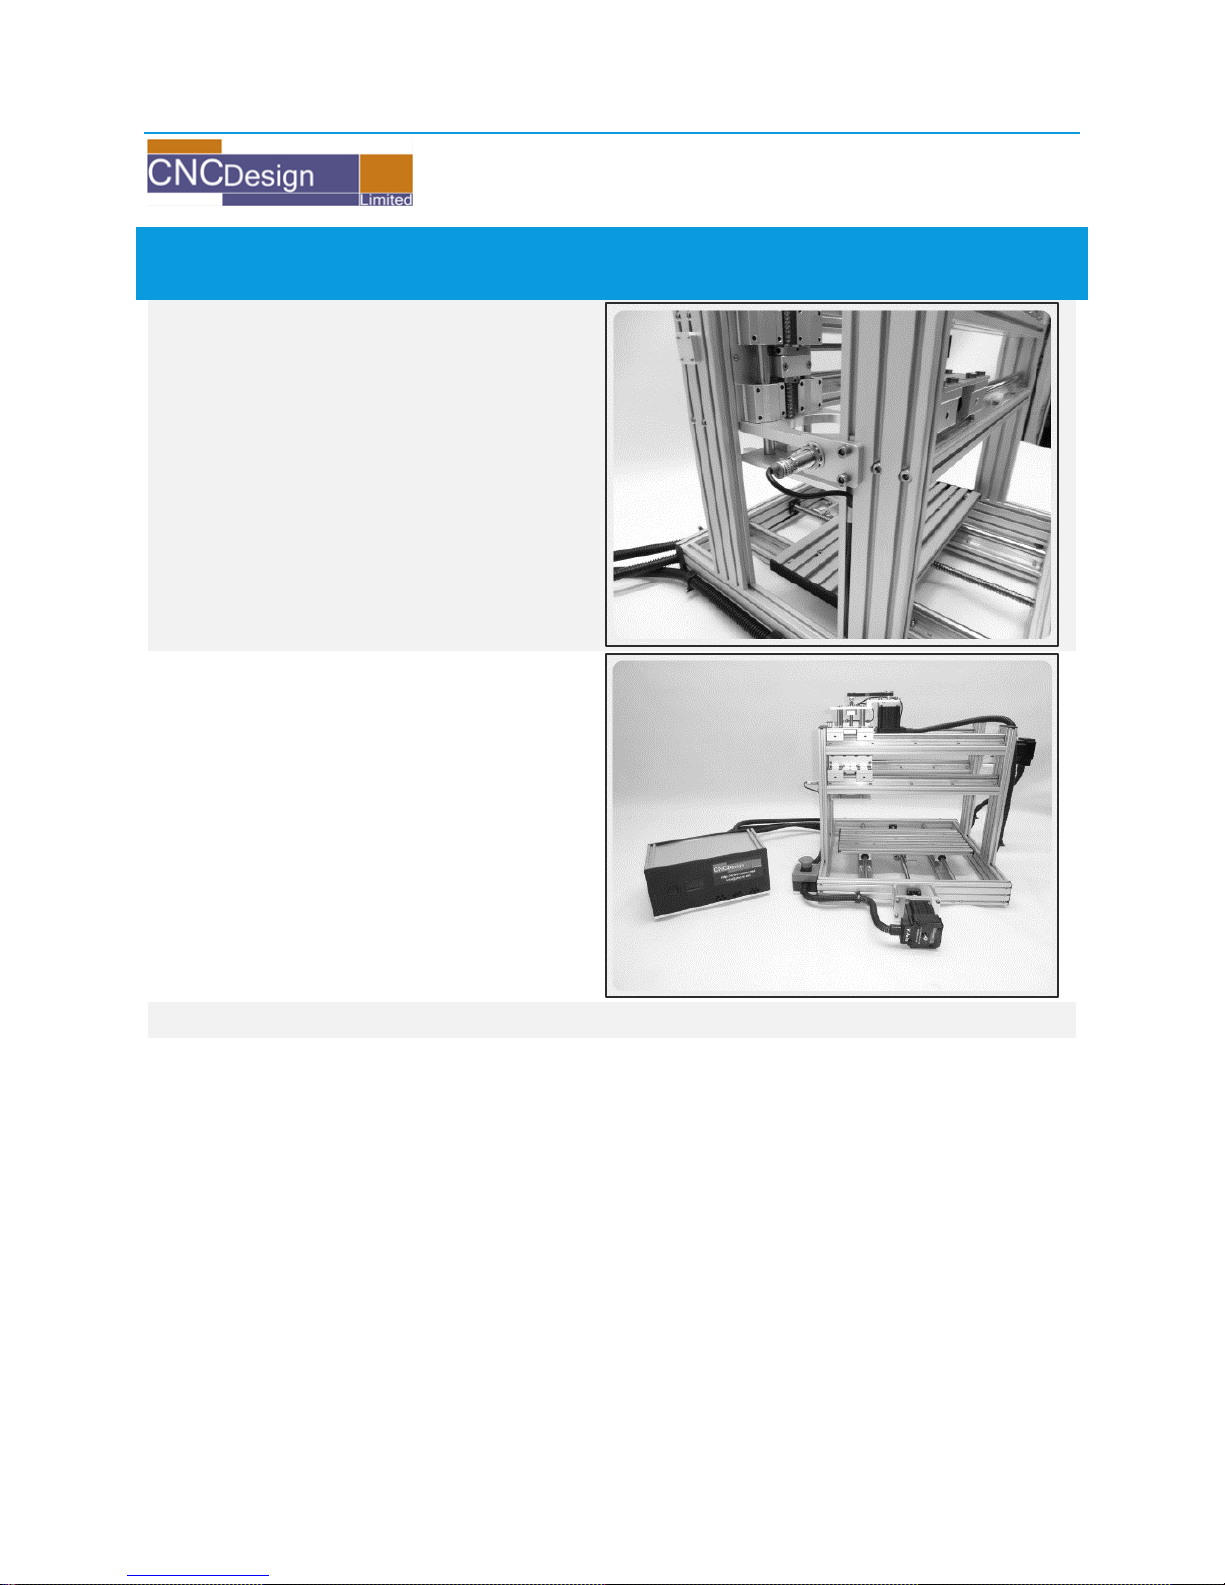
Place the conduit in the P-clip
that’s on the front of the frame.
Tighten the 4 spacers onto the Yaxis, bolt on the motor and
tighten the coupler.
Slide the ground line away from
the emergency stop button.
Page 10
[9]
UNPACKING YOUR CNC MINI MUSCLE
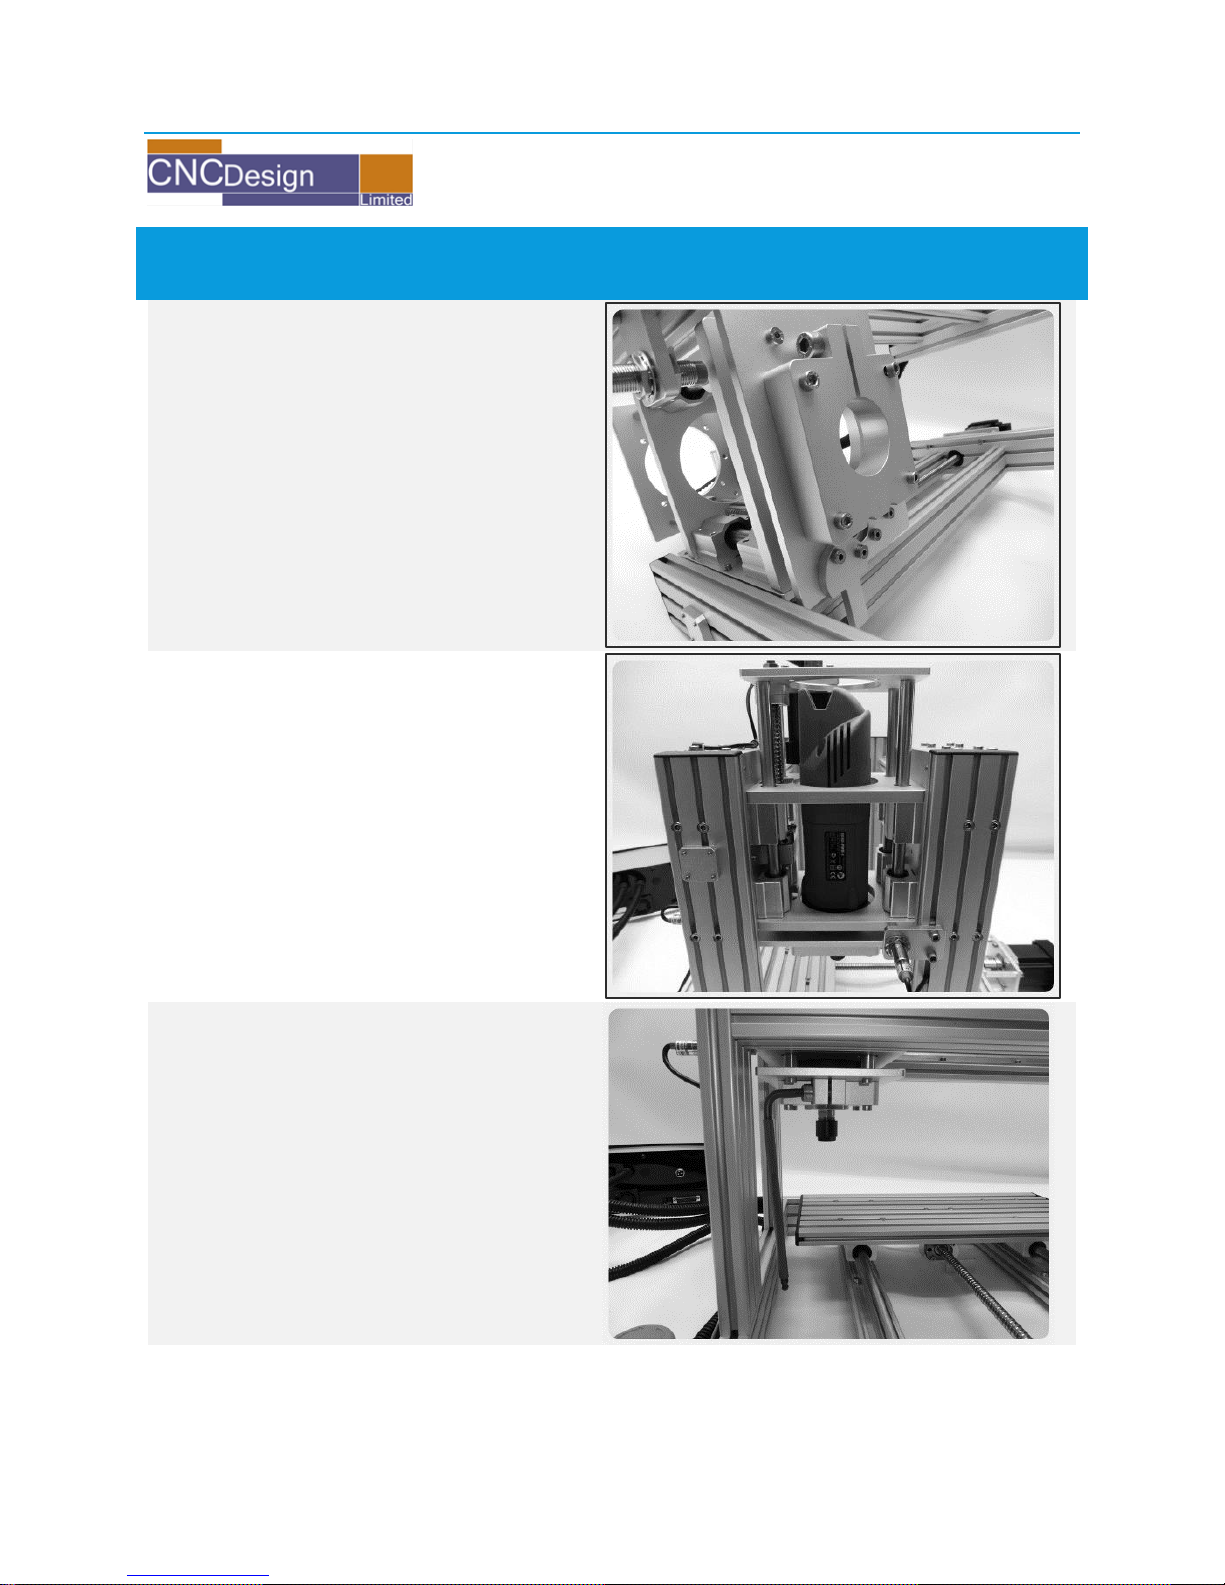
Bolt the X-limit switch plate onto
the side of the frame.
All complete and ready to run up
the software and test.
Please note: Make sure the
power switch is always set to off
before connecting to the mains,
hot plugging could damage the
electronics.
Page 11
[10]
OPERATION AND USE
Insert all 4 of the M5 x 25mm
bolts, tighten up the back 2
securely leaving the 2 front ones
loose.
Insert spindle.
Tighten off the M8 Bolt on the
spindle holder (making sure it’s
secure) and finally tighten off the
two front M5 x 25mm bolts.
Page 12
[11]
OPERATION AND USE
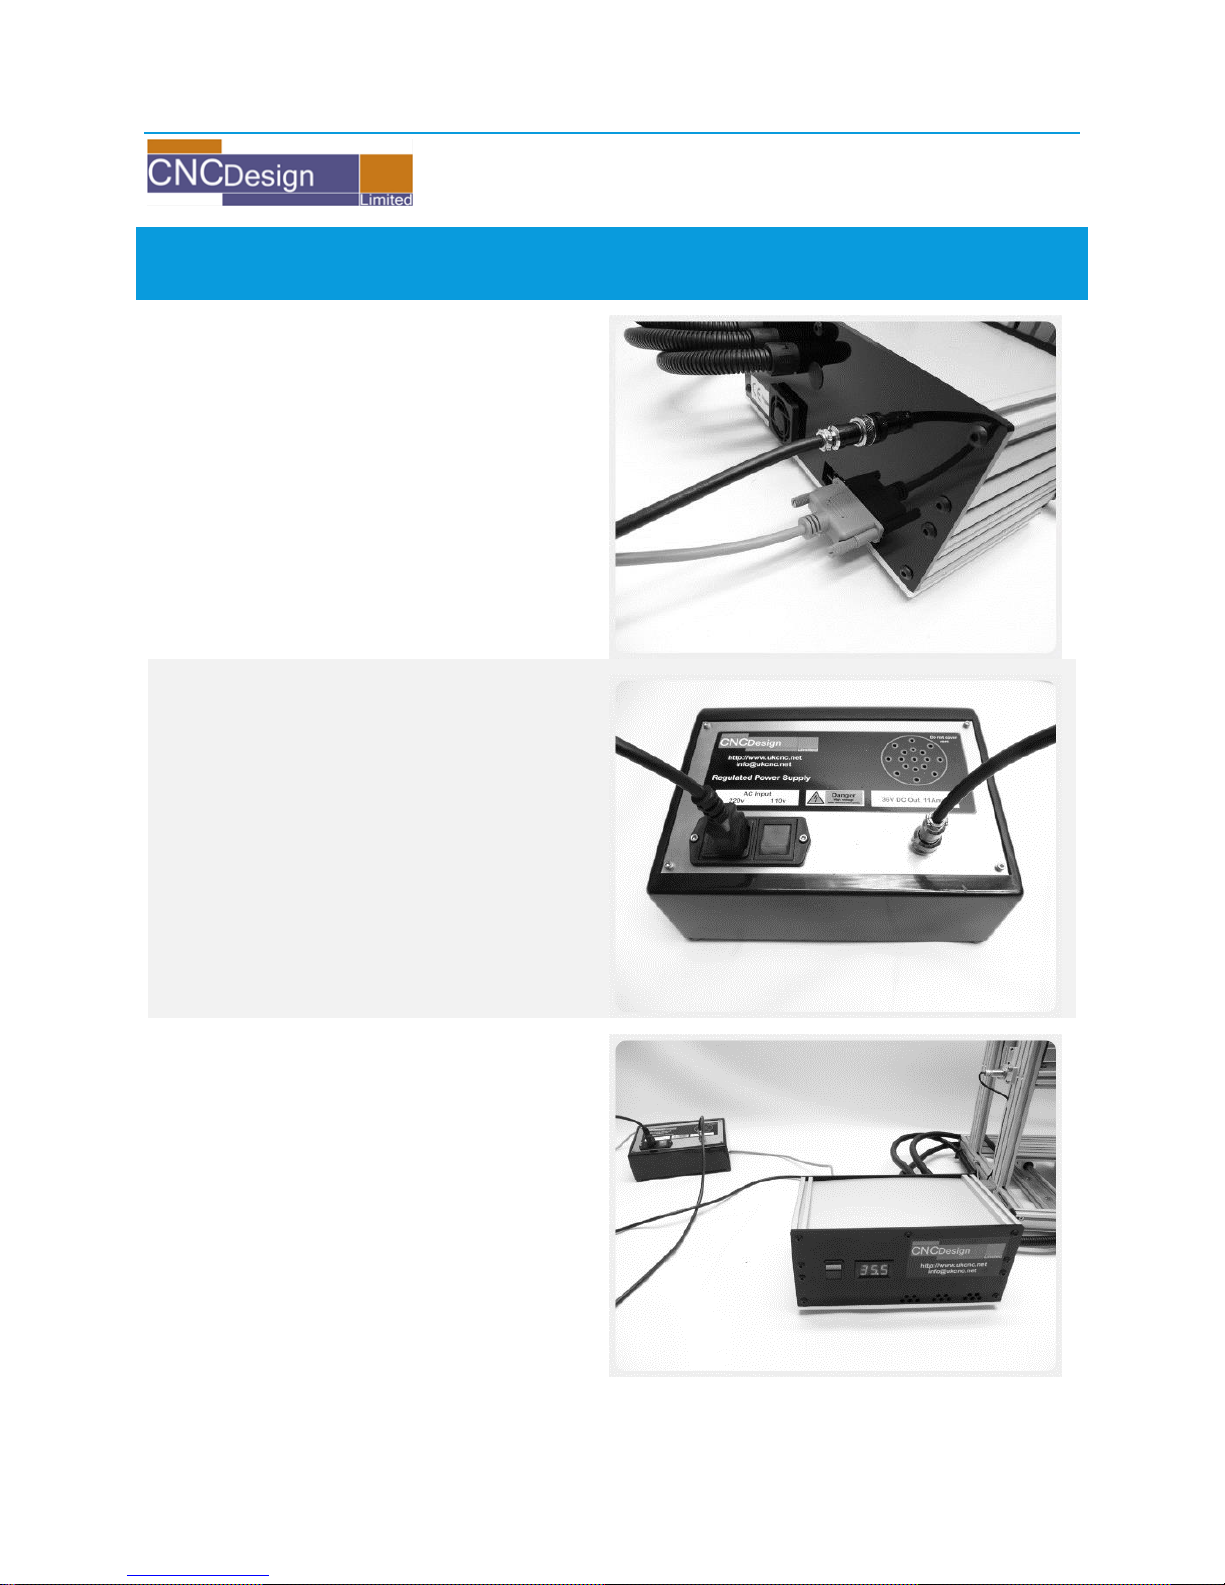
Insert the dc and parallel cable
into the controller box.
Please note: Make sure the power
switch is always set to off before
connecting to the mains, hot
plugging could damage the
electronics.
Make sure the power switch is set
to off and then insert the DC and
AC cables into power supply.
Now insert the AC Mains lead into
your Mains socket.
All finished and ready to be used
with your CNC Mini Muscle.
Please Note: Switch on the power
supply first then switch on the
controller box otherwise this
could damage the electronics.
Page 13
[12]
CONTACT DETAILS
CNC Design limited,
Unit 5S Lanvale Estate,
St. Columb Major,
Industrial Estate,
Cornwall,
TR9 6SF,
England
Telephone: +44(0) 1637 881520
Web: http://www.ukcnc.net
Email: [email protected]
©PUBLISHED BY CNC DESIGN LTD.
No part of this publication may be reproduced, stored in a retrieval
system or transmitted in any form or by any means, electronic,
mechanical photocopying, recording or otherwise without prior
permission in writing from CNC Design Ltd.
Page 14

[13]
NOTES
Page 15

[14]
NOTES
 Loading...