

Page 1
BTS-002 - CMT Bowl and Tray Kit
Owner’s Manual
Thank you for purchasing the CMT Bowl and Tray Kit. With this kit you can make platters and bowls up to 70mm deep. Bowls and platters
make great gifts, and they’re a great way to use up scrap wood. There’s no end to the different combinations of wood and shapes you can
create with this kit. Please read all the instructions thoroughly before using the BTS-002 kit.
Tool Requirements
- 1300 watt or larger plunge router with variable speed
- Forstner bit, 35mm or larger
- 12,7mm radius roundover bit (CMT #938.880.11 w/ 12mm shank, or,
#938.380.11, w/8mm shank)
- Drill Press (Note: The bowl can be excavated with a router only.
It just takes longer and puts more wear and tear on your router and bit.)
- Soft disc sanding pads designed for bowl turning for sanding bowl interior.
(Available where turning supplies are sold.)
- Compass
Get Started
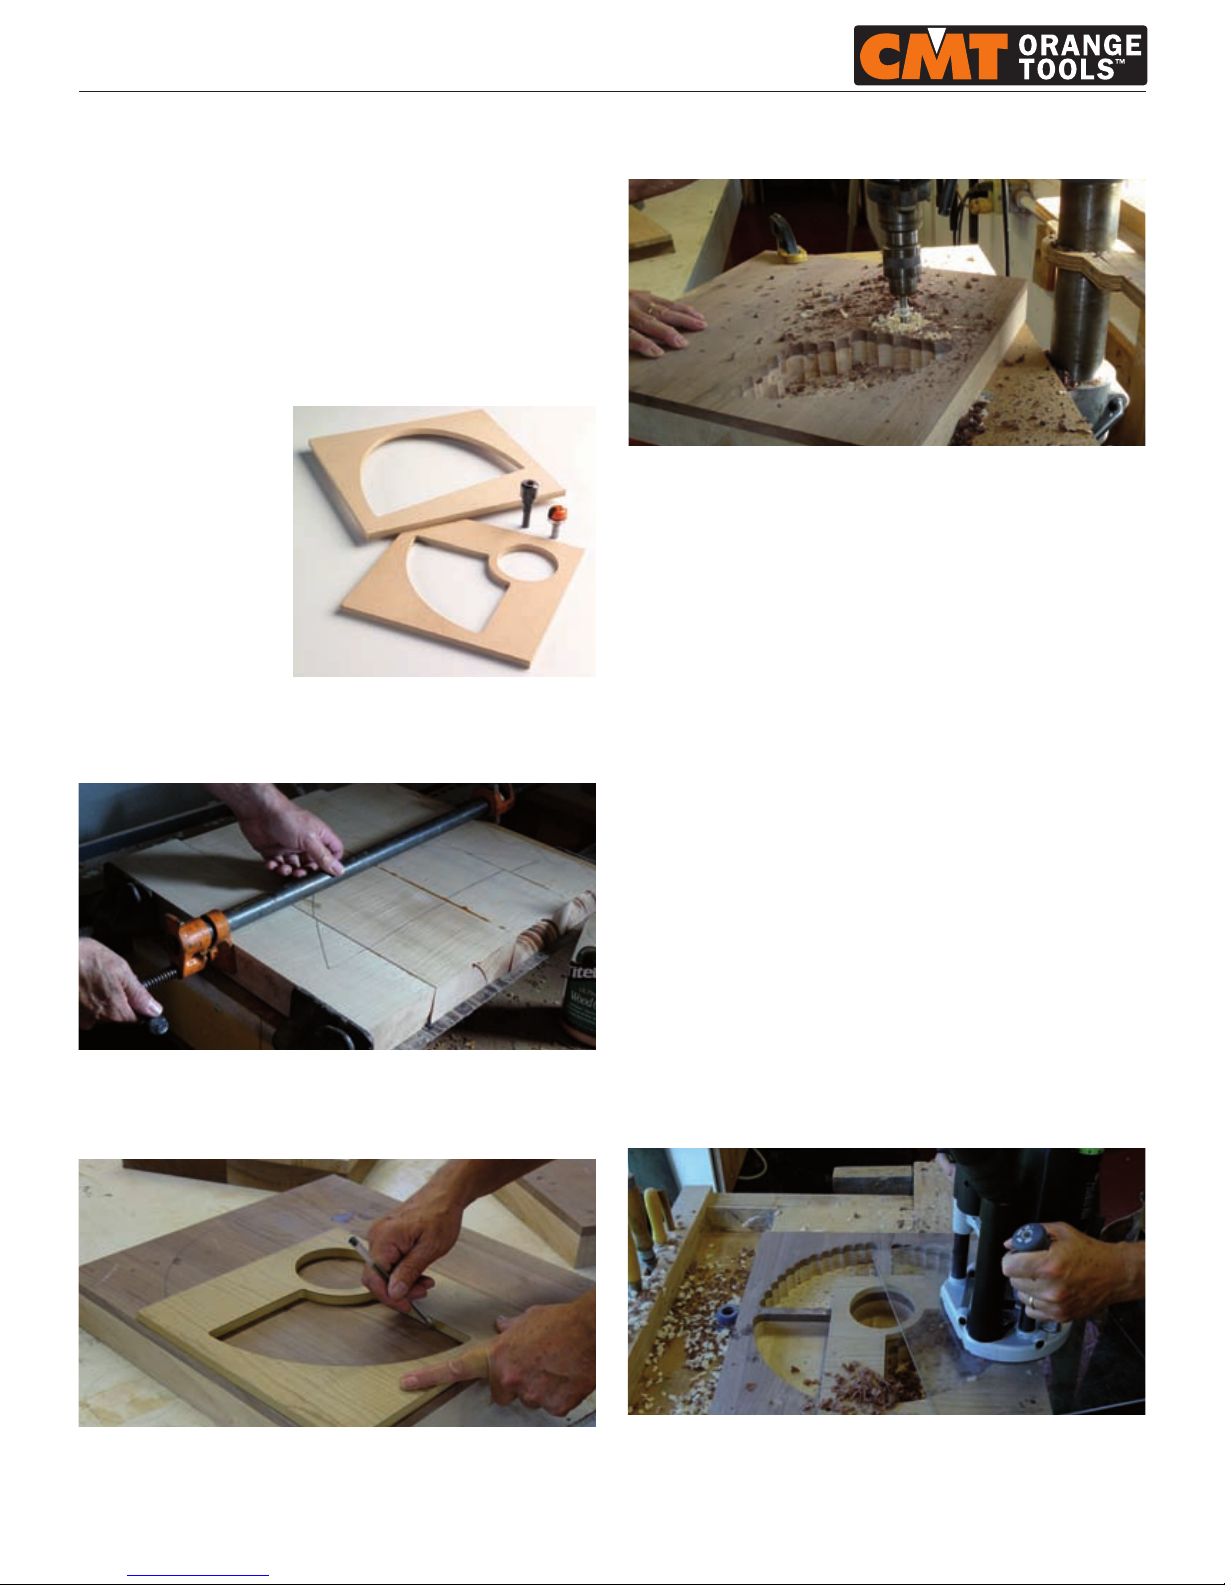
Unpack the CMT Bowl and Tray Kit,
which includes a Bowl and Tray
bit, collet extension and two bowl
templates.
Glue up a bowl blank. Make an 460x460mm blank to use with the round bowl template
and a 380x590mm blank for the oval template. Thick stock works best, but you can stacklaminate thinner boards to build the blank to the desired depth.
Note: A 70mm deep bowl is about the max for most routers.
You can mix woods in your bowl blank. A layer of contrasting wood at the top is a nice
touch. Like bowl turners, you can have a lot of fun experimenting with different woods and
different glue-up patterns to achieve stunning results. It’s important to align your boards
perfectly flush in the clamps to avoid unnecessary sanding to flatten out the blank. This is
especially true if you are going to stack-laminate or add an accent layer as shown here.
Lay out the bowl using the template. Center the template on the blank and mark the
first partition. Remove the template and make marks exactly 12,7mm from the edge of
the first partition. This defines the wall thickness for each partition. It’s important to be
exact in order to achieve a uniform wall thickness for all the partitions. Use these marks
to align the template for the two adjoining partitions. Make additional marks to position
the template for the last partition.
Use a Forstner bit in a drill press to remove most of the wood. Forstner bits do the best
job because they can make overlapping cuts and leave a flat bottom.
Drill the holes to within 3,2mm of your layout lines. Set the depth of cut to stop short of
the finished bottom so the router bit can clean up the dimples left by the center point in
the Forstner bit.
Note: It’s best to use a bit whose diameter is larger than the 31,75mm diameter Bowl
and Tray Bit. If you must use a Forstner bit less than 31,75mm, don’t cut too close into
the corners or the router bit won’t be able to clean it up.
Once the partitions have been excavated on the drill press, it’s time to move on to the
router. First, make an extension router base plate that’s large enough to safely bridge the
opening in the template. The base plate can be made of 12,7mm sheet stock or 9,5mm
thick acrylic or polycarbonate plastic. Drill a 50,8mm hole in the middle of the plate.
Mount the extension base to your router.
Next, assemble the collet extension using a 14mm and an 18mm wrench. Insert the
bowl-cutting bit into the collet and tighten using a 27mm wrench and the 18mm wrench.
Warning: You must have at least 2/3 of the bit’s shaft length inside the collet. Do not
try and extend the depth of cut by overextending the bit from the collet.
Insert the collet extension into the router and tighten.
Note: Be certain to unplug the router whenever changing bits or making adjustments to
the router.
Mount the template on the blank so it lines up exactly with the previously drawn lines.
Drill and countersink at least two holes in the template. Be sure to locate the holes over
the waste portions of the bowl where they will be removed later. Fasten the template onto
the blank with flat head screws. Make sure the screw heads are set just below the surface
of the template so they don’t interfere with the router.
Set the plunge router’s turret stop for a cut deep enough to finish the bottom of the
bowl.To do this, set the router on top of the template on the bowl blank and plunge the
unplugged router down until the bit bottoms out. Set the stop so the bit will plunge another 3,2mm - 4,7mm beyond the drilled out bottom and remove the dimples left by the
Forstner bit’s center point.
Finally, be certain that at the top of the router’s travel the bearing on the router bit is riding
on the template. This sets the router for the first pass. If your router has a chip collection
attachment, be sure to use it.
Secure the blank to your bench. With the plunge mechanism set at the top of its travel,
place the router over an open area on the template. Make sure the cutter is not contacting the wood and turn on the router. Gently slide the router to the template edge and
begin your cut. Continue the cut around the opening.
Then, lower the bit 9,5mm and make another pass. Eventually the bearing on the bit will
drop below the template and begin to register on the wall of the bowl itself. Keep making
Page 2
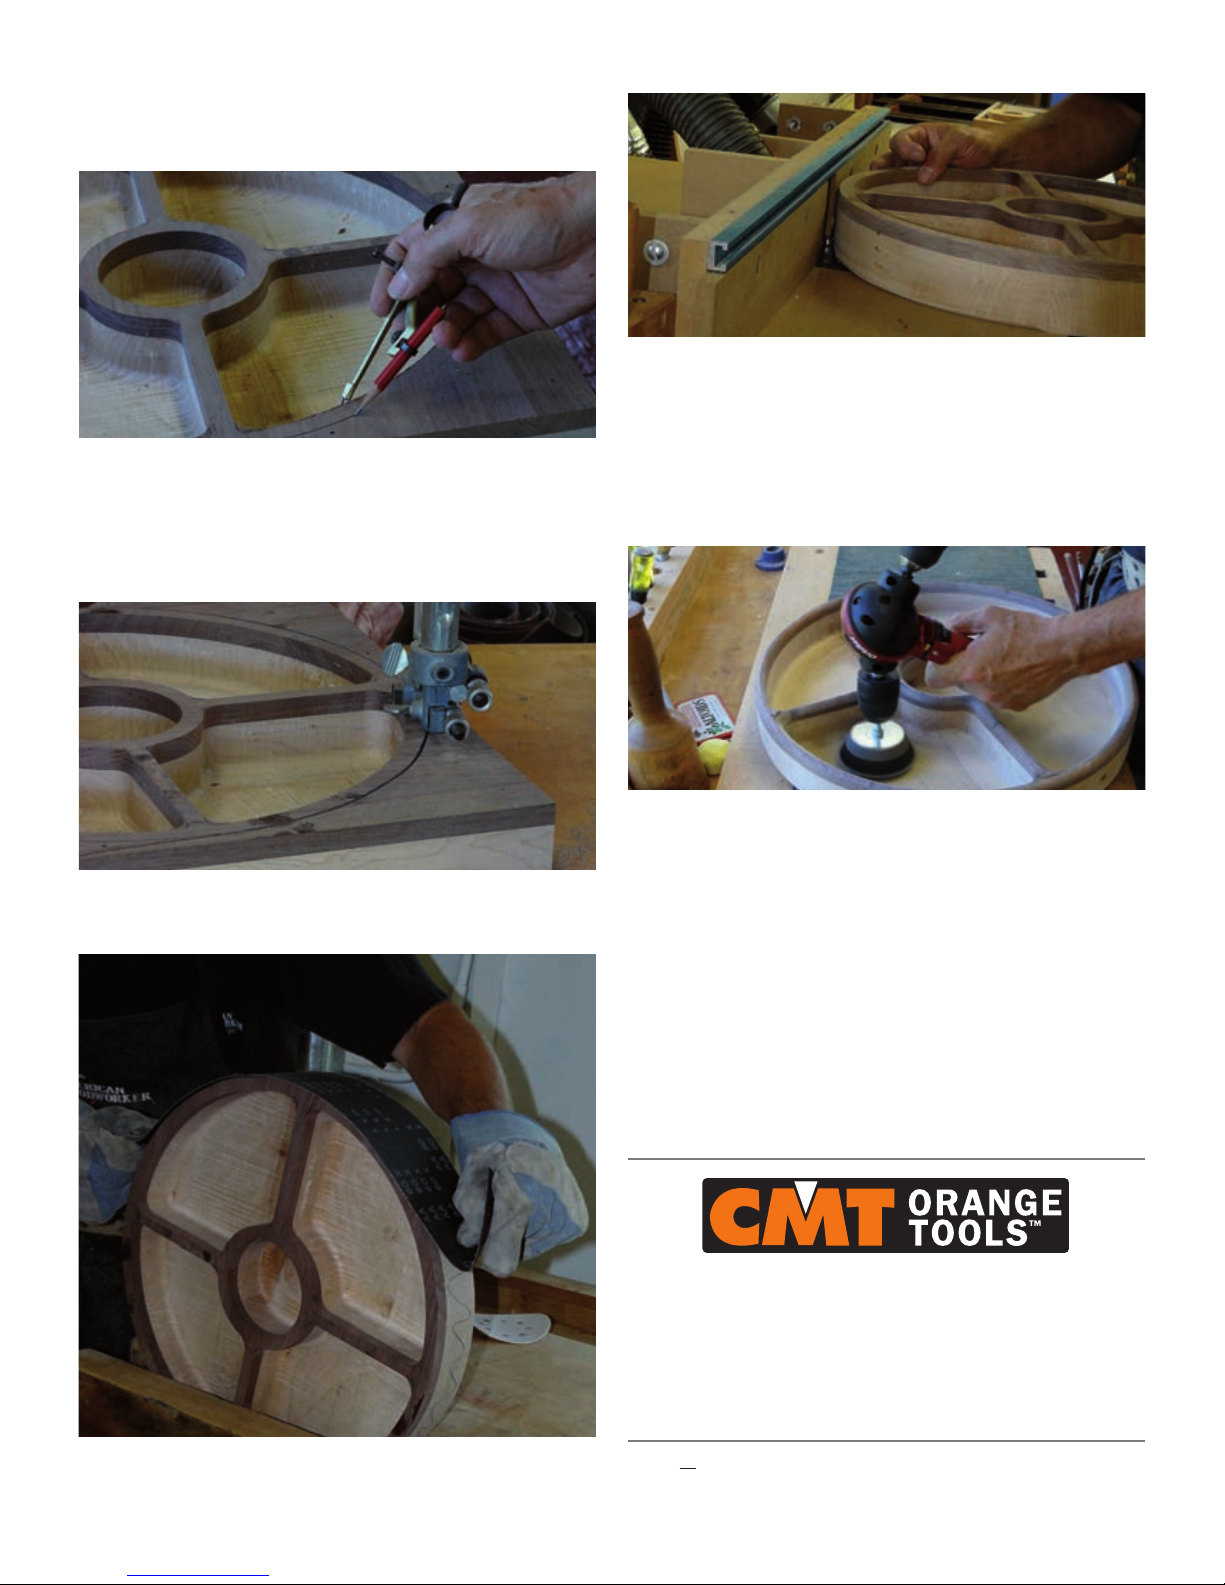
An edge or disc sander will make quick work of this job but be careful; they can just as
quickly cut a facet on the edge and ruin the piece. You can also sand the exterior using
a random orbit sander.
With the bowl sanded round and the band saw marks removed, head to the router table
for some final shaping. Mount a 12,7mm roundover bit in the router and round over the
bottom edge of the bowl.
To rout the top edges of the partitions, mount a 6,35mm roundover in the table, remove
the fence and set the bowl upside down so the bit is inside one of the quadrants. Make
sure the bit is not in contact with the bowl. Turn the router on and rout the inside edge of
the partition. Turn the router off and let it spin down to a stop. Reposition the bowl over
the bit and rout the next partition. Repeat this process for all four partitions and the dip
cup hole. Rout the outside top edge of the bowl with the same bit.
Sand the interior of the bowl using a soft disc. These discs are commonly used by lathe
turners on lathe-turned bowl interiors. Start with 80-grit and work your way up to 220-grit.
Finish sanding the outside with an orbital sander. Now you’re ready to apply a finish.
A great food safe finish for wood is walnut oil. You’ll find it at most health food stores.
It dries hard and is totally non-toxic. Other food safe finishes include mineral oil, salad
bowl finish and shellac.
TM: CMT, the CMT logo and the orange color applied to tool surfaces are trademarks
of C.M.T. UTENSILI S.P.A.
© C.M.T. UTENSILI S.P.A.
This document has been sent for your personal use only.
All usage and reproduction is forbidden without written permission from C.M.T. UTENSILI S.P.A.
progressively deeper cuts until you reach the bottom of the bowl. Then, sweep the router
back and forth to clean up the bottom. Don’t worry about the slight ridges left by the router
bit. These will clean up easily with a disk sander.
Turn the router off and let it stop before lifting it from the bowl. Move the template to
the next quadrant and repeat the process until all four partitions and the center hole
are complete.
The next step is to lay out the outside wall of the bowl. Set a compass to mark a little
over 12,7mm to allow for sanding. Make sure the compass point extends about 6,35mm
or so past the pencil point.
Hook the pivot point just inside the rim of the bowl and run the compass around the bowl.
Always keep the line from the pencil point to the pivot point perpendicular to the rim.
To bridge the gaps in the outline that occurs at the partitions, bend a thin piece of wood
along the existing lines and pencil in the break.
Take the blank to the bandsaw and cut off the excess stock. Take care to cut up to the
layout line. Go slowly and do your best to make the cut smooth and accurate. It’ll save
you a lot of sanding later.
The bowl will come off the band saw round but rough. Sand the band sawn edge smooth
and fair. A good way to sand the edge on a round bowl is to use a sanding belt. Pencil
marks on the outside edge tell you where the low spots are and where you’ve sanded.
Clamp the bowl blank in a vise (use scrap wood to protect the bowl form iron jaws) and
sand the edge like a shoeshine polishes a shoe.
C.M.T. UTENSILI S.p.A.
Via della Meccanica
61122 Pesaro
Fraz. Chiusa di Ginestreto - Italia
Phone #39 0721 48571
Fax #39 0721 481021
info@cmtutensili.com www.cmtutensili.com
 Loading...