

Page 1

Hard Disk
Installation
& Set-Up
Guide
For All Computers
Copyright © 2003 by CMS Peripherals, Inc. All rights
reserved. No part of this document may be reproduced
in any form without prior written consent from CMS.
The information and specifications in this document are
subject to change without notice.
CMS, CMS Peripherals, and the CMS logo are registered
trademarks of CMS Peripherals, Inc. All other trademarks or
registered trademarks used herein are the property of their respective
owners.
510168.0
May, 2003
6. Problems
Having problems? Review the steps for
removal or installation, then call our Tech.
Support Department at (714)424-5520. Online
help is available [email protected]
and www.cmsproducts.com.
Universal Installation &
Set-up Guide
Page 2
To replace your hard drive with
your new CMS hard disk drive follow these
instructions.
1. Preserve your data
If you’ve used the EasyMove software to
transfer your data from your original drive to
your new drive, you’re ready to exchange your
original and new drive.
If you don’t have EasyMove, you should
backup your data using whatever method is
best for you (ABS backup, floppies, tape,
network, removable drive, etc.).
2. Remove the old disk drive
Follow these steps to remove and replace your
old drive.
A. Make sure your computer is turned Off. Turn
the computer over, and keep the front of
machine towards you. First you must locate,
and remove the drive retaining screw, which
should be located on the bottom, or the side of
the notebook. If it is not you should make
sure your notebook hard drive is accessible
before trying to upgrade your hard drive. If
you have difficulty locating your notebook hard
drive, refer to your notebook documentation
for further assistance.
B. Pull the hard drive out of the computer.
There is usually a pull tab, or handle to remove
the drive. A small flat headed screw driver might
also be needed to help ease the drive out.
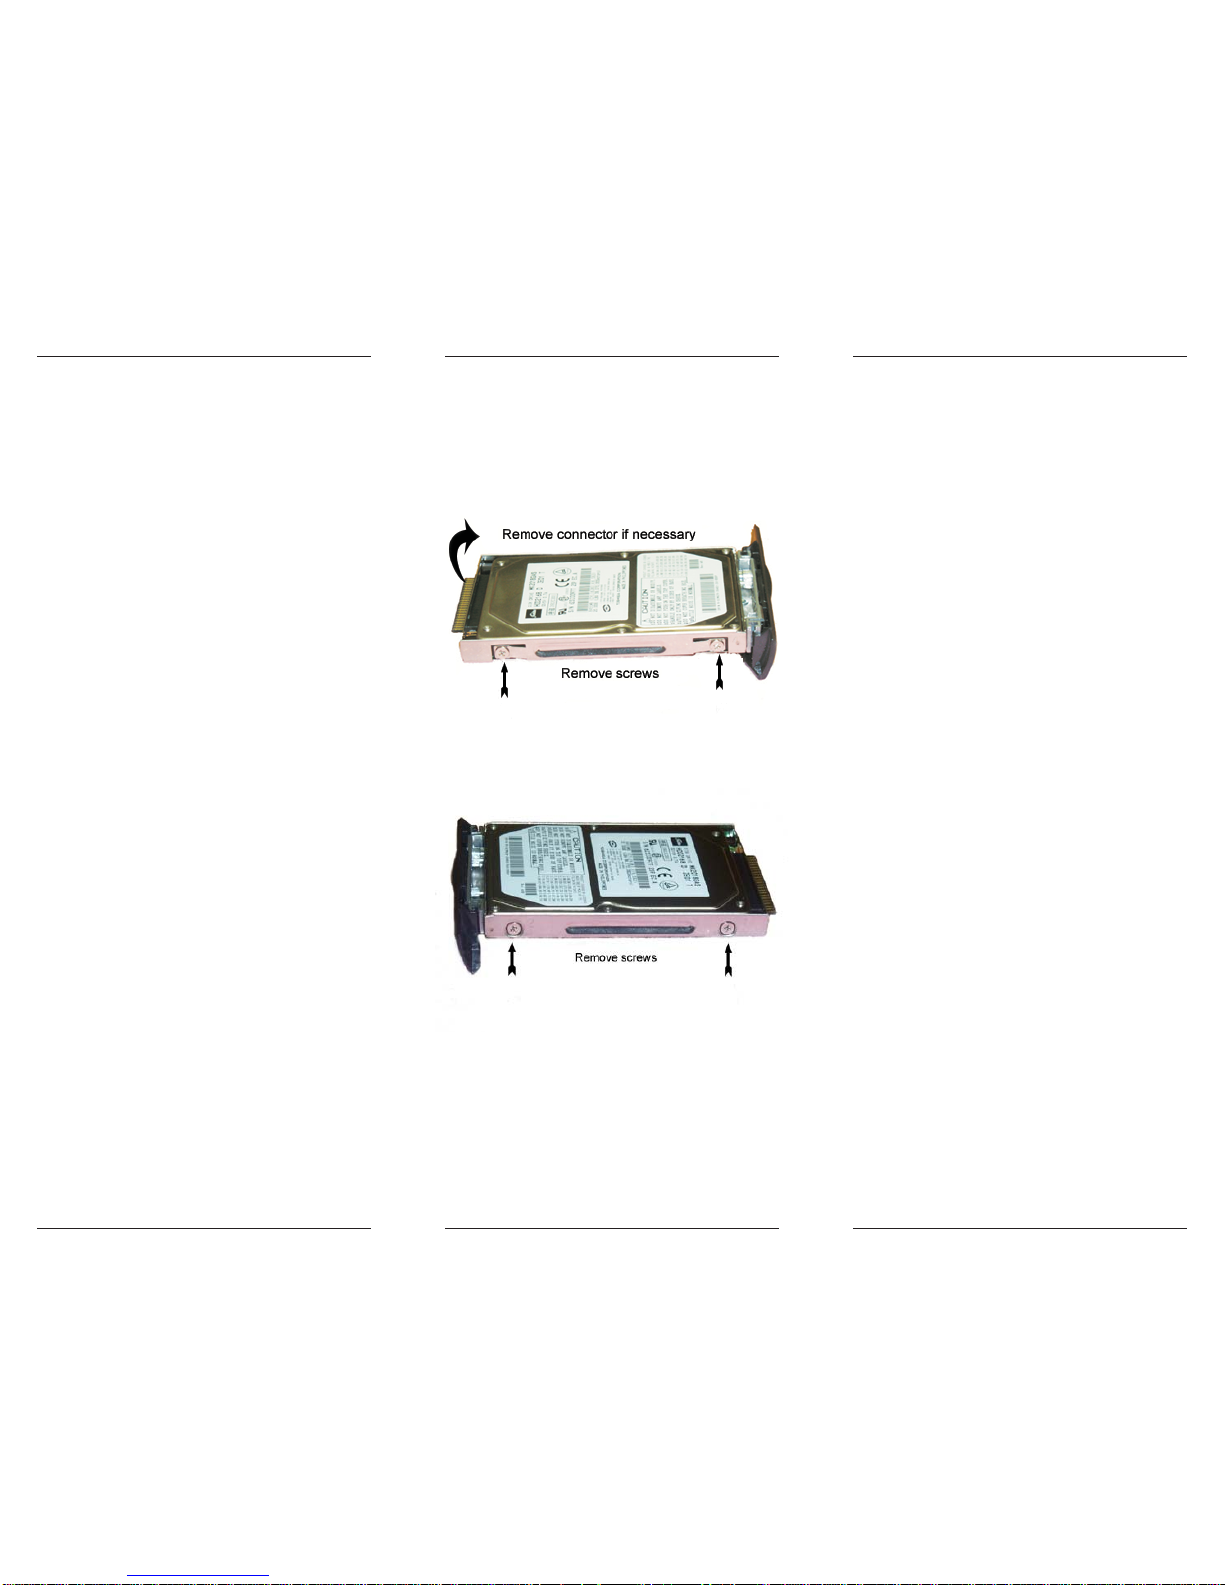
C. Once the drive is removed, the drive bracket
must be removed from the original drive. To
do this, use a Phillips screwdriver to remove
all the necessary screws. Typically, the hard
drive will be attached to a bracket by 4 screws.
An example is given in Figure 1, and Figure 2.
Pull the drive free from the bracket. If there is
a connector, make sure to carefully remove it
as well.
Figure 1
Figure 2
D. Once the bracket is removed, it must be
reinstalled on your new CMS drive. Reinstall
all of the screws and if necessary, carefully
reinstall the connector on your new drive.
3. Install the new drive
Install your new disk drive by following these
steps:
A. Install the disk drive into the computer by
reversing the procedure from Step 2B. Make
sure the disk drive is fully seated in the
computer.
B. Replace the screw previously removed in
step 2A. The installation is now complete.
4. Setting up your new drive
If you used EasyMove to transfer your data,
your installation is complete. Turn on your
computer and you’re back at work.
If you didn’t use EasyMove, insert a Windows
®
CD and turn the power on. The computer will
automatically determine the drive type for your
new disk. The Windows
®
installation will
partition, and format your new drive. At the
end of the installation use whatever method is
best for you to copy all of your data back to
the new drive.
5. Review
• Use EasyMove (if available) to transfer
your data.
• If you don’t use EasyMove, back up your
data.
• Remove the drive-retaining screw/screws.
• Remove the drive from the computer.
• Remove hard drive bracket/connector from
old drive, and install on your new drive.
• Install the new drive into the bay.
• Replace the drive cover and screw.
• If you didn’t use EasyMove, partition and
format the disk, then restore your operating
system and data from your backup.
 Loading...