

Page 1

Getting Started Guide
Macintosh® OS X 10.3.9 or greater
Connecting the ABSplus w/ USB2.0 Interface..................... 2
Connecting the ABSplus w/ eSATA Interface....................... 3
Connecting the ABSplus w/ FireWire® Interface.................. 4
Macintosh Software Installation........................................... 5 - 7
CMS Support....................................................................... 8
Automatic Backup System
510299.0
Page 2
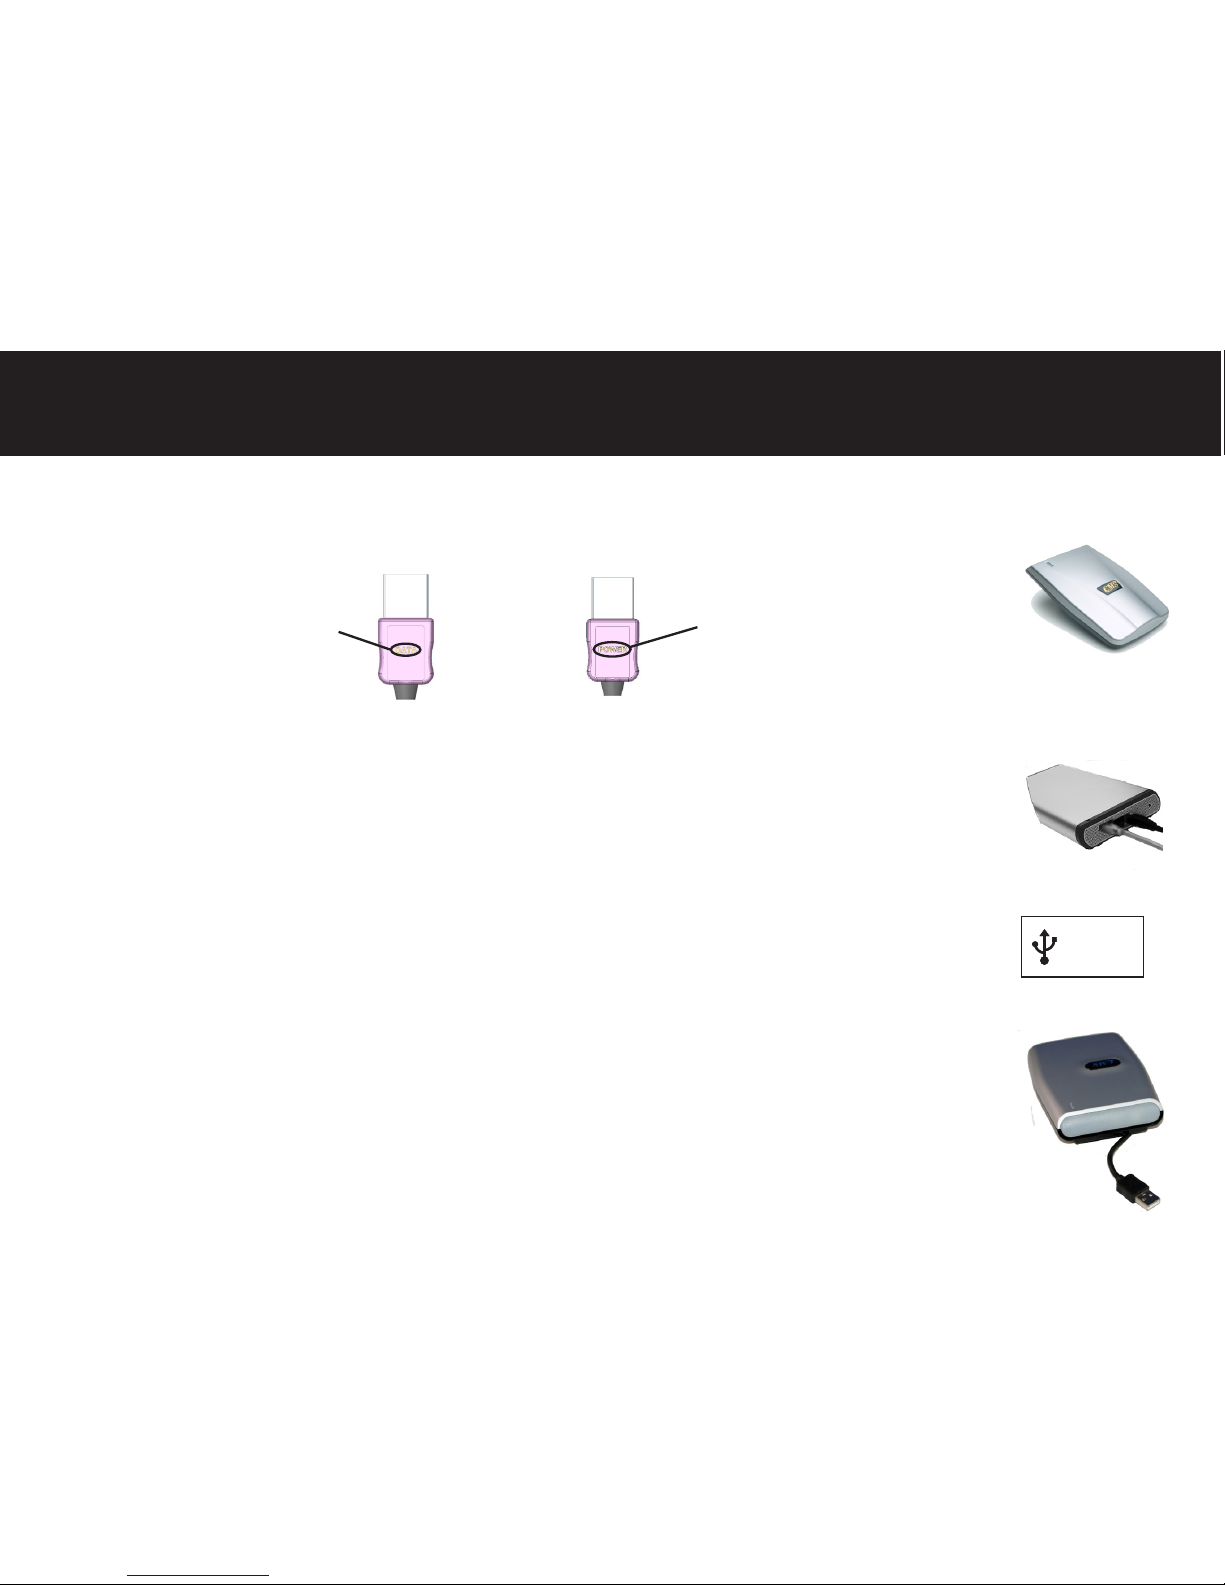
Connecting the ABSplus w/ USB2.0 Interface
2
1 Notebook USB Users: If your computer does not have enough power to start your ABSplus
drive use the included extension cable with the additional Power Connector. The connectors
are labeled DATA and POWER. You will need to use both connectors.
Desktop USB User: Connect the power supply to the ABSplus drive and the AC power cable
to a power outlet, and turn the ABSplus on. The blue power LED should be illuminated.
2 Connect the ABSplus USB cable to the USB port on your computer. The USB port is usually
identied by USB or the USB logo.
If you cannot locate a USB port, refer to your computer documentation.
3 Connect the other end of the USB cable to the ABSplus.
4 The Windows® 2000, XP, or Vista operating systems will recognize the new hardware and
congure accordingly.
5 Verify that the ABSplus drive can be seen in the ‘My Computer’ option of the Windows® Start
menu; if not, check all cable connections to the ABSplus and reboot the computer. You are
now ready to install the BounceBack Professional software (see “Installing the Software”).
USB
DATA
POWER
Page 3
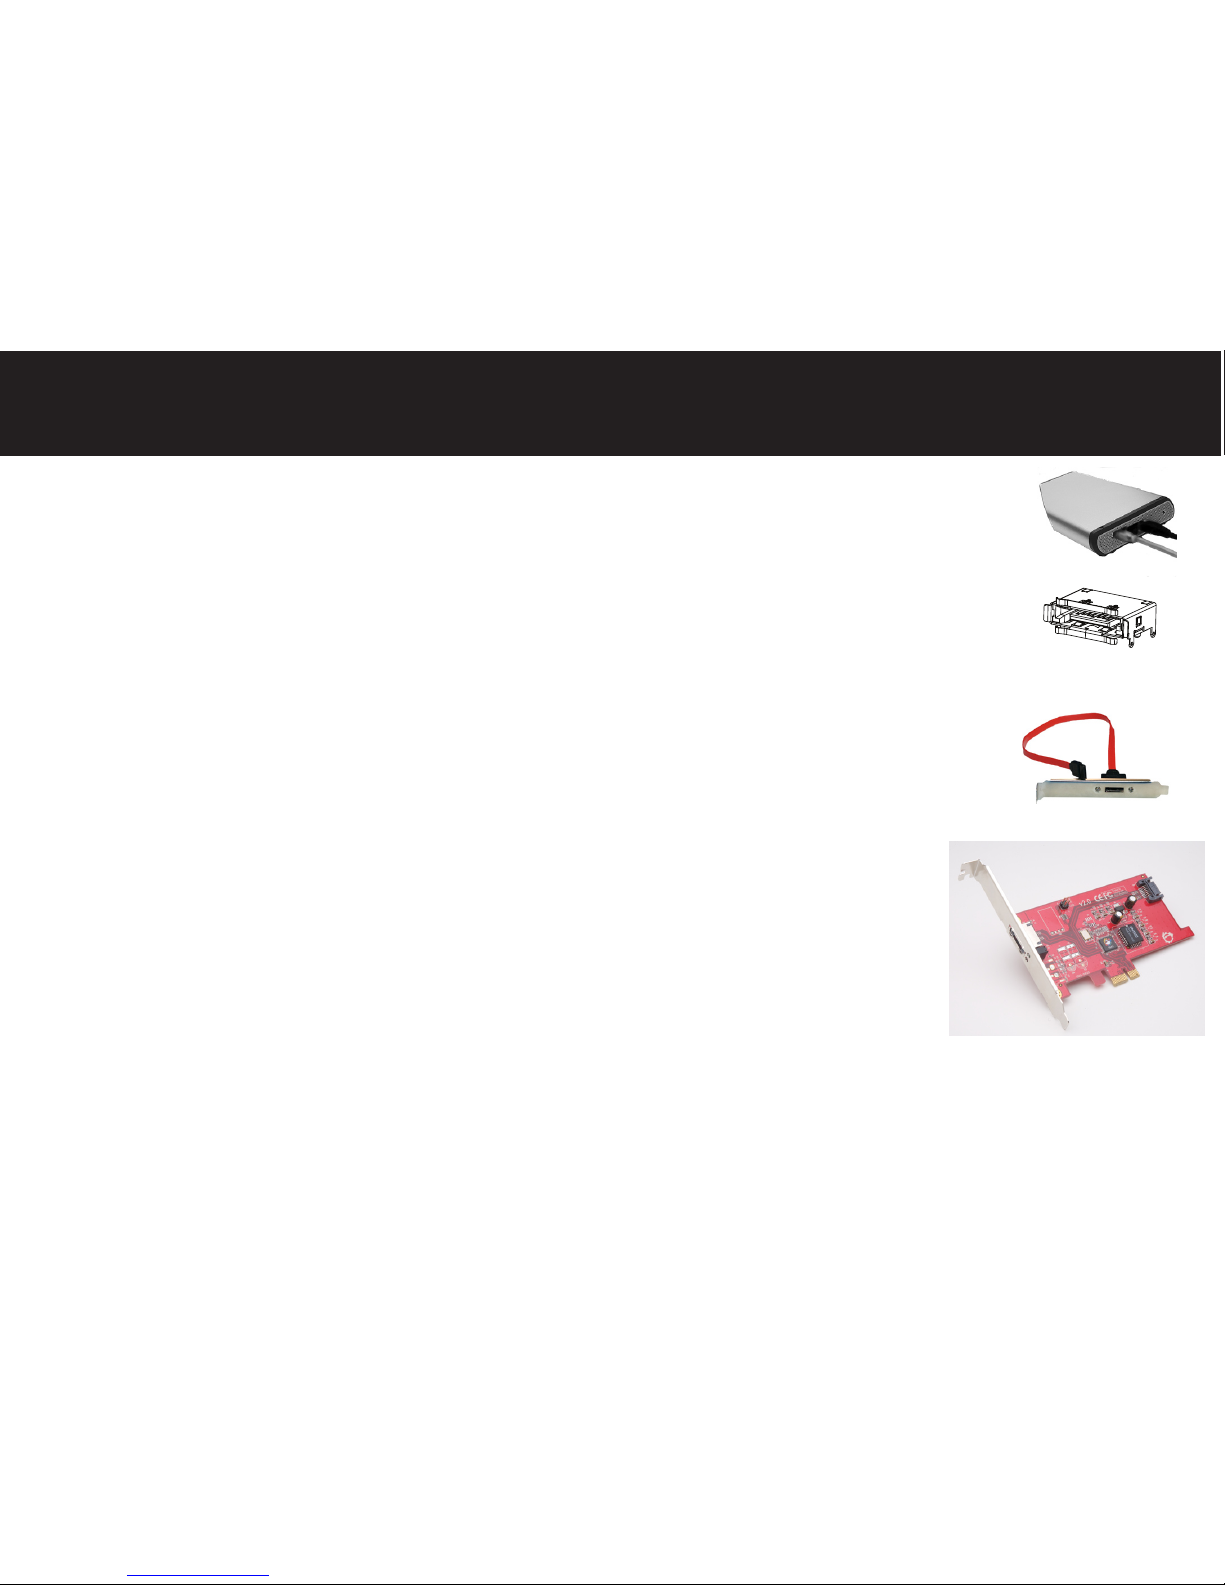
Connecting the ABSplus w/ eSATA Interface
3
1 Connect the power supply to the ABSplus drive and the AC power cable to a power
outlet, and turn the ABSplus on. The blue power LED should be illuminated.
2 Connect the ABSplus eSATA cable to the eSATA port on your computer.
If you cannot locate a eSATA port, you have the following options:
A) Use the supplied eSATA pass through cable which requires a free PCI slot.
Note. This option may not support hot swapping of your external drive depending
on your computers SATA support.
B) Purchase a PCI Express, PCI, or PCI-X eSATA Host Bus Adapter to add eSATA
support to your computer, check your owners manual for which type your system
supports. eSATA Host Bus Adapters are available from CMS at www.cmsproducts.
com.
3 Connect the other end of the eSATA cable to the ABSplus.
4 Verify that the ABSplus drive can be seen in the ‘My Computer’ option of the Windows
®
Start menu; if not, check all cable connections to the ABSplus and reboot the computer.
You are now ready to install the BounceBack Professional software (see “Installing the
Software”).
eSATA port
eSATA pass through
eSATA PCI HBA
Page 4
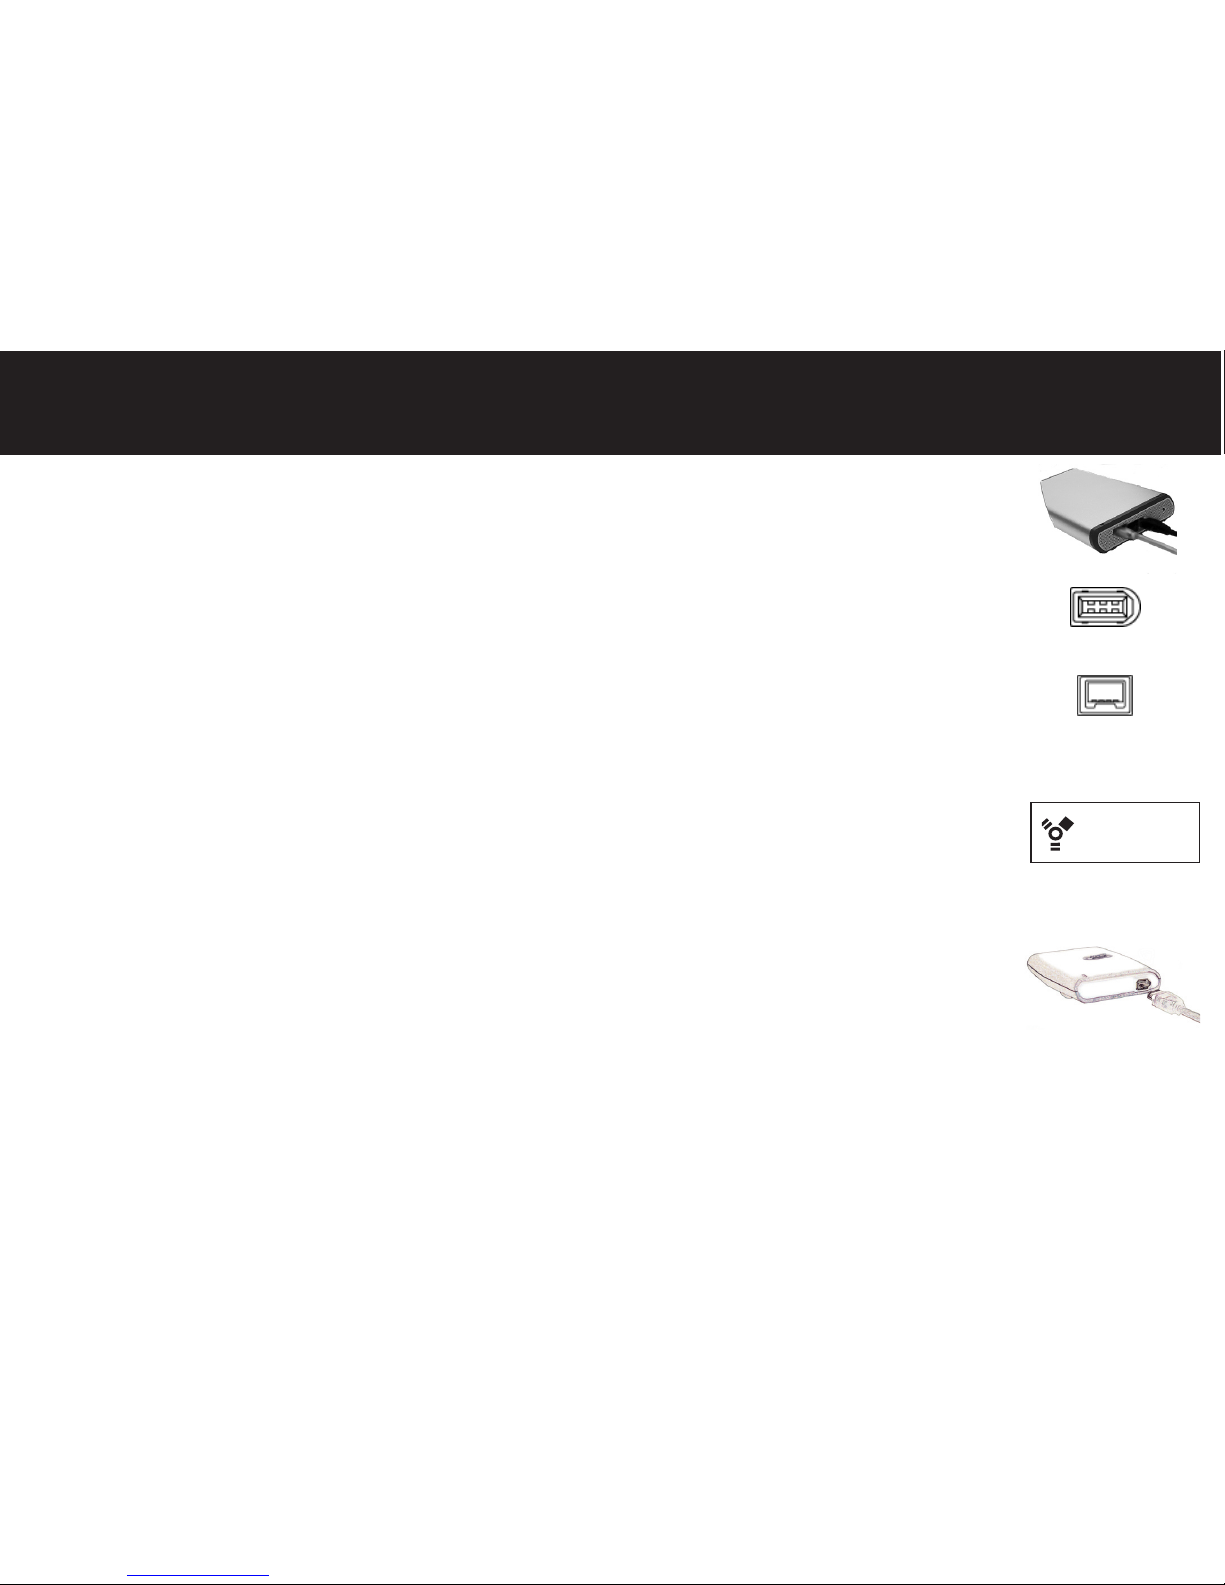
Connecting the ABSplus w/ FireWire Interface
4
1 Desktop FireWire users: Connect the power supply to the ABSplus drive and the AC
power cable to a power outlet, and turn the ABSplus on. The blue power LED should be
illuminated.
Notebook FireWire users: FireWire ABSplus units are supplied with standard 6-Pin to
6-Pin cables. 6-Pin FireWire ports supply power and data to the ABSplus unit.
4-Pin mini-1394a FireWire connectors, found on some computers, provide data only
and require a power kit.
Power kits are available at: www.cmsproducts.com/product_accessories.htm.
2 Connect the ABSplus FireWire cable to the FireWire port on your computer. The
FireWire port is usually identied by 1394a, the FireWire logo or the iLink logo.
If you cannot locate a FireWire port, refer to your computer documentation.
3 Connect the other end of the FireWire cable to the ABSplus.
4 Verify that the ABSplus drive can be seen in the ‘My Computer’ option of the Windows
®
Start menu; if not, check all cable connections to the ABSplus and reboot the computer.
You are now ready to install the BounceBack Professional software (see “Installing the
Software”).
FireWire
6-Pin
4-Pin
Page 5

5
! IMPORTANT: Before You Begin (Macintosh®)
Activation Codes: BounceBack software requires an activation code, the code may be found on the ap of the
BounceBack CD envelop shipped with the product.
If you are running a virus protection program, temporarily disable it (if you can). This will increase the speed
of your rst backup.
When the Authenticate dialog box is displayed, you will need to enter your administrator name and password.
If you are using an external device for the backup, make sure it is connected and working correctly with the Mac
operating system. The ABSplus will appear as a volume on the desktop.
Disconnect any other external storage devices (i.e., HDD, DVD, CDR, MP3 players, etc.) including any devices
in or attached to notebook docking stations.
Mac OS X Special Requirements
• Macintosh OS X 10.3.9 or greater is required.
• Full backups require you to install BounceBack Professional on the system you will be backing up.
1
2
3
4
5
Macintosh Installation
Page 6

Partitioning & Formatting An External Drive
6
1
2
3
Formatting
Using Apple’s Disk Utility program (found under the Go menu inside Utilities), the external backup drive
may be formatted on Mac OS X. Choose Mac Extended format for all G3 or G4 systems, choose Mac OS
Extended (Journaled) for all Intel-based systems. When erasing the External drive with Apple Disk Utility, be
sure to select the drive and not the volume. (Selecting the drive will repartition the drive).
Do not use DOS format for backups.
Partitioning
While you can use Apple’s Disk Utility program to partition the backup drives, we do not recommend it. A single
partition is optimal for the backup drive. If you are backing up multiple computers, and want each backup
to be bootable, see “Backing up Multiple Computers” in the manual for detailed instructions on installing
BounceBack Software and partitioning the external drive.
Note: To use the ABSplus to start up an Intel-based Macintosh choose the GUID partition table on the
partition tab in the Apple disk utility application.
Installing The BounceBack Software
The BounceBack Professional “Double Click Me” icon should appear automatically. If it doesn’t, double
click on the BounceBack Professional CD icon on the Desktop and then double click on the BounceBack
Professional “Double Click Me” icon.
Click Install in the BounceBack Professional menu.
Follow the on-screen instructions to install the software.
Macintosh Installation
Page 7

7
Your First Backup
1
2
3
4
Once the software installation is complete and your system has rebooted, the BounceBack software will begin
to congure your rst backup. During the setup process you will be prompted to determine the target location
where you will back your data up to.
At the Activation Window enter your Activation code from the ap of the CD envelop.
Click Ye s to use a second internal hard drive or external drive as the backup device. Click No to direct the
backup to your primary hard drive.
If you choose Yes and you have both a second internal drive and external hard drive, the BounceBack software
will detect it and then prompt you to choose which hard drive to use. Select your choice Use Internal Drive
or Use External Drive.
a. Once you have selected the target location, the BounceBack software will scan your
computer to determine the size of the backup and estimate the total amount of time
to perform the backup. The backup size, time estimation, source and backup locations
are all displayed.
b. If you choose to change the “default” backup created, you can select Settings in the
BounceBack Control Center enabling you to customize your backup. Otherwise, you may
choose between starting the backup now or later.
Macintosh Installation
Page 8

CMS Support
8
Where is the documentation?
• The User’s Manual is integrated into the BounceBack Professional Control Center . To access the manual
open the Control Center and click on the Green Question Mark.
• If you would like to view the entire manual or print the manual, you will nd it on the BounceBack CD. It is a
pdf le entitled BB Pro V 7.1.3 User’s Manual.To get to the manual “Explore” the BounceBack CD.
What do I do if I need more help?
1. Access CMS online support at: www.cmsproducts.com/support
2. E-mail CMS Support at [email protected]
3. Contact Technical Support at (714)424-5520
 Loading...