

CMNO PR 2080TI User Manual
DECRYPTUM
PR 2080TI/12 4U
USER MANUAL
CMNO LTD. 2020
DECRYPTUM PR 2080TI/12 4U. USER MANUAL 1
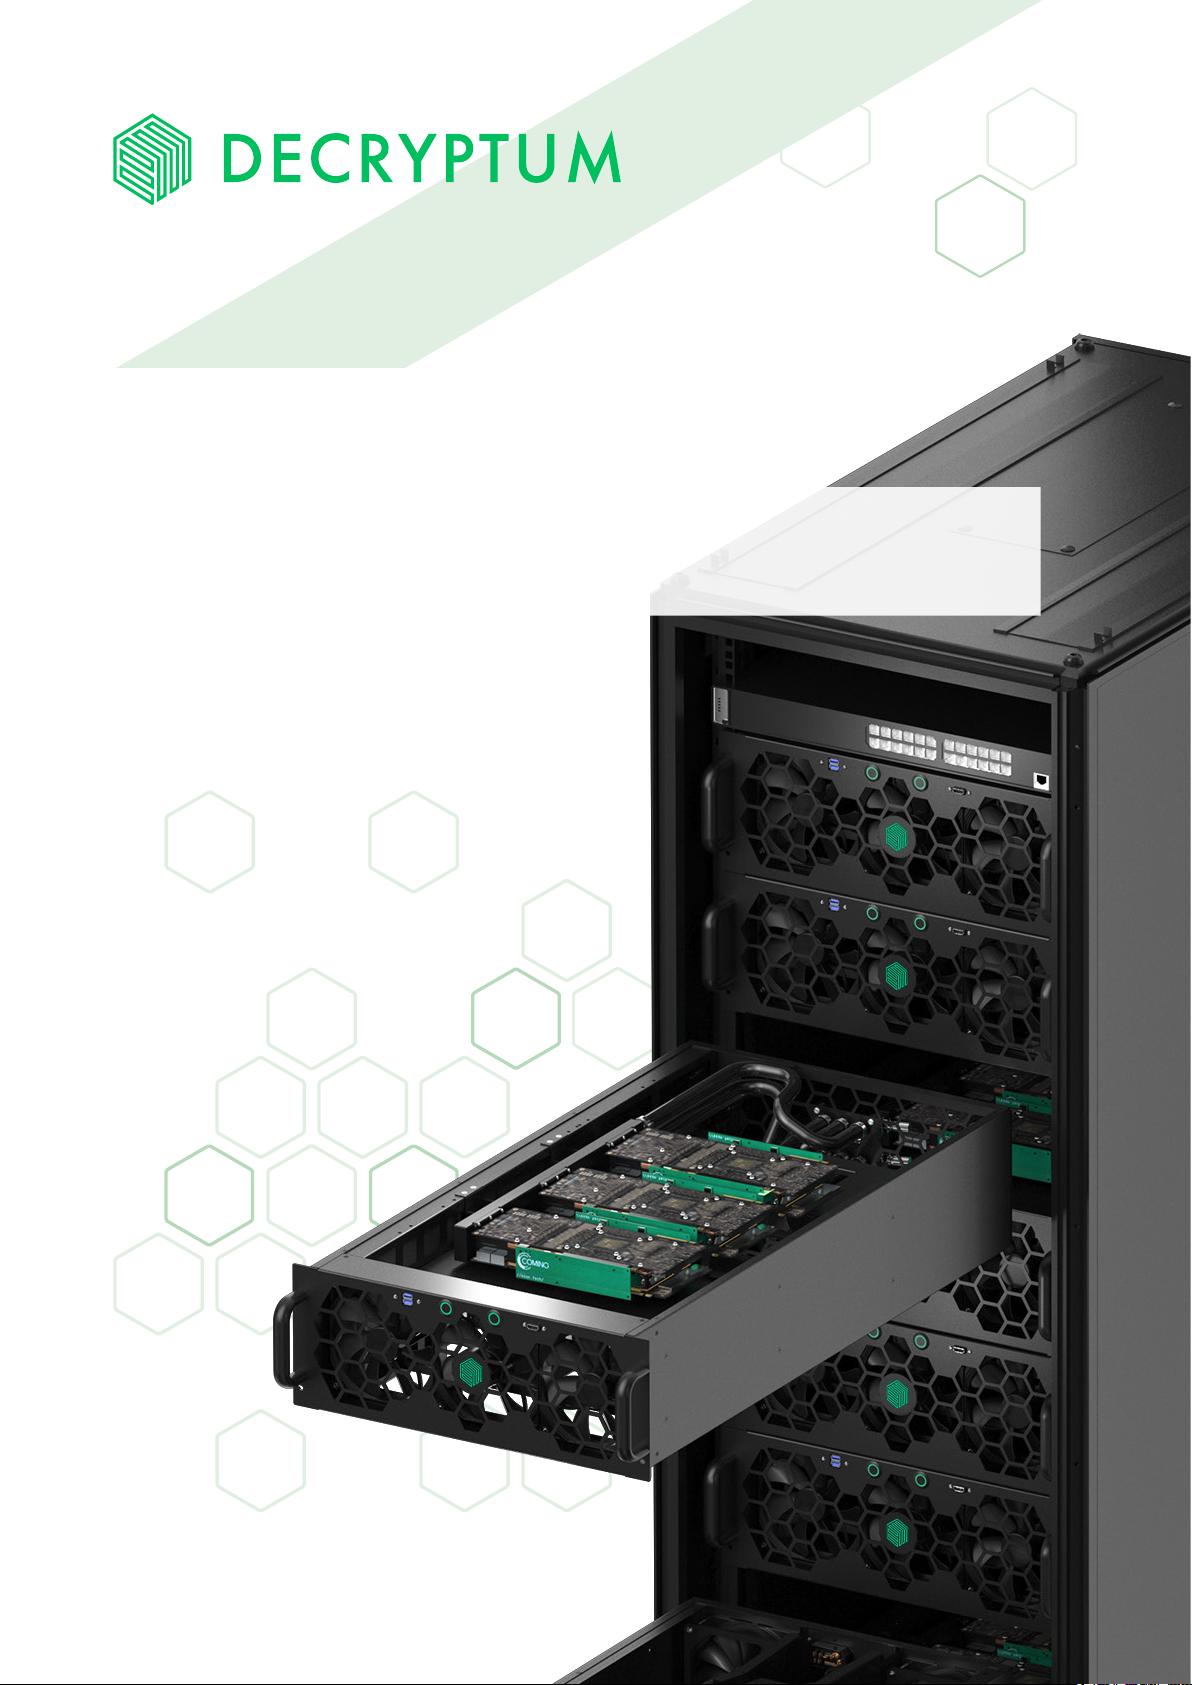
Congratulations on purchasing your DECRYPTUM Professional Computing
Device. We are pleased to welcome you as a customer. These user instructions
contain all safety information and instructions necessary for using your
DECRYPTUM PR 2080TI/12 4U.
!
Before using your device, please familiarise yourself with all relevant
information. Only use the device in the manner described and for
the applications indicated. If you pass on the device, be absolutely
sure to also pass on all instructions and other relevant documents.
DECRYPTUM PR 2080TI/12 4U. USER MANUAL 2

OVERVIEW
1.
2.
3.
4.
5.
6.
7.
UNPACKING AND CHECKING THE CONTENTS
SETTING UP
STARTING UP THE DEVICE
FREECOOLER OPERATION
POWER SUPPLY UNIT
POWER MODULES REPLACEMENT
LIQUID COOLANT
4
5
9
12
25
29
30
DECRYPTUM PR 2080TI/12 4U. USER MANUAL 3
1.
UNPACKING AND CHECKING
THE CONTENTS
1.1
1.2
1.3
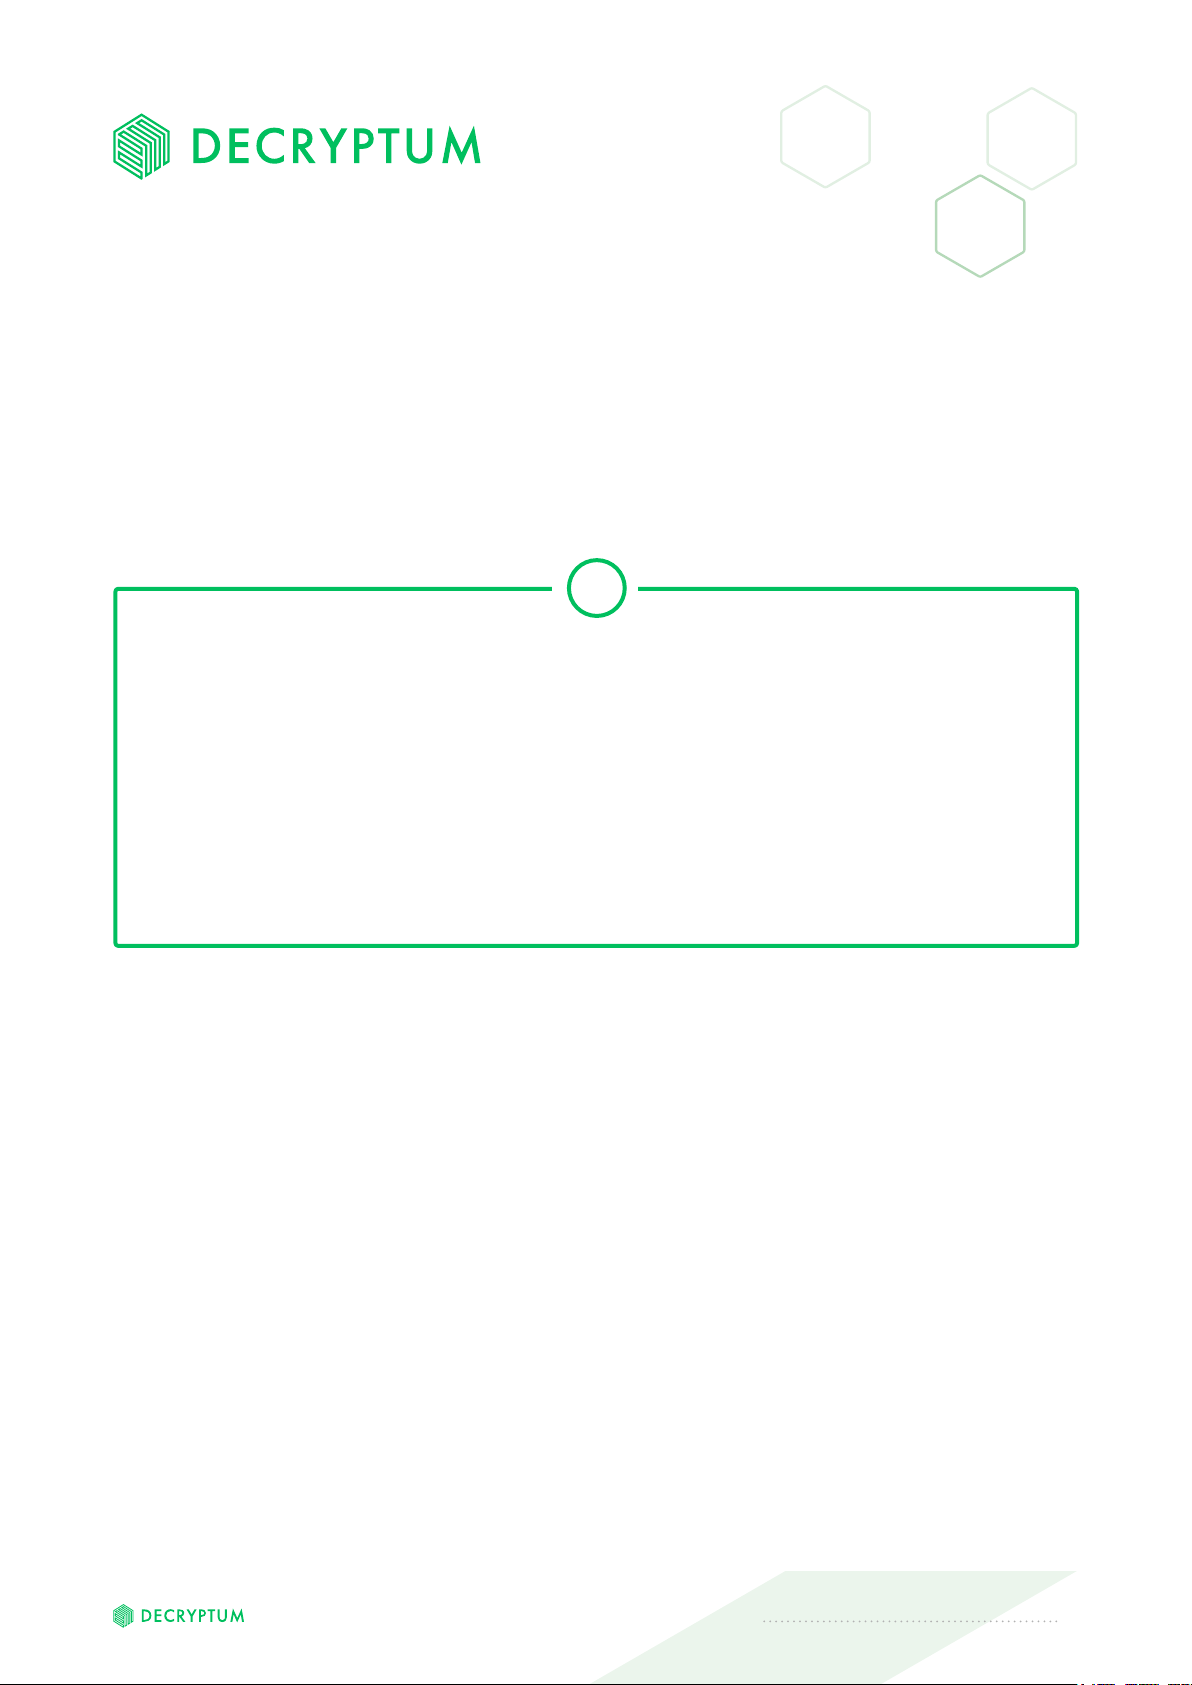
Unpack the devices — computing unit and cooling unit (freecooler).
Check if the package contains all of the components ordered (Pic.1):
• DECRYPTUM PR 2080TI/12 4U main unit x1 A
• Freecooler x1 B
• Tubings with Quick Disconnect Couplings x2 C
• Switching Cable x1 D
• Power Supply x3 E
Make sure that both devices are not visibly damaged. If there is visible
damage, do not use the devices and contact the manufacturer.
A B
Reboot
button
Fans
Start
button
C D
Pic.1
E
DECRYPTUM PR 2080TI/12 4U. USER MANUAL 4

2.
SETTING UP
2.1
2.2
Place both devices in a 4U rack or on an even horizontal surface.
When installing in a 4U rack, it is advisable to place the freecooler
under the main unit.
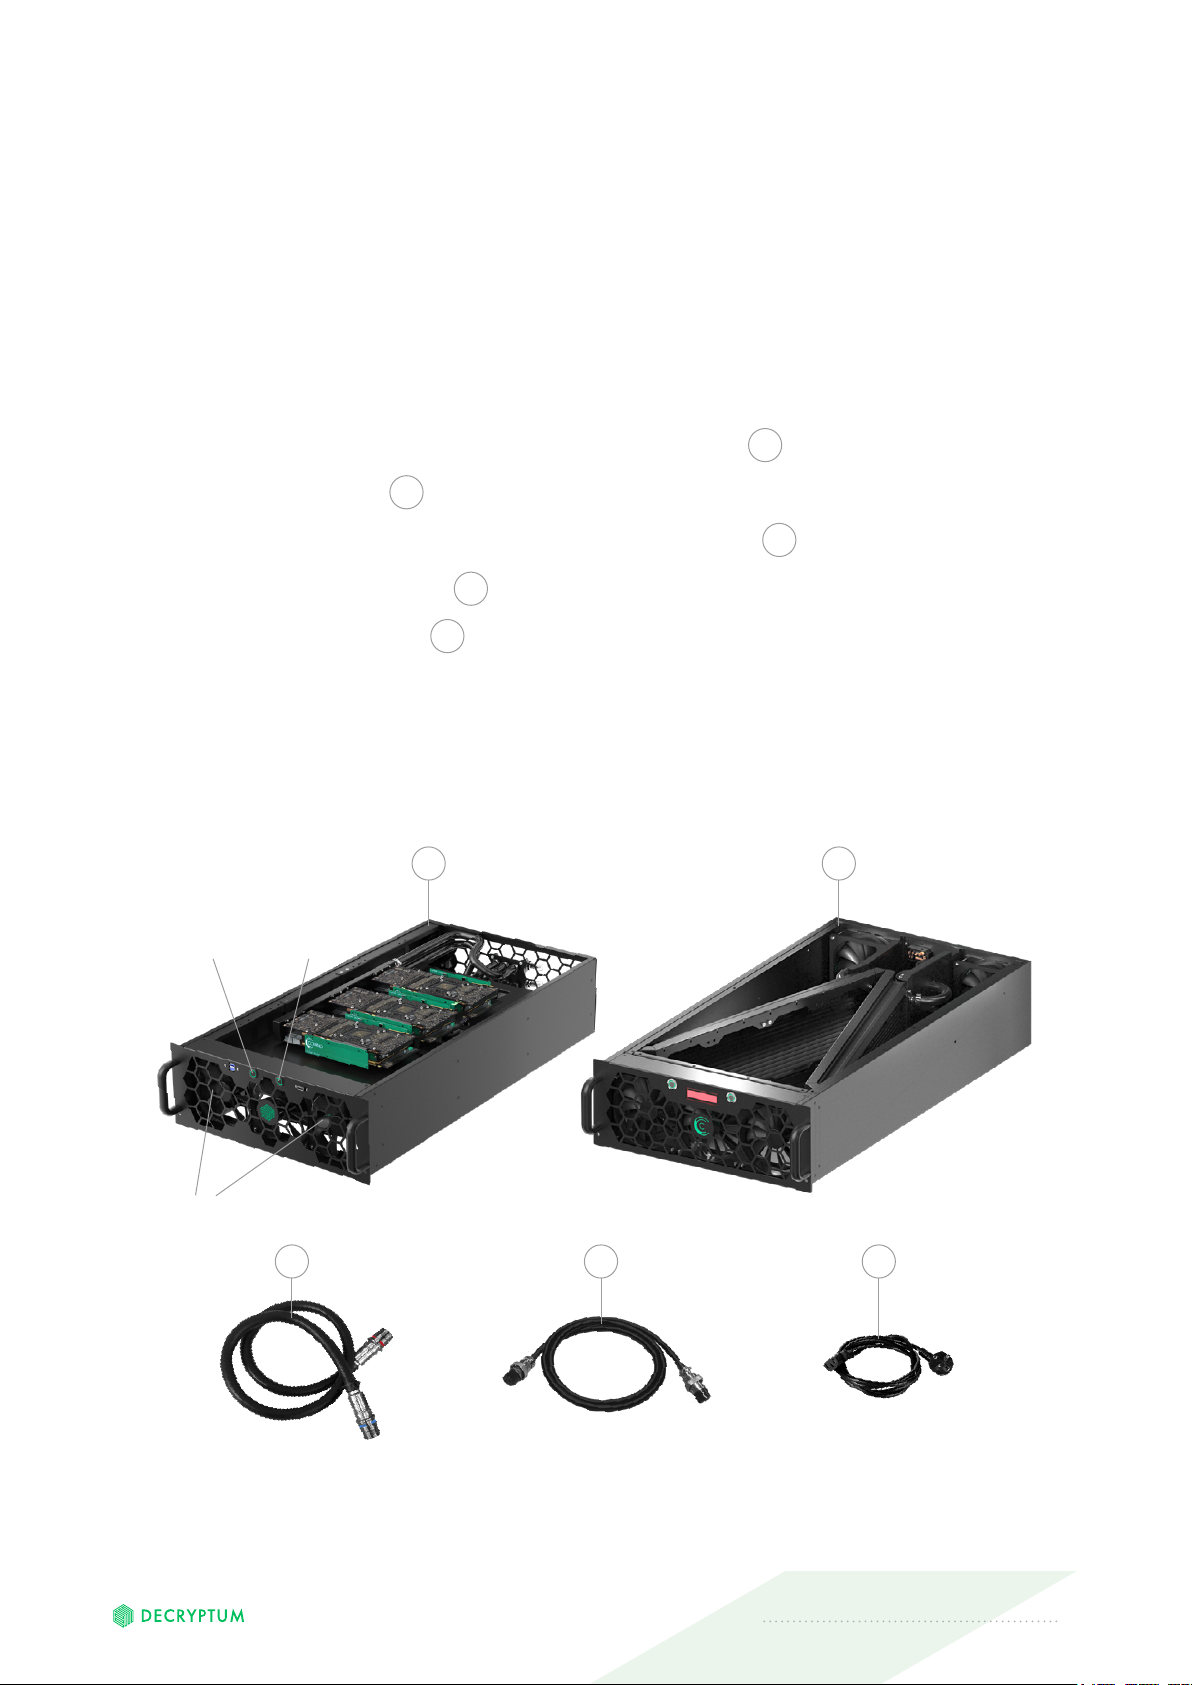
Connect the devices with hoses in accordance with the color coding
on the Quick Disconnect Couplings (QDC) (see Pic.2). Respectively
connect blue to blue and red to red QDC on the devices and hoses.
QDC should be installed tightly, until a typical click.
Red
to red
Blue
to blue
Pic.2
DECRYPTUM PR 2080TI/12 4U. USER MANUAL 5
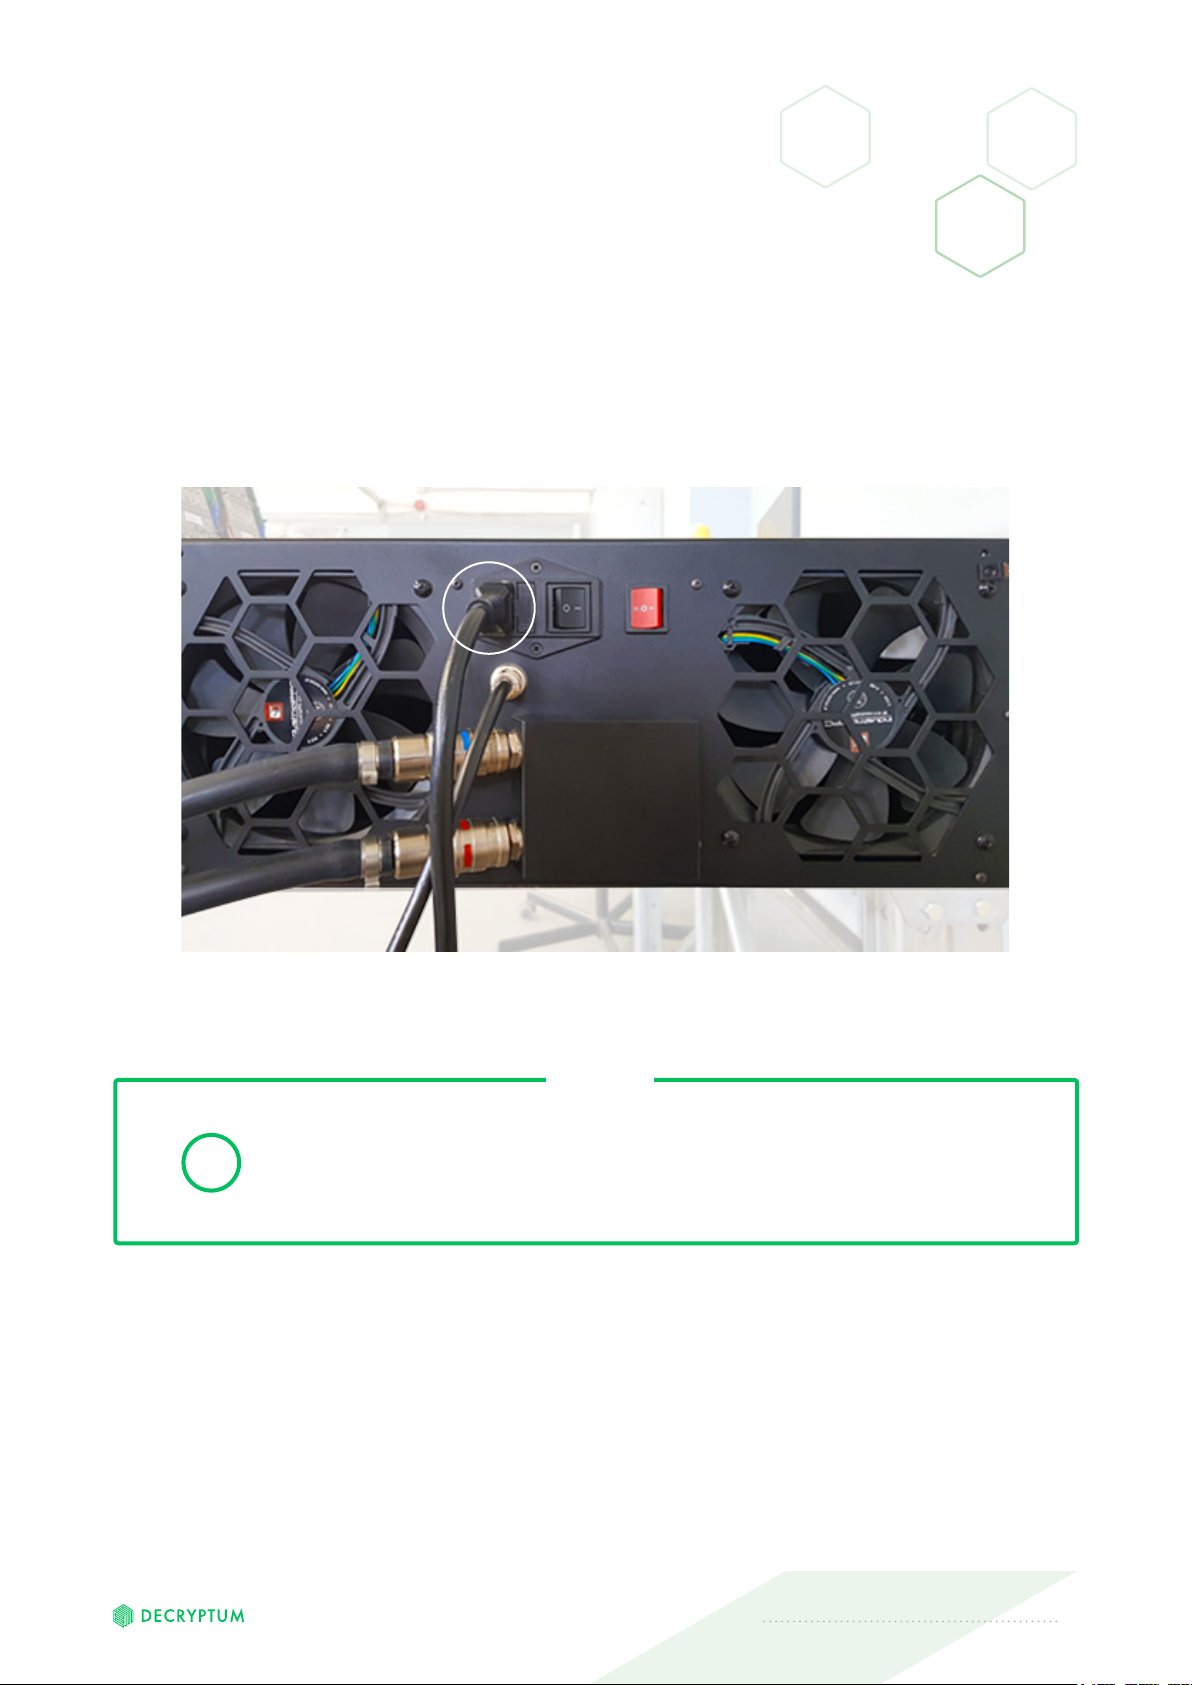
2.
SETTING UP
2.3
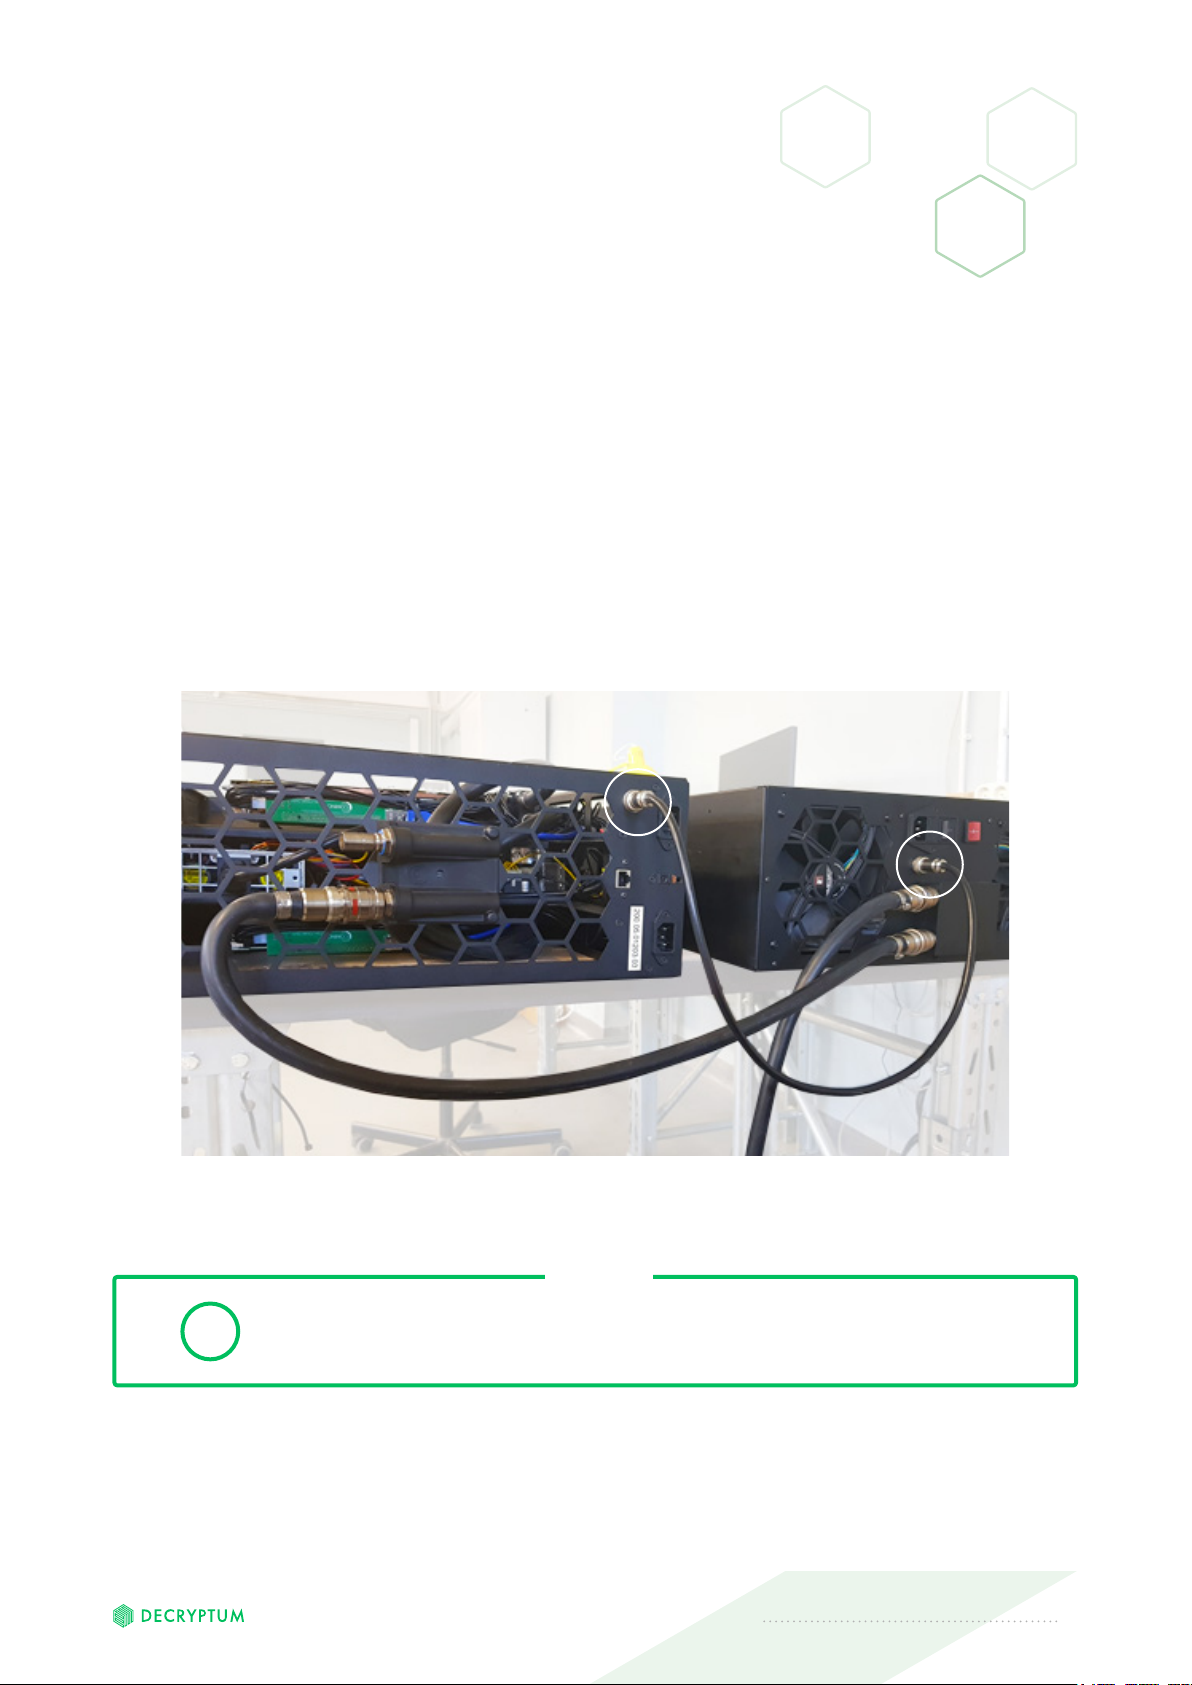
Connect the freecooler to the main unit using the supplied switching
cable (see Pic.3).
Please note that in rev 1.02, the sync cable connectors have 8 contacts.
The cable must be securely connected to both freecooler and main unit,
the metal retaining rings must be twisted on both sides to ensure the cable
screen is in electrical contact with the grounded housing.
Pic.3
WARNING
IT IS FORBIDDEN TO TURN ON THE MAIN UNIT
!
WITHOUT CONNECTING THE FREECOOLER TO IT!
DECRYPTUM PR 2080TI/12 4U. USER MANUAL 6
2.
SETTING UP
2.4
Connect a power cable to both units of the complex (freecooler
and main unit) (see Pic.4)
Pic.4
WARNING
THE FREECOOLER MUST BE CONNECTED TO ELECTRICAL
GRID BEFORE TURNING ON THE COMPUTING UNIT.
!
AN UNCONNECTED FREECOOLER UNIT CAN CAUSE
DAMAGE TO THE COMPLEX!
DECRYPTUM PR 2080TI/12 4U. USER MANUAL 7
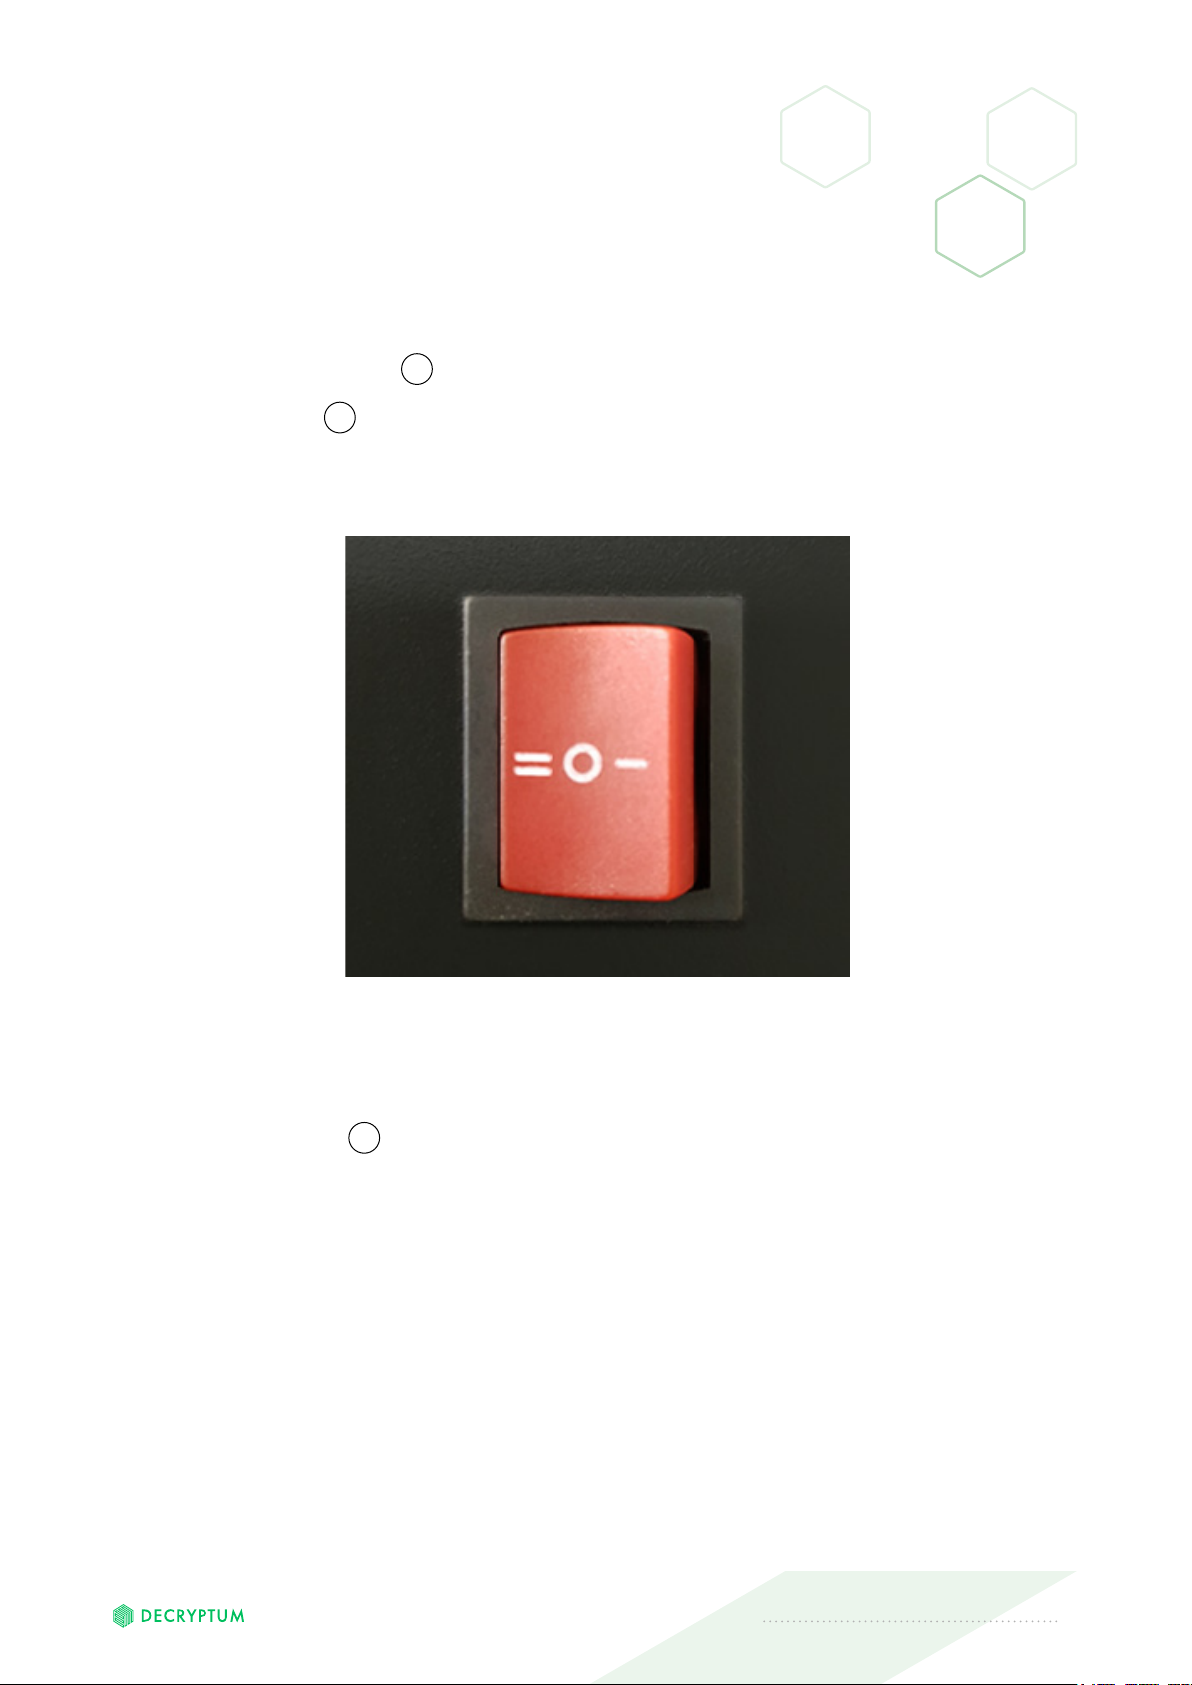
2.
SETTING UP
2.5
Applicable only for rev 1.01. Set the 3-position button (see Pic.5) on the free-
cooler to position I if the air temperature in the operating room is <18°C,
to position II if the temperature is >18°C. Please note that in rev 1.02 cool-
ers are controlled by the built-in controller instead of 3-position button.
2.6
2.7
Pic.5
Applicable only for rev 1.01. Make sure that the freecooler power button
is in position I
Connect the monitor and keyboard to the computing unit.
DECRYPTUM PR 2080TI/12 4U. USER MANUAL 8
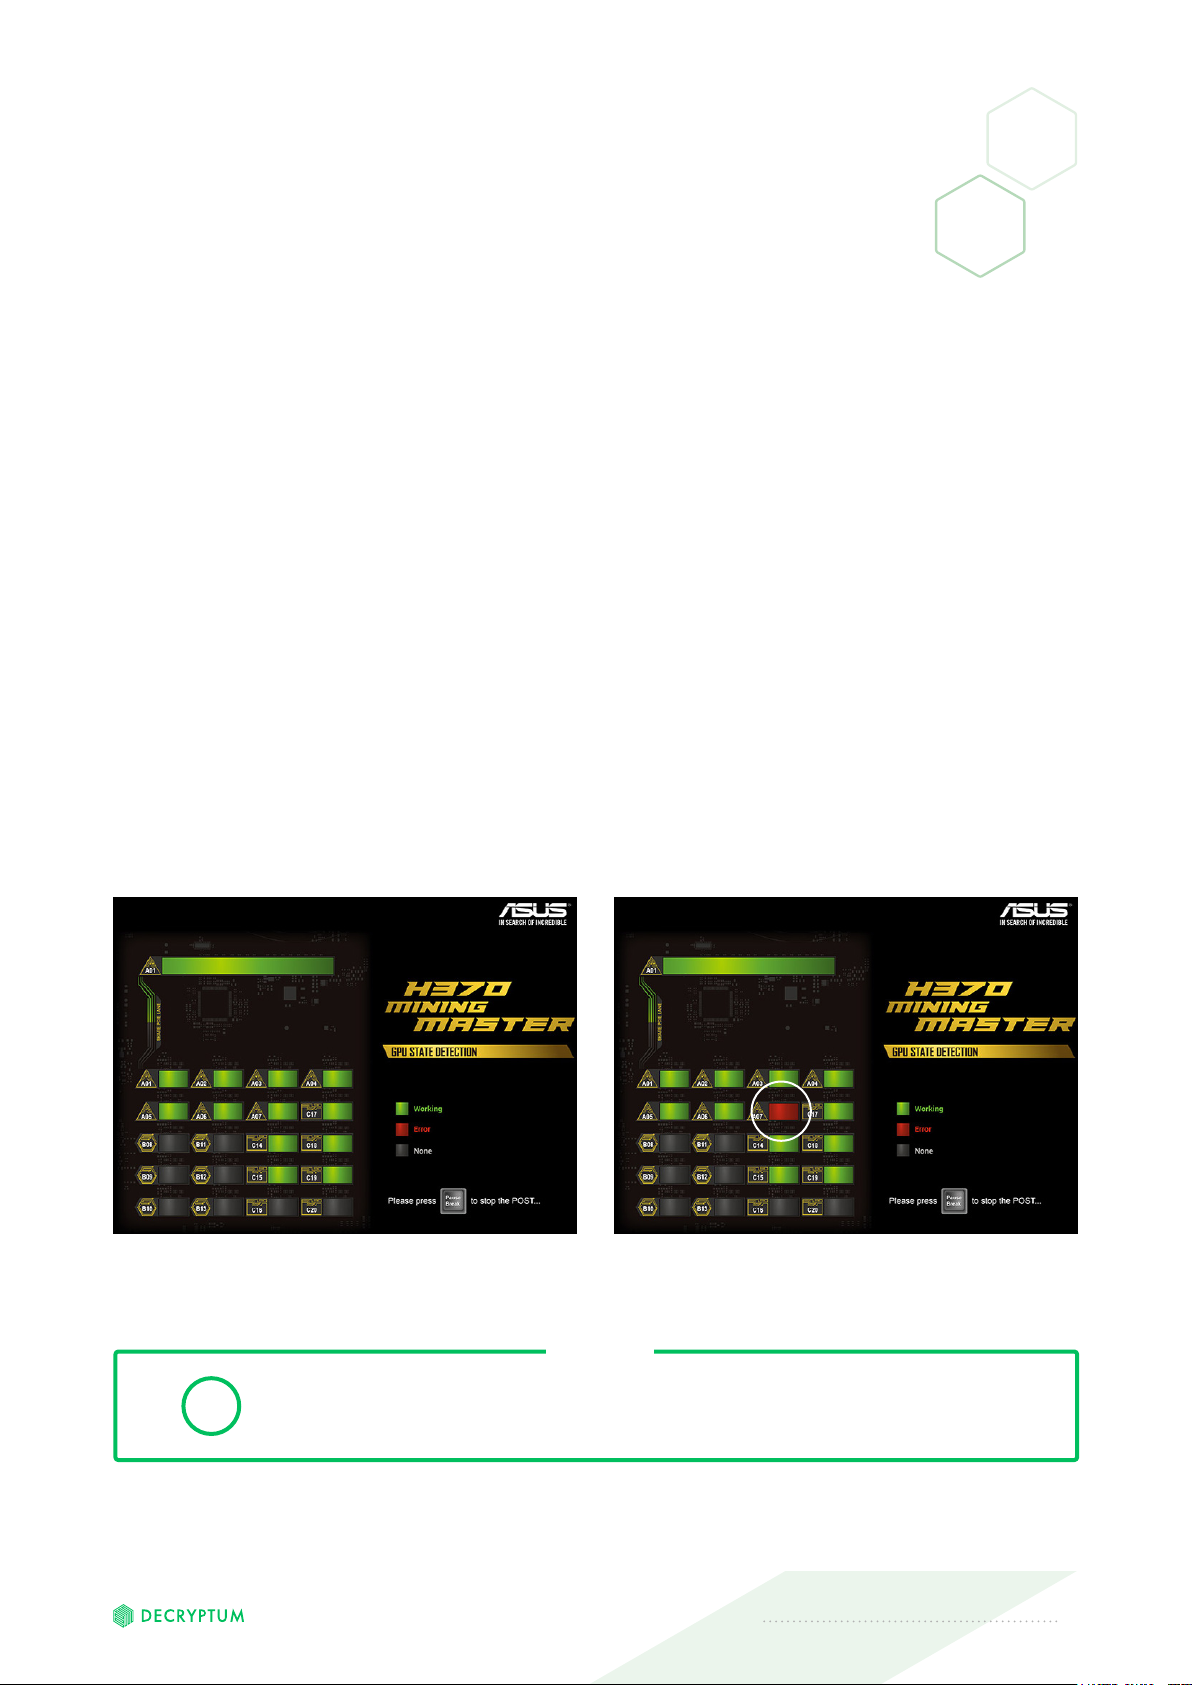
3.
STARTING UP THE DEVICE
3.1
3.2
3.3
Push the start button on the front panel of the main unit to switch
the device on. The freecooler should turn on automatically. Fans should
start rotating. If for some reason the freecooler does not start, imme-
diately turn off the main unit.
A diagnostic screen saver for card denition in the BIOS should appear
on the connected monitor (see Pic.6).
Make sure all 12 cards are displayed in green, if any card is marked in red
(see Pic.7) nd the faulty card according to the connection slot numbers
in the BIOS screen.
Error
(Red color)
Pic.6 Pic.7
WARNING
TO REPAIR A FAULTY GPU, DISCONNECT THE MAIN UNIT
!
FROM THE POWER SUPPLY.
DECRYPTUM PR 2080TI/12 4U. USER MANUAL 9
STARTING UP THE DEVICE3.
DANGER
IT IS STRONGLY FORBIDDEN TO START REPAIRING
!
A DEVICE WHICH IS CONNECTED TO ELECTRICAL GRID.
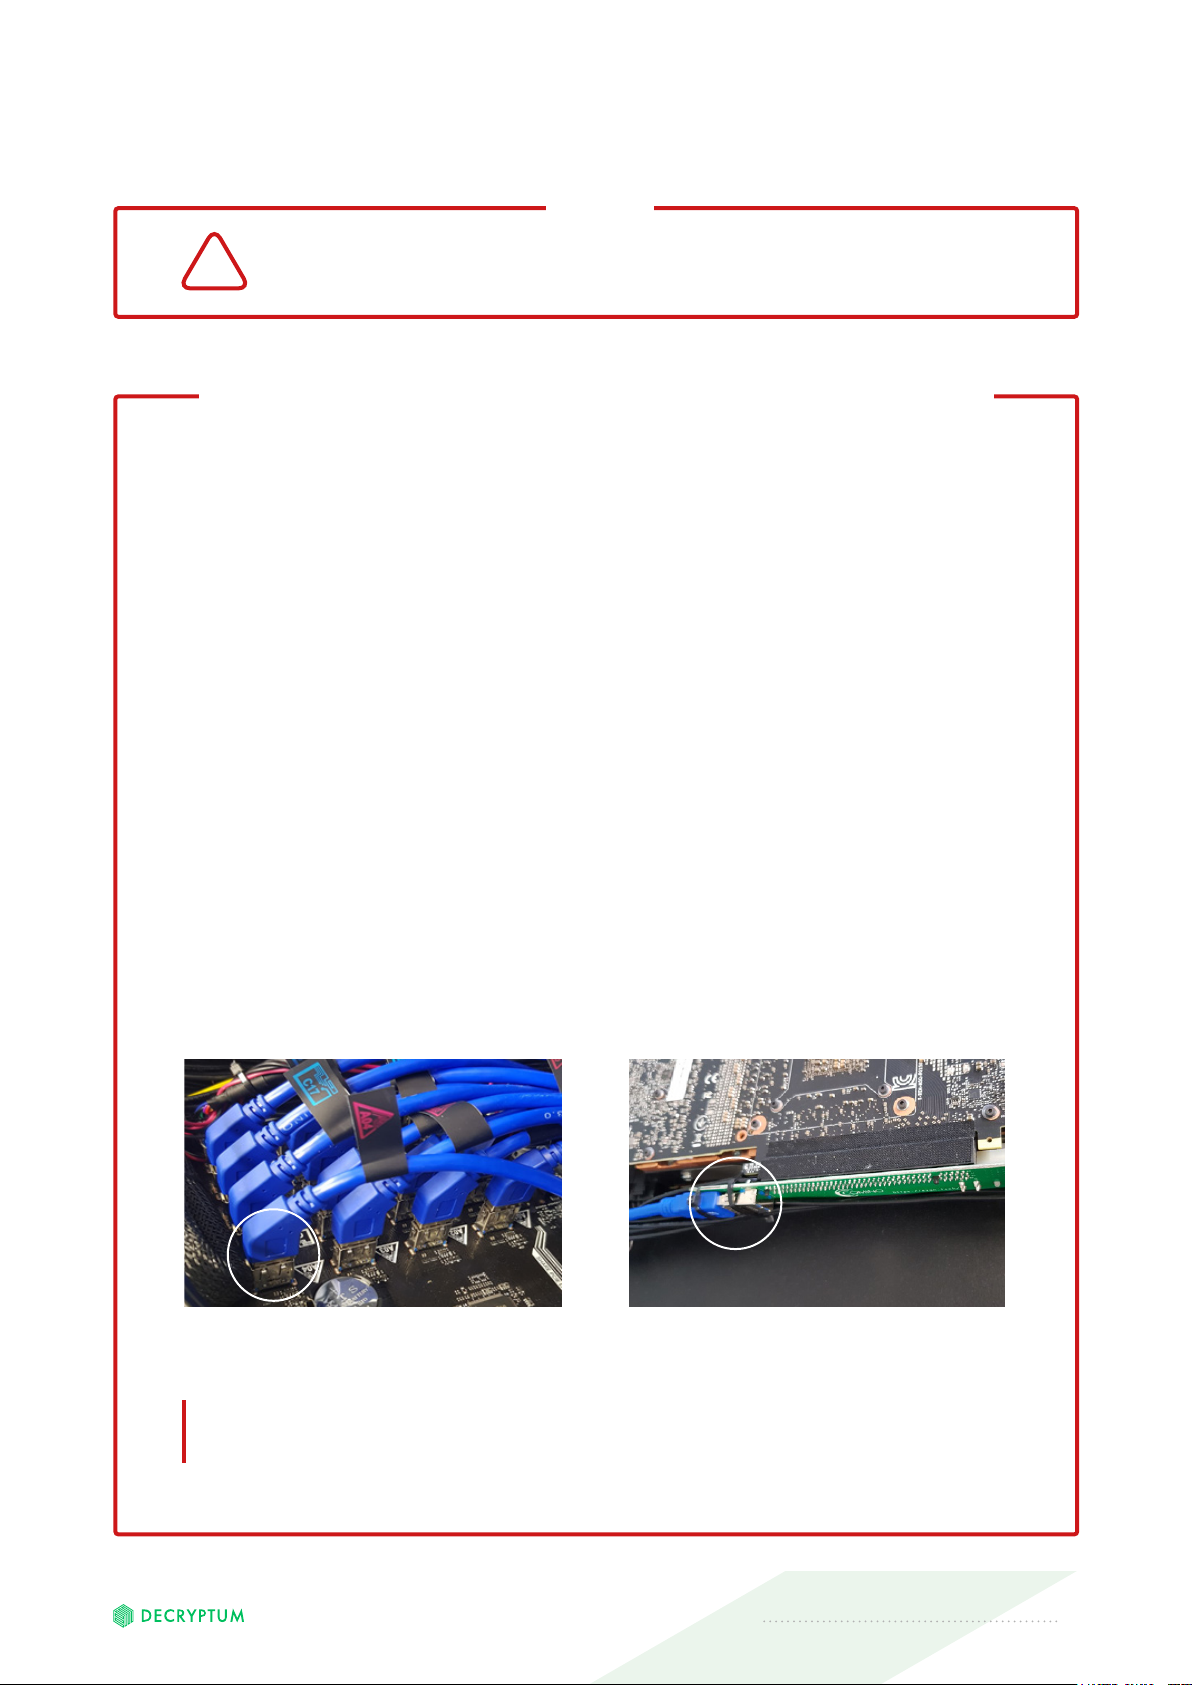
THE LIST OF ACTIONS IN CASE OF GPU FAILURE
3.4.1
3.4.2
3.4.3
3.4.4
3.4.5
Try to re-plug the motherboard — GPU connecting cable (see
Pic. 6-7). The number on the cable and on the card corresponds
to the number displayed in the BIOS diagnostic message.
Re-plug the GPU riser. Do it after carefully removing the protec-
tive adhesive tape from the Pci-e connector.
Check the condition of the riser/GPU power cables.
Disconnect the main unit and reconnect power.
If none of the abovementioned steps help, contact your Comino
representative for troubleshooting.
Pic.8 Pic.9
After each of the above mentioned steps, connect the com-
puting unit to the electrical grid and try to switch it on.
DECRYPTUM PR 2080TI/12 4U. USER MANUAL 10
 Loading...