

CLS ACX 60 User Manual
www.cls-led.com
www.cls-led.com
CLS ACX 60
Manual
Version 1.1 june 2016
2
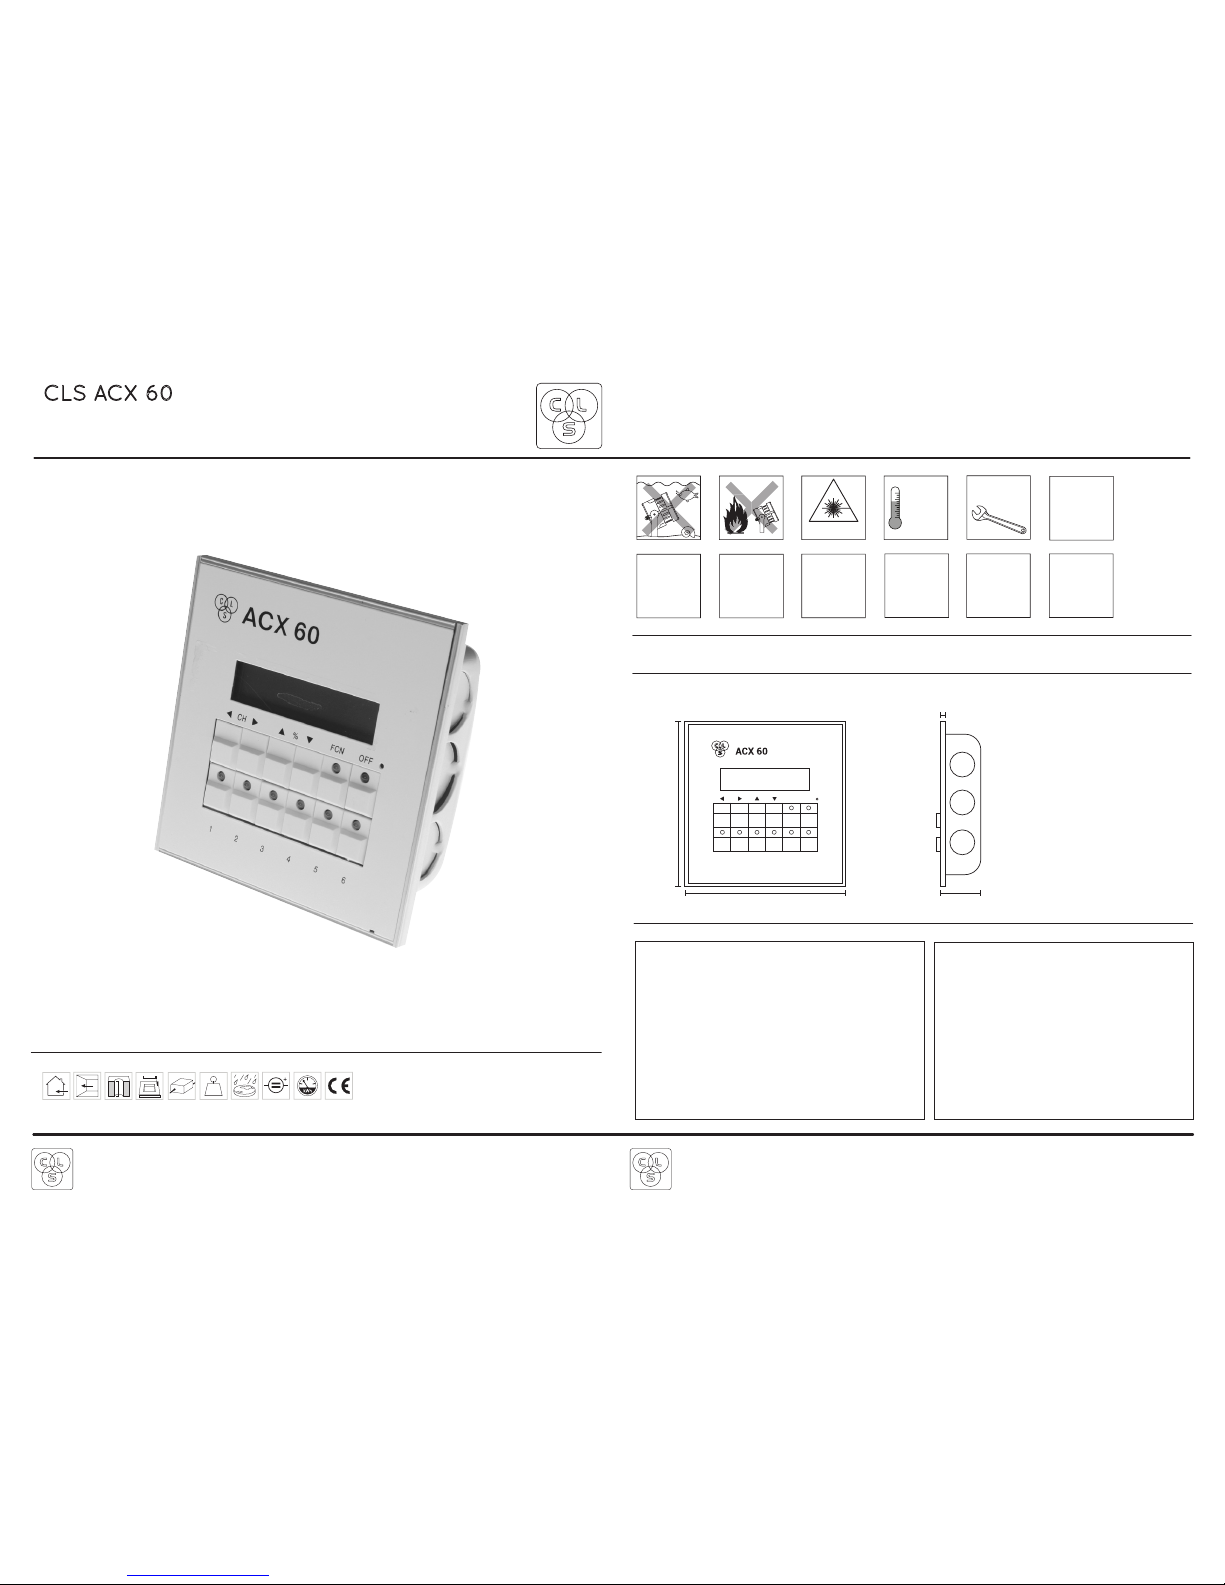
Wall 5 cm 10 x 10 cm Driver incl. 500 gr 9~12 VDCIP20 Max.
0,3 Watt
h
w
d
MEASUREMENTS
Ambiance
Max. 40º
Block access
below the work
area when
maintaining
the unit
Disconnect the
power supply
before
installing or
maintaining
Use a source
of AC power
that complies
local electrical
codes
Don’t install in
a ammable
or explosive
area
Warning!
Some surfaces
can be hot
Do not stare
into the LED
Don’t modify
or install
genuine parts
on this product
Qualied
technician
Make sure all
connectors are
connected
properly
SPECIFICATIONS
Power supply: 9-12V AC/DC
Power consumption: Max. 0,3 Watt
DMX protocol: DMX512
Maximum DMX channels: 60
Maximum scenes: 40
Maximum chasers: 6 (Max. 24 scenes at each chaser)
Connector: RJ11
Housing: Steel Frame
Weight: 500 gr
IP value: IP20
Measurements: 120 x 116 x 55 mm (hxwxd)
Ambient temperature: -30º C till +40º C
ACCESSORIES
707032 CLS LED-Powersupply for ACX60 9-12V new type
707037 CLS LDV-45 DMX LED dimmer 4 channels 5Amp
113000 CLS LDC-41 DMX LED dimmer 4 channels
707061 CLS convertercable RJ11-RJ45 for LDV/LDC 1 mtr
707050 CLS ACX60 adapter RJ11 3 way
707051 CLS RJ11 RJ11 extension cord 2mtr
707052 CLS RJ11 RJ11 extension cord 5mtr
SAFETY INFORMATION
OFFFCNCH %
123456
116 mm
120 mm
55 mm
5 mm
www.cls-led.com
www.cls-led.com
3 4
2. LOCKING/UNLOCKING PROGRAM-BUTTONS
It is possible to lock and unlock the program-buttons of the ACX60. When you start programming first unlock the
program-buttons.
• To lock the program-buttons of the ACX60 press [FCN] + [OFF] + [t] + [u].
• To unlock the program-buttons of the ACX60 press [FCN] + [t] + [u].
3. CHANNEL SETTINGS
With the channel-settings you can enable/disable the DMX-channels or set how much DMX-channels you have
to program. Factory-set (and maximum) is 60 DMX-channels.
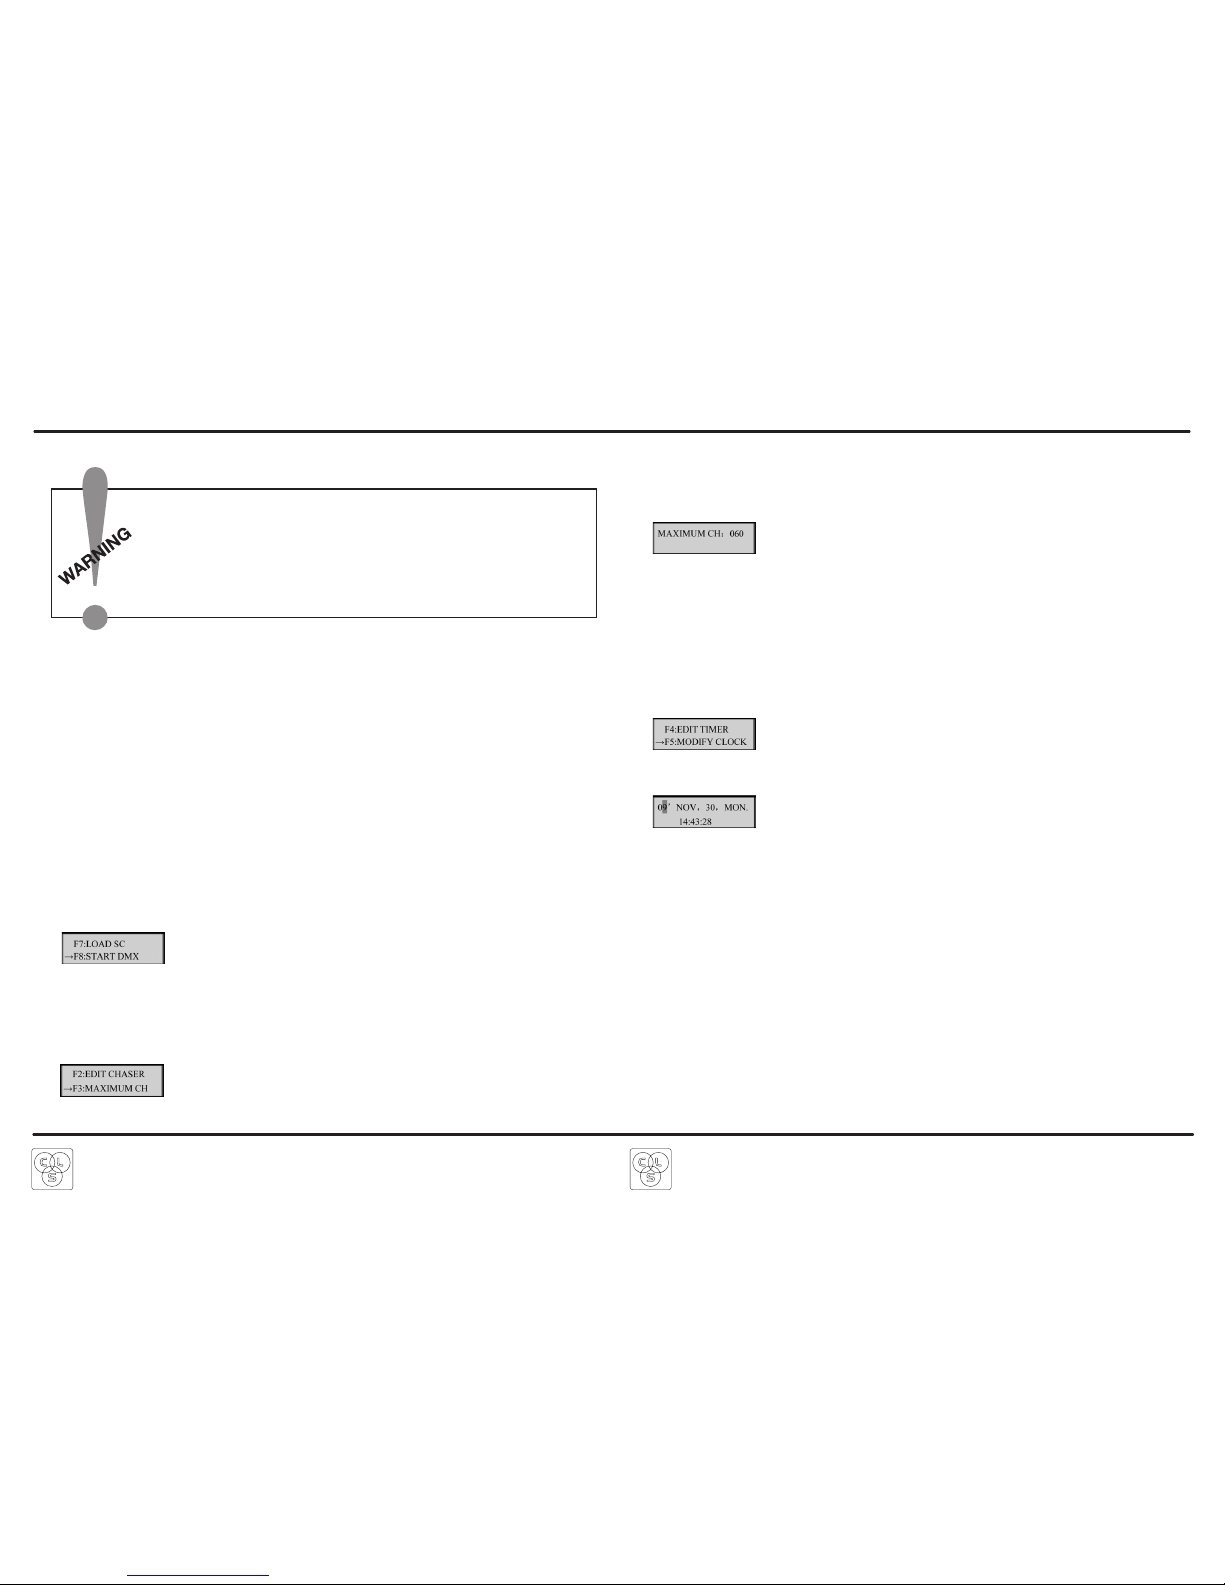
3.1 Setting the dmx start address
You have to select a start address for the controller, here you can set on which channel the ACX60 should start
sending it's DMX data. For standard use this address should be set to 1.
• First push the [FCN] button to get in the main-menu.
• Scroll with the %-buttons [s] [q] to select [F8: START DMX] where you can set the address.
• You can change the address using the %-buttons [s] [q].
• To confirm and go back to the main-menu press [FCN].
3.2 Set maximum of DMX-channels
• First push the [FCN] button to get into the main-menu.
BEFORE PROGRAMMING, FIRST POWER ON THE ACX60 FOR 8 HOURS. AFTER
THIS 8 HOURS, THE BACKUP BATTERY IS FULL, AND NOW YOU CAN
PROGRAM THE ACX60.
THE MAXIMUM LENGTH OF THE RJ11- RJ11 CABLE BETWEEN THE SPLITTER
AND ACX60 IS 5 METRES. IF YOU USE A LONGER CABLE, THE DISPLAY OF
THE ACX60 WON'T WORK!
PROGRAMMING
• Scroll with the %-buttons [s] or [q] to select [F3: MAXIMUM CH] where you can set a maximum of DMX channels. Enter this menu with the [FCN] button.
• Change the maximum of settings with the %- and CH-buttons [s] or [q] - [t] or [u]. To save press the
function-button [FCN] and go back to the main-menu.
3.3 Disable DMX-channels
• To black-out (disable channels) press [OFF].
4. EDIT INTERNAL CLOCK
• First push the [FCN] button to get into the main-menu.
• Scroll with the %-buttons [s] or [q] to select [F5: MODIFY CLOCK] where you can edit the internal clock.
Enter this menu with the [FCN] button.
• Now select a date/time to edit. To do this, use the %-buttons [s] or [q].
• Now edit the date/time with the %- or CH-buttons [s] or [q] or [t] or [u].
• If you are ready press the function-button [FCN] to save.
5. SCENES
Before you can program a chase you must program scenes. A scene is 1 step with information for all 60 DMXchannels.
[Example] Scene 1: DMX-Channel 1 value 50%
DMX-Channel 2 value 50%
Scene 2: Channel 30 value 24%
Channel 59 value 75%
All other DMX-channels value 0%
Scene 3: …
5.1 Programming Scenes
Every time you want to program, first push the function [FCN] button. You enter a menu where you can change all
settings.
• First push the [FCN] button to get into the main-menu.
 Loading...