

CLS CAS 6 Luxeon K2-TFFC, 87215768, 87215765 User Manual
CLS Manuals
CLS CAS 6 Luxeon K2-TFFC
CLS Manuals
CLS Atmosphere LED-panel
INTRODUCTION
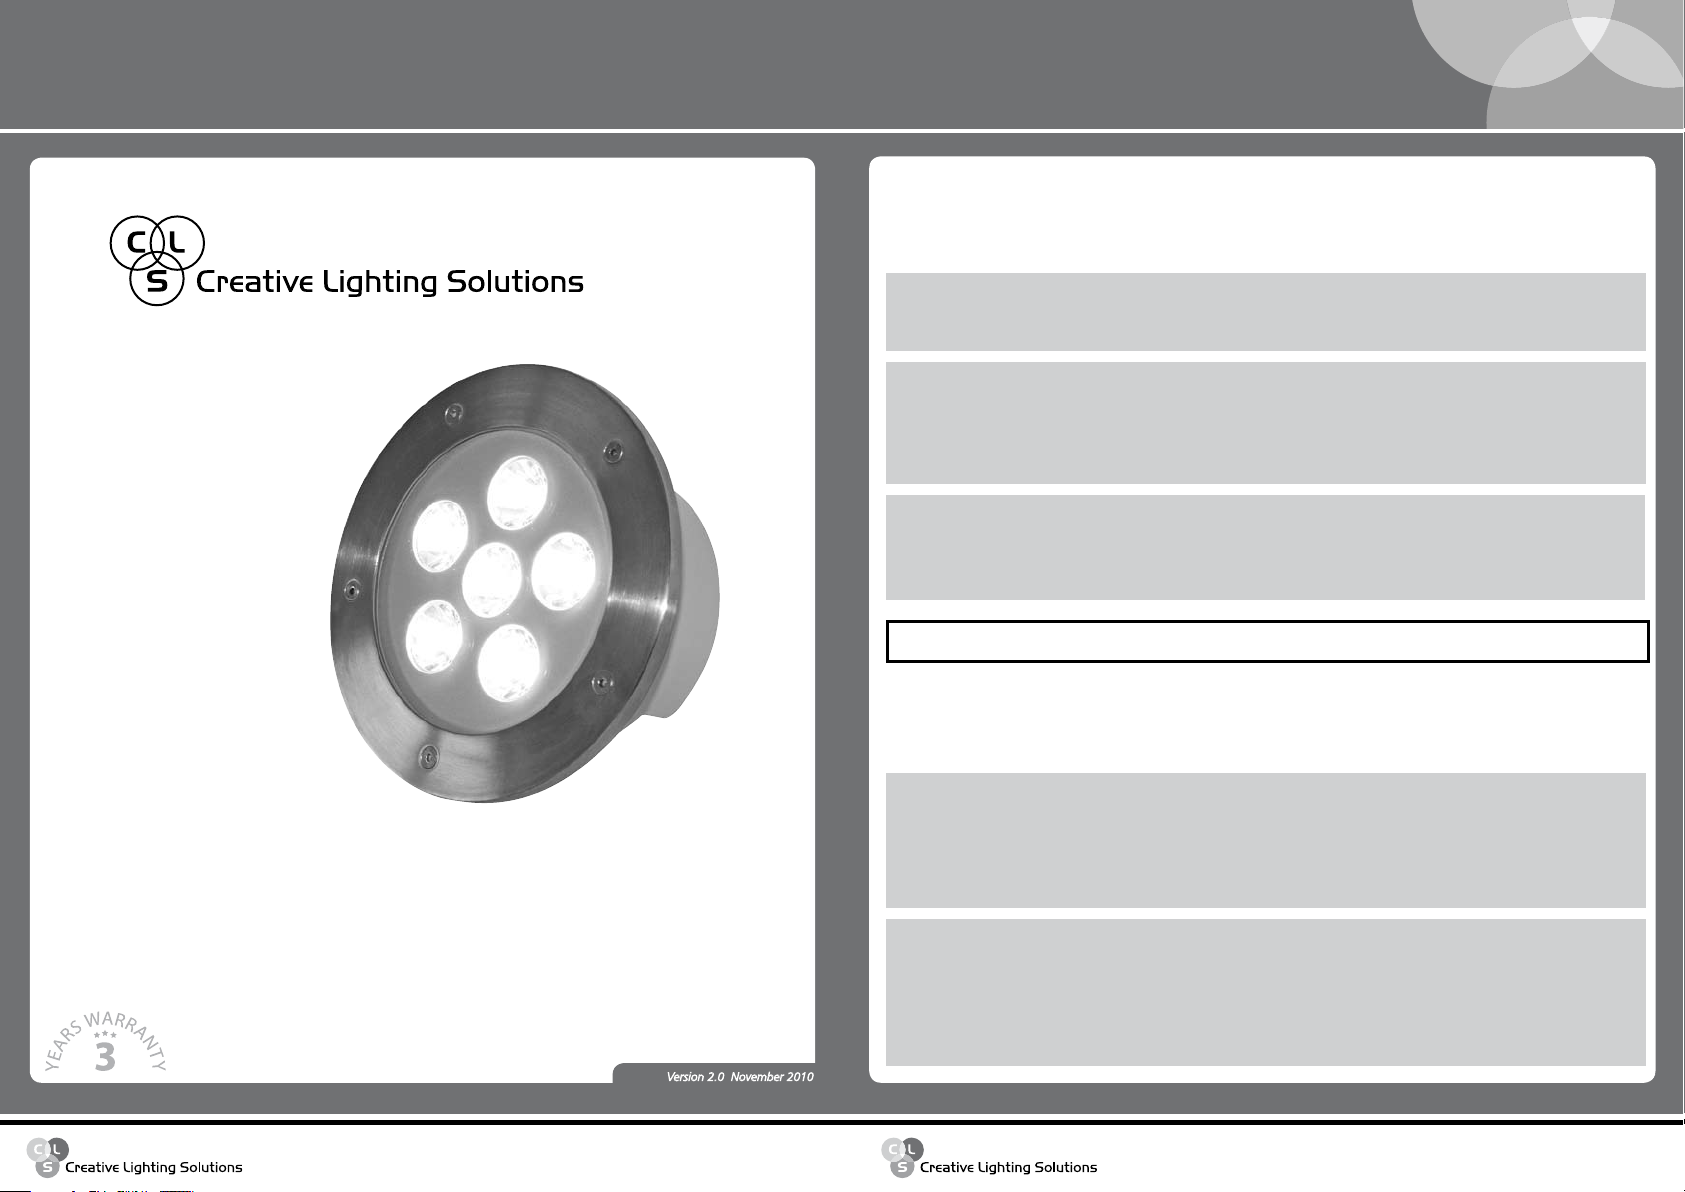
Thank you for choosing the CLS CAS 6 inground floodlight. The CLS CAS 6 floodlight is a compact but yet
powerful inground floodlight for numerous applications. The unit can be used for lighting up all sorts of
facades, objects and landscape lighting projects.
Available CLS CAS 6 floodlights
• 87215765 CLS CAS6 flood 6xK2-TFFC warm white 3150K 110-277V IP65
• 87215768 CLS CAS6 flood 6xK2-TFFC cold white 6700K 110-277V IP65 (not in stock)
Included items
The CLS CAS 6 is shipped in one package containing the following items:
• 1 x CLS CAS 6 inground floodlight
• 1 x CAS 6 Sleeve
• 1 x manual
Optional accessories
• 871992 CLS mold set, straight 8-26mm
• 87215773 CLS CAS 6 Spot Lens plate
• 872157 CLS CAS 9 frosted glass
CLS CAS 6 Luxeon K2-TFFC
- 1 -
www.cls-led.com
Version 2.0 November 2010
Note: It is important to read this manual before you install this product.
SAFETY INFORMATION
Warning! This product is for professional use only, not for domestic use.
Read this manual before powering up or installing the CLS CAS 6. Follow the instructions listed
below and observe all warnings in this manual.
2007 CLS-LED BV. All rights reserved. Information subject to change without notice, CLS-LED BV and all affiliated
companies disclaim liability for injury, damage direct or indirect loss, consequential or economic loss or any other
loss occasioned by the use of, inability to use or reliance on the information contained in this manual. No part
of this manual may be reproduced, in any form or by any means, without permission in writing from CLS-LED
BV. Other legal information can be found in our General conditions to be found on the back of your CLS-LED BV
invoice or on our website www.cls-led.com/conditions.pdf
Protection from electric shock
• Disconnect the power supply from AC power before installing, dismounting or maintaining the unit.
• Make sure all connectors are connected properly.
• Use only a source of AC power that complies with local building and electrical codes and has both
overload and ground-fault protection.
• Refer all service to a qualified technician.
- 2 -
www.cls-led.com
CLS CAS 6 Luxeon K2-TFFC
CLS Manuals
CLS Atmosphere LED-panel
Protection from burns and fire
• Do not install the CLS CAS 6 near a heat source.
• Do not install the CLS CAS 6 in a corrosive, flammable or explosive area.
• Do not modify the CLS CAS 6, or install other than genuine parts.
• Do not operate the CLS CAS 6 if the ambient temperature exceeds 40 ºC.
• Do not stare into the LED, this can cause damage to the eyes.
Protection from injury due to falls
• Verify that all covers and mounting hardware are securely fastened.
• Block the access below the work area whenever installing or removing the unit.
INSTALLATION
This section shows how to install the CLS CAS 6.
ATTENTION!
TO prEvENT dAmAgE TO ThE CLS CAS 6, uSE ThE INCLudEd
CLS CAS 6 SLEEvE. mAkE SurE drAINAgE CONdITIONS ArE
WARNING
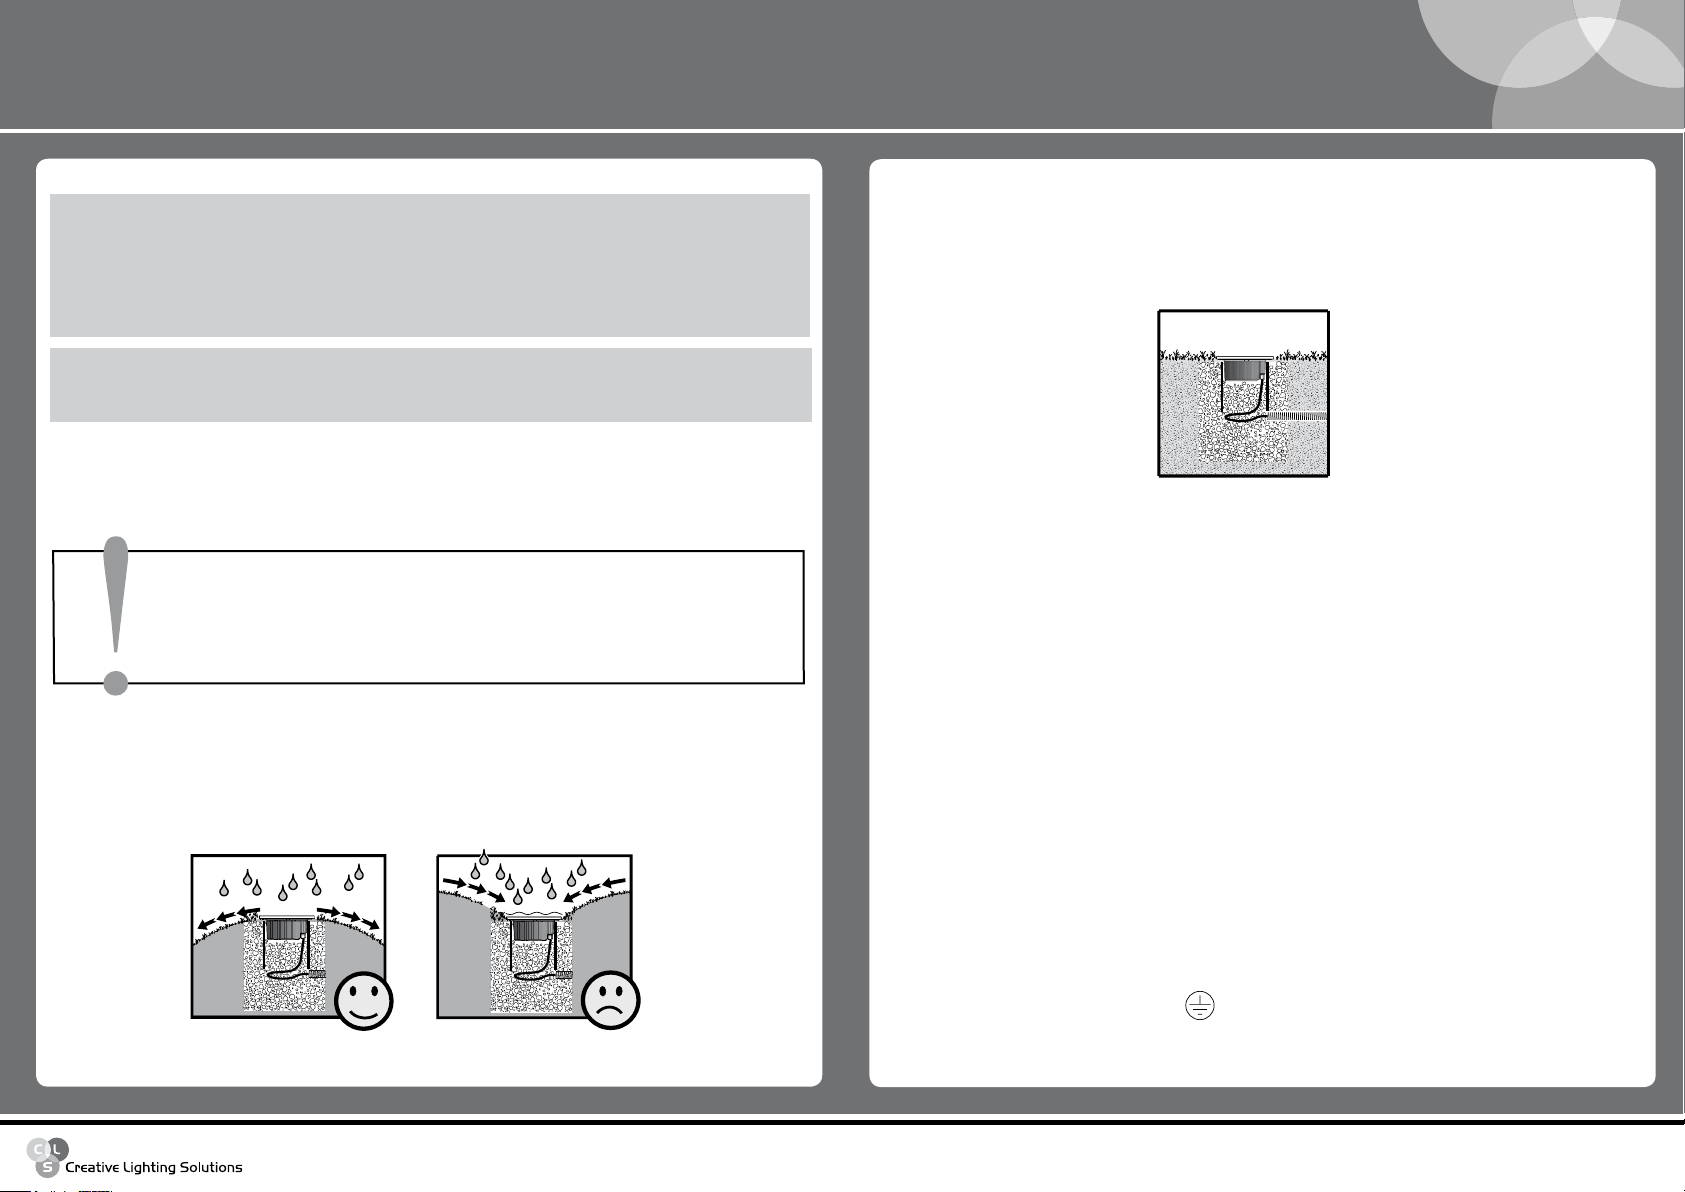
Drainage
To minimize the risk of flooding or water logging, install the fixture in a location which is above the level of
the surrounding area, and make sure drainage conditions are adequate. CLS recommends to use gravel for
the best drainage conditions. The unit is not designed to withstand high pressure water jets.
AdEquATE. ThESE prECAuTIONS muST bE fOLLOwEd,
OThErwISE ThE wArrANTy wILL bECOmE INvALId!
Obstruction by roots
The further the CLS CAS 6 is located from vegetation such as trees, hedges or bushes, the less chance there
is that the roots will obstruct the CLS CAS 6 or even cause damage to its cables. If the CLS CAS 6 is located
close to vegetation, consult a landscape architect about the solutions for the root obstruction.
CABLE INSTALLATION
Cable slack
Allow at least 300 mm of free cable in the installation, so that the CLS CAS 6 is clear for service without
disconnecting cables.
NOTE!
For protection from potentially lethal electric shock:
• The CLS CAS 6 must be grounded.
• The AC-power supply must be fitted with a fuse or circuit breaker, ground-fault protection, and a means
to isolate the CLS CAS 6 from power during service or when not in use.
• Cables and fixtures must be isolated from power, and steps taken to prevent reconnection, before carrying
out any work on them.
• Do not connect the CLS CAS 6 to an electrical dimmer system: doing so can damage the electronics.
- 3 -
Connecting to AC-power
Connect the power cable only on the right positions! See diagram for the colours of all electric cables:
Wire (EU) Function Marking
Brown Live L
Blue Neutral N
Yellow/green Earth
- 4 -
www.cls-led.com
 Loading...