

Page 1
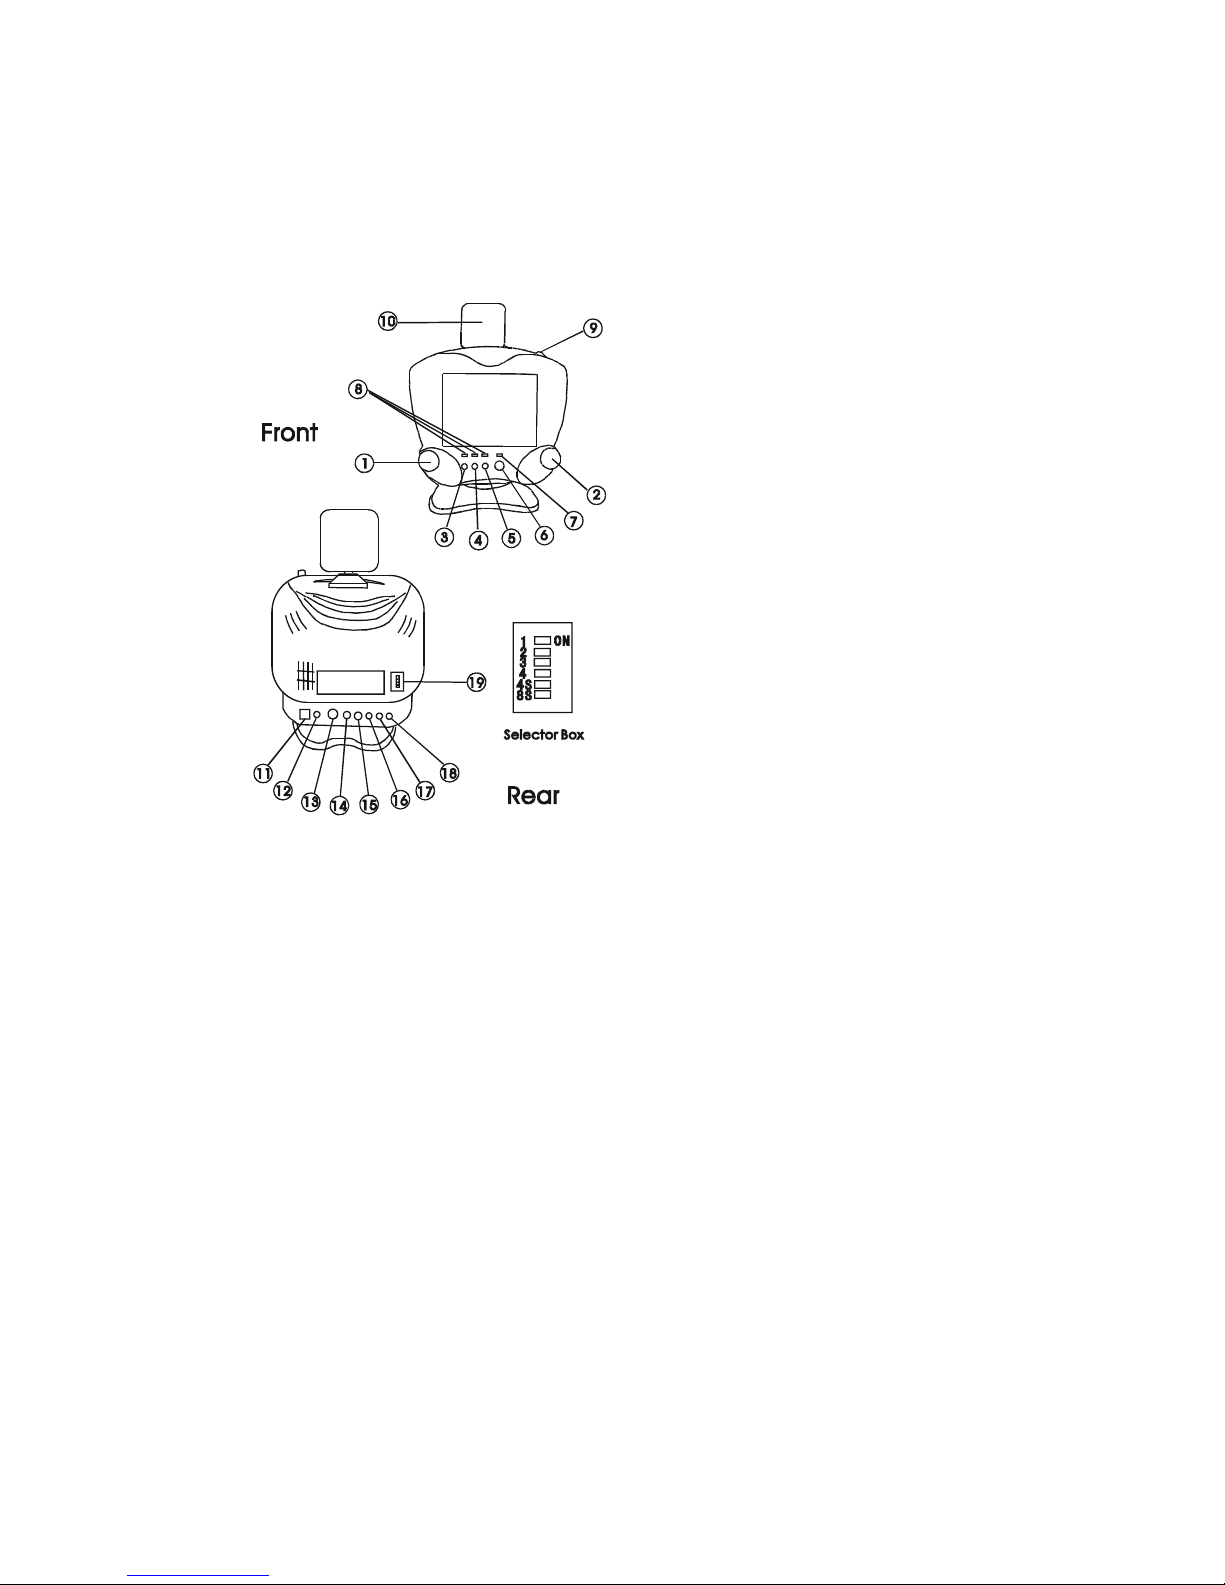
Wireless Monitor (WW5000R)
1. Component
① Volume Knob
① Turning Knob
② TV/Monitor Switch Button
③ TV Band and Channel Select Button
④ Scan / Pause Button
⑤ Power Button
⑥ Power Indicator Lamp
⑦ TV Band Indicator Lamp (VL, VH, UHF)
⑧ Pull-shaft Antenna
○
10
Rectangle Antenna
○
11
Input Jack of Power DC 12V
○
12
Earphone Jack
○
13
Extension Antenna Jack
○
14
Audio Input Jack
○
15
Video Input Jack
○
16
Contrast Degree Knob
Page 2
○17 Brightness Degree Knob
○
18
Frame Fixing Knob
○
19
Selector Box
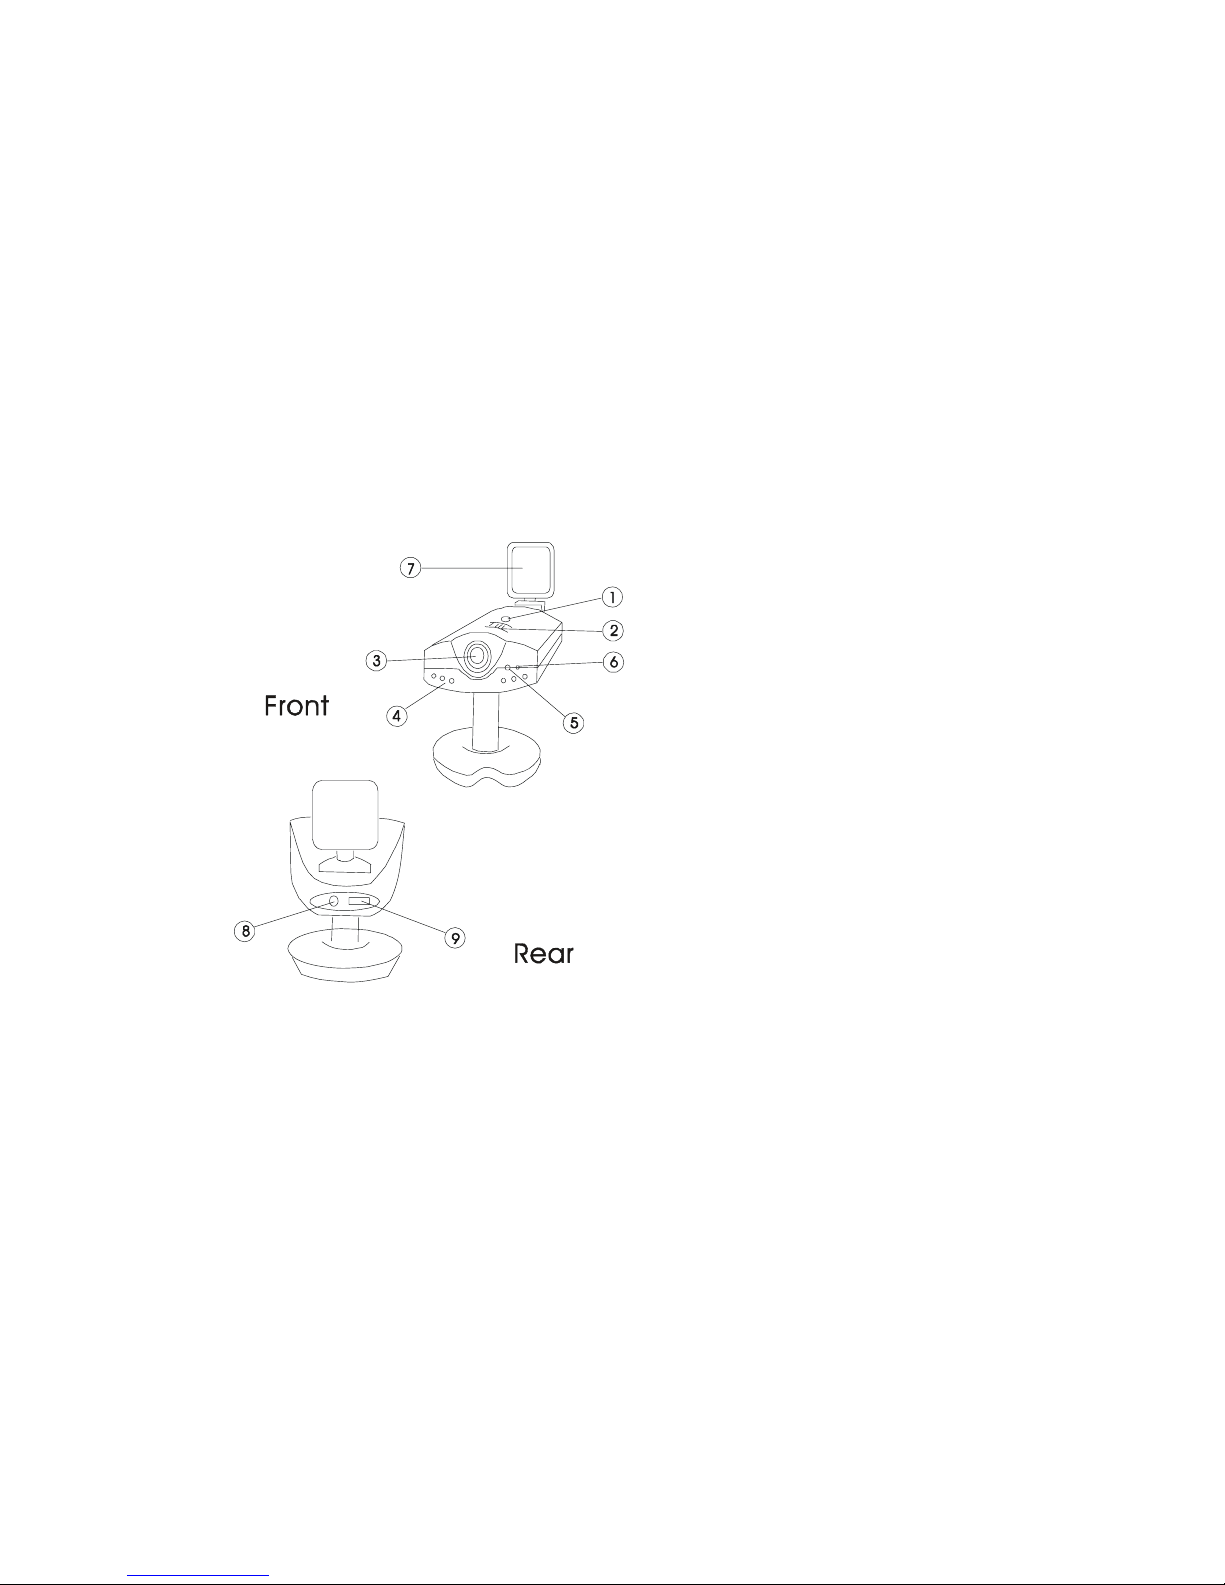
II. Wireless Camera (WW2000)
1. Component
① Power Button
② Focus Adjustor
③ Camera Lens
④ Infrared Emitting Tube
⑤ Indicator Lamp
⑥ Microphone
⑦ Rectangle Antenna
⑧ Input Jack of Power DC 12V
⑨ Channel Selector
1) Use the pin of power line with adaptor to insert into the jack ⑧, and plug the power
supply to connect the camera.
Page 3

2) Press the Button ① to open the power then the indicator lamp ⑤ will be bright.
3) Adjust the Channel Selector ⑨ to the corresponding channel of monitor.
4) If the monitor is working, it will display the picture which camera was taken.
5) Adjust the Focus Adjustor ② to get the clearest image (when first time do it, then
afterward do not need to re-adjust it).
6) Place the camera in the far site, and synchronously adjust its antenna ⑦ and monitorˊs
to get the clearest image.
7) You can also adjust the direction and the up-angle of camera when you need.
TV Receiving
1) Use the pin of power supply line with adapter to insert into the DC jack ○11 and, put the plug of
power supply line into the socket of power supply to connect the current. Press down the power
button ○
6
, there will appear the raster display on the screen. Press down the TV/Monitor Switch
Button ○
3
to the TV state, and press TV Band and Channel ○4 to select the desired TV Band,
then the corresponding TV Band Indicator Lamp ○
8
will be bright. Pull out the Pull-shaft
Antenna ○
9
(or insert the extra antenna to the extension antenna jack ○13), turn the Turning
Knob ○
2
to the desired TV program, and then adjust the direction and length of Pull-shaft
Antenna ○
9
to get the clearest image and sound.
 Loading...