

Page 1
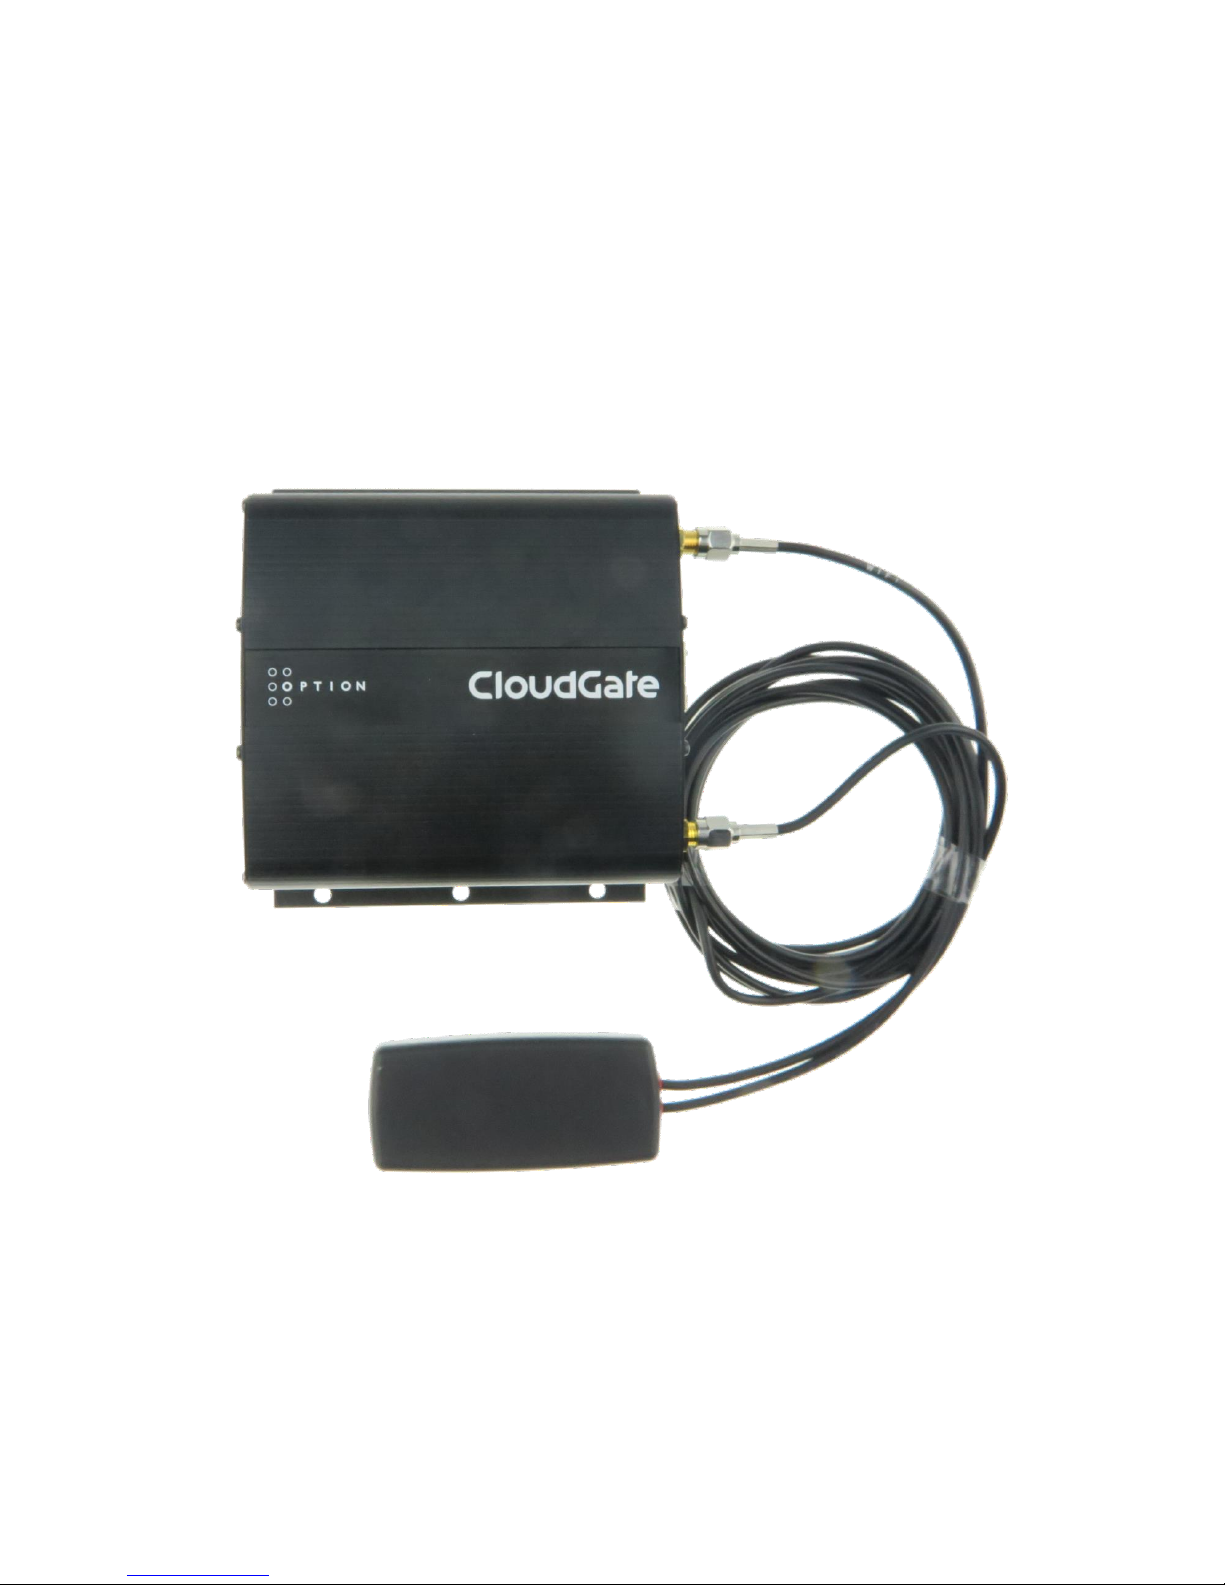
CloudGate „Marwis“
Manual
Page 2

Operating manual CloudGate V 1.0 / 01.02.2017
Version 1.00
01.02.2017
P. Rau / Informatik Werkstatt GmbH
Page 3

Operating manual CloudGate V 1.0 / 01.02.2017
3 Contents
Contents
Connecting the Marwis/UMB ........................................................................ 4
Power Supply ............................................................................................. 4
Status LEDs ............................................................................................... 4
Hints for the operation ................................................................................ 5
Configuration User Interface ........................................................................ 5
Configuration files ...................................................................................... 7
/myconfig/marwis.ini ............................................................................... 7
/myconfig/sensor_config.ini ...................................................................... 8
Log file ...................................................................................................... 8
Firmware-Update ....................................................................................... 8
Page 4
Operating manual CloudGate V 1.0 / 01.02.2017
4 Connecting the Marwis/UMB
Connecting the Marwis/UMB
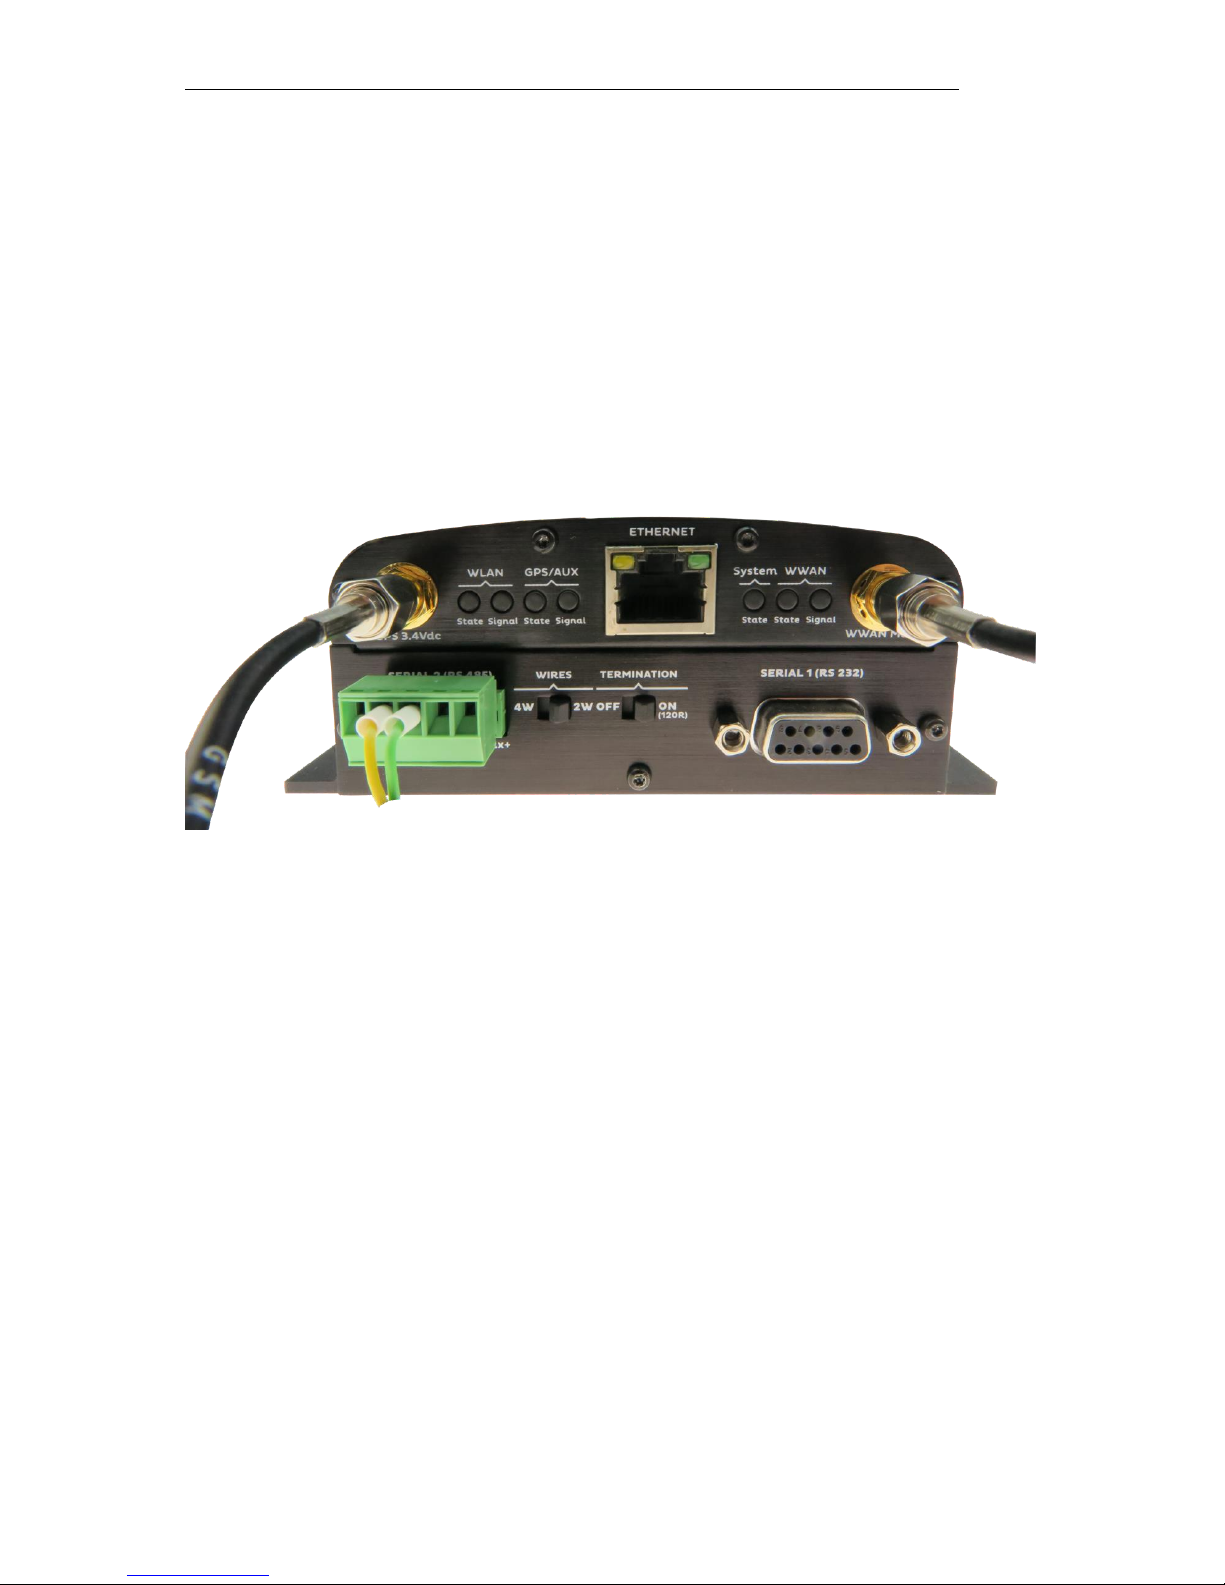
The Marwis device / UMB bus is connected via the RS485 interface on the
CloudGate device (green connector on the left side) using the pins:
TX+ = A (green)
TX- = B (yellow)
Switch settings:
Wires: 2W
Termination: On
Power Supply
MARWIS and CloudGate have to be connected to a power supply that is not
interrupted when the vehicle is restarted.
This applies especially to vehicles with a start-stop system.
Explanation:
If the power supply is interrupted frequently it cannot be guaranteed that the
MARWIS LEDs acquire their operating temperature.
The CloudGate needs approximately 2 minutes for starting. Since there is no
buffer, the data of this period will get lost.
Status LEDs
The application controls the 2 „WLAN“ status LEDs on the left side of the
CloudGate front panel.
LEDs off: the application is not (yet) running, or is being started.
Page 5

Operating manual CloudGate V 1.0 / 01.02.2017
5 Hints for the operation
Both LEDs blink synchroniosly red/off (after startup): clock is not set yet.
The application is waiting for the clock to be set (which happens after a
connection to the internet could be established).
In normal operations, the “WLAN State” LED (left) shows the status of the UMB
communication and GPS data:
Green: normal communication / no error. Data is being queued for
transmission to the server. Short “flickering” indicates communication with
the device(s).
Constant red: error in UMB communication (no data from the Marwis
device)
Red Orange “blinking”: no or no valid GPS data
Constant orange: GPS data outdated (older than 1.5 seconds)
Green/Orange “blinking”: GPS location
Note: “blinking” is in 500 ms interval (i.e. color is changing every half second),
independent of the polling interval
The “WLAN Signal” LED indicates the status of the server connection.
Green: connection established. “Flickering” indicates data transmission
with the server
Orange: no MARWIS id – no communication with the server because no
Marwis is connected
Orange/Red “blinking”: some internal error in server communication
Red: no connection to server
Hints for the operation
Switch off Bluetooth connections
Try to deactivate all Bluetooth connections (Car, mobile phones) close to
the CloudGate antennae since they may interfere with the GPS and GPRS
signals.
If the CloudGate does not receive any valid GPS data during 60 s it will
interrupt the data transmission to ViewMondo and data will be lost.
Data visualization only in ViewMondo
The MARWIS-App as well as the LufftConfigTool offer the possibility to look
at the data online simultaneously to the transmission. However, both tools
communicate with MARWS over Bluetooth. Due to the above mentioned
problems none of them should not be used simultaneously to the
CloudGate.
If you want to look at the data online please use ViewMondo.
Configuration User Interface
Most Important settings can be performed via an extension of the CloudGate
user interface.
Page 6
Operating manual CloudGate V 1.0 / 01.02.2017
6 Configuration User Interface
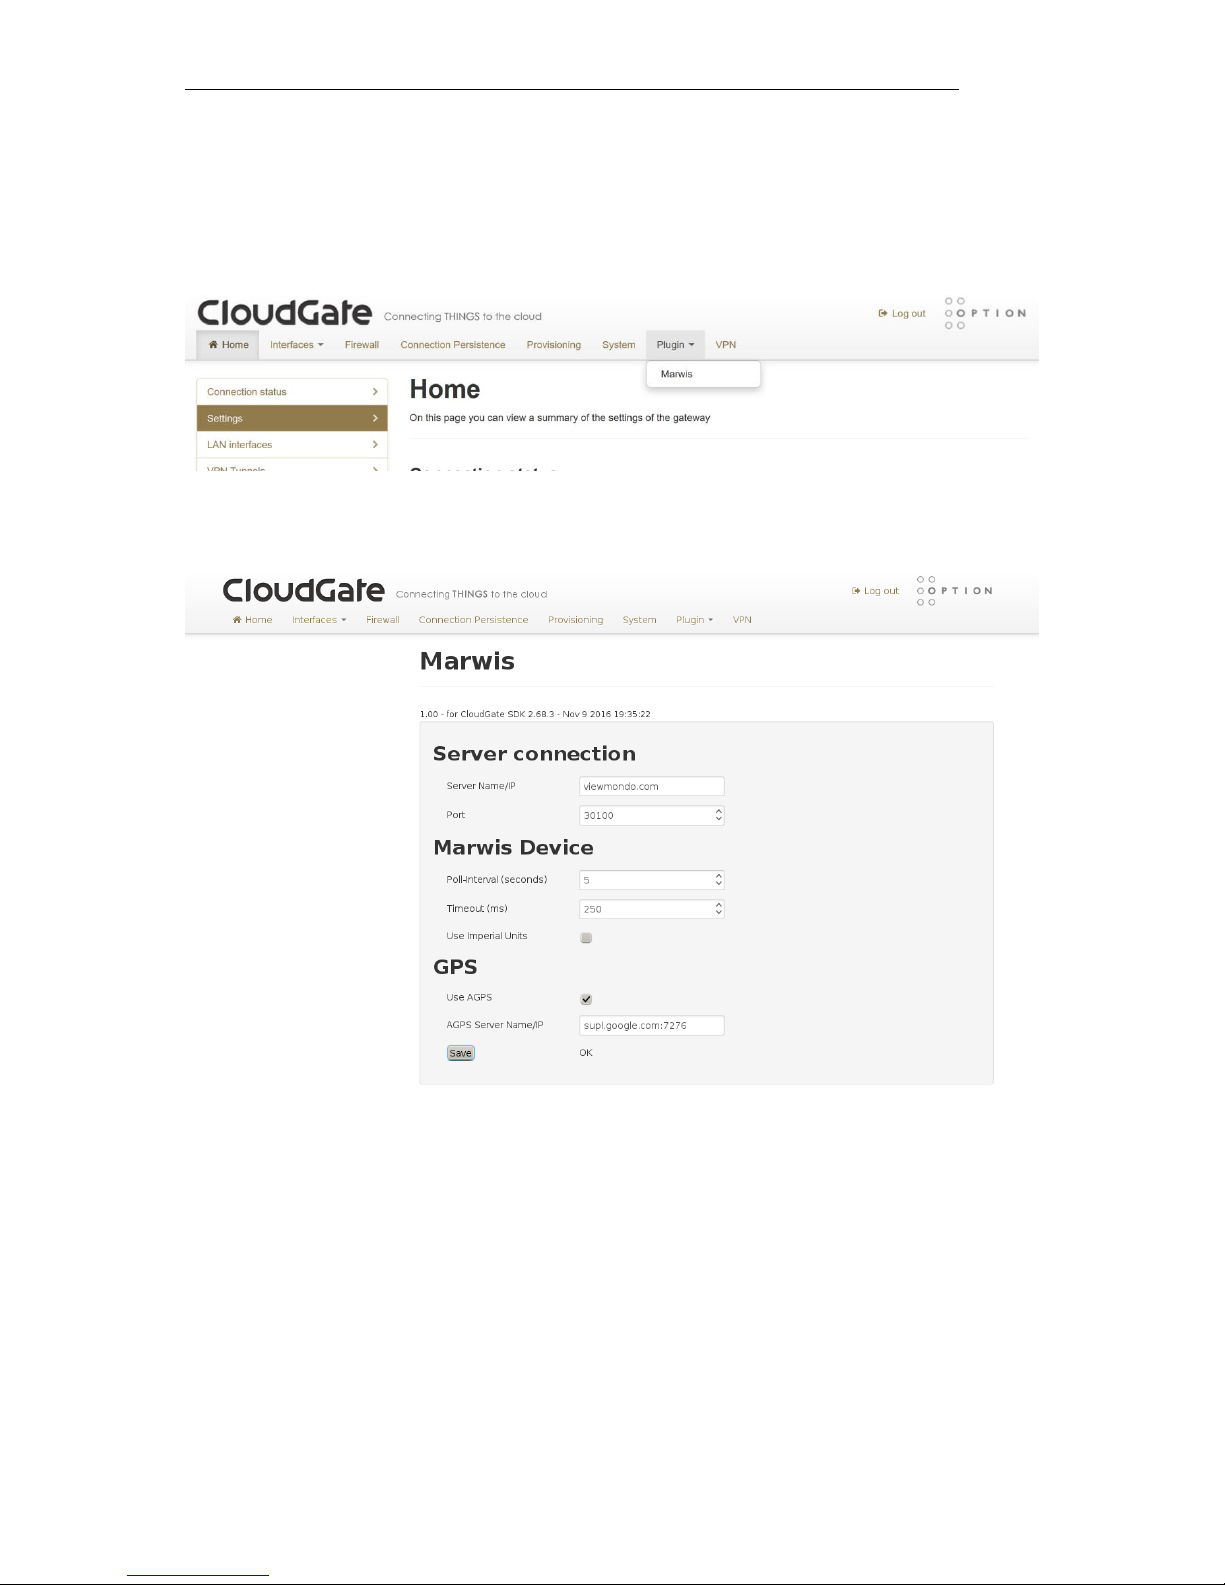
Log on to the CloudGate device, using the username and passwort (factory
default is “admin” and “admin”).
From the main menu, open “Plugin” and “Marwis”
A form with basic settings for the Marwis app is shown:
Change the values to your needs, and click “save”. This will save the values to
the config file (see below) and re-start the Marwis app (not re-boot the device!),
so that the changed parameters will take effect.
Note on AGPS usage: the LTE version of the CloudGate router does not support
AGPS (the chipset uses a different mechanism to refine the GPS location data),
so for the LTE version, “Use AGPS” can/should be disabled
Page 7
Operating manual CloudGate V 1.0 / 01.02.2017
7 Configuration files
Configuration files
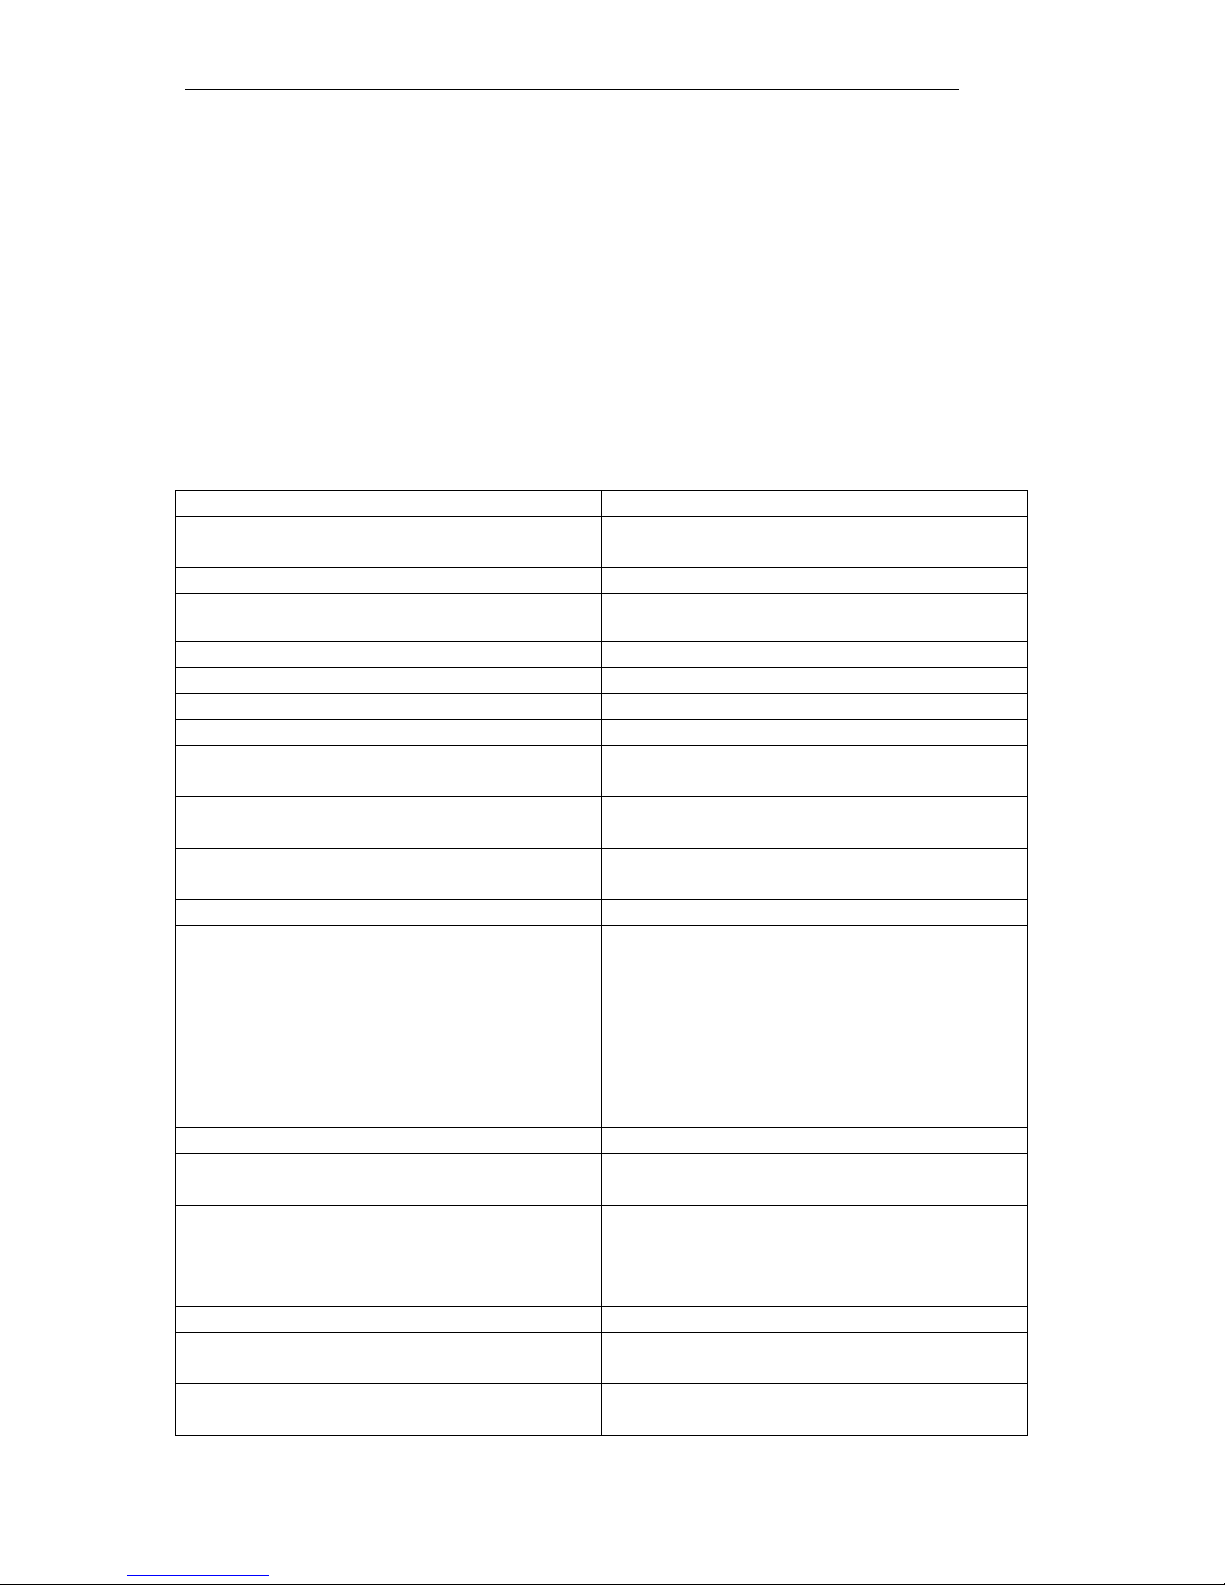
There are 2 configration files, located in the „\myconfig“ folder on the CloudGate
device.
File security for these files permits the “admin” user to read/write these files, so
they can be edited by logging on via SSH and using a text editor (vi).
Booth configuration files are empty by default, i.e. all default values apply.
/myconfig/marwis.ini
Contains common parameters for the app.
[MARWIS]
GPS-STARTUP-DELAY=15
Delay for initializing the GPS chip after
startup.
ENABLE-AGPS=ON
AGPS active
AGPS-SERVERNAME=supl.google.com:7276
AGPS Server
SERVER-NAME=viewmondo.com
Data Server
SERVER-PORT=30100
Server Port
SERVER-TIMEOUT=2000
Communication-Timeout Server in ms
SERVER-RECONNECT-DELAY=10
Server re-connect timeout in S
STANDBY-TIMEOUT-LOCATION=60
Standby Timeout for location change
in S
LOCATION-CHANGE-MIN-DIFFERENCEMM=100
Minimum Delta in mm between 2 GPS
Samples for location change
MAX-SEND-QUEUE-ENTRIES=86400
Maximum number of measure samples
entries in „Send Queue“ („storage“)
UMB-MASTER-ADDRESS=61695
UMB Master address.
DEVICE-IO-RESET-TIMEOUT=60
Device Reset timeout in sec. After this
time, device data (Marwis – ID) is
reset, and transmission of data to the
server is stopped (WLAN State LED
will turn red).
The Marwis device can be changed different serial number will be
recognized.
DEVICE-TIMEOUT=250
Timeout device communication in ms
DEVICE-IO-RETRIES=3
Number of retries for UMB
communication
DEVICE-POLL-IV=5000
Device Poll-Interval (and data
transmission interval) in ms.
Minimum: 1000 ms! Should always be
in whole seconds !
MARWIS-UMB-ADDRESS=40961
UMB address for the Marwis device
SEND-ERROR-VAL-ON-IO-FAULT=ON
Send error values on communication
error with Marwis
USE-IMPERIAL-UNITS=OFF
Use default sensor channels for
imperial units
Page 8
Operating manual CloudGate V 1.0 / 01.02.2017
8 Log file
/myconfig/sensor_config.ini
Here, the sensor channels to be polled can be configured freely.
Note: if any sensor channel is configured in this file, none of the “default”
channels is active, i.e. if this file is used, all sensor channels that should be
polled need to be configured here.
[SENSOR-CHANNELS
NUM-CHANNELS=0
Number of configured channels
DEVICE-ID-xx=0
UMB Device ID for channel xx
CHANNEL-NR-xx=0
UMB Channel Nr for channel xx
IS-ACTIVE-xx=ON
Channel active/inactive
If the file is empty (default), or NUM-CHANNELS=0, the default channels (in
metric or imperial units, depending on param USE-IMPERIAL-UNITS above) will
be used.
Log file
The application is writing a log file:
/tmp/marwis.log
The file is size-restricted to 0.5 Mbyte. If this size is reached, the file is renamed
to /tmp/_marwis.log, i.e. the maximum space occupied by the log file is 1 MB.
/tmp is a temporary file system in RAM, i.e. the log file is NOT persistent, and
will be deleted on a reboot/power failure etc.
Firmware-Update
Updating the MARWIS firmware is still possible with the Lufft Config Tool or the
MARWIS app over Bluetooth.
Since a Bluetooth connection can disturb GPS and GPRS signals data loss may
occur during firmware updates, see “hints for the operation”
Attention!
Doing an update with the IOS MARWIS app is only possible at the moment as
long as there is no connection to the CloudGate. Before starting an update
therefore please unplug the RS485 connection on the CloudGate housing and
only re-plug it when the update has finished.
 Loading...