

Page 1
MA40 Installation and User Guide v1.0
1
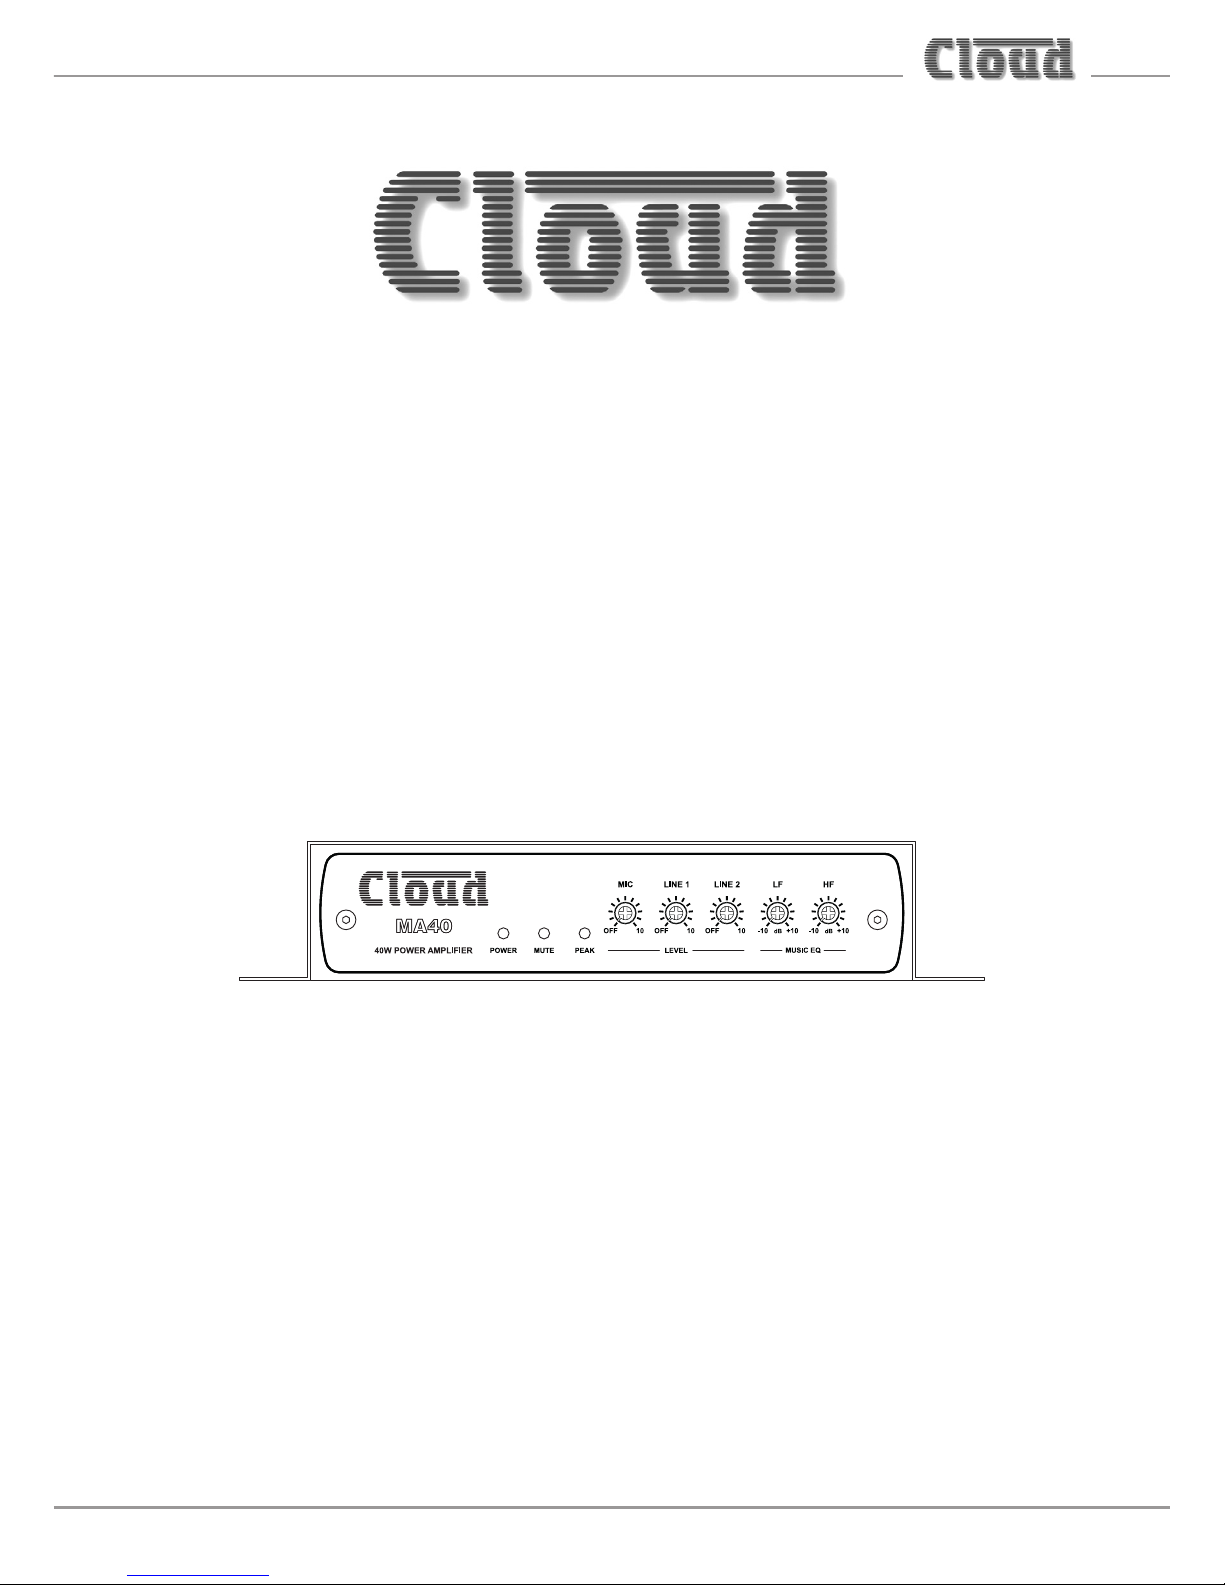
MA40
Mini Amplier
Installation and User Guide
Page 2

MA40 Installation and User Guide v1.0
2
WARNING:
To reduce the risk of re or electric shock, do not expose this appliance to rain or
moisture.
WARNING: SHOCK HAZARD – DO NOT OPEN
AVIS: RISQUE DE CHOC ELECTRIQUE – NE PAS
OUVRIR
The lightning ash with the arrowhead symbol
within an equilateral triangle, is intended
to alert you to the presence of uninsulated
dangerous voltages within the product’s
enclosure that may be of sufcient magnitude
to constitute a risk of electric shock.
The exclamation point within an equilateral
triangle is intended to alert the user to
the presence of important operating and
maintenance (servicing) instructions in the
literature accompanying the appliance.
Page 3

MA40 Installation and User Guide v1.0
3
IMPORTANT SAFETY INSTRUCTIONS
1. Read these Instructions.
2. Keep these Instructions.
3. Heed all Warnings.
4. Follow all Instructions.
5. Do not use this apparatus near water.
6. Clean only with a dry cloth.
7. Do not block any ventilation openings. Install in accordance with the
manufacturer’s instructions.
8. Do not install near any heat sources such as radiators, heat registers, stoves or
other apparatus (including ampliers) that produce heat.
9. Do not defeat the safety purpose of the polarized or grounding - type plug. A
polarized plug has two blades with one wider than the other. A grounding type
plug has two blades and a third grounding prong. The wide blade or the third
prong are provided for your safety. When the provided plug does not t into
your outlet, consult an electrician for replacement of the obsolete outlet.
10. Protect the power cord from being walked on or pinched particularly at plugs,
convenience receptacles, and the point where they exit from the apparatus.
11. Only use attachments/accessories specied by the manufacturer.
12. Use only with the cart, stand, tripod, bracket or table specied by
the manufacturer or sold with the apparatus, when a cart is used,
use caution when moving the cart/apparatus combination to avoid
injury from tip-over.
13. Unplug this apparatus during lightning storms or when unused for long periods
of time.
14. Refer all servicing to qualied service personnel. Servicing is required when the
apparatus has been damaged in any way, such as power-supply cord or plug is
damaged, liquid has been spilled or objects have fallen into the apparatus, the
apparatus has been exposed to rain or moisture, does not operate normally, or
has been dropped.
Page 4
MA40 Installation and User Guide v1.0
4
Do not expose the apparatus to dripping or splashing, and ensure that
no objects lled with water, such as vases, are placed on the apparatus.
L’appareil ne doit pas être exposé aux écoulements ou aux éclaboussures et aucun
objet ne contenant de liquide, tel qu’un vase, ne doit être placé sur l’objet.
The mains plug is used as the disconnect device and it should remain
readily accessible during intended use. In order to isolate the apparatus
from the mains, the mains plug should be completely removed from the
mains outlet socket.
La prise du secteur ne doit pas être obstruée ou doit être facilement accessible
pendant son utilisation. Pour être complètement déconnecté de l’alimentation
d’entrée, la prise doit être débranchée du secteur.
Terminals marked with the symbol may use Class 2 Wiring, but
voltages at these terminals may be of sufcient magnitude to
constitute a risk of electric shock. The external wiring connected to
these terminals requires installation by an instructed person or the use
of pre-made leads or cords.
Page 5

MA40 Installation and User Guide v1.0
5
Contents
IMPORTANT SAFETY INSTRUCTIONS ..........................................3
SAFETY INFORMATION ....................................................................7
Safety Notes regarding Installation........................................................................ 7
Conformities .............................................................................................................. 7
RoSH and WEEE declaration .............................................................................. 8
Safety Considerations and Information ................................................................ 9
Mains Fuse ............................................................................................................. 9
Servicing .................................................................................................................. 9
OVERVIEW ..........................................................................................10
Introduction .............................................................................................................. 10
Applicable Models ................................................................................................... 10
MA40 main features................................................................................................ 11
What’s in the Box ................................................................................................... 11
BLOCK DIAGRAM .............................................................................12
FRONT PANEL DESCRIPTION .......................................................13
REAR PANEL DESCRIPTION ...........................................................14
INSTALLATION ..................................................................................15
Mechanical ................................................................................................................ 15
Ventilation ................................................................................................................. 16
Connections and adjustments .............................................................................. 17
Line inputs ............................................................................................................. 17
Sensitivity & Gain Control .............................................................................. 18
Music Level and EQ control ........................................................................... 18
Line 1 Priority .................................................................................................... 18
Mic inputs .............................................................................................................. 19
Mic gain adjustment .......................................................................................... 19
Microphone level control ................................................................................ 20
Mic EQ ................................................................................................................ 20
Microphone priority ......................................................................................... 20
Output ................................................................................................................... 20
Page 6

MA40 Installation and User Guide v1.0
6
Remote Control .................................................................................................. 21
Connecting an RL-1 Series remote control plate .....................................22
Control of music source and level via external DC ................................. 22
Music Mute Input ................................................................................................. 23
Auto Power Down .............................................................................................. 24
Loudspeaker EQ cards ....................................................................................... 24
Installation Instructions ................................................................................... 24
APPENDIX ..........................................................................................25
PCB layout diagram................................................................................................. 25
Table of internal jumpers and default settings .............................................. 25
Summary of rear panel DIP switch functions ................................................... 26
EMC considerations ............................................................................................... 27
Earthing...................................................................................................................... 27
Technical specications .......................................................................................... 28
Page 7

MA40 Installation and User Guide v1.0
7
SAFETY INFORMATION
Safety Notes regarding Installation
• Do not expose the unit to water or moisture.
• Do not expose the unit to naked ames.
• Do not block or restrict any air vent.
• Do not operate the unit in ambient temperatures above 35°C.
• Do not touch any part or terminal carrying the hazardous live symbol while
power is supplied to the unit.
• Do not perform any internal adjustments unless you are qualied to do so and
fully understand the hazards associated with mains-operated equipment.
• The unit has no user-serviceable parts. Refer servicing to qualied service
personnel.
• If the moulded plug is cut off the AC power lead for any reason, the discarded
plug is a potential hazard and should be disposed of in a responsible manner.
Conformities
This product conforms to the following European EMC Standards:
BS EN 55103-1:2009
BS EN 55103-2:2009
This product has been tested for use in commercial and light industrial environments.
If the unit is used in controlled EMC environments, the urban outdoors, heavy
industrial environments or close to railways, transmitters, overhead power lines,
etc., the performance of the unit may be degraded.
The product conforms to the following European electrical safety standards:
BS EN 60065:2002 (+A2:2010)
UL60065
This product is compliant with the relevant provisions of:
Energy Star® Eligibility Criteria Ver 3.0 for Audio-Video products.
Page 8

MA40 Installation and User Guide v1.0
8
RoSH and WEEE declaration
Cloud Electronics Limited manages its business and collaborates with its suppliers
to comply with the European Union restriction of the use of certain hazardous
substances in electrical and electronic equipment, RoSH Directive (2002/95/EC),
that came into force on 1st July 2006, and similar restrictions in other jurisdictions.
The “crossed out wheelie bin” symbol on the product and represented
above is there to remind users of the obligation of selective collection
of waste. This label is applied to various products to indicate that the
product is not to be thrown away as unsorted municipal waste. At the
end of life, dispose of this product by returning it to the point of sale or
to your local municipal collection point for recycling of electric and electronic
devices.
Customer participation is important to minimize the potential effects on the
environment and human health that can result from hazardous substances that may
be contained in this product.
Please dispose of this product and its packaging in accordance with local and national
disposal regulations, including those governing the recovery and recycling of waste
electrical and electronic equipment. Contact your local waste administration, waste
collection company or dealer.
Page 9

MA40 Installation and User Guide v1.0
9
Safety Considerations and Information
The MA40 is powered by an external DC supply. A separate Power Supply Unit
(PSU) is supplied with the amplier. The PSU must be earthed. Ensure that the mains
power supply provides an effective earth connection using a three-wire termination.
Mains Fuse
The PSU is a sealed unit and contains no user-replaceable fuses. Mains over-current
protection is provided by the fuse in the AC mains plug, which should be rated at
5 A.
Servicing
The unit contains no user serviceable parts. Refer servicing to qualied service
personnel. Do not perform servicing unless you are qualied to do so. Disconnect
the power cable from the unit before removing the top panel and do not make
any internal adjustments with the unit switched on. Only reassemble the unit using
either the original bolts/screws, or ones identical to the original parts
Page 10

MA40 Installation and User Guide v1.0
10
OVERVIEW
Introduction
The MA40 is a very compact mono amplier designed for integration into audio
and AV systems where de-centralised installation is advantageous. It is intended
as an “install-and-forget” component, and is small enough to be tted into wall or
ceiling voids or in any convenient location adjacent to projectors, at screen displays
or loudspeakers. A simple set of controls and conguration options makes it easy
to integrate into any audio system. It is highly suitable for use with in-store digital
signage, gallery and museum exhibits and xed or mobile tour guide systems.
The MA40 can deliver 40 W (mono) into a 4 ohm load. It has two unbalanced
stereo inputs for line level signals (typically music sources) and a balanced mic input
for announcements, etc. Front panel preset-type controls are provided for music
levels, music EQ and microphone level. There are also various preset adjustments
and conguration DIP switches on the rear panel, and jumpers mounted internally
on the main PCB. A Cloud RL Series remote level control plate can be wired to
the rear panel RL-1 connector; this connector also allows audio volume control by
a third-party control system (e.g., Crestron, AMX, etc.) using a DC voltage in the
range 0 – 10 V.
Applicable Models
This Installation Guide describes the installation and operation of the following
model only:
• Cloud MA40 40 W mono amplier for 4 ohm loudspeakers
NOTE: Amplier models MA40F, MA40T and MA40E are NOT covered by this
Guide, and when installing any of these models, reference should only be made to
the Guides specic to them.
Page 11

MA40 Installation and User Guide v1.0
11
MA40 main features
• Two unbalanced stereo line inputs with individual sensitivity trims
• Electronically-balanced mic input with separate gain control
• 12 V phantom power selectable by internal jumper
• Front panel control of music and mic levels
• HF & LF EQ adjustments for music sources
• Rear panel HF & LF EQ for mic input
• Selectable MIC-over-LINE priority
• Selectable LINE 1-over-LINE 2 priority
• 40 W power amplier
• Remote volume control port: compatible with Cloud RL Series plates
• Music Mute control input (N/O or N/C) for interfacing to an emergency
system
• Selectable 65 Hz high-pass lter for use with 100/70/25 V line systems (via
external transformer)
• Optional EQ cards available to suit various popular installation loudspeakers
• Automatic power-down function (user-selectable)
• Less than 1 W power consumption in sleep mode
• Convection cooled – silent in operation.
• PSU meets US DoE Level VI energy requirements
• Power requirements: 12 to 24 V DC, 47 W
• Universal AC adaptor included (both models), operates from 100 to 240 V AC
Available Options:
• RL Series remote control plates for music volume
• EQ cards to match various popular installed-sound loudspeakers
What’s in the Box
Please check the shipping carton for damage before opening. If there is damage,
please contact your Cloud agent and the shippers.
The packing carton should contain the following items:
• MA40 amplier
• External PSU (AC mains adaptor)
• IEC mains lead (AC cord) with moulded plug appropriate to the territory
• Set of mating plug-in screw-terminal connectors
• Set of four self-adhesive polyurethane feet
• This manual
Page 12

MA40 Installation and User Guide v1.0
12
BLOCK DIAGRAM
Page 13

MA40 Installation and User Guide v1.0
13
FRONT PANEL DESCRIPTION
16 7 8 2 3 4 5
LEVEL controls:
1. MIC – sets volume of signal at the MIC input
2. LINE 1 – sets volume of signal at the LINE 1 input
3. LINE 2 – sets volume of signal at the LINE 2 input
EQ controls:
4. LF – LF EQ adjustment of music channel: +/-10 dB @ 100 Hz
5. HF – HF EQ adjustment of music channel: +/-10 dB @ 5 kHz
6. POWER – bi-colour LED: illuminates green when the amplier is active and
red when the amplier is in Automatic Power Down mode
7. MUTE – red LED: illuminates when the MUSIC MUTE function is active
8. PEAK – red LED: illuminates if the amplier’s dynamic clip protection becomes
active
Page 14

MA40 Installation and User Guide v1.0
14
REAR PANEL DESCRIPTION
1 7 8 1192103
4
15 6
1. LINE 1 and LINE 2 – stereo line inputs for music sources (unbalanced)
2. GAIN – two preset level trim controls (+/-10 dB) for each line input
3. MIC INPUT – balanced mic input
4. GAIN – preset gain control for mic input; range +10 to +50 dB
5. LF – LF EQ adjustment of mic signal: +/-10 dB @ 100 Hz
6. HF – HF EQ adjustment of mic signal: +/-10 dB @ 5 kHz
7. RL-1 – for connecting an RL-1 Series remote volume control plate
8. SPEAKER OUTPUT – amplier output for low-impedance circuits
9. MUSIC MUTE – connect to external N/O or N/C contacts for remote
muting of music sources
10. SETTINGS – three-pole DIP switch for setting various amplier congurations:
SWITCH FUNCTION
1 Enables LINE 1-over-LINE 2 priority
2 Enables mic-over-music priority
3
Enables RL-1 connector and disables front panel LINE level
controls
See “Summary of rear panel DIP switch functions” on page 26 in the Appendix
section for full details.
11. POWER INPUT – connect external DC power here: the MA40 requires 12
to 24 V at 2.5 A
Page 15

MA40 Installation and User Guide v1.0
15
INSTALLATION
Mechanical
The compact size and light weight of the MA40 combined with its high energy
efciency allows it to be installed in almost any location. It can be easily placed in
ceiling or wall voids, or tted to the rear of display screens or loudspeaker cabinets.
The amplier has mounting anges with keyhole slots to permit it to be secured on
a horizontal or vertical at surface.
144.3 mm
5.7”
25.4 mm
1”
73.5 mm
2.9”
200 mm
7.9”
10 mm
0.4”
10 mm
0.4”
If using the MA40 in a free-standing situation, the self-adhesive feet (supplied with
the amplier) should be tted. The amplier should always be stood on a at surface.
Care should be exercised in selecting a location for a free-standing unit, which
should allow ventilation but be clear of any liquid or similar hazard.
MA40
Page 16

MA40 Installation and User Guide v1.0
16
Ventilation
The amplier uses natural convection cooling, and care should be taken to
locate it where airow is unrestricted (e.g., not under ceiling insulation material).
Consideration should also be given to ease of access, should the operational
conguration or audio levels need adjustment after installation.
In free-standing installations, always t the rubber feet supplied, and do not stand
any other items on top of the unit.
Page 17

MA40 Installation and User Guide v1.0
17
Connections and adjustments
Line inputs
The unit has two stereo line inputs 1, each of which is mixed internally to mono;
these inputs are suitable for most music sources such as CD/DVD players, satellite
receivers and computer line outputs.
Both inputs are unbalanced and use 3-pin 3.5 mm-pitch screw terminal connectors.
The connectors should be wired as follows:
0V L R
LINE 1
LEFT CHANNEL
RIGHT CHANNEL
LINE 2
LEFT CHANNEL
RIGHT CHANNEL
AUDIO
SOURCE 1
AUDIO
SOURCE 2
The two line inputs are summed together internally, though Line input 1 can be
congured to have priority over Line input 2, see “Line 1 Priority” on page 18.
Page 18

MA40 Installation and User Guide v1.0
18
Sensitivity & Gain Control
Each of the stereo line inputs has an input impedance of 10 kohms and a preset type
gain control on the rear panel adjacent to the input sockets 2. The gain controls
have a range of 20 dB allowing the input sensitivity to be varied from -12 dBu to
+8 dBu (0 dBu = 0.775 Vrms). The gain controls should be set so that the input
sources in use do not distort, and the front panel level controls 2 and 3 have a
useful range.
Music Level and EQ control
The front panel LINE 1 and LINE 2 controls 2 and 3 should be adjusted during
installation to set the volume of the audio sources. The line inputs are summed
post the level controls; equalisation can be applied using the front panel LF and HF
controls 4 and 5, which can apply a cut or boost of up to 10 dB at 50 Hz and
10 kHz respectively. Adjust the EQ controls to suit the audio programme material
being used, the speaker characteristics and the room acoustics. If the programme
material includes speech, the EQ should be adjusted for best intelligibility.
If the line input levels are set too high, the amplier’s dynamic protection will activate
to prevent clipping and the front panel PEAK LED 8 will illuminate to indicate this.
Note that this LED also indicates an excessive mic signal level.
Line 1 Priority
When both line inputs are in use, one audio source can be given automatic priority
over the other by connecting it to Line 1 input and setting rear panel SETTINGS
DIP switch 1 (LINE 1 PRI) to ON. This is a useful facility when a Digital Sound
Store, emergency announcement system or similar source forms part of the audio
system.
When Line 1 Priority is enabled, the amplier will route the input signal at Line 2
normally until a signal is detected at Line 1’s input. When this happens, it switches
its music source automatically to Line 1. Once the signal at Line 1 stops (e.g., when
an announcement nishes), Line 2’s source will smoothly restore to its former level
over approx. 3 seconds.
Page 19

MA40 Installation and User Guide v1.0
19
Mic inputs
The MA40 has a single microphone channel, enabling it to be used for announcements,
commentary, karaoke or any other purpose requiring a microphone. By default,
the mic channel is independent and is simply mixed with the summed line inputs,
but may be recongured so that it has automatic mic-over-line priority. It is then
compatible with paging microphones using zone selection by contact-closure
such as the Cloud PM range, including the PM1 single-zone microphone. See
page 20 for more details.
The mic input is a 3-pin 3.5 mm-pitch screw terminal connector. Use the wiring
shown below.
2 3
HOT
COLDSCREEN
1
MIC INPUT
The MA40’s microphone pre-amplier is an electronically balanced, transformerless design congured for optimum low noise performance. The input impedance is
greater than 2 kohms and is suitable for microphones in the 200 ohm to 600 ohm
range. The microphone signal path includes a xed high-pass lter. This attenuates
the response below 120 Hz, which helps to reduce the effects of microphone
handling noise.
12 V phantom power is available at the mic input, and is activated by setting internal
jumper J6 to the ON position. See page 25 for further information regarding the
internal jumpers. Care should be taken to ensure that phantom power is activated
only when the microphone connected to the input requires it – i.e., a capacitor or
electret type; other types of microphones (such as dynamic) may be damaged if a
DC voltage is applied to them.
Mic gain adjustment
The mic input has a preset gain control 3 adjacent to the input connector. The gain
can be adjusted over a range of 40 dB, from 10 dB to 50 dB.
Page 20

MA40 Installation and User Guide v1.0
20
Microphone level control
A front panel level control 1 is provided for the mic channel and this provides the
user with a means of adjusting the volume of the microphone. The rear panel gain
control 3 should be set at a level where distortion does not occur even when the
front panel level control is fully clockwise. If the mic level is set too high, the frontpanel PEAK LED 8 will illuminate. Note that this LED also indicates excessive
music level.
Mic EQ
The mic input has associated HF 5 and LF 6 EQ controls. These provide 10 dB of
cut or boost at 5 kHz and 100 Hz respectively and should be adjusted by listening to
achieve a clear mic sound. The purpose for which the mic input will be used should
be borne in mind when making adjustments.
Microphone priority
By default, the microphone channel is simply mixed with the music channel. It may
be recongured with SETTINGS DIP switch 2 to have automatic priority over
the music channel.
With SETTINGS DIP switch 2 – MIC PRI. (ON/OFF) - set to ON, a signal at
the mic input will automatically mute both line inputs; typically this conguration
will be desirable to give announcements or commentary priority over background
music. When the announcement is complete, the music channel fades back up to its
previous level.
When set ON, mic-over-line priority has priority over Line 1/Line 2 priority, meaning
that a microphone announcement will always be heard.
Output
The power amplier stage is fully protected against DC offset, over-current, overand under-voltage and is also thermally protected. Activation of the protection
circuitry shuts the power amplier stage down until the fault condition clears. All
protection conditions will automatically self-clear if the amplier is power-cycled.
A switch-on delay function mutes the output during power-up and power-down to
protect loudspeakers.
The MA40 will deliver its rated power of 40 W into a 4 ohm load when powered
by the external PSU supplied with the amplier. The maximum output power will
Page 21

MA40 Installation and User Guide v1.0
21
be reduced with lower supply voltages (please refer to MA40 datasheet for power
de-rating curve).
When using multiple low-impedance loudspeakers (generally 8 ohms) with a single
amplier, series and parallel wiring should be employed to produce a total load
impedance of not less than 4 ohms.
The low impedance output is available at the 2-pin 5 mm-pitch screw terminal
SPEAKER OUTPUT connector on the rear panel 8.
If driving 100/70/25 V line loudspeaker systems, an external transformer must be
connected between the amplier output and the loudspeakers: the Cloud accessory
CXL-40T is a suitable transformer. With such systems, there is a risk of transformer
core saturation at high levels and low frequencies, which can produce distortion. To
prevent this, the MA40’s output stage is provided with a switchable 65 Hz high-pass
lter. We recommend that the lter is always enabled when the amplier is used
with 100/75/25 V line systems.
The lter is enabled/disabled by moving internal PCB jumper J3. See page 25 for
locations of PCB jumpers.
Remote Control
The MA40 amplier is provided with a rear panel RL-1 connector 7, which may
be used to remotely control the volume of the music channel. The usual method
of doing this will be by connecting a Cloud RL-1 Series remote volume control
plate, but music volume may also be controlled by an externally applied DC voltage
(0 to 10 V), permitting volume adjustment by external control systems.
IMPORTANT: In order for the remote control connector to operate, SETTINGS
DIP switch 3 (RL-1) must be set OFF. This will disable the front panel LINE 1 and
LINE 2 controls, and control of music level (the mix of LINE 1 and LINE 2) will be
available from the remote plate.
Page 22

MA40 Installation and User Guide v1.0
22
Connecting an RL-1 Series remote control plate
Connect an RL-1 Series plate as shown below using twin-core screened cable.
Maximum reliable cable run is 100 m. Set DIP switch 3 to OFF as described above.
RL-1 PORT
1
2
3
REMOTE LEVEL CONTROL WIRING
RL-1
USE TWO-CORE SCREENED CABLE
2
3
Control of music source and level via external DC
It may be necessary in some installations to adjust the music level from an external
control system (e.g., Crestron, AMX, etc.). If the RL-1 connector is not required
for an RL-1 Series plate, it may be used to receive DC voltages from the external
system to effect these adjustments.
Music level may be varied over its full range by applying a DC voltage of between
0 and +10 V to pin 2 of the RL-1 connector, with the 0 V reference connected to
pin 1 (indicated b a ‘chassis’ symbol on the rear panel). 0 V on pin 2 corresponds to
maximum level and +10 V will produce 60 dB of attenuation. The rate of attenuation
is approximately 165 mV/dB.
Page 23

MA40 Installation and User Guide v1.0
23
Music Mute Input
External muting of music may be commanded through the MUSIC MUTE connector.
National or Local Authority regulations governing installed audio systems may
require that normal programme material (i.e., music) should be muted in an
emergency, to ensure that any evacuation messages are clearly audible. When active,
it mutes both line inputs, leaving the microphone inputs active.
The Music Mute input is on a 2-pin 5 mm-pitch screw-terminal connector. It should
be connected to the appropriate alarm output on whichever building management
system registers the alarm (typically the Fire System). The alarm output must be
volt-free; if no such output is available, an intermediate relay or other isolation
device must be installed between the alarm output and the Music Mute input.
The Music Mute input can be set to operate on either normally open (N/O) or
normally closed (N/C) contacts via internal jumper J1 (see “PCB layout diagram” on
page 25). The factory default setting is N/O, thus requiring a short-circuit to be
applied across the two pins of the connector for muting to occur.
REMOTE MUSIC MUTE TERMINATIONS
1 2
MUSIC MUTE
INPUT
RELAY
NORMALLY OPEN (NO)
CONNECTION
1 2
MUSIC MUTE
INPUT
RELAY
NORMALLY CLOSED (NC)
CONNECTION
Page 24

MA40 Installation and User Guide v1.0
24
Auto Power Down
The MA40 is an extremely energy-efcient amplier, but can be made even more so
by enabling the Auto Power-Down feature. When active, the signal level is constantly
monitored and if no input signals are measured for 15 minutes the amplier enters
a “Sleep” mode, minimising power consumption. If a signal is detected while the
channel is in this mode, the amplier “wakes up” in less than 100 ms.
The MA40 is shipped with the Auto Power Down function disabled. It may be
enabled by moving internal PCB jumper J5. See “PCB layout diagram” on page 25
for details of jumper locations.
Loudspeaker EQ cards
The MA40 may be tted with a single channel loudspeaker equalisation module.
EQ modules are available from Cloud Electronics to suit several popular ranges
of installed sound loudspeakers; please check current module availability at
www.cloud.co.uk/accessories.
Installation Instructions
Refer to the PCB layout diagram (see “PCB layout diagram” on page 25) for the
location of the EQ module connector and its associated bypass jumper J2.
To install an EQ module, proceed as follows:
1. Isolate the amplier from its DC power source.
2. Remove the screws securing the top cover: there are two on the top and two
on each side. Remove the cover.
3. Remove jumper J2. We recommend “stowing” it on one of the header pins in
case it ever needs to be replaced.
4. Plug the loudspeaker equalisation module into its 12-pin connector CON1;
note that the connector has two notches on one side which engage with lugs
on the module’s mating connector to ensure correct orientation.
5. Replace the top cover.
Page 25

MA40 Installation and User Guide v1.0
25
APPENDIX
PCB layout diagram
To access the internal PCB, disconnect the amplier from its DC power source and
remove the six screws securing the top cover; remove the cover.
ON OFF
OFF ON
NO NC
REAR OF UNIT
NOT TO SCALE.
ONLY PRIMARY COMPONENTS SHOWN
J1
J4
DO NOT
FIT A JUMPER
HERE!
J5
J3
J2
J6
CON1
EQ CARD SOCKET
Table of internal jumpers and default settings
JUMPER PURPOSE OPTIONS DEFAULT
J1 Music Mute N/O or N/C N/O
J2 EQ card bypass Present/absent Present
J3 65 Hz hi-pass lter ON/OFF OFF
J4
For factory use only – do not t a
jumper here
Absent
J5 Auto Power Down Present/absent Present
J6
+12 V Mic
phantom power
ON/OFF OFF
Page 26

MA40 Installation and User Guide v1.0
26
Summary of rear panel DIP switch functions
JUMPER POSITION FUNCTION
1
LINE 1
PRIORITY
OFF = PRIORITY OFF
The signals at LINE 1 and LINE 2
are always mixed together.
ON = PRIORITY ON
A signal at LINE 1 input has
priority over that at LINE 2: LINE
2 is automatically muted.
2
MIC
PRIORITY
OFF = PRIORITY OFF
The mic signal is mixed with the
line inputs according to the front
panel LEVEL controls.
ON = PRIORITY ON
The mic signal will take priority
over the line inputs, which will be
muted while the mic is in use.
3 RL-1
ON = LOCAL
The levels of LINE 1 and LINE 2
input signals are controlled by the
two front panel LEVEL controls.
The two inputs are mixed together.
OFF = REMOTE
The two front panel LEVEL
controls (LINE 1 and LINE 2) are
disabled. The summed line input
level is controlled by the level
control on the remote plate wired
to the RL-1 connector.
Note: default settings are in BOLD text.
Page 27

MA40 Installation and User Guide v1.0
27
EMC considerations
MA40 ampliers fully conform to the relevant electromagnetic compatibility (EMC)
standards and are technically well behaved. You should experience no problems
interfacing units to other items of equipment and under normal circumstances, no
special precautions need to be taken. If the unit is to be used in close proximity to
potential sources of HF disturbance such as high power communication transmitters,
radar stations and the like, it is suggested that input signal leads be kept as short as
possible. Always use balanced interconnections wherever possible. We recommend
that the MA40 amplier is not located in close proximity to a high-power amplier
or similar item of equipment, which may radiate a strong magnetic eld from its
power transformer.
Earthing
When several mains powered units are connected together via their signal cables,
there is a risk of one or more earth loops which may cause an audible hum on the
system even with the gain controls set to minimum. The 0 V rail of an MA40 amplier
is directly coupled to the chassis ground. No interconnection problems should
be encountered, but if there is any hum or other extraneous noise when source
equipment is connected, the situation can generally be remedied by observing the
following guidelines:
1. Always connect sources using balanced connections wherever possible. Note
that, for EMC reasons, the cable screen should be connected at both ends.
2. Use audio isolating transformers (readily available from trade suppliers) at the
inputs if necessary. These will ensure that the amplier is electrically isolated
from the source equipment.
3. The signal source units should be located as close as practical to the amplier.
The metal housings of the various units should not be electrically connected.
Try to ensure that all interconnected units, including power ampliers, are
connected to a common power source to ensure a common ground is provided.
Page 28

MA40 Installation and User Guide v1.0
28
Technical specications
LINE INPUTS
Frequency Response ±1 dB, 20 Hz to 20 kHz
Distortion <0.1 %
Sensitivity 0.2 V (-12 dBu) to 1.95 V (+8 dBu)
Input Gain Control 20 dB range
Input Impedance 10 kohms (unbalanced)
Headroom >12 dB
Noise <-90 dB
Equalisation LF: ±10 dB @ 50 Hz, HF: ±10 dB @ 10 kHz
MICROPHONE INPUT
Frequency Response -3dB @ 120 Hz (lter) to 20 kHz ±1 dB
Distortion <0.1%
Gain 10 dB to 50 dB
Input Impedance >2 kohms (balanced)
Headroom >12 dB
Noise <-90 dB
Phantom Power +12 V (internal jumper)
OUTPUT
Output Power (1 kHz
continuous sine wave)
40 W, DC input >18 V
Page 29

MA40 Installation and User Guide v1.0
29
GENERAL
Power Input 12 to 24 V DC
Power Consumption 47 W
External AC PSU
adaptor
Universal type, 100 V to 240 V, 47 to 63 Hz
Amplier Protection
Fixed level signal limiter
Protection against DC, PSU overcurrent, amplier
overcurrent, over-temperature, supply voltage under/
over-voltage
Resettable internal breaker (no fuses)
Dimensions
(w x h x d)
Net
220 mm x 41 mm x 144.5 mm
8.7” x 1.6” x 5.7”
Shipping
290 mm x 160 mm x 210 mm
11.4” x 6.3” x 8.3”
Weight
Net 750 g
Shipping 1.0 kg
Page 30

MA40 Installation and User Guide v1.0
30
Page 31

MA40 Installation and User Guide v1.0
31
Page 32

www.cloud.co.uk
www.cloudusa.pro
 Loading...