

Page 1
Mounting the DU-111-02 Delegate Unit Battery
2014-01-10
Page 1
Warning!
Please read this instruction in full! Damages caused by improper handling of the batteries is not
covered by any warranties. Close Talk Conference System will under no circumstances assume any
responsibilities for direct or indirect damages caused by handling the system batteries.
!
The battery type used contains corrosive acids, do not try to open the battery
!
The battery is of a sealed, maintenance-free type and should not show any signs of leaking. In case
of signs of leakage (liquid in the battery compartment, whitish residues), be sure to use rubber
gloves when handling the battery. Clean the battery compartment with soap and water
!
A battery is a storage of energy. Even a used battery may still contain large amounts of energy, do
not short the battery terminals
!
The battery contains lead, a substance known to be harmful to the nature. Handle damaged batteries with care
Requirements
Replacing the battery is a relatively simple operation but
should only be carried out by a qualified technician. The
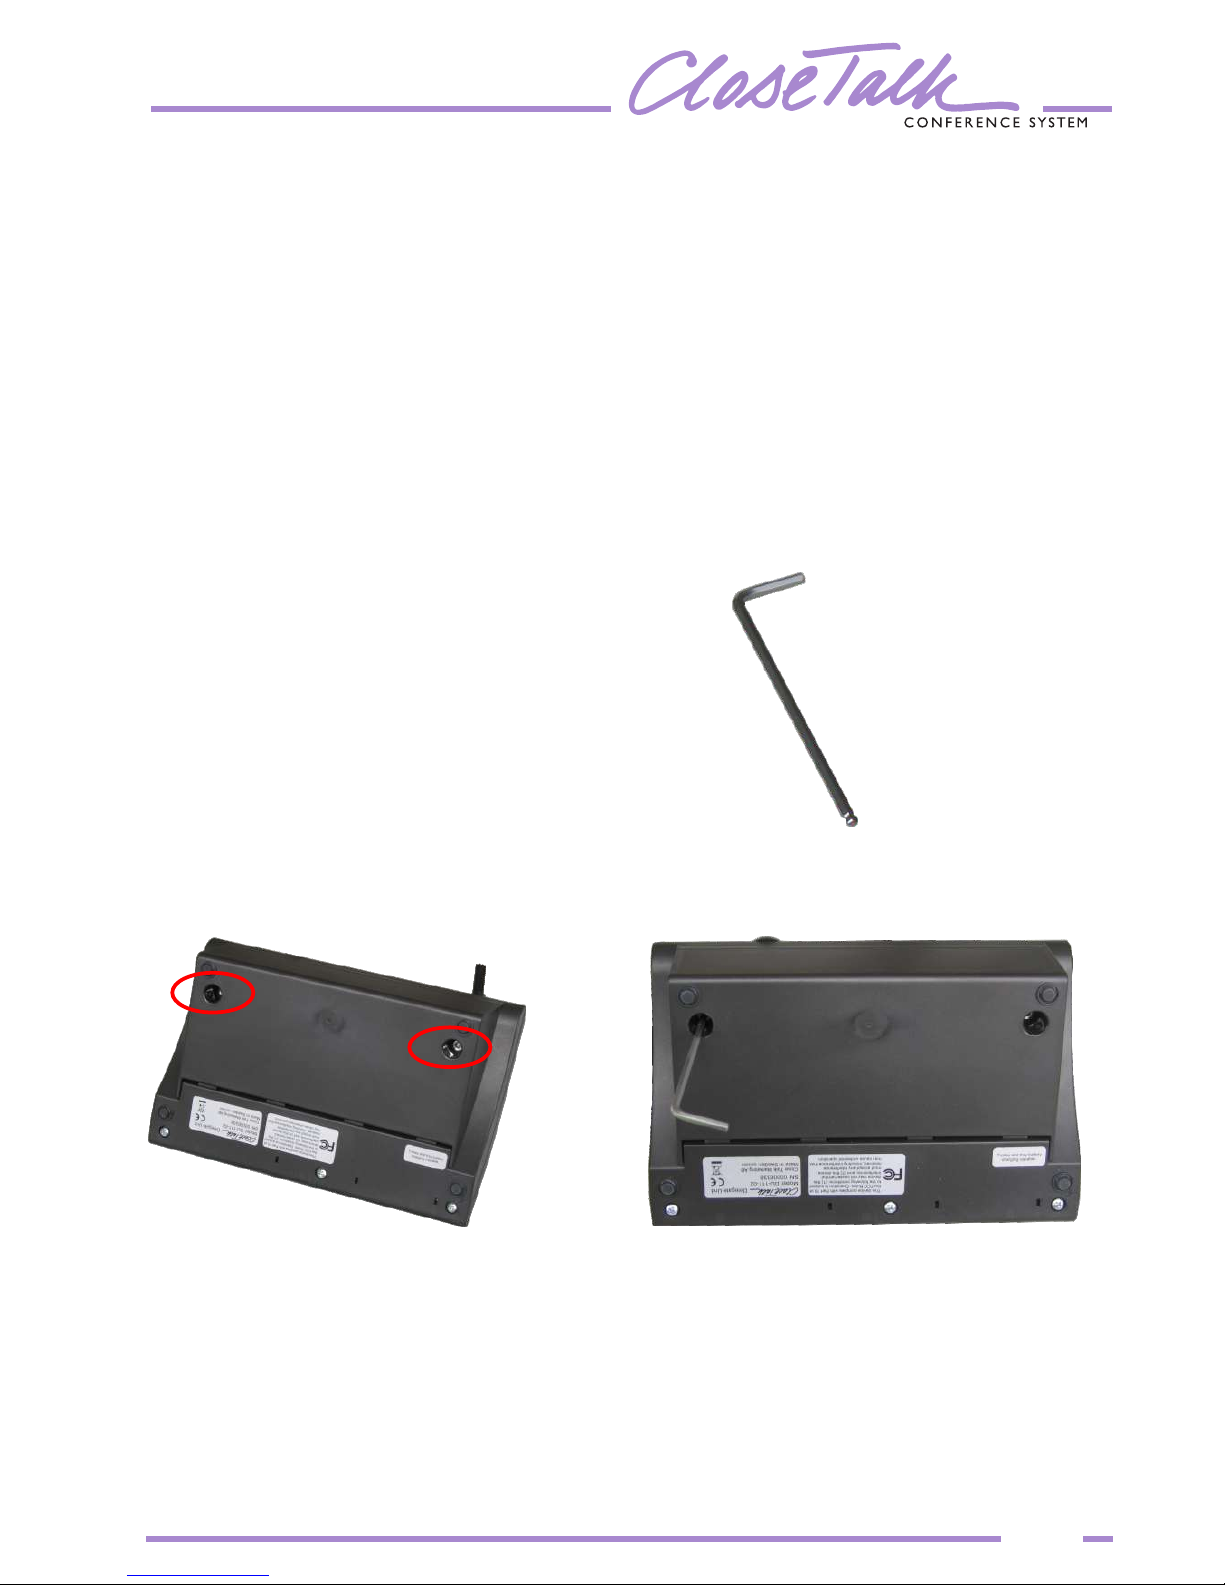
required tools is a 3mm hex/allen key. With large
amounts of Delegate Unit’s it will be advantageous to use
a power screw driver.
Please set up a proper workplace to avoid damaging the
Delegate Unit.
Fig. 1: Hex/allen key 3mm
Opening the unit
Place the delegate unit upside down on a soft surface, be sure to not damage the microphone. Locate
the battery cover holding screws and use the appropriate tool to remove them together with the
locking washers. Do not loose the screws or washers.
Fig. 2: Delegate unit upside down, cover holding
screws are circled
Fig. 3: Use the allen key tool to remove the two screws
Warning!
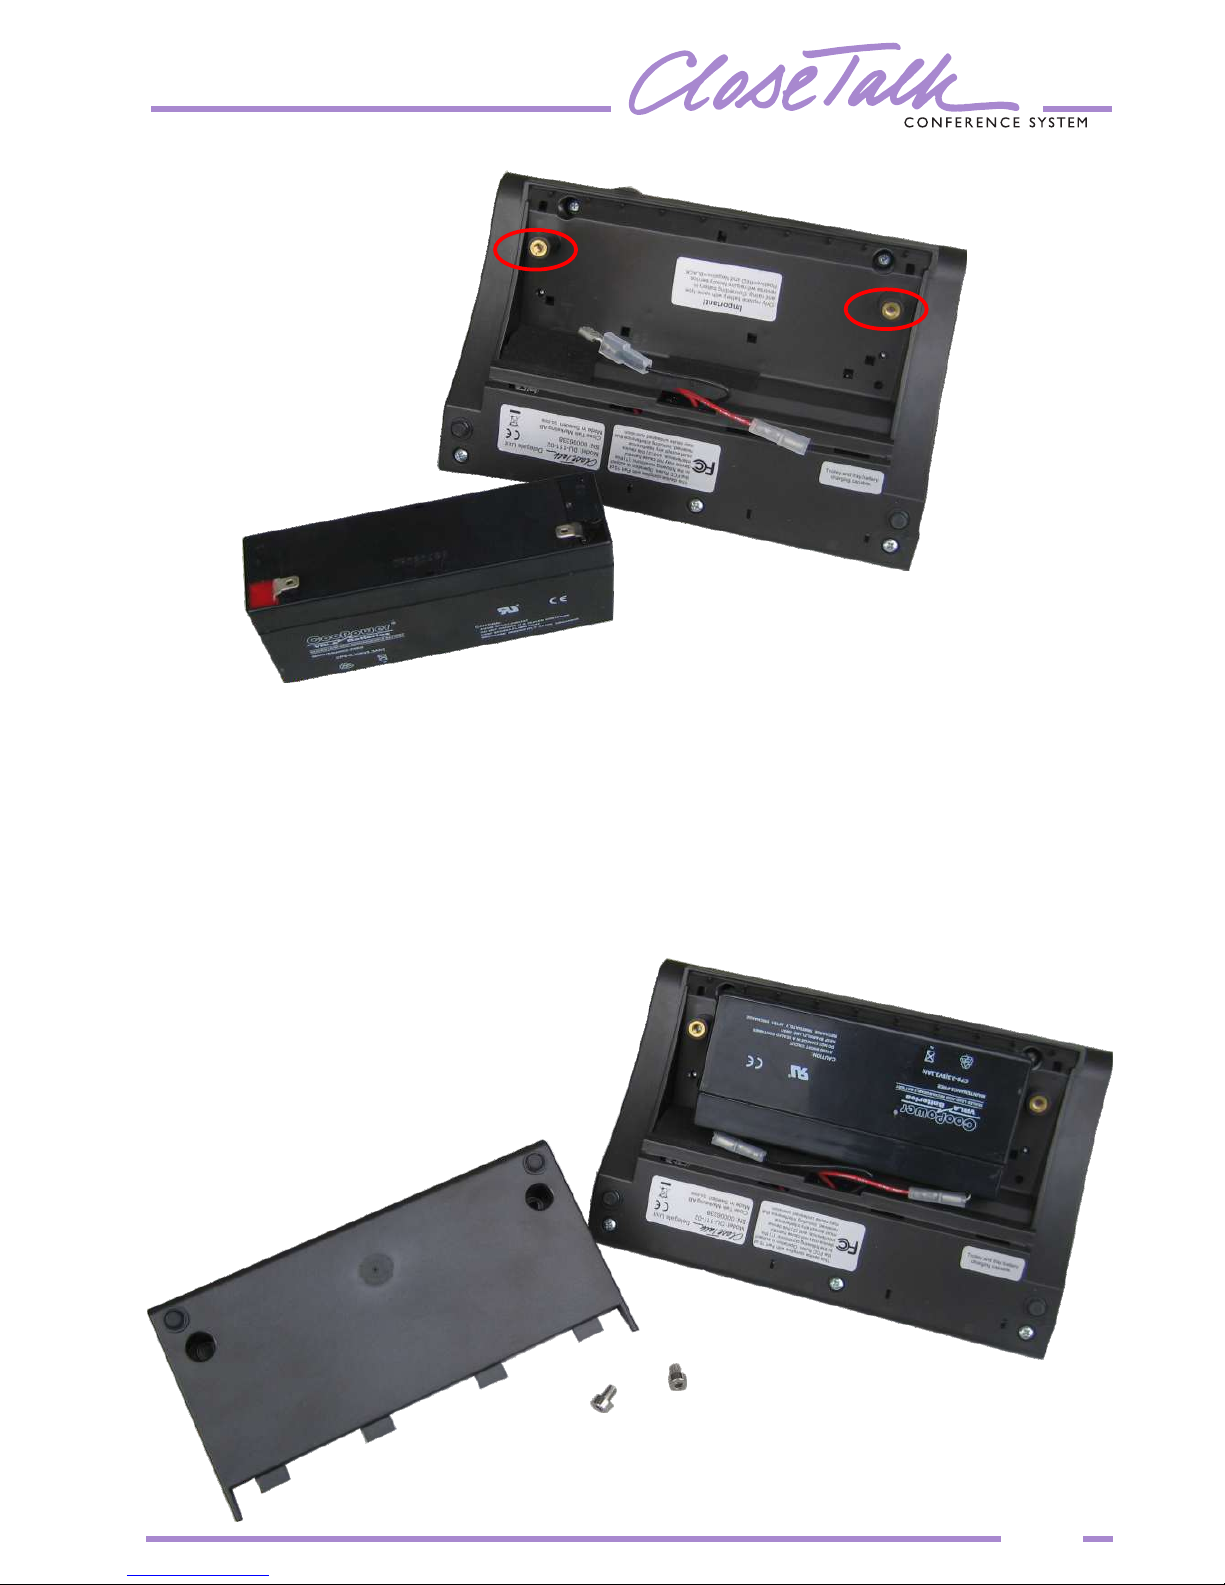
On delegate units that are trolley charger capable, the brass threads inside for the cover screws are
live with battery power (see figure 4), do not short the battery terminals to these threads or an inter-
nal fuse may blow and require factory service!
Page 2
Page 2
Fig. 4: Battery case open. The circled brass threads
are live with battery voltage when the battery is
connected!
- Warning! -
RED LEAD = BATTERY PLUS
Do not connect the battery in reverse or short the terminals to the brass battery cover screw threads
an internal fuse may blow and require factory service!
Connect the battery and place it in the battery compartment as figure 5 shows. Be sure not to short
the battery to the brass threads. Arrange the cables so that they don’t are clamped by the battery
compartment cover.
BLACK LEAD = BATTERY NEGATIVE
Fig. 5: Connect the battery correctly and place it in the battery
compartment
Page 3
Page 3
Replacing the battery cover
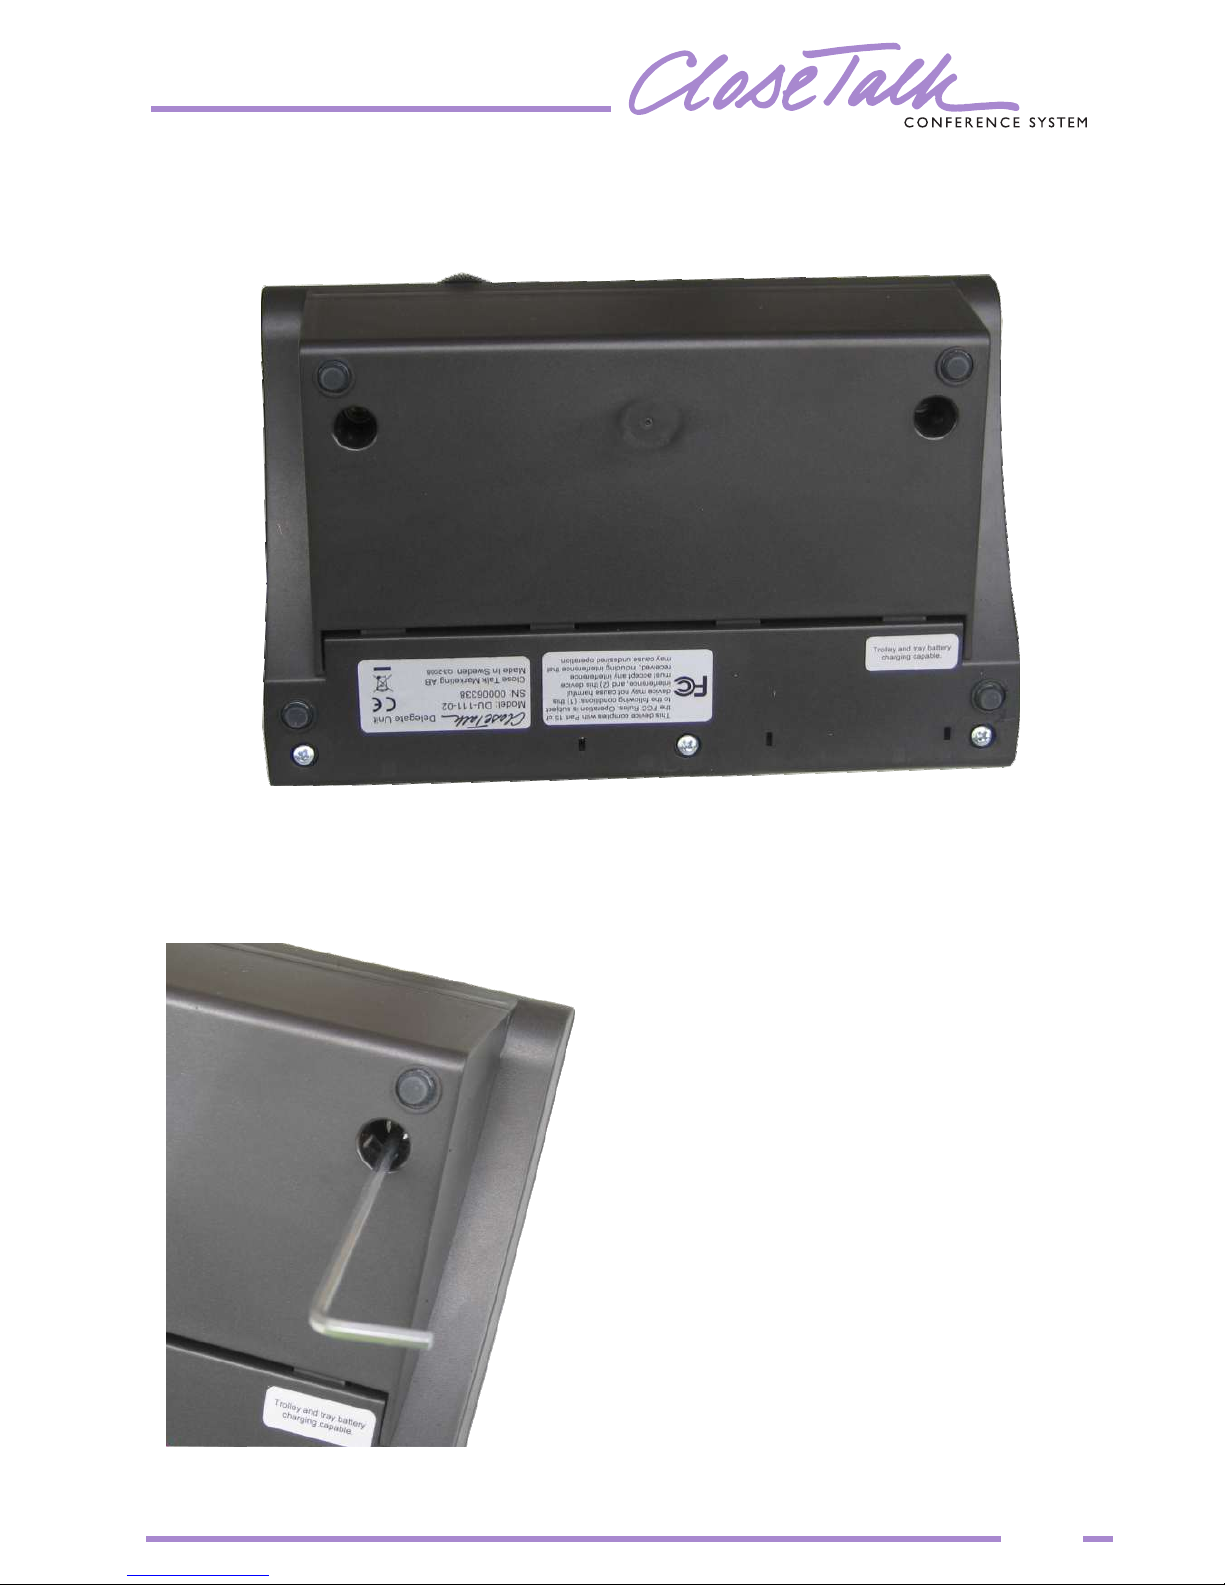
When the battery has been replaced, carefully return the plastic battery cover, make sure that it fits
properly on all sides. Check that the unit’s rubber feets are attached properly.
Fig. 6: Replace the battery cover, making sure it fits properly on all sides
Return and fasten the battery cover screws and locking washers using the appropriate tool. Turn the
unit back upside and make sure that it stands properly on a flat table surface. Turn the unit on and
test it. Done!
Fig. 7: Return and fasten the cover screws. Do not overtight the screws or thread damage may occur!
 Loading...