

Closer to nature perfect prep Instructions For Use Manual
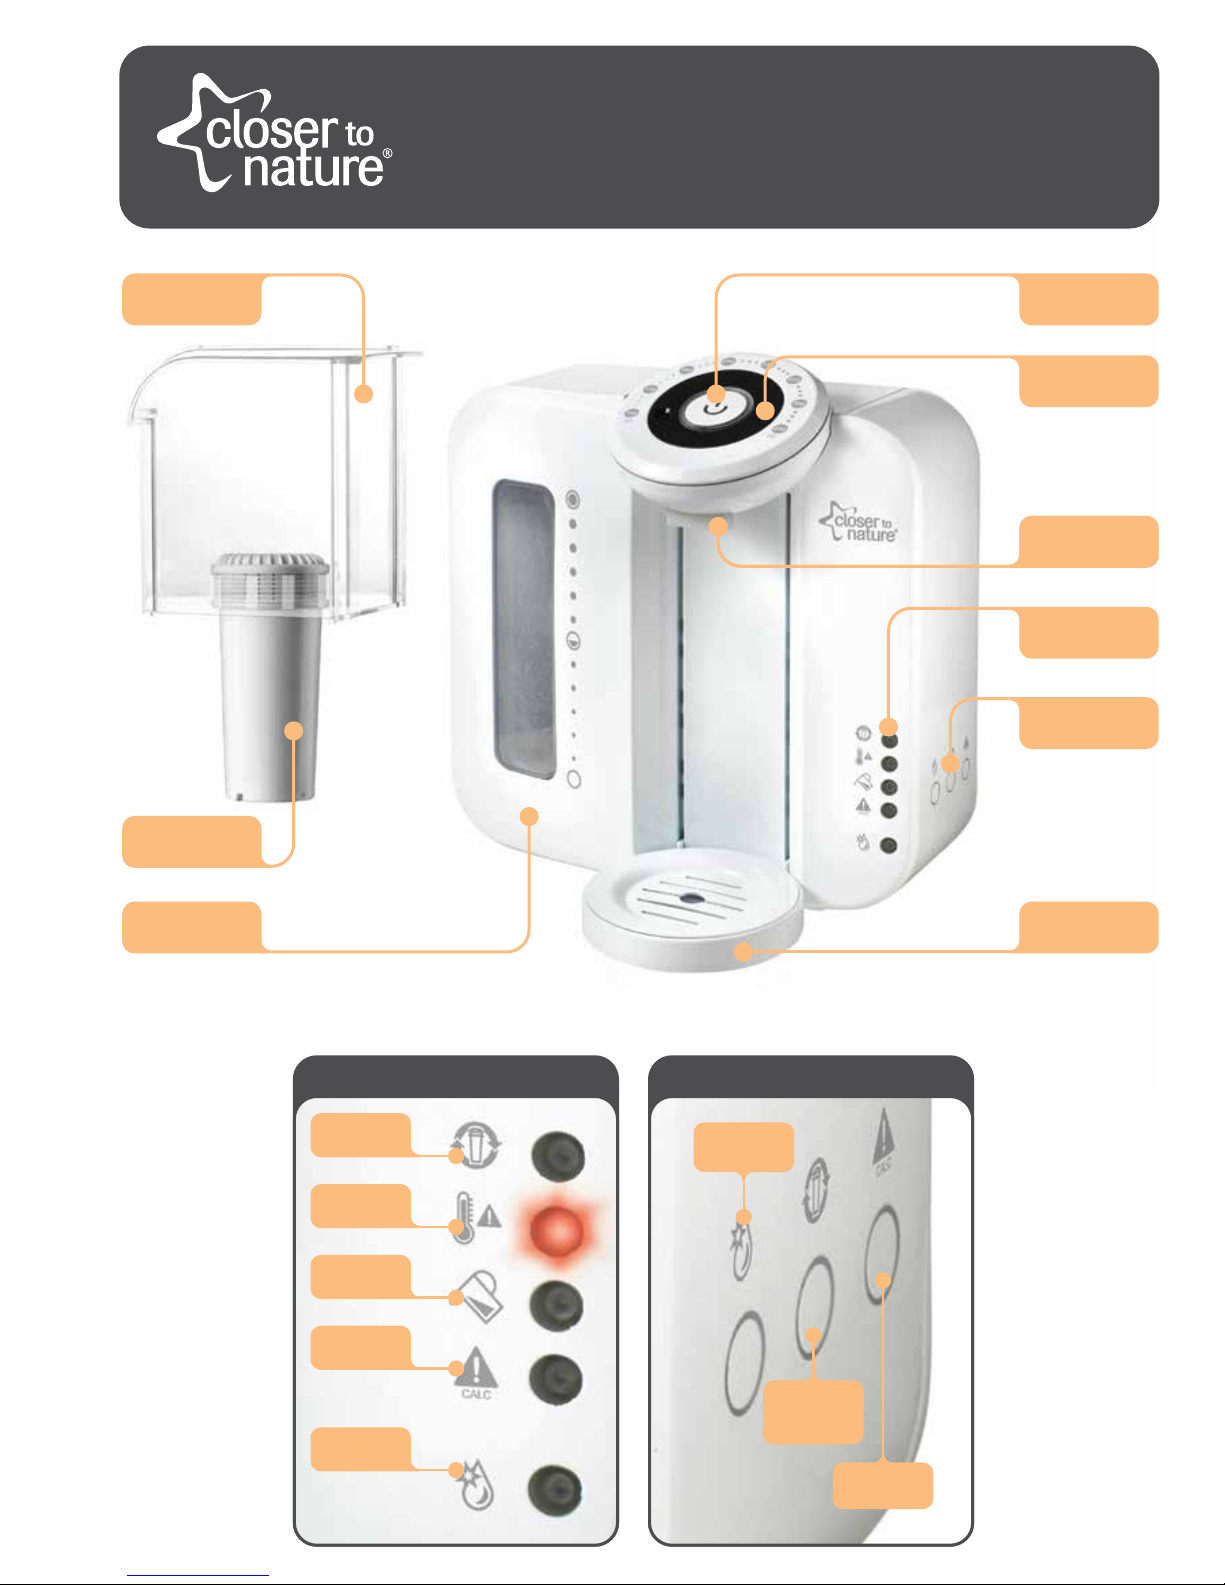
WATER
HOPPER
closer to nature® perfect prep™ machine
INSTRUCTIONS FOR USE
START / STOP
BUTTON
SETTING
DIAL
WARNING
LIGHTS
ACTION
BUTTONS
DISPENSER
OUTLET
DISPENSER
OUTLET
WATER
TANK
WATER
FILTER
BOTTLE
STAND
WARNING LIGHTS ACTION BUTTONS
CHANGE
FILTER
CLEANING
MODE
FILTER
VOLUME
RESET
DE-CALC/
DE-SCALE
WATER TANK
HOT
WATER LEVEL
LOW
DE-CALC/
DE-SCALE
CLEANING
MODE
FOR DOMESTIC USE ONLY - NOT INTENDED FOR COMMERCIAL USE
NOTE: SET UP YOUR UNIT IN A COOL PLACE IN YOUR KITCHEN OUT OF DIRECT SUNLIGHT
Mayborn ANZ Pty Ltd.
(ABN 66 154 703 134)
Mayborn Group is a business
name of Mayborn ANZ Pty Ltd.
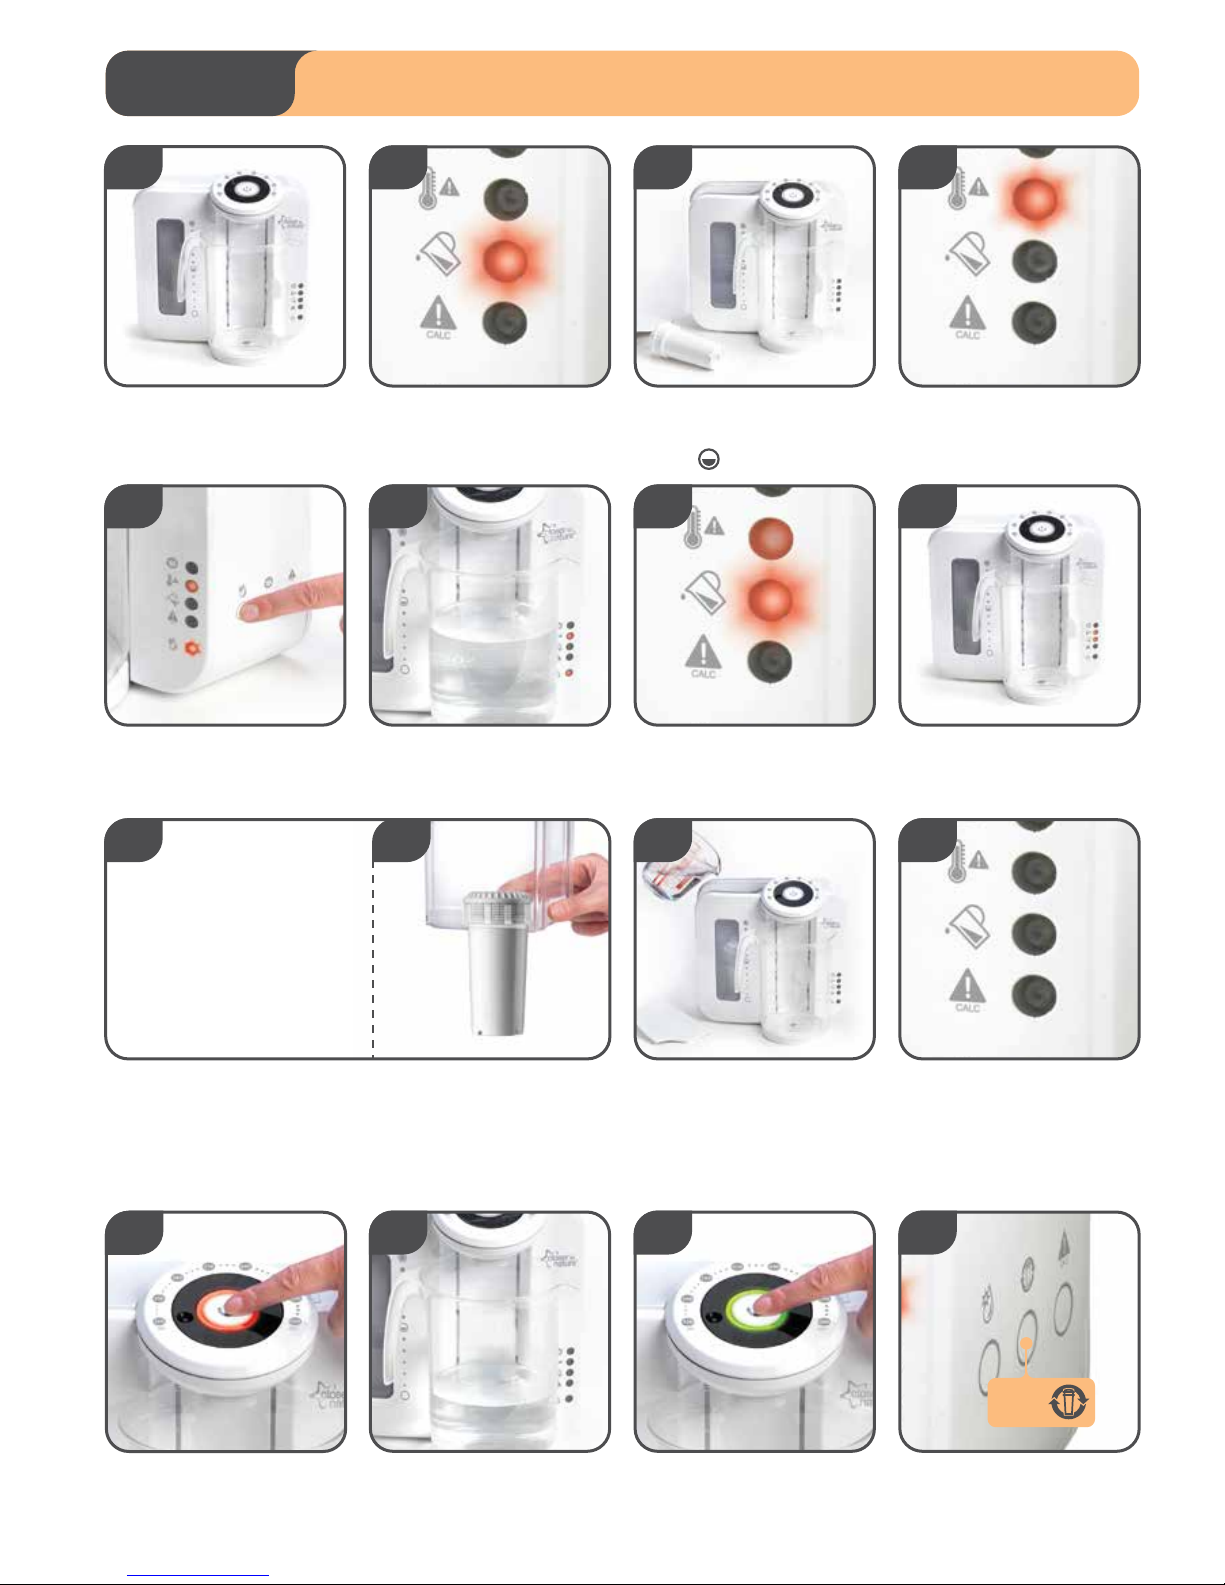
1. SET UP AND
CLEANING
2 3 4
Place a container under the
dispenser outlet to capture the
water used to clean the system (at
least 1 litre capacity).
Plug in the unit, the tank empty
warning light will illuminate.
With the water hopper in place
(but not the filter) fill the hopper
with 1 litre of freshly boiled HOT
WATER -
Wait for the tank empty warning
light to go out. The water tank hot
light will illuminate.
5 6 7 8
Press the cleaning mode button and
hold for 2 seconds. The cleaning
mode light will illuminate.
Wait whilst the boiled water is
emptied from the tank, through the
dispenser, into the container that you
placed under the outlet in step 1.
The tank empty warning light will
illuminate once the water has
flushed through the system.
Discard the water captured in your
container and replace it under the
dispenser.
9a 9b 10 11
12
Remove the water hopper and
fit the filter*.
Replace in the water tank.
Fill the hopper with COLD WATER. Wait for the tank empty warning
light to go out.
Press the start/stop button. A red
light will flash.
13 14 15
The appliance will dispense an
amount of hot water.
Press the start/stop button again.
A green light will flash and an
amount of water will be dispensed
to finish the cycle.
Press the filter volume reset button
for 2 seconds to clear the memory.
Discard dispensed water.
Your system is now ready to use.
Before first use you need to run a cleaning cycle – which should take approximately 10 minutes. You should
clean your unit as part of the set up and again whenever you replace your filter. For hygiene and safety
reasons you should always clean your unit if it has been unused or in storage for longer than 2 weeks.
*Handling the filter cartridge by the top only:
• Remove the filter cartridge from packaging
• Remove sticker from the top of filter
• Fill a bowl with cold drinking water
• Fully submerge the cartridge in the water
• Gently agitate until the bubbles cease
1
FILTER
VOLUME
RESET
 Loading...