

Page 1
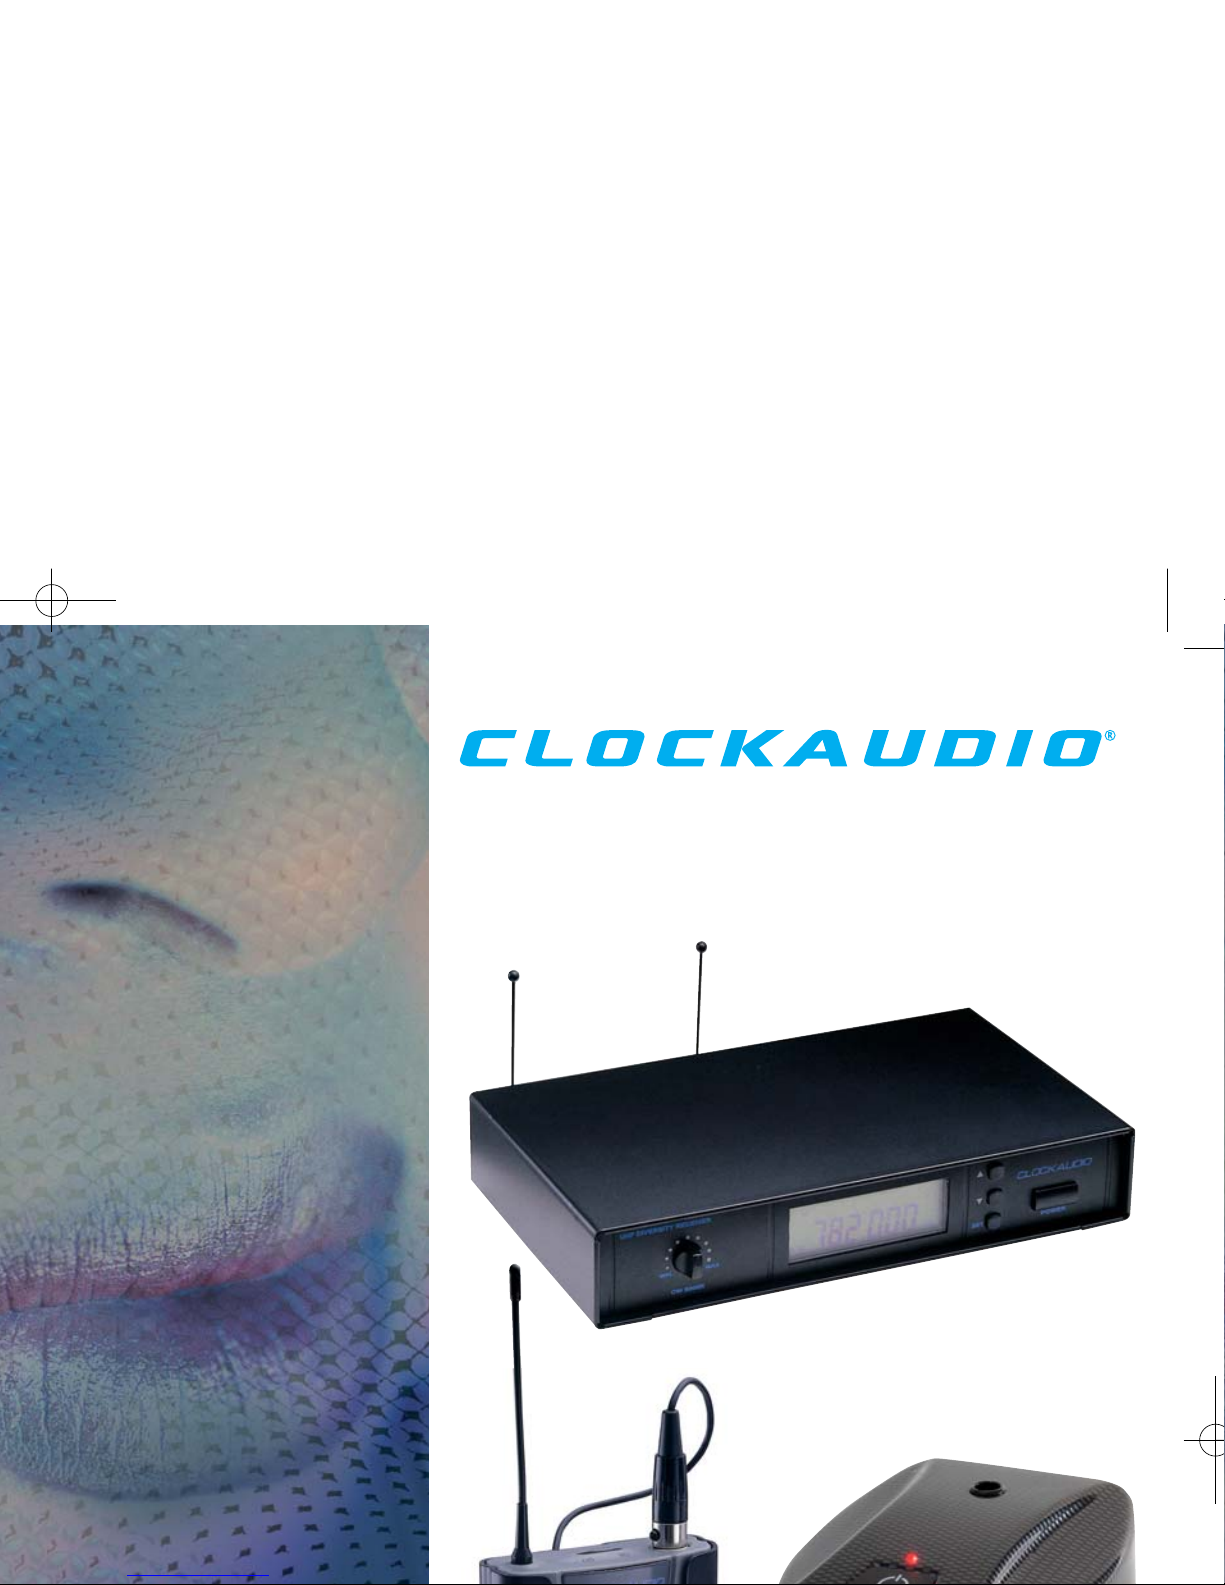
UHF PPL WIRELESS MICROPHONES
SYSTEM INSTRUCTION
MANUAL
Page 2
1. FEATURES
• UHF Band operation for reduced interference
• PLL Synthesised technology for stable frequency and multiple simultaneous channels
• True diversity reception with tuned Antennas and two independent receivers for optimum
continuity and reception conditions
• Integral squelch and mute functions to minimise noise
• S.A.W. filtering to minimise interference
• Receivers in compact half rack size rugged metal case with easy controls, comprehensive
LCD display, balanced (XLR) and unbalanced (6.3mm jack) outputs
• Belt Pack (Lavalier Microphone) and Hand Held systems with easy to use and secure controls,
and LCD display
• Headworn boom microphones for belt pack system and interchangeable condenser microphone
head for hand held system available as optional extras
2. SPECIFICATIONS
2.1 Receiver CW9000R
FM Carrier UHF for reduced interference
Frequency Range 630 - 960Mhz (Bands according to local regulation)
Channel Frequencies 192 PLL pre selectable channels per Band
Frequency stability ± 0.005%
S/N Ratio ± 100dB
Audio Output Level -12dB
AF Output Impedance 600 Ohms
Squelch Pilot Tone and Noise Mute
Output Terminations Balanced - 3 Pin XLR socket. Unbalanced - 6.3mm jack socket
Display LCD
Display Information Frequency; Receiver A/B; Mute Status; RF/AF levels.
Controls Power On/Off; Frequency Up/Down; Frequency Scan;
Audio level
Supply Power External 12V DC; 500mA.
Rugged Metal Case
Dimensions (W) 211mm x (H) 40mm x (D) 152mm
Finish Black
Accessories Audio link cable terminated in 6.3mm jack
1 U Rack Mount for 2 receivers
Rack Cover Panel for vacant slot (when only one
receiver mounted)
CONTENTS
1. Features 3
2. Specifications
2.1 CW9000R Receiver 3
2.2 CW9001T Belt pack Transmitter 4
2.3 CW9000T Handheld Transmitter & Microphone 4
2.4 Standard Microphones 4
3. Equipment Parts and Accessories
3.1 CW9000R Diversity Receiver 5
3.2 CW9000T Handheld Microphone and Transmitter 5
3.3 Standard Accessories 5
3.4 CW90001T Belt pack Transmitter 6
3.5 CL6 Lavalier Cardioid Condenser Microphone 6
4. Setting Up and Operation
4.1 CW9000R Diversity Receiver 7
4.2 CW9000T Handheld Microphone/Transmitter 8
4.3 CW9001T Belt Pack Transmitter and Microphones 9
4.4 CW9004-T UHF Desk Wireless Transmitter 12
4.5 CW9005-T UHF Desk Wireless
Microphone Transmitter 13
4.6 CW9006-T UHF Desk Wireless Transmitter 14
4.7 CU-2 Intelligent Battery Management System 15
5. Optional Accessories
5.1 Microphones for the CW9004 Transmitter 17
5.3 HW 1500 Lightweight Headworn
Boom Microphone 18
5.4 HW 1200 Lightweight Headworn
Boom Microphone 18
5.5 CL4 Lavalier Omni-Directional Microphone 18
5.6 CW9000T-C Interchangeable
Condenser Microphone Head 18
5.7 AA9000 Antenna Distribution
Amplifier 19
5.8 AB9000 Antenna Booster 19
5.9 RRM9000 Rackmount 19
6. General Information 20
CLOCKAUDIO
PAGE 3
11745 Clockaudio R-M Manual 18/12/08 11:30 Page 3
Page 3
2.2 Belt Pack Transmitter CW9001T
FM Carrier UHF for reduced interference
Frequency Range 630 - 960MHz (Bands according to local regulation*)
Channel Frequency 192 PLL Pre selectable Channels
RF Output 10mW
Frequency Stability ± 0.005%
Frequency Deviation ± 48KHz
S/N Ratio > 102dB
Audio Frequency Response 50Hz - 15KHz
Dynamic Range > +110dB
Controls Power On/Off, Frequency and AF Level set
LCD Display Information Frequency and Battery Status
Microphone CL6 Cardioid Lavalier including Windshield
Power 2 x AA Batteries giving more than 8 hours use
Finish Black and Grey dual colour
Belt clip Reverseable/removable
Accessories Presentation Case and Microphone Windshield included
CMH2000 or HW1500 Headworn microphones available as
optional extras
2.3 Hand Held Radio Microphone CW 9000T
RF,AF and control information as for CW9001T above
Microphone Dynamic Cardioid
LCD Display Information Frequency,AF Level and Batter y Status
Power 2 x AA batteries giving more than 10 hours use
Finish Soft touch Black
Accessories Presentation Case, Identifying Coloured Microphone End
Covers and SA5 Microphone Holder/Stand Adaptor included
Interchangeable Cardioid Condenser Microphone Head
CW9000T-C available as optional extra
2.4 Standard Microphones
Model CL6 9000T-D
Type Condenser (Back Electret) Dynamic
Polar Diagram Cardioid Cardioid
Frequency Response 100Hz - 12KHz 50Hz - 16.5KHz
Impedance 2.2 KOhms 600 Ohms
Sensitivity -50dB @ 1KHz -52dB @ 1KHz
(0dB = 1VPa)
Termination 4 Pin Tini-Q connector
* Licence may be required.You are advised to contact your Licencing Authority before use to
ensure legal transmission.
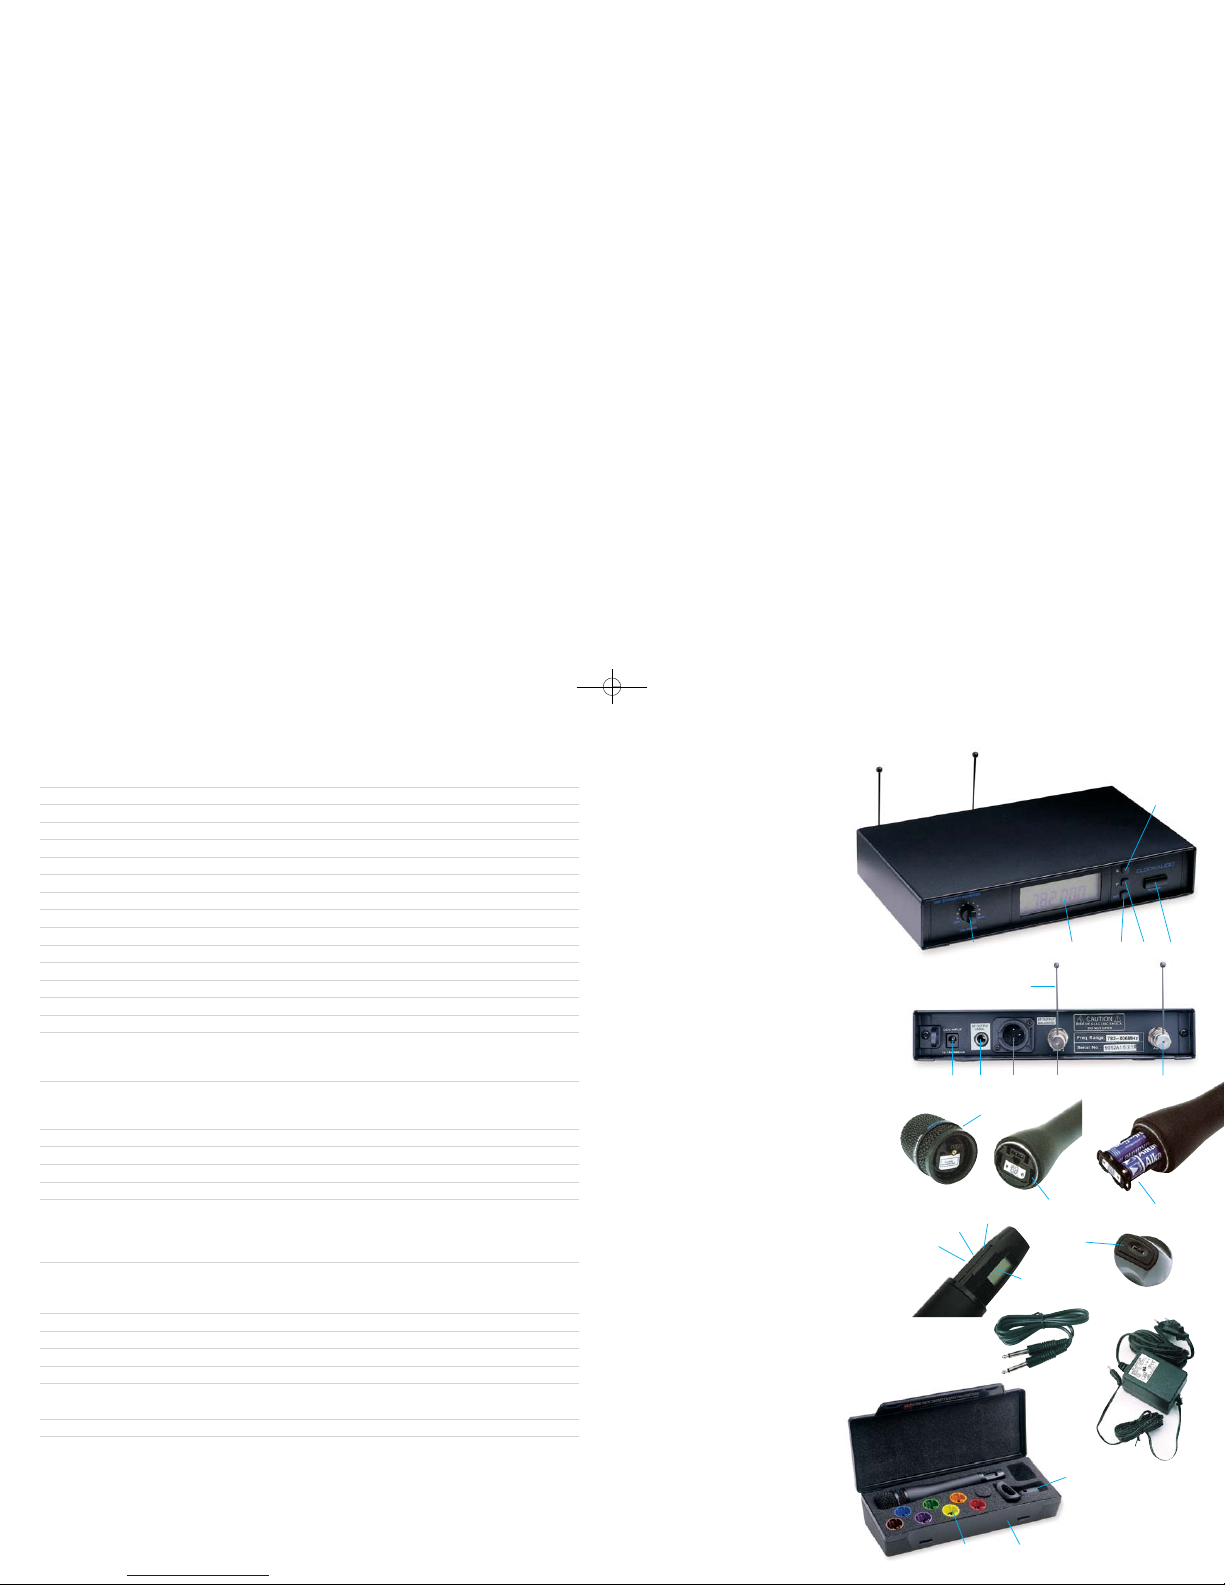
3. EQUIPMENT PARTS AND ACCESSORIES
3.1 CW9000R Diversity Receiver
A. Power On/Off switch
B. Up button
C. Down button
D. Set button
E. LCD display
F. Audio level control
G. DC power input socket
H. Audio output, jack socket - unbalanced
I. Audio output XLR socket - balanced
J. Antenna 2 input socket
K. Antenna 1 input socket
L. Antenna
3.2 CW9000T Hand held transmitter
A. Interchangeable microphone head
B. Battery tray
C. Batter y tray clips
D. Power On/Off switch
E. Set button
F. Down button
G. Up button
H. LCD display
3.3 Standard Accessories
A. Receiver audio output cable with unbalanced
6.3mm jack plugs
B. Receiver AC/DC Power supply unit
C. Colour coded end covers
D. Microphone carrying case
E. SA5 microphone holder
and stand adaptor
CLOCKAUDIO
PAGE 5PAGE 4
CLOCKAUDIO
ABCDEF
GH I
JK
L
CD
E
A
C
D
B
B
A
E
F
G
H
11745 Clockaudio R-M Manual 18/12/08 11:30 Page 5
Page 4
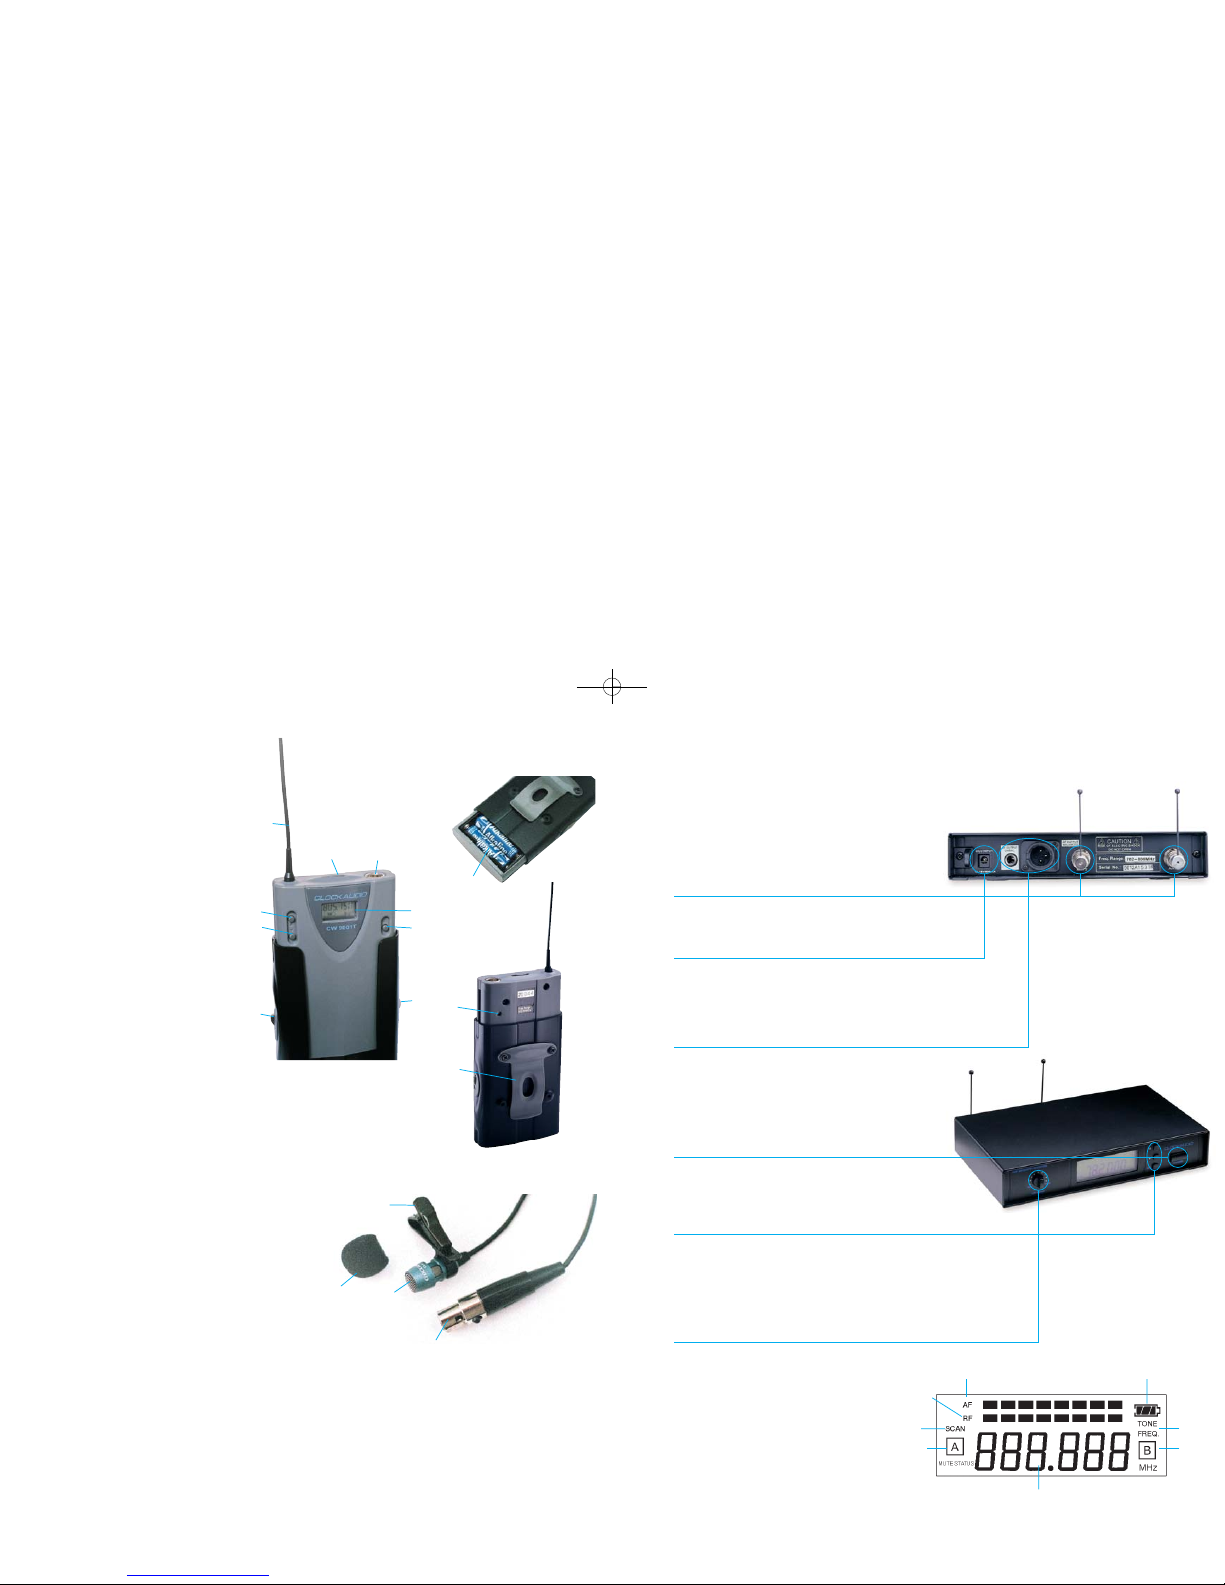
3.4 CW9001T Belt pack transmitter
A. Microphone input
B. Power On/Off switch
C. Antenna
D. LCD display
E. Set button
F. Up button
G. Down button
H. Sliding outer cover
release buttons
I. Audio (modulation) level control
J. Belt clip
K. Battery tray
3.5 Lavalier microphone
A. CL6 Lavalier condenser microphone
B. Microphone clip
C. Tini Q 4 pin connector
D. Windshield
4. SETTING UP AND OPERATION
4.1 CW9000R Diversity Receiver
(i) Connect the two antennas to the easy mount
BNC sockets on the rear of the receiver and
align them vertically.
(ii) Insert the DC connector of the power supply
unit in the DCV Input socket on the rear of
the receiver.
(iii) Connect the audio output to a mixer or
amplifier using a lead with an XLR male
connector if it is a balanced connection, or a
lead with a 6.3mm jack plug if it is an
unbalanced connection.
(iv) The electrical supply to the DC power supply
unit can now be made or switched on.
(v) Turn the receiver on by pressing the “Power”
button. (To turn off receiver depress the
“Power” button again)
(vi) To scan or set frequency press the “SET”
button for 3 seconds. Use the “Up” and
“Down” buttons to select the desired frequency
with reference to the LCD display.
(vii)Press the “SET” button again to store the
setting.
(viii)When signal is present audio output level
can be set by using the rotating level control
on the left side of the front panel.
LCD display
A. AF signal level
B. RF signal level
C. Display for scan mode
D. Display for frequency mode
E. Main display
F. Diversity display (antenna 1 or 2)
G. Transmitter battery status
CLOCKAUDIO
PAGE 7
A
A
C
A
B
B
C
D
J
I
K
F
G
H
E
PAGE 6
CLOCKAUDIO
G
C
D
F
E
B
F
D
H
11745 Clockaudio R-M Manual 18/12/08 11:31 Page 7
Page 5
CLOCKAUDIO
PAGE 9
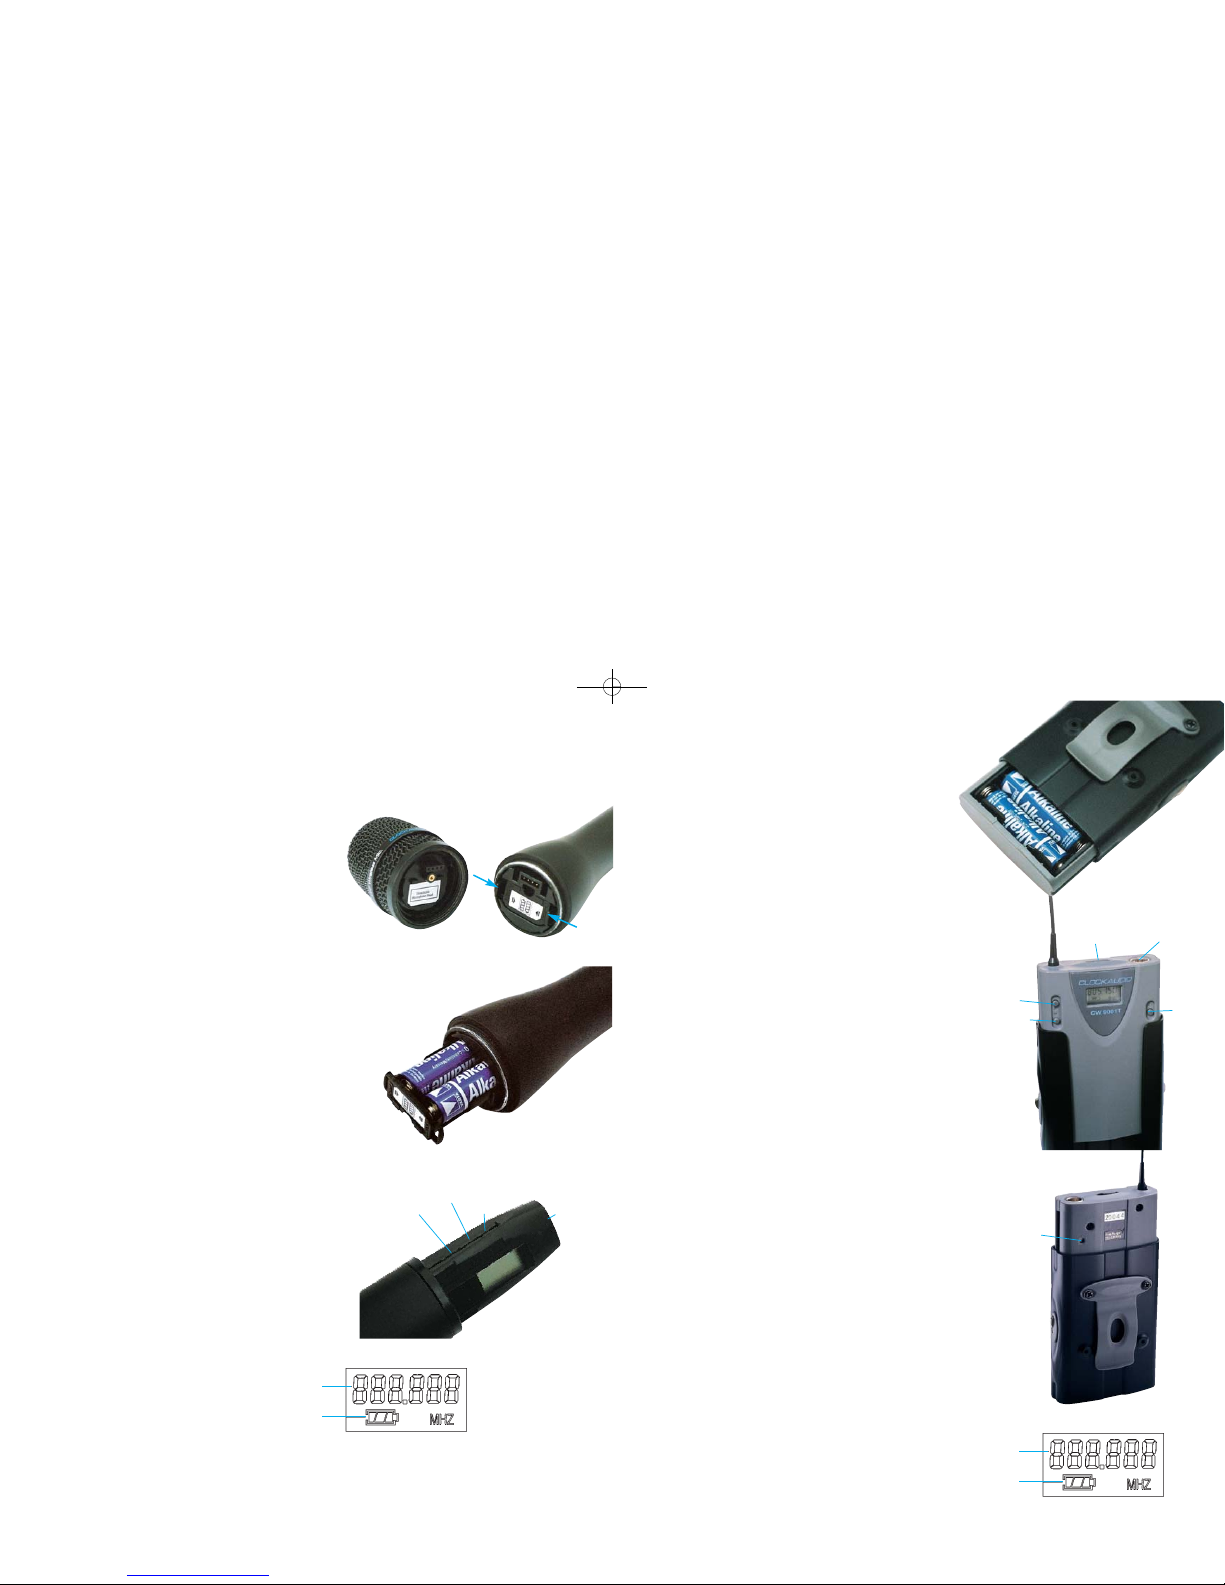
4.2 CW9000T Hand held Transmitter/microphone
(i) To insert or change the battery
A. Remove the microphone head by unscrewing
counter-clockwise
B. Press both battery tray buttons towards each
other to release battery tray
C. Remove exhausted batteries and insert two
new AA batteries according to polarity
shown on tray
D. Push the batter y tray carefully back in to the
microphone body until “clicked” home
E. Present the microphone head to the body
ensuring the connectors mate and resecure by
screwing clockwise
(ii) Switch the transmitter on using the On/Off switch
at the bottom of the microphone
(iii) To set the desired frequency press the “SET”
button for 3 seconds.
When “MHZ” blinks on the display the frequency
may be selected by using the “Up” and “Down”
buttons
(iv) Press the “SET” button to store the setting
(v) When signal is present AF (modulation) level
may be set.
Press the “SET” button twice.When “Sensit”
appears on the display use the “Up” and
“Down” buttons to adjust the right level
(vi) Press the “SET” button to store the setting
(vii)To prevent accidental operation of controls press
the “Up” button for 3 second to activate
the “Lock Mode”.To unlock press the “Up”
button again
LCD display
A. Main display
B. Battery status indicator
4.3 CW9001T Belt Pack Transmitter
(i) To insert or change the batteries
A. Press in and hold both outer cover release
buttons
B. Slide transmitter body downwards to expose
battery compar tment in rear of body
C. Remove exhausted batteries and insert two
new AA batteries according to polarity shown on
tray
D. Push the transmitter carefully back in to
position until the release buttons click home
(ii) Inser t the lavalier microphone connector in the
microphone socket on the top of the
transmitter
(iii) Switch on the transmitter using the On/Off
switch on top of the unit
(iv) Release the outer cover and slide transmitter
upwards to expose the display and controls at
the front of the transmitter
(v) To set the desired frequency press the “SET”
button for 3 seconds.
When “MHZ” blinks on the display the
frequency may be selected by using the “Up”
and “Down” buttons
(vi) Press the “SET” button to store the setting.
(vii)When signal is present the AF (modulation) level
may be set by using a trimmer to adjust the
control set in the top left rear face of the unit
(viii) To prevent accidental changes to settings press
the “Up” button for 3 seconds to activate the
“Lock Mode”.To unlock press the “Up” button
again
(ix) Push the transmitter carefully back in to position
LCD display
A. Main display
B. Battery Status indicator
PAGE 8
CLOCKAUDIO
ON/OFF
MICROPHONE
SOCKET
UP
DOWN
AF LEVEL
SET
SET
UP
A
DOWN
ON/OFF
B
A
B
11745 Clockaudio R-M Manual 18/12/08 11:31 Page 9
Page 6
CLOCKAUDIO
PAGE 11PAGE 10
CLOCKAUDIO
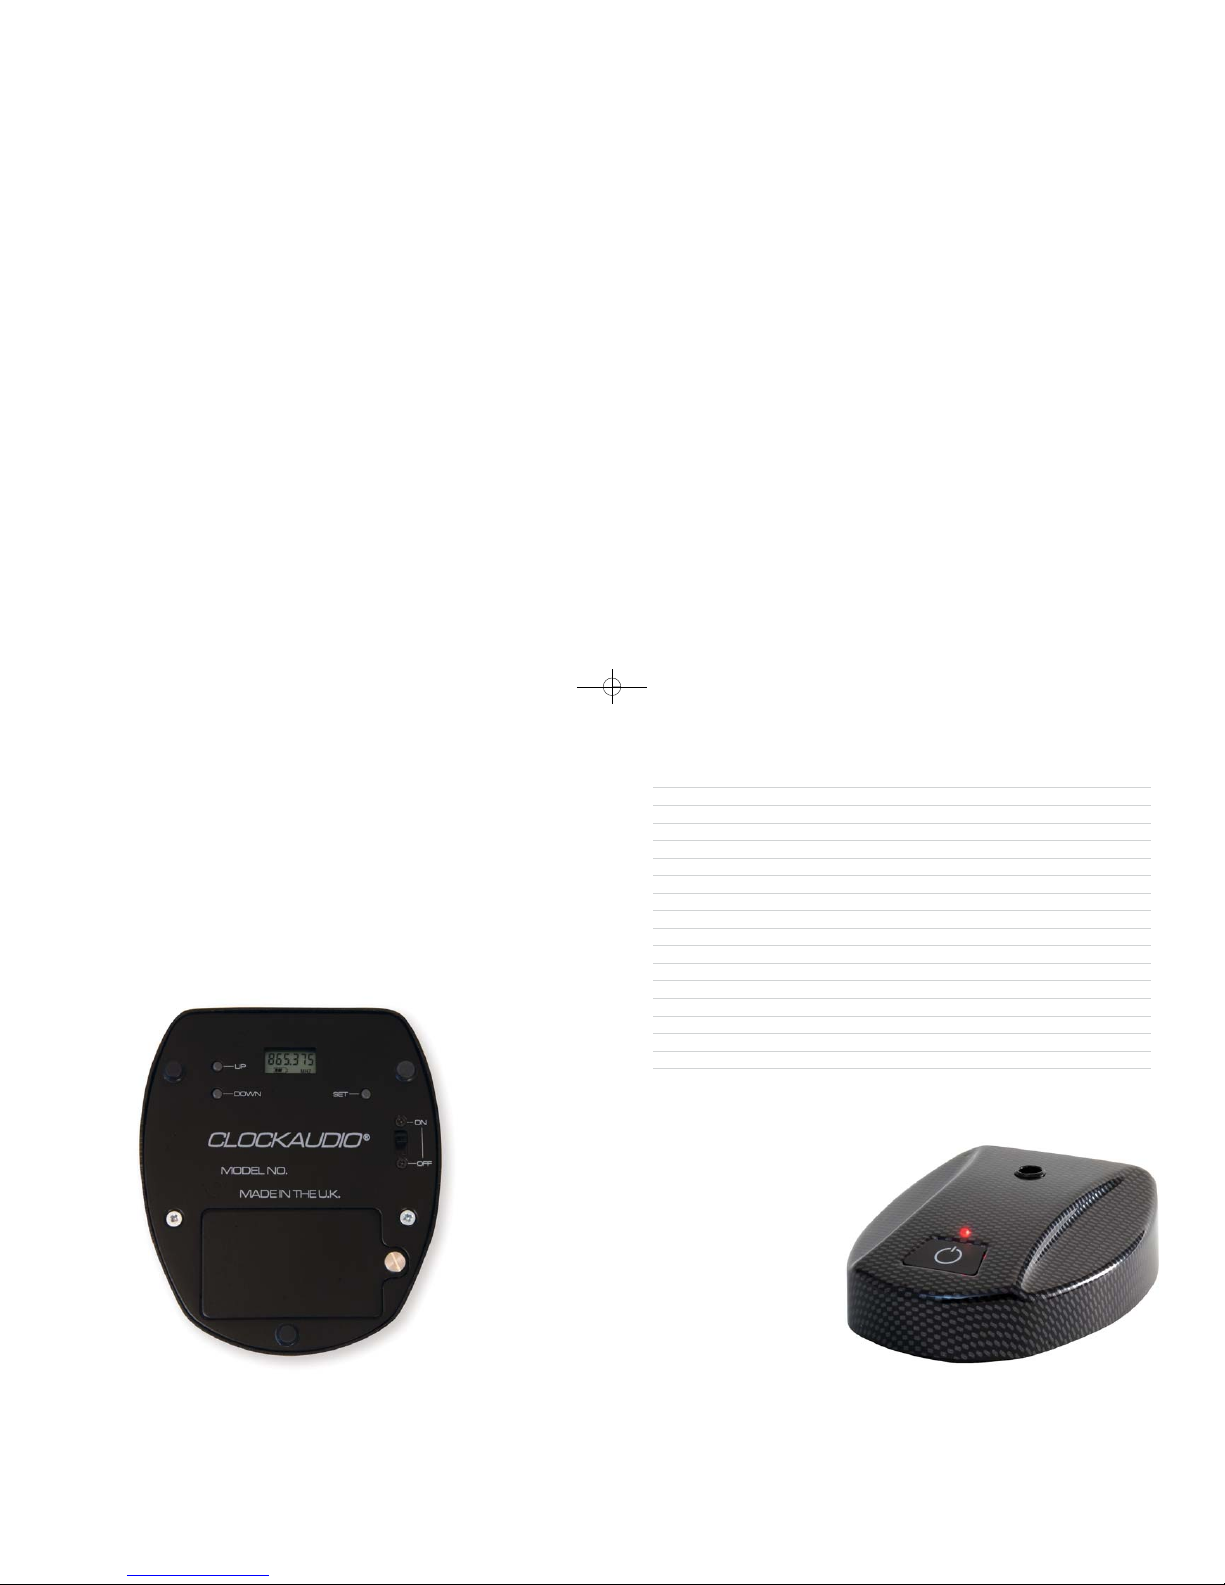
CW9004T - CW9005T - CW9006T TRANSMITTER
1. Switch on the transmitter using the On/Off on the bottom of the unit
2. To set the desired frequency press the “SET” button for 3 seconds. When “MHz” blinks on
the display the frequency may be selected by using the “UP” and “DOWN” buttons.
3. Press the “SET” button to store the setting
4. To prevent accidental changes to the settings press the p button again.
5. LCD display (A) Main display (B) Battery Status indicator.
6. Batter y compartment ensure correct polarity when replacing the rechargeable batteries.
4.4 CW9004T UHF Desk Wireless Transmitter
Frequency Range 630 - 960MHz (According to local regulation)
Channel Frequencies 192 PLL selectable channels per frequency band
RF Output 10mw
Frequency Stability ±0.005%
Frequency Deviation ±48KHz
S/N Ratio > 102dB
Audio Frequency Response 50Hz - 15KHz
Dynamic Range > +110dB
Controls Power On/Off Frequency and AF level set
LCD Information Frequency and battery status
Switching Programmable touch switch and LED indicator
Power Supply 2 x AA batteries giving more than 9 hours use
Connections 3 Pin Mini XLR (Tini-Q Switchcraft)
Finish Black
Dimensions L 125mm (4.93”) x W 115mm (4.53”) x (D) 40mm (1.58”)
Weight 394g (13oz)
Accessories Microphones Models C310 C312 C313 and C314
11745 Clockaudio R-M Manual 18/12/08 11:31 Page 11
Page 7
CLOCKAUDIO
PAGE 13
PAGE 12
CLOCKAUDIO
4.5 CW9005T UHF Desk Wireless Microphone Transmitter
Frequency Range 630 - 960MHz (According to local regulation)
Channel Frequencies 192 PLL selectable channels per frequency band
Polar Pattern Omni-directional
Audio Bandwidth 50Hz - 18KHz
RF Output 10mw
Frequency Stability ±0.005%
Frequency Deviation ±48 KHz
S/N Ratio > 102dB
Audio Frequency Response 50Hz - 15KHz
Dynamic Range > +110dB
Controls Power On/Off Frequency and AF level set
LCD Information Frequency and batter y status
Switching Programmable touch switch and LED indicator
Power Supply 2 x AA batteries giving more than 9 hours use
Finish Black
Dimensions L 125mm (4.93”) x W 115mm (4.53”) x (D) 40mm (1.58”)
Weight 394g (13oz)
Accessories CU-2 Gang battery charging unit
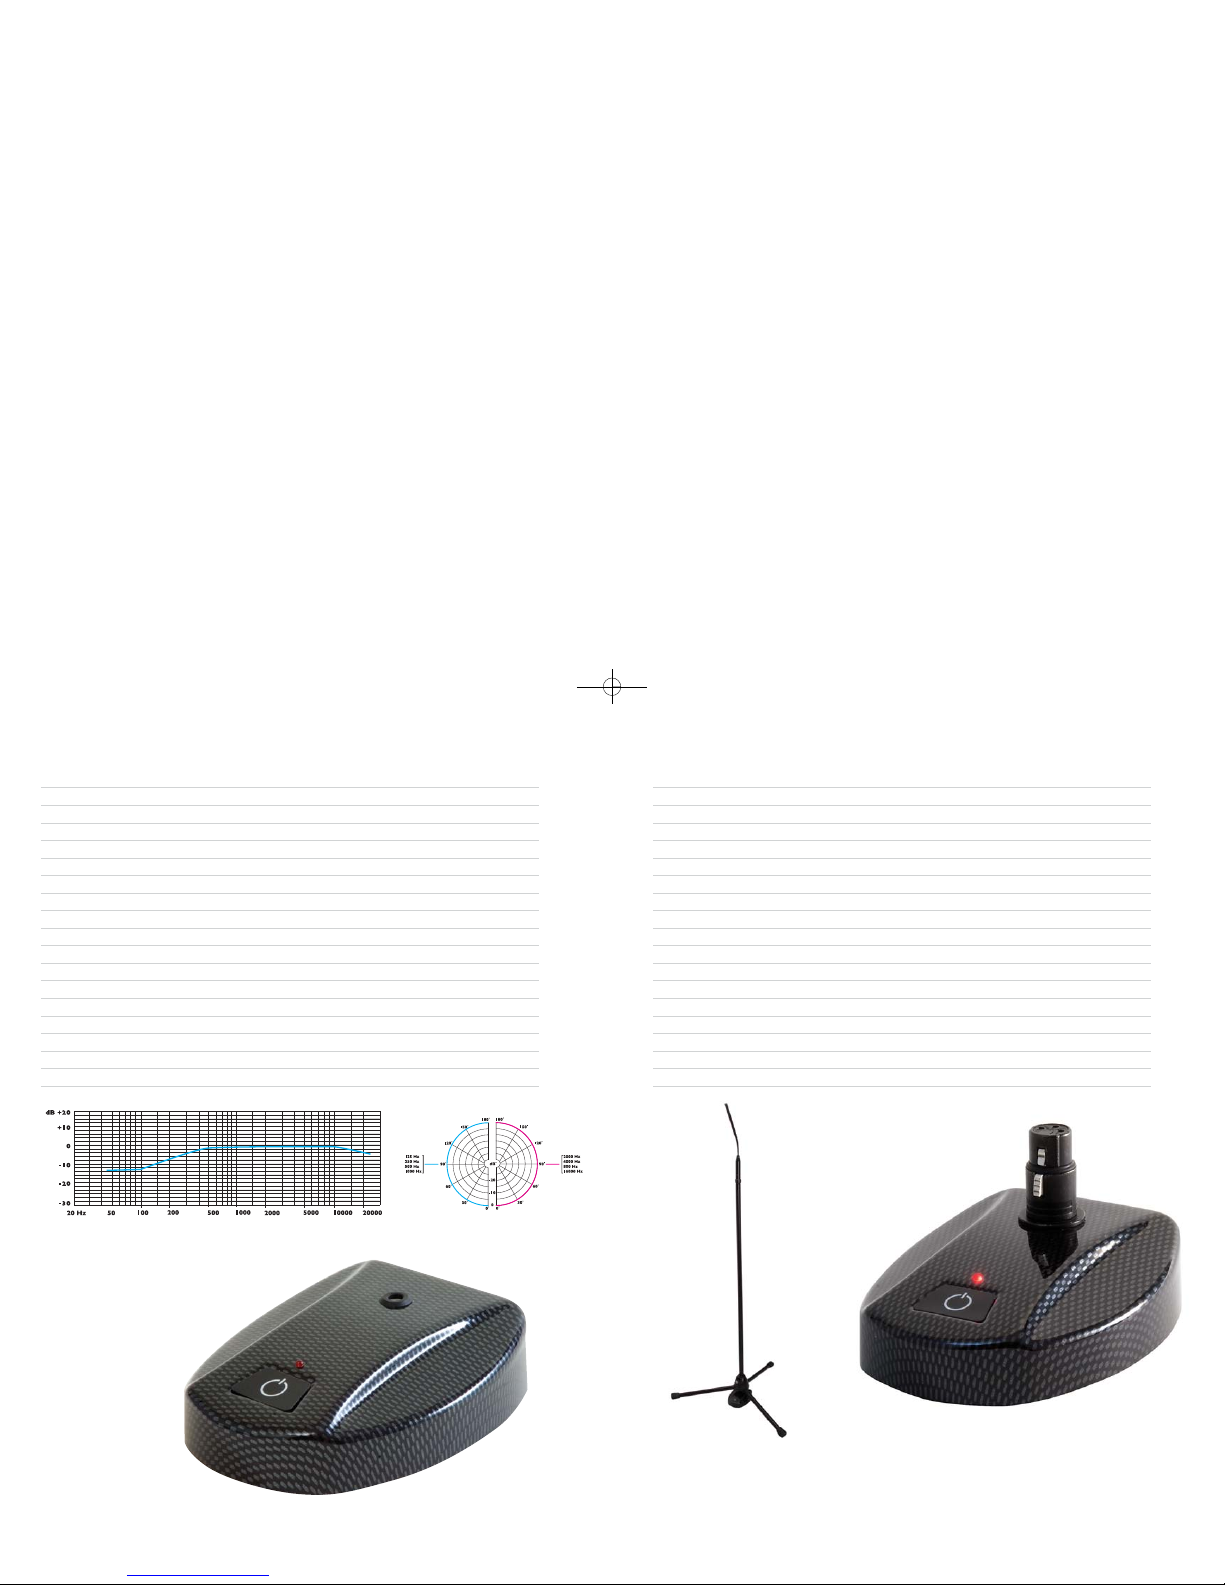
4.6 CW9006T UHF Desk Wireless Transmitter
Frequency Range 630 - 960MHz (According to local regulation)
Channel Frequencies 192 PLL selectable channels per frequency band
RF Output 10mw
Frequency Stability ±0.005%
Frequency Deviation ±48KHz
S/N Ratio > 102dB
Audio Frequency Response 50Hz - 15KHz
Dynamic Range > +110dB
Controls Power On/Off Frequency and AF level set
LCD Information Frequency and battery status
Switching Programmable touch switch and LED indicator
Power Supply 2 x AA batteries giving more than 9 hours use
Output 24 Volts Phantom Power
Connections 3 Pin XLR
Finish Black
Dimensions L 125mm (4.93”) x W 115mm (4.53”) x (D) 40mm (1.58”)
Weight 394g (13oz)
Accessories S-201-X Floor Stand
S210-X
MICROPHONE FLOOR STAND
A fixed height folding long legged stand with a diecast base for stability and ease of transport.
Fitted with a 3 pin XLR connector at the base and the top, the top connector is lockable.
Specially designed for use with the CW-9006 UHF transmitter.
Overall height 1023mm (41”)
Shown with
C815E
Shown with
CW9006T fitted
11745 Clockaudio R-M Manual 18/12/08 11:31 Page 13
Page 8
CLOCKAUDIO
PAGE 15PAGE 14
CLOCKAUDIO
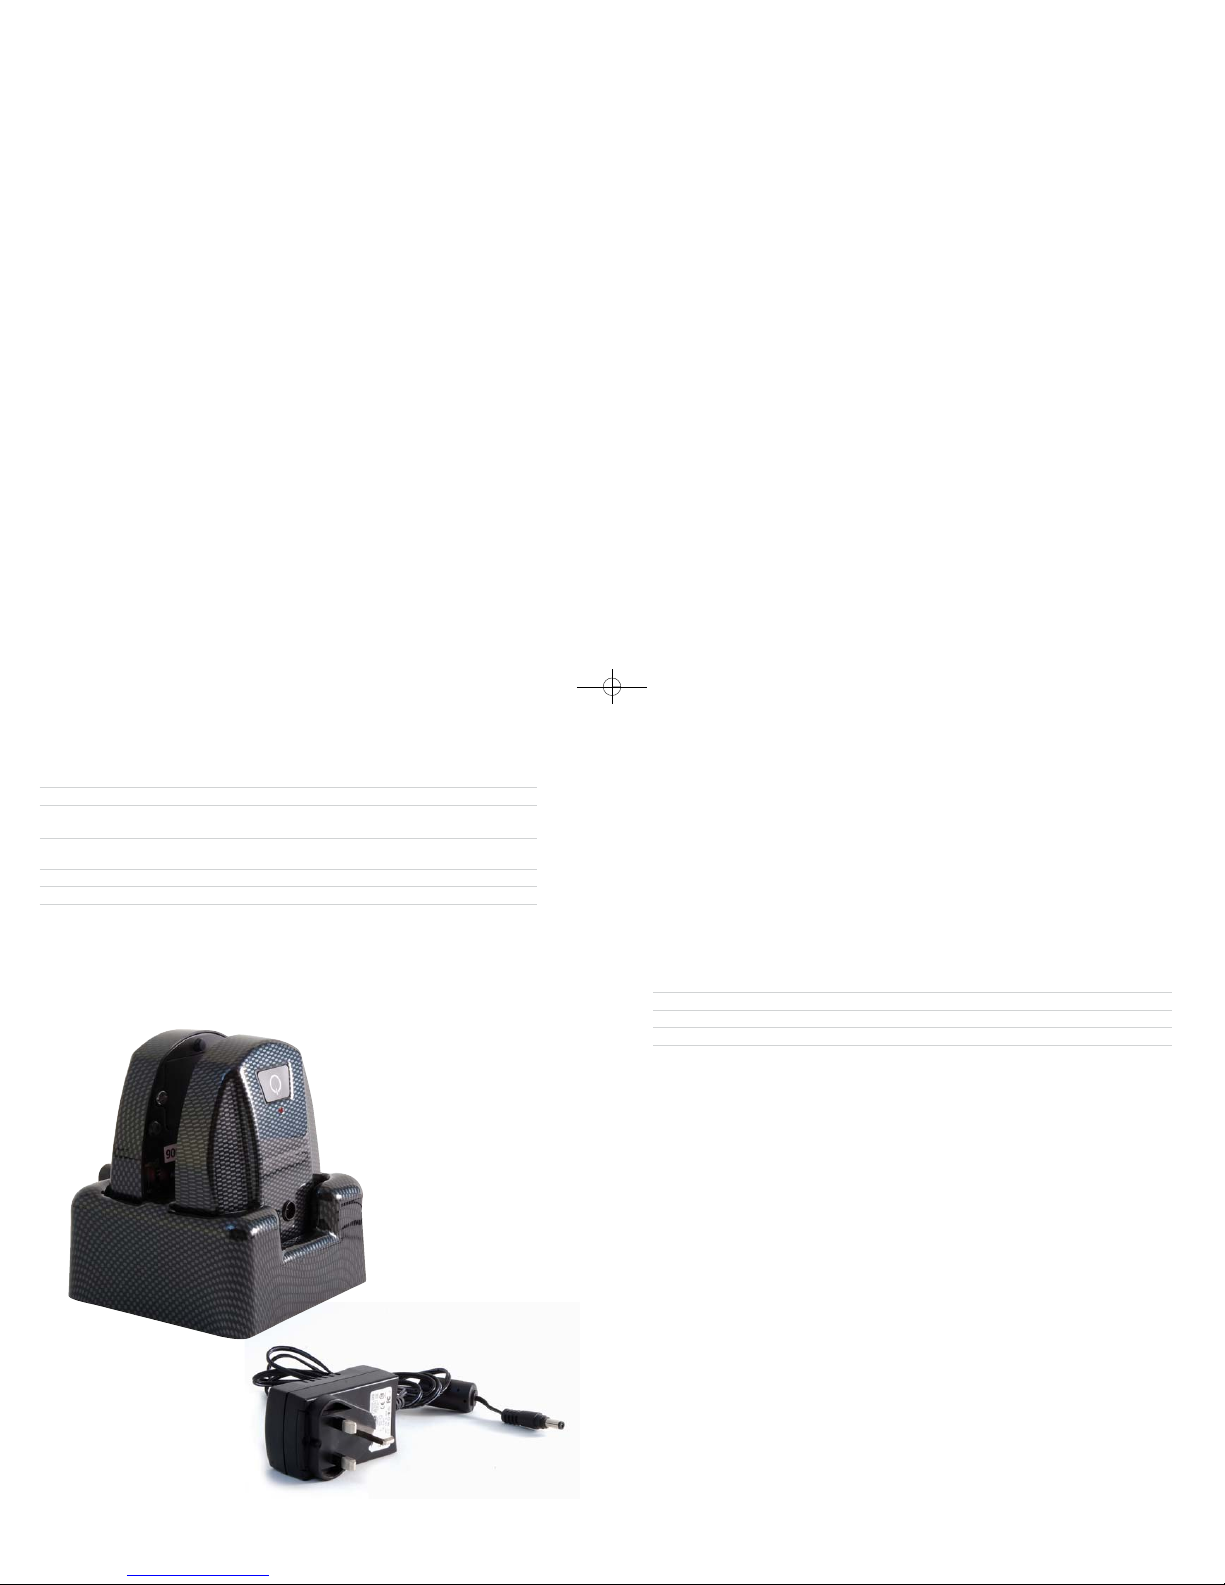
4.7 CU-2 Intelligent Battery Management System
Charging Current 1.25A
Charging Time 6 hours (Ni-MH. 2700mAH)
Indicators Red LED charging
Green LED charging complete
Power Supply Input 90-260V AC
Output 12VDC 1.25A
Dimensions L 125mm (4.93”) W 125mm (4.93”) H 63mm (2.48”)
Weight 282g (9.95oz)
• Processor controlled
• Built-in active monitoring circuitry
• Pulse charging system
• Temperature sensor
• Two dedicated compartment for charging two CW9004-T, CW9005-T or CW9006-T
CW9004T - CW9005T - CW9006T SWITCHING INSTRUCTIONS
The following instructions are a step to step guide of how you can programme the switch to the
function you require:
1. Whilst holding down the function switch, power up the base by switching on the power
switch located on the underside of the base. This enables you to enter programming
mode. Note both bases require 9 to 48 volts phantom power to operate.
2. You will notice the LED flashes on and off for approximately 2 seconds to tell you that
programming mode has been selected.
3. At each stage of programming the base will tell you what functions have already been
stored by the LED flashing the appropriate numbers of times. See the table below for a
quick reference guide.
Programme Description Option 1 Option 2
1 Switch Type Momentary Latching
2 Switch Action PTT (Normally Off) PTM (Normally On)
By pressing the switch once programme option 1 shall be selected and the LED will flash
according to which option is stored (either once for Momentary or twice for Latching) and
likewise for programme option 2 for PTT or PTM.
You are able to change the switching operation by following the step by step guide.
Latching (Normally On)
This is the default setting, the switch has a latching operation and the microphone is live as soon
as the base is powered. Should the default setting be cleared perform the following actions:
1. Press the switch once the LED will flash once, then press the switch twice the LED will
flash twice. Once you have performed this step the switch is set for Latching operation.
2. For Normally On press the switch twice, the LED will flash twice, then again press the
switch twice the LED will flash twice. Wait for approximately 5 seconds and the switch
function willbe set into the bases memory.
Latching (Normally Off)
The microphone requires the switch to be pressed to become live. For programming follow step
one from above and then for normally off press the switch twice, the LED will flash twice, then
press the switch once the LED will flash once. Wait for approximately 5 seconds and the switch
function will set into the bases memory.
11745 Clockaudio R-M Manual 18/12/08 11:32 Page 15
Page 9

5.1 Microphone for the CW9004 Transmitter
C310 Short Rigid Stem
C312 Semi-rigid Gooseneck
C313 Semi-rigid Gooseneck
C314 Semi-rigid Gooseneck
CLOCKAUDIO
PAGE 17PAGE 16
CLOCKAUDIO
Push to Talk
In this function the switch needs to pressed and held for the microphone to be live.
1. Press the switch once the LED will flash once, then again press the switch once the LED
will flash once. Once you have performed this step the switch is set for push operation.
2. For PTT press the switch twice the LED will flash twice, then press the switch once the
LED will flash once. Wait for approximately 5 seconds and the switch function will be set
into the bases memory.
Push to Mute
In this function the microphone is live until the switch is pressed and held down.
1. Press the switch once the LED will flash once, the again press the switch once the LED
will flash once. Once you have performed this step the switch is set for push operations.
2. For PTM press the switch twice the LED will flash twice, then press the switch twice the
LED will flash twice. Wait for approximately 5 seconds and the switch function will be set
into the base memory.
Please allow time for the LED to flash between each stage of programming and also at each stage
the interval between pressing the switch should be no more than one second.
Should for any reason you wish to start over remove to the base.
5. OPTIONAL ACCESSORIES
SPECIFICATIONS
Type Condenser (Black Electret)
Polar Pattern Cardioid
Frequency Response 50 - 18KHz
Sensitivity -47dB ± 3dB @ 1KHz (0dB = 1VPa)
S/N Ratio 64dB (A)
Connection 3 pin Tini-Q Female Plug
Product Overall Length Shaft Diameter Head Diameter
C310 100mm (3.94”) 6mm (0.24”) 12mm (0.47”)
C312-SR 200mm (7.88”) 6mm (0.24”) 12mm (0.47”)
C313-SR 300mm (11.82”) 6mm (0.24”) 12mm (0.47”)
C314-SR 400mm (15.76”) 6mm (0.24”) 12mm (0.47”)
11745 Clockaudio R-M Manual 18/12/08 11:32 Page 17
Page 10
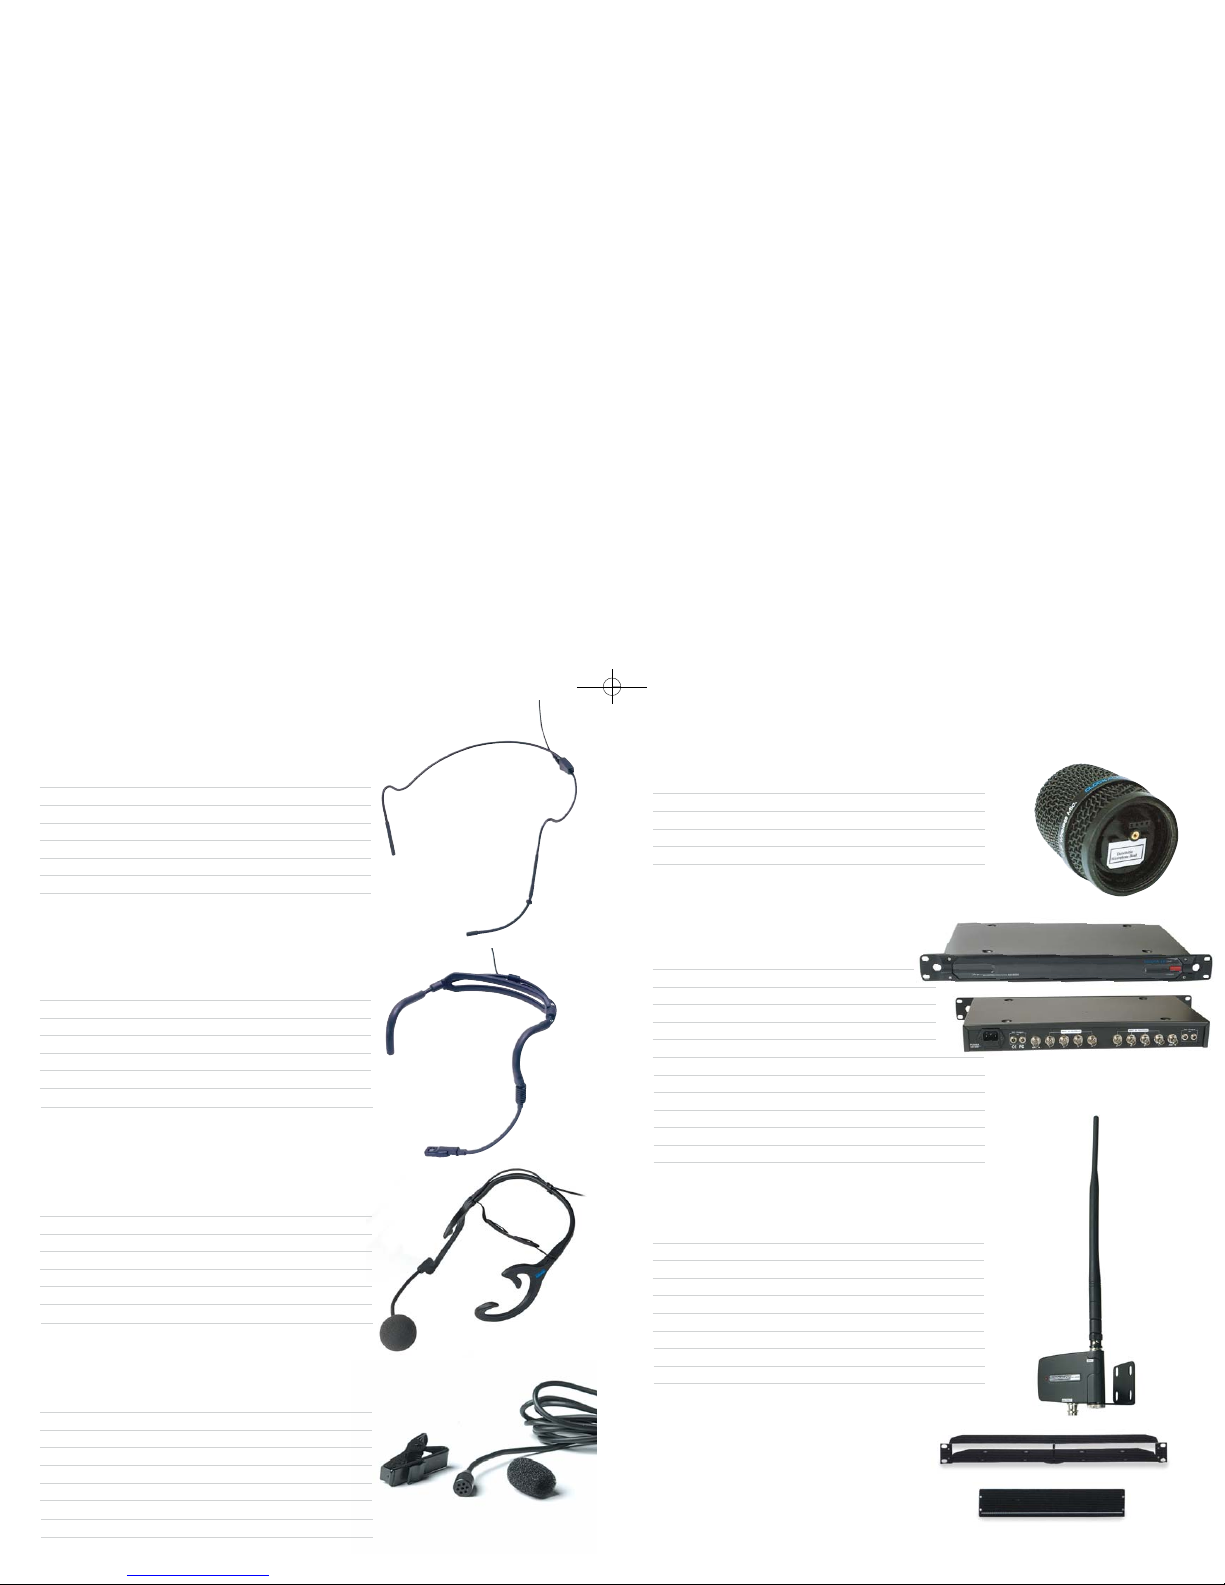
5.3 CMH 2000 Microlightweight Headworn Boom Microphone
Type Condenser (Back Electret)
Polar Diagram Omni Directional
Frequency Response 30Hz - 18KHz
Impedance 4.4K Ohms
Sensitivity -33dB @ 1KHz (0dB = 1VPa)
Termination TAF4 Tini-Q 4 Pin connector
Finish Black and Beige
5.4 HW1500 Lightweight Headworn Boom Microphone
Type Condenser (Back Electret)
Polar Diagram Bi-directional Close Talking
Frequency Response 300Hz - 5KHz
Impedance 1K Ohms
Sensitivity -44dB @ 1KHz (0dB = 1VPa)
Termination TAF4 Tini-Q 4 Pin connector
Finish Black
5.5 HW1200 Lightweight Headworn Boom Microphone
Type Condenser (Back Electret)
Polar Diagram Cardioid
Frequency Response 50Hz - 18KHz
Impedance 680 Ohms ± 30%
Sensitivity -50dB @ 1KHz (0dB = 1VPa)
Termination TAF4 Tini-Q 4 Pin connector
Finish Black
5.6 CL4 Lavalier Omni-Directional Microphone
Type Condenser (Back Electret)
Polar Diagram Omni-Directional
Frequency Response 50Hz - 16KHz
Impedance 1K Ohms ± 30%
Sensitivity -44dB @ 1KHz (0dB = 1VPa)
Termination TAF4 Tini-Q 4 Pin connector
Finish Black or Beige
Accessories Tie clip and Foam windshield
CLOCKAUDIO
PAGE 19PAGE 18
CLOCKAUDIO
5.7 CW9000T-C Interchangeable Condenser Microphone Head
Type Condenser (Back Electret)
Polar Diagram Cardioid
Frequency Response 60Hz - 18KHz
Impedance 400 Ohms
Sensitivity -50dB (0dB = 1VPa)
5.8 AA9000 Antenna Distribution Amplifier
Carrier frequency 470-870 MHz
Antenna inputs 2 (BNC)
Antenna outputs 4 x pairs (BNC)
Output connector isolation 24dB
Nominal cascade gain 3dB
Inline antenna power 12 Volts DC 120MA
Dimensions (W) 263mm x (H) 45mm x (D) 480mm
Weight 3Kg
Rack height 1U
Finish Satin black
Power supply 4 x 12 V DC
Mains input voltage 90-264 AC 50/60 Hz
5.9 AB9000 Antenna Booster
Carrier frequency 470-870 MHz
Antenna gain 1.8dBi
Booster gain 0dB +2/-1
Antenna coverage 360 degrees
Operating voltage 12 - 18 V DC
Inline antenna power 12 Volts DC 120MA
Dimensions (W) 77mm x (H) 65mm
Antenna height 250mm
Weight 166g
RRM9000
RCP9000
5.10 RRM9000 Rack mount for 2 Receivers and
RCP9000 Cover Panel for vacant slot (when only
1 receiver mounted)
11745 Clockaudio R-M Manual 18/12/08 11:32 Page 19
Page 11

6. GENERAL INFORMATION
• Always make all other connections before plugging the
DC power supply into an AC power outlet
• Do not keep the devices in places of very high temperature
or humidity
• For optimum reception and maximum operating distance aim
for open space between receiver and transmitter
• For optimum performance use devices at least 50cm away
from known interference sources
• For best pick up pattern grip the hand held microphone
around the middle of its body
• Remove the batteries when transmitters are not likely to be
used for some time
• When replacement batteries are needed always change both
for new ones at the same time
11745 Clockaudio R-M Manual 18/12/08 11:30 Page 1
 Loading...