

Page 1
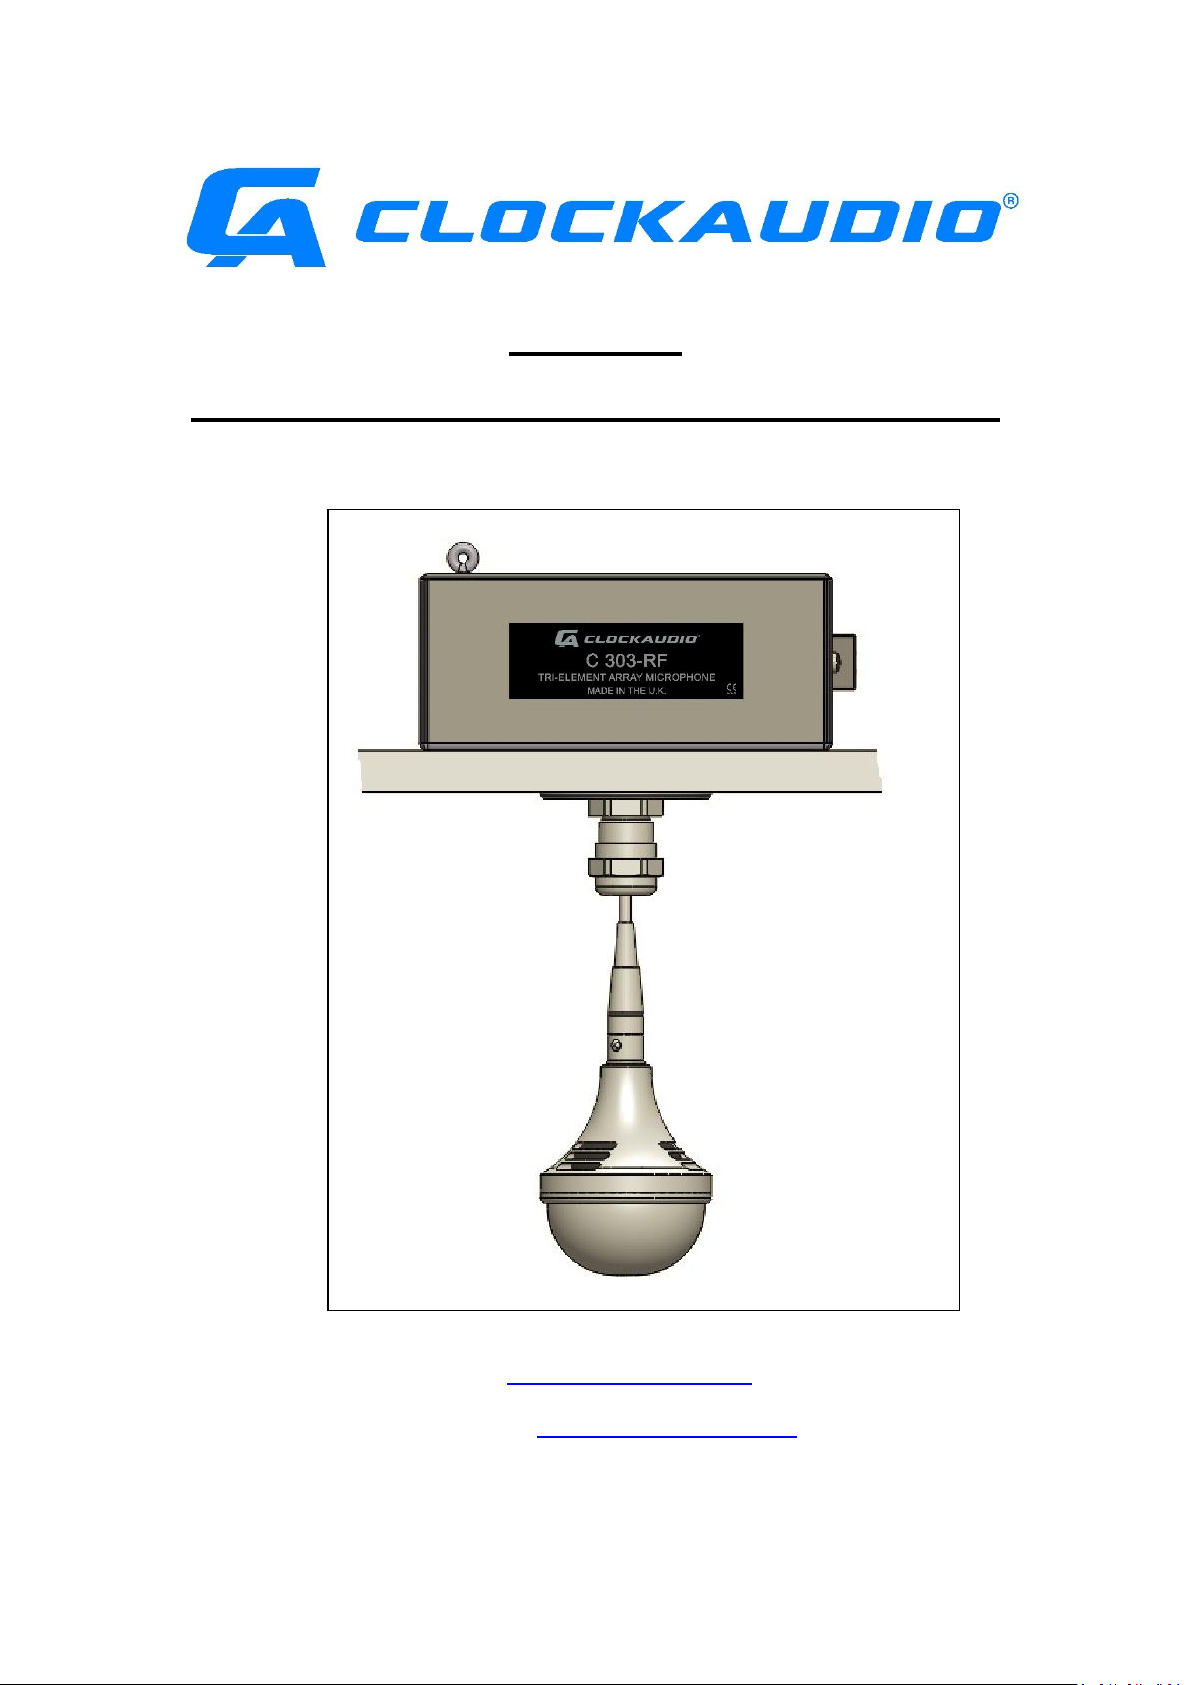
C 303-RF
www.clockaudio.com
email: [email protected]
Clockaudio Ltd, Wellington Gate, Silverthorne Way,
Waterlooville, Hampshire, PO7 7XY, England
Tri-element Array Microphone Instructions
1
Page 2

CONTENTS
1. C 303-RF Installation Instructions...................................................... 3
1.1. Packaging .................................................................................... 3
1.2. Installation ................................................................................... 3
1.3. Electrical connections .................................................................. 4
2. Safety ................................................................................................ 6
3. Product Warranty .............................................................................. 7
4. Disposal of Unit ................................................................................. 8
2
Page 3
1. C 303-RF Installation Instructions
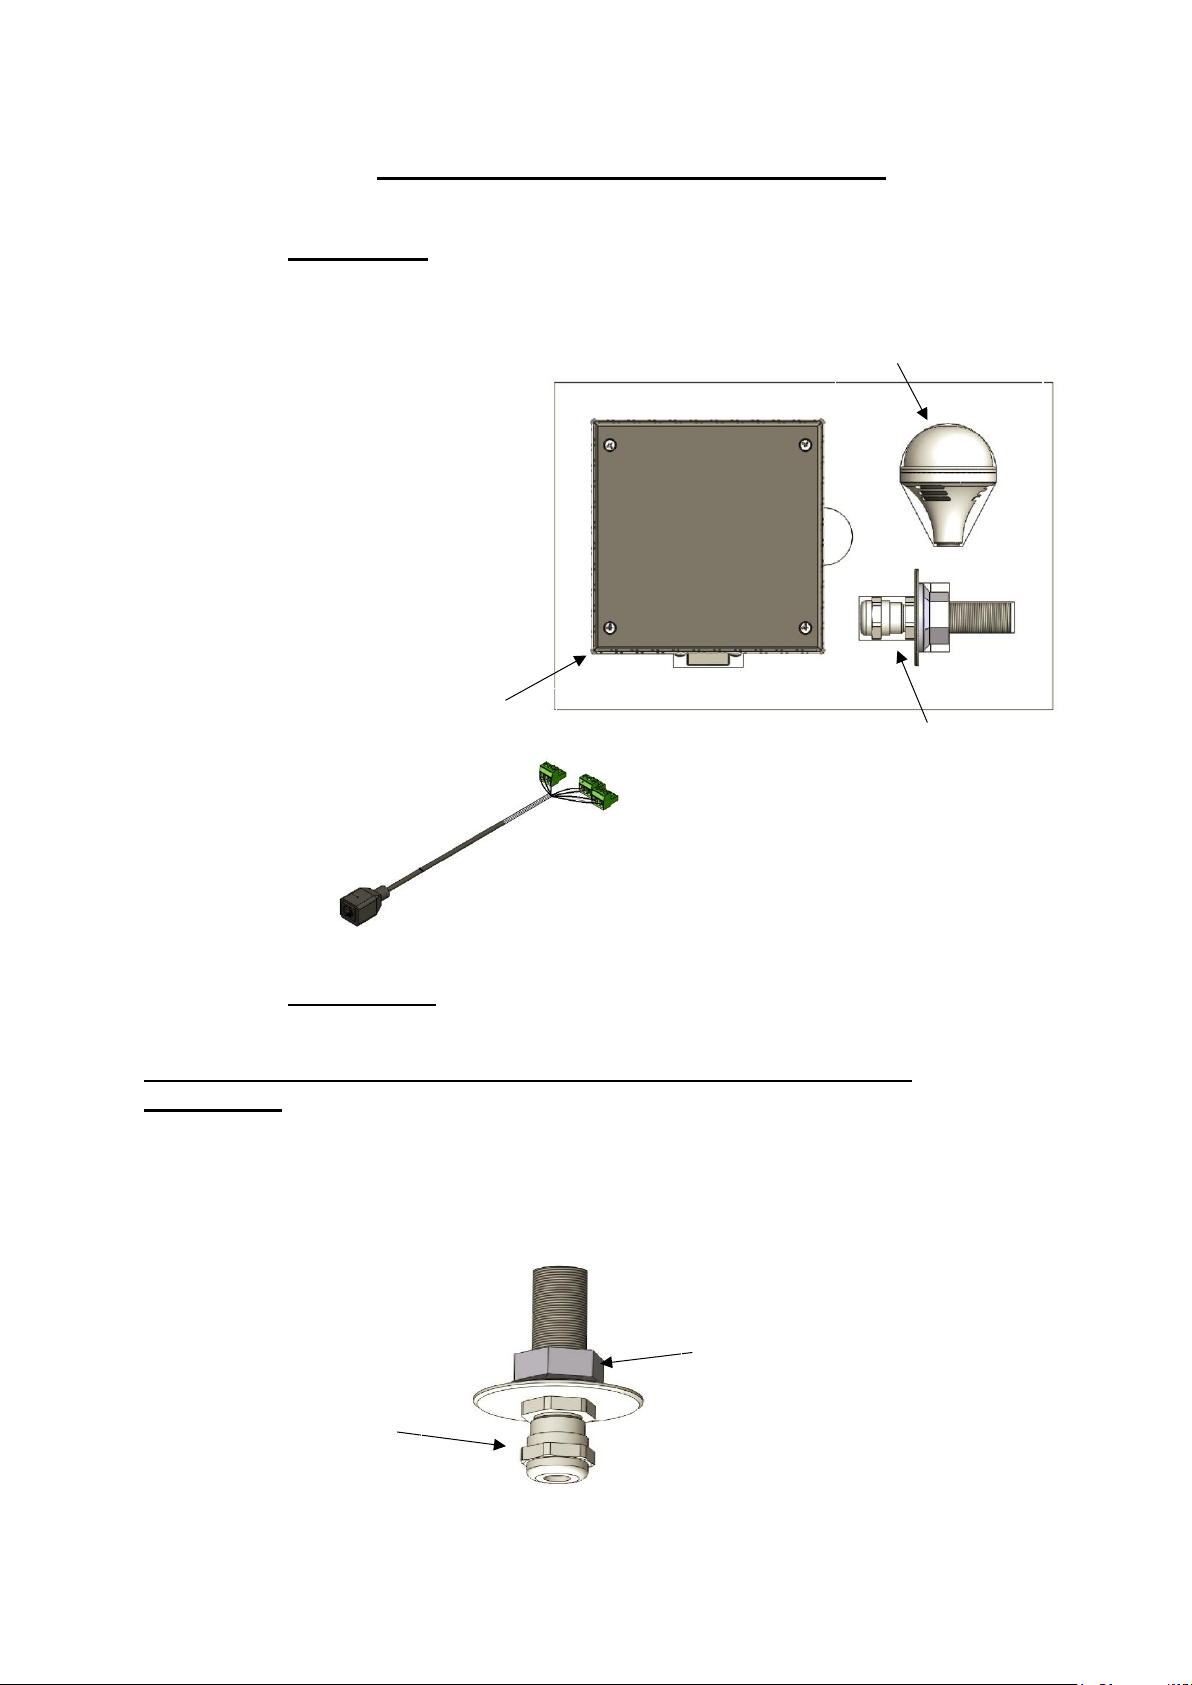
Enclosure
Cable gland
C303 Microphone
Link cable
Flanged nut
Cable gland
1.1. Packaging
The C 303-RF packaging contains
An enclosure containing
a 2.5m (8ft) cable
1 x Link cable
1 x C303 microphone
1 x Cable gland
1 x Safety Harness kit
consisting of cable with
hook and lock.
M3 Eyelet & Washer
1.2. Installation
NOTE: It may be easier to remove the ceiling tile to install the C 303
microphone
1. Drill a 16.5mm / 0.65” diameter hole in the ceiling tile.
2. Remove the flanged nut from the cable gland.
3
Page 4
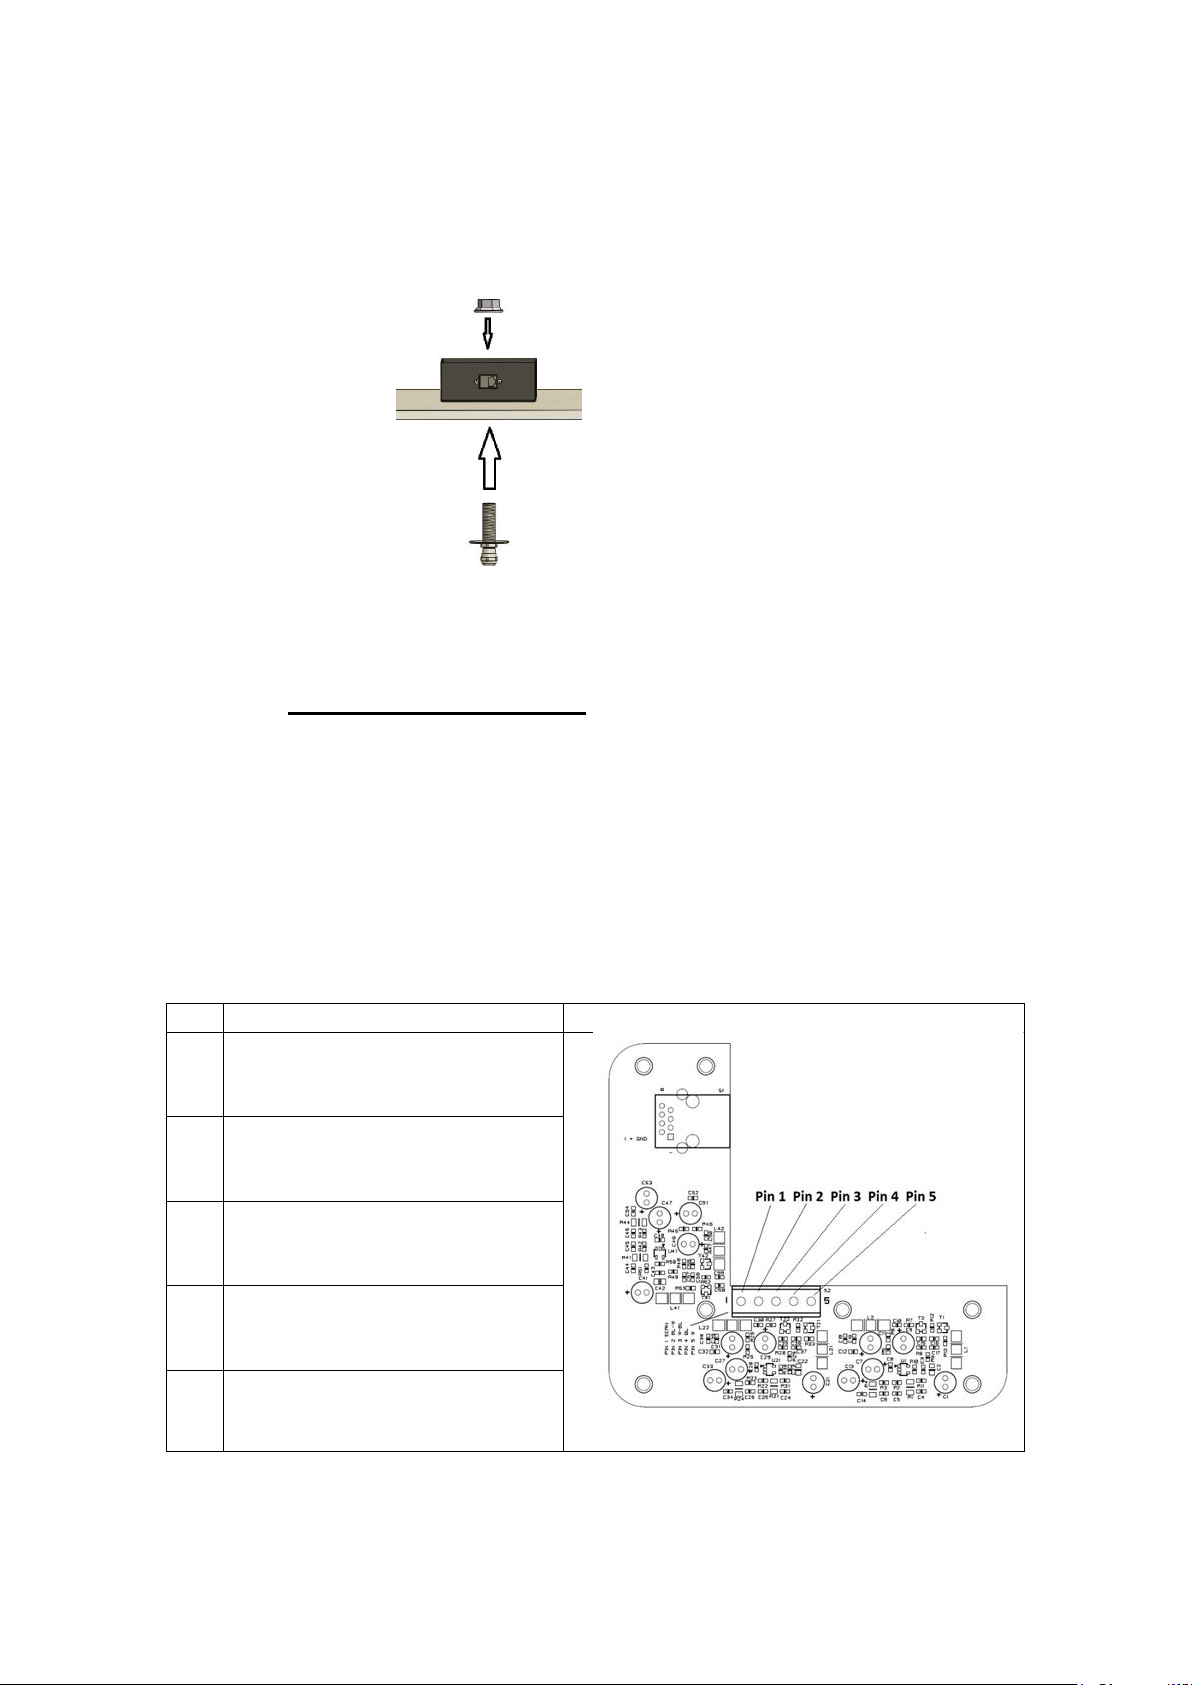
3. Open top lid of the enclosure and remove the microphone cable.
Pin
Connection
1
SCRN (Screen) Ground (all)
2
Black Phase – (all)
3
Red Phase +
4
Yellow Phase +
5
White Phase +
4. Position the hole in the bottom of the enclosure over the previously drilled
hole in the ceiling.
5. Insert the cable gland, threaded portion, up through ceiling tile and enclosure.
6. Refit the flanged nut to secure the enclosure to the tile.
1.3. Electrical connections
1. Pass the supplied multicore cable back up through the locking grommet and
pull the cable through until the desired height of the microphone is obtained.
2. Lock the cable in place by rotating the locking grommet clockwise.
3. Coil and loop the spare cable inside the C303-RF enclosure to allow for
further height adjustment if required.
4. Connect the cable to the PCB Phoenix block connector details are shown
below:
4
Page 5
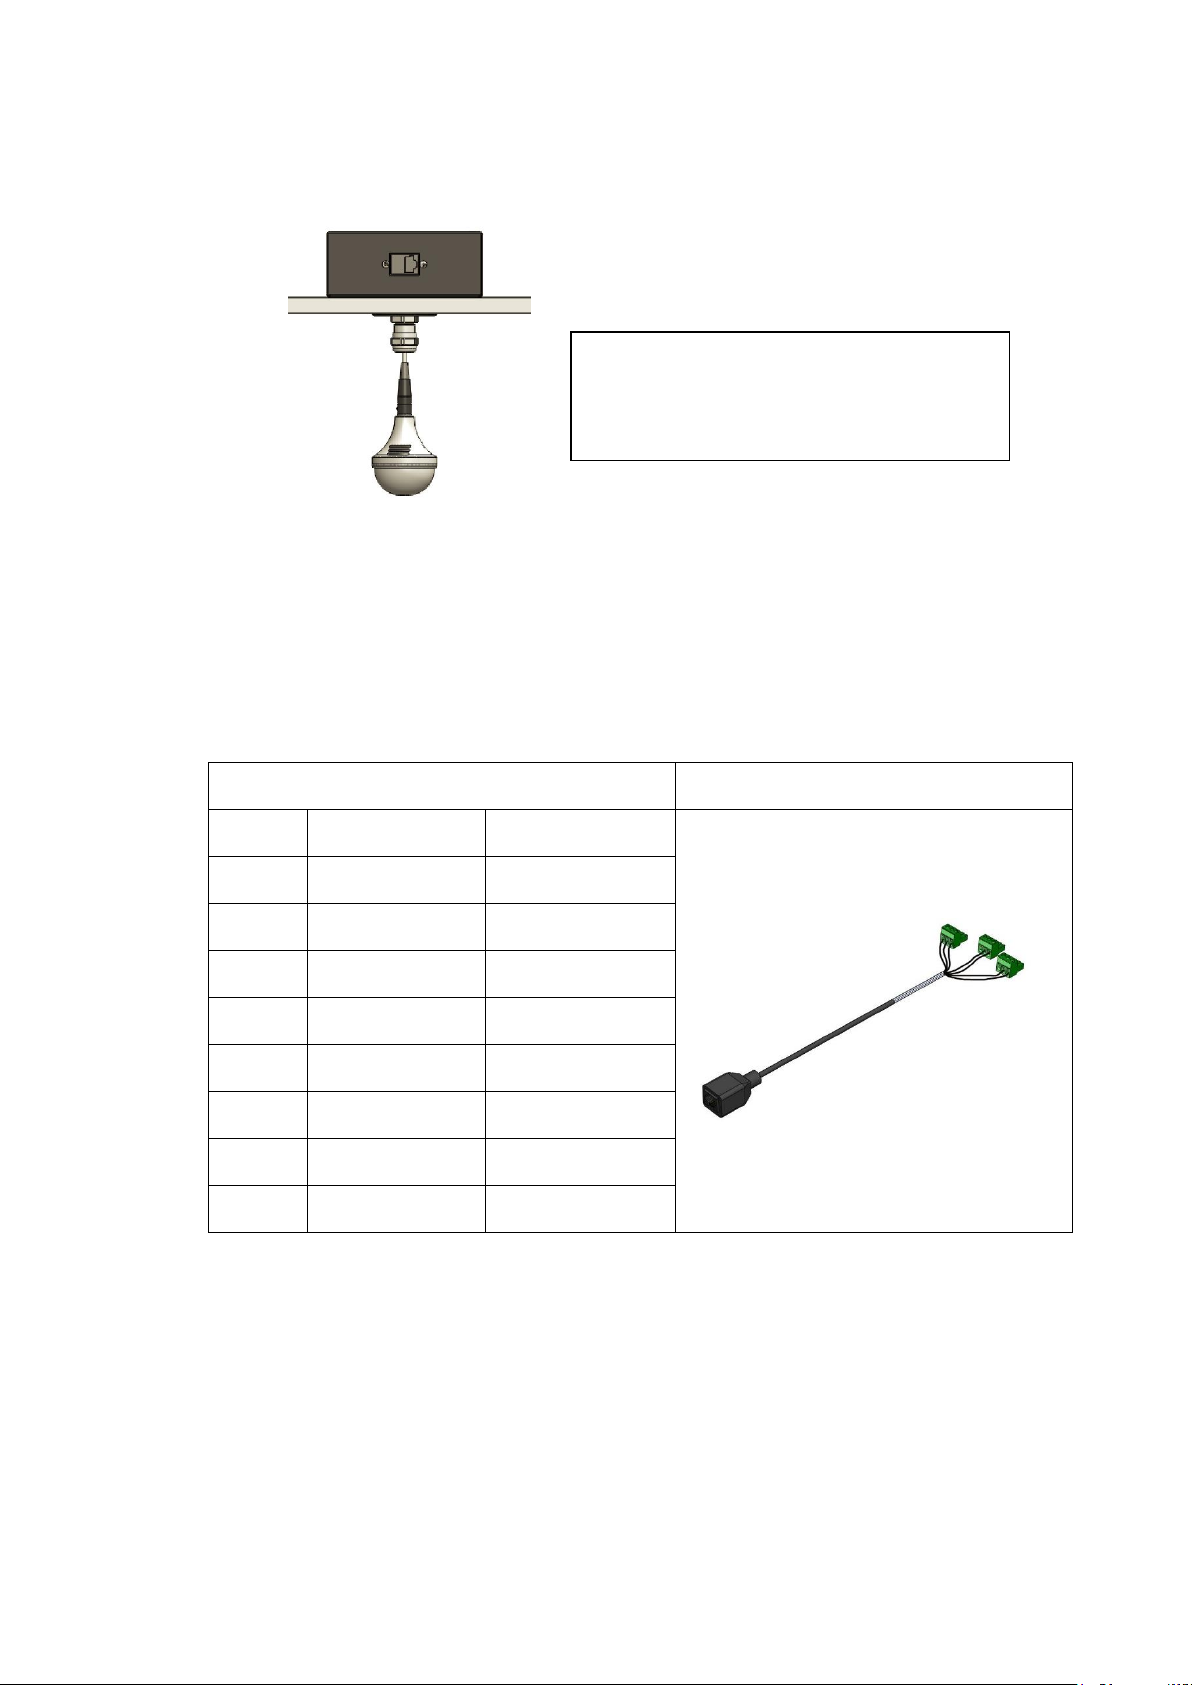
5. Push / connect the microphone to the Mini XLR connector.
Link cable colour code
Link cable
RJ 45
Pin No.
Cable colour
Function
1
ORANGE/WHITE
MIC 3 PHASE +
2
ORANGE
MIC 3 PHASE -
3
GREEN/WHITE
MIC 2 PHASE +
4
BLUE
MIC 1 PHASE +
5
BLUE/WHITE
MIC 1 PHASE -
6
GREEN
MIC 2 PHASE -
7
BROWN/WHITE
NOT USED
8
BROWN
GROUND
Warning: Do not pull on the cable once
installation has been completed
as there is a potential for
damage to a ceiling tile.
1 2 3
6. Connect a straight wired cable (CAT 5, 5e or 6) fitted with an RJ45 to RJ45
Male connector observing 568B wiring standard.
7. Plug the RJ45 into the socket on the ceiling enclosure. 9-48V Phantom
power is required.
8. Connect the other end of the cable to your preferred audio device (mixer /
DSP). A link cable is supplied for connection to DSP.
5
Page 6
2. Safety
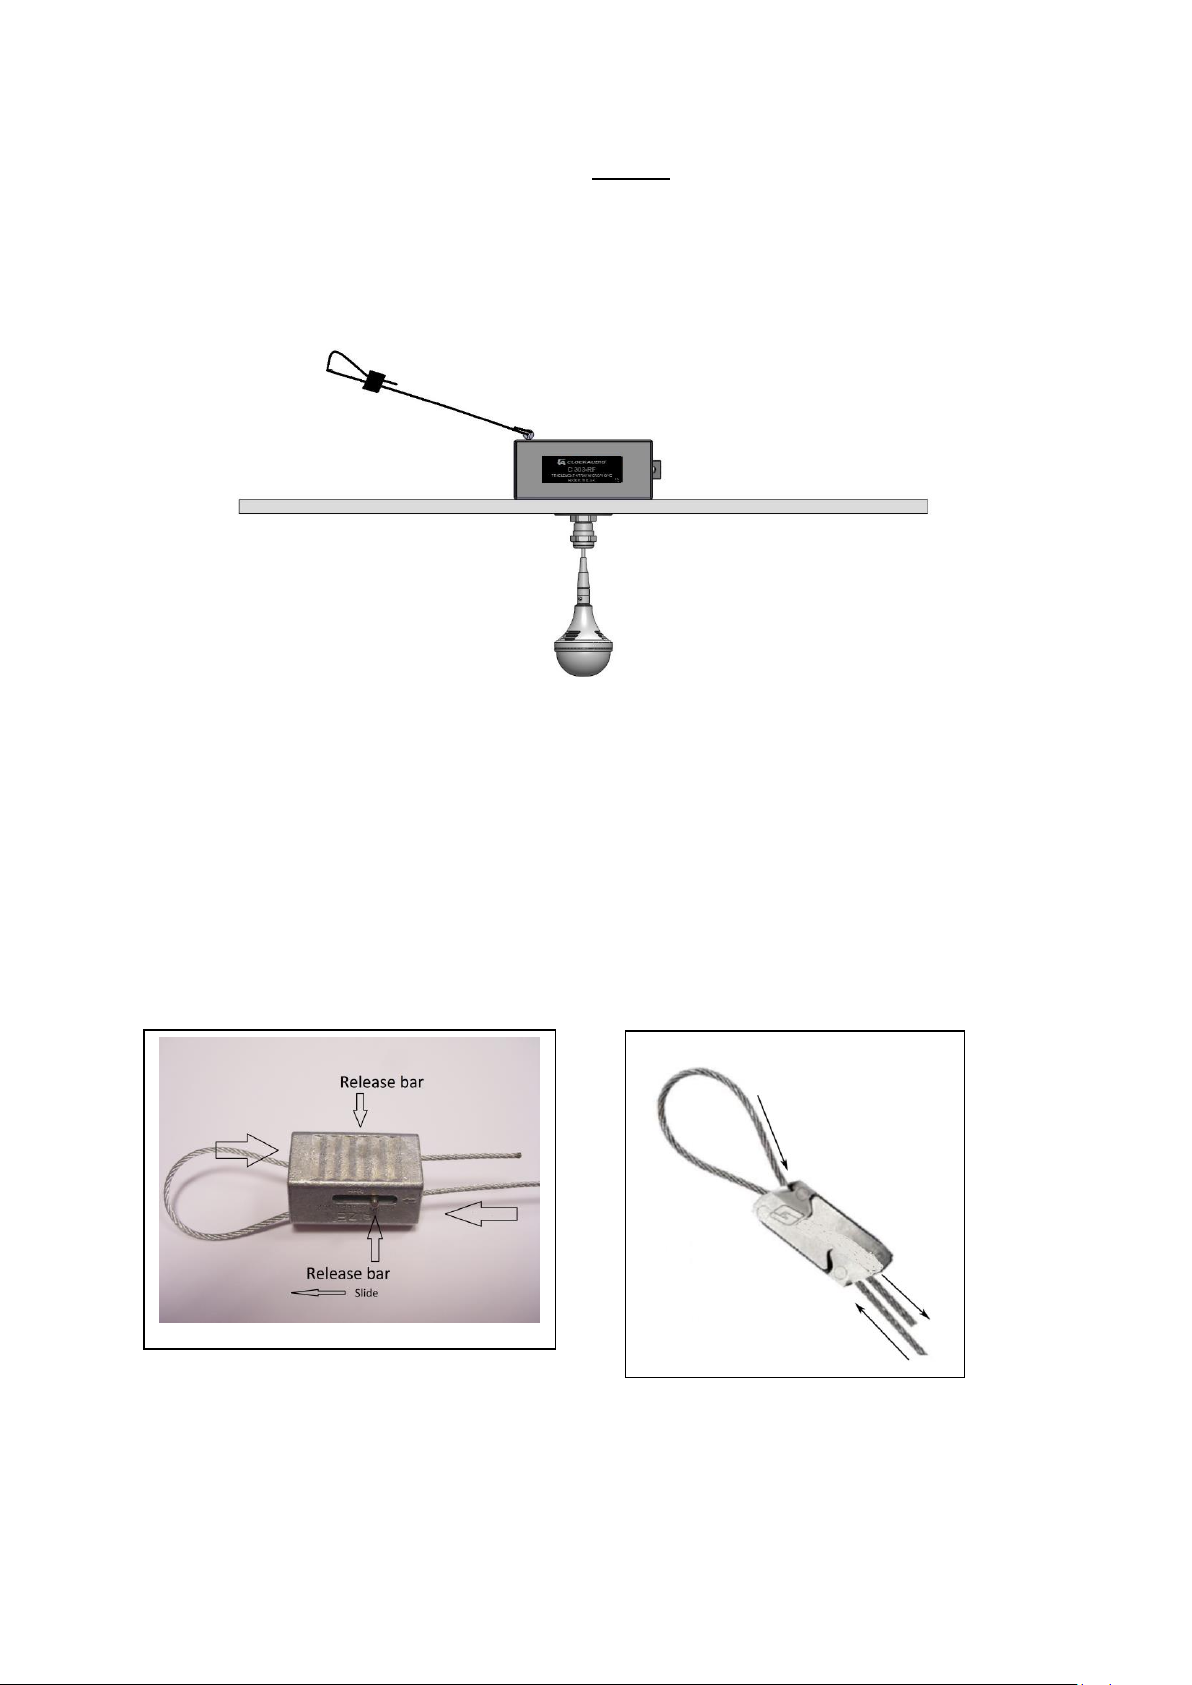
IMPORTANT: For safety reasons the completed installation should be secured to a
ceiling truss or any structure capable of taking 3Kgs (7lbs) this includes the weight of
a ceiling tile.
Replace one of the 4 enclosure lid screws with the supplied M3 eyebolt and washer.
Attach the supplied safety harness hook to the eyebolt on top of the C 303 metal
case and insert the free end of the cable through the entrance hole on the gripper.
Attach the other end of the safety cable to a fixed secure structure.
Note: There are 2 types of cable grippers that may be supplied. Both types use same
method of cable tensioning and locking. Pass the cable through the gripper as
shown below, loop the cable over a secured structure then pass the cable back
through the other hole in the gripper and slide / tension the cable through the gripper.
6
Page 7

3. Product Warranty
CLOCKAUDIO IS NOT RESPONSIBLE FOR INCIDENTAL OR CONSEQUENTIAL DAMAGES INCLUDING
LABOUR COSTS FOR REMOVING AND REPLACING DEFECTIVE PRODUCTS OR PARTS. THIS DOES NOT
AFFECT YOUR STATUTORY RIGHTS.
Thank you for purchasing a Clockaudio product. We are confident that this product will give you many
years of trouble free operation and is backed up with a 2 year warranty.
This product is guaranteed for 24 months from the date of purchase. Any defect that arises due to
faulty materials or workmanship will either be replaced, or repaired free of charge by the agent from
whom you purchased the unit. Please note charges will be incurred on any product returned for
service / repair not in warranty or has been subject to customer abuse or incorrect wiring.
The guarantee is subject to the following provisions:
The warranty does not cover accidental damage, misuse, cabinet parts, knobs, batteries or
consumable items. Any product returned to Clockaudio failing to meet the terms listed will
incur a repair and postage charge.
The product must be correctly installed and operated in accordance with the instructions
supplied with the product.
Unauthorised modifications and alterations to the original specifications will render the
warranty void
The product must be used for the sole purpose that it was designed for.
The warranty given is strictly with the original owner and becomes invalid if the product is
resold or becomes damaged by inexpert repair.
Product purchased outside of the countries served by Clockaudio designated / approved
Agents are not covered by the warranty.
Specifications / improvements are subject to change without notice.
Clockaudio disclaims any liability for incidental or consequential damages.
The warranty is in addition to and does not diminish your statutory legal rights
As part of a continuous product improvement programme we reserve the right to change
specification without prior notice.
7
Page 8

4. Disposal of Unit
Clockaudio Limited,
Wellington Gate,
Silverthorne Way,
Waterlooville,
Hampshire, PO7 7XY,
United Kingdom
Clockaudio North America Inc.
2891 Rue du Meunier,
Unit 103, Vaudreuil Dorion,
Quebec, J7V 8P2,
Canada
Clockaudio Pte. Ltd
BizTech Centre,
Unit #01-02, 627A Aljunied
Road, Singapore 389842
Tel: +44 23 92251193
Tel: + 1 450 4249797
Fax: + 1 450 4243660
Tel: +65 67484738
Fax: +65 67484428
© 2018, Clockaudio Limited
Rev 1.3 201906
At the end of the life of this equipment, dispose of equipment according to local
regulations
For more information and advice on Clockaudio products please look on Clockaudio
website: www.clockaudio.com
8
 Loading...