

Page 1
Installation Guide
M100/M150 – CL300/CL400 – CK100/CK500
__________________________________________________________________________________________
Clivus Multrum International AB
Phone: +46 8 501 642 29
VAT-nummer: SE556095862001
Box 2090
Web: www.clivusmultrum.eu
IBAN: SE02 1200 0000 0136 83600195
19102 Sollentuna
Sweden
E-mail: [email protected]
Swift: DABASESX
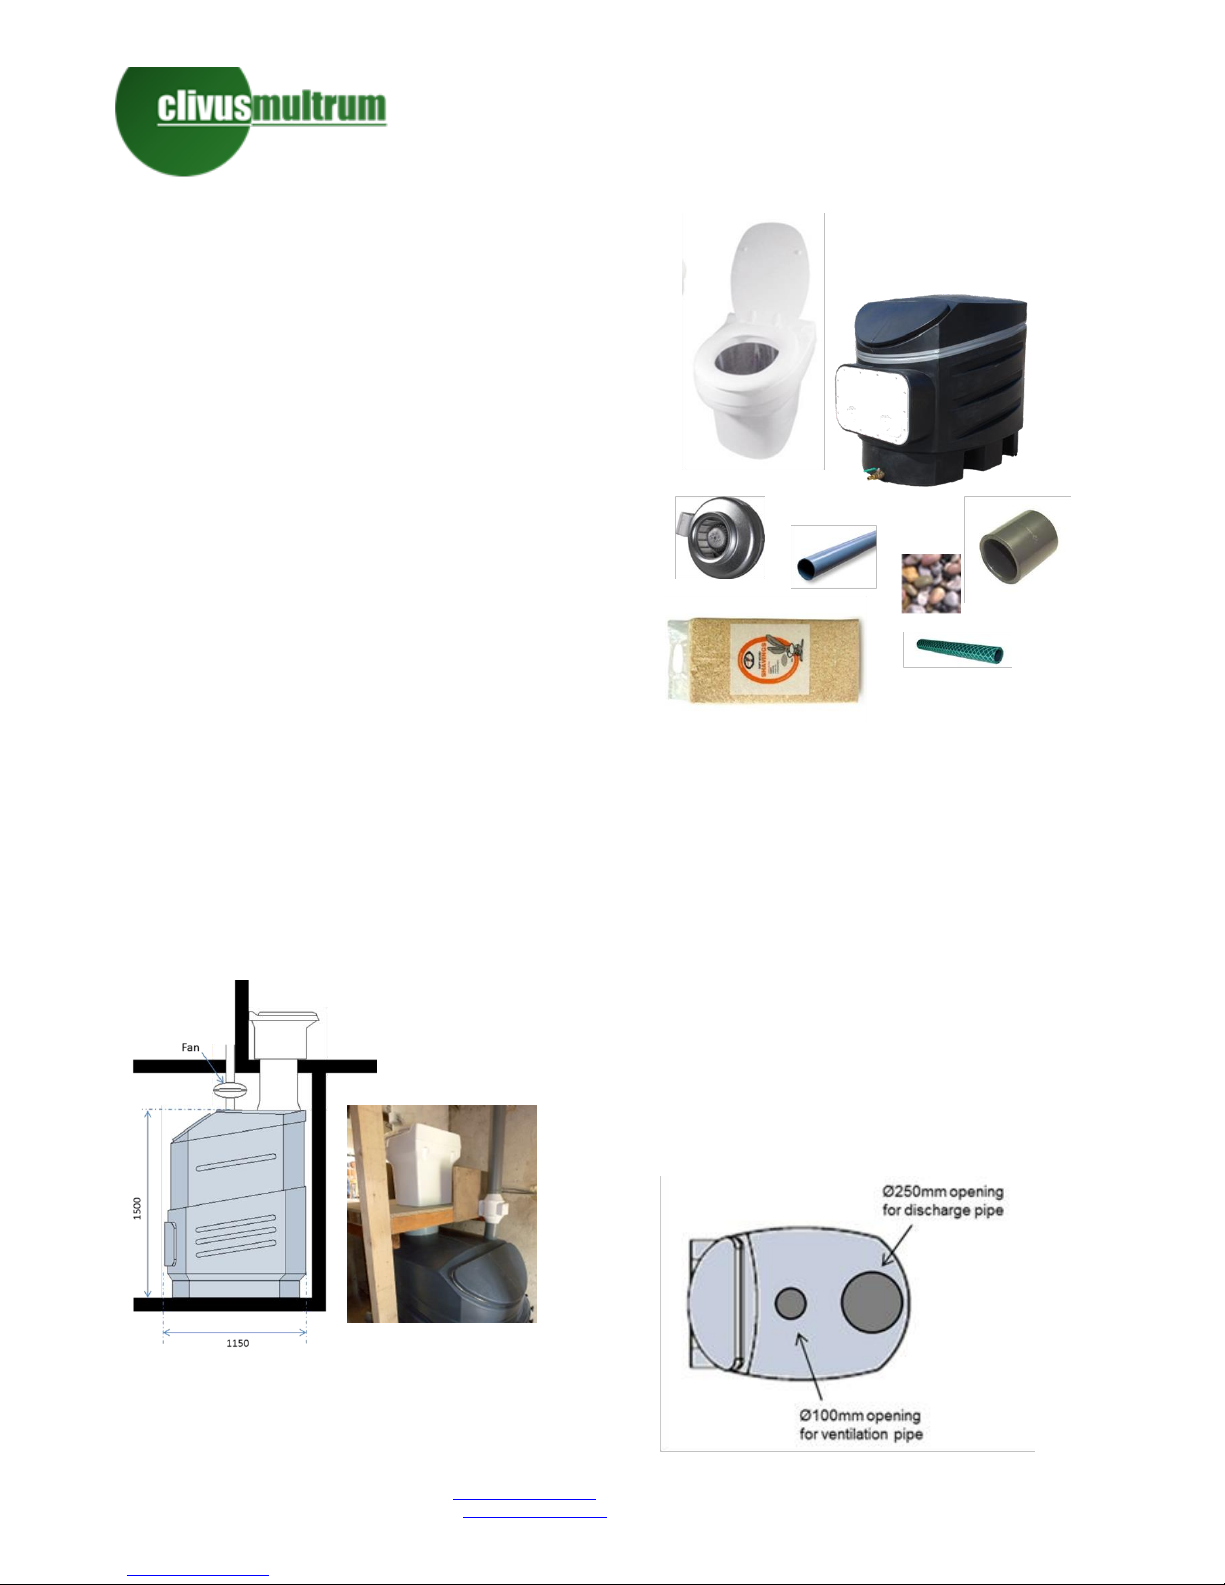
Material required:
- 1x M100 (or M150) composting tank
- 1x CL200/CL400 floor-mounted (or
CL300/CL310 bench-mounted) toilet
- 1x CK100 (or CK500) ventilator
- Ø100mm ventilation pipe & clamps
- Gravel or pebbles (handful)
- Wood chips (~150 litres)
- Ø250mm discharge pipe
- Garden hose (optional)
Step 1: Planning & Preparation
The below diagram shows a schematic of a
typical installation.
The fan can be put directly above the tank
or at the top of the ventilation pipe. The
toilet has to be placed right above the
composting tank.
For compost removal, it is important that
access to the white hatch is possible. There
are no extra space requires along the other
sides.
It is possible to put the toilet immediately
above the tank without using a discharge
pipe.
Step 2: Cutting pipe openings
The below diagram shows the top of the
composting tank. Clivus Multrum delivers
the tanks without the openings for the
ventilation and discharge pipes to allow
maximum flexibility when installing.
The typical placement of the pipe openings
is indicated with the circles. However, if
placement requires it is not a problem to
cut the openings elsewhere on the top of
the tank. The ventilation opening can also
be placed at the top end of the side of the
tank.
The openings can be cut with a sharp knife
Page 2
Installation Guide
M100/M150 – CL300/CL400 – CK100/CK500
__________________________________________________________________________________________
Clivus Multrum International AB
Phone: +46 8 501 642 29
VAT-nummer: SE556095862001
Box 2090
Web: www.clivusmultrum.eu
IBAN: SE02 1200 0000 0136 83600195
19102 Sollentuna
Sweden
E-mail: [email protected]
Swift: DABASESX
of a saw.
Step 3: Placement of composting tank
The composting tank is self-supporting and
can be placed directly on the floor without
additional support or isolation.
The picture shows an
example of how the tank
can be placed.
Note that the tank is not
strong enough to support
the toilet. The toilet needs
to be supported by the
floor or bench.
Step 4: Discharge pipe (optional)
Whether a discharge pipe is necessary
depends on the placement of the toilet
fixture relative to the tank. As long as the
toilet is vertically above the tank there is
no limitation for the length of the discharge
pipe. It is not problem to place the
compost tank in the basement for a toilet
on the upper floor.
Most important is to fix the discharge pipe
such that it does not risk falling inside the
composting tank.
Step 5: Toilet placement
CL300/CL310: Place the toilet on a bench
to support it.
CL200/CL400: Place the toilet on the floor.
Ensure that the toilet’s discharge is fitted
inside the discharge pipe or composting
tank opening.
Step 6: Ventilation
Ventilation is important for a healthy
composting process, and to avoid foul
odours to enter the bathroom.
CK100: Cut the ventilation pipe at the
place where the ventilator shall be placed.
Join the pipe and ventilator on both sides.
CK500: Fix the ventilator to the top of the
pipe.
Ensure a good seal to avoid false air draw.
Place, fix and seal the ventilation pipe onto
the opening on the tank.
CK100: Connect the fan to a circuit breaker
according to the wiring diagram that can
be found on the inside of the junction box.
Step 7: Garden hose (optional)
For excess leachate removal connect a
garden hose to the tap at the bottom of the
tank.
Step 8: Commissioning
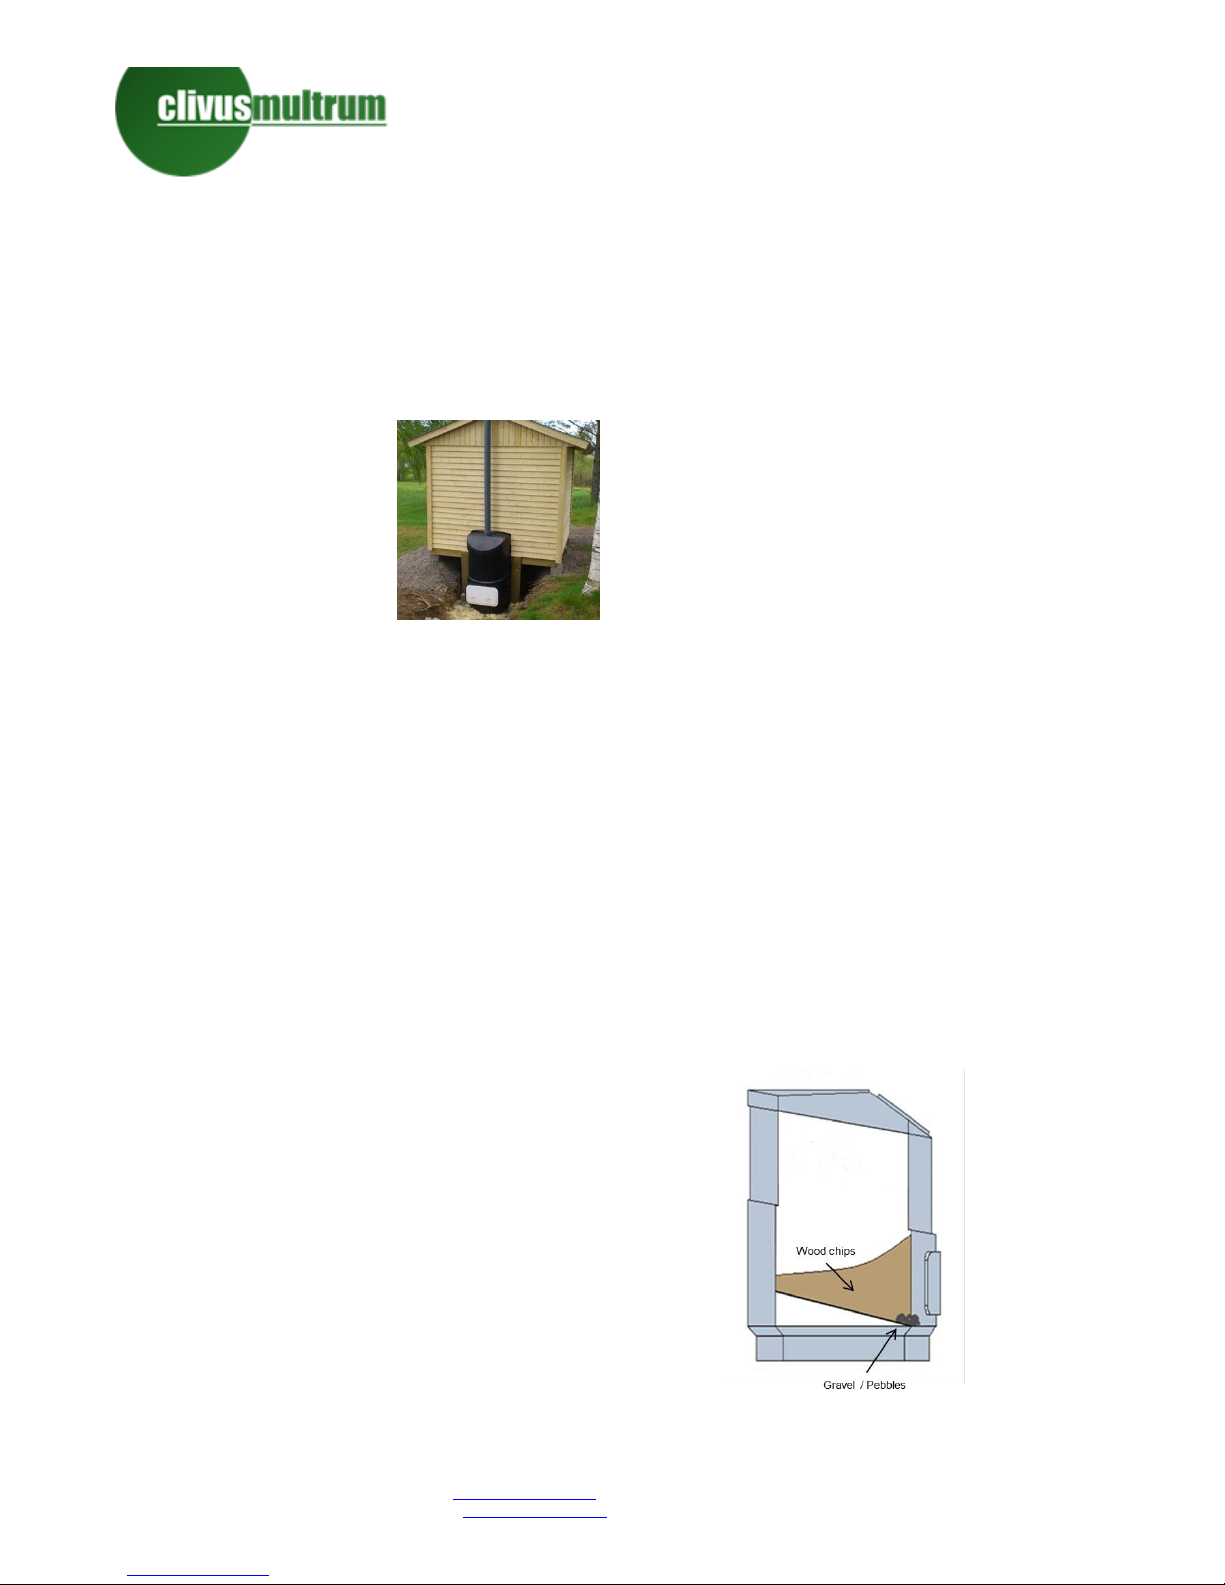
Through the white hatch, place the floor
plate in the tank so that the drain holes are
on the side of the hatch.
To avoid the drain holes from clogging up,
place a hand full of gravel or pebbles so
that they are covered.
Using the top hatch, fill the tank with
approximate 150 litres of wood chips as
shown in the below drawing.
 Loading...