

Clippasafe 70-5 Socket Protector User Manual
IMPORTANT - READ INSTRUCTIONS CAREFULLY
AND KEEP FOR FUTURE REFERENCE
Socket Protector
Instructions for Installation and Use
TOOLS REQUIRED - Insulated screwdriver
ELECTRICAL SAFETY
This product is designed to be used with BSI approved UK style three pin electric wall mounted sockets,
switched or unswitched. It is not suitable for use with surface mounted pattress boxes or for use outdoors.
There is no need to disconnect the mains supply, so long as the Socket Protector is used with a correctly
maintained BSI approved double or single wall socket.
When working near electricity always take good care. If in any doubt consult a qualified electrician.
7
2
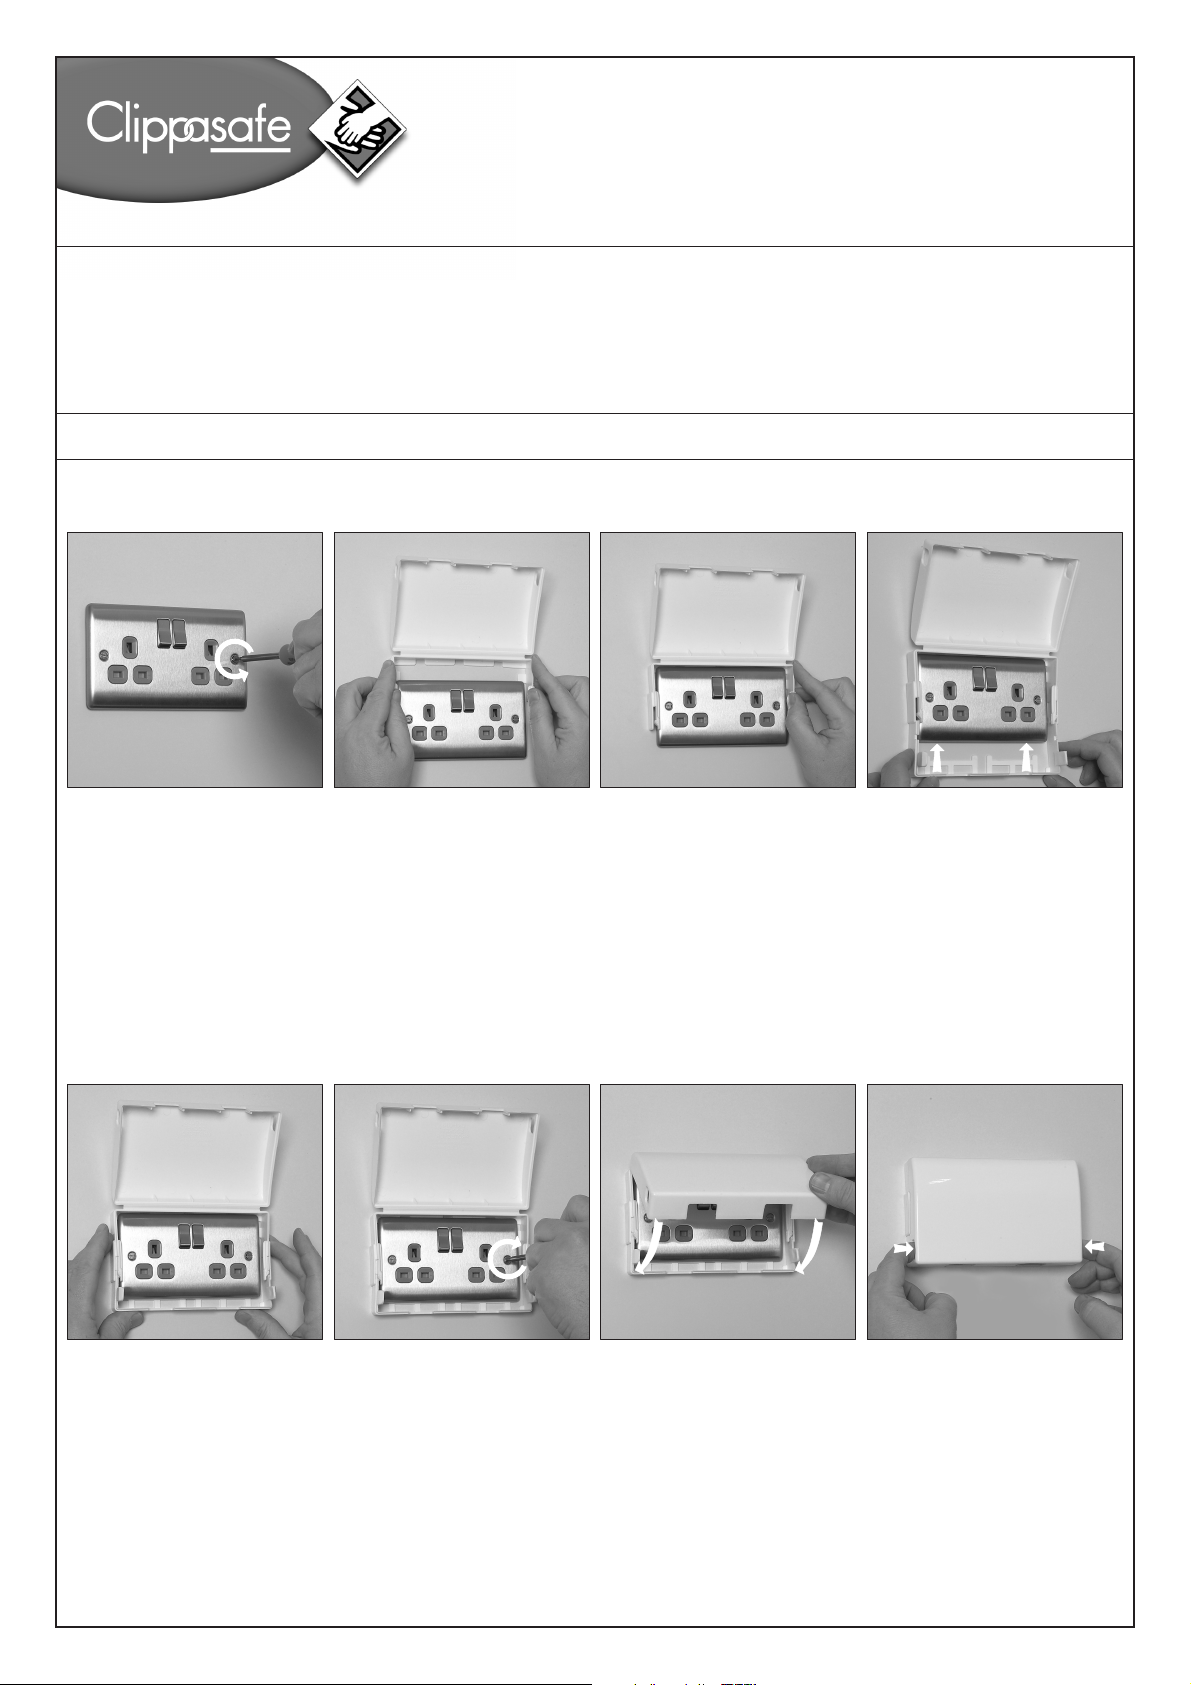
Installation
1. Select the wall socket
you intend to protect,
power off the switches
and remove any plugs in
use. Loosen the screws
on the socket faceplate
until a gap of 4mm, or as
much as is needed to
allow the Socket Protector
frame to slide in between
the faceplate and the wall.
2. Slide the upper part of
the Socket Protector
frame down between the
wall and the socket
faceplate.
3. Ensure that the lugs
in the top of the Socket
Protector frame slide
fully down behind the
top edge of the socket
faceplate.
4. Keeping the lower part
of the frame in position,
slide the bottom part of
the Socket Protector frame
up between the wall and
the socket faceplate.
Guide the side walls into
the locking mechanisms
on each side of the top
frame ensuring that a
portion of the bottom lugs
fit behind the faceplace.
5.Close the top and
bottom frames together
until both side catches
click and lock into place.
For many socket faceplates
the Socket Protector may
appear slightly oversized,
however the Socket
Protector is designed to
accommodate all faceplates
including the largest
currently available.
6. Retighten the screws
on the socket faceplate.
Ensure that the Socket
Protector frame is secured
firmly all round between
the wall and the socket
faceplate.
7. Check that the Socket
Protector closes and
locks. If not, loosen the
faceplate screws, check
that the top and bottom
parts of the frame are
firmly locked together,
and adjust the position of
the frame between the
wall and socket faceplate.
Then retighten the screws.
8. To open the Socket
Protector, press the
buttons on each side
and raise the front cover.
1
5
3 4
6 8
Clippasafe Ltd.,
Lanthwaite Road, Clifton,
Nottingham. NG11 8LD. England.
Fax: 0115 984 5554
E-mail: sales@clippasafe.co.uk
Website: www.clippasafe.co.uk
Troubleshooting
In case of any difficulty with the installation or operation of your Socket Protector, please contact the Careline.
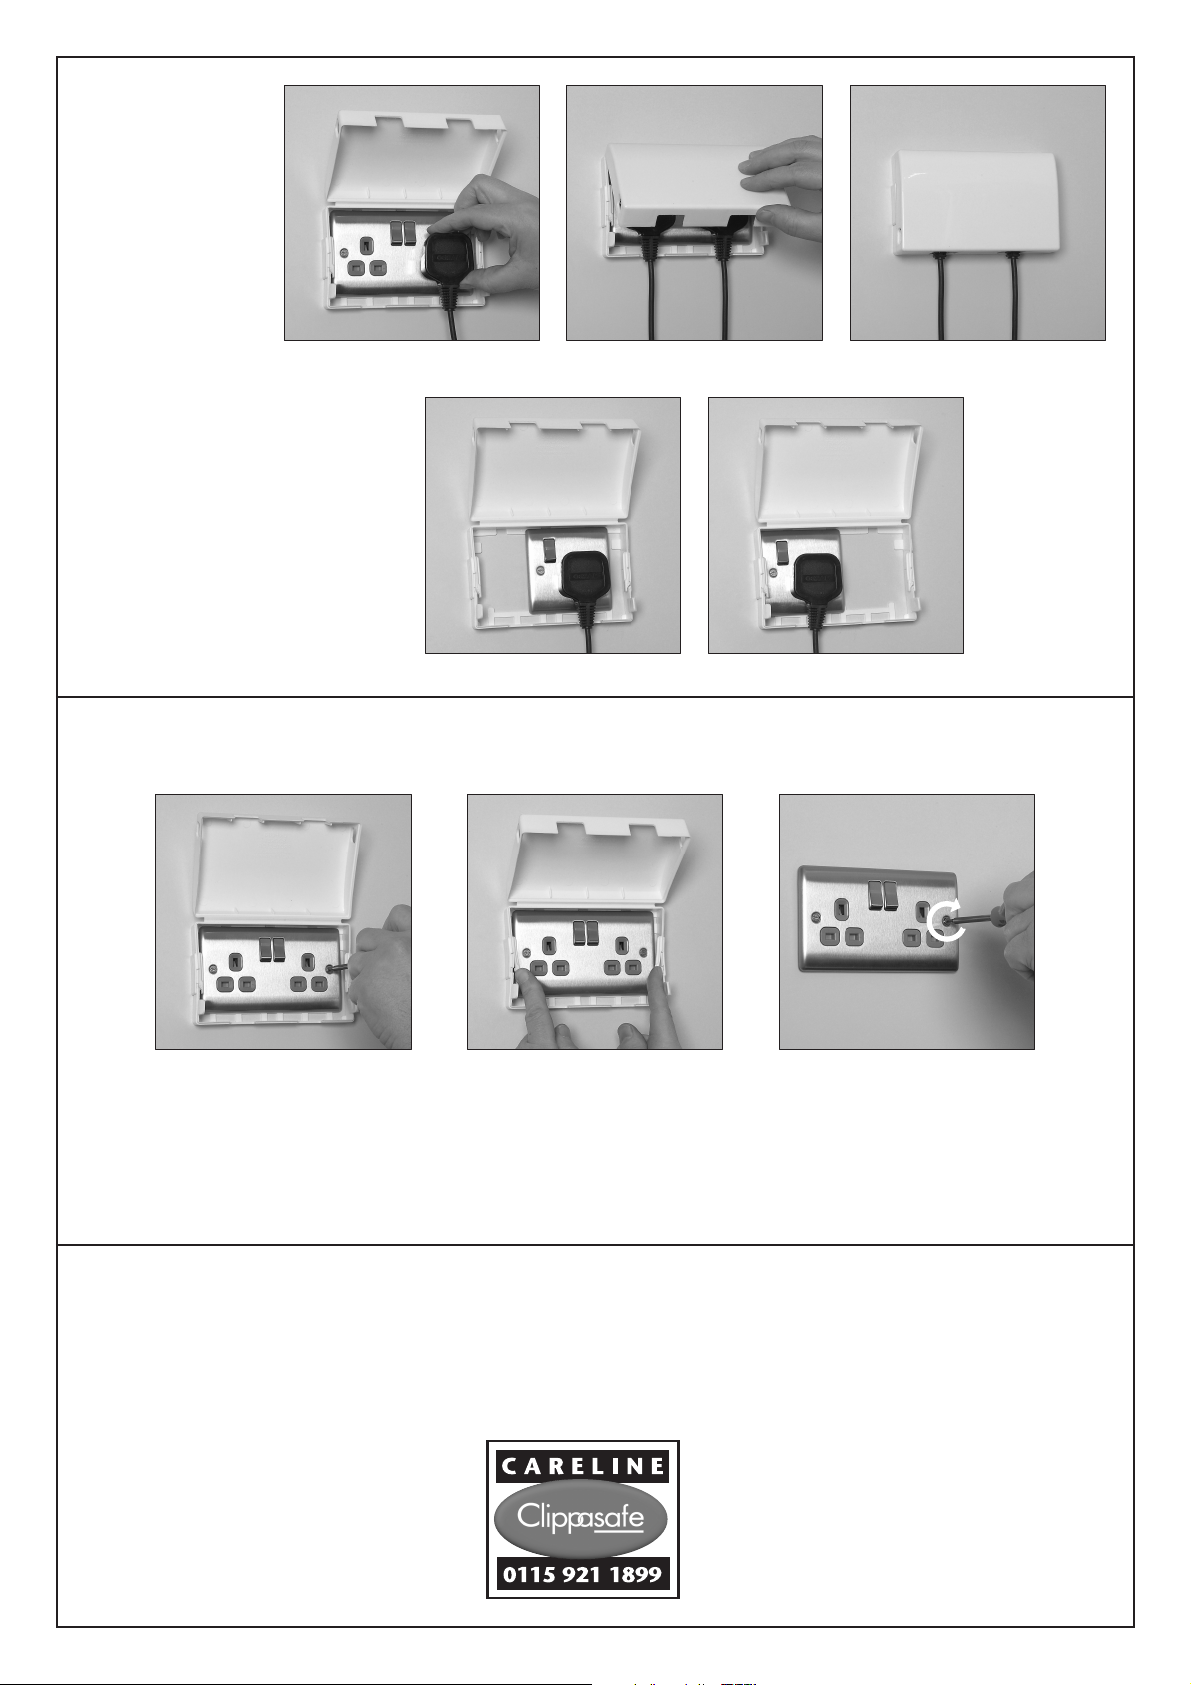
9. You can now plug
in your appliances.
Ensure that the lid
is securely closed and
locked, and that the
whole unit is firmly
secured between the
wall and socket
faceplate at all times.
Socket Protector can be fitted to
single socket faceplates as shown.
Removal
1. Loosen the screws
on the socket faceplate.
2. Release the securing
clips on both sides and
slide the upper and
lower parts of the
Socket Protector away
from the faceplate.
1
3. Retighten the screws
on the socket faceplate.
32
9
©Clippasafe Ltd 2010 - 70/5/Mar2010
CLIPPASAFE MODEL No.70/5
 Loading...