

Clint CT4 User Manual
English English
Power Supply
Placement
Cleaning
Ventilation
Setup & Usage
Repair / Service
Battery
Important – Safety precautions
Carefully read below, for your safety.
Only use the included AC/DC adapter: SUNUN (SW15-120S100V)
input AC 100-240V (50/60Hz) 0.4A, Output 12V DC / 1A. or
FLYPOWER (PS12R120K1000ED) input AC 100-240V (50/60Hz)
0.35A, Output 12V DC / 1A. Please consult your dealer if any further
questions.
Please carefully notice that the power adapter/power plug must be
easy to operate if you need to disconnect the device from power.
Device is only to be used indoors. Keep away from direct sunlight
and protect it from water and humid condition.
If you need to clean the device, make sure to remove power rst.
Only use a soft cloth for cleaning and never use solvents.
Always make sure that the device is placed where there is good
ventilation around, to avoid any kind of overheating.
Only use the accessories included with the device or specied by
the manufacturer.
Never try to open the device by yourself. All service shall be handled
by a authorized technician. Please consult your dealer.
The included remote control uses batteries.
Danger of explosion if battery is incorrectly replaced. Replace only
with the same or equivalent type.
Batteries (battery pack or batteries installed) shall not be exposed to
excessive heat such as sunshine, re or the like.
1. Your new digital TV receiver
Unpacking and setup
Congratulations with your new Clint CT4 digital TV receiver. The CT4 can be used
for either Terrestrial TV (own roof antenna) or Cable TV.
Clint CT4 is a simple and cost effective solution for those who want to receive
the new digital TV stations from various European TV providers. It is tested and
approved by Finnish Ficom and furthermore designed for user friendliness, and to
operate awlessly on the major North European TV networks.
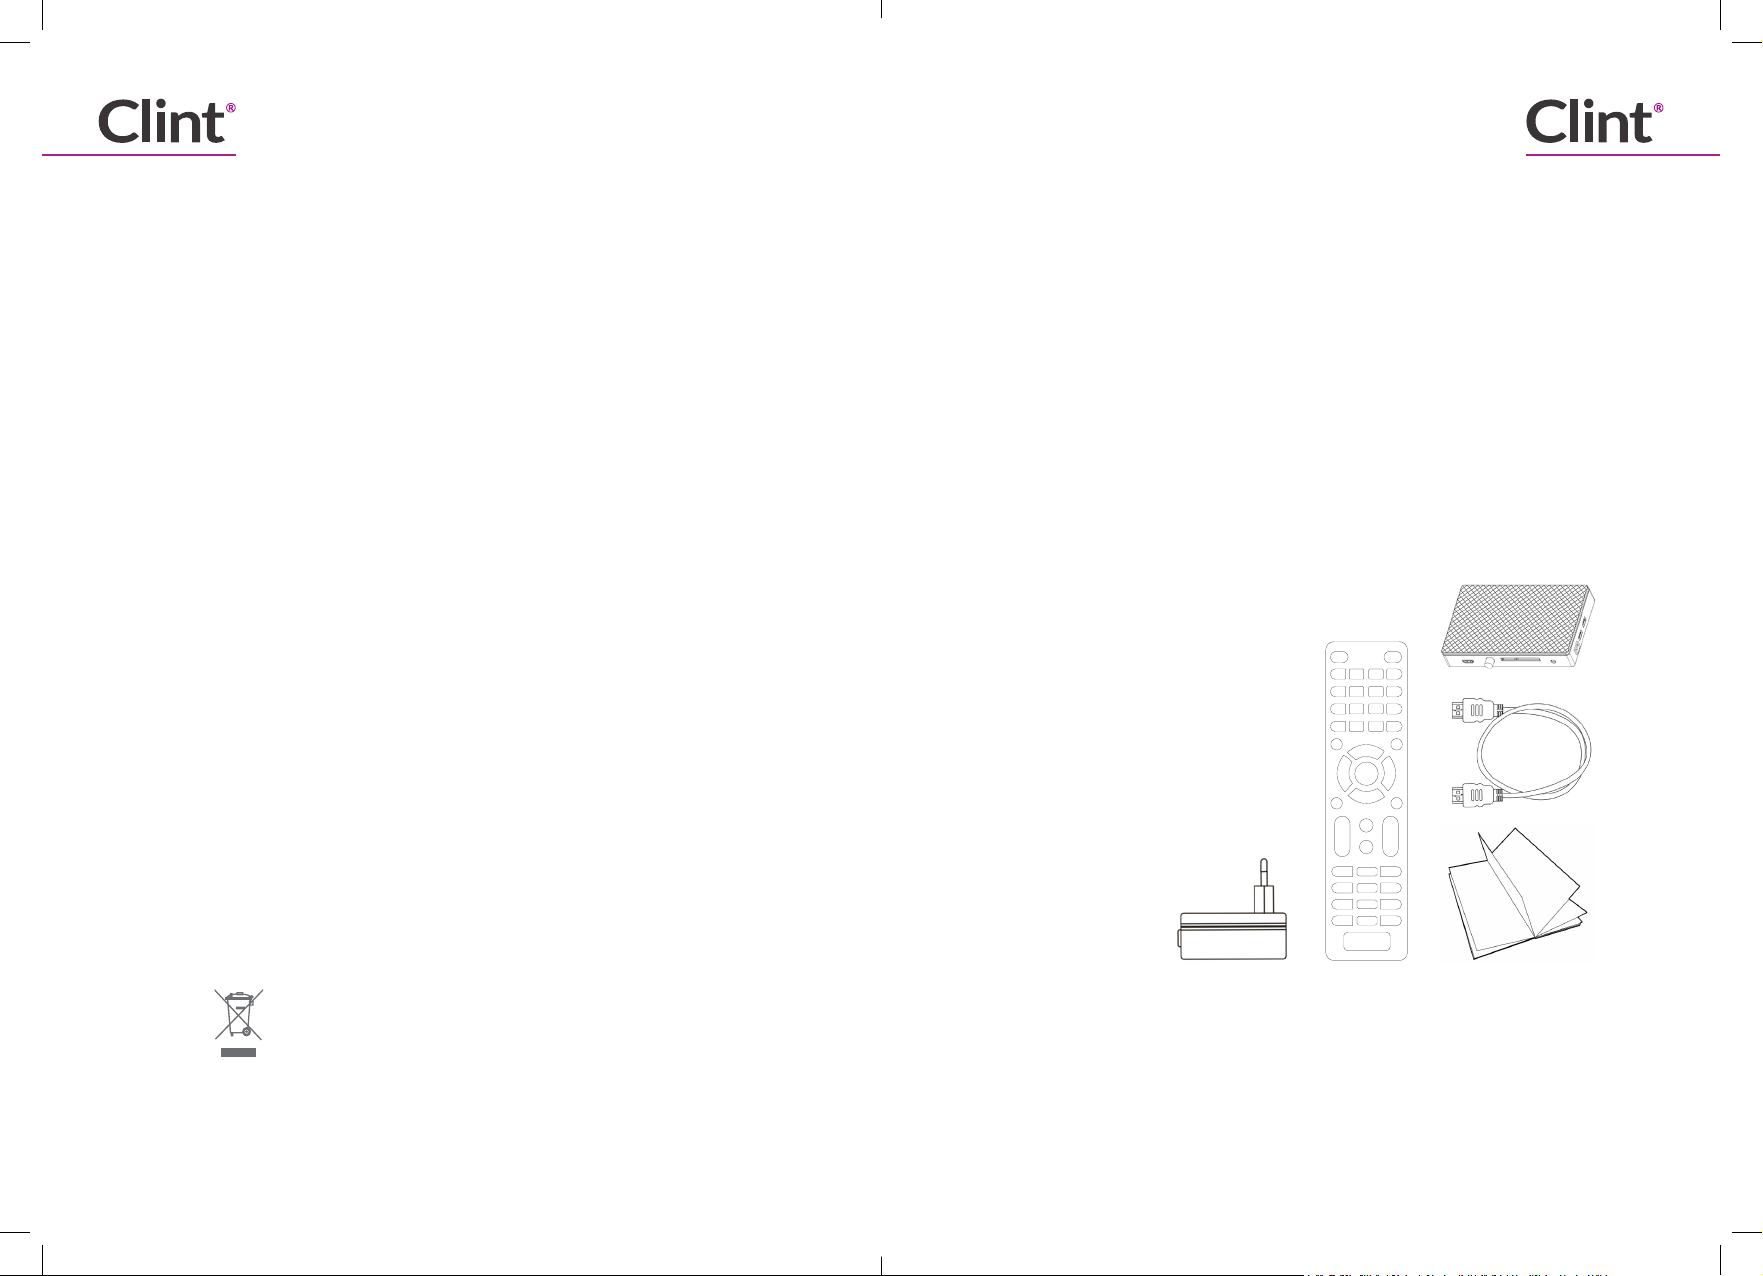
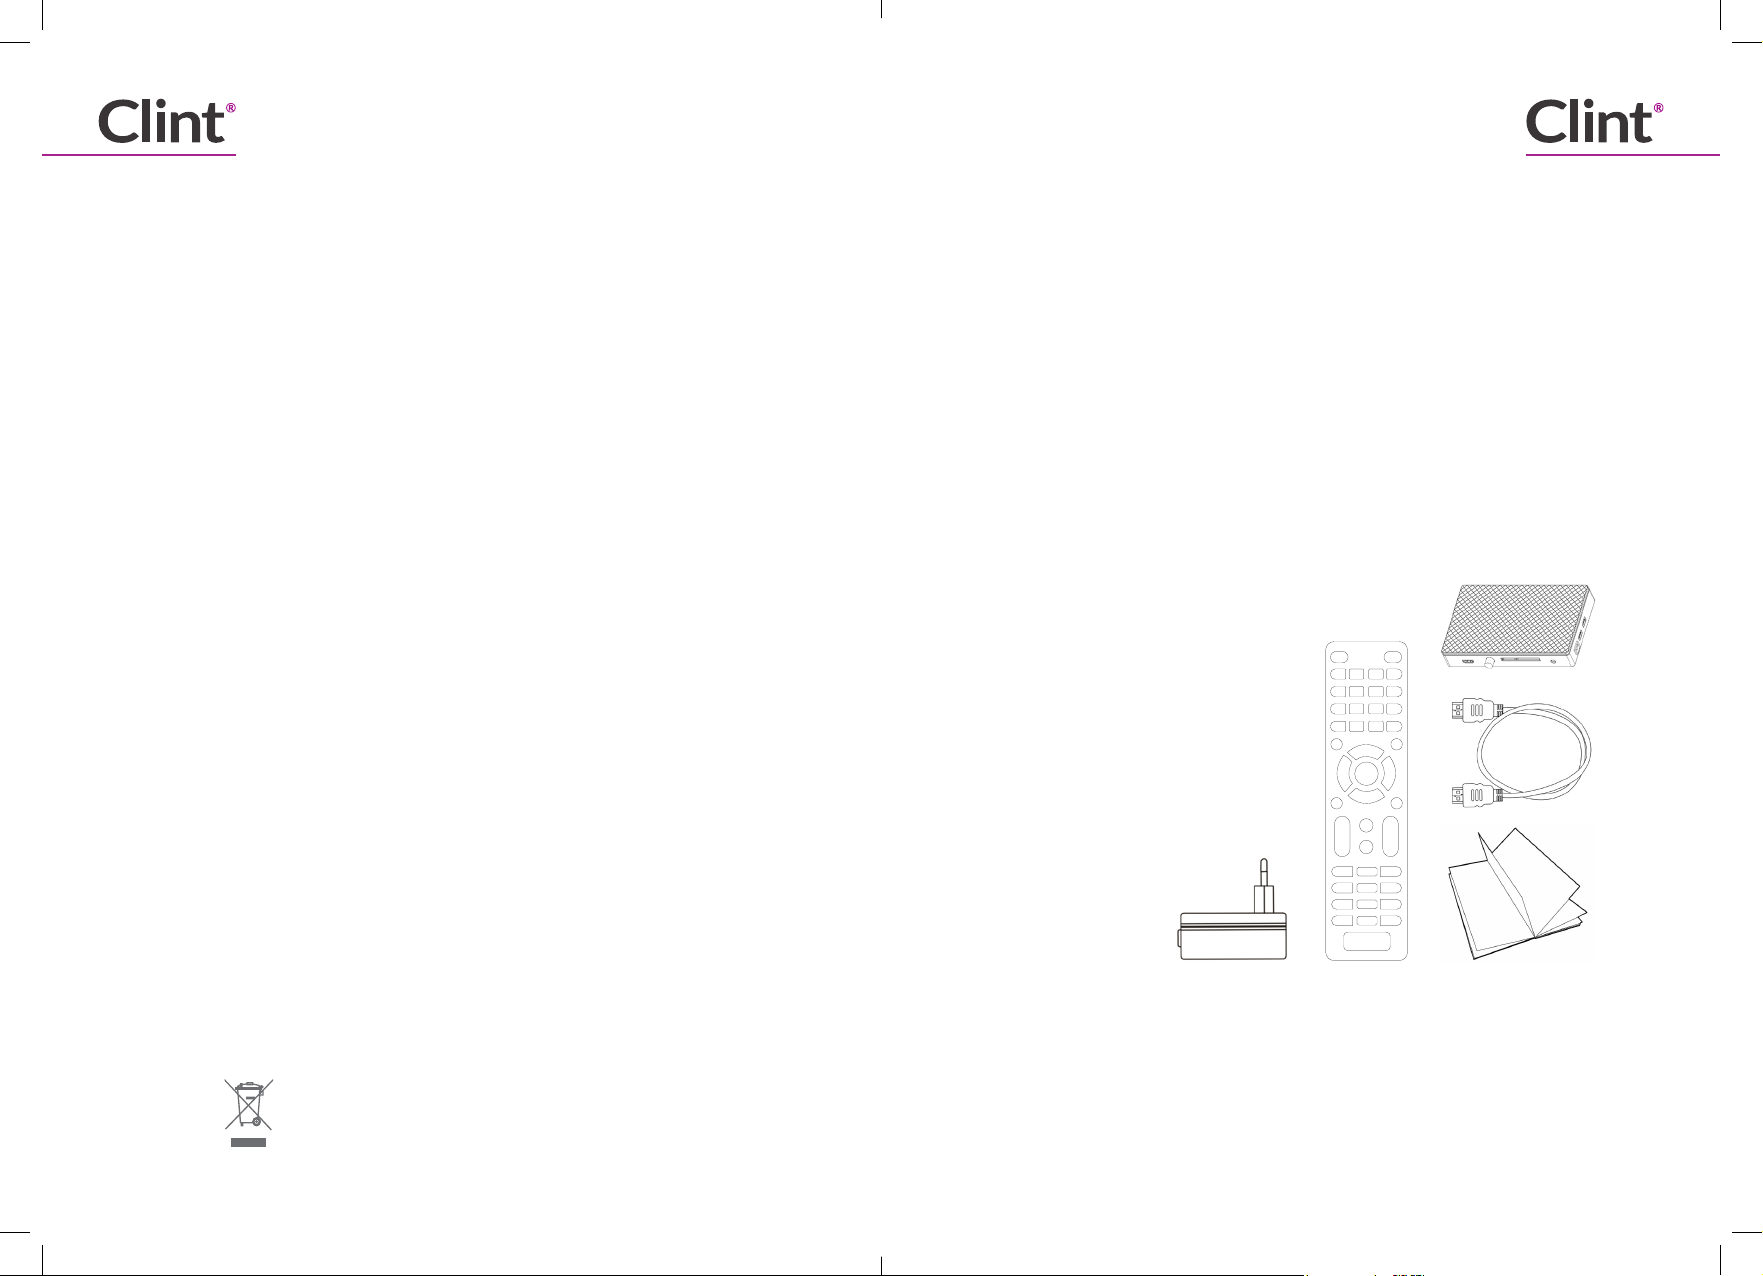
Content of the box:
1. Clint CT4 TV receiver
2. Power supply. AC/DC adapter
3. Remote control including batteries
4. HDMI cable
5. This User Manual
Environmental
Protection
This symbol on the product or in the instructions means that your electrical
and electronic equipment should be disposed at the end of life separately
from your household waste. There are separate collection systems for
recycling in the EU. For more information, please contact the local authority
or your retailer where you purchased the product.
Clint CT4 | User Manual Clint CT4 | User ManualPage | 1 Page | 2
NOTE: Please note that it is highly recommended to check and ensure, that your antenna installation
and antenna cables are of newest high quality standard to avoid signal interference and disturbance.
English English
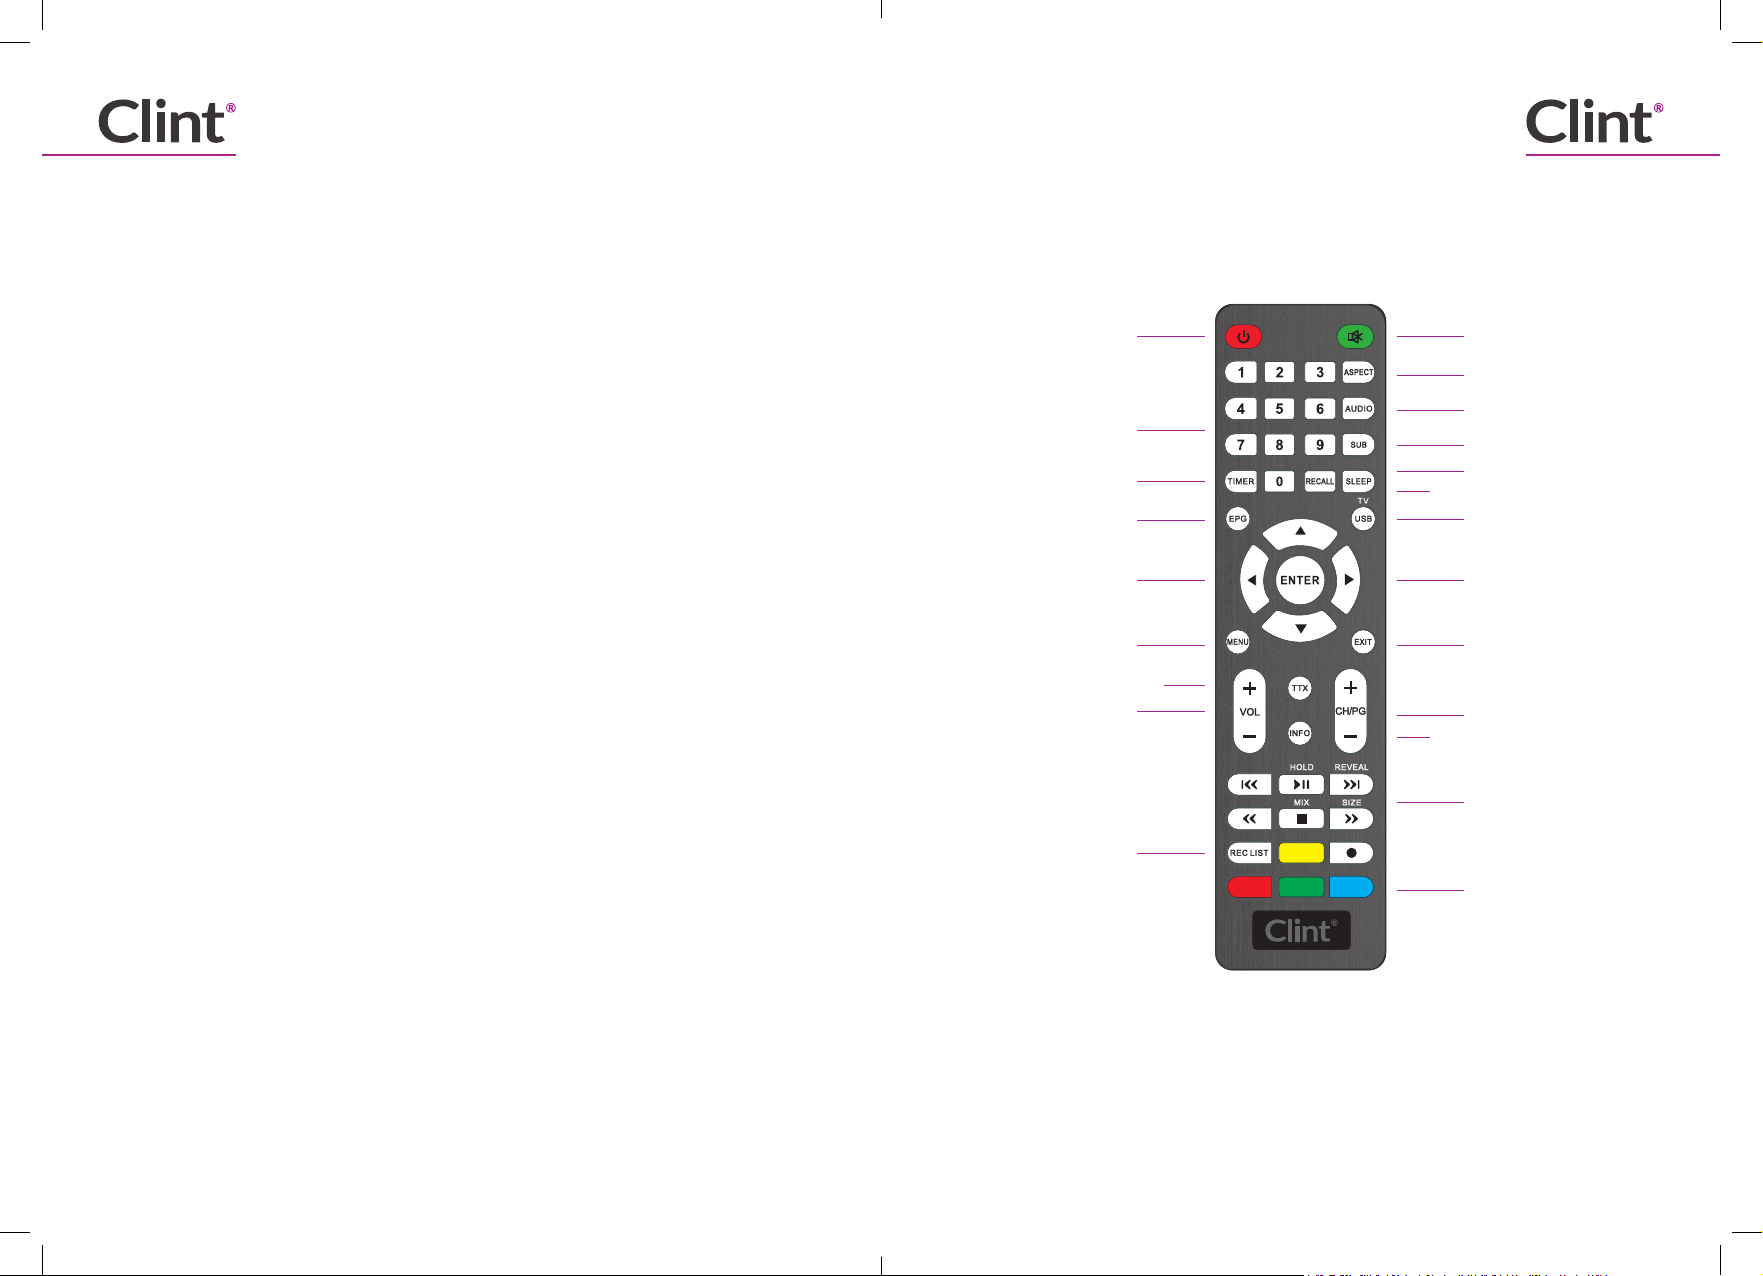
2. Remote Control
Layout and description of each button
1. Power button
2. MUTE button
3. 0-9. Numeric buttons used to make direct channel choice etc.
4. ASPECT. Changes the picture aspect ratio. 4:3, 16:9 etc.
5. AUDIO. Press to choose the Audio track of the broadcast (if any available).
6. SUB. Press to choose subtitle language (if any available).
7. SLEEP. Press to start/set the Sleep timer function.
8. RECALL button. Press this button to switch between the 2 last viewed channels.
9. TIMER. Currently it has no function.
10. EPG. Press to open the Electronic Program Guide (TV Guide).
11. USB. Press to open the USB (Media) playback Menu.
PS: Not all media formats are supported.
12. ARROW BUTTONS. Use these buttons to Navigate in the OSD etc.
13. ENTER. Press this button to Conrm your choice. Or to show the channel list.
14. MENU. Press this button to enter the MENU of the device.
15. EXIT. Press this button to EXIT from an Menu etc.
16. VOL+ and VOL-. Adjust the Volume level of the device.
17. TTX. Open Text TV.
18. INFO. Press to open the Information bar.
19. CH/PG + and - . Switch to Next or Previous channel or switch a whole page
in the channel list.
20. BACK/PLAY/NEXT/STOP/FORWARD/REWIND buttons are used to control
the Media playback from USB.
Secondly they are used to further control the Text TV picture (in Text TV mode).
21. REC LIST and REC button have currently no action !
22. Colored buttons are only used when navigating in the OSD.
See on screen information about their usage.
1
3
9
10
12
14
16
21
8
17
18
2
4
5
6
7
11
13
15
19
20
22
Clint CT4 | User Manual Clint CT4 | User ManualPage | 3 Page | 4
English English
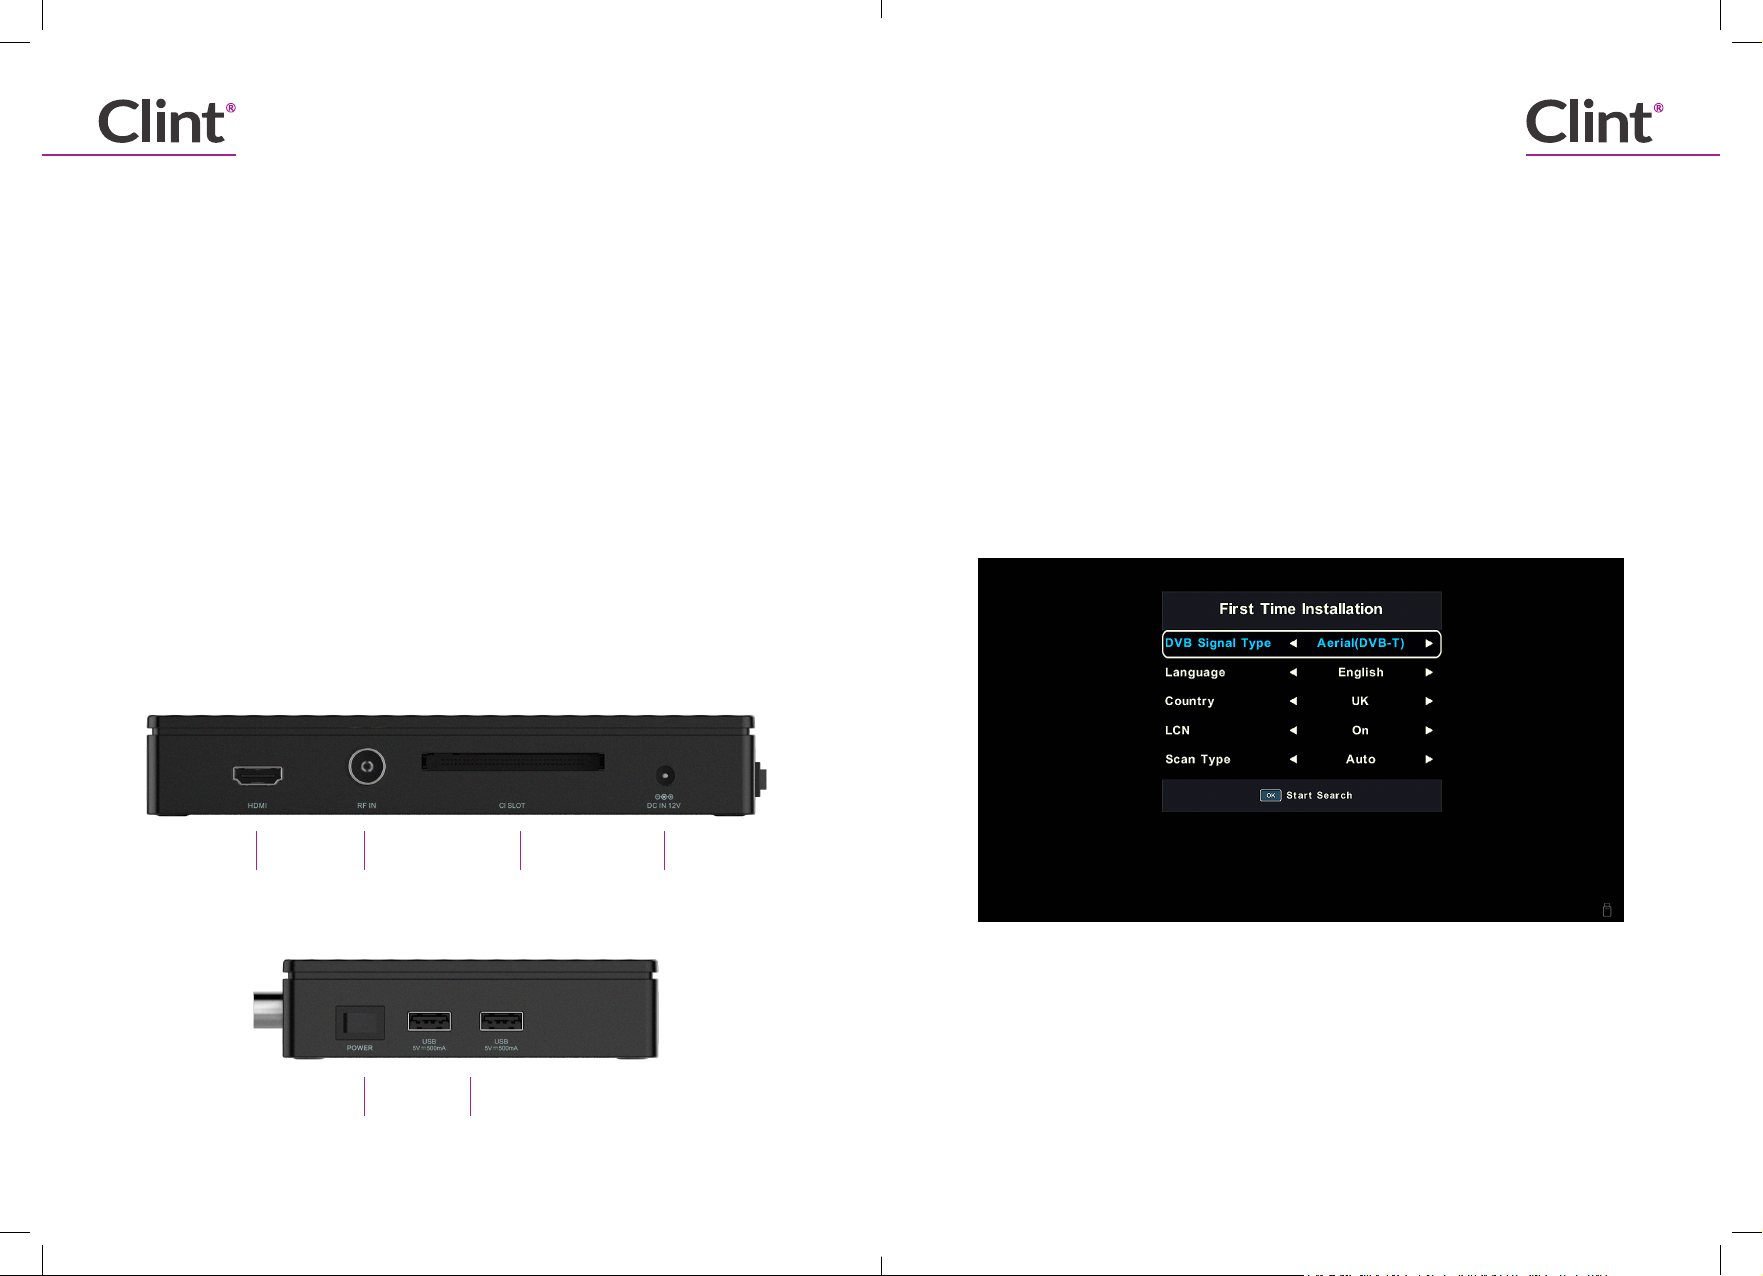
3. CT4 and it’s I/O connectors
How to setup and connect your CT4
1. HDMI compatible output. Here you connect your TV. HDMI cable is included.
2. RF-In (Antenna Input). Here you connect the antenna cable. CT4 support
signals from your own antenna (DVB-T/T2) or signals from your cable TV
provider (DVB-C).
3. Common Interface. Here you can insert your CI or CI+ module and smart card
for use with pay-tv channels.
4. DC-In. Here you connect the Power Supply. AC/DC power supply is included.
5. ON/OFF switch.
6. USB ports (USB 2.0). USB ports are to be used for Software updating or Media
Playback. For Media playback, you can connect external USB hard drives or
USB memory sticks, that contain your media les.
4. First Time Installation
Setup and installing the TV channels (Channel Search)
Once CT4 is properly connected to TV and antenna cable, you need to power it
ON.
When power ON CT4 for the rst time, or when doing a factory reset of the CT4,
it will show the “First Time Installation” screen and guide you through the channel
search procedure.
PS: If you don’t see the installations screen on your TV, please make sure that the
HDMI cable is properly connected and your TV has been switched to the correct
HDMI port (HDMI source). For changing the Input Source on your TV, please study
the user manual for your TV.
1 2
3 4
NOTE: Since channel search might be different from each Country, it is important that you choose the
correct Country of where the CT4 is actually being setup and used.
NOTE: If you search TV channel from Cable TV (DVB-C), you might need to know the Search Data for
your TV provider like Frequency, Symbol rate, QAM etc. Please consult your TV provider.
(This is however not needed in all Countries.)
5 6
Clint CT4 | User Manual Clint CT4 | User ManualPage | 5 Page | 6

English English
5. Main Menu
Short description of the Main Menu
DVB-T/T2 Channel search (Terrestrial TV):
DVB-C Channel search (Cable TV):
Press the Menu button on the remote control to enter the Main Menu.
The Menu is used to make different setting (if needed) or e.g. to start a new
channel search.
PS: At the bottom of a sub Menu screen, you will see additional information about
what other buttons that are used to navigate in the Menu. E.g. use arrow keys on
remote control to navigate.
CHANNEL Menu.
Enter this Menu to start channel search, Edit Channels, get signal information or get
information from the CI module/smart card (if used).
A/V SETUP Menu.
Enter this Menu to adjust Aspect Ratio, Audio output or Video output (HDMI output).
NOTE: If you later want to do another channel scan, it can be started from the Main Menu, by choosing
Channel->Auto Scan (or Manual Scan). Manual Scan only search channels on one single frequency !
Clint CT4 | User Manual Clint CT4 | User ManualPage | 7 Page | 8
TIME Menu.
Adjust Time, Time Zone, Sleep Timer, Auto Standby and OSD Timer.
LOCK Menu.
Enter this Menu if you want to set up System password, Parental guidance etc.
SETTINGS Menu.
Setup the OSD language, TTX language, Audio language, Subtitle language, Hearing
impaired, Make a factory Reset,
Software update, or get actual system Information.

English
English
6. Service & Support
Should you need any technical support or have questions in general, please start
by consulting your local dealer. You can also contact our technical support directly
by e-mail: help@clintdigital.com. We can help in English or Danish language only.
NOTE: Any available Software updates, or this user manual, for your CT4, can be found on our website
www.clintdigital.com. Software updates are only to be installed from a USB device.
7. Main Technical Specications
Power Supply
(AC/DC Adapter)
Tuner
Demodulation
AC 100-240V (50/60Hz) -> DC 12V(1A)
Type: SMPS
Connector Type: IEC
VHF (50-230Mhz)
UHF (474Mhz-862Mhz)
Descrambling for pay-tv: CI+ Slot built-in
DVB-T/T2 or DVB-C supported
Bandwidth: 7Mhz / 8Mhz
Guard Interval: 1/128 1/32 1/16 1/8 1/4
FFT mode: 2K/ 8K/32K
FEC: 1/2, 3/5,2/3, 3/4,4/5,5/6
DVB-T Demod: COFDM 2K/8K QPSK,16QAM,64QAM
DVB-T2 Demod: QPSK, 16QAM, 64QAM, 256QAM
Video System: MPEG 1, MPEG 2, MPEG 4, H264, H265
Sound Systems: MPEG-1 layer 1/2, DD, DD+, AAC, HE-AAC
Basic Functions: MHEG5, EPG, Subtitle, LCN, TELETEXT (Europe)
8. EU Declaration of Conformity
Denmark, 04-08-2017
Clint Digital ApS
part of EET Group A/S
Tempovej 41
2750 Ballerup
Denmark
Hereby declare that Clint CT4 Set Top Box:
Comply with European RED directive 2014/53/EU standards:
ESTI EN 303 340 V1.1.2 (2016-09)
EN 55032:2015, Class B
EN 55020:2007+A12:2016
EN 60065:2014
Draft ESTI EN 301 489-1 V2.2.0 (2017-03)
Final Draft ESTI EN 301 489-3 V2.1.1 (2017-03)
Comply with European ERP directive (EC) No 107/2009, IEC62087:2011,
IEC62301:2011 Ed 2.0
Denmark, 04-08-2017
René Larsen, Clint Digital ApS
Connectors
(Interface)
Dimensions & Weight
DC-In Connector
RF-In (Ant-In, Antenna Input)
HDMI v1.4a compatible output connector (720p or 1080p support)
CI+ Slot, for supported CI and CI+ modules (for pay-tv access)
USB connectors for Media playback and Software update only
Power switch (ON/OFF)
Dimensions: 183,5 x 115 x 25,5 (mm) / Approx. 300g
Material: ABS
Operating temp: 0-35 degrees Celsius
Clint CT4 | User ManualPage | 9
Clint CT4 | User Manual Page | 10
Bedienungsanleitung
Deutch
2017
Clint Digital
All rights reserved
www.clintdigital.com
We accept no liability for printing errors.
Specications are subject to change without notice
DeutchDeutch
Stromversorgung
Platzierung
Reinigung
Belüftung
Einrichtung und
Nutzung
Reparatur/Wartung
Wichtig - Sicherheitsvorkehrungen
Lesen Sie das Folgende sorgfältig für Ihre eigene Sicherheit durch.
Verwenden Sie nur den mitgelieferten AC/DC-Adapter: SUNUN
(SW15-120S100V) Eingang AC 100-240V (50/60Hz) 0.4A, Ausgang
12V DC / 1A. or FLYPOWER (PS12R120K1000ED) Eingang AC 100240V (50/60Hz) 0.35A, Ausgang 12V DC / 1A. Wenden Sie sich bitte
bei weiteren Fragen an Ihren Händler. Bitte beachten Sie sorgfältig,
dass der Netzadapter/Netzstecker einfach zu bedienen sein muss,
wenn Sie das Gerät vom Stromnetz trennen müssen.
Gerät darf nur im Innenbereich verwendet werden. Vor direkter
Sonneneinstrahlung schützen sowie vor Wasser und Feuchtigkeit
schützen.
Wenn Sie das Gerät reinigen müssen, stellen Sie sicher, dass
Sie zunächst die Stromversorgung entfernen. Verwenden Sie
zum Reinigen nur ein weiches Tuch und verwenden Sie niemals
Lösungsmittel.
Achten Sie immer darauf, dass das Gerät dort platziert ist, wo eine
gute Belüftung besteht, um jegliche Überhitzung zu vermeiden.
Verwenden Sie nur das mitgelieferte oder vom Hersteller
angegebene Zubehör.
Versuchen Sie niemals, das Gerät selbst zu öffnen. Alle
Wartungsarbeiten sind von einem autorisierten Fachmann
durchzuführen. Bitte wenden Sie sich an Ihren Händler.
1. Ihr neuer digitaler Fernsehempfänger
Auspacken und Einrichten
Herzlichen Glückwunsch zum neuen Clint CT4 digitalen TV Receiver. Der CT4
kann entweder für terrestrisches TV (eigene Dachantenne) oder Kabelfernsehen
verwendet werden.
Clint CT4 ist eine einfache und kostengünstige Lösung für diejenigen, die die
neuen digitalen Fernsehsender von verschiedenen europäischen TV-Anbietern
erhalten möchten. Es wird von der nnischen Ficom getestet und genehmigt
und ist darüber hinaus für die Benutzerfreundlichkeit ausgelegt und funktioniert
einwandfrei bei den großen nordeuropäischen TV-Netzwerken.
Packungsinhalt:
1. Clint CT4 TV-Receiver
2. Netzteil. AC / DC-Adapter
3. Fernbedienung inkl. Batterien
4. HDMI-Kabel
5. Diese Bedienungsanleitung
Batterie
Umweltschutz
Die mitgelieferte Fernbedienung wird mit Batterien betrieben.
Es besteht Explosionsgefahr, wenn die Batterie falsch eingelegt
wird. Verwenden Sie zum Auswechseln nur Batterien desselben oder
eines äquivalenten Typs.
Batterien (Akkupack oder bereits eingelegte Batterien) dürfen
keiner übermäßigen Hitze, wie z.B. Sonneneinstrahlung, Feuer oder
Ähnlichem, ausgesetzt werden.
Dieses Symbol auf dem Produkt oder in der Anleitung bedeutet, dass Ihre
Elektro- und Elektronikgeräte am Lebensende getrennt von Ihrem Hausmüll
entsorgt werden müssen. In der EU gibt es getrennte Sammelsysteme für
Recycling. Für weitere Informationen wenden Sie sich bitte an die örtlichen
Behörden oder Ihren Händler, bei dem Sie das Produkt gekauft haben.
Clint CT4 | Bedienungsanleitung Clint CT4 | BedienungsanleitungPage | 1 Page | 2
HINWEIS: Bitte beachten Sie, dass es dringend empfohlen wird, zu überprüfen und sicherzustellen,
dass Ihre Antenneninstallation und Antennenkabel von neuem Qualitätsstandard sind, um
Signalstörungen und Störungen zu vermeiden.
 Loading...