

Clicgear 1.0, 2.0 Replacement Manual
BRAKE HANDLE
REPLACEMENT
BULLETIN
02
MODEL
1.0
MODEL
2.0
SB
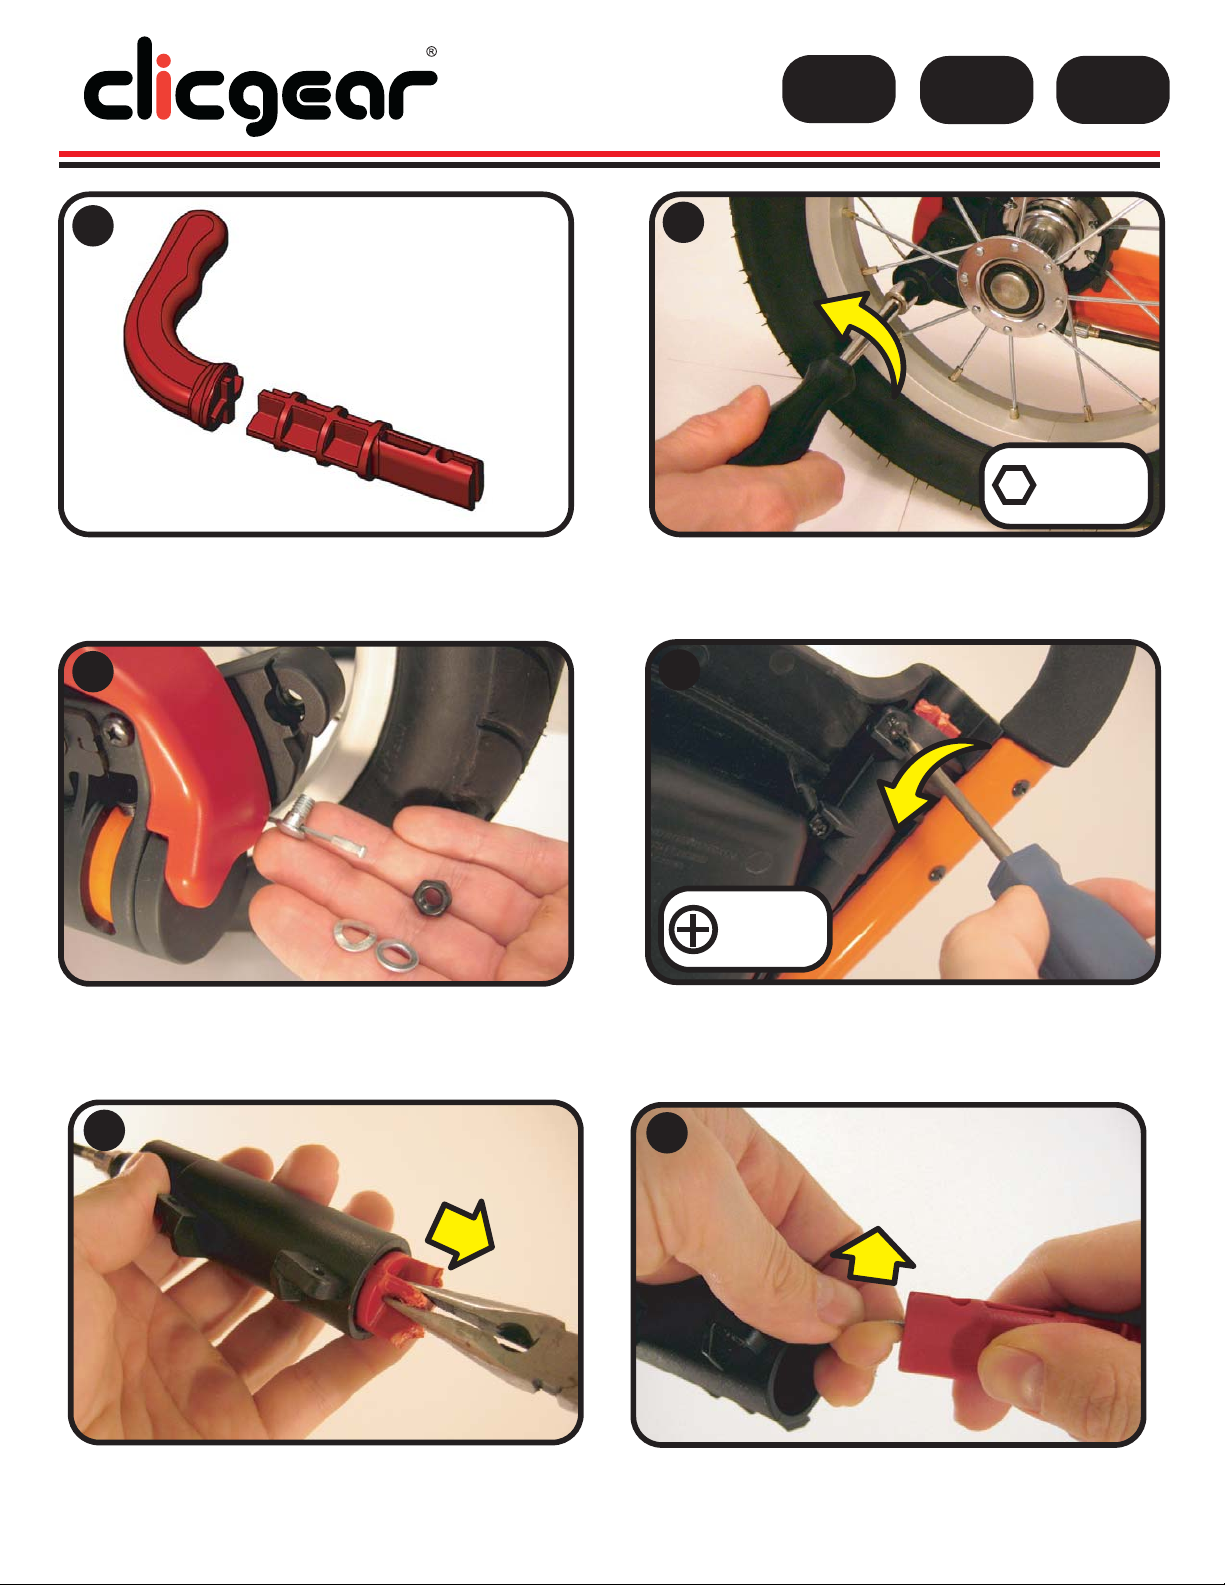
Service Bulletin SB-02 covers the replacement of
broken brake handles on the Clicgear Cart, Model 1.0
and Model 2.0
2
1
10MM
SOCKET
DRIVER
Remove the 10mm Nut from the Cable Nut Assembly.
This should loosen the cable and the Brake Hammer
should swing upwards when free.
3
Remove the two washers and lock nut from the cable
nut assembly. Leave the cable nut and protective
cable end cap attached to the brake cable as shown.
4
Using needle nose or similar pliers, remove the
remaining portion of the Brake Handle from the Brake
Cylinder.
CROSS
SCREW
DRIVER
Unscrew the two screws that secure the Brake
Cylinder to the under side of the tray.
5
Pull the cable barrel end up and out of the brake
handle.
PAGE: 1 OF 2
BRAKE HANDLE
REPLACEMENT
BULLETIN
02
MODEL
1.0
MODEL
2.0
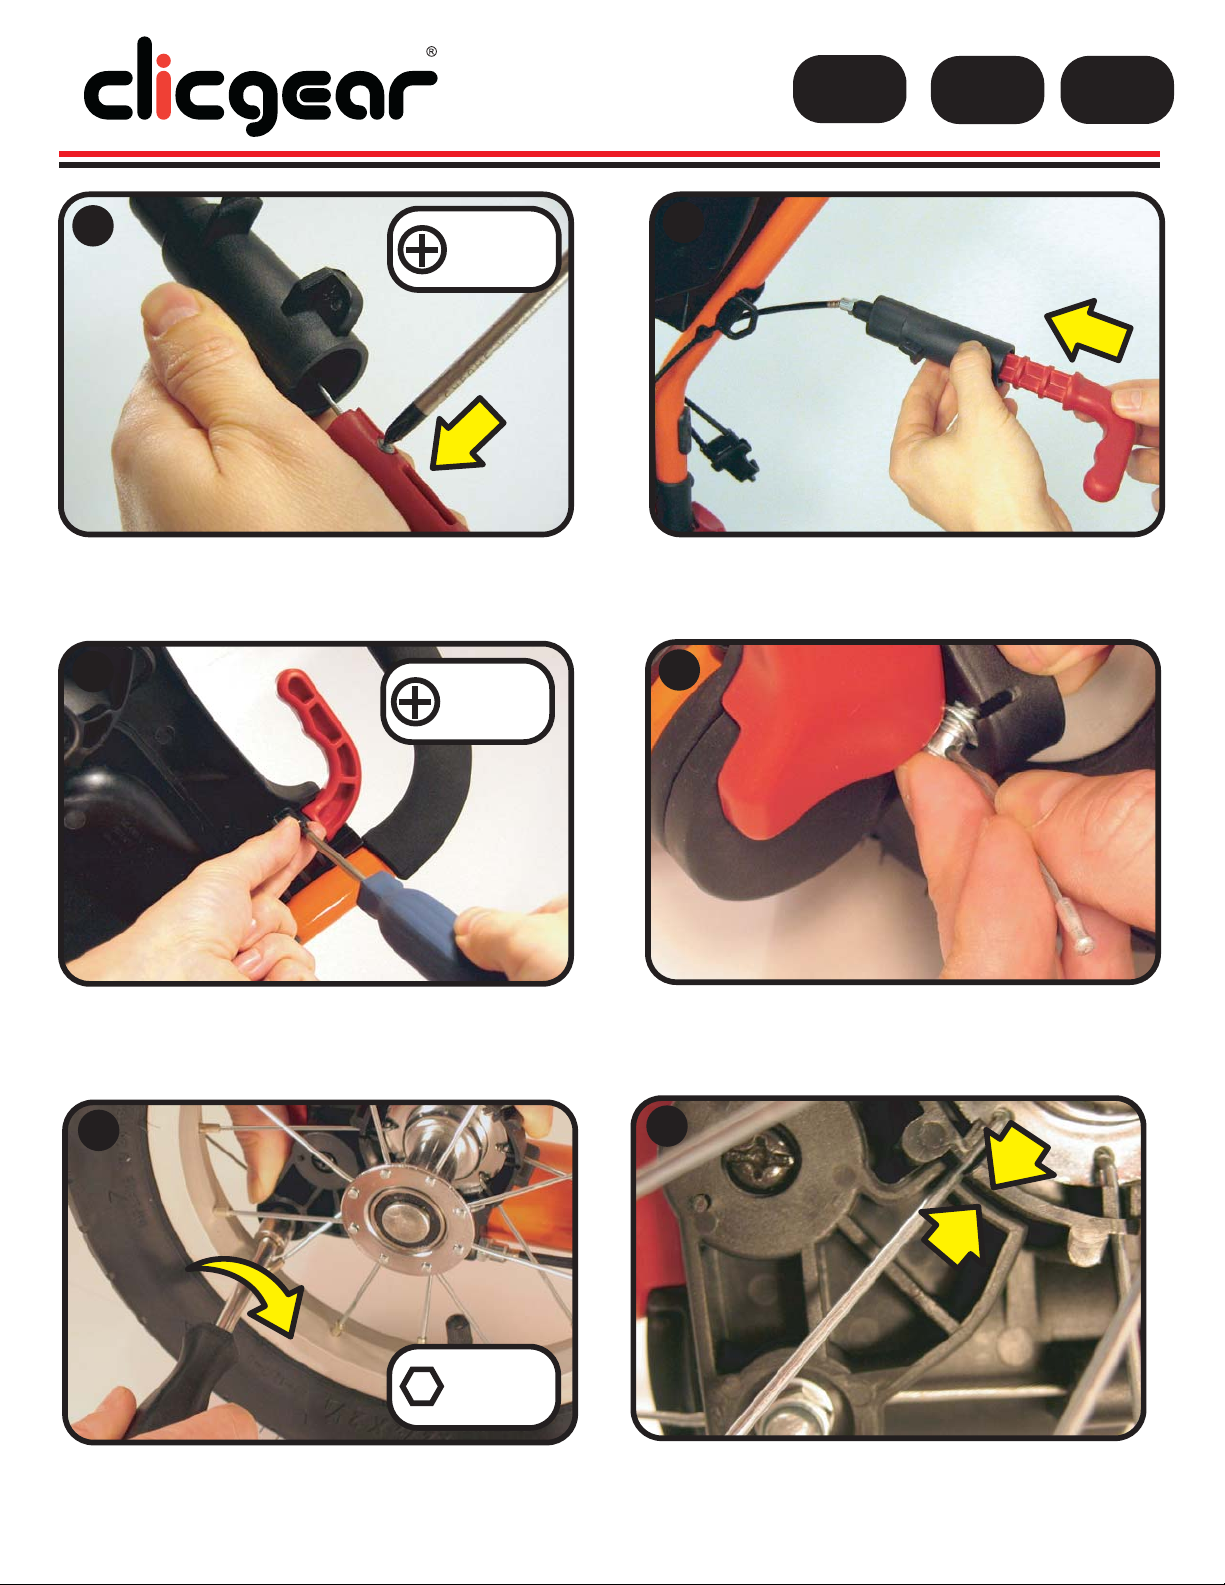
6
Install the new Brake Handle onto the cable. Carefully
seat the cable end barrel into the handle using a small
cross screw driver.
8
CROSS
SCREW
DRIVER
CROSS
SCREW
DRIVER
7
Insert the new brake handle into the brake cylinder.
Push any excess cable back inside the cable housing.
9
Reinstall the two screws that hold the brake and brake
cylinder assembly to the bottom of the tray.
10
10MM
SOCKET
DRIVER
Tighten the cable lock nut while holding the brake
hammer in the approximate position shown.
PAGE: 2 OF 2
Push the cable bolt with one (1) washer into the brake
hammer with the washer between the cable and
plastic. Then install the second washer and lock nut
on the opposite side of the brake hammer.
11
Adjust the brake cable until the brake hammer fully
engages the brake gear, as shown, when the brake is
in the ON position.
 Loading...