

Page 1
INSTALLATION INSTRUCTIONS
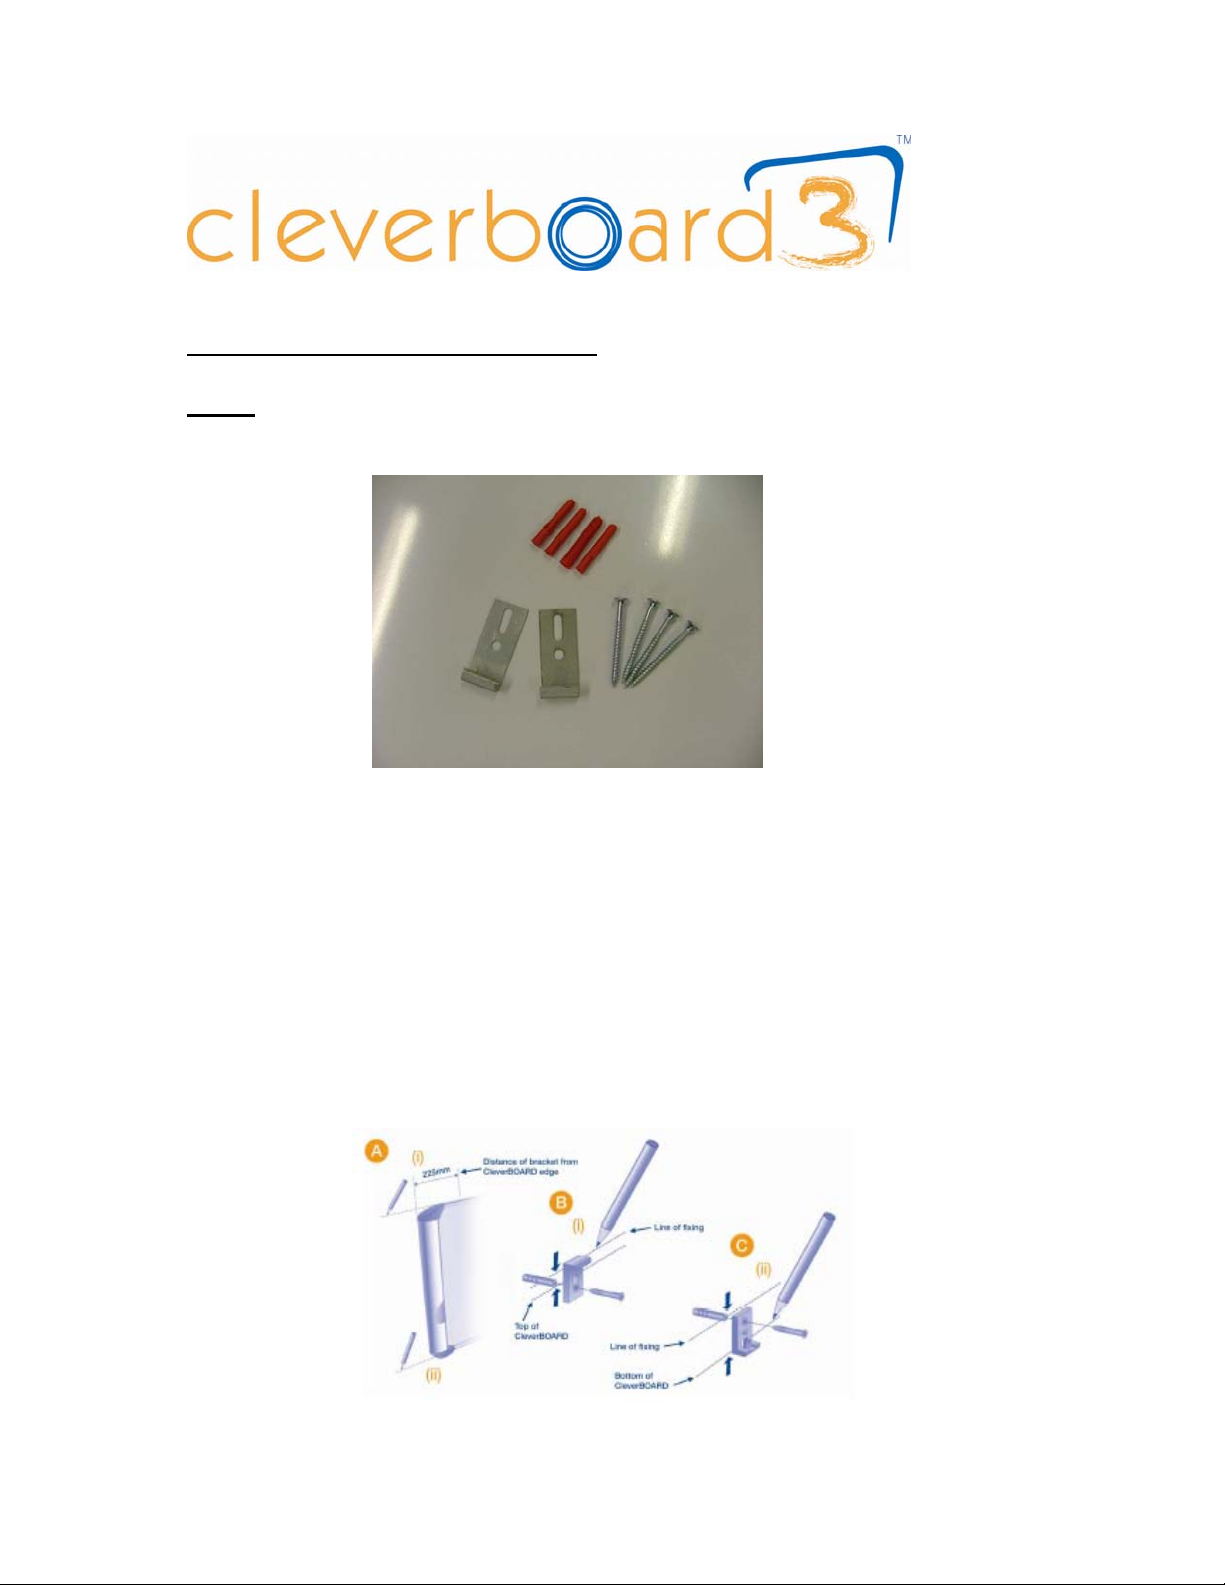
Note :
The screws and rawl plugs supplied are to be used for mounting the unit
to brick / concrete walls only.
• Pencil mark the top and bottom of the Cleverboard as desired on wall, Fig
A.
• Fix brackets as shown in Figs B and C.
• Lift Cleverboard onto lower brackets, Fig D
• Push the top of the board towards the wall until it is vertical as in Fig D.
• Then push down the top brackets until they “click” onto the top of the
board, Fig E
• The Cleverboard is now securely wall mounted
Page 2
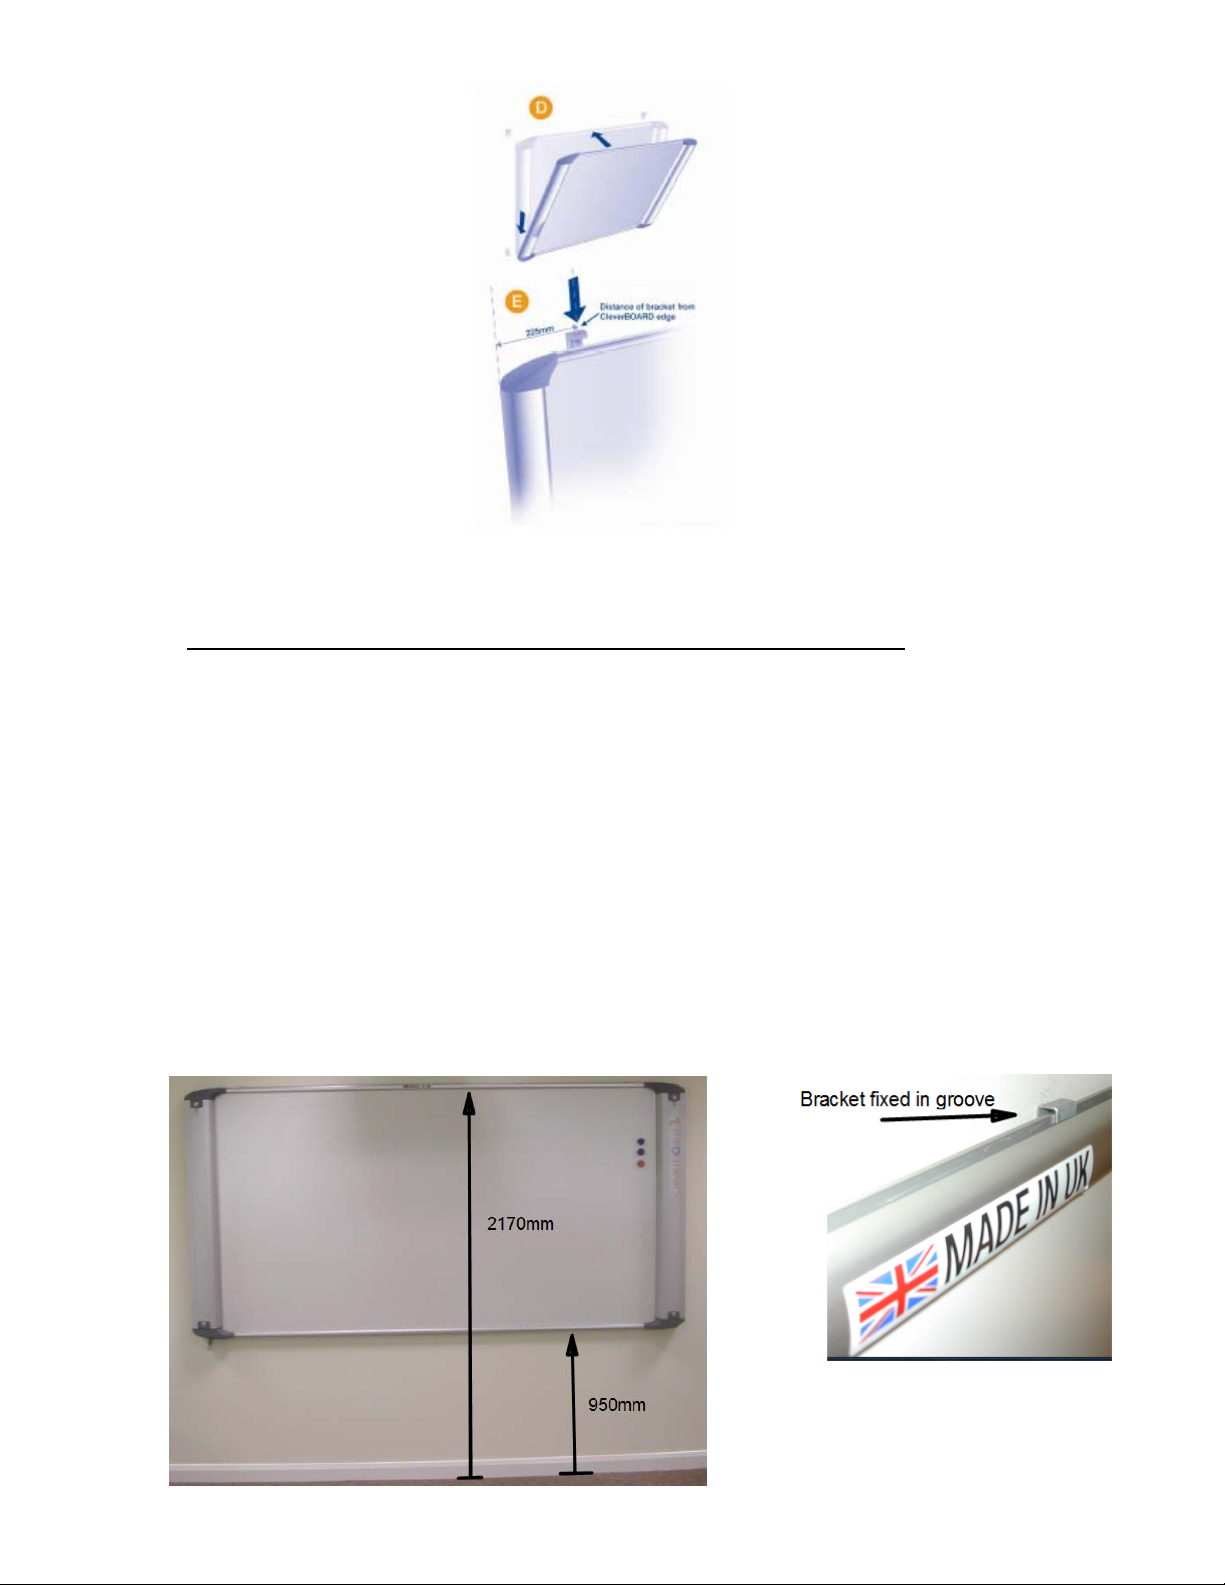
DETERMINING THE OPTIMUM HEIGHT OF THE BOARD
The Cleverboard needs to be positioned at a height that is comfortable for the
user to operate at. The board needs to be reachable by the user in all corners. If
there is to be just one user then ask him or her to reach up with their hand and
take a note of the highest position that they can comfortably reach...this is the
position of the top of the board.
If the room is to be used by many people then try to carry out the same exercise
with as many of the users as possible and then take the average as the optimum
height position.
If no “end users” are available then refer to the diagram below for a guide as to
a comfortable working height for an “average height” person.
 Loading...