

Clever NPM Quick Installation Manual
NPM Quick Installation Guide
NPM Quick Installation Guide
This Quick Installation Guide is a basic introduction of the NPM hardware and software configuration. It is
provided with the hope of helping you to configure the device fast and easily. For more detailed information,
please refer to the User Manual.
Ⅰ. Hardware Configuration
1. Checking the devices and accessories first, one set of NPM and one piece of network cable.
2. Set up the NPM as Master. See the top right corner of the LCD display, ‘M” means Master, “S” means
Slave.
Master Setting Method: Press Reset button on the device for 5 seconds (the interval of RUN light is 2 seconds.
Setting is successful when “M” appears on the LCD.
Slave Setting Method: Press Reset button on the device for 3 seconds (the interval of RUN light is 2 seconds.
Setting is successful when “S” appears on the LCD.
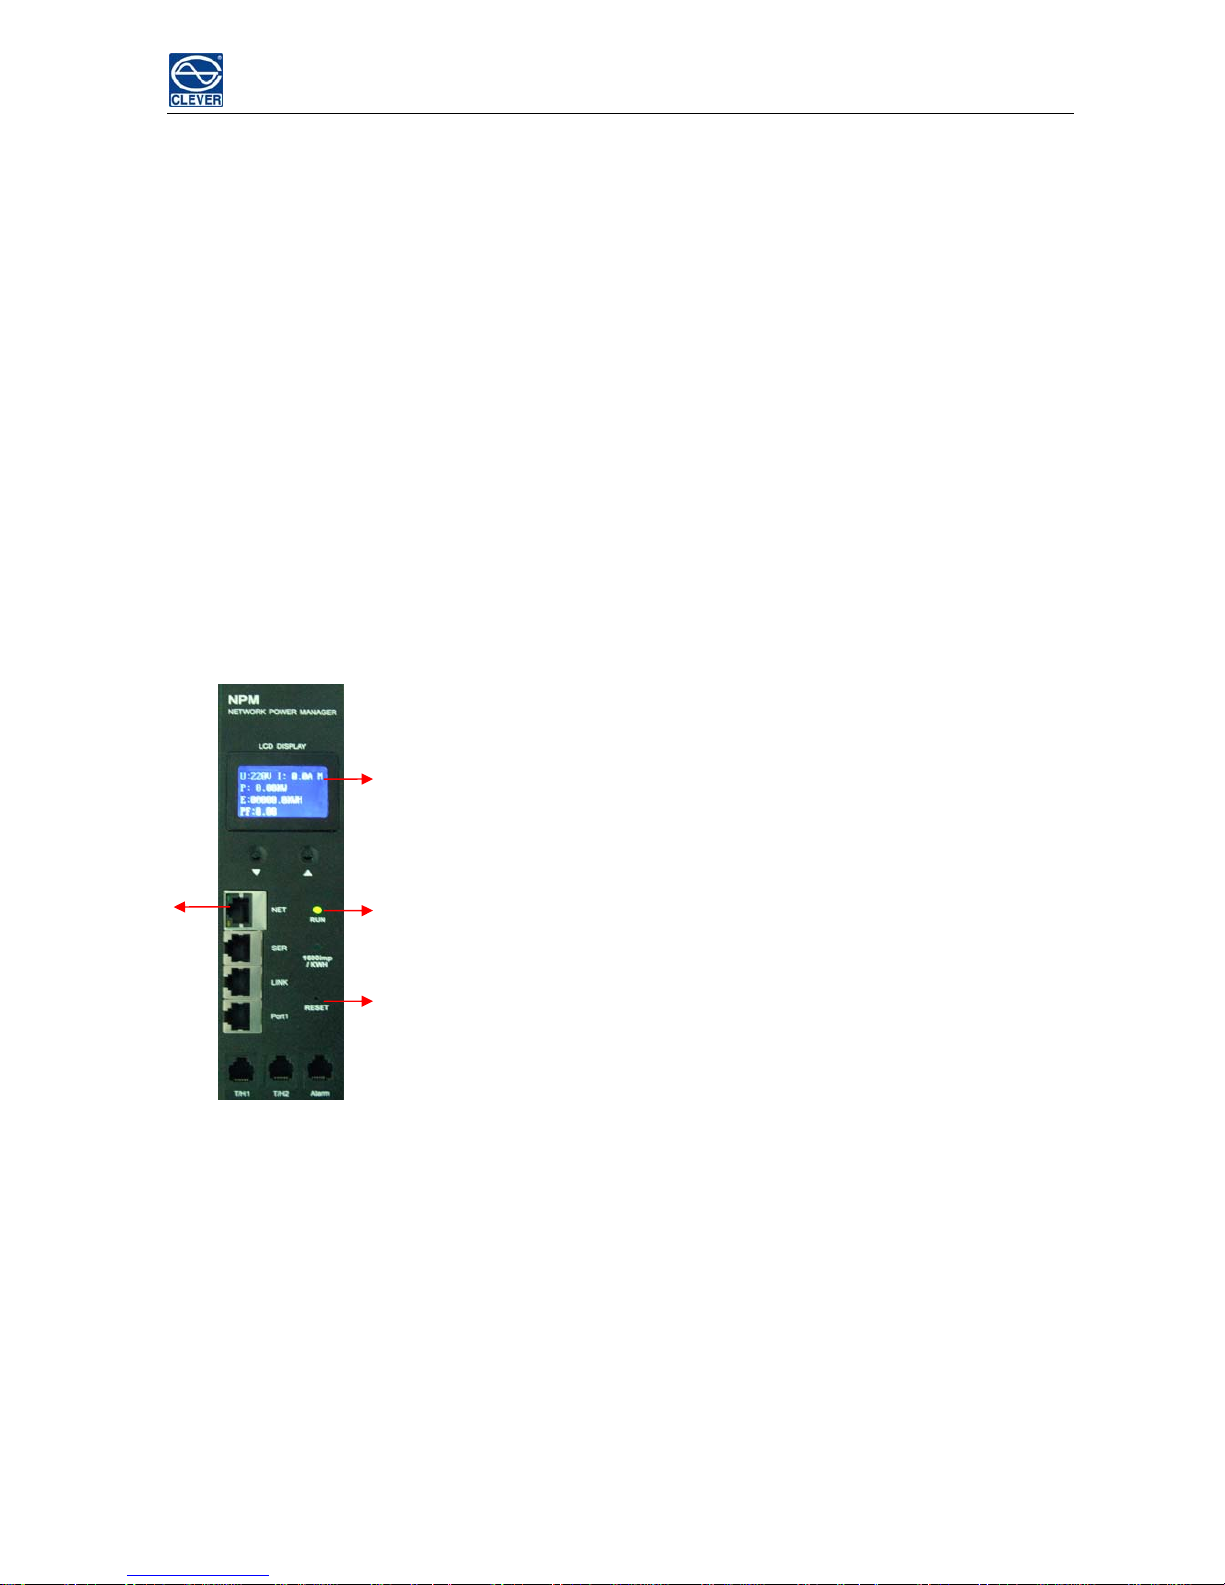
1. M/S:Master or Slave status
2. RUN:Operating state indicator
3. RESET:to set the device as Master or Save, reset button.
4. NET: 10-100Mbps Ethernet RJ45 Connector, to connect to
RJ45 port of PC, HUB, router, switch etc.
1
4 2
3
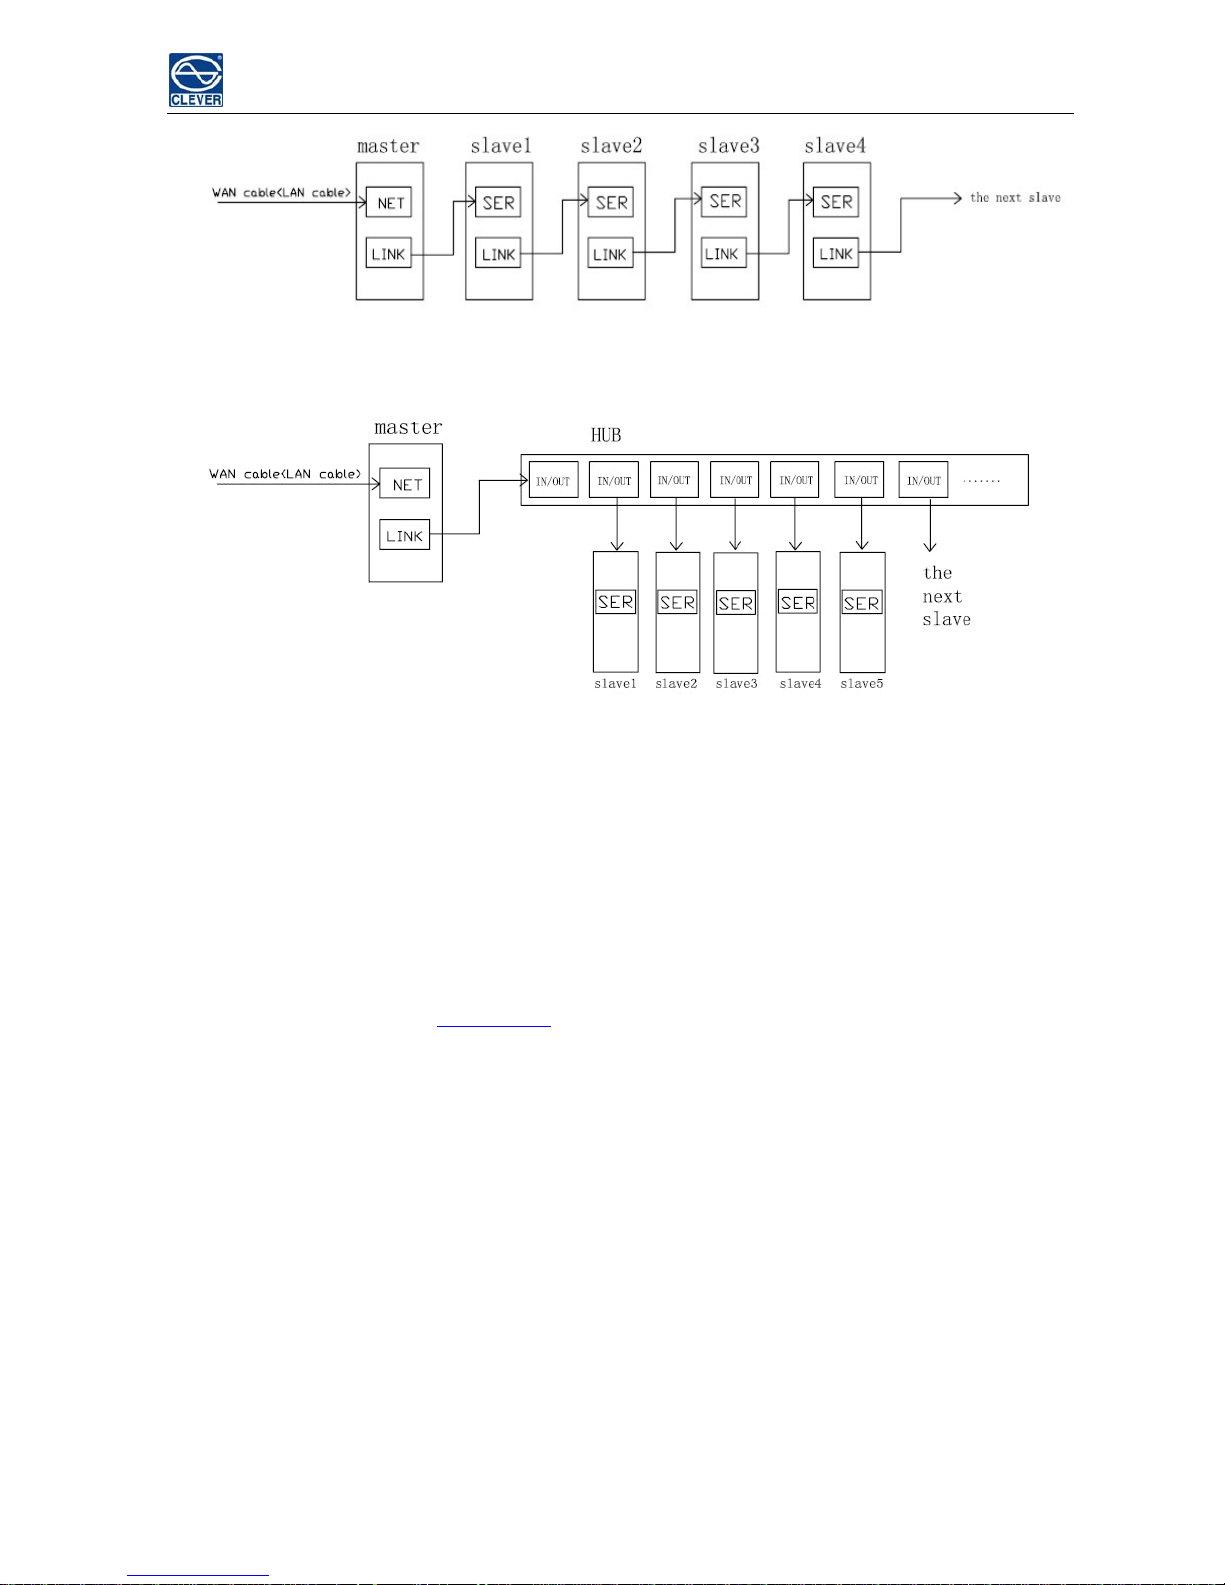
3. Device connection:
a. Single device connection: Single device must be set as the Master. Connect the NET port of device to PC
by network cable.
b. Multiple device connection: Multiple devices can take the daisy-chain style by setting one of them as the
Master and others as slaves. One Master can daisy-chain nine slaves at most. Please see the specific
connecting ways as illustrated in figure 1 and figure 2:
NPM Quick Installation Guide
Figure 1 Hand by hand
Figure 2 Through CLEVER HUB
Ⅱ. Software Configuration & User login
Opening IE browser (support IE 6.0, 7.0 and 8.0 versions; other browsers except IE are not available
currently). Default IP address is
192.168.1.163 and default Login Name is "clever", Password is "clever" .
Please note that the login name and password are all Lower-case letter. Please see details as following:
1. Connect the PC and the device directly;
2. Revise the PC network configuration to access NPM firstly; making sure the changed PC IP address and
the default device IP address are in the same network segment. For instance: set the PC IP address to be
192.168.1.X (X can be 0 to 255 except 163); the Sub-net Mask 255.255.255.0; the default gateway
192.168.1.1; As shown in the following :
 Loading...