


CLEVELAND-KIDDER® UNDER PILLOW BLOCK
WASHDOWN-DUTY
LOAD CELL
INSTRUCTION MANUAL . . . TYPE UPB WASHDOWN-DUTY
7550 Hub Parkway
Cleveland, Oh 44125-5794
Phone: 216-524-8800
Or 800-321-8072
Fax: 216-642-2100
Visit Us: www.cmccontrols.com
INSTRUCTION NUMBER: AO-70136 BA 1 of 9

1.0 GENERAL INFORMATION
1.1 RECEIVING AND UNPACKING
Handle and unpack the equipment carefully.
Immediately upon arrival, check the shipment against
the packing list. Any damage should be reported
immediately to the carrier and to the nearest CMC
representative.
Equipment that will not be installed immediately
should be stored in a clean, dry location. Precautions
should be taken to prevent moisture, dust and dirt
from accumulating in storage and installation areas
1.2 PRECAUTIONS
1.2.1 Shipping
roll be removed when the machine is shipped with the
transducers mounted. The shock and vibration
transmitted to the transducers by the sensing roll
during transporting can damage them.
1.2.2 Roll Balance
balanced to prevent forces caused by imbalance.
These forces cause a noise signal to be superimposed
on the tension signal. The centrifugal force (F) caused
by imbalance can be calculated using the equation
below.
F = 28.6 x 10
W = Weight of roll in pounds
R = Displacement of mass of roll from the
axis of rotation in inches
RPM = Revolution per minute
It is recommended that the force (F) be less than 5%
of the resultant web force at the maximum web speed
for most applications.
1.2.3 Critical Roll Speed
vibration can be set up in a stationary shaft. If this
vibration (in cycles per minute) occurs at the
harmonic frequency of the shaft, the transducers can
be damaged. To determine the critical roll speed, use
the following formula:
- It is recommended that the sensing
- The sensing roll should be
-6
x W x R x (RPM)2 Lbs.
- Even with a balanced roll, a
Critical roll = 4.8 x 10
speed in RPM (Shaft Length)
6
x Shaft O.D.
2
Dimensions are in inches.
To assure that this problem is avoided, the critical roll
speed should at least be 20% above the roll speed
attained at maximum web speed.
1.2.4 Overloading
- Repetitive overloading above the
maximum working force or severe overloading should
be avoided because it will damage the transducers.
1.3 SPECIFICATIONS
Gage Resistance - End to end resistance 440-480
Ohms
Gage Factor - 100 nominal
Excitation Voltage -10 VDC or VAC (RMS)
maximum
Output Signal
at Rated MWF - 100 mV nominal per
Transducer (1/2 bridge)
200 mV nominal per
Transducer pair (full bridge)
Output Impedance - Approximately 880 Ohms for
UPB2 and UPB3
Approximately 120 for UPB 1
Required Input
Impedance of
Tension Amplifier - 5K ohms per Transducer (1/2
bridge)
Maximum Voltage,
Gage to Beam or
Base (Ground) - 50 VDC
Operating
Temperature Range - 0
F to +200 F
Compliant
INSTRUCTION NUMBER: AO-70136 BA 2 of 9

1.4 DESCRIPTION
The Cleveland-Kidder Washdown Duty UPB
transducers utilize a sensing twin beam to which
semiconductor strain gages are bonded. With these
high output signal gages a very small force on the
sensing beam will be shown as a change in the tension
signal.
The type UPB transducers are for use with shafts that
are mounted in Pillow Block Bearings. See Figure 1.
For mounting dimensions see Figure 2.
Pillow Block Bearing
Washdown UPB Transducer
Figure 1
BM N
A
F G
PILLOW BLOCK
MOUNTING PLATE
LOAD CELL
C
L
J
E
H
K
D
W
No.
Size
No.
*Allow 2.5 inches (64 mm) clearance for connector
**Approximate rating in Newtons
A B C D E F(Max.) G H J (Max.) K L M N W
1 1.5 0.55 5.8 1.5 5/16 (4) 5.8 1.6 1.95 ½ (2) 1.40 6.5 1.3 2.2 2.2 25, 50, 100, 250, 500, 1000
2 3 0.80 10.0 3.0 ½ (4) 10.0 3.0 2.5 ¾ (4) 1.71 11.0 3.3 3.95 4.0 1000, 2500, 5000, 10000, 20000
3 4.5 1.63 15.0 4.5 1 (4) 15.6 5.0 4.2 1-1/8 (4) 2.80 17.0 4.8 5.2 6.5 10000, 20000, 30000
A B C D E F(Max.) G H J (Max.) K L M N W
1 38 14 147.5 38 M8 147 40.5 49.5 M12 (2) 35.5 165 33 56 56 110, 225, 450, 1100, 2250, 4500
2 76 20 254 76 M12 254 76 63.5 M20 (4) 43.5 279.5 84 100 101.5 4500, 11000, 22000, 45000, 9000
3 114 41.5 381 114 M24 396 127 106.5 M30 (4) 71 432 122 132 165 45000, 9000, 13500
Dimensions in Inches* Size
Dimensions in Millimeters*
Figure 2
Maximum Working Force (lb.)
Maximum Working Force (N.)**
INSTRUCTION NUMBER: AO-70136 BA 3of 9
2.0 INSTALLATION
2.1 SELECTION OF TRANSDUCER
MOUNTING LOCATION
When selecting a transducer mounting location,
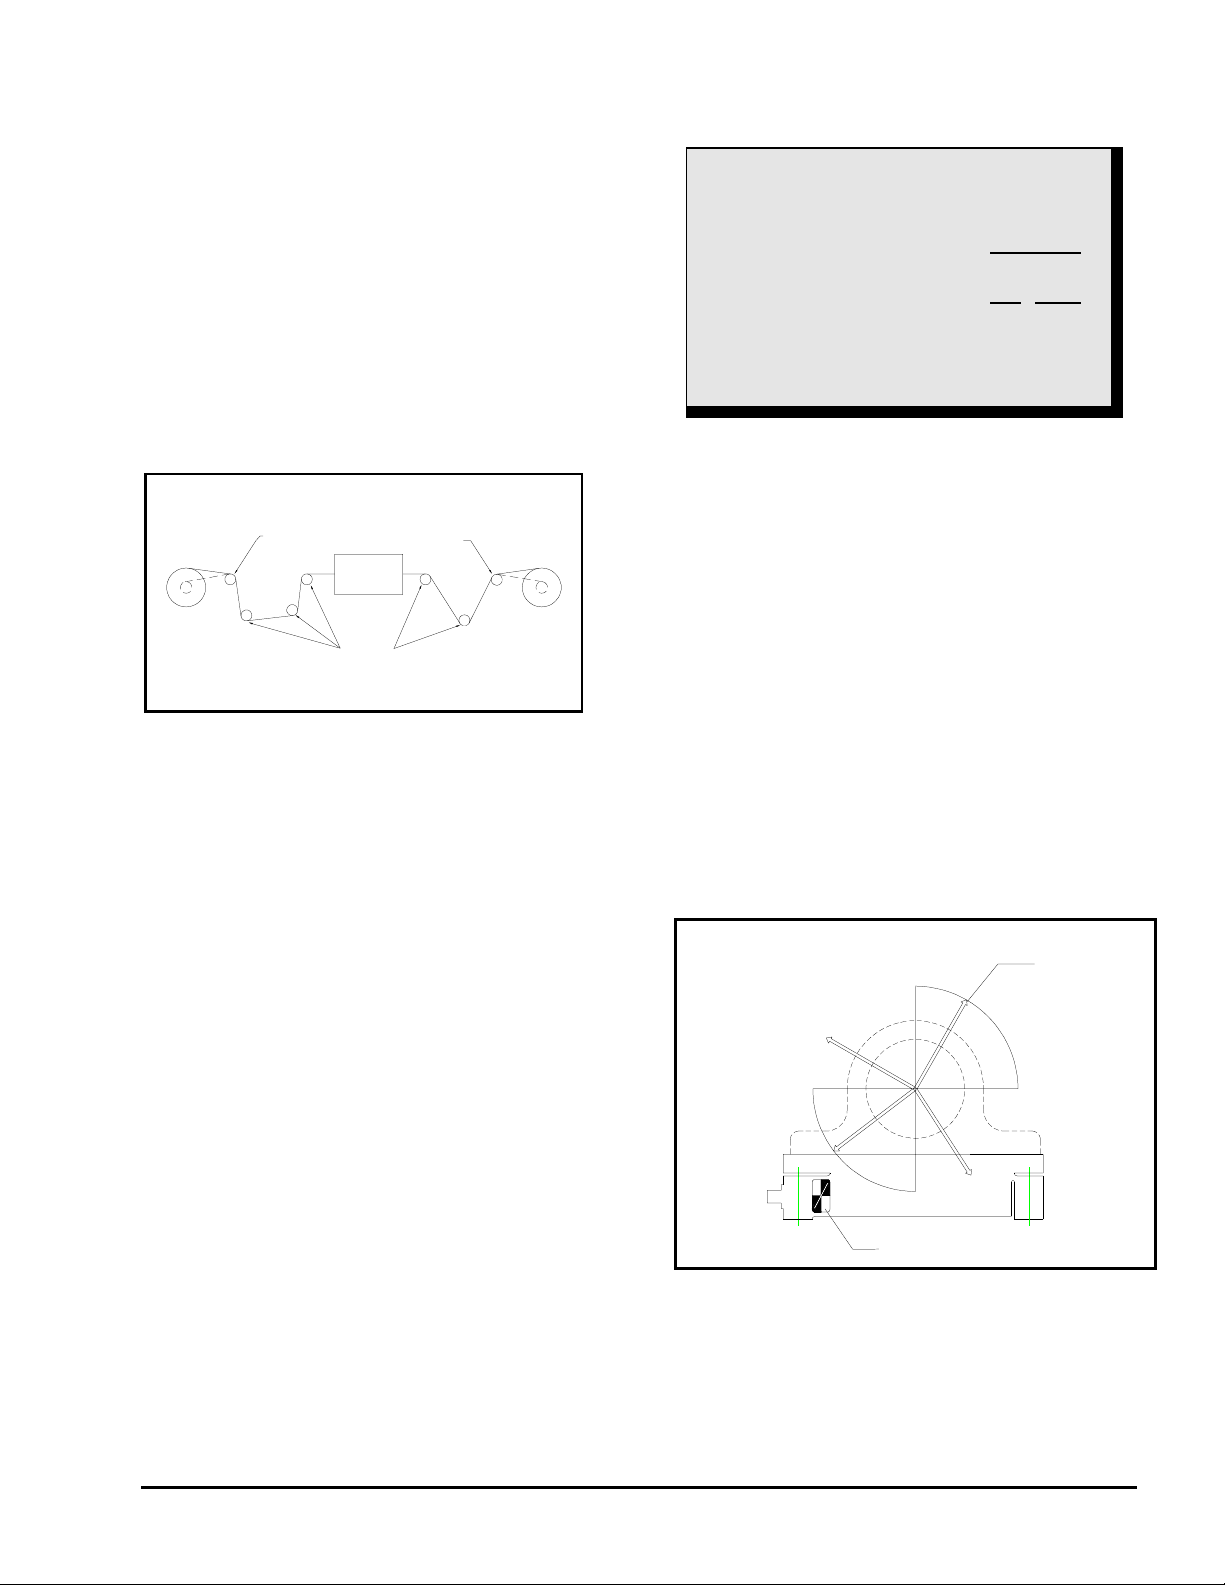
keep in mind that the tension-sensing roll must
NOT be mounted where the web wrap angle can
vary. Any change in the wrap angle will be sensed
by the transducers as a change in tension, and
indicated as such on the tension indicator.
WRAP VARIESWRAP VARIES
PROCESS
OK FOR TENSION SENSING
Figure 3
In some cases, it may be impossible to find a
location for the transducers where the wrap angle
does not vary. The change in indicated tension that
will result can be calculated and, if small, may not
be significant.
2.2 MOUNTING SURFACE
PREPARATION
The mounting surfaces for the transducers should
be flat and parallel. Prepare the machine frames or
mounting surfaces by removing any loose paint,
rust, scale, etc.
2.3 INSTALLATION PRECAUTIONS
To insure proper installation and operation of the
system, the following steps should be performed in
sequence. Failure to do so could seriously
damaged the Transducers and void the warranty.
PRECAUTION
Always install, orient and firmly bolt
down the transducers BEFORE
installing the tension-sensing roll. When
disassembling or installing, DO NOT
remove the transducer and the tensionsensing roll as an assembly - remove the
roll first, before loosening the transducer
mounting bolts.
2.4 INSTALLATION OF TYPE
UPB TRANSDUCERS
Instructions for Mounting the UPB Load Cell to
the Machine Frame (see Figure 6)
Remove the pillow block mounting plate (it is held
in place by four stainless steel corner bolts) in order
to gain access to the four load cell mounting holes.
Drill and tap the machine frame to match the load
cell mounting holes (refer to section 2.5 to properly
position the load cell). Bolt the load cell in place.
The UPB load cell is designed so that either
imperial or metric mounting bolts can be used when
mounting the load cell to the machine frame. Refer
to E in the Figure 2 above for the proper bolt size.
Before remounting the pillow block mounting plate,
refer to section 2.6.
WEB FORCE
INCORRECT
CORRECT
INCORRECT
CORRECT
LOAD ZONE DIRECTION LABEL
Figure 4
2.5 POSITIONING THE TRANSDUCER
Once the four tapped holes have been drilled, you
need to orient the UPB load cell properly to obtain
INSTRUCTION NUMBER: AO-70136 BA 4of 9

a good tension measurement. See Figure 4 for
details.
Note: the UPB must be oriented so that the
resultant tension force direction (bisector of the
wrap angle) is in the same quadrant as the load
direction arrow on the side of the UPB.
Once the correct orientation is selected, you need
to tighten four locking bolts (not supplied)
accordingly to Figure 5.
English Metric
UPB
Length
min. (in.)
Torque
(ft.-lbs.)
Length
min. (mm)
Torque
(N-m)
1 1.00 10 25 15
2 1.50 30 40 40
3 2.50 150 65 200
Figure 5
2.6 INSTALLATION OF PILLOW BLOCK
BEARING
Remove the mounting plate, then drill and tap it to
match the pillow block mounting dimensions. A
centerline mark is provided on the mounting plate.
The plate is to be drilled and tapped by utilizing
this centerline mark to insure that the pillow block
bearing is centered on the plate. Remount the plate
and bolt the pillow block bearing to it. The
mounting plate is 304 Stainless Steel, which is
amenable to drilling but offers corrosive and
chemical resistance. Refer to J in the table above
for the maximum bolt diameter recommended for
bolting the pillow block bearing to the mounting
plate.
2.7 EXTREMELY SEVERE APPLICATIONS
For applications that can create major build-ups of
material (paint, glue…), it is recommended to close
the exposed gaps of the transducer. A good way to
do this is to use Electrical Tape all around the side
of the UPB Transducer (See figure 7).
Figure 7
Figure 6
Instructions for Mounting the Pillow Block
Bearing to the UPB Load Cell (see Figure 6)
Mounting the pillow block bearing to the UPB is
2.8 SHAFT EXPANSION
If the roller is subjected to higher temperatures after
installation, thermal shaft expansion may damage
the transducers. To prevent damage to the
transducers, an expansion type pillow block bearing
should be used.
simple and convenient. The UPB is shipped with a
pillow block mounting plate. The mounting plate
is held in place by four stainless steel corner bolts.
INSTRUCTION NUMBER: AO-70136 BA 5of 9
3.0 ELECTRICAL CONNECTION
EXCITATION
VOLTAGE
SHIELD
OUTPUT
SIGNAL
(-)
(+)
(-)
(+)
WIRING DIAGRAM FOR TRANSDUCERS
BLK
WHT
RED
BLK
WHT
RED
Figure 8
Refer to the installation wiring diagrams supplied
with the Cleveland-Kidder tension indicator or
controller for making the transducer connections.
Make certain that the cables do not interfere with
the web path and that they are away from gearing
or other moving parts.
Many of the Cleveland-Kidder indicators and
controllers use only half bridge transducer inputs
and then sum the two transducer signals internally.
See the applicable installation wiring diagrams for
the tension indicator or controller.
3.1 MATING CONNECTORS FOR
TRANSDUCERS
USE CMC P/N
Mating Straight Connector,
Boot and Clamp Kit MO-09854
Mating 90
Angle Connector,
Boot and Clamp Kit MO-09855
These are not sealed for washdown duty. For
washdown duty mating connector consult CMC.
3.2 INTRINSICALLY SAFE
TRANSDUCERS
These transducers are intrinsically safe only when
they are part of a complete intrinsically safe
TENSION GAGE
B
TEMP. COMPENSATION
NETWORK
A
COMPRESSION GAGE
C
TENSION GAGE
B
TEMP. COMPENSATION
NETWORK
A
COMPRESSION GAGE
C
NO. 1
TRANSDUCER
NO. 2
TRANSDUCER
system using the TIX-1 tension indicator or wired
per CMC control drawings.
Barrier block assemblies and/or the individual
barrier blocks may be purchased from CMC. Please
contact CMC for part numbers and pricing.
4.0 TEMPERATURE
COMPENSATION
The transducers are supplied with a temperature
compensation network (except size 1 which don’t
require it) which is in series with the output signal
lead. The compensation circuit is designed to be
used with a tension amplifier which has an input
impedance of 10K Ohms when a pair of transducers
connected as a full bridge is used. If only one
transducer is used, the tension amplifier impedance
should be 5K Ohms. If other than the input
impedances given above are used, drift will occur
in the tension amplifier output when the transducer
temperature changes.
5.0 SINGLE TRANSDUCER
OPERATION
For those applications where only one transducer is
required, a dummy circuit may or may not be
required depending upon the input circuit of the
tension amplifier. Consult the factory for this
information. The dummy circuit consisting of two
resistors is substituted in place of the second
transducer. The resistors should have a resistance
value between 100 and 150 Ohms and should be
matched to within 1%. Dummy circuits are
available from the factory for connecting to tension
indicators or controllers.
6.0 TROUBLESHOOTING
6.1 EXCESSIVE OUTPUT SIGNAL
WITH NO LOAD
There may be a high degree of misalignment of the
transducers causing a severe pre-load.
Or
The sensing guide roll assembly may be
excessively heavy. The sensing guide roll should
INSTRUCTION NUMBER: AO-70136 BA 6of 9

not weigh more than ½ the maximum working
force of the transducers in most cases.
Or
The surface under the UPB is not flat enough.
Or
The bolting torque is not in accordance with
Figure 5 (especially for UPB with MWF under
250 lb.).
6.2 LOW OUTPUT SIGNAL
The transducer may have too large a maximum
working force for the application. Replace with a
lower maximum working force transducer or
increase web wrap angle.
6.3 WRONG POLARITY OF OUTPUT
SIGNAL
Transducers may have been incorrectly oriented.
See Section 2.4 for proper load direction.
Alternately, change the transducer excitation
voltage by interchanging the B and C connections.
6.4 OUTPUT SIGNAL NOT LINEAR,
ZERO SHIFTS DURING
OPERATION
Check transducer and tension roll mounting. All
mounting bolts must be tight. Check that there is
no dirt or foreign matter interfering with the
transducer mounting. Check that mounting surface
is flat and rigid.
6.5 NO OUTPUT SIGNAL
Check to see that all connections have been made
completely. Check for places where the
connecting cables might be crimped or cut.
6.6 VERY HIGH OUTPUT WITH NO
LOAD
Check cables and connectors for good connections
and check continuity of cables with an ohmmeter.
Check for proper wiring to transducers. Check
transducer gage resistance as given in the
following chart at room temperature with no load
applied.
TRANSDUCER GAGE RESISTANCE CHECK
Resistance
(ohms)
Pin C to B 420±20 420±20
Pin A to B 210±10 900-1100
Pin A to C 210±10 900-1100
UPB 1 UPB 2/3
7.0 SERVICE ASSISTANCE AND
REPAIR
For additional service assistance, please obtain the
Type, MWF, and Serial Number from the
nameplate. Contact the Factory Service
Department.
Phone: 216-524-8800
Or 800-321-8072
Fax: 216-642-2100
Visit Us: www.cmccontrols.com
Disassembly by improperly trained personnel may
result in additional damage to these units. Should
repairs be required or for warranty repairs, contact
the Customer Service Department for a return
authorization number before returning the units.
INSTRUCTION NUMBER: AO-70136 BA 7of 9

8.0 USEFUL SPECIFICATIONS
8.1 WEIGHT
Complete
Unit
Without
mounting plate
8.2 RATINGS
SIZE RATING (LB) * ULTIMATE OVERLOAD (%)
UPB 1 25 to 1000 500
UPB 2
UPB 3 10000 to 30000 500
* Ultimate overload: Maximum force applied on the
transducer without risking permanent deformation. For
the Washdown duty UPB the output is linear up to the
point of the ultimate overload.
1000 to 10000 500
8.3 SIZING CALCULATION
T = Max Tension
A = Wrap Angle (degrees)
W = Roll Weight
B = Angle of tension force
K = Overload for Transients
(Nominally 1.4 for most applications)
MWF = Maximum Working Force
(This is used to select the proper force rating of the
transducer)
C = Mounting Angle
H = Bearing Height + D
SIZE L (in) D (in)
UPB 1 2.5 0.98
UPB 2 4.5 1.25
UPB 3 6.5 2.10
See figure 9.
∗
=
MWF
SIZING CALCULATION:
* The MWF calculation defines the force on each
individual load cell.
** If Angle b is below horizontal use + in calculation
If Angle b is above horizontal use - in calculation
Weight lb. (kg.) Each
UPB 1 UPB 2 UPB 3
3.7 (1.7) 22 (10) 102 (47)
1.5 (0.7) 12 (5.4) 59 (27)
20000 250
A
[][]
sin 2KT
2
±+
2L
∗∗
sinC H-cosC LWB LcosBHsin
Note: Consult CMC for assistance in sizing the load cell
to your specific application.
A
A/2
T
C
B
L
T
W
H
D
Figure 9
8.4 SELECTION CHART
Transducer MWF (lbs.)
UPB1
UPB2
UPB3
Ordering procedure:
1. Calculate the Maximum Working Force
2. From the Selection Chart, determine the part
3. Obtain pricing and delivery information by
Rating 25 50 100 250 500 1000
M846-12171- 000 100 200 300 400 500
Rating 1000 2500 5000 10000 20000
M846-12172- 000 100 200 300 400
Rating 10000 20000 30000
M846-12173- 000 100 200
(MWF) rating based upon your calculations
from the sizing calculation equation.
number for the UPB Washdown-Duty LC.
Select a MWF rating that equals or exceeds the
MWF from your sizing calculation. Then, make
sure that your pillow block bearing fits the UPB
type that you selected (UPB 1, 2 or 3).
Example: If you calculate a MWF of 2,204
lbs., select a UPB 2 rated at 2500 lbs. MWF
from the Selection Chart. You part number
is M846-12172-100. Then, from Figure 2.
make sure that you pillow block bearing fits
on the Size 2 transducer. If it does not,
please consult factory.
contacting a CMC sales representative,
distributor, or the factory.
INSTRUCTION NUMBER: AO-70136 BA 8of 9

LIMITED WARRANTY.
ALL GOODS ARE SOLD SUBJECT TO
THE MUTUAL AGREEMENT THAT
THEY ARE WARRANTED BY THE
COMPANY TO BE FREE FROM
DEFECTS IN MATERIAL AND
WORKMANSHIP FOR ONE YEAR
FROM THE DATE OF SHIPMENT. THE
COMPANY'S WARRANTY DOES NOT
COVER, AND IT MAKES NO
WARRANTY WITH RESPECT TO ANY
DEFECT, FAILURE, DEFICIENCY OR
ERROR WHICH IS:
A) NOT REPORTED TO THE
COMPANY WITHIN THE
APPLICABLE WARRANTY
PERIOD; OR
B) DUE TO MISAPPLICATION,
MODIFICATION, DISASSEMBLY,
ABUSE, MISUSE, IMPROPER
INSTALLATION, UNAUTHORIZED
REPAIR, IMPROPER
MAINTENANCE OR ABNORMAL
CONDITIONS OF TEMPERATURE,
DIRT OR CORROSIVE MATTER;
OR
C) DUE TO OPERATION, EITHER
INTENTIONAL OR OTHERWISE,
ABOVE RATED CAPACITIES OR
IN AN OTHERWISE IMPROPER
MANNER.
THE FOREGOING WARRANTY IS IN
LIEU OF ALL OTHER WARRANTIES.
THE PARTIES AGREE THAT THE
IMPLIED WARRANTIES OF
MERCHANTABILITY AND FITNESS
FOR A PARTICULAR PURPOSE AND
ALL OTHER WARRANTIES, EXPRESS
OR IMPLIED, ARE EXCLUDED FROM
THE SALE OF GOODS.
LIMITATION OF REMEDY AND
LIABILITY.
THE REMEDY PROVIDED HEREIN IS
BUYER'S SOLE AND EXCLUSIVE
REMEDY. THE BUYER'S REMEDY
AND THE COMPANY'S LIABILITY
(WHETHER UNDER THE THEORIES
OF BREACH OF WARRANTY,
CONTRACT, TORT INCLUDING
NEGLIGENCE OR STRICT LIABILITY
OR ANY OTHER LEGAL THEORY)
SHALL BE LIMITED EXCLUSIVELY
AT THE COMPANY'S OPTION TO
REPLACING OR REPAIRING
WITHOUT CHARGE AT THE
COMPANY'S FACTORY OR
ELSEWHERE ANY MATERIAL OR
WORKMANSHIP DEFECTS WHICH
BECOME APPARENT WITHIN ONE
YEAR FROM THE DATE ON WHICH
THE GOODS WERE SHIPPED. THE
COMPANY SHALL NOT BE LIABLE
FOR SPECIAL, INCIDENTAL OR
CONSEQUENTIAL DAMAGES OF ANY
KIND INCLUDING BUT NOT LIMITED
TO DAMAGES FOR LOSS OF USE,
INCOME OR PROFIT, OR LOSSES
SUSTAINED AS A RESULT OF INJURY
(INCLUDING DEATH) TO ANY
PERSON OR DAMAGES TO
PROPERTY. THE COMPANY SHALL
HAVE NO LIABILITY FOR DAMAGES
OF ANY KIND ARISING FROM THE
INSTALLATION AND/OR USE OF THE
GOODS BY ANYONE. BY THE
ACCEPTANCE OF THE GOODS, THE
BUYER SHALL ASSUME ALL
LIABILITY FOR ANY DAMAGES
WHICH MAY RESULT FROM USE OR
MISUSE BY THE BUYER, ITS
EMPLOYEES OR BY OTHERS.
INSTRUCTION NUMBER: AO-70136 BA 9of 9
 Loading...