

Page 1
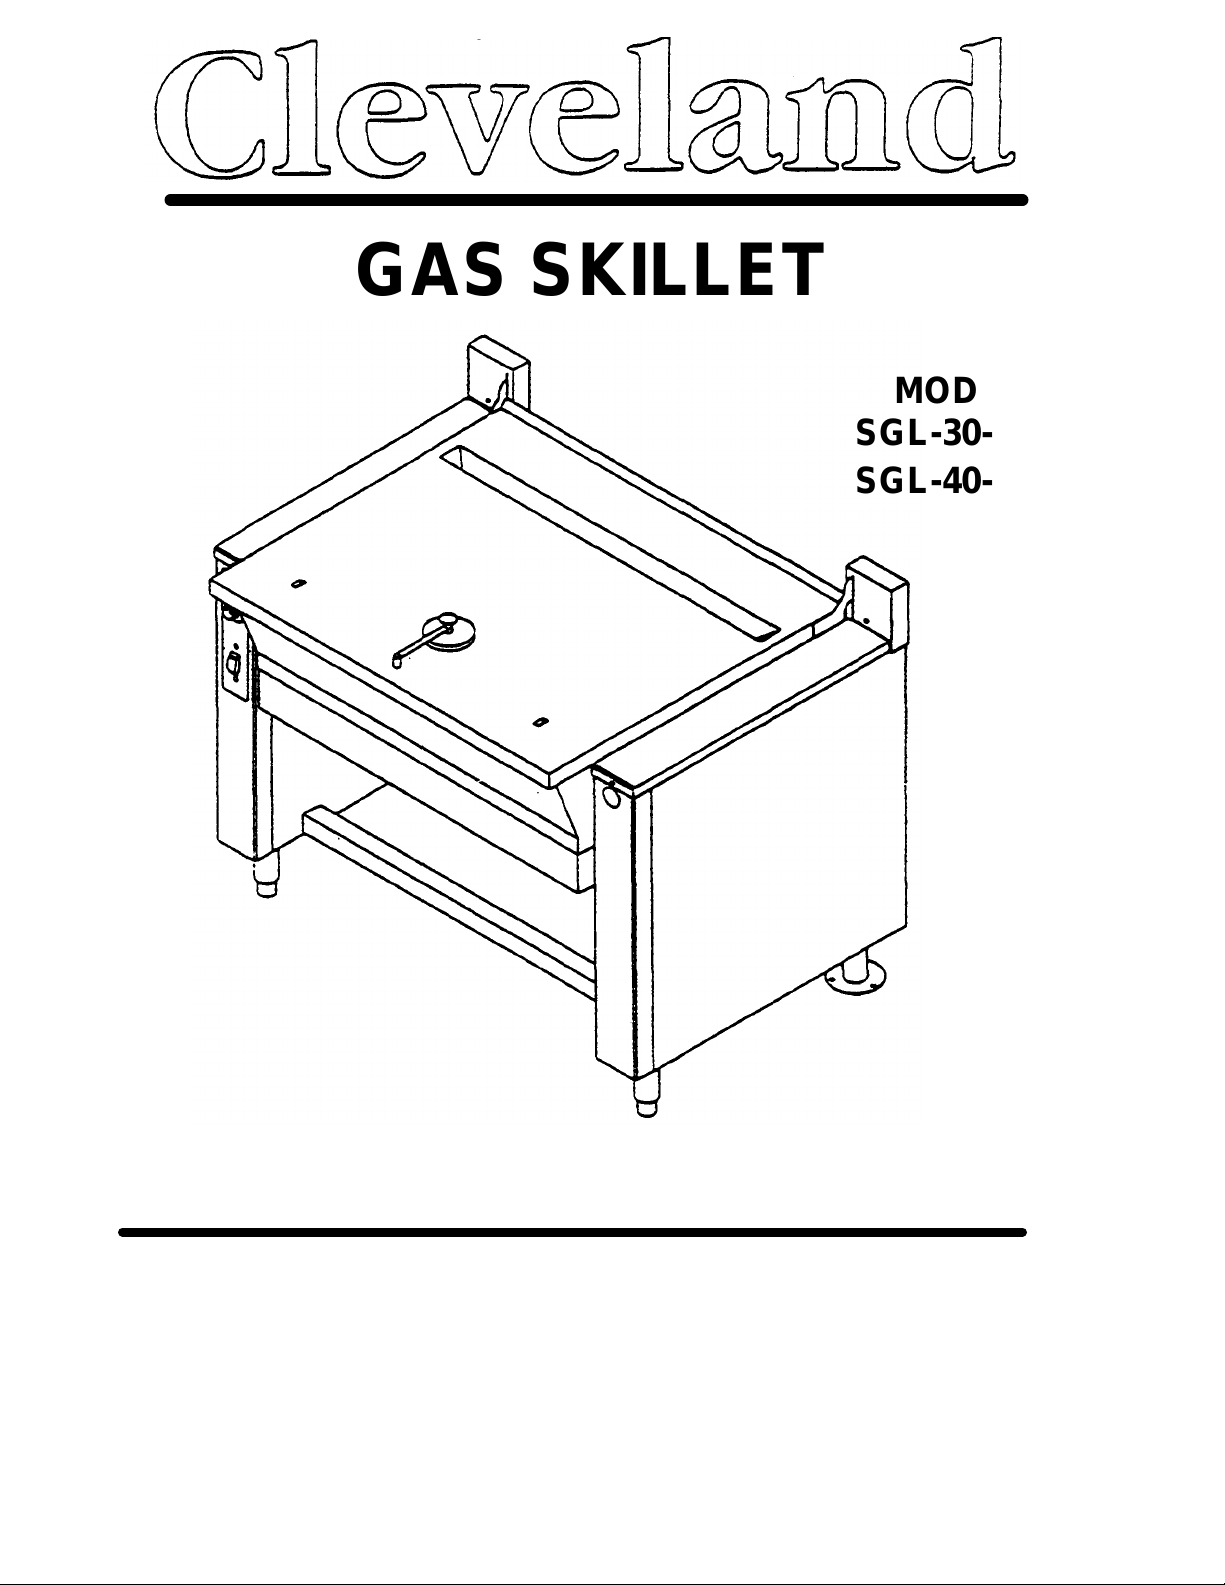
MODEL:
GAS SKILLET
SGL-30-T4
SGL-40-T4
INSTALLATION, OPERATION AND REPAIR MANUAL
CLEVELAND RANGE, INC.
1333 EAST 179TH ST.
CLEVELAND, OHIO
U.S.A44110
PHONE: 1-800-338-2204
FAX: (216) 481-3782
SKI-10
Page 2
FOR YOUR SAFETY
WARNING
IMPROPER INSTALLATION, ADJUST
- DO NOT STORE OR USE GASOLINE
MENT, ALTERATION, SERVICE OR
OR OTHER FLAMMABLE VAPORS
MAINTENANCE CAN CAUSE
OR LIQUIDS IN THE VICINITY OF
PROPERTY DAMAGE, INJURY OR
THIS OR ANY O
THER APPLIANCE.
DEATH. READ THE INSTALLATION,
OPERATION AND MAINTENANCE
INSTRUCTIONS THOROUGHLY
BEFORE INSTALLING OR SERVICING
THIS EQUIPMENT.
THE FOLLOWING POINTS ARE TO ENSURE THE SAFE INSTALLATION AND OPERATION O
F THIS EQUIPMENT:
ENSURE ALL GAS AND ELECTRICAL SUPPLIES MATCH RATING PLATE AND
ELECTRICAL STICKERS.
OBSERVE ALL CLEARANCE REQUIREMENTS.
DISCONNECT THE ELECTRICAL POWER SUPPLY TO THE APPLIANCE BEFORE
CLEANING OR SERVICING UNIT.
ONLY QUAL
IFIED SERVICE TECHNICIANS SHOULD REPAIR THIS UNIT.
THE INSTALLATION AND CONNECTION MUST COMPLY WITH LOCAL CODES, OR IN THE
ABSENCE OF LOCAL CODES, WITH CAN/CGA
-
B149 INSTALLATION CODE OR WITH THE
NATIONAL DUEL GAS CODE, ANSI Z223.1
-
LATEST EDITION.
POST IN A PROMINENT LOCATION, INSTRUCTIONS TO BE FOLLOWED IN THE EVENT THE
USER SMELLS GAS. THIS INFORMATION SHALL BE OBTAINED BY CONSULTING YOUR
LOCAL GAS SUPPLIER.
THE APPLIANCE AND ITS INDIVIDUAL SHUT
-
OFF VALVE MUST BE DISCONNECTED FROM
THE GAS
SUPPLY PIPING SYSTEM DURING ANY PRESSURE TESTING OF THAT SYSTEM
AT TEST PRESSURES IN EXCESS OF
1/2
PSIG.
(3.45
KPA).
THE APPLIANCE MUST BE ISOLATED FROM THE GAS SUPPLY PIPING SYSTEM BY
CLOSING ITS INDIVIDUAL MANUAL SHUT
-
OFF VALVE DURING ANY PRESSURE
TESTING
OF THE GAS SUPPLY PIPING SYSTEM AT TEST PRESSURES EQUAL TO OR LESS THAN
1/2 PSIG.
(3.45
KPA).
RETAIN THIS MANUAL FOR FUTURE REFERENCE.
(11936)
-1-
IMPORTANT
Page 3
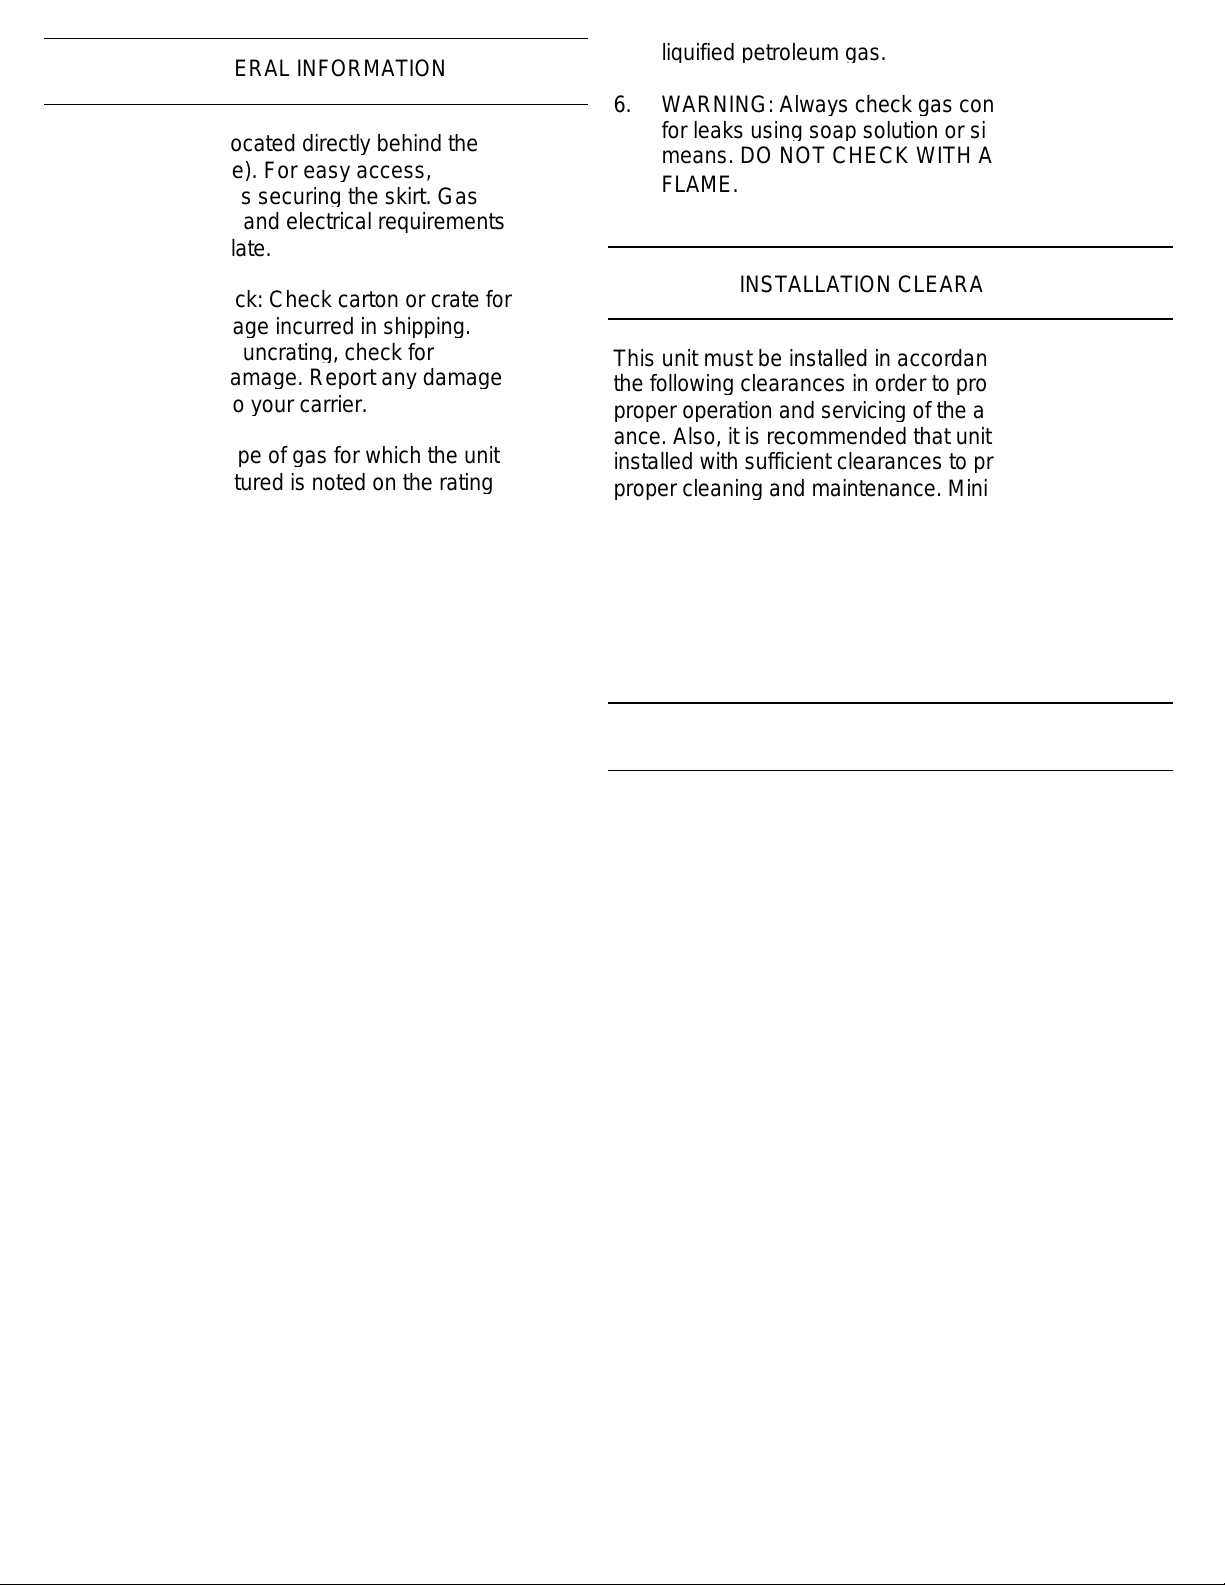
GENERAL INFORMATION
The serial plate is located directly behind the
front skirt (right side). For easy access,
remove the
3
screws securing the skirt. Gas
type, burner ratings and electrical requirements
are stated on the plate.
1. Dam
age Check: Check carton or crate for
possible damage incurred in shipping.
After carefully uncrating, check for
'concealed' damage. Report any damage
immediately to your carrier.
2. The correct type of gas for which the unit
was manufa
ctured is noted on the rating
plate, and this type of gas must be used.
3. A pressure tap is supplied with each unit
and is installed on the manifold. The gas
pressure must be checked when unit is
installed, to ensure unit gas pressure is
the
same as specified on the rating plate. For
access to the pressure tap, remove front
skirt; turn power switch to the 'OFF' posi
-
tion as a precaution. If necessary, pres
-
sure adjustments can be made at the pres
-
sure regulator whi
ch is installed on the
manifold. Once pressure test is completed,
turn power switch and thermostat to the
'OFF' position. Reattach front skirt.
4. Have a qualified gas technician check the
gas pressure to make certain that existing
gas
facilities (meter, piping, etc.) will deliver
the BTU's of gas required at the unit with
no more than
1/2"
water column pressure
drop. When checking pressure, be certain
that all the equipment on the same gas line
is turned to the 'ON' posi
tion.
5. Make certain that new piping, joints and
connections have been made in a clean
manner and have been purged so that pip
-
ing compound, chips, etc. will not clog
valves and/or controls. Use pipe joint
sealant that is approved f
or use with
liquified petroleum gas.
6. WARNING: Always check gas connections
for leaks using soap solution or similar
means. DO NOT CHECK WITH AN OPEN
FLAME.
INSTALLATION CLEARANCES
This unit must be inst
alled in accordance with
the following clearances in order to provide
proper operation and servicing of the appli
- ance. Also, it is recommended that unit be
installed with sufficient clearances to provide for
pro
per
cleaning and maintenance. Minimum
clearances are
1"
for the sides and
6"
(152mm)
from back to adjacent combustible walls. Zero
clearance is required from non
-
combustible
Surfaces. Certified for installation on com
- bustible floor.
INSTALLATION INSTRUCTIONS
1. Carefully remove unit from carton or crate.
Remove any packing material from unit.
2. A protective material has been applied to
the stainless steel panels.
NOTE: This material must be removed
immediately after installation, as
heat will
melt the material and make it difficult to remove.
3. These units must be installed under an
adequate ventilation system. Refer to the
sections titled VENTILATION and AIR
SUPPLY for further instructions.
4. Comply with cl
earances stated on the
specification sheet. Ensure there is
sufficient clearance between skillet and
(11936) -2-
Page 4

back wall. Check for overhead clearance
to accommodate for hinged cover when in
the raised position.
5. Level skillet by means of adjustable stain
less steel feet. Use a spirit level and level
unit four ways; across front and back
and
down left and right edges. Securely
anchor the adjustable feet to the floor and
seal joint with a silicone sealant.
6. FOR YOUR SAFETY: Keep the appliance
area free and clear of combustible
materials.
A cord and plug is supplied on each unit,
120
volts, single phase,
2.0
amps.
WARNING
Electrical Grounding Instruction
This appliance is equipped with a three prong
(grounding) plug for your protection against
shock hazard
and should be plugged directly
Into a properly grounded three prong
receptacle. Do not cut or remove the
grounding prong from this plug.
A separate
15
amp service must be provided.
For 120V usage, each skillet is electrically
equipped with a cord
set with a three prong
plug, which fits any standard
120
volt three
prong grounded receptacle.
When a unit is ordered and built for
108/240
Volt
:,
the supply line must be connected to the
wiring terminations located inside the left
Console. For e
ase in attaching the supply line,
There is a removable side panel on the console.
A wiring diagram is attached to the rear of the
front panel of each unit.
IMPORTANT: This appliance must be elec
- trically grounded in full accordance with local
codes or, in the absence of local codes, with
the Canadian Electrical Code C22.1
,
or with the
National Electrical Code. ANSI/NFPA No.
70
- latest edition (whichever is applicable).
A
3/4"
NPT gas connection is required along
the rear of the unit.
It is recommended that a sediment trap (drip
leg) be installed in the gas supply line. If the
gas pressure exceeds 14" water column, a
pressure regulator must be installed to provide
a maximum of
14"
water column gas pressure
to the gas control valve.
Connect the gas supply piping to the input side
of the gas control valve. Location and pres
- sure data are shown on the specification sheet.
Installation must be in accordance with local
codes and/or the National Fuel G
as Code
ANSI 2233.1
-
latest edition (USA), or Installation
Codes for Gas Burning Appliances and Equip
- ment CAN/CGA
-B149.1
and B149.2 (Canada).
Use a gas pipe joint compound which is resist
- ant to LP. gas. Test all pipe joints for leaks
with soap a
nd water solution. Ensure that the
gas pressure regulator is set for the manifold
pressure indicated on the gas rating plate.
A
1/4"
NPT cold water line and a
1/4"
NPT hot
water line are required for the fill fauc
et.
A gas skillet must be installed in a location in
which the facilities for ventilation permit
satisfactory combustion of gas and proper
venting. Proper ventilation is imperative for
GAS CONNECTION
ELECTRICAL CONNECTION
WATER CONNECTIONS (OPTIONAL)
VENTILATION
Page 5

good operation of the appliance. The ideal
method of ventilating a gas skillet is the use of
a property designed ventilating canopy, which
should extend at least
6"
(152mm) beyond all
sides of the appliance (except against a wall, if
the canopy is
a wall installation). This is usually
part of a mechanical exhaust system.
Further information can be obtained by
referring to the U.S.A. National Fire Protection
Association's NFPA96 regulations. These
standards have also been adopted by the
Nati
onal Building Code in Canada.
AIR SUPPLY
1. Appliances shall be located so as not to
interfere with proper circulation of air within
the confined space. All gas burners
require sufficient air to operate.
2. Large objects should not be pla
ced in front
of the appliance which might obstruct the
air flow through the front. Do not obstruct
the flow of combustion and ventilation air.
3. Do not permit fans to blow directly at the
appliance and, wherever possible, avoid
open windows
adjacent to the appliance
sides and back; also wall type fans which
create air cross
-
currents within the room.
This appliance has been factory tested and
adjusted under ideal conditions but, rough
handling, low gas pressure
, altitude or
variations in gas characteristics may require
fine adjustment.
All units are equipped with fixed orifices and do
not require primary air adjustment
NOTE: This appliance is equipped with a direct
s
park ignition system. Ensure the gas and
electrical supply to the appliance are in the
‘ON’ position.
1. Turn the main manual gas valve to the 'ON'
position.
2. Turn power switch to the 'ON' position.
3. Set thermostat to desired tem
perature.
4. If ignition fails and/or the control system
goes into lockout, set power switch to the
'OFF' position.
5. Wait
5
minutes, then repeat steps
1
through
3.
If the problem persists, have a
qualified serviceman check the sys
tem.
6. To shut down system, turn power switch
and main manual gas valve to the 'OFF'
position.
1. Ensure the gas and electrical supply to the
appliance are in the 'ON' position.
2. Turn power sw
itch to the 'ON' position.
The green pilot light will indicate power is
on. Wait one minute to allow flame sensor
to heat up.
3. Power Tilt
Cleveland skillets are equipped with an
electric power tilt mechanism for raising
and loweri
ng the frypan. To raise frypan,
raise the cover and press up on the tilt
switch. To lower frypan, press down on
the tilt switch.
LIGHTING INSTRUCTIONS
OPERATING INSTRUCTIONS
START-UP PROCEDURE
(11936) -4-
Page 6

Manual Tilt
Cleveland skillets can also be equipped
worth the optional manual tilt mechanism for
raising and lowering the frypan. To raise
frypan, raise the cover and turn the crank
clockwise. To lower frypan, turn counter-
clockwise.
4. FOR YOUR SAFETY, this skillet is also
equipped with a power interrupter which
automatically shuts off the gas supply to
the burners whenever the skillet is raised
more than 1/2" (13mm).
IMPORTANT: Before commencing to
cook, ensure frypan is in the lowered
position by pressing down on the tilt
switch. Ensure cover is raised first.
5. To preheat, set thermostat to desired
cooking temperature.
6. Allow skillet to preheat for approximately
15-30 minutes.
7. Once preheated, insert product in skillet
and adjust thermostat to required cooking
temperature.
8. If desired, once product has cooked, it can
be held prior to serving at a lower
temperature setting.
9. When cooking is completed, set thermostat
and power switch to the 'OFF' position.
10. The best time to dean the skillet is
immediately after use, once skillet has
cooled down. Refer to section titled
CLEANING INSTRUCTIONS.
OPERATING SUGGESTION S
1. Turn power switch to the 'OFF' position
when skillet is not in use.
2. Clean skillet as soon as possible after
cooking.
3. Allow skillet to preheat before adding
product.
4. Always lift the spring assist cover before
activating the tilt mechanism.
5. During an electrical power interruption, turn
power switch to the 'OFF' position. This
unit cannot be made to operate without
electrical power.
MAINTENANCE INSTRUCTIONS
NOTE: ANY MAINTENANCE OR SERVICE
INVOLVING DISASSEMBLY OF COMPONENTS
SHOULD BE MADE BY A QUALIFIED SERVICE
TECHNICIAN. ENSURE GAS, ELECTRICAL
AND WATER SUPPLY (IF APPLICABLE) TO
THE APPUANCE ARE SHUT OFF.
You have purchased the finest commercial
cooking equipment available anywhere- Like
any other fine, precision-built piece of
equipment it should be given regular care and
maintenance.
Periodic inspections by your dealer or a
qualified service agency are recommended to
check temperatures, adjustments and ensure
moving parts are operative. Whenever
possible, avoid over-heating idle equipment, as
this is the primary cause for increased service
costs.
When corresponding with the factory or your
equipment dealer regarding service problems
or replacement parts, be sure to refer to the
particular unit by the correct model number
(including prefix and suffix letters and numbers)
and the serial or code number. The rating
plate affixed to the unit contains this
information.
(11936) -5-
Page 7

"REGULAR MAINTENANCE ENSURES PEAK
7. After cleaning, the skillet should be
thoroughly rinsed with dean water and
PERFORMANCE."
MOTION. Soil or burnt deposits which do
not respond can usually be removed by
rubbing the surface with Scotch -Brite
scouring pads or stainless scouring pads.
DO NOT USE ORDINARY STEEL WOOL
CLEANING INSTRUCTIONS
A regular daily cleaning program should be
followed to maintain your skillet's efficient
performance and minimize service calls. At the
end of each day's operation, the following
stepS are recommended:
1. Turn power switch to the 'OFF' position.
2. Skillet should be cleaned after each use, as
3. For general purpose cleaning, use a soft
soon as possible after cooking. CAUTION:
Ensure skillet has cooled down.
5. Do not use grill stones. Heat tint can be
6. Tomato and vinegar based products have a high
removed by a vigorous scouring in the
direction of the polish lines using Scotch -
Brite scouring pads or a stainless scouring
pad in combination with a non-abrasive
cleanser.
add content which could attack the
stainless steel finish of the frypan. After
cooking of such products, clean frypan
interior with a baking soda and water
solution. Use one tablespoon of baking
soda per one gallon of water.
4. To remove grease that has baked on,
cloth with mild detergent and warm water.
A sponge, non-abrasive scouring pad or a
fiber brush can also be used for this
purpose.
apply a non-abrasive cleanser to a damp
cloth or sponge and rub cleanser on the
metal in the direction of the polishing lines
of the metal. NEVER RUB IN A CIRCULAR
(11936) -6-
dried.
Calibration
IMPORTANT: DO NOT ATTEMPT TO
CALIBRATE THE THERMOSTAT.
Page 8

Page 9

Cleveland MAINTENANCE & REPAIR
1. Acme American Repairs
99
Scott Avenue
Brooklyn. MY
11237
(718)456
-
6544 1-
800-221-3026
(National)
2.
American Kitchen Machines
204
Quarry Street
Philadelphia. PA
19106 (215)627
-
7760 1-
800-848-7760
(National)
3.
Appliance Installation & Service
1336
Main Street
Buffalo. NY
14209
(716)884
-
7425 i -800-722-1252
(National)
4.
Armstrong Repair Center
5750-A Royalton
Houston. TX
77081
(
713)666
-
7100 1-
800-392-5325
(National)
5.
Authorized Commercial Service
4832'Soutti 35th Street
Phoenix. AZ
85040
(602) 234
-
2443 1-
800-824-8875
(National)
6.
Authorized Factory Service
1010
First Avenue
Coraopolis, PA 15108
(412)262
-
2330 1 -
800-223-2862
(National)
7.
Bana Part, Inc.
1501
Kuebel Street
Harahan. LA
70123
(504)734
-
0076 1 -
800-325-7543
(National)
8.
Ron's Service
703
E.
44
Boise.
10 83714
(20Q375
-
4073
9. Bromley Parts
and Service
10th & Ringo St
Little Rock, AR
72201
(501)3740281
1-
800^82
-
9269
(National)
10. BGSI
3121
N.W. 16th Terrace
Pompano Beach. FL
33064
(954)971
-
0456 1-
800-253-0200
(National)
11. Burners Commercial Service
4480 Aldebaran Avenue
LasVegas.NV89l03
(702) 736
-
0006 1-
800-634-7600
(National)
12. CAC,lnc.
610
industrial Avenue NC.
Albuquerque, NM
87102
(505)343
-
6100 1-
800-366-8242
(National)
13. Casco Food Equipment Service
10 D
unldee Road
Bow. NH
03304
(603)224
-
9173 14. Certified Service Center
4946-50
Paddock Road
Cincinnati, OH
45237
(513)
242-3139 1-
800-543-2060
(National)
15. Chandlers Parts and Service
11656
Darryl Drive
Baton Rouge. LA
7
0815
(504) 272
-
6620 1-
800-349-8888
(National)
16. Commercial Appliance Parts
165
Commerce Circle, Suite B
Sacramento. CA
95816
-
4201
(916)567
-
0203 17. 8416
Laurel Fair Ode
Buldng6.Sutell4
Tampa. Florida
33610
(813)66
3-0313
1-
800-282-4718
(National)
18. Commercial Kitchen Repair Co.
1377
North Brazos
San Antonio.
IX 78207
(512)735
-
2811 1-
800-292-2120
(National)
19
Commercial Parts & Service
1150
West Mount Street
Columbus, OH
43223
-
2295 (614)221
-
0057 20
Commercial Parts
&
Service
5310
East 25th Street
P.O. Box
18688
Indianapolis. IN
46218
(317)545
-
9655 1-800-727-8710
(National)
21
Commercial Parts
&
Service
3717
Cherry Road
Memphis. TN
38118
(901)36
6-1587 1-800-974-9155
(National)
22
Commercial Parts
&
Service
748
Fesslers Lane
Nashvile, 7N
37210
(615)244
-
8050 1-800-831-7174 (National)
23
Cones Repair Service
2408
40th Avenue
Mo6ne.lL.61265
(309)797
-
5323 1-800-716-7070
(National)
24
Daubers Inc.
7645
Dynatech Court
Springfield. VA221
53 (703)866
-
3600 1-800-554-7788
(National)
25
Duffy
-
s Equipment Service
3138
Oneida Street
Sauquoit, NY
13456
(315)737
-
9401 1 -
800-443-8339 (Na
tional)
26
Eichenauer Services
130
South Oakland Street
Decatur, IL
62522
(217) 429
-
4229
1 -800-342-0240
(National)
The following is an alphabetical listing of regional distrib
utors of
Free Performance & Installation Check-Out
parts and service throughout the United States and Canada.
Contact your nearest distributor for the name of an Authorized
Service Agency in your area.
CENTERS
Page 10

Cleveland
27 Electrical Appliance Repair
5805
Valley 3eft Road
Independence, OH 44131
(216)459
-
8700
1-800-621-825S (OH)
28
Electric Motor Repair
700
East 25th Street
Baltimore. MD
21218
(410) 467
-
8080
1-800-879-4994
(National)
29
Food Equipment Parts & Service
300
Punhale Road
Honolulu. HI
96819
(808) 847
-
4871
30
GCS Service, Inc.
946
East l2lh Street
Los Anodes. CA
90021
(213) 749
-
7785
1-800-327-1433
(National)
31GCS Servic
e, Inc.
9030
Kenamor Drive. Suite
314
San Diego. CA
92121
(619)549
-
8411
1-800-422-7278 (National)
32GCS Service, Inc.
360
Utttefield Avenue
So. San Francisco, CA
94080
(415) 871
-
6693
1-800-969-4427
(National)
33GCS Service, In
c.
292
Murphy Road
Hartford, CT
06114
(860)549
-
5575
1-800-523-7901
(CT) 34
GCS Service, Inc.
3373
N.W. 168th Street
Miami. PL
33056
005) 621
-
6666
1-800-766-8966
(National)
35GCS Service, Inc.
4305
Vineland Road. Suite
0-12
Orlando. PL
32811
(407)841
-
25510
-
2552
1-800-338-7322
(National)
36GCS Service, Inc.
696
Larch Avenue
Elmhurst, IL 60128
(630)941
-
7800
1 -800-942-9689
(National)
37GCS Service, Inc.
180
Second Street
Chelsea, MA 02150
-
0007
(617)889
-
9393
1-800-225-1155
(National)
38GCS Service, toe.
31829
W. Eight Mile Road
Livonia, MI
48152
l-aOO-772-2336 (National)
39GCS Service, Inc.
2660
Pittman Drive
Silver
-
Springs, MD
20740
(301) 927
-
7330
(D.C.)
1-800638
-
7278
(National)
40GCS Service, Inc.
6107Cooneclicut
Kansas City, MO
64120
1-800-229-6477 (National)
41
GCS Service, Inc.
9722
Reavis Park Drive
SL Louis. MO
63123
(314)
638-74A4
1-800-392-3505
(MO)
1-800-284-4427
(National
42GCS Service, inc.
932
Grand Street
Brooklyn. NY 11211
(718)486
-
5220
1-800-96&4271 (National)
43GCS Service, Inc.
1002
Waterman Avenue
East Providence, Rl
06144
(401)434
-
6803
1-800-162-6012 (National)
44GCS Service, Inc.
2421
Grenoble Road
Richmond. VA
23294
(804)672
-
1700
1-800-899-5954
45
GCS Service, Inc.
5760
Hampton Boulevard. Suite
106
Virginia Beach. VA
23455
(804)464
-
3500
1 -800-476-4278
(National)
46General Parts
&
Service
West
223
North 735
Saratoga Dm®
Waukesha. Wl
53186
(414) 650
-
6666
1 -800-2794976
(National)
47Goodwin/Tucker Group, Inc.
815
North 19th Street
Omaha, NE
68102
(402)345
-
7400
1-800-228-0342
(National)
48
Hagar Restaurant Equipment Service
1229 West Main
Oklahoma City, OK
73106
(405)235
-
2184
1-800-445-1791
(National)
49Hawkins Commercial Appliance Service
3000
South Wyandot
Englewood, CO
80110
(303)781
-
5548
1-800-624-2117
(National)
50Industrial Electric
5662
Engi
neer Drive
Huntington Beach. GA
92649
(714)379
-
7100
1-800-457-3983
(National)
51
Jackson Faspray Service
155
Sargeant Avenue
Clifton, NJ 07013
(201)471
-
8000
1-800-356-6740
(National)
52Jones
-
McLeod Appliance Service
1616 7th A
venue, North
Brimingham, Al 35203
(205)251
-
0159
1-600-821-1150
(National)
53K&D Service
1833-41
North Cameron Street
Harrisburg, PA 17103
(717)236
-
9039
1-800-932-0503
(National)
54. La Monica Restaurant Equipment Service
6182
South Stratier
Murray, UT
84107
(801)263
-
3221 55. Metro Appliance Service
1640
South Broadway
Denver, CO
80210
(303)778
-
1126
1-800-525-3532 (National)
5S. Metro Appliance Service, Inc.
10911
WestHighvuav55
Minneapolis, MN
554^1
(612) 546
-
4221
1-800-345-4221
(National)
57. Northern Parts Distributors
4874
South Catherine Street
Plattsburg, NY 12901
(518)563
-
3200
1-800-634-5005
(National)
58. P&O Appliance Service
100
South Linden Avenue
So. San Francisco.
CA
94080
(415)861
-
1414
1-800-424-1414
(National)
59. Restaurant Appliance Service
7219
Roosevelt Way NE
Seattle. WA
98115
(206)524
-
8200
1-800-433-9390
(National)
60. Ron's Service
16364
S.W. 72nd Avenue
Portland, OR 97224
(503)
624-0690
1/800
-
851-4018 (National)
61. Elmer Schultz Service
540
North Third Street
Philadelphia. RA
19123
(215)627
-
5400
62. Southeastern Restaurant Service
2200
Norcross Parkway. Suite
210
Altanta, GA 30071
(404)446
-
6177
1-800-23S-
6516 (National)
63. State Wide Service
603
Main Avenue
Nitro. West Virginia
25143
(304) 755
-
1811
(National)
1-800-441-9739 64. Stove Parts Supply Co.
2120
Solana Street
Ft. Worth.
7X76117
(817) 831
-
0381
1-800-433-1804
(National
)
65. Summit Restaurant Repair
272
Elmont Road
Elmont, NY 11003
(516)326
-
7900
66. Whaley Electric Service
I-26 at US
1
West Columbia. SC
29169
(803)791
-
4420
1-800-877-2662
(National)
MAINTENANCE & REPAIR CENTERS
 Loading...