

Cleveland QII-55 Installation Manual

QII- STARTUP INSTRUCTIONS FOR FINAL TEST --OVEN UNIT 55
1.) First conduct a visual safety check on oven unit.
• Make sure all wires are connected
• Verify gas lines are connected properly
• Verify the 120/240 to 24VAC transformer jumpers (H2 to H3) are in the correct position…Large
Transformer. See Figure 1
• Verify the 208/240 to 120VAC transformer jumpers (H1 to H3) and (H2 to H4) are in the correct
position…Medium Transformer. See Figure 2
Figure 1 Figure 2
2.) Connect gas line to oven unit. See Figure 3 & 4
Figure 3
Figure 4
MOUNT GAS
REGULATOR ON
BACK OF OVEN
CONNECT
BLUE GAS
HOSE TO
OVEN UNIT TO
GAS VALVE
IN OFF
POSITION
GAS
REGULATOR
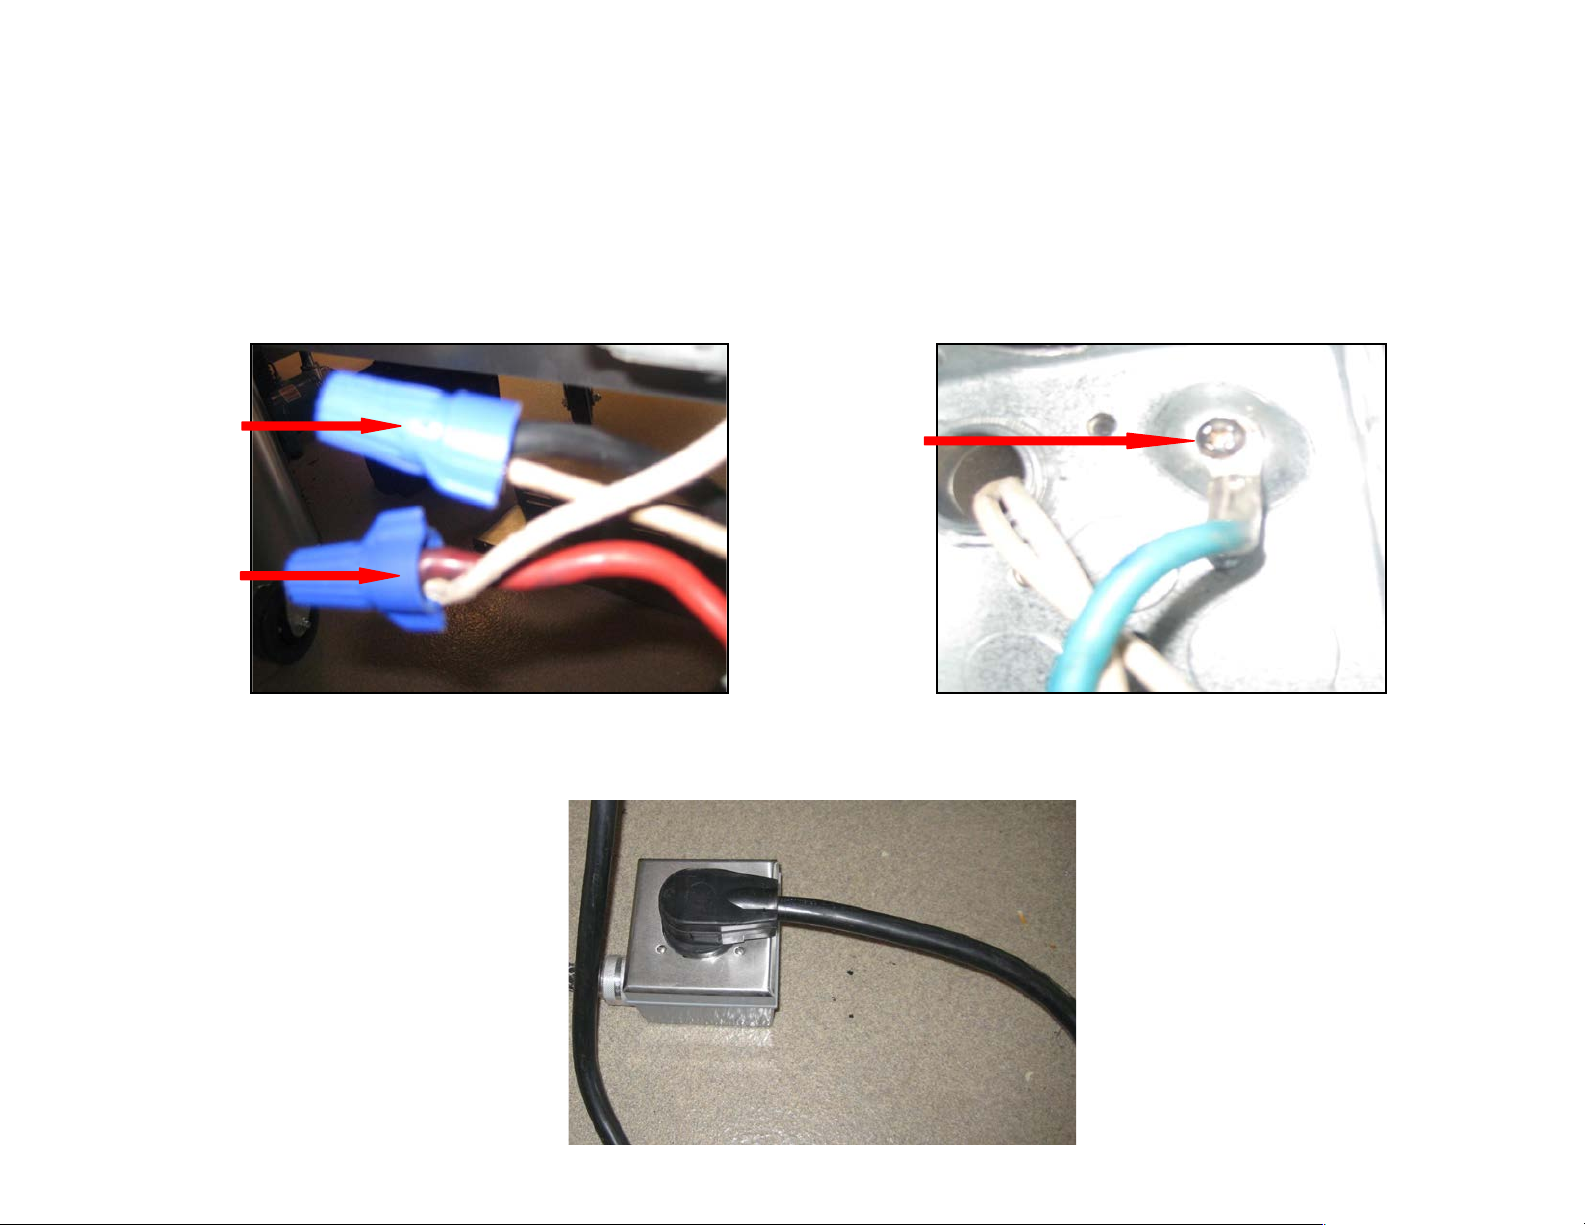
Figure 3 Figure 4
3.) Turn gas valve on...verify there is no gas leaks anywhere in the oven. See Figure 4
4.) Remove all burner screens.
5.) Connect the power cord to the oven unit. See Figure 5 & 6
Figure 5 Figure 6
6.) Plug electrical plug into power outlet. See Figure 7
CONNECT
BLACK WIRE TO
WHITE WIRE
CONNECT RED
WIRE TO WHITE
WIRE FROM
CONNECT
GROUND
WIRE TO
OVEN
ELECTRICAL
MAKE SURE ELECTRICAL PLUG IS NOT PLUGGED INTO POWER OUTLET PRIOR TO
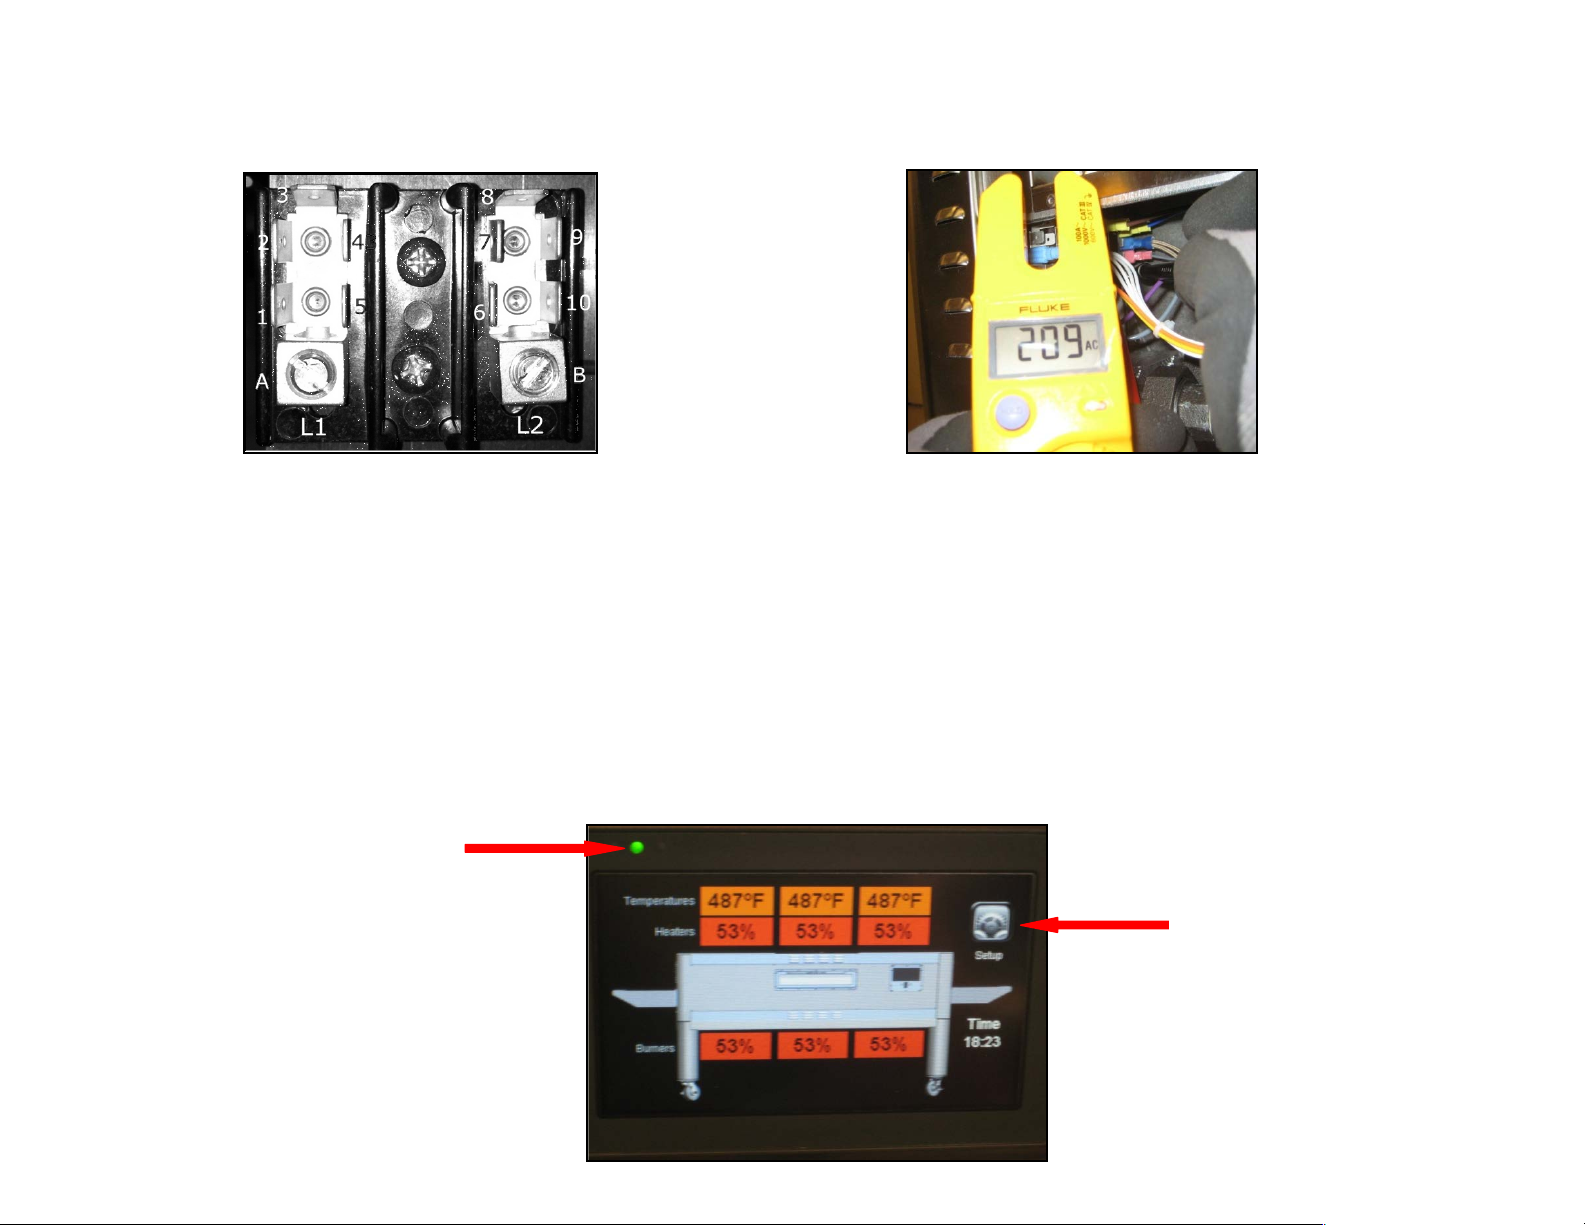
Figure 7
7.) Measure the input supply voltage from the left rear terminal block across L1 and L2 using Fluke Amp Meter …
See Figure 8 & 9
Figure 8 Figure 9
8.) Once you verified there is no gas leak and the appropriate voltage is applied to the oven then you can move to
the next step.
9.) Open heater circuit breakers… See Figure 9
10.) Turn main power switch “on” located on the main control panel. Note: you will notice the LED flashing at first
then you should see the LED light turn green. See Figure 10
11.) Figure 9 shows the default screen.
YOU MUST MEASURE BETWEEN 206 TO
GREEN LED
SETUP
 Loading...