

ClearWater Emperor Installation Instructions Manual
. CAUTION: Risk of product damage.
• It is advisable always to run in some cold water before turning
on the hot tap
• Do not use abrasive cleaners.
• Wipe your bath with a soft cloth after each use to prevent a
build-up of soap and residue.
• Avoid cleaning products that contain acetone, ethyl alcohol,
amyl or ethyl acetate, sodium
hypochlorite, toluene, or phenol. These products can damage
the finish
• Extreme heat s uc h as th at generated by cigarettes or porta b le
heaters can damage Acrylic surfaces. Do not use such items
near your bath.
• In the event of slight scratches in the bath surface, a mild
abrasive, similar to metal polish, can be used to polish these
out.
FOR TECHNICAL ADVICE/ SPARE PARTS
PLEASE CONTAC T OU R CUSTOMER
SERVICES DEPARTMENT
Tel. 01274 738140 Fax. 01274 732461
Please leave the instruction le aflet for the
TO THE INSTALLER
Clearwater Collection Ltd
Enterprise House, Ironworks Park
Bowling Back Lane, Bradford
customer
BD4 8SX
The Emperor Bath
Installation Instructions
Please read carefully prior to commencing any work.
Any installation should only be carried out by a qualified tradesman with knowledge of the
Statutory Regulations and plumbing requirements for your area.
HANDLING
Please note that this product has been through our rigid quality control procedures which
include a thorough visual inspection under bright lights water testing etc. Please unwrap the
bath and check it carefully to ensure it has not been damaged in handling or transport which
is beyond our control.
Do not remove the old fixture before you unpack and inspect the new unit.
Upon receipt, check for shortages. Report any shortages immediately.
Store the bath and wall surrounds in a safe place until you begin installation to avoid
damage.
Claims regarding cracks and/or face damage must be reported
within 24 hours of receipt of the product. No such claims will be
recognised after installation as this is classed as acceptance of the
product.
The bath should not be exposed to direct flame or abnormal heat. Once installed it is good
practice to cover the entire bath with a soft protective cloth until other trades have completed
their work.
The Bath Instructions
This bath is suitable for plastic wastes or exposed wastes. These are available
to purchase separately.
1. The bath is designed for floor or wall mounted taps.
2. The floor which the bath sits on must be level.
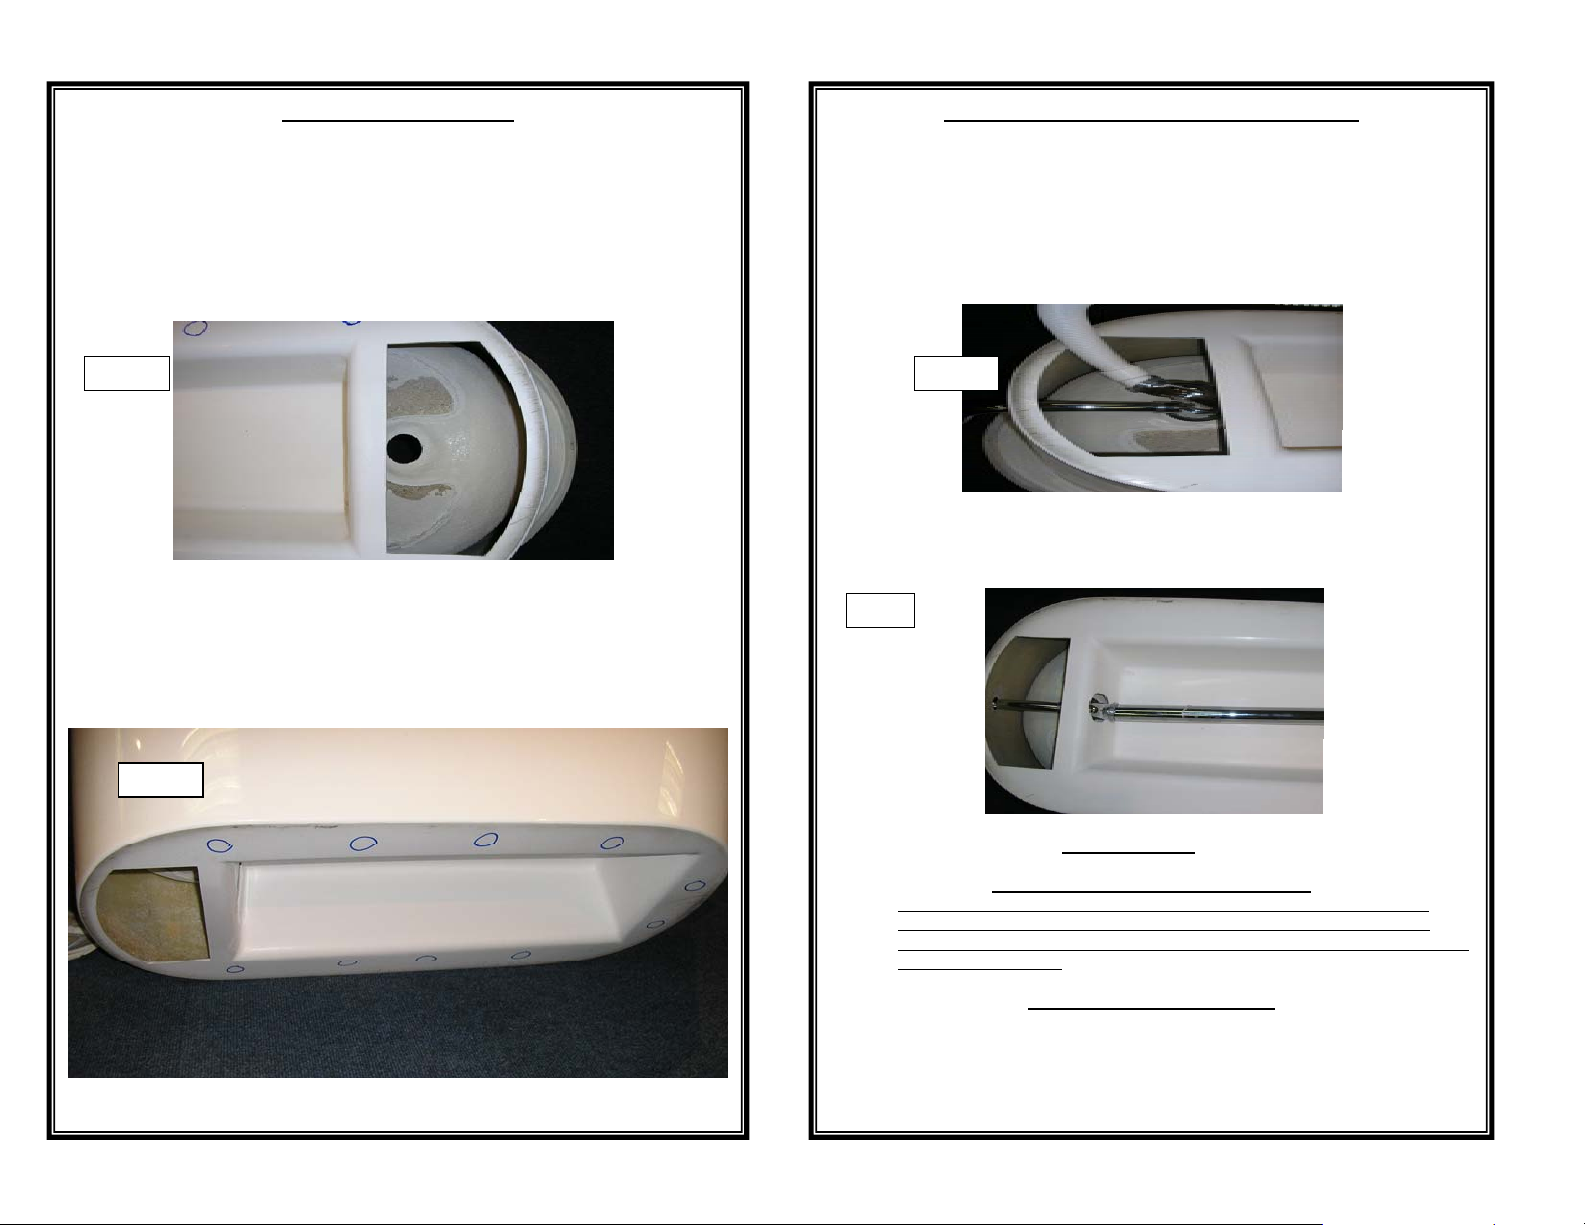
3. There is access under the bath for the connection of the outlet pipe
to the trap. (See Fig 1.)
Connecting the waste to the drain pipe
the drain pipe to the waste.
Method 1) If you have a waste that comes up through the floor, you can connect to it
There are two ways in which you can connect
with a flexible drain pipe which enables you to tilt the bath up and move the
bath into the required position. (see fig 3) To avoid water retention in the
trap the flexible pipe should have a continuous downward flow
Fig 1
4. This access point on the base can be enlarged if required, but should
not extend beyond the base up the sides walls.
5. The bath can be tipped up slightly to allow connection to the drain
piping running into the floor void, or a length of flexible pipe can be
used. (See fig. 2)
Fig 2
Fig 3
Method 2) If under-floor ac cess is impossible, an additional hole of approx 45mm
When the bath is in positio n and the installation is complete,
diameter can be drilled through the outer skin of the bath to allow the trap to
be connected to a rigid pipe(see fig 4)
Fig 4
Very important
Once the waste connection has been made, with the plug in, run a little
water into the bath and check for leaks. Take the plug out and let water
drain. Check again for leaks. Then fill the bath past the over flow, empty and
check for leaks again.
It is recommended that you apply clear silicone sealant around the bottom
of the bath to secure it to the floor (Circles shown in Fig 2).
Should maintenance access be needed the silic one can be released by
cutting round it with a sharp knife.
Check for leaks before securing to floor
Securing your bath to the floor
 Loading...