

ClearWater CWC-9, CWC-9B Installation Manual
Installation Manual
CWC-9 and CWC-9B
(2006-2008 MX-5 / Miata Sound Systems)
Page 2
Step 1: Parts and Overview
Congratulations on your purchase of the ultimate car audio upgrade
available for the Mazda Miata/MX5!
Below are some of the features associated with this speaker component set:
• This system was specifically designed for the Miata/MX5.
• Hundreds of hours have gone into the testing and design of this audio system.
• Measurements were made with the industry’s top equipment.
• No other speakers in the world have been so meticulously designed
specifically for one vehicle.
• The system was designed so that anyone can install it with minimal tools.
• As with all Clearwater purchases your satisfaction is guaranteed!!
Please be sure to read our instructions thoroughly before
attempting installation.
Parts Included:
1. Door Speakers (2)
2. Custom Tweeters (2)
3. Sound Modules (2)
4. Screws (8)
5. Large Zip Tie (Cable Ties) (2)
6. Small Zip Ties (Cable Ties) (12)
7. Door speaker water shields (2)
8. Installation Manual (1)
Tools Needed:
1. Phillips Head
Screwdriver #2
2. Knife or wire cutters
3. Pliers
4. Small (very small) flat
head screwdriver
We are passionate about our audio and you should be too!
Page 3
Step 2: Factory Speaker Removal
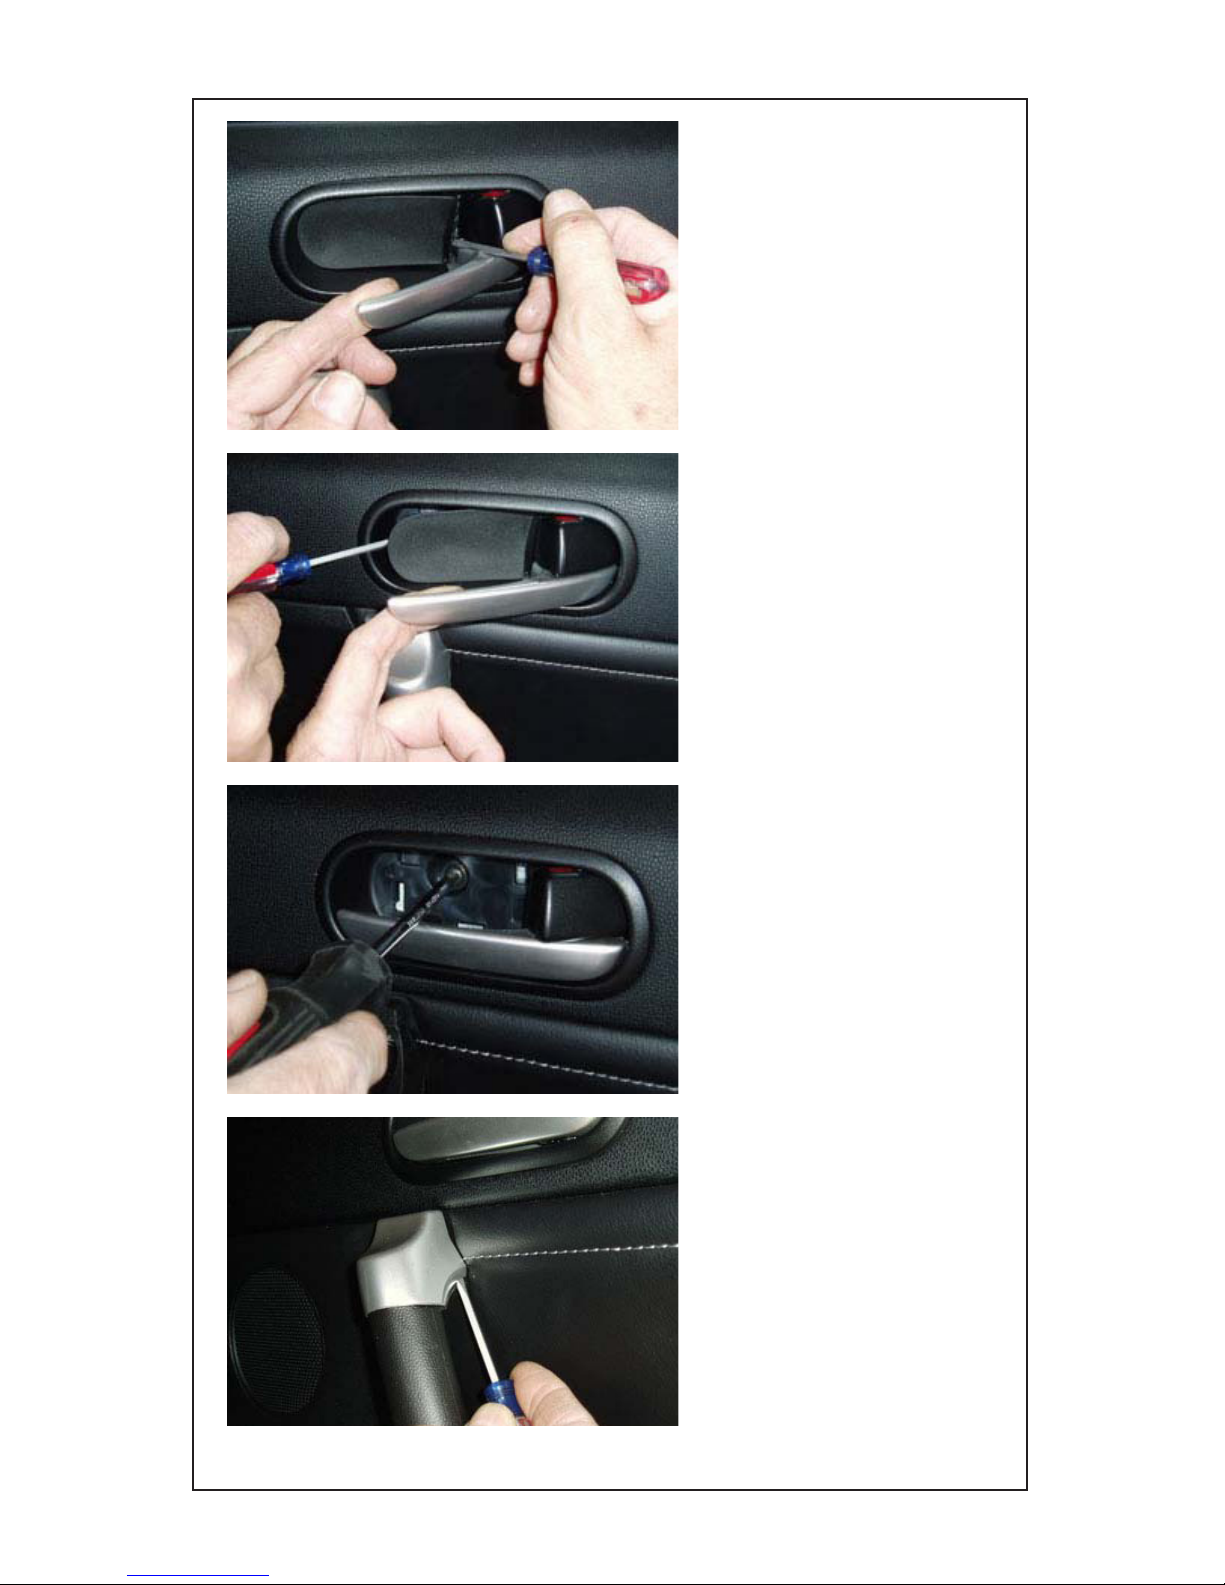
• With the door handle
held in the “open-the-
door” position, gently
insert a small flat head
screwdriver behind the
blank plastic insert and
apply enough prying force
to loosen.
• With the door handle
still in the “open-the-door”
position, insert the small
flat head screwdriver
into the front of the now
loosened blank plastic
insert and pry it out.
• Using a #2 Phillips
head screwdriver,
unscrew the screw from
behind the blank plastic
insert that you just
removed.
• Gently insert your small
flat head screwdriver
upwards into the base
of the plastic cap at the
top of the main door grab
handle. Apply upward
pressure until the plastic
cap comes off into your
hands. Be ready to catch
these because they have
been known to take flight.
Page 4
Step 2: Factory Speaker Removal
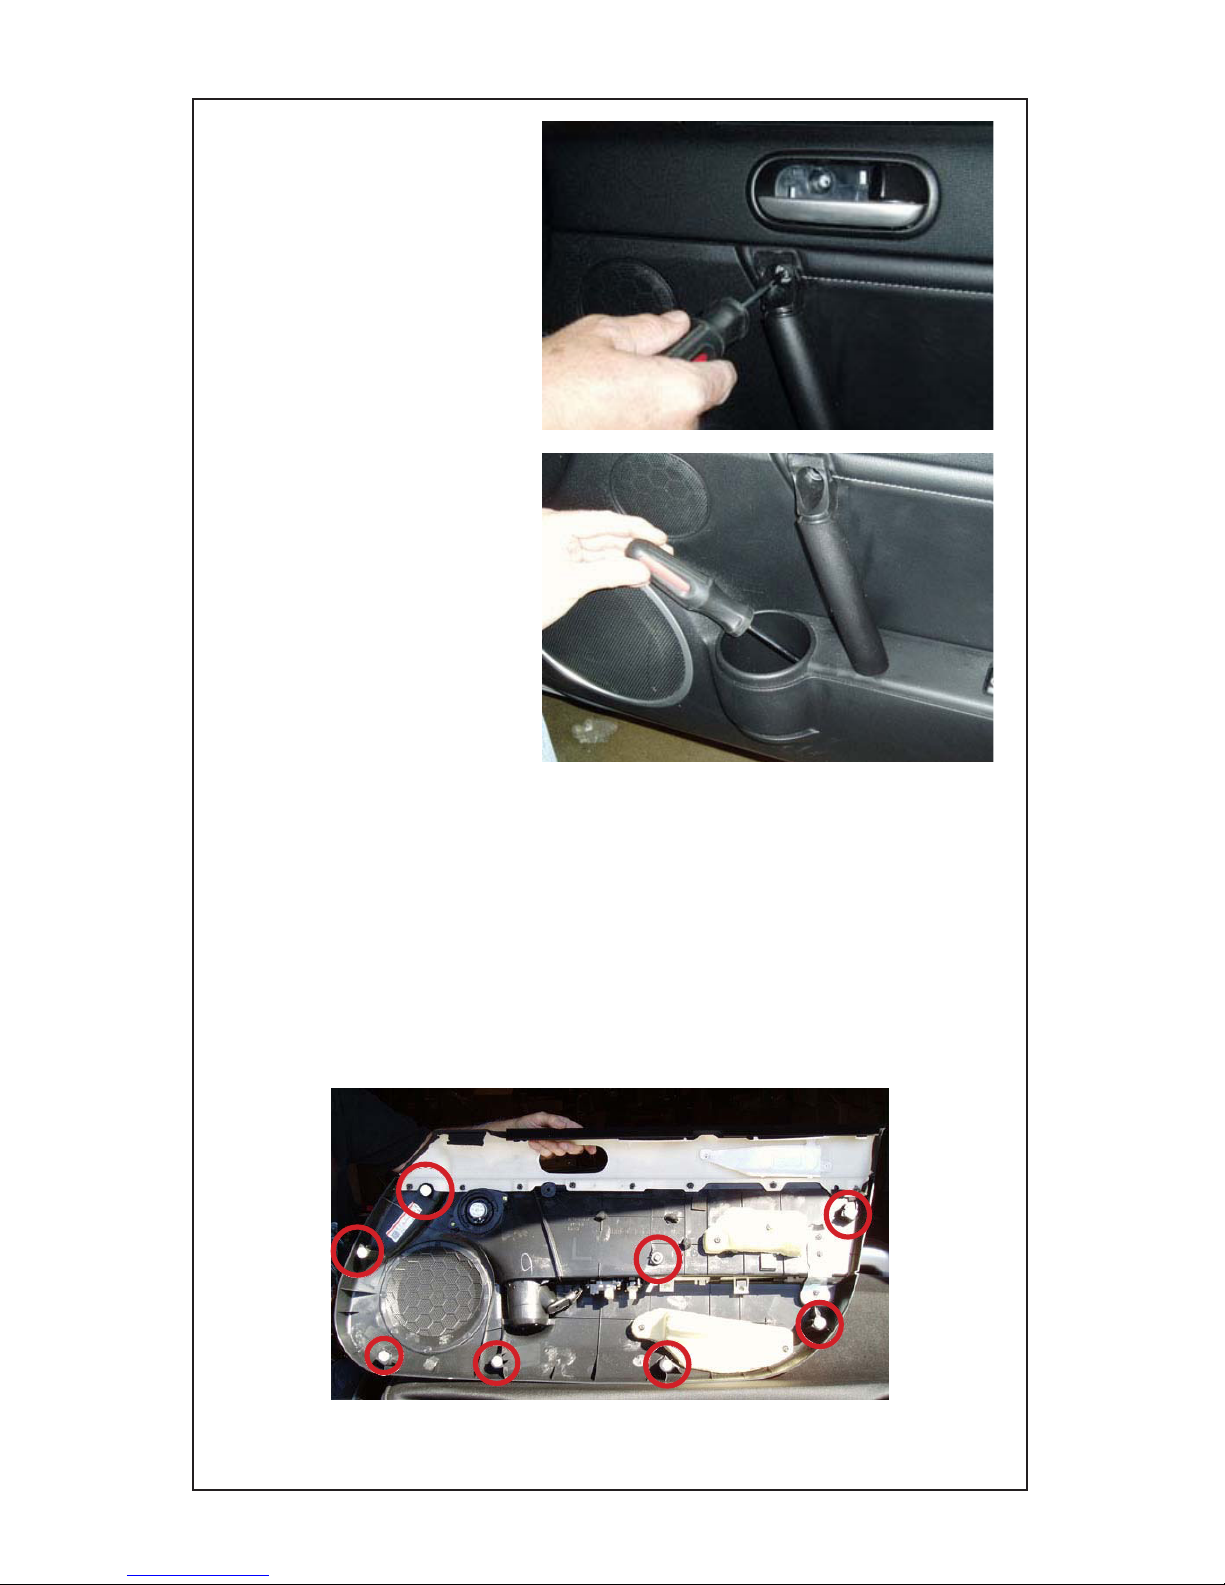
• Remove the screw at
the top of the grab handle
with your #2 Phillips head
screwdriver.
• Locate the screw inside
the doors cup holder and
remove with your #2 Phillips
head screwdriver.
• Using your hands, start at the bottom of the door panel and pull outward
to release the snaps from the back side of the panel. These snaps will
make a “pop” sound as they release one by one. Once all 8 snaps have
been released, the door panel can be lifted and pulled away from the door.
Push the door panel upwards to remove from the door. (These clips can
break, we have included a few replacements just in case. Also they sometimes get left in the door instead of sticking to the panel, if this happens pry
them off the door and re-insert into the door panel)
 Loading...