

Page 1
Eagle / Hawk / CBT
Thanks for choosing C learView - the clear choice in video surveillance!
Register Your New DVR Onl ine
KIT INSTALLATION GUIDE
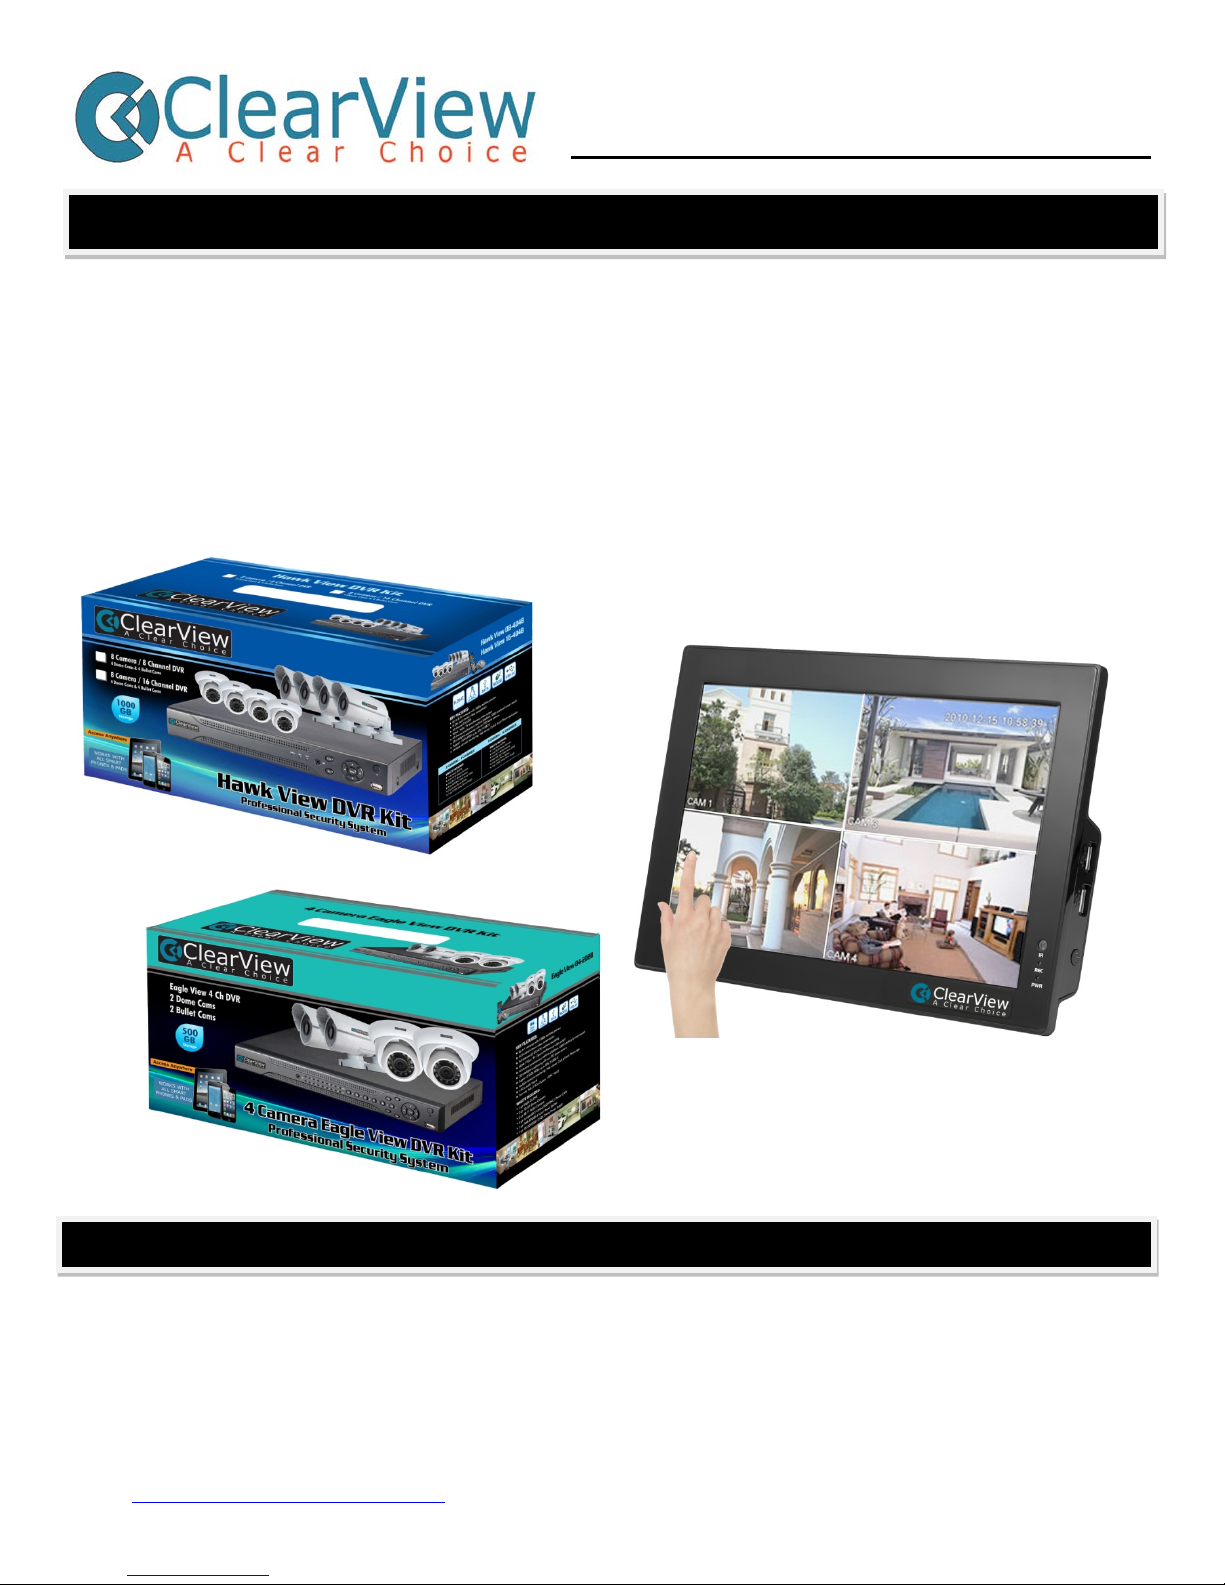
You should have these components in your DVR system package:
1 – ClearView DVR with hard drive pre-installed, and a DVR power supply.
1 or 2 – Camera power supply w/AC cord & 4 port splitter (2 of these with an 8 camera system ) .
4 or 8 – Clearview weatherproof cameras (8 cameras included with an 8 camera system).
Accessory Box – Camera mounting screws, mount templates, DVR remote control, USB mouse.
Report any missing components to your dealer immediately!
Why register? Registering your product confers the following benefits:
• FREE DDNS so your DVR will stay connected
• Ensures product warranty – REGISTRATION IS REQUIRED for product repairs
• New Software updates & and feature notification
• Knowledge base and video tutorials
Go to http://register.clearviewcctv.com
and enter your information under the PRODUCT REGISTRATION
column. Filling in the form will create a MyClearView login, and you will be asked to register your DVR.
Page 2
DVR INSTALLATION
You will need the following tools for installation: An OSHA approved ladder, Phillips screwdriver, power drill &
3/4” and 3/16” bits, rubber self-seal tape or heat shrink tubing, and some caulk or sealant for outdoor cables.
A section of stiff wire and some masking tape can help run the camera cables.
TIP: When you run your camera wires, MAKE SURE that the POWER JACK end of the
video cable is located at the DVR end to connect to one of the camera power supply plugs
there. It’s a good idea to set up the system on a table or workbench before installation,
free just the ends of each cable, connect and test & familiarize yourself with connections.
• Check local laws regarding installation & aiming of outside cameras, stay clear of AC electric wires
& fixtures, and be considerate of your neighbor’s privacy. Determine your camera locations, and run
the cables to each camera. Do not point cameras directly into light sources, or directly into the rising
or setting sun which may cause damage to the camera’s sensors that will not be covered under
warranty. IMPORTANT: Make sure that the cable at the camera ends with the power plug
so that it will correctly attach to the camera’s power lead. The BNC plug will be the same on
both cable ends.
• Use the included base mounting templates to mark the mounting screw
holes. Pre-drill the screw anchor holes with the 3/16” bit,
and drill the cable access holes with the 3/4” bit. Loosely
attach each camera in position with one or 2 screws, attach
each camera’s BNC video and power leads to the cable,
and fish the camera wire through to the DVR location. DO
NOT CUT CAMERA WIRES - this will void warranty. If the connections are exposed to weather,
seal with heat shrink tubing or self-adhesive sealing tape, then finish mounting the camera bases
and caulk/seal any outside holes.
Place the DVR and monitor within reach
of the provided 60 foot camera cables
and a wall plug AC power source (a
battery backup UPS is recommended). If
you are attaching a monitor using the
HDMI output, remember to locate the
unit so that is within reach of the HDMI
input on your TV or AV receiver. At the
DVR, attach the DVR power supply,
your VGA monitor & power supply, and
camera power supply to AC power, and
each camera cable’s power plug
to one of the 4 power jacks
on the camera power supply.
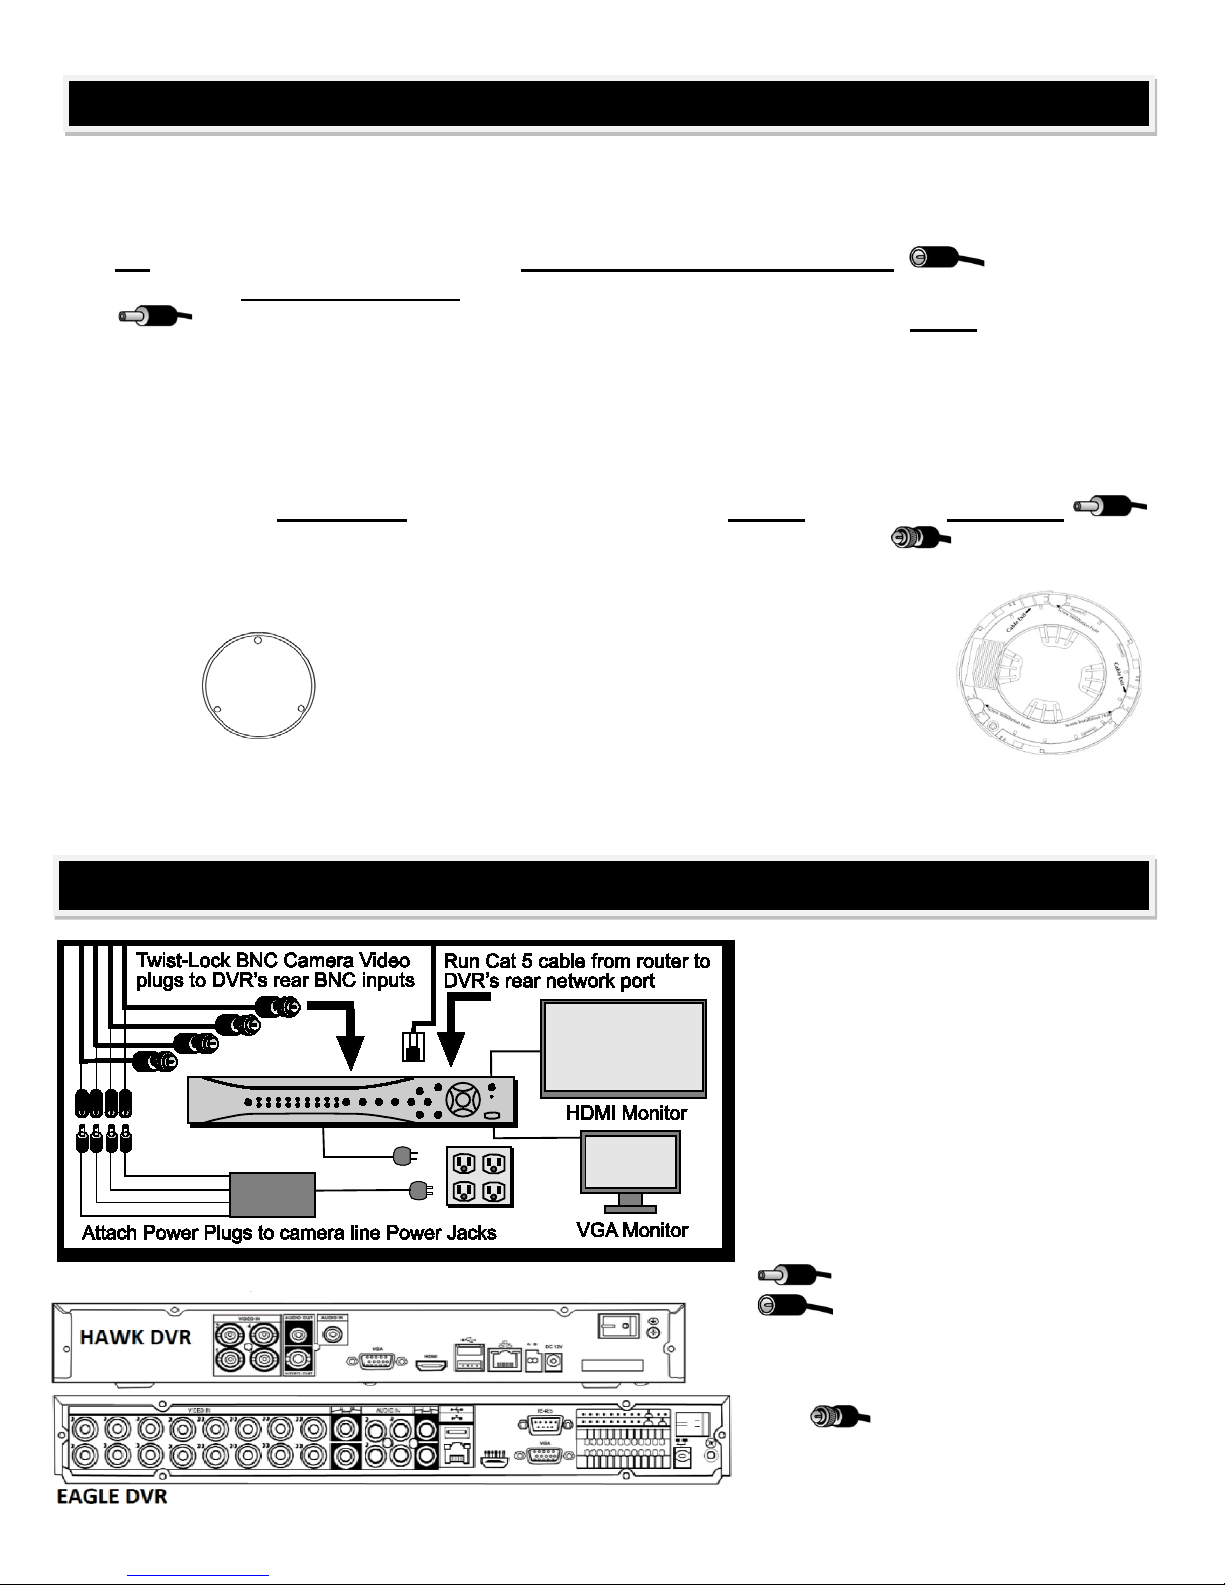
On the back of the DVR (or on the multiinput cable on the touch screen CBT
DVR), push in and twist-lock the BNC
plug connector for each camera
to the chosen channel’s BNC input,
attach the USB mouse, power on &
begin DVR setup.
Page 3

NETWORK & ONLINE SETUP
DVR SET-UP
Once DVR powers up, the system will begin the Setup Wizard, and
guide you through the unit’s initial set up. Using the mouse, click on
the pop-up on-screen panel to enter the Login and Password
(both are “admin” as the factory default.) For your security, you
should change the default log-in and password to your own at this
time. Make sure to write down this information in a secure, hidden
place somewhere in case you forget it. Note: For security
reasons, entering the wrong log-in and/or password 3 times
will result in system alarm and 6 login failures will result in
account lock. If you are locked out, please call tech support.
Once you have
logged in, you will see your cameras in live view on screen
automatically, automatically be recorded to the hard drive, and
be ready to review from this screen.
To review recorded video, use the mouse to move your
cursor over any live camera video, and the menu below will
appear over the selected channel’s video screen:
Playback Zoom Record to USB
Playback allows you to
replay the last 5-60
minutes of video from that channel. Zoom allows an electronic zoom on
the channel’s video, by dragging the cursor to select the area to be enlarged. Record to USB allows up to 60
minutes of the selected channel’s recorded video to be copied to a USB device (thumb drive, etc.) The “X” at
the left end of the bar closes this menu bar.
Congratulations – you have successfully installed your ClearView DVR!
Now that your ClearView video system is up & running, you can connect it to your network to view and work
with from a remote PC or Apple Mac computer on your network and online.
To start, plug in a Cat 5 network cable to the RJ-45 network port on the rear of the DVR, and then into an
available port on your network’s router. Then, using the DVR’s mouse and the on-screen menus as you did
above, log into the DVR, and from the Main Menu choose SETTING, then NETWORK. To enable your
network’s router to link to the DVR, check the DHCP
button on the second line of the Network window, and your
router will assign the required information to put your DVR
on your network. This process may take a few minutes.
Once this process is completed, open an internet browser
window using Internet Explorer, and type in http:// followed
by the IP address assigned by your router. Your DVR
should show up, and is now accessible on your local
network. You may also wish to enable your DVR to be
viewed on the internet when you are away from your local
network – refer red to as remote viewing.
Remote viewing on another PC or Mac will use the same
method you use on your local network computer, but the
DVR’s output must be available on the internet so that
Page 4

Internet Explorer can find it from a remote
REGISTER & STAY CONNECTED AUTOMATICALLY –
FOR FREE!
location, a process known as “port
forwarding.” Your Internet Service
Provider – or ISP (such as AT&T or
Infinity/Comcast ) will often set your DVR
up for you once it is available on your
local network. Call them first, and they can
walk you through the process, or
sometimes they can “take over” your
router and do the set up for you. You will
need your router’s brand & model number.
TIP: www.PortForward.com has instructions for many models of routers.
Note: You can also view your cameras on Apple Iphone / Ipad, and Android devices with an
optional viewer app, available here: http://www.clearviewcctv.com/DVRs/Ipad-Iphone-Interface/
If your ISP cannot assist you, you can enter numbers manually in the NETWORK screen. Log in to the DVR
with your User Name & Password, go to SETTINGS then to NETWORK SETTINGS and enter:
• TCP port: Default value is 37777. You can change if necessary.
• UDP port: Default value is 37778. You can change if neces sary.
• HTTP port: Default valu e i s 80.
• RTSP port: Default valu e i s 554.
When these values are entered, hit SAVE at the bottom of the window. Write down your DVR’s IP address
nd
(2
line on the screen above), and then back out through the SETTINGS and MAIN MENU. Once you hit
“SAVE”, give the changes a few minutes to work through your ISP’s system. Check if your DVR is online by
entering it in Internet Explorer as “http://enter your IP address”
ClearView gives you a FREE DDNS service - when you register your new DVR online! The DDNS (Dynamic
Domain Name System) automatically keeps your DVR online, and gives your DVR an easy to remember “host
name” rather than a numeric IP address - mydvr.no-ip.com for
example instead of 198.102.10.55. DDNS will also automatically
update your DVR if your IP address changes (which can happen
if you don’t pay your ISP extra for a “static IP.”)
To use DDNS, first log into your DVR, navigate from the 'Main
Menu', to 'Settings,' and then 'Network'. Under the 'Advanced'
section, double click the DDNS section and highlight the 'enable'
button. Next, you will be given the choice – depending on model of eit her No-IP, DYDNS, ICRDDNS or ClearviewDDNS - any of
these DDNS hosts are FREE – choose one.
Now, on your computer, go to http://register.clearviewcctv.com
and register your DVR, and on that screen select the DDNS host you decided on, and you will be given a host
name. Write that name down. Back on your DVR, select the 'custom domain name' option, click in the
'domain name' space, and input the host name you were given. Everything else is already in place. Enter in
your e-mail address under it to track it at a later time. Test your setup by clicking the 'test' option. You will get a
success prompt if everything goes well. Click 'ok' to exit and save your information.
TIP: Save / Bookmark your new address as a “favorite” for easy access.
For more detailed information, our DVR Quick Start Guide available for download or online viewing
http://www.clearviewcctv.com/Tools/Download-Center
.
You can also contact our Tech Support line at (954) 772-5327 and they will assist you. CVSMP11.13
 Loading...