

Page 1
COLLABORATE DESKTOP
USER GUIDE
Page 2

Page 3
C learOne
E -mail
tech.support@clearone.com
5
225 Wiley Pos t Way
uite 500
S
alt Lak e C ity, UT 84116
S
Telephone 1.800.283.5936
Tech Sales 1.800.705.2103
FAX 1.801.974.3669
On the Web www.clearone.com
1.801.974.3760
support@netstreams.com
www.netstreams.com
www.streamnetpartners.com
Collaborate Desktop
US E R GUIDE
LE AR ON E DOC UME NT
C
DOC-0074-001 Rev 1.0 - November 2012
© 2012 ClearOne and NetStreams
document may be reproduced in any form or by any means without written
permission from ClearOne and NetStreams. Printed in the United States of
America. ClearOne and NetStreams reserves speci
Information in this document is subject to change without notice.
- All rights reserved. No part of this
c privileges.
WAR NING : This is a class A product. In a domestic environment this
roduct may caus e radio interference in which case the us er may be
p
r
equired to take adequate measures .
Page 4

Page 5

© 2012 ClearOne. All Rights Reserved.
Information in this document is subject to change without notice. No part of this document
can be reproduced or transmitted in any form or by any means - electronic or mechanical for any purpose without written permission from ClearOne.
Collaborate Central is a registered trademark of ClearOne.
All other product names are trademarks or registered trademarks of their respective
companies or organizations.
Limited Warranty
ClearOne warrants that SOFTWARE will perform according to accompanying user
documentation for a period of 90 (ninety) days from the date of receipt; replacement
SOFTWARE will be warranted for 90 (ninety) days from the date of receipt. This Limited
Warranty shall not apply to any product that in the opinion of ClearOne has not been
installed or upgraded according to accompanying documentation from ClearOne or been
subject to misuse, misapplication, negligence or accident while in the hands of the
purchaser.
GRANT OF LICENSE ClearOne grants the Purchaser a non-exclusive and non-transferable
license to use the SOFTWARE product and to make one copy solely for backup or archival
purposes, which may include user documentation provided via online or other electronic
form. Additional copies may not be made nor may anyone else be allowed to copy or
otherwise reproduce any part of the licensed software without prior written consent of
ClearOne
COPYRIGHT All trademarks), logo(s), name(s), software, documentation and other
supporting materials relating to the Product are trademarked, copyrighted or owned by
ClearOne as proprietary information protected by United States copyright laws and
international and applicable national treaty provisions and laws. Software protection
extends beyond its literal code to structure, sequence and organization; any unauthorized
use or modification would constitute a misappropriation of ClearOne’s proprietary rights
and a violation of the License agreement.
LIABILITIES ClearOne’s entire liability and the Purchaser’s exclusive remedy shall be at
ClearOne’s option, either return of the price paid or repair/replacement of the Product not
meeting ClearOne’s declared Limited warranty. ClearOne or its suppliers shall not be liable
in any event to anyone for any indirect, incidental, consequential, special or exemplary
damages including without limitation damages for loss of business profits, business
interruptions, business information or other pecuniary loss arising out of the use of or
inability to use the said Product even if advised of the possibility of such damages. In any
case, ClearOne’s entire liability under any provision of this agreement shall be limited to the
amount actually paid by the Purchase for the Product.
Page 6

Page 7

Table of Contents
Chapter 1: Welcome to Collaborate Desktop Help! ........................................ 13
In this Chapter .................................................................................................................................. 13
Welcome to Collaborate Desktop Documentation! ......................................................................... 13
Using the Online Help ...................................................................................................................... 14
Contacting ClearOne Technical Support ......................................................................................... 15
Chapter 2: Starting Collaborate Desktop ........................................................ 17
In this Chapter .................................................................................................................................. 17
Starting Collaborate Desktop ........................................................................................................... 17
Logging into Collaborate Central ..................................................................................................... 18
Changing Your Collaborate Central Password ................................................................................ 19
Collaborate Desktop Setup .............................................................................................................. 20
Multiple IP Address .......................................................................................................................... 21
User Profiles List ............................................................................................................................... 22
Adding a New User Profile ............................................................................................................ 22
Editing a User Profile ..................................................................................................................... 22
Deleting a User Profile ................................................................................................................... 23
Showing Profile List During Collaborate Desktop Startup ............................................................ 23
Chapter 3: Making Videoconferences ............................................................. 25
In this Chapter .................................................................................................................................. 25
Making Videoconferences ................................................................................................................ 25
Starting Videoconferences ............................................................................................................... 26
Manually ........................................................................................................................................ 26
Personal Phone Book .................................................................................................................... 27
Speed Dial ..................................................................................................................................... 27
Online Directory ............................................................................................................................. 27
Chairing an Interactive Multicast ................................................................................................... 27
Participating in an Interactive Multicast ......................................................................................... 28
Watching a Multicast ..................................................................................................................... 28
Audio only Call .............................................................................................................................. 28
Outgoing Call Message .................................................................................................................... 29
Answering Videoconference Calls ................................................................................................... 30
Automatically Accepting Incoming Calls ....................................................................................... 30
Accepting Calls Manually .............................................................................................................. 30
Incoming Call Message .................................................................................................................... 31
Ending a Videoconference ............................................................................................................... 32
Opening the Conference Moderator ................................................................................................ 33
Desktop Sharing ............................................................................................................................... 34
Data Sharing Option ......................................................................................................................... 35
The Conference State ...................................................................................................................... 36
Grabbing Pictures ............................................................................................................................ 37
Collaborate Desktop: User Guide 7
Page 8

Grabbing Pictures ......................................................................................................................... 37
Saving a Grabbed Picture ............................................................................................................. 37
Telephony Exchange Functions....................................................................................................... 38
Telephony Exchange Functions .................................................................................................... 38
Picking Up a Call For a Specific User ........................................................................................... 39
Picking Up Any Ringing Call ......................................................................................................... 40
Setting Call Forwarding ................................................................................................................. 41
Selecting a Call Forward Destination ............................................................................................ 42
Transferring a Call to Another Contact .......................................................................................... 43
From the Manual Dialer ............................................................................................................. 43
From the Personal Phone Book, Speed Dial, or Online Directory ............................................ 43
Inviting Another Contact Into an Ad-hoc Conference ................................................................... 44
Manually .................................................................................................................................... 44
From the Dialer .......................................................................................................................... 44
Interactive Multicast .......................................................................................................................... 45
Interactive Multicasts ..................................................................................................................... 45
Chairing an Interactive Multicast ................................................................................................... 46
Chairing an Interactive Multicast ............................................................................................... 46
Starting an Interactive Multicast ................................................................................................ 47
Multicast Session Properties ..................................................................................................... 48
Calling Participants to an Interactive Multicast.......................................................................... 49
The Outgoing Tab - Interactive Multicast .................................................................................. 50
The Control Tab - Interactive Multicast ...................................................................................... 51
Ending an Interactive Multicast ................................................................................................. 53
Participating in an Interactive Multicast ......................................................................................... 54
Participating in an Interactive Multicast ..................................................................................... 54
Entering an Interactive Multicast ............................................................................................... 55
Requesting the Floor ................................................................................................................. 56
ClearOne Multicast Viewer ............................................................................................................ 57
ClearOne Multicast Viewer ........................................................................................................ 57
The Multicast Viewer List ........................................................................................................... 58
Chapter 4: Controlling Video ........................................................................... 59
In this Chapter .................................................................................................................................. 59
The Camera Controller ..................................................................................................................... 60
The PTZ Camera Controller ............................................................................................................. 61
Adjusting the Color of the Local Video ............................................................................................. 62
Controlling a Pan / Tilt / Zoom (PTZ) Camera .................................................................................. 63
Preset Camera Positions .................................................................................................................. 64
Saving a Preset Position ............................................................................................................... 64
Moving to a Preset Position ........................................................................................................... 64
Switching Between Video Sources .................................................................................................. 65
Muting the Outgoing Video .............................................................................................................. 66
Adjusting Call Properties .................................................................................................................. 67
Synchronizing Video and Audio .................................................................................................... 67
8 Collaborate Desktop: User Guide
Page 9

Video Frame Rate / Quality ........................................................................................................... 67
Chapter 5: Controlling Audio........................................................................... 68
In this Chapter .................................................................................................................................. 68
Adjusting the Volume ....................................................................................................................... 69
Muting the Audio .............................................................................................................................. 70
Muting Outgoing Audio ................................................................................................................. 70
Muting Incoming Audio ................................................................................................................. 70
Audio Tuning Wizard ........................................................................................................................ 71
Chapter 6: Application Configuration .............................................................. 73
In this Chapter .................................................................................................................................. 73
Accessing Collaborate Desktop Configuration Settings .................................................................. 74
Calls Settings.................................................................................................................................... 75
Calls Settings ................................................................................................................................. 75
General Settings ............................................................................................................................ 76
Ringing Settings ............................................................................................................................ 78
Multicast Settings .......................................................................................................................... 80
Call Forwarding Settings ............................................................................................................... 82
General Settings ............................................................................................................................... 83
General Settings ............................................................................................................................ 83
User Info Settings .......................................................................................................................... 84
License Details .............................................................................................................................. 85
Shortcuts Settings ......................................................................................................................... 86
Display Settings ............................................................................................................................. 87
Hardware Settings ............................................................................................................................ 88
Hardware Settings ......................................................................................................................... 88
Audio Settings ............................................................................................................................... 89
ISDN Settings ................................................................................................................................ 90
ISDN Adapter Settings .................................................................................................................. 91
Camera Settings ............................................................................................................................ 92
Network Settings .............................................................................................................................. 93
Network Settings ........................................................................................................................... 93
Login Settings................................................................................................................................ 93
Firewall & NAT Settings ................................................................................................................. 95
Directory Settings .......................................................................................................................... 99
SIP Settings ................................................................................................................................. 100
Chapter 7: Setting Up the Dialer ................................................................... 101
In this Chapter ................................................................................................................................ 101
Setting Up the Dialer Overview ...................................................................................................... 101
Adding a Personal Phone Book Contact ....................................................................................... 103
During a Videoconference........................................................................................................... 103
Manually ...................................................................................................................................... 103
Editing a Personal Phone Book Contact ........................................................................................ 104
Personal Phone Book Contact Details ........................................................................................... 105
Collaborate Desktop: User Guide 9
Page 10

Adding a Picture to a Personal Phone Book Contact .................................................................... 106
From the Grabbed Picture Window............................................................................................. 106
Through the Personal Phone Book Contact Details ................................................................... 106
Deleting a Personal Phone Book Contact...................................................................................... 107
Adding and Removing a Speed Dial Contact ................................................................................ 108
Removing a Speed Dial Contact ................................................................................................. 109
Adding an Online Directory Contact to the Personal Phone Book ................................................ 110
Online Directory Contact Details .................................................................................................... 111
Chapter 8: The Main Viewer .......................................................................... 112
In this Chapter ................................................................................................................................ 112
Normal Mode .................................................................................................................................. 112
Customizing Collaborate Desktop ................................................................................................. 114
Customizing Collaborate Desktop .............................................................................................. 114
Customizing Shortcut Buttons .................................................................................................... 115
Customizing the Shortcut Tray ................................................................................................ 115
Changing a Shortcut's Location in the Shortcut Tray ............................................................. 115
Restoring the Default Shortcut Tray Configuration ................................................................. 115
Shortcuts Settings ....................................................................................................................... 116
General Settings .......................................................................................................................... 117
Resizing the Video Window ............................................................................................................ 118
Resizing the Video Window ......................................................................................................... 118
Normal Mode ............................................................................................................................... 120
Mini Mode .................................................................................................................................... 121
Large Mode ................................................................................................................................. 122
Full Screen Mode ........................................................................................................................ 123
Application Elements...................................................................................................................... 124
Application Elements ................................................................................................................... 124
The Video Window ...................................................................................................................... 125
The Manual Dialer ....................................................................................................................... 126
The Call Log ................................................................................................................................ 128
Dialing a Contact from the Call Log ........................................................................................ 128
Adding a Contact to the Phone Book ..................................................................................... 128
Deleting a Contact from the Call Log ...................................................................................... 129
The Drawer .................................................................................................................................. 130
The Drawer Tab ....................................................................................................................... 130
The Dialer ................................................................................................................................ 131
The Conference Tab ................................................................................................................ 135
The Settings Tab ..................................................................................................................... 136
Main Viewer Menus ..................................................................................................................... 137
Main Viewer Menus ................................................................................................................. 137
The Control Menu .................................................................................................................... 139
The Dialer Menu ...................................................................................................................... 140
The View Menu ........................................................................................................................ 142
The Help Menu ........................................................................................................................ 143
10 Collaborate Desktop: User Guide
Page 11

Conferencing Controls and Command Buttons ......................................................................... 144
Shortcut Buttons .......................................................................................................................... 146
Chapter 9: Glossary ...................................................................................... 147
Chapter 10: Index ............................................................................................ 149
Collaborate Desktop: User Guide 11
Page 12

Page 13

Starting Collaborate Desktop
Setting Up Collaborate Desktop's Configuration
Making Videoconferences
Setting Up the Dialer
Controlling Video
Resizing the Video Window
Controlling Audio
Multi-Party Conferencing with Interactive Multicast
Telephony Exchange Functions
Desktop Sharing
Data Sharing Option
Chapter 1: Welcome to Collaborate Desktop Help!
IN THIS CHAPTER
This chapter introduces the Collaborate Desktop documentation and help services and
includes the following sections:
Welcome to Collaborate Desktop Documentation!
Using the Online Help
Contacting ClearOne Technical Support
WELCOME TO COLLABORATE DESKTOP DOCUMENTATION!
This Help utility explains how to use Collaborate Desktop's features, provides instructions for
participating in conferences, and provides details of videoconferencing concepts so that you
can get the most out of Collaborate Desktop.
To get started, click one of the following topics:
Collaborate Desktop: User Guide 13
Page 14

USING THE ONLINE HELP
This online help was designed to help you use your ClearOne Collaborate Desktop
videoconferencing system easily and to enjoy its many features.
You can open Help at any time by:
Opening the Help menu near the top of the Main Viewer and selecting:
Contents to open the Table of Contents of topics and procedures. To open a topic,
click the topic.
Index to open the Index of keywords. To open a topic, double-click the keyword or
term.
Search to search for topics containing a specific word or phrase. Enter the word(s)
you need and select List Topics. All topics that contain at least one match for your
word(s) are then listed.
Clicking the ? button to receive information about the open window, dialog box, tab, or
function.
Pressing the <F1> key on your keyboard to receive information about the open window,
dialog box, tab, or function.
14 Collaborate Desktop: User Guide
Page 15

Page
Type of support
Support Notes
Troubleshoot or receive technical information about specific
ClearOne products.
Downloads
Download a new software release or a free product evaluation.
Demo Numbers
Test your videoconferencing system.
License Key Requests
Request a permanent license key for your organization’s
Collaborate Central(s), if applicable.
CONTACTING CLEARONE TECHNICAL SUPPORT
This Help utility was designed to help you set up Collaborate Desktop and conduct
videoconferences easily so that you can enjoy its many features.
If a situation occurs that is not covered by the Help or the supplied Getting Started Guide,
contact your local ClearOne distributor and request assistance from their ClearOne-trained
technical support department. Please describe the problem, device, and PC operating
system (if applicable), and any other relevant details.
Also, you may access the Technical Support section of the ClearOne website
(http://www.ClearOne.com/customer_support) in order to check its knowledge base or
initiate other customer support processes:
Collaborate Desktop: User Guide 15
Page 16

Page 17

Chapter 2: Starting Collaborate Desktop
IN THIS CHAPTER
This chapter explains how to access and set up Collaborate Desktop and includes the
following sections:
Starting Collaborate Desktop
Logging into Collaborate Central
Changing Your Collaborate Central Password
Collaborate Desktop Setup
Multiple IP Address
User Profiles List
STARTING COLLABORATE DESKTOP
Collaborate Desktop's Start procedure varies, depending on whether or not your system will
be in a videoconferencing network managed by Collaborate Central, or if your computer has
more than one IP address defined in its Network configuration.
To start Collaborate Desktop:
1. In the Windows Desktop, double-click the ClearOne Collaborate Desktop icon.
2. According to the relevant situation, perform the rest of the startup procedure:
Your system is managed by Collaborate Central.
Your system is managed by a non-ClearOne gatekeeper or runs in a standalone
configuration (no gatekeeper management).
Is this the first time that you are running Collaborate Desktop? Enter setup
information.
NOTE: If you want Collaborate Desktop to start automatically whenever
your computer starts up, select the Load on Startup (Minimized to Tray)
option when you run Collaborate Desktop for the first time or log into
Collaborate Central for the first time. Afterwards, you can select or
deselect this option in the Display Settings.
Collaborate Desktop: User Guide 17
Page 18

LOGGING INTO COLLABORATE CENTRAL
Collaborate Central
Login
Name of your computer as listed in Collaborate Central.
Password
If you set a password, the first time you register you must type it
twice for verification.
Gatekeeper
IP address of Collaborate Central. If you do not know it, ask your
system administrator.
Automatic Login
Select to log in automatically to Collaborate Desktop using the
entered login name and password. This setting takes effect from the
next login attempt.
NOTE: This task is only applicable to Collaborate Desktop applications
that support management by ClearOne's Collaborate Central.
When you start Collaborate Desktop, log into Collaborate Central to receive management
and telephony exchange services:
Call Forwarding, Call Pickup, Call Transfer, Invite to Ad-hoc Conference.
Click Connect to complete the login process.
NOTES: If you want to work temporarily without Collaborate Central
management and telephony exchange services, click Cancel. To receive
these features again, you have to log in again.
If you are running Collaborate Desktop for the first time after installation
(or logging into a different Collaborate Central), the Collaborate Desktop
Setup appears. In this dialog box, enter the information required to run
Collaborate Desktop from your specific location.
18 Collaborate Desktop: User Guide
Page 19

Current Password
Current password that you do not want to use anymore.
New Password
Password that replaces the current one.
Verify Password
Confirmation of the new password.
CHANGING YOUR COLLABORATE CENTRAL PASSWORD
From the Login settings, you may change your password for logging into Collaborate
Central. The next time you log into Collaborate Central, you will need to enter the changed
password.
To change your Collaborate Central login password:
1. In the Control menu, choose Settings.
-or-
Open the Drawer and click the Settings tab.
2. Select the Network tab, choose one of the Collaborate Central profiles, and then click on
the Details button.
3. Click Change Collaborate Central Password. The Collaborate Central Password dialog
box appears, displaying your User Name as it is listed in the Collaborate Central
database and the Collaborate Central Administrator.
4. Change the password information:
5. Click OK.
Collaborate Desktop: User Guide 19
Page 20

COLLABORATE DESKTOP SETUP
User Information
Enter your first name, last name, company name, and email address.
Items marked with * are mandatory.
Load on Startup
(Minimized to Tray)
Select to open and minimize Collaborate Desktop during your
computer's startup. The Collaborate Desktop icon will appear in the
icon tray at the bottom of the Windows Desktop. This option takes
effect only after restarting your computer.
Tuning Settings
Click Tuning Wizard to test and adjust the level of your microphone
and speakers.
If you are running Collaborate Desktop for the first time after installation, the Collaborate
Desktop Setup dialog box appears. Enter the information required to run Collaborate
Desktop from your specific location.
Click OK to implement the settings and to open the Collaborate Desktop Main Viewer.
20 Collaborate Desktop: User Guide
Page 21

MULTIPLE IP ADDRESS
If your computer has more than one IP address in its network configuration, you can connect
to these IP addresses. The application will receive the incoming call that was dialed to these
IP addresses.
Collaborate Desktop: User Guide 21
Page 22

USER PROFILES LIST
A User Profile stores user identification and network connection information, enabling users
to log into Collaborate Desktop under various configurations.
The Profiles List shows all user profiles which have been created for this Collaborate
Desktop. You can add profiles to the program or edit existing ones.
ADDING A NEW USER PROFILE
To add a new user profile:
1. From the Profiles List, click New.
2. In the Profiles Details dialog box, enter a unique Profile Name. To configure the profile, fill
in the appropriate details under the relevant tabs:
3. In the Login tab, define how Collaborate Desktop starts up when this profile is active. For
example, select if Collaborate Desktop operates in Stand Alone mode or logs into
Collaborate Central.
4. In the Firewall/ NAT tab, define your system's identification configuration on the local
network.
5. In the Directory tab, define your system's entry and connection in an online directory.
This tab is only available in Stand Alone mode (in Collaborate Central mode, your system
is automatically registered to any online directories set up by the Collaborate Central
Administrator).
6. In the SIP tab, enter the appropriate details.
7. Click OK. The new profile now appears in the Profiles List.
EDITING A USER PROFILE
To edit a user profile:
1. From the Profiles List, click Details.
2. If needed, change the name of the profile in the Profile Name box.
3. In the Profiles Details dialog box, edit Login, Firewall/NAT, Directory and SIP properties
as needed.
4. Click OK.
22 Collaborate Desktop: User Guide
Page 23

DELETING A USER PROFILE
To delete a user profile:
1. In the Profiles List, select a profile. The active profile cannot be deleted.
2. Click Delete.
3. Click Yes to confirm.
SHOWING PROFILE LIST DURING COLLABORATE DESKTOP STARTUP
Since user profiles may vary in their login properties (Collaborate Central Mode, Stand Alone,
Gatekeeper, User Name), you can enable the User Profiles List to appear during Collaborate
Desktop's startup. From the list, you then choose which profile will be active initially.
To show the User Profile List during Collaborate Desktop startup:
1. Under the Profiles List, select Show Profiles Dialog On Startup.
2. Click Apply.
Collaborate Desktop: User Guide 23
Page 24

Page 25

Chapter 3: Making Videoconferences
IN THIS CHAPTER
Communicating with other parties in videoconferences is, likely, the activity you will do most
in Collaborate Desktop. This chapter provides instructions for:
Making Videoconferences
Starting Videoconferences
Outgoing Call Message
Answering Videoconference Calls
Incoming Call Message
Ending a Videoconference
Opening the Conference Moderator
Desktop Sharing
Data Sharing Option
The Conference State
Grabbing Pictures
Telephony Exchange Functions
Interactive Multicast
MAKING VIDEOCONFERENCES
Communicating with other parties in videoconferences is, likely, the activity you will do most
in Collaborate Desktop.
Click the relevant link for instructions on:
Starting (dialing) a videoconference
Answering an incoming videoconference
Ending (hang up) a videoconference
Collaborate Desktop: User Guide 25
Page 26

STARTING VIDEOCONFERENCES
NOTE: Before you start a video conference, you must first select (or
verify) the appropriate communication protocol for your connection. The
available protocols are H.323, ISDN, and SIP.
H.323 is selected by default. The protocol is selected from a dropdown
list in the dialup section
NOTE: If your dialup leads to a voice answering system, you can send
DTMF tones (for choice selection) by either typing the desired numbers
on your keyboard, or using the Dial pad available from the call log
section.
You can start videoconferences by several different methods:
MANUALLY
To start a videoconference manually:
1. In the Manual Dialer type the IP address, user number (E.164), or alias of the party you
want to call.
-or-
Select the party from the Manual Dialer's Call Log.
-or-
Open the on-screen dial pad and dial the desired numbers.
2. To dial to an extension that is registered to a specific Gatekeeper, enter the Gatekeeper
IP followed by ^ and the extension no. e.g., 170.50.4.1^1234
3. In the Bandwidth box, choose the bandwidth allotted for this call.
4. Click .
26 Collaborate Desktop: User Guide
Page 27

PERSONAL PHONE BOOK
To start a videoconference from the Personal Phone Book:
1. In the Dialer menu, click Personal. The Drawer opens to the Personal Phone Book.
2. Double-click the name of the party you want to call.
SPEED DIAL
To start a videoconference from the Speed Dial:
1. Click the Speed Dial button to the left of the Manual Dialer.
-or-
Select Speed Dial from the Dialer menu.
-or-
Open the Drawer, and select the Speed Dial tab.
2. Double-click the name of the party you want to call.
ONLINE DIRECTORY
To start a videoconference from the Online Directory:
1. In the Dialer menu, click Online Directory. The Drawer opens to the Online Directory.
2. Double-click the name of the party you want to call.
CHAIRING AN INTERACTIVE MULTICAST
To start an Interactive Multicast:
1. Check the Multicast settings. If necessary, change them to meet your session's
requirements.
2. In the Dialer menu, click Start Interactive Multicast.
-or-
In the Shortcut tray, click the Multicast button (depending on your shortcut tray's
customization).
The Session Information dialog box appears.
Collaborate Desktop: User Guide 27
Page 28

3. Set up the next Interactive Multicast according to its specific requirements, and then click
Start.
4. Even though you have not called anyone yet, the Interactive Multicast is now in session.
The Drawer opens to the Chair's Conference Control tab. If the session is available for
third-party viewing, someone with a third-party video viewer can tune in already.
5. Call participants to join in the session. Contacts may also join an open Multicast by
calling the Chair.
PARTICIPATING IN AN INTERACTIVE MULTICAST
To enter an Interactive Multicast
Answer an incoming call from the Chair of an Interactive Multicast.
-or-
Call the IP address of the session after the Interactive Multicast starts.
WATCHING A MULTICAST
To view an Interactive Multicast:
1. In the Dialer menu, click Multicasts.
-or-
In the Shortcut tray, click the Live button (depending on your Shortcut tray's
customization).
2. Double-click the Multicast entry.
-or-
Click on Multicast and then click View.
AUDIO ONLY CALL
Using the Audio-only call option, you can make a regular audio only phone call over IP.
To make an audio only call:
In the Manual Dialer, select Audio Only before initiating the call.
28 Collaborate Desktop: User Guide
Page 29

Cancel
Click this button to stop dialing and cancel the call.
Redial
Click this button to call the contact again.
Close
Click this button to close the message.
OUTGOING CALL MESSAGE
After you dial another contact, the Outgoing Call message appears. The name of the contact
appears as well as an indication if the contact's side is ringing (Calling) or did not answer
(Rejected).
While the message is open, the following tasks are available:
Collaborate Desktop: User Guide 29
Page 30

ANSWERING VIDEOCONFERENCE CALLS
When Collaborate Desktop is running but no call is active, you can receive an incoming
videoconference call or audio-only call at any time. An incoming call emits a ringing sound just like an ordinary telephone ring.
AUTOMATICALLY ACCEPTING INCOMING CALLS
In the Call Settings, define if the system automatically accepts incoming calls or to decide
whether to accept or reject each call manually on a call-by-call basis.
To accept incoming calls automatically:
1. Open the Drawer.
2. Click the Settings tab, the Calls tab and then the General tab.
3. Select Auto Answer.
4. Click Apply.
If your system is not in a videoconference, any incoming call will be accepted without
requesting your approval.
ACCEPTING CALLS MANUALLY
If Auto Answer is deselected, you decide whether to accept or reject every incoming
videoconferencing call. When a call arrives, the system rings. The Incoming Call message
states the identity of the caller and provides the choice of accepting or rejecting the call.
To accept or reject an incoming call manually:
In the Incoming Call message, click Accept to receive the call or Reject if you don't want
to answer.
NOTE: If you want to automatically accept all subsequent calls, click
Auto Answer before clicking Accept or Reject.
30 Collaborate Desktop: User Guide
Page 31

Accept
Click to accept the call and start the videoconference.
Reject
Click to reject the call.
Auto Answer Incoming Calls
Select to turn on Auto Answer, so that when your system is
idle, it will automatically answer all incoming calls.
INCOMING CALL MESSAGE
When an incoming videoconferencing call arrives and Auto Answer is turned off, the
Incoming Call message appears. You have the choice of accepting or rejecting the call.
The Incoming Call message states who the caller is.
If the system's Auto Answer is turned on, the call connects without displaying this message.
Collaborate Desktop: User Guide 31
Page 32

ENDING A VIDEOCONFERENCE
To end a videoconference:
Click Hang Up (upper-right corner of the Collaborate Desktop application).
32 Collaborate Desktop: User Guide
Page 33

OPENING THE CONFERENCE MODERATOR
NOTE: The Conference Moderator is available only for licensed users of
the ClearOne Conference Moderator option. If you want to add this
option to your organization's conferencing network, please contact your
local ClearOne representative.
This option is available only when the system is logged into Collaborate
Central.
The ClearOne Conference Moderator combines web-based scheduling and multipoint
session moderation for videoconferencing networks of any size. Through ClearOne's
WebShare feature (or alternatively, WebEx), users can share Microsoft® PowerPoint®
presentations and other applications through the web browsers of other conference
participants.
Collaborate Desktop provides direct access to your organization's Conference Moderator
site, so that you can schedule point-to-point or multipoint videoconferences, and to easily
manage those conferences in real-time.
To open the Conference Moderator:
1. In the Control Menu, choose Open Conference Moderator.
2. If required, enter your login information. Your login name must be registered in the
associated Collaborate Central.
After you log in, the Conference Moderator opens in your browser.
Collaborate Desktop: User Guide 33
Page 34

DESKTOP SHARING
You may share the display of your computer screen with the other participants in the
conference. During a conference, pressing the Desktop Sharing button sends the images of
your screen to the other party. This is an excellent tool for displaying documents such as
PowerPoint presentations to the other participants.
To share your computer desktop:
1. During a conference, Start Data Sharing button under the manual dialer in the
Video Window, and select Desktop Sharing from the dropdown list.
Your computer desktop screen is now visible on the monitors of the conference
participants. On your screen, Collaborate Desktop switches into Mini Mode.
2. To stop sharing your desktop, click Stop Desktop Sharing button.
NOTE: The minimum bandwidth for data sharing is 96Kb.
34 Collaborate Desktop: User Guide
Page 35

Start Desktop Share
Display your computer screen on the monitors of the other
participants.
Share File
Display documents such as PowerPoint presentations, tables,
illustrations, etc., to the other participants.
In the Open dialog box, browse and select the file to open.
Region Sharing
Displaying a selected area of your screen on the monitors of the
other participants.
Drag the mouse pointer to select an area, and click inside the
selection rectangle to select, or right-click to cancel.
Window Sharing
Display an application window on the monitors of the other
participants.
Drag the mouse pointer from the target icon to the application
window.
DATA SHARING OPTION
The ability to share data is a very important feature of videoconferences. For example, you
may need to view a business presentation together, exchange files, or analyze the execution
of another application with the other party. During a conference, the following data sharing
options are available:
To share data:
1. During a conference, click the Start Data Sharing button in the Video Window.
2. Select one of the available sharing options.
3. Your sharing selection is now visible on the monitors of the conference participants. On
your screen, Collaborate Desktop switches into Mini Mode.
4. To stop sharing your desktop, click the Stop Desktop Sharing button (same button as
the start sharing).
NOTES:
To share data, you need to enable H.239 support.
Depending on your license, the incoming data stream appears either
as an additional window or inside the main view (remote view).
Collaborate Desktop: User Guide 35
Page 36

THE CONFERENCE STATE
Video
Information for outgoing and incoming video:
Codec
Video transmission coding standard (H.261, H.263 or
H.264) and format (CIF, QCIF, QVGA, 4CIF, 720p, and
1080p) during live video or XGA during data application
viewing).
Frame Rate
Frequency that video frames are displayed on the screen,
in frames/second (fps).
Max. Bit Rate
The maximum rate that bits of information (video, audio,
control) can be transferred in a second (bps).
Actual Bit Rate
The bit rate at this time.
Audio
Information for outgoing and incoming audio:
Codec
Audio transmission coding standard (G.711, G.722,
G.723, G.728, G.729, AAC-LD, G722.1 Annex C)
Bit Rate
The rate that bits of information (video, audio, control) can
be transferred in a second (bps).
Advanced
Display advanced call statistics:
Security mode
Packet loss
Average jitter
Remote name
User number (Collaborate Central or gatekeeper mode only)
Address
Server mode
Call duration
In the Conference State tab, you can view technical information about the transmission of
video, audio, and data streams during a videoconference.
The information in this tab is available only during a videoconference.
How to access this information
The Conference State displays the following information. You cannot edit this information.
36 Collaborate Desktop: User Guide
Page 37

GRABBING PICTURES
GRABBING PICTURES
Use the Grab Picture feature to copy the picture from the Video Window and save it as a
picture file. You can use this picture as an additional identifying feature for an entry in the
Personal Phone Book, or use it in other applications.
To grab a picture:
Under the Remote Video or Local Video, click the Grab Picture button . The Grab
window appears, showing the picture that you copied.
At this point, you can:
Save the picture as a file
Add the picture to a Phone Book entry
SAVING A GRABBED PICTURE
You can save a grabbed picture as a file to use either in a Personal Phone Book entry or in
other applications.
To save a grabbed picture
1. In the Remote Video or Local Video panes, click the Grab Picture button . The Grab
window appears, showing the picture that you copied.
2. Click Save As.
3. In the Save As dialog box, enter a filename and folder location, and then click Save.
Collaborate Desktop: User Guide 37
Page 38

TELEPHONY EXCHANGE FUNCTIONS
TELEPHONY EXCHANGE FUNCTIONS
NOTE: These features are only applicable to Collaborate Desktop
applications that support management by ClearOne's Collaborate
Central.
Telephony exchange functions are available if your system is logged into Collaborate Central
as follows:
Call Forwarding
Call Transfer
Picking Up a Call For a Specific User and Picking up any Call
Inviting Additional Parties to Ad-hoc Conferences
38 Collaborate Desktop: User Guide
Page 39

PICKING UP A CALL FOR A SPECIFIC USER
NOTES: This feature is only applicable to Collaborate Desktop
applications that support management by ClearOne's Collaborate
Central.
You may pick up a call for another user only if your system administrator
has given you pickup permission for that specific user in Collaborate
Central. To receive pickup permission for specific users, consult with
your system administrator.
If you know of or hear an incoming call for another specific user, such as an absent
neighboring colleague, you may pick up that call and carry on the videoconference.
To pick up a call destined for a specific user:
From the Manual Dialer
If you recognize that an incoming call is destined for a specific user, enter the desired user
number (E.164) or address into the Manual Dialer's address field near the top of the Main
Viewer, and click Pick Up.
From the Personal Phone Book or Online Directory
1. If you recognize that an incoming call is destined for a specific user, open the Personal
Phone Book or the online directory.
2. Right-click on the desired user name and then click Pick Up.
The Incoming Call message appears on your screen and then you can accept the call.
Collaborate Desktop: User Guide 39
Page 40

PICKING UP ANY RINGING CALL
NOTES: This feature is only applicable to Collaborate Desktop versions
that support management by ClearOne's Collaborate Central.
This feature is only available when Collaborate Desktop is logged into
Collaborate Central.
You may pick up a call for another party only if your system
administrator has given you pickup permission for that specific party in
Collaborate Central. To receive pickup permission for specific parties,
consult with your system administrator.
If you know of or hear an incoming call for any other party, such as an absent neighboring
colleague, you may pick up that call and carry on the videoconference.
To pick up a call to any other party:
When you hear an incoming call ringing at another party:
From the Dialer Menu
In the Dialer menu, choose Pick Up Any Ringing Call.
From the Shortcut Tray
Click Pick Up in the Shortcut tray (if the icon is located there).
The Incoming Call message appears on your screen, and then you can accept the call.
40 Collaborate Desktop: User Guide
Page 41

SETTING CALL FORWARDING
NOTE: These settings are only applicable to Collaborate Desktop
applications that support management by Collaborate Central.
If your system is logged into Collaborate Central, Call Forwarding is available. Calls may be
forwarded to a specific contact unconditionally, or if the actual destination does not answer,
or is busy.
The Call Forwarding settings for your system may be done by both you and the system
administrator. The last changes, regardless of who made them, are valid.
To set the Call Forwarding settings:
1. Open the Drawer.
2. Click the Settings tab, the Calls tab, and then the Forward tab.
3. Set the Call Forwarding options and destinations as required.
4. When you're finished setting the configuration, click Apply to implement the settings.
Collaborate Desktop: User Guide 41
Page 42

SELECTING A CALL FORWARD DESTINATION
NOTE: This feature is only available in systems that are managed by
ClearOne's Collaborate Central.
To select a target contact to whom you want to forward calls:
1. In the Forward Settings, click Browse next to the appropriate forwarding selection.
The Forward Call - Select a Contact dialog box appears, containing a list of contacts
based on the online directory in which your system is listed.
2. Double-click the target contact.
NOTES: To update the list of contacts, click Go.
To view information about a contact, select the contact and click Details.
To display fewer names, you can filter the list of names. Choose the
appropriate filter from the Display list and then click Go.
All Contacts – Display all contacts registered in the online directory
Available Contacts – Display only contacts registered in the online
directory who are currently online and not in a call.
Online Contacts – Display only contacts registered in the online
directory who are currently online.
42 Collaborate Desktop: User Guide
Page 43

TRANSFERRING A CALL TO ANOTHER CONTACT
NOTE: This feature is only available in systems that are managed by
Collaborate Central.
In a transferred call, the videoconference is transferred from one contact to another. If the
latter contact accepts the call, the conference continues between the other original contact
and the contact that received the transfer. The initiator of the transfer is disconnected from
the videoconference.
To transfer a videoconference call to another contact:
FROM THE MANUAL DIALER
1. In the Manual Dialer at the top of the Main Viewer, enter the user number (E.164) or
name of the contact who will receive the call.
2. Click Transfer.
FROM THE PERSONAL PHONE BOOK, SPEED DIAL, OR ONLINE DIRECTORY
1. Open the Drawer to the Dialer tab.
2. Right-click a destination contact from the Personal Phone Book, Speed Dial, or Online
Directory.
3. Click Transfer.
Collaborate Desktop: User Guide 43
Page 44

INVITING ANOTHER CONTACT INTO AN AD-HOC CONFERENCE
NOTE: This feature is available only in systems that are managed by
Collaborate Central.
You can "invite and join" additional contacts to an open videoconference, turning it into an
ad-hoc multipoint conference.
The Invite function is only available during an open videoconference.
To invite and join other contacts into an ad-hoc conference:
MANUALLY
1. Enter an additional contact's user number (E.164) or address into the Manual Dialer's
address box.
2. Click Invite.
FROM THE DIALER
1. From the Dialer menu, click Personal, Speed Dial or Online Directory. The Drawer opens
to the Personal Phone Book, Speed Dial or Online Directory respectively.
2. Right-click the name of the party you want to call and then click Invite.
After several seconds, the additional contact is added to the session, which is now a
multipoint conference. The parties' video is displayed either in Continuous Presence or
Voice-Activated Switching, in accordance with the configuration of the MCU hosting the
conference.
During an ad-hoc conference, you can invite additional contacts using any of the procedures
described above.
44 Collaborate Desktop: User Guide
Page 45

INTERACTIVE MULTICAST
INTERACTIVE MULTICASTS
During an Interactive Multicast, identical transmissions, which comprise the floor (video
streams, audio streams, and data packets) are sent from one party to multiple parties. The
initiating party (Chair) calls one or more contacts (Participants) at the start of the conference
and controls its progression. Contacts may also join an open Multicast by calling the Chair.
The Chair can grant and reclaim the floor, clear floor requests and disconnect the session. A
Participant may receive the floor, in which its video and audio is seen and heard,
respectively, by the other Participants and the Chair for a period of time.
Only Collaborate Desktop system supports Interactive Multicasts over a Local Area Network
(LAN), in which the Chair and all Participants may be seen and heard during the duration of
the meeting. Collaborate Desktop provides both Chair and Participant functions.
Interactive Multicasts can proceed in the form of a lecture or demonstration, in which
Participants’ participation is restricted and controlled by the Chair, or as a free discussion, in
which the main Participants can interact freely without the need to receive permission from
the Chair. Additionally, these sessions may be public Multicasts, in which non-participating
audience members can view the events from their desktops or conference rooms.
NOTE: Interactive Multicasts are available only over local area networks
(LANs) that conform to H.323-based recommendations. Therefore, all
parties must have a LAN (IP) connection.
Collaborate Desktop: User Guide 45
Page 46

CHAIRING AN INTERACTIVE MULTICAST
Starting an Interactive Multicast
You decide whether the session should be open or
closed. Among other options, you can restrict the session
with a password, to leave it open to all callers, or to
multicast it to public viewers.
Calling Participants to an
Interactive Multicast
Dial Participants from your station, and/or join incoming
callers to the session.
Managing the Multicast Session
Control who has the Floor (is seen and heard).
Ending an Interactive Multicast
Disconnect individual Participants or the session.
CHAIRING AN INTERACTIVE MULTICAST
If you initiate an Interactive Multicast, you become the Chair of the session. The Chair is
responsible for managing communication during the session, and for ending it. The session
starts when you start the Multicast from the Start Multicast dialog box, even if no Participants
have joined yet. From the Control tab, you control the Multicast.
46 Collaborate Desktop: User Guide
Page 47

STARTING AN INTERACTIVE MULTICAST
When you start an Interactive Multicast as the Chair, you must first set it up in the Start
Multicast dialog box.
NOTE: The required Multicast settings must also be defined before
starting
To start an Interactive Multicast:
1. Check the Multicast settings. If necessary, change them to meet your session's
requirements.
2. In the Dialer menu, click Start Interactive Multicast.
-or-
In the Shortcut tray, click the Multicast button (depending on your Shortcut tray's
customization).
The Session Information dialog box appears.
3. Set up the next Interactive Multicast according to its specific requirements, and then click
Start.
4. Even though you have not called anyone yet, the Interactive Multicast is now in session.
The Drawer opens to the Chair's Conference Control tab. If the session is available for
third-party viewing, someone with a third-party video viewer can tune in already.
5. Call participants to join in the session. Contacts may also join an open Multicast by
calling the Chair.
Collaborate Desktop: User Guide 47
Page 48

MULTICAST SESSION PROPERTIES
The Start Interactive Multicast dialog box contains options for setting up an Interactive
Multicast as the Chair.
How to access this dialog box
Multicast Information
Name – Type a name to identify this Interactive Multicast.
Private Interactive Multicast – Select to limit viewing only to the intended Participants.
Public viewers cannot receive this Multicast.
Require Password – Select to limit participation in the Interactive Multicast only to
those persons who enter the correct password when they call in.
Password – Type the password.
Public Interactive Multicast – Select to make the Interactive Multicast available for live
public viewing through online video viewers. Persons observing through an online video
viewer cannot participate actively in the Multicast.
Description – Type a name or description of the Interactive Multicast.
Duration – The estimated duration, in minutes, of the Multicast. The third-party
viewer’s program schedule, if applicable, will show this session's duration.
Use Local IP – If Collaborate Desktop is running in Stand Alone mode, and is
configured with more than one IP address, choose the active IP address from the list.
Click Start to begin the Multicast session.
48 Collaborate Desktop: User Guide
Page 49

CALLING PARTICIPANTS TO AN INTERACTIVE MULTICAST
After you have set up an Interactive Multicast in the Start Multicast dialog box, invite
participants to join the session by dialing:
Contacts Using the Manual Dialer
In the Manual Dialer , enter user numbers (E.164) or IP
addresses one by one and click Invite.
Personal Phone Book or Speed Dial Contacts
Select single or multiple Personal Phone Book or Speed Dial contacts and click Invite.
Online Directory Contacts
Select single or multiple contacts in the online directory and then click Invite.
After each contact is dialed, it appears in the Conference Control's Outgoing tab in the
Drawer. Each successful connection is added to the Interactive Multicast.
NOTES: Interactive Multicast sessions are available only over LAN (IP)
connections with systems that conform to the H.323 Recommendation.
To be able to complete the connection and join a session, the remote
systems must be able to support the video (H.26x) and audio standards
that you set in the Calls Settings>Multicast tab.
Collaborate Desktop: User Guide 49
Page 50

THE OUTGOING TAB - INTERACTIVE MULTICAST
In Progress
List of Participants currently being dialed.
To cancel dialing to one Participant, select that Participant and click
Cancel.
To select all Participants in the list, click Select All.
Failed
List of Participants to whom dialing was unsuccessful.
To remove a Participant from the dialing list, select that Participant and
click Remove.
To dial a Participant again, select that Participant and click Redial.
To select all Participants in the list, click Select All.
The Outgoing tab lists all Participants called by the Chair to join an Interactive Multicast.
50 Collaborate Desktop: User Guide
Page 51

Grant Floor
Grants the Floor to the selected Participant. The Participant's audio and
video will then be multicast to all stations in the Multicast.
If the Participant requests to receive the floor, an icon appears next to the
Participant's name and in the Indications tray of the Main Viewer.
After the Floor is granted, the Participant's video appears in the Main
Viewer and its name appears under the Remote video view.
Reclaim Floor
Returns control of the floor to the Chair.
Disconnect
Disconnects the selected Participant(s).
The Participant is disconnected at this time. There is no confirmation
request.
Clear Request
Denies requests for the Floor.
Select the requesting Participant(s) and click this button. The Participant
receives a message stating that the Chair rejected their requests.
Auto Grant
Grants the Floor automatically to all Participants that request it, therefore
allowing the session to proceed as a free discussion.
The Chair does not see the requests, and the Participants do not receive
messages asking if they want to accept the floor. The current speaker is
seen and heard by all the other participants.
Only one person at a time can have the floor. To avoid conflicts and quick
hopping from one request to another, a delay period of several seconds
passes after the system grants a request. During this delay period, no
other requests are granted. The floor can always be requested again later.
To disable Auto Grant mode, click this button again.
THE CONTROL TAB - INTERACTIVE MULTICAST
The Control tab contains controls and commands for managing Interactive Multicasts as the
Chair.
How to access this tab
Participants Area
The Participants area contains a list of Participants who successfully joined the Multicast, and
the following Multicast Management controls:
Collaborate Desktop: User Guide 51
Page 52

Incoming Area
Accept
Joins the incoming caller to the Multicast. The caller becomes a
Participant in the Multicast.
Reject
Rejects the incoming caller. The caller receives a message stating that
the call was rejected.
Do Not Disturb
Select to automatically reject all incoming calls while the Multicast
session is open.
Auto Answer
Select to automatically answer all incoming calls while the Multicast
session is open.
The Incoming area lists the names of any incoming callers while the Multicast session is
open.
52 Collaborate Desktop: User Guide
Page 53

ENDING AN INTERACTIVE MULTICAST
There are two levels of disconnecting from a Multicast:
Individual Participant Disconnection
When they want to leave the Multicast, Participants can hang up on their own, or the Chair
can disconnect them individually.
To disconnect from a Multicast (Participant):
Click Hang Up. You are disconnected from the Multicast at this time. There is no
confirmation request.
To disconnect Participants from a Multicast (Chair):
1. In the Control tab, select the Participant(s) to disconnect.
2. Click Disconnect. The Participant(s) is disconnected at this time. There is no confirmation
request.
Session Hang Up
At the end of the Interactive Multicast, the Chair can disconnect all the Participants and
terminate the session at the same time.
To end the Multicast session:
Click Hang Up. The session ends.
Collaborate Desktop: User Guide 53
Page 54

PARTICIPATING IN AN INTERACTIVE MULTICAST
Joining a Session
Join a session either by receiving a call from the Chair, or by
calling the Chair's address after a session has begun (if the
Chair has set the system to accept calls during a session).
Participating In the
Session
See and hear the same remote video and audio as everyone
else in the session. During the session, you can request and
receive the Floor from the Chair.
Disconnecting
At any time, click Hang Up to disconnect. Otherwise, the Chair
can disconnect you at any time or at the end of the session.
PARTICIPATING IN AN INTERACTIVE MULTICAST
Participating in an Interactive Multicast includes the following actions:
54 Collaborate Desktop: User Guide
Page 55

ENTERING AN INTERACTIVE MULTICAST
As a Participant, you can enter an Interactive Multicast in one of the following ways:
To enter an Interactive Multicast:
Answer an incoming call from the Chair of an Interactive Multicast.
-or-
Call the IP address of the session after the Interactive Multicast starts.
You will see and hear the same video and audio as everyone else in the conference.
Collaborate Desktop: User Guide 55
Page 56

REQUESTING THE FLOOR
After you join an Interactive Multicast, you will see and hear the same remote video and
audio as everyone else in the meeting.
To speak and be seen, request the Floor from the Chair. When you finish speaking to the
floor, return the Floor to the Chair.
Request the Floor
To request the Floor:
Below the remote video, click Request Floor. Wait for the Chair to grant you floor
permission.
NOTE: If the Chair enabled Auto Grant, you automatically receive the
floor.
When you take the Floor, everyone in the meeting sees and hears you. Above the remote
video, "On the Air" indicates that you have the Floor.
Return the Floor
To return the Floor:
Below the remote video, click Return Floor. Your video and audio are replaced on the
screens of the other Participants by the Chair.
56 Collaborate Desktop: User Guide
Page 57

CLEARONE MULTICAST VIEWER
CLEARONE MULTICAST VIEWER
The ClearOne Multicast Viewer enables you to watch, although not participate directly, in live
Interactive Multicasts. From the Dialer, you can choose to watch any Interactive Multicast in
your network that's set up for public viewing. However, you are not seen or heard by the
Multicast's Chair or Participants.
Collaborate Desktop: User Guide 57
Page 58

THE MULTICAST VIEWER LIST
The Multicasts tab lists current Interactive Multicasts which are available for public viewing.
These sessions may be viewed through the ClearOne Multicast Viewer.
The list provides the name of the Multicast, the time it started, and its estimated duration.
How to access this list
To view an Interactive Multicast:
Double-click the Multicast entry.
-or-
Click the Multicast name and then click View.
To stop viewing an Interactive Multicast:
1. Click Hang Up.
58 Collaborate Desktop: User Guide
Page 59

Chapter 4: Controlling Video
IN THIS CHAPTER
Collaborate Desktop provides several ways to improve video quality both during a
videoconference and offline. You can control color quality, camera focus and movement
(PTZ cameras only), and usage of video-enhancing technologies. This chapter provides
instructions for:
The Camera Controller
The PTZ Camera Controller
Adjusting the Color of the Local Video
Controlling a Pan / Tilt / Zoom (PTZ) Camera
Preset Camera Positions
Switching Between Video Sources
Muting the Outgoing Video
Adjusting Call Properties
Collaborate Desktop: User Guide 59
Page 60
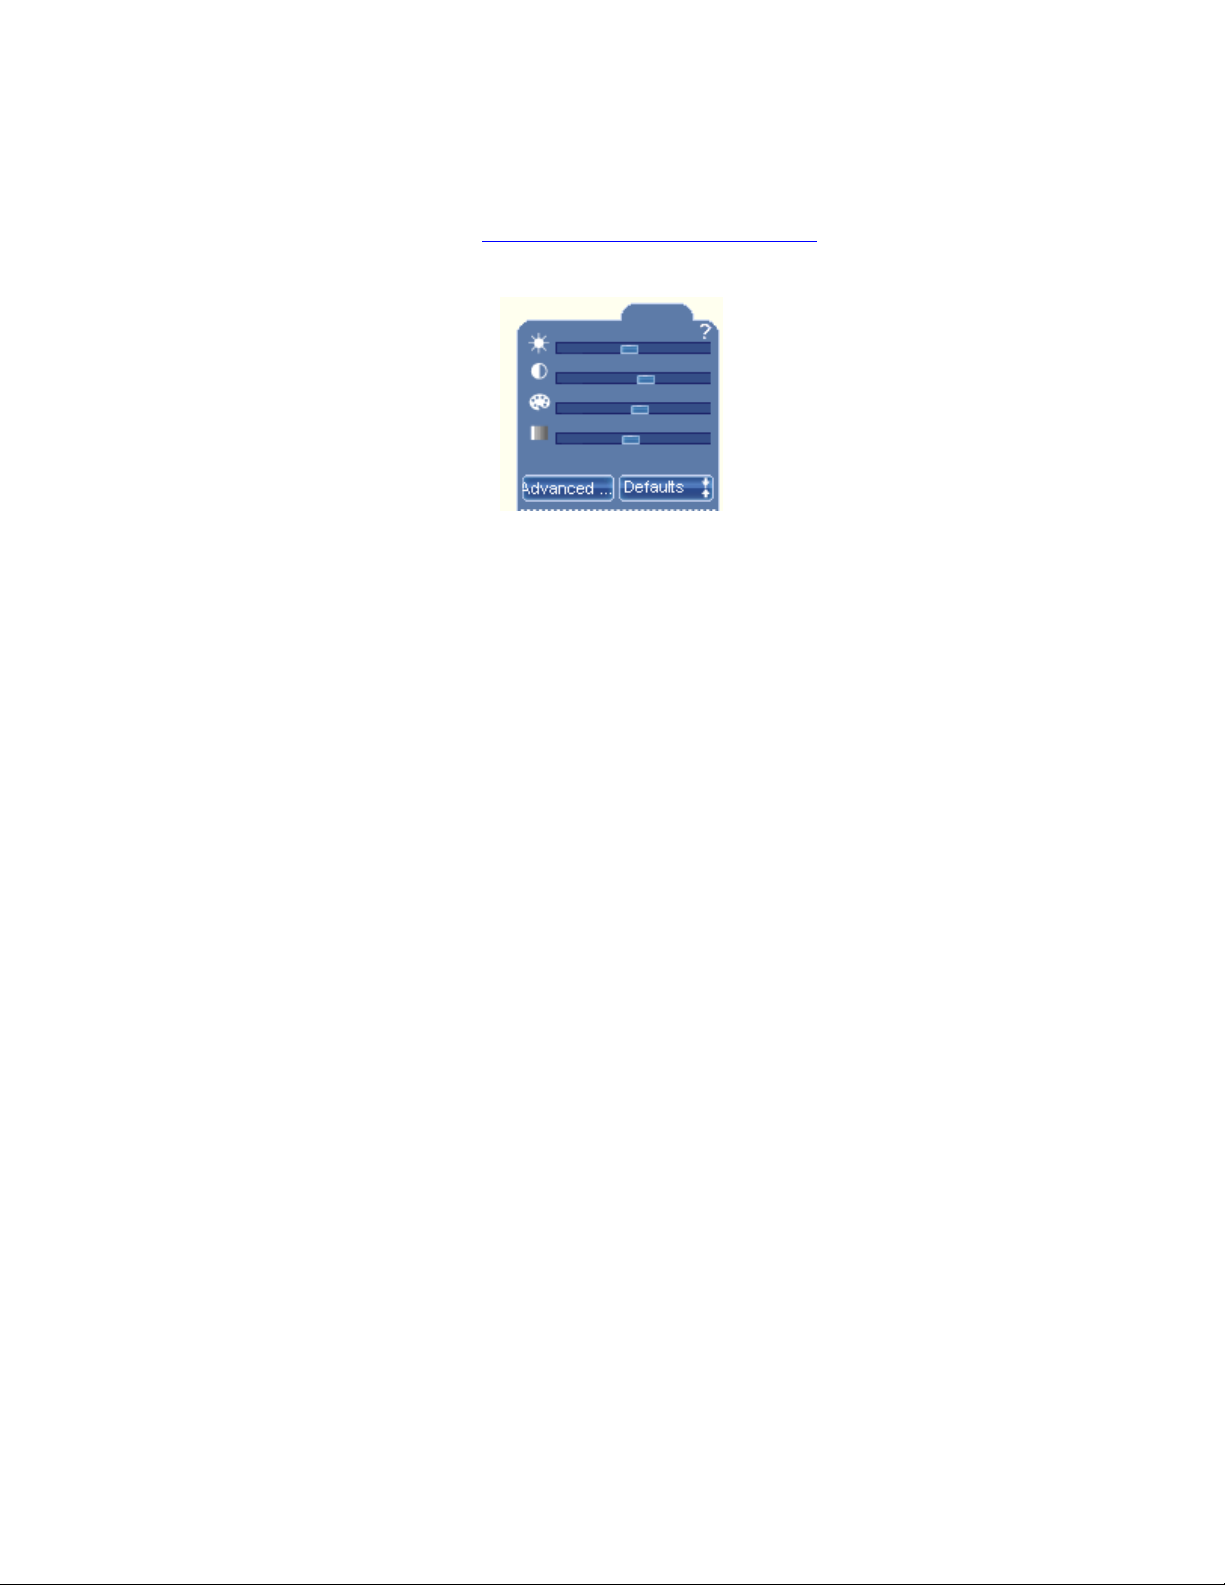
THE CAMERA CONTROLLER
In the Camera Controller, you can make color quality adjustments. It has separate sliding
controls for color, contrast, brightness, hue and sharpness.
If you're using a USB camera, click Advanced to access additional settings, such as
sharpness and advanced adjustments.
60 Collaborate Desktop: User Guide
Page 61

THE PTZ CAMERA CONTROLLER
In the Pan/Tilt/Zoom (PTZ) Camera Controller, you can:
Make color quality adjustments. It has separate sliding controls for color, contrast,
brightness and hue (local video only).
Control camera positioning.
Save preset camera positions and move the camera to them.
Collaborate Desktop: User Guide 61
Page 62

ADJUSTING THE COLOR OF THE LOCAL VIDEO
To improve video color, adjust the brightness, color, contrast and hue of the local video.
To adjust the color of the local video:
In the Local Video window, click the Adjust Picture button . The Camera Controller
appears.
To decrease a setting, drag the appropriate slider to the left.
To increase a setting, drag the slider to the right.
To return to the original settings, click Defaults.
NOTE: Any adjustments to the local video image also affect the remote
party's video when connected in a videoconference.
62 Collaborate Desktop: User Guide
Page 63

Zoom in (left mouse
button) or zoom out (right
mouse button).
Tilt up left
Tilt down right
Tilt up
Tilt up right
Pan left
Tilt down
Tilt down left
Pan right
CONTROLLING A PAN / TILT / ZOOM (PTZ) CAMERA
If you and/or the remote party is using a Pan/Tilt/Zoom (PTZ) camera, you can control their
positioning. In addition, you can control the color settings of a local PTZ camera. In addition,
you may have to manually adjust the lens focus on the front of the camera.
NOTE: If the remote party is using a ClearOne videoconferencing
product, it may also control the positioning of your PTZ camera.
To control a PTZ camera:
Through the Camera Controller:
Click the Camera Controller button below the Local or Remote Video window.
In the Camera Controller, you can:
Adjust the brightness, color, contrast and hue of the local video.
Click the up and down arrow buttons to tilt the camera up and down.
Click the left and right arrow buttons to pan the camera from side to side.
Click the + button to zoom the view closer in or the – button to zoom the view
farther out.
You can store and recall up to 6 preset camera positions for repeated use.
Within the Video Window:
Place the mouse pointer inside the Video Window displaying video from a PTZ
camera. The pointer changes according to its location within the window. Press the
left mouse button (except where noted below) to move the camera.
Collaborate Desktop: User Guide 63
Page 64

PRESET CAMERA POSITIONS
If you want to save the camera’s current position for future use, you can save it as a preset
position. At any time afterwards, you can recall this preset position to save adjustment time.
SAVING A PRESET POSITION
To save the current position as a preset position:
1. Position and zoom the camera.
2. In the number list, select any number from 1 to 6. Each number button represents a
preset position.
MOVING TO A PRESET POSITION
To move to a preset position:
Click one of the Save Presets buttons.
The camera pans, tilts, and zooms to the preset position.
64 Collaborate Desktop: User Guide
Page 65

SWITCHING BETWEEN VIDEO SOURCES
Collaborate Desktop supports the use of both Web cameras and Pan/Tilt/Zoom (PTZ)
cameras. If two cameras are connected, you can switch between them both during a
videoconference and offline.
To switch to another connected camera:
1. Click the Select Video Source button .
2. From the Video Source list, choose a camera.
Collaborate Desktop: User Guide 65
Page 66

MUTING THE OUTGOING VIDEO
You may want to prevent video from being transmitted to the other participant. During a
videoconference, you can temporarily stop transmitting video.
To mute the outgoing video
In the Local Video Window, click the Mute Video button.
The system stops transmitting video, sending a graphic to the remote side instead. The
incoming video is not affected. The Mute button changes to .
To restore video transmission click on the mute (unmute) video button again .
66 Collaborate Desktop: User Guide
Page 67

ADJUSTING CALL PROPERTIES
During a videoconference, you can make adjustments to the video transmission. The Call
Properties provide controls for video quality (frame rate) and synchronization of audio and
video.
This tab is available only during an open videoconference.
How to access these settings:
1. In the Control menu, choose Adjust Call Properties.
-or-
Open the Drawer, click the Conference tab.
2. Click the Properties tab.
SYNCHRONIZING VIDEO AND AUDIO
If you notice that the video and audio are out of sync (for example, you hear voice only after
the other party’s lips move), you can adjust the Lip Synch.
To adjust the Lip Synch:
1. Drag the slider towards Delay Video if you hear the audio after the video movement, or
towards Delay Audio if you see the appropriate video movement only after you hear the
audio.
2. Click Defaults to return to the default setting.
If you are unsatisfied with the adjustment:
Click Undo to return to the previous setting, discarding the last change.
VIDEO FRAME RATE / QUALITY
Increasing the video frame rate provides smoother video. However, the video image is
sharper by lower frame rate. Drag the slider until you reach optimum balance between the
two.
Click Undo to return to the previous setting, discarding the last change.
Collaborate Desktop: User Guide 67
Page 68

Chapter 5: Controlling Audio
IN THIS CHAPTER
Collaborate Desktop provides several functions to help you improve audio quality. This
chapter provides instructions for:
Adjusting the Volume
Muting the Audio
Audio Tuning Wizard
68 Collaborate Desktop: User Guide
Page 69
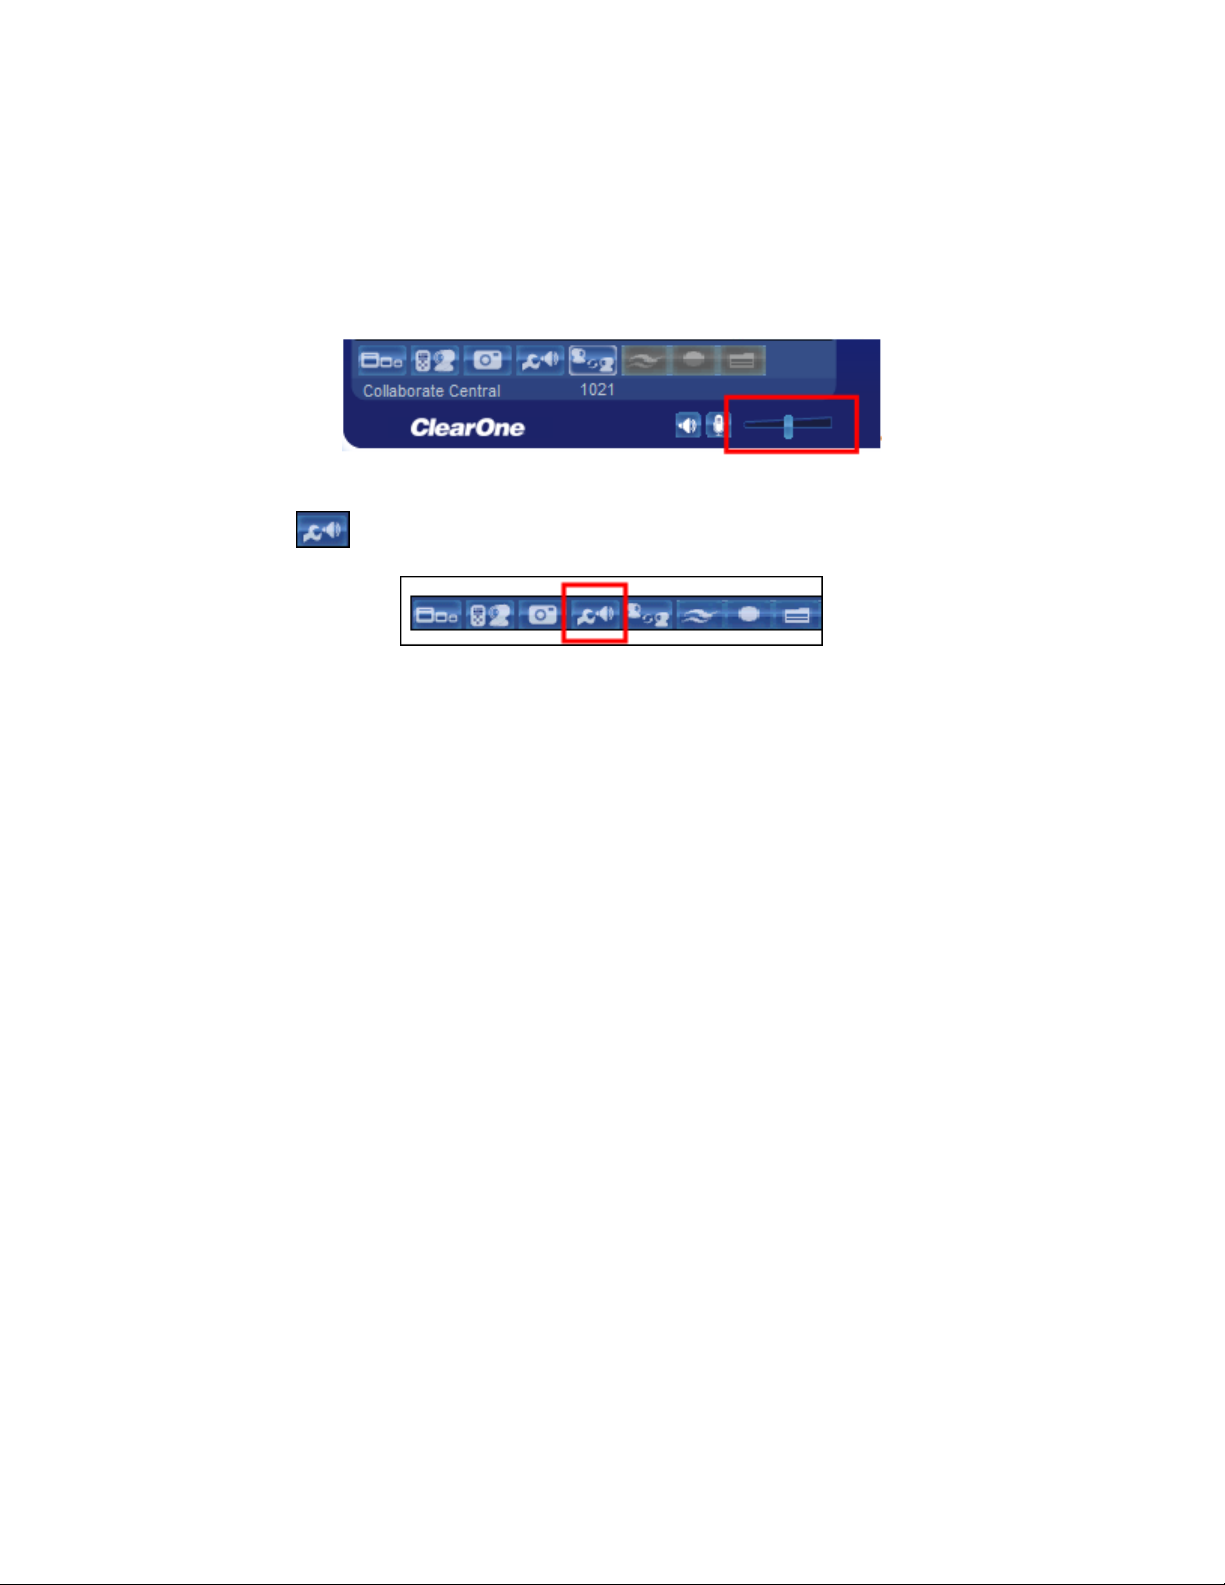
ADJUSTING THE VOLUME
To adjust the volume that you hear:
Click and drag the Volume slider to the right (to increase volume) or to the left (to
decrease volume).
NOTE: To run the Audio Tuning Wizard, click the Audio Tuning Wizard
button in the Video Window.
Collaborate Desktop: User Guide 69
Page 70

MUTING THE AUDIO
Use this feature to prevent the remote party from hearing a local discussion, or to turn off the
audio transmitted from the remote party.
NOTE: Muting the Audio does not allocate the extra bandwidth for
video.
MUTING OUTGOING AUDIO
To mute outgoing audio:
Click the Mute Microphone button .
The icon changes to . The remote party cannot hear you, but you can hear them.
Click again to reactivate the microphone.
MUTING INCOMING AUDIO
To mute incoming audio:
Click the Mute Speaker button . The icon changes to .
Click again to restore.
70 Collaborate Desktop: User Guide
Page 71
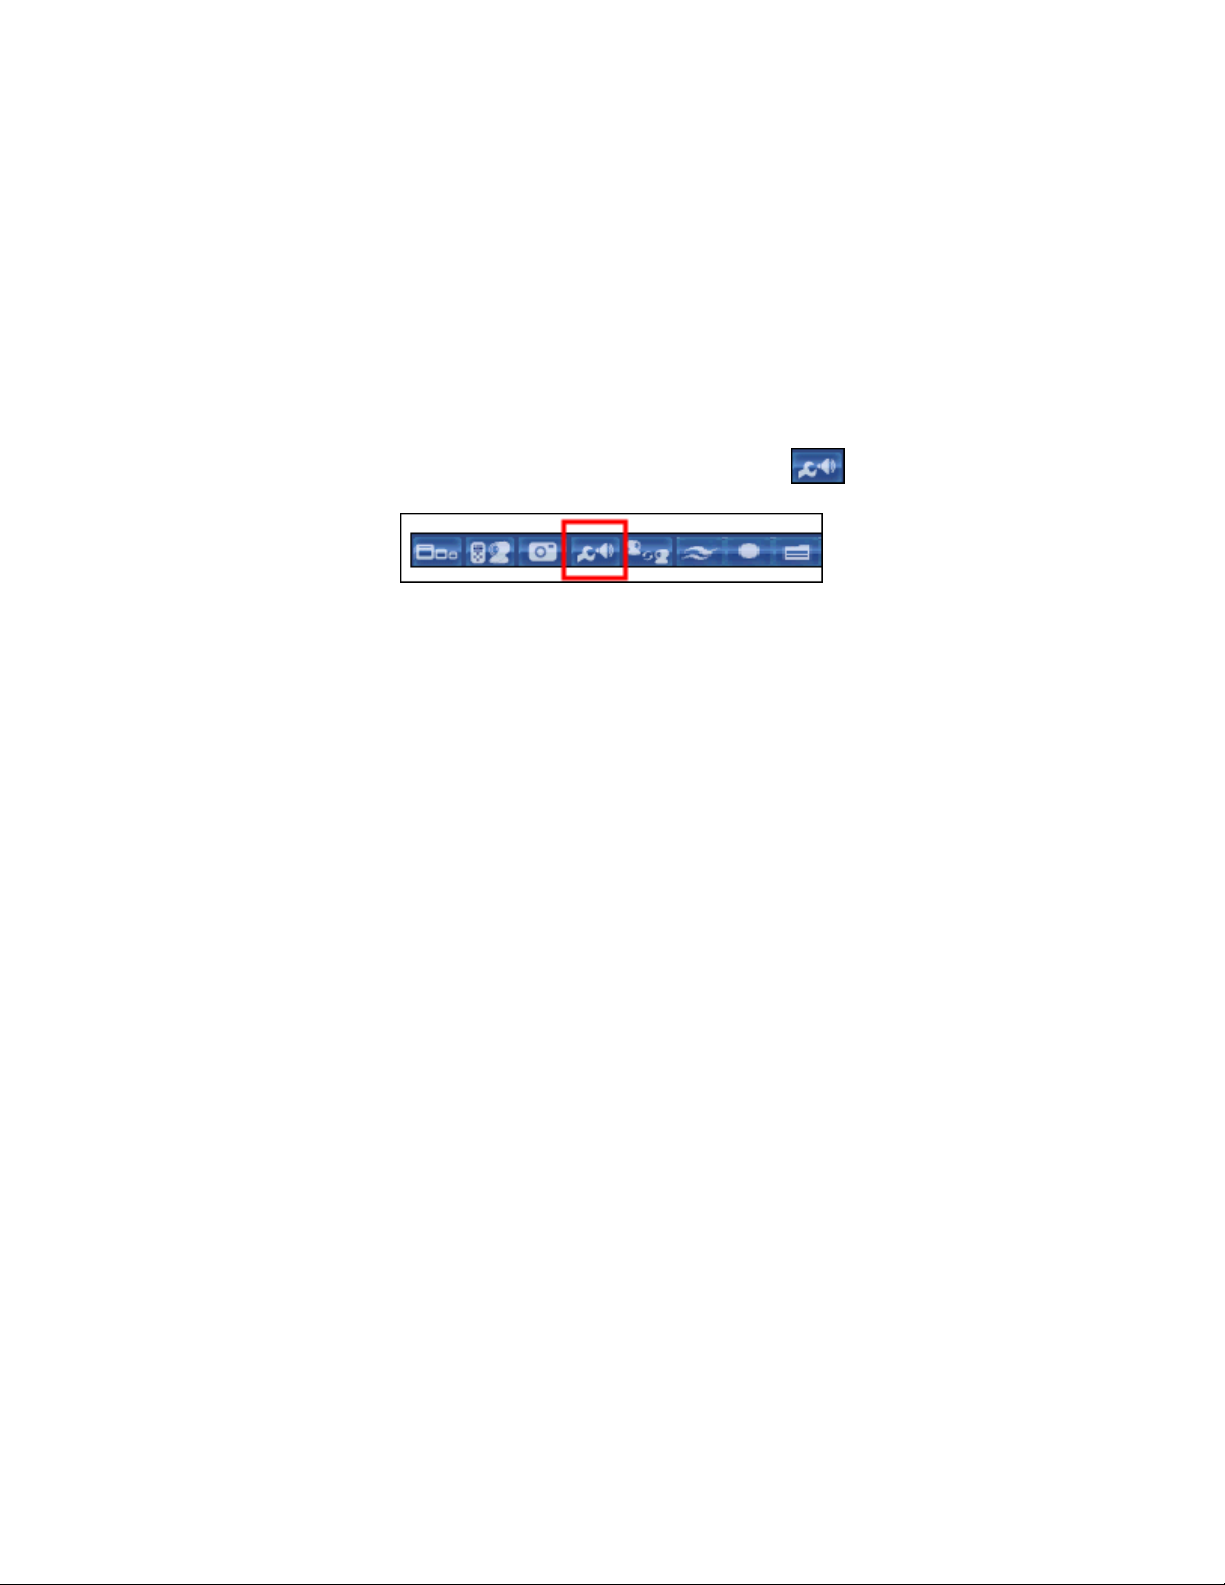
Speaker Mode
Tune the audio levels of the external speakers and connected
microphone.
Headset Mode
Tune the audio levels of the headset speakers and its attached
microphone.
AUDIO TUNING WIZARD
Using the Audio Tuning wizard, you can test and adjust the levels of your speakers, headset,
and microphone (or other audio source) to their optimum sound levels.
NOTE: The Audio Tuning wizard "remembers" your last setup. Whenever
a new call is initiated, the Audio Tuning wizard will set the audio
parameters to the configured setup.
To open the Audio Tuning Wizard:
In the Video Window, click the Audio Tuning Wizard button .
To test and tune your audio devices:
1. Before starting the test, close all other applications on your system that play or record
sound. Keeping any of these applications open may distort the results of the Audio
Tuning wizard.
The Audio Tuning wizard contains separate sections. Depending on the type of device,
perform the appropriate Tuning tests in the wizard. If you work in Headset Mode, skip the
Speaker Mode pages by clicking Next without performing any action in those pages.
2. In the Playback page, choose the sound card which generates the audio for the
Collaborate Desktop application.
3. Click Start. Music starts playing from the speakers. Move the Volume slider in either
direction until you hear the clearest audio output. Click Stop to exit the test.
Click Next to continue.
4. In the Record page, choose the sound card which generates the audio for the
Collaborate Desktop application.
5. Click Start and read the following line into the microphone (or camera if it contains a
built-in microphone):
"I am using the microphone setup wizard. It is checking to see whether my microphone
is plugged in and working properly."
Collaborate Desktop: User Guide 71
Page 72

Line In Mixer
Select to enable audio input through the Line In connector from
an external audio source, such as DVD or VCR.
Microphone Boost
Select to significantly raise the volume range of the microphone.
Deselect this option to lower the range.
The Volume slider moves to the optimum level. Click Stop to finish the test. After
pressing on the Stop button, the Audio Wizard will playback the recording.
To set the level manually, move the Volume slider towards the right to raise the volume
range, or towards the left to lower the range.
6. Enable/disable the following modes (available if the sound card or audio equipment
supports them):
7. Click Next to continue.
8. If tuning was successful, select the active mode for Collaborate Desktop — Headset
mode or Speaker mode. Then, click Finish to close the wizard.
If tuning was not successful, make sure that the devices are connected securely to your
computer's sound card (or that the camera is connected securely to the USB port). Click
Back to test the audio again.
72 Collaborate Desktop: User Guide
Page 73

Chapter 6: Application Configuration
IN THIS CHAPTER
The Drawer contains the various settings that, together, make up Collaborate Desktop's
configuration. You may control many of the settings, while some may be defined only by a
system administrator and others may be defined automatically by your computer system.
This chapter provides instructions for the following Collaborate Desktop configuration
settings:
Accessing Collaborate Desktop Configuration Settings
Calls Settings
General Settings
Hardware Settings
Network Settings
Collaborate Desktop: User Guide 73
Page 74

ACCESSING COLLABORATE DESKTOP CONFIGURATION SETTINGS
To access Collaborate Desktop configuration settings:
1. In the Control menu, choose Settings.
-or-
Open the Drawer and click the Settings tab.
The Drawer opens, displaying the Settings tab that was last open.
2. When you're finished setting the configuration in each tab, click Apply to implement the
settings.
3. To open another Settings tab, click the appropriate tabs.
74 Collaborate Desktop: User Guide
Page 75

CALLS SETTINGS
CALLS SETTINGS
The Calls Settings tab provides access to other tabs where you can define how Collaborate
Desktop handles incoming and open videoconference calls.
To access the Calls Settings:
1. From the Control menu, choose Settings.
-or-
Open the Drawer and click the Settings tab.
2. Click the Calls tab.
General
Multicast
Ringing
Forward
Collaborate Desktop: User Guide 75
Page 76

GENERAL SETTINGS
Auto Answer
Select to turn automatic acceptance of incoming calls on. If your
system is idle when a conferencing call arrives, the session
starts automatically.
Allow Adaptive Bandwidth
Adjustment
Enables videoconferences to precede at reduced bandwidth if
the network is congested. Deselecting this option maintains a
constant quality to the session, but it may cause network
problems.
Enable H.239
Enables the use of the H.239 standard during data sharing.
H.239 enables Collaborate Desktop to convert PC application
graphics into a separate media stream and transmit it parallel to
the video stream. Video systems supporting H.239 display
shared data and remote video in separate windows. Systems
not supporting H.239 display only the shared data in a single
window. Read more about data sharing options
Enable AAC-LD
Enable using the audio codec AAC-LD when possible.
Enable G722.1 Annex C
Enable using the audio codec G722.1 Annex C when possible.
Enable 720p
Enable using video resolution 720p when possible. This feature
depends on your license and might be disabled.
Faster Data Presentation
Enable this feature to support faster data presentation when
available. If this option is selected, more bandwidth is allocates
to XGA data.
Do Not Disturb
When enabled, you are not able to receive calls, and the
Collaborate Desktop icon in the tray is red.
In the Calls>General Settings you define various aspects of the actual call.
To access the General Settings:
1. From the Control menu, choose Settings.
-or-
Open the Drawer and click the Settings tab.
2. Click the Calls and Ringing tabs.
76 Collaborate Desktop: User Guide
Page 77

Force FEC
Force using the Forward Error Correction mechanism. This
option is useful when the network is congested.
Connection
Set outgoing and incoming bandwidth if they are asymmetric.
This is mostly applicable to satellite and xDSL based
connections. Use the following fields to configure:
Maximum outgoing bandwidth - Your maximum upload
bandwidth (0 for unlimited)
Maximum incoming bandwidth – Your maximum download
bandwidth (0 for unlimited)
MTU size - Set the packet size. Default is 1500.
Encryption Mode - Set the encryption mode for your calls.
Encryption Mode
None: Outgoing calls will not be encrypted and incoming
encrypted calls will be rejected.
Auto: Enables the application to encrypt a call if the remote
side has also enabled encryption. If the remote side has not
enabled encryption, an outgoing call will be unsecured.
AES: Select this option to encrypt all calls using the AES
(Advanced Encryption Standard) encryption method. If the
remote side has not enabled encryption, the call attempt will
be unsuccessful.
Note: During a secure call, the 'Encrypted Call' sign appears on
the notification area.
Recording
Configure recording and streaming settings:
Recording Folder – Default recording files directory
Recording Quality:
High: the recorded file will be in 4CIF resolution.
Low: the recorded file will be in CIF resolution
Streaming URL Port(1-65535) – Port number for streaming to
media player
Number of Streaming Ports (1-20): Set the maximum number of
streaming clients
When you're finished setting the configuration, click Apply to implement the settings.
Collaborate Desktop: User Guide 77
Page 78

RINGING SETTINGS
PC Speaker
Select to use your computer's built-in speaker for the incoming
ring sound.
Soundcard
Select to use your computer's sound card for the incoming and
outgoing ring sounds.
In the Ringing Settings, define the sounds used to indicate incoming and outgoing
videoconference calls.
To access the Ringing Settings:
1. In the Control menu, choose Settings.
-or
Open the Drawer and click the Settings tab.
2. Click the Calls and Ringing tabs.
78 Collaborate Desktop: User Guide
Page 79

Ringing Device
Select the device used to produce the ringing sound.
Incoming Ringing Sound
Filename of the sound that indicates an incoming call. To
change the sound, click Browse and select a different file.
Outgoing Ringing Sound
Filename of the sound that indicates an outgoing call. To
change the sound, click Browse and select a different file.
NOTE: You can select both of the above options for playing the
incoming sound. For example, you would be able to hear the incoming
ring while wearing a headset.
When you're finished setting the configuration, click Apply to implement the settings.
Collaborate Desktop: User Guide 79
Page 80

MULTICAST SETTINGS
Multicast IP Address
The destination IP address for the Interactive Multicast. All
participants in the session transmit and receive from this
common IP address. This address must be a class D address in
the range of 224.0.0.0 to 239.255.255.255.
Max. Participants
The maximum number of participants that may participate in a
Multicast session initiated by your system.
Bandwidth
The maximum bandwidth for Interactive Multicasts. The actual
bandwidth will depend on the amount of available bandwidth
during the session.
Video Format
The video coding standard that all parties in the Multicast are
capable of using - H.264, H.263 and H.261. H.264 and H.263
provide better video quality, especially at low bit rate
transmissions.
However, some video systems do not support H.264 or H.263. If
at least one Participant's system does not support these
standards, or you are not sure, select H.261.
Time to Live
The maximum number of routers that the Session's packets may
pass through.
The Multicast Settings contain the default configuration for sending video and audio to
Interactive Multicast Participants and public viewers. These settings are only applicable for
sessions chaired by this system.
To access the Multicast Settings:
1. In the Control menu, choose Settings.
-or-
Open the Drawer and click the Settings tab.
2. Click the Calls and Multicast tabs.
NOTE: The default Multicast settings are recommended for most
Multicast conditions. Change them ONLY after consultation with your
system administrator.
NOTE: If you select a codec unsupported by any of the participants, that
participant will not be able to participate in the session.
80 Collaborate Desktop: User Guide
Page 81

Video port
The ID of the port used for the video connection.
Audio port
The ID of the port used for the audio connection.
NOTE: Participants must use the same video, audio and control ports.
Make sure that the ports you choose are available for every Participant.
Announce Every _____
Seconds
The interval between announcements of your Multicast in the
public viewer's schedule.
Refresh Video Every
________ Seconds
The maximum number of seconds required until the video
Multicast is synchronized for all viewers. If the refresh value is
low, the quality is lowered. If the refresh value is high, it will take
a longer time to see the video display when the viewers connect.
Use the default setting as a guide.
Defaults
Click to return to the original settings. These settings help you
connect to the Interactive Multicast through the default ports
and/or IP address that was defined automatically by your
system.
When you're finished setting the configuration, click Apply to implement the settings.
Collaborate Desktop: User Guide 81
Page 82

CALL FORWARDING SETTINGS
Unconditional forward
Select if you want to forward ALL calls intended for you to
another party.
Forward on busy
Select if you want to forward calls to another party if you are
engaged in another videoconference.
Forward on no answer
Select if you want to forward calls intended for you to another
party, if you cannot answer the call.
Forward After
_____ Seconds
Enter the amount of time that will pass before Collaborate Central forwards
the call.
NOTE: These settings are only available when you are connected to
Collaborate Central server. If you are not connected to Collaborate
Central, the Forward tab will not appear under Calls.
If your system is logged into Collaborate Central, Call Forwarding is available. Calls may be
forwarded to a specific party unconditionally, or if the local party does not answer, or is busy.
The Call Forwarding settings for your system may be done by both you and the system
administrator. The last changes, regardless of who made them, are valid.
To access the Call Forwarding Settings:
1. In the Control menu, choose Settings.
-or-
Open the Drawer and click the Settings tab.
2. Click the Calls and Forward tabs.
In each option’s accompanying box, enter the target party by one of the following methods:
1. Type the party’s directory number, IP address, DNS name or E.164 number.
-or-
Click Browse at the end of the row to open the Online Directory. Select a contact and
click OK,
When you're finished setting the configuration, click Apply to implement the settings.
82 Collaborate Desktop: User Guide
Page 83

GENERAL SETTINGS
GENERAL SETTINGS
The General Settings provide access for customizing Collaborate Desktop.
To access the General Settings:
1. In the Control menu, choose Settings.
-or-
Open the Drawer and click the Settings tab.
2. Click the General tab.
User Info Settings
Display Settings
Shortcuts Settings
License Settings
Collaborate Desktop: User Guide 83
Page 84

USER INFO SETTINGS
First Name
Company or organization
Last Name
E-mail address
The User Info settings provide identification of the Collaborate Desktop system user (most
likely, you). This includes the following information:
To access the User Info Settings:
1. In the Control menu, choose Settings.
-or-
Open the Drawer and click the Settings tab.
2. Click the General and User Info tabs.
84 Collaborate Desktop: User Guide
Page 85

License Option
Contains a list of available features. The feature current license is
stated in the Value column
Value
The value per each feature in the license currently installed on
your system.
Buttons:
Export
Export your existing or temporary license. The export operation
creates a file which is saved on your hard drive in a location
according to your selection.
Import
Import an existing or new license. When pressing this button, a
browse window opens which enables you to browse to the
license file on your hard drive.
View
Opens a small window containing the actual body of the license.
The license is represented by a long alphanumeric string.
LICENSE DETAILS
To access the License Details Settings:
1. In the Control menu, choose Settings.
-or-
Open the Drawer and click the Settings tab.
2. Click the General and License tabs.
In the license settings screen you can set and view the license for your Collaborate Desktop
application.
Collaborate Desktop: User Guide 85
Page 86

SHORTCUTS SETTINGS
Shortcut buttons provide quick access to various functions. Clicking one of these buttons
quickly starts the specified function.
The Shortcut tray provides places for up to six shortcut buttons. It is located on the right side
of the Main Viewer in Normal Mode and Large Mode. In the Shortcuts Settings, you can
customize the Shortcut tray.
To access the Shortcuts Settings:
1. Right-click in Main Viewer and select Customize Shortcuts.
-or-
In the Control menu, choose Settings.
-or-
Open the Drawer and click the Settings tab.
2. Click the General and Shortcuts tabs.
From a list of functions, you can choose up to six shortcut buttons to provide quick access to
various functions. Clicking one of these buttons in the Shortcut tray quickly starts the
specified function.
When you're finished setting the configuration, click Apply to implement the settings.
86 Collaborate Desktop: User Guide
Page 87

Language
Choose the language of your Collaborate Desktop application.
No Video Image
Allows you to select a static image that will be displayed when
there is no video image. Default displays a built-in "No Camera
Detected" image .
Always on Top
Display Collaborate Desktop on top of all open windows (when
it's not minimized). Otherwise, Collaborate Desktop remains
open on the screen but hidden behind other applications when
they are selected.
Show Video Toolbar in Full
Screen Mode
Display the toolbars and status information in Full Screen mode.
Deselect this option to display only the video.
Show Local Video Window
During Call
Display a small Local Video window or PIP during an open
videoconference. Deselect this option to display only remote
video during a call.
Load on Startup
(Minimized to Tray)
Open and minimize Collaborate Desktop during your computer's
startup. The Collaborate Desktop icon appears in the taskbar at
the bottom of the Windows Desktop. This option takes effect
only after restarting your computer.
Keep Aspect Ratio
Keep the selected display ratio in order to force the aspect ratio
on screens with different ratios.
Overlay my name on
outgoing video
Display the station name overlaid on the remote side video
image.
DISPLAY SETTINGS
In the Display Settings, you can set display options for the Collaborate Desktop application.
To access the Display Settings:
1. In the Control menu, choose Settings.
-or-
Open the Drawer and click the Settings tab.
2. 2. Click the General and Display tabs.
When you're finished setting the configuration, click Apply to implement the settings.
Collaborate Desktop: User Guide 87
Page 88

HARDWARE SETTINGS
HARDWARE SETTINGS
In the Hardware Settings, define the system's configuration for audio devices, cameras ISDN
and ISDN Adapter.
To access the Hardware Settings:
1. In the Control menu, choose Settings.
-or-
Open the Drawer and click the Settings tab.
2. Click the Hardware tab.
Audio
ISDN
ISDN Adapter
Camera
88 Collaborate Desktop: User Guide
Page 89

Select Audio Mode
Select Headset Mode to tune the audio levels of the headset
speakers and its attached microphone.
Select Speaker Mode to tune the audio levels of the external
speakers and connected microphone.
AGC (Automatic Gain
Control)
Select to ensure that the remote parties hear your audio
normally regardless of the speaker's distance from the
microphone.
Auto Mute Microphone
Upon Incoming Call
Select to mute the microphone automatically whenever
Collaborate Desktop answers an incoming call.
Audio Noise Suppression
Select to suppress unwanted background noises. Disable this
feature when it is supported by an external device.
Microphone Level
Drag the slider to the right to raise the volume of the microphone
or to the left to lower it.
Tuning Wizard
Click Tuning Wizard to test and adjust the level of your
microphone and speakers.
AUDIO SETTINGS
In the Audio Settings, you can define the audio configuration to be used during
videoconferences.
To access the Audio Settings:
1. In the Control menu, choose Settings.
-or-
Open the Drawer and click the Settings tab.
2. Click the Hardware and Audio tabs.
When you're finished setting the configuration, click Apply to implement the settings.
Collaborate Desktop: User Guide 89
Page 90

ISDN SETTINGS
Switch Type
Select the appropriate ISDN switch type that matches you
network. Consult with your ISDN network provider if you are not
sure.
Lines
Set the appropriate phone number for each (1-8) of your ISDN
physical lines. You may not have 8 numbers unless you use all 4
BRI lines.
SPID
For 5ESS switch types, SPID (Service Profile Identifier) numbers
are also required for each phone line. Enter the SPID numbers
obtained from your ISDN service provider per each line.
NOTE: The availability of the ISDN option on your system depends on
your license type.
In the ISDN Settings you can configure your ISDN connection parameters. This page is only
available after enabling ISDN and configuring the ISDN adapter (and providing you have an
ISDN license)
When you're finished setting the configuration, click Apply to implement the settings.
90 Collaborate Desktop: User Guide
Page 91

ISDN
Check this option to enable or disable ISDN networking in this
application.
Adapters List
Displays the list of ISDN adapters available for this system.
Discover
Scans for available ISDN adapters that can be available for this
system
IP Address
IP address of the selected ISDN adapter
MAC Address
MAC address of the selected ISDN adapter
Line 1
ISDN line status for line number 1
Line 2
ISDN line status for line number 2
Line 3
ISDN line status for line number 3
Line 4
ISDN line status for line number 4
ISDN ADAPTER SETTINGS
NOTE: The availability of the ISDN option on your system depends on
your license type.
The ISDN adapter page enables connecting to ISDN-based networks, using up to 4 ISDN
BRI lines, reaching a connection bandwidth of up to 512Kbps. Enable ISDN networking and
enter the appropriate configuration settings.
When you're finished setting the configuration, click Apply to implement the settings.
Collaborate Desktop: User Guide 91
Page 92

CAMERA SETTINGS
Camera Type
Select the manufacturer and/or model of the connected PTZ
camera (if applicable).
If you are using a web camera, select None.
Communication Port
Select the name of the computer port to which the PTZ camera
is connected.
Device
Select the manufacturer and/or model of the connected main
camera.
Capability
Select camera type: Fixed (cannot be moved) or Pan/Tilt/Zoom
(can be moved).
Video Capture Format
Select the video format that is compatible with your camera
and/or monitor.
PAL is used in many countries in Western Europe, Asia,
Africa, as well as Australia.
NTSC is widely used throughout the Western Hemisphere,
Japan and South Korea.
Set the type of main camera that is connected to the system and the communications port
through which it can be controlled.
To access the Camera Settings:
1. In the Control menu, choose Settings.
-or-
Open the Drawer and click the Settings tab.
2. Click the Hardware and Camera tabs.
When you're finished setting the configuration, click Apply to implement the settings.
92 Collaborate Desktop: User Guide
Page 93

NETWORK SETTINGS
NETWORK SETTINGS
The Network Settings contain the configuration for operating within the connected local-area
network (LAN).
To access the Network Settings:
1. In the Control menu, choose Settings,
-or
Open the Drawer and click the Settings tab.
2. Click the Networks tab.
Login Settings
Firewall/NAT Settings
Directory Settings
SIP Settings
LOGIN SETTINGS
In the Login Settings, define how Collaborate Desktop starts up and enters into its
operational mode.
To access the Login Settings:
1. In the Control menu, choose Settings.
-or-
Open the Drawer and click the Settings tab.
Collaborate Desktop: User Guide 93
Page 94

Mode
Select Collaborate Central Mode to log Collaborate Desktop into
Collaborate Central in order to receive management services,
organizational directory, and telephony features (Call
Forwarding, Call Pickup, Call Transfer, Invite).
Select Stand Alone to operate Collaborate Desktop without
Collaborate Central/gatekeeper management or telephony
features.
Automatic Login
Your videoconferencing system automatically logs in to
Collaborate Central during Collaborate Desktop's startup. If this
option is selected, you do not have to enter login details each
time you run Collaborate Desktop.
User Name
Your user name as it is listed in the Collaborate Central database
and the Collaborate Central Administrator
2. Click the Networks tab.
3. Click New (if adding a new profile) or Details (if editing an existing profile).
4. In the Profile Details dialog box, click the Login tab.
94 Collaborate Desktop: User Guide
Page 95

User Number
Your E.164 number in the connected network.
E.164 provides the number structure and functionality for
addresses, used for successfully routing calls in international
public telecommunication. In Collaborate Central mode,
Collaborate Central provides you with the user number.
Collaborate Central
Address
In Collaborate Central Mode
IP address of Collaborate Central to which your system registers
and logs in during startup.
Gatekeeper Address
In Stand Alone Mode
IP address of a gatekeeper to which your system registers and
logs in during startup, if applicable.
Change Collaborate
Central Password
Click this button to change your Collaborate Central login
password.
License Server Details
License server login settings. (Keep this option checked if you
are working in Collaborate Central mode.)
When you are finished setting the configuration, click Apply to implement the
settings.
FIREWALL & NAT SETTINGS
The Fire wall/NAT Network Settings contain your system's identification configuration on the
local network.
How to access these settings
1. In the Control menu, choose Settings.
-or-
Open the Drawer and click the Settings tab.
2. Click the Network tab to display the Profiles List.
3. Click New (if adding a new profile) or Details (if editing an existing profile).
4. In the Profile Details dialog box, click the Firewall/NAT tab.
Collaborate Desktop: User Guide 95
Page 96

Connection Modes
A firewall protocol that allows Collaborate Desktop to pass the
firewall according to the selected standard. This protocol is set
to Auto Detection by default.
Auto Detection: The system will determine the best
connection protocol to use.
H.323: The H.460 protocol will not be used.
H.460: The H.460 protocol is always used.
Tunneling: The Tunneling feature is created to solve
connectivity problems between one or more
videoconferencing devices or between devices and users
caused by Firewalls, NATs, routers and other network
elements. The solution "Tunnels" all videoconferencing traffic
from endpoint to port 80 and additional pre configured port
(this port will be pre configured in the endpoint and the
NetPoint/Collaborate Central) on the server. (The Tunneling
feature only works with ClearOne gatekeepers. )
Enable DNS Addressing
Allows the use of DNS for contacting other parties by a defined
computer name.
DNS Name
Your computer's name if it's located in a network that employs a
DNS server
96 Collaborate Desktop: User Guide
Page 97

Enable NAT
If your organization uses NAT when communicating with parties
in another LAN or WAN, type the external address for your
videoconferencing device.
NAT helps protect a LAN from exposure to unwanted traffic by
providing one single external address to remote users. NAT
uses a system of local and external addresses to hide a LAN's
users from other networks. A NAT server translates local parties'
addresses to an external address, which is then used to identify
the local party to remote parties. Therefore, remote parties use
this external address to call the local party, without knowing its
actual local address.
Ports to open when using NAT:
389 Static TCP LDAP
1718 Static UDP Gatekeeper discovery
1719 Static UDP Gatekeeper ,RAS (Registration Admission
& Status )
1720 Static TCP Q.931 (Call Setup)
1731 Static TCP Audio control
5004-6004 Dynamic TCP H.245 (Call Parameters)
(5004-5035) Dynamic TCP/UDP H235/RTP
5004-6004 Dynamic UDP (RTP) Video Data Streams, (RTP)
Audio Data Streams, (RTCP) Control Information
3000 Static TCP Collaborate VCB for 1 service
3001 Static TCP Collaborate VCB for 2 services
22136 Static TCP ClearOne Collaborate Central - Remote
ClearOne Endpoint Admin
26505 Static TCP ClearOne Collaborate Central - Remote
Console Login
Ports to open when using SIP:
5060 TCP and UDP
5004 UDP
10000 UDP (SIP gate service - usually 3478/9)
16348-32768 UDP (RTP, RTCP multimedia streaming)
Collaborate Desktop: User Guide 97
Page 98

Tunneling Details
Click to open the Tunneling details dialog box. Complete the
following information.
Tunneling Port – The default tunneling port is 443. Tunneling
is available only when working with Collaborate Central.
Use Proxy
Proxy Address - If your organization uses Proxy server,
configure in the Proxy Address
Proxy Port - If your organization uses Proxy server,
configure also the Proxy Port.
Send Media As HTTP – Disguising tunneling traffic as HTTP.
Run Connection Wizard
Click to rerun the Connection Wizard to configure the
connection mode.
When you are finished setting the configuration, click Apply to implement the settings.
98 Collaborate Desktop: User Guide
Page 99

Online Directory Address
The address of the online directory.
Domain
The domain name of the online directory
Path
Folder in which your user information is stored, as created in the
online directory.
User Name
Your user name as displayed in the online directory.
Password
Access password as defined in the online directory server.
Port
Number of the host port of the online directory server.
Server Type
Type of LDAP (Lightweight Directory Access Protocol) server
which is hosting this online directory.
List me in the Online
Directory
Select if you want to be listed in the online directory and be able
to receive calls from other listed contacts.
DIRECTORY SETTINGS
NOTE: The Directory settings are available only in Collaborate Desktop
systems that are not being managed by Collaborate Central.
Online directories are lists of contacts (such as Internet Location Server, or ILS) whose
videoconferencing systems are online and registered with that directory. If your system is not
registered with Collaborate Central, the Directory Settings provide a way to register with an
online directory.
To access the Directory Settings:
1. In the Control menu, choose Settings.
-or-
Open the Drawer and click the Settings tab.
2. Click the Network tab to display the Profiles List.
3. Click New (if adding a new profile) or Details (if editing an existing profile).
4. In the Profile Details dialog box, click the Directory tab.
When you're finished setting the configuration, click Apply to implement the settings.
Collaborate Desktop: User Guide 99
Page 100

SIP SETTINGS
Use Proxy
Use a proxy server or as stand alone.
User Name
The user name as configured in the proxy server (proxy mode).
User Password
The user password as configured in the proxy server (proxy mode).
Proxy address
Proxy server IP
Local Port
The SIP port on your computer (the standard is 5060).
Transport Protocol
Select the desired protocol (TCP or UDP). Select Auto if you want the
system to make the selection automatically.
SIP is a common communication signaling protocol for VoIP.
To access the SIP Settings:
1. In the Control menu, choose Settings.
-or-
Open the Drawer and click the Settings tab.
2. Click the Network tab to display the Profiles List.
3. Click New (if adding a new profile) or Details (if editing an existing profile).
4. In the Profile Details dialog box, click the SIP tab.
When you're finished setting the configuration, click Apply to implement the settings.
NOTE: To register ClearOne products to the Collaborate Central proxy
server, in the Profile Details dialog box, select Stand Alone mode (not
Collaborate Central mode). (Collaborate Central SIP registration is
configured as a closed mode you need to manually to allow it.)
100 Collaborate Desktop: User Guide
 Loading...