

Page 1
Ceiling Microphone Array Analog-X
Quick-Start Guide
Page 2

PRODUCT OVERVIEW .................................................................. 1
PARTS ............................................................................................ 1
TOOLS REQUIRED ........................................................................ 1
INSTALLATION .............................................................................. 2
MICROPHONE ARRAY PLACEMENT ........................................... 2
COMPLIANCE ................................................................................ 5
CE................................................................................................... 5
PLENUM ......................................................................................... 5
Table of Contents
Page 3
QUICK-START GUIDE
1
PRODUCT OVERVIEW
The Ceiling Microphone Array (CMA) Analog-X is the newest and
most advanced tri-element CMA addition to our ceiling mic lineup for
conferencing and sound reinforcement applications. Flexible and easy to
use, the Analog-X is 100% RF immune, optimized for speech-intelligibility,
and can daisy-chain for easy installation.
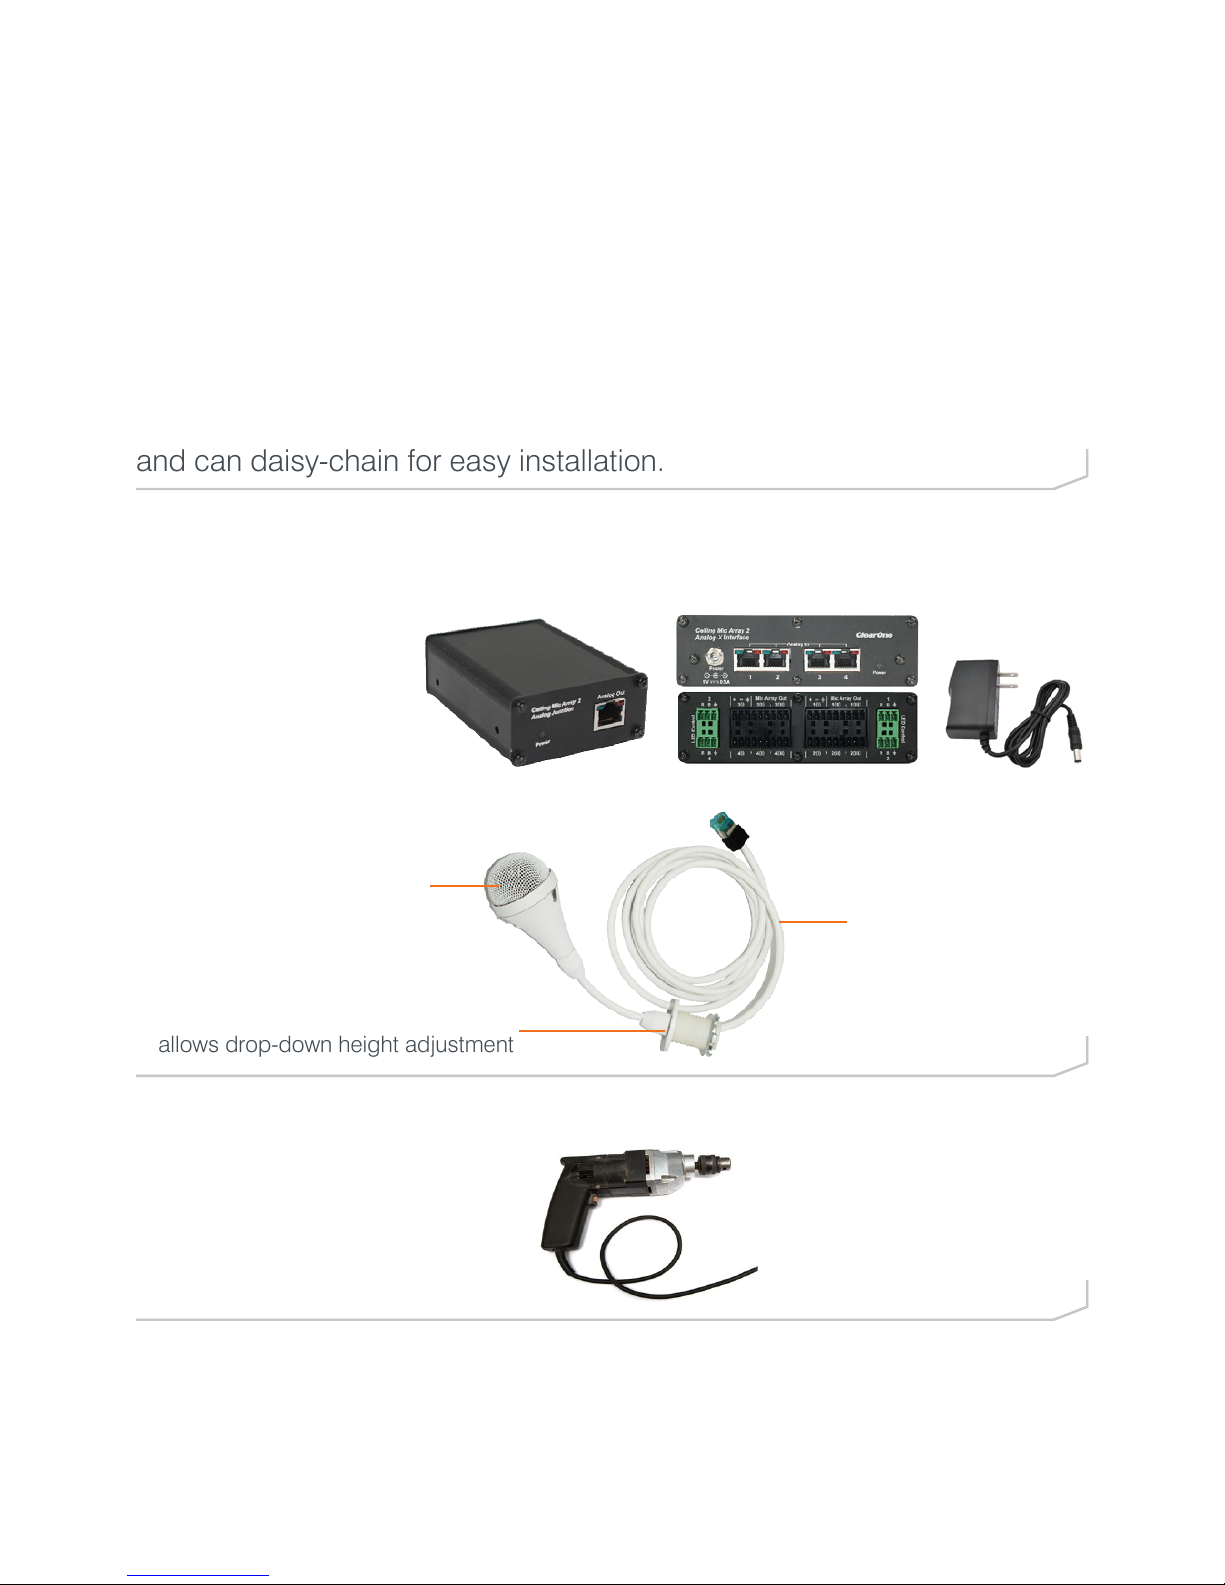
PARTS
The Analog-X CMA comes with the following parts:
• Mic Array
• Junction Box
• Interface Box &
Power Supply
The mic array is made up of 3 components:
Mic Capsule
Drop Cable
Integrated Fixing Assembly that
allows drop-down height adjustment
TOOLS REQUIRED
A drill with a 7/8” saw bit
Page 4

CEILING MIC ARRAY ANALOG-X
2
MICROPHONE ARRAY PLACEMENT
Determine placement of an array by its pickup pattern and room
characteristics. Adjusting drop-down height from 0 to 7 ft. determines
how close an array is to users, and how far its pickup pattern extends.
INSTALLATION
1. Drop the ceiling tile where you are installing the microphone array.
2. Place the Junction Box in the space above the suspended ceiling
where you want to place the microphone array.
3. If mounting, secure screws. You must supply your own screws
appropriate to your mounting structure.
NOTE: Mount ears are pre-installed on the Junction Box, with
holes sized for M3 or #6 size screws.
IMPORTANT: Installer is responsible for making sure structure
can support the weight of all equipment. Reinforce ceiling
structure as necessary.
Page 5

QUICK-START GUIDE
3
4. The holes in the mounts may also be used to attach a Ø3mm (Ø1/8”)
safety cable. You must supply your own safety cable.
5. Run the CAT5e/6 cable from the Interface Box location to the Junction
Box through the open ceiling to conceal the cable. You must supply
your own CAT5e/6 cable.
6. Drill a 7/8” hole in the removed ceiling tile for mic cable pass-through.
Drill 7/8” Hole for Placement of
Ceiling Adapter
7/8" HOLE TEMPLATE
1:1 SCALE
7/8” Hole
Template
7. Place the ceiling adapter in the hole, and pass the drop cable through.
8. Tighten the washer snugly into place against the ceiling adapter.
9. Adjust the length of drop-down for the cable as needed.
10. Slide the collet cap up to the ceiling adapter, and tighten snugly.
Page 6

CEILING MIC ARRAY ANALOG-X
4
11. Connect the Analog-X cable to the Junction Box.
12. Put the tile back into place.
Balanced Audio
Ch 1 to 12
Mic Array cable
max 7 feet ( 2 meters)
Mic Array 1
Mic Array 4
Mic Array 3
Mic Array 2
Ceiling Tile
CAT5E/CAT6 cable, max 200 feet (60 meters)
GPIO for Mute Control
Arrays 1, 2 & 3, 4
Power
Junction
Box
Interface
Box
CONVERGE Pro 2
Sample Scenario:
Four ANALOG-X Mic Arrays connecting to a CONVERGE Pro 2 mixer
13. Connect Euroblock Phoenix connectors from the Interface Box to the
DSP mixer.
Page 7

QUICK-START GUIDE
5
© 2018 ClearOne, Inc. All rights reserved.
Information in this document is subject to change without notice. QSG-0050-001 Rev 1.0 MAY 2018
Headquarters:
5225 Wiley Post Way
Suite 500
Salt Lake City, UT 84116
Tel: 801.975.7200
Sales: 800.707.6994
US & Canada
Tel: 801.975.7200
Toll Free: 800.945.7730
Fax: 801.303.5711
International
Tel: +1.801.975.7200
e-mail: global@clearone.com
Sales
Tel: 801.975.7200
e-mail: sales@clearone.com
TechSupport
Tel: 801.974.3760
e-mail: tech.support@clearone.
com
CLEARONE LOCATIONS
COMPLIANCE
CE
This product complies with the requirements of the European Community
Directive.
PLENUM
This product meets the UL 2043 plenum-rating standard. This certifies
that the product has adequate fire resistance and low smoke-emission
characteristics to be mounted and operated in a building’s environmental
air spaces, such as above suspended ceilings in an office environment.
 Loading...