

ClearMirror Custom, 2436BL, 18100-1836BL, 1836SL, ClearLite Series Installation Instructions Manual
...
ClearLite
Installation Instructions
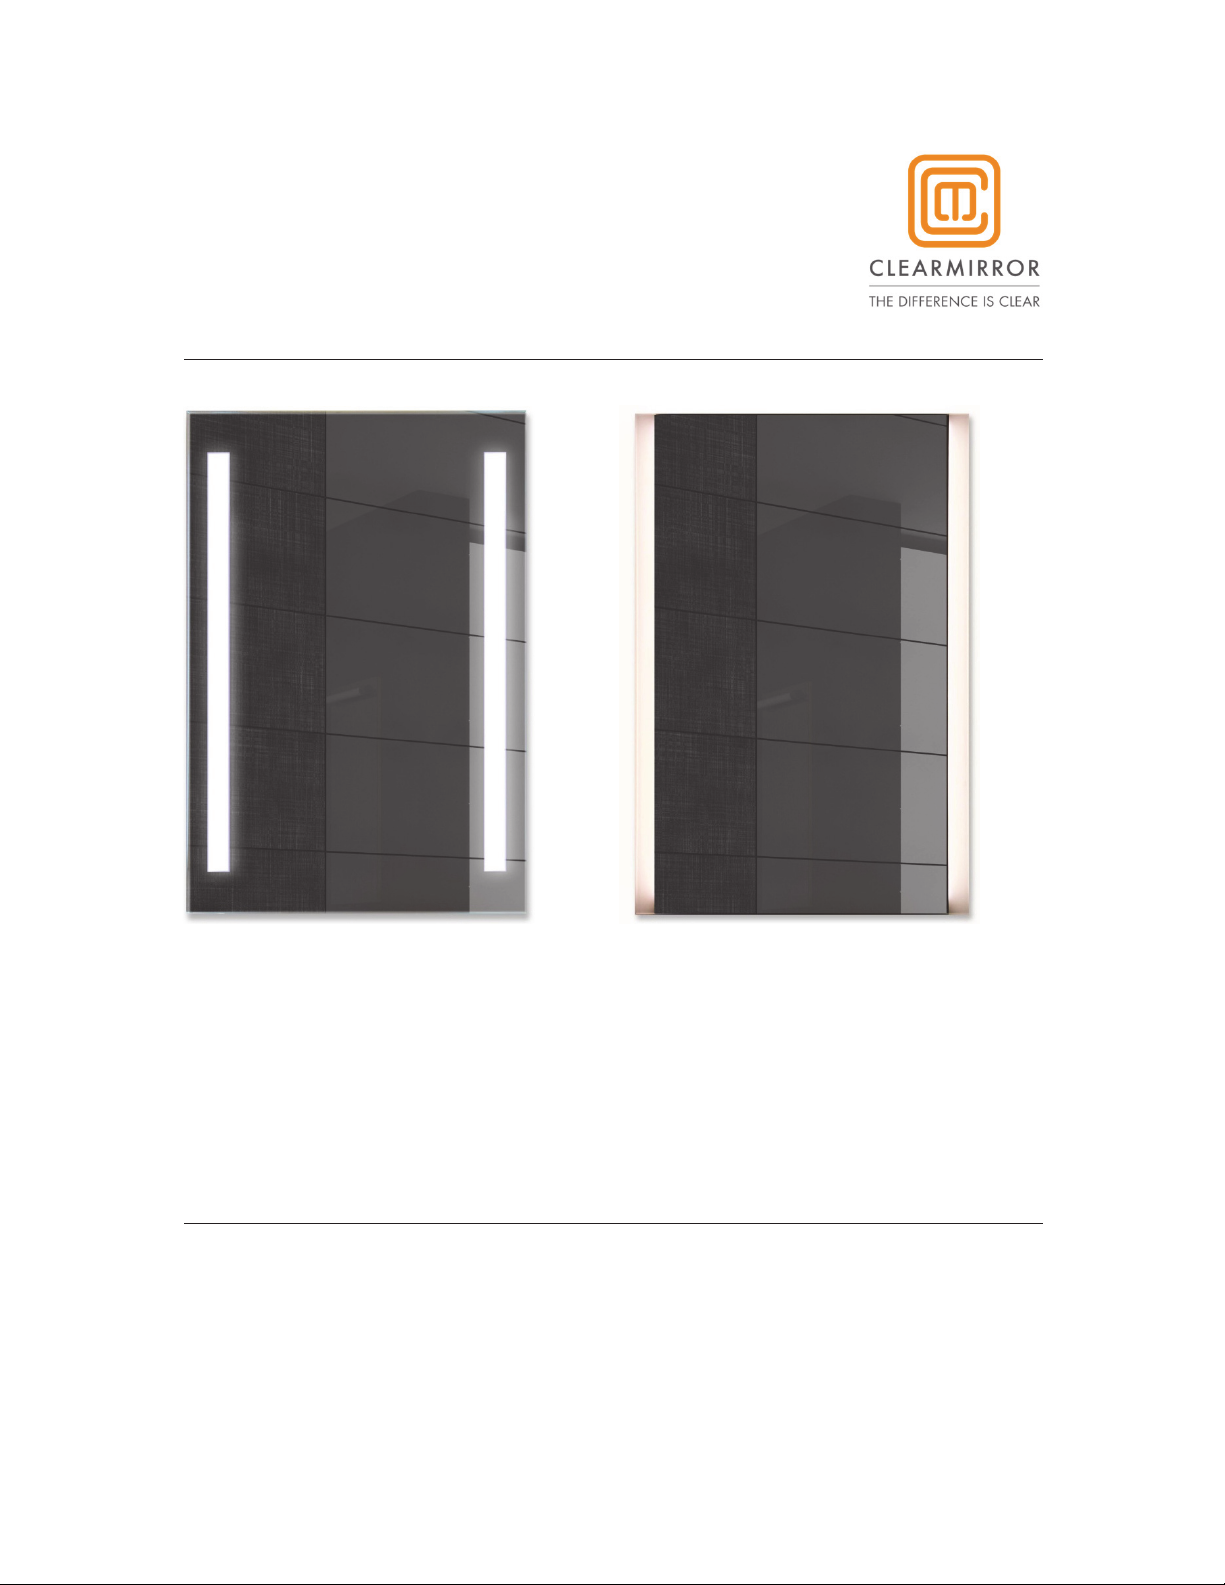
ClearLite LED Back-lit and Side-lit,
Fog-free Vanity Mirrors
Models 18100-1836BL, 2436BL, 1836SL, 2436SL, Custom
June 2018
IMPORTANT INSTRUCTIONS
ClearLite vanity mirrors with attached ClearMirror®Defogger is designed to be powered by a
switched circuit. A 15A or 20A fuse or circuit breaker at the electrical box should protect the
circuit. Read all instructions before using the ClearLite ClearMirror.
NOTICE: All wiring must be performed by a licensed electrician. Follow the National Electrical
Code or local codes as applicable.
WARNING: Failure to follow instructions could result in death or serious injury.
Installation
COMPONENTS OF THE CLEARLITE
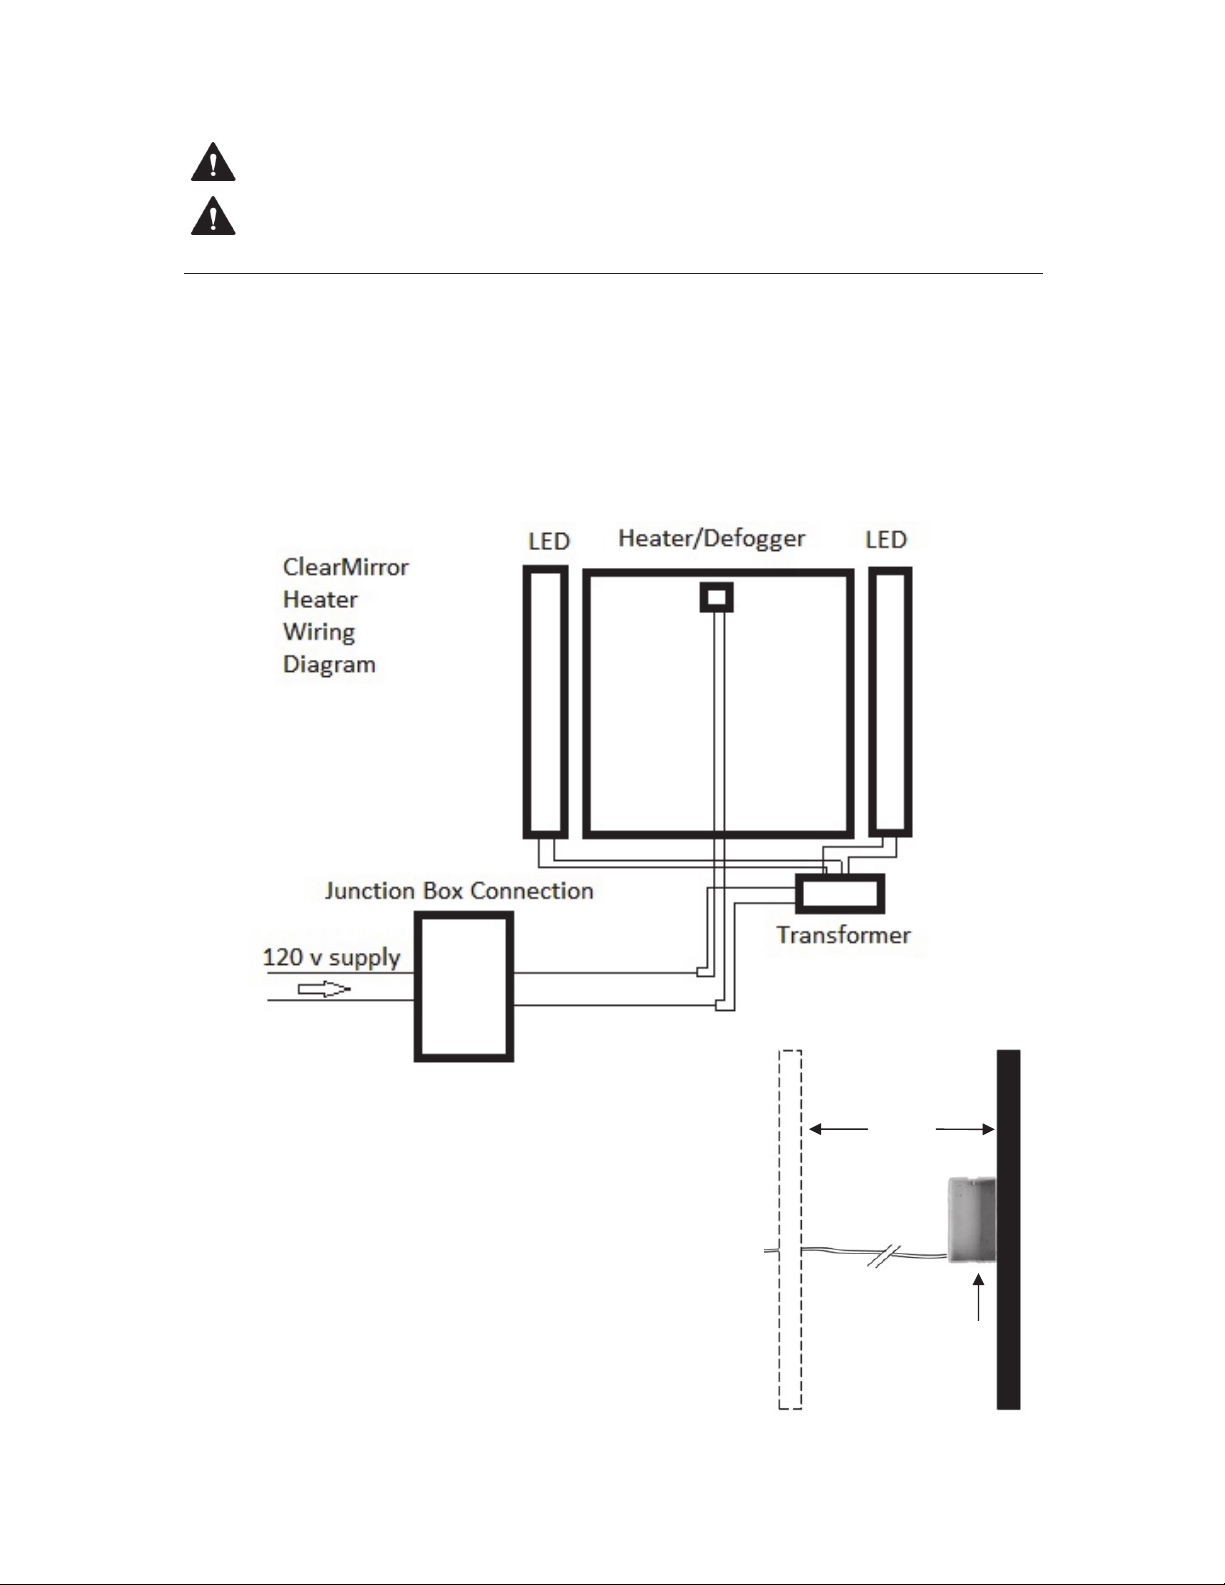
INSTALL JUNCTION BOX
Position junction box near the center of the mirror as shown in
Figure 1.
• Cut a 2” x 3” section of drywall
• Install 2” x 3” remodeler’s electrical junction box
Studs
Junction Box
Figure 1. Junction box installation.

WARNING: This stage requires a qualified electrician and conformance with both the National
Electrical Code and local building codes. Turn off the power to the circuit connected to the light
fixture at the disconnect means. Failure to do so could result in death or serious injury.
• Run a switched power supply cable to the
new junction box.
• The transformer power supply is designed to
be wired into a standard 110V US outlet
installed by licensed electrician meeting all
local and U.S. building codes. Wire electric
box so that a wall switch will turn the mirror
on and off.
• Place mounting plate (without mirror) against
wall and center cut-out over junction box.
Mark four mounting hole locations, note the
direction of the arrows for up and attach
mirror mounting plate to the wall.
• Screw into studs where possible or use
appropriate drywall anchors. Installer is
responsible for determining and using the
appropriate fasteners to fasten mirror to wall.
Hang the mirror onto the wall hanger. Both
upper and lower hangers must be inserted
into the mounting slots.
NOTICE: Always use two people
when moving and installing.

NOTE: Polarity is not relevant - there are neither positive nor negative connections on the
ClearMirror heater pad, nor are there any ground wires
CAUTION: Ensure leads are not stuck between the mirror and the wall.
CONNECT LEADS TO POWER SUPPLY
To connect the mirror heater and mirror wires:
1. Coming through the opening in the back of the unit, twist one of the black wires marked
“HEATER” to one of the black wires marked “LED” and connect to one of the power supply
wires in your junction box using wire connectors.
2. Do the same for the two remaining wires (twist the other black wire marked “HEATER” to
the other black wire marked “LED” and connect to the remaining power supply wire in your
junction box using wire connectors.
3. Wrap wire connectors and wire with electrical tape and push excess into junction box.
COMPLETE WIRING AND MOUNTING
1. Hang mirror on the double hanger system. Use two people.
2. Turn on the circuit breaker and the switch for mirror power supply.
3. Test ClearLite fog-free heater by placing hand on mirror surface. Area will heat in 3 to 5
minutes. LED lights should turn on.

IMPORTANT INSTRUCTIONS
SAVE THESE INSTRUCTIONS
Read all instructions before installing or using this heater.
When using electrical appliances, basic precautions should always be followed to
reduce the risk of fire, electric shock, and injury to persons, including the following:
• Do not operate any heater after it malfunctions. Disconnect power at service panel and
have heater inspected by a reputable electrician before reusing.
• Do not use outdoors.
• To disconnect heater, turn bath switch to off, and turn off power to heater circuit at main
disconnect panel (or operate internal disconnect switch if provided).
• Do not insert or allow foreign objects to enter any ventilation or exhaust opening as this
may cause an electric shock or fire, or damage the heater.
• To prevent a possible fire, do not block air intakes or exhaust in any manner.
• Use this heater only as described in this manual. Any other use not recommended by the
manufacturer may cause fire, electric shock, or injury to persons.
OPERATING
• The ClearLite assembly must be properly installed before it is used.
• The ClearLite is to be installed over a bathroom vanity sink with wiring fed from behind the
full, wall-mounted assembly.
• Be certain that the controls are operational per the instructions above in that the bathroom
light, ceiling fan or alternate switch power on and power off the ClearLite.
• Do not modify the installation from within (or outside) the assembly, and do not tamper
with any user-operated devices intended to reduce the risk of fire, electric shock, or injury
to persons; and warn against tampering with such devices.
• Any servicing should only be done by a qualified service person.

MAINTENANCE
The ClearLite requires very little (if any) user maintenance; some items to consider are
as follows:
• Be sure the power is turned off and the heating element (mirror surface) is cool prior to
performing any of these functions.
• Ensure that once mirror is hung it is firmly hanging from the attached bracket and that the
bracket is still firmly attached to the wall. Use two people to hang mirror.
• Be sure that all excess wires are stowed in the electrical box, and are not hanging outside of
the protective area of the mirror.
• Use a lint-free cloth and lightly clean the surface. Never use chlorine, ammonia, chemical
glass cleaners or any abrasive material on the mirror. Use of those cleaners or chemicals
will void all warranties and guarantees. DO NOT SPRAY MIRROR.
• Heater and other internal components on the back of the mirror should never be accessed
and requires no cleaning.
• All other servicing should be performed by qualified service personnel. Call ClearMirror
directly with any warranty or operational problems or concerns.
GROUNDING
The components on this mirror use a 120 volt power supply. The cord (leads) exiting the back
of the mirror assembly are 18-gauge and are not required to be grounded.
WARRANTY INFORMATION
NewHome Bath & Mirror, Inc. DBA ClearMirror and its affiliates will not warranty the labor or
material costs for installation, replacement or use of ClearLite when operated in an application
that is lower than 50° F.
NewHome Bath & Mirror, Inc. and its suppliers cannot be held responsible for damage caused
by improper installation. These installation instructions are to be used as a guide only while
meeting all applicable building codes. Consult a professional installer if you have any
questions.
The ClearLite product line is provided with a one-year warranty against defects in workmanship
or materials. Improper installation and/or cleaning voids the warranty. A two-year warranty is
extended against mirror spoilage (with the above conditions of care). Contact your installer or
original place of purchase for issues relating to installation and replacement. The warranty is
void without proof of purchase, proper installation, or if product is altered in any way.
ClearMirror
2861 Eagandale Blvd • Eagan, MN 55121 • 651.251.9036
ClearMirror.com
 Loading...