

Page 1
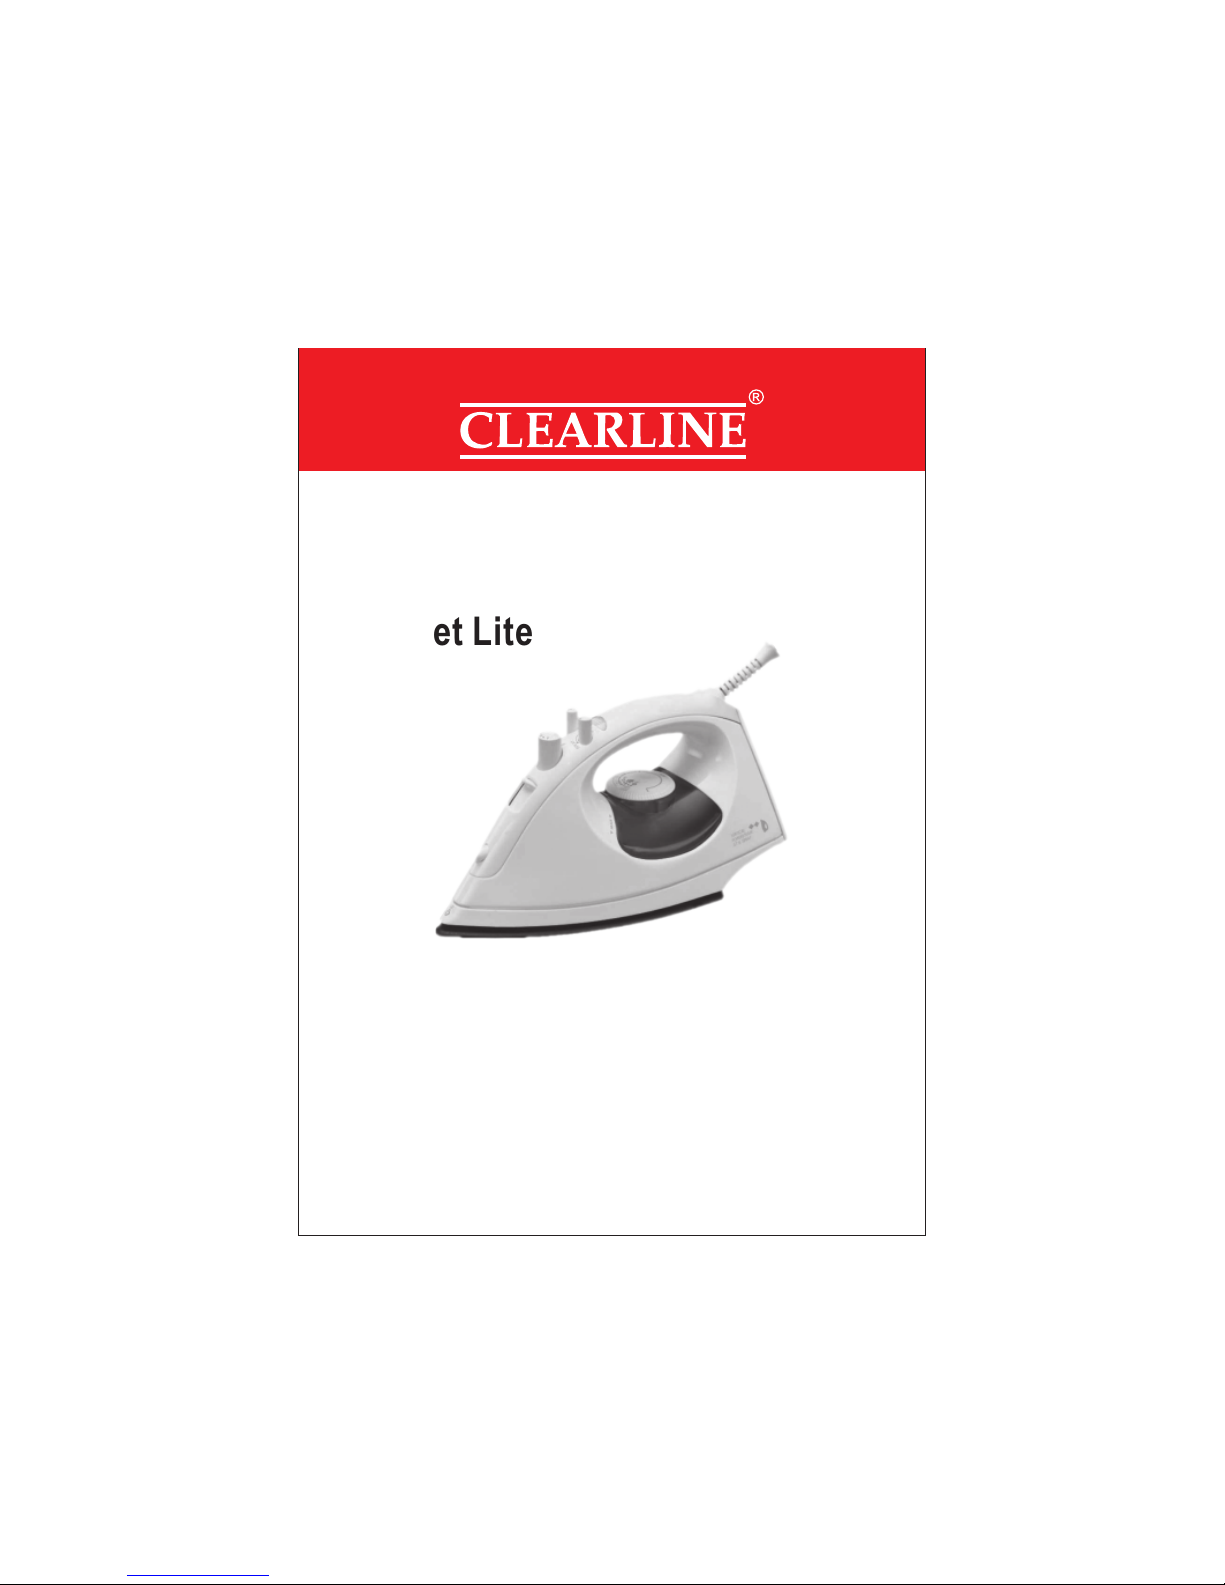
Steam Iron
Jet Lite
INSTRUCTION MANUAL
Please read and keep these instructions
Page 2

When using your iron, basic safety precautions
should always be followed including the
following:-
1. Read all the instructions.
2. Use the iron only for its intended use.
3. To protect against the risk of electric
shock do not put the appliance in water
or in any other liquid.
4. Close supervision is necessary when any
appliance is used near children.
NEVER ALLOW A CHILD TO USE THIS
PRODUCT
5. The iron should always be put off by turning
the temperature control dial to “MIN” before
plugging or unplugging from the socket.
Never yank the cord to disconnect from the
socket, instead grasp plug and pull to
disconnect.
6. Do not allow cord to touch hot surfaces. Let
iron cool completely before putting away.
Loop cord loosely around the iron before
storing.
7. Always disconnect the iron from the
electrical socket when filling the water or
emptying and when not in use.
8. Do not use outdoors.
9. Do not operate the iron with a damaged
cord or if the iron has been dropped or
damaged. To avoid the risk of electric shock,
do not disassemble the iron but contact
customer care for advice. Incorrect
reassembly can cause a risk of electric
shock when the iron is used.
10.Do not leave the iron unattended whilst
plugged in or on an ironing board. Never
allow the mains lead to over-hang the
work surface.
11.Burns can occur from touching hot metal
part, hot water or steam. Use caution when
you turn the steam iron upside down there
may be hot water in the water tank.
1. If iron does not work, check the
following points;
Has the temperature been set to the
required temperature? Is the plug in its
socket? Is the plug itself or the socket faulty?
(Check by plugging in another appliance)
2. Warning: when not in use, your iron should
never be placed flat and left on the ironing
board.
3. To prevent damage to textile being ironed,
follow the temperature guide carefully (test
the inside of the hem of the garment)
4. When ironing is complete, remove the plug
from the socket, empty any remaining water
from the tank and allow to cool before
storage.
5. If you drop or severely knock your iron this
could cause internal damage even if the
outside appear alright. Have it checked by
authorised Service Centre.
6. It is recommended that you use up one
beaker of water by operating your iron’s
steam and shot of steam functions before
ironing any clothes as some dripping may
occur while your iron steam system is
activated.
IMPORTANT SAFEGUARDS
Special instructions
Save these instructions
2
Page 3
Check that the voltage on the plate of your
appliance corresponds with your house
electricity supply which must be A.C.
(alternating Current)
If the socket outlets in your home are not
suitable for the plug supplied with this
appliance, the plug should be removed and
the appropriate one fitted.
IMPORTANT THE PLUG REMOVED FROM
THE MAINS LEAD, IF SEVERED, MUST BE
DESTROYED AS A PLUG WITH A BARED
FLEXIBLE CORD IS HAZARDOUS.
ELECTRICAL REQUIREMENTS
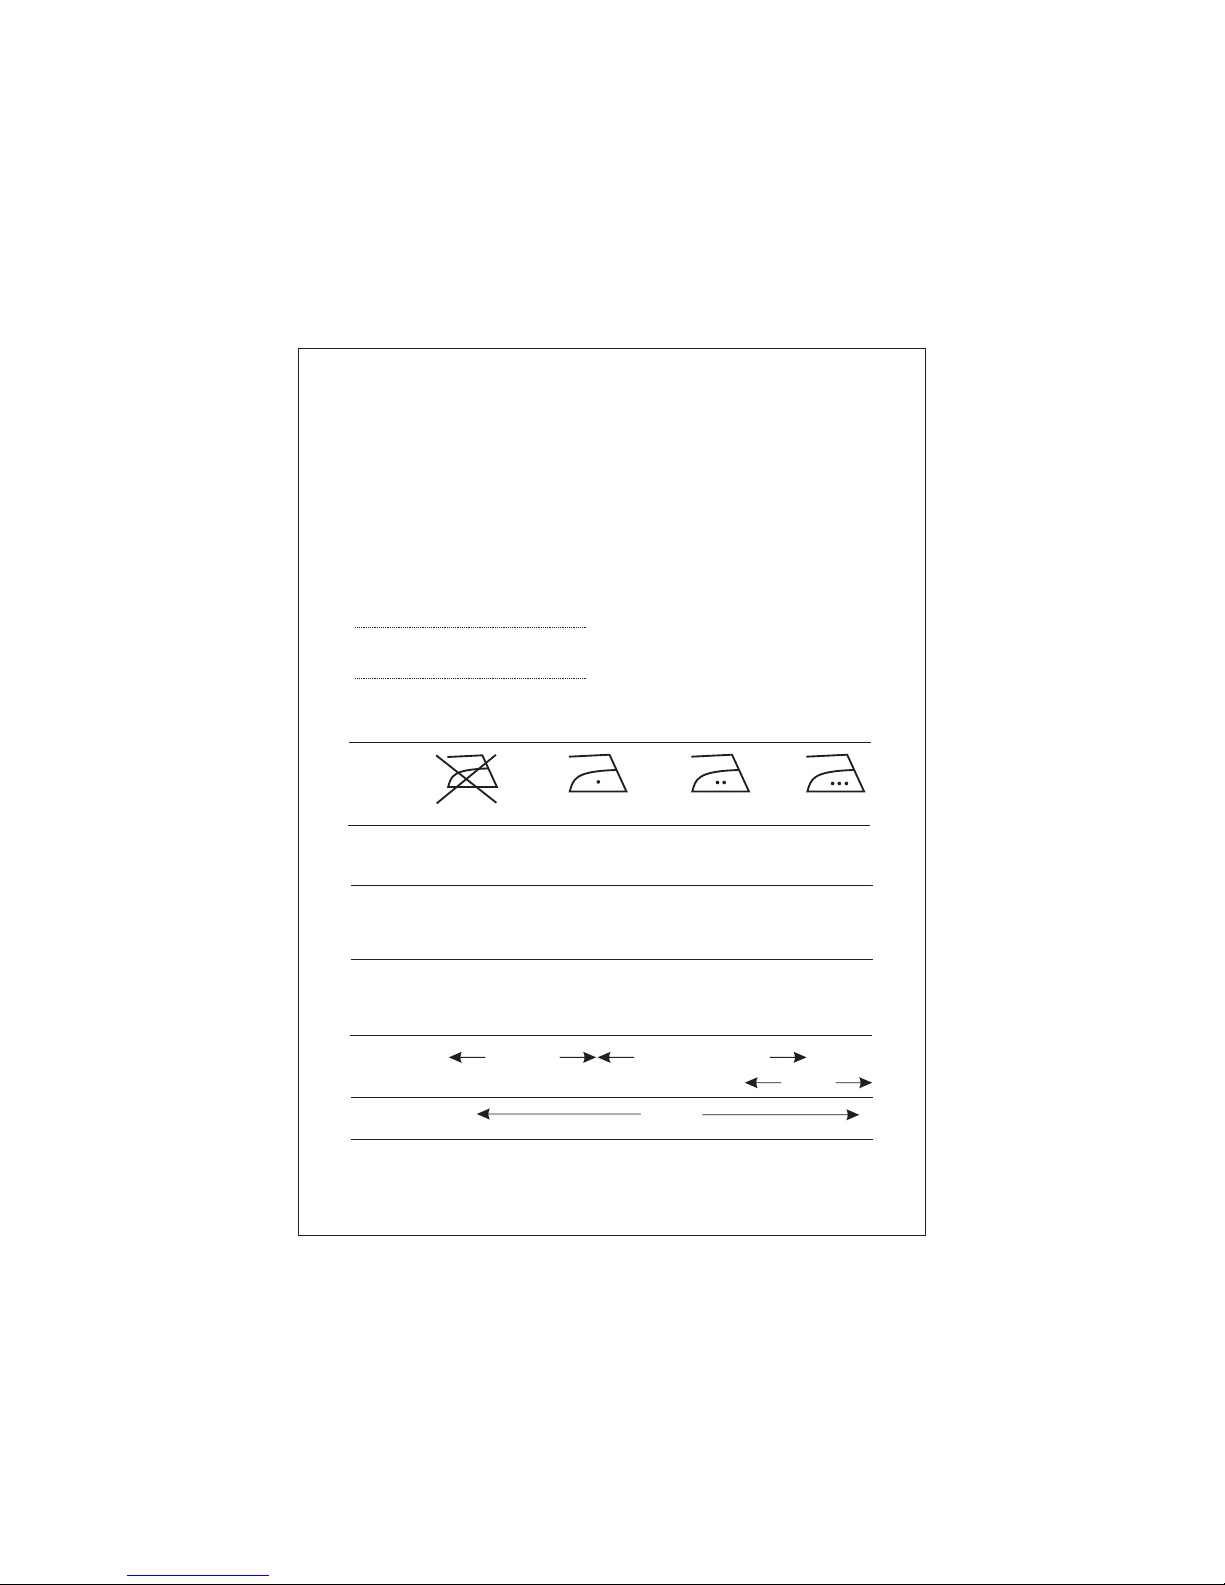
Heat setting marking on the adjustable control dial of Clearline Jetlite irons those
of the International Textile Care labelling code.
Instructions for use
Temperature guide
Fabric Nylon acetates e.g.
Acrilan,
Polyester
wool, polyester mixtures
e.g. polyester/ cotton
Cotton, Rayon, Rayon
mixtures e.g. Rayon/
Linen
Ironing Iron on wrong side
If moisture required
Use damp cloth
( Not Acetate)
Fabrics requiring this setting
usually require steam
pressing for heavy cotton
denim etc.
With water in Dry and spray steam/spray/shot of steam
tank
Self clean
Without water in Dry ironing
tank
Control knob
Position
Do not iron
at all
=======
Symbol
(120°C Max) Cool (160°C Max) Warm (210°C Max) Hot
3
Page 4
Note: - The Steam facility should only be
used on garments which are suitable for ironing
at 2 dot, 3 dot and “MAX’ Setting.
Textiles and clothes are supposed to carry ironing
instructions. If you are not sure which setting to
use, you could follow the fabric guide on page 3.
Otherwise test the temperature by ironing the
hem of the garment or similar area first.
If you turn the temperature down from a hot
setting to a cooler setting wait until the iron
temperature has stabilized before you continue
ironing.
Before Use
Sort the laundry out first – Wool with wool, Cotton
with cotton etc. Start ironing the fabrics requiring
the lowest temperature and progress to the
higher ones because the iron heats up quicker
than it cools down.
If the fabric consists of various kinds of fibres
(e.g. Cotton with polyester) you must always
select the lowest ironing temperature of the
composition of those fibres
IRONING
Important:
Please read the section
“Important Safeguards”
Special instructions
Choice of water
This iron can be used with normal tap Water.
If the water in your area is particularly hard, it is
advisable to use distilled or demineralised water
to prevent the scale forming on the critical point of
the iron.
Do not use chemically de – scaled water.
Filling With Water
Ensure that the iron is disconnected
from the power supply before filling.
Turn the steam dial (4) to dry position.
Open the lid (3) fill water
through the water filling
aperture (Fig 3).
Close the lid.
fig. 3
2
3
4
4
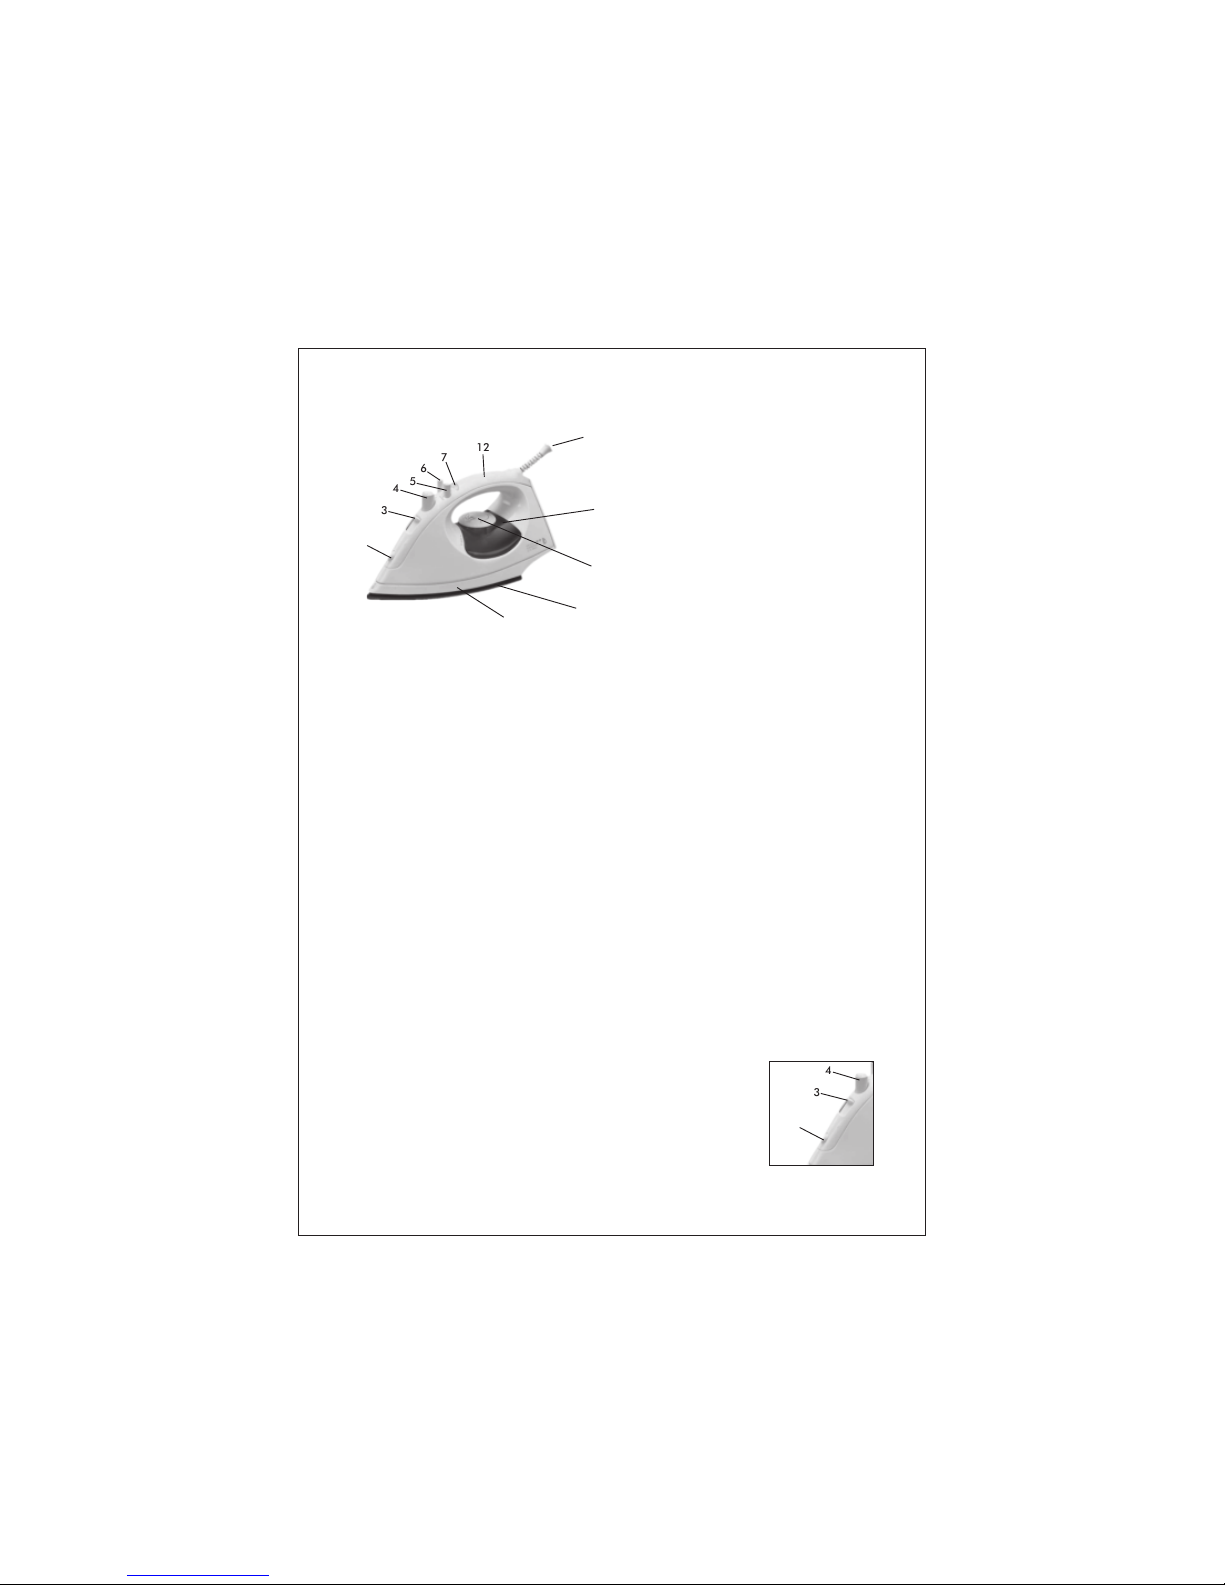
1.Temperature control dial
2.Spray nozzle
3.Lid
4.Steam dial
5.Spray button/Shot of Steam
6.Jet of Steam
7.Indication light
8.Water tank
9.Sole plate
10.Skirt
11.Power cord
12.Handle
2
3
1
4
5
6
7
8
9
10
11
12
Page 5
Note :
Do not fill higher than indication “max” of the
water tank in order to avoid spilling out of water.
Do not fill with anything but water. If you have to
refill while ironing, remove the mains plug from
the wall socket before filling.
Pour out any remaining water after use.
Insert the plug in the wall socket and stand the
iron upright
Set the temperature control dial (1) to the correct
temperature as indicated in the ironing instruction
or in the label.
The correct temperature will be reached when the
indication light has gone. The indication light will
be on and off from time to time indicating that the
selected temperature is being maintained.
Setting the temperature
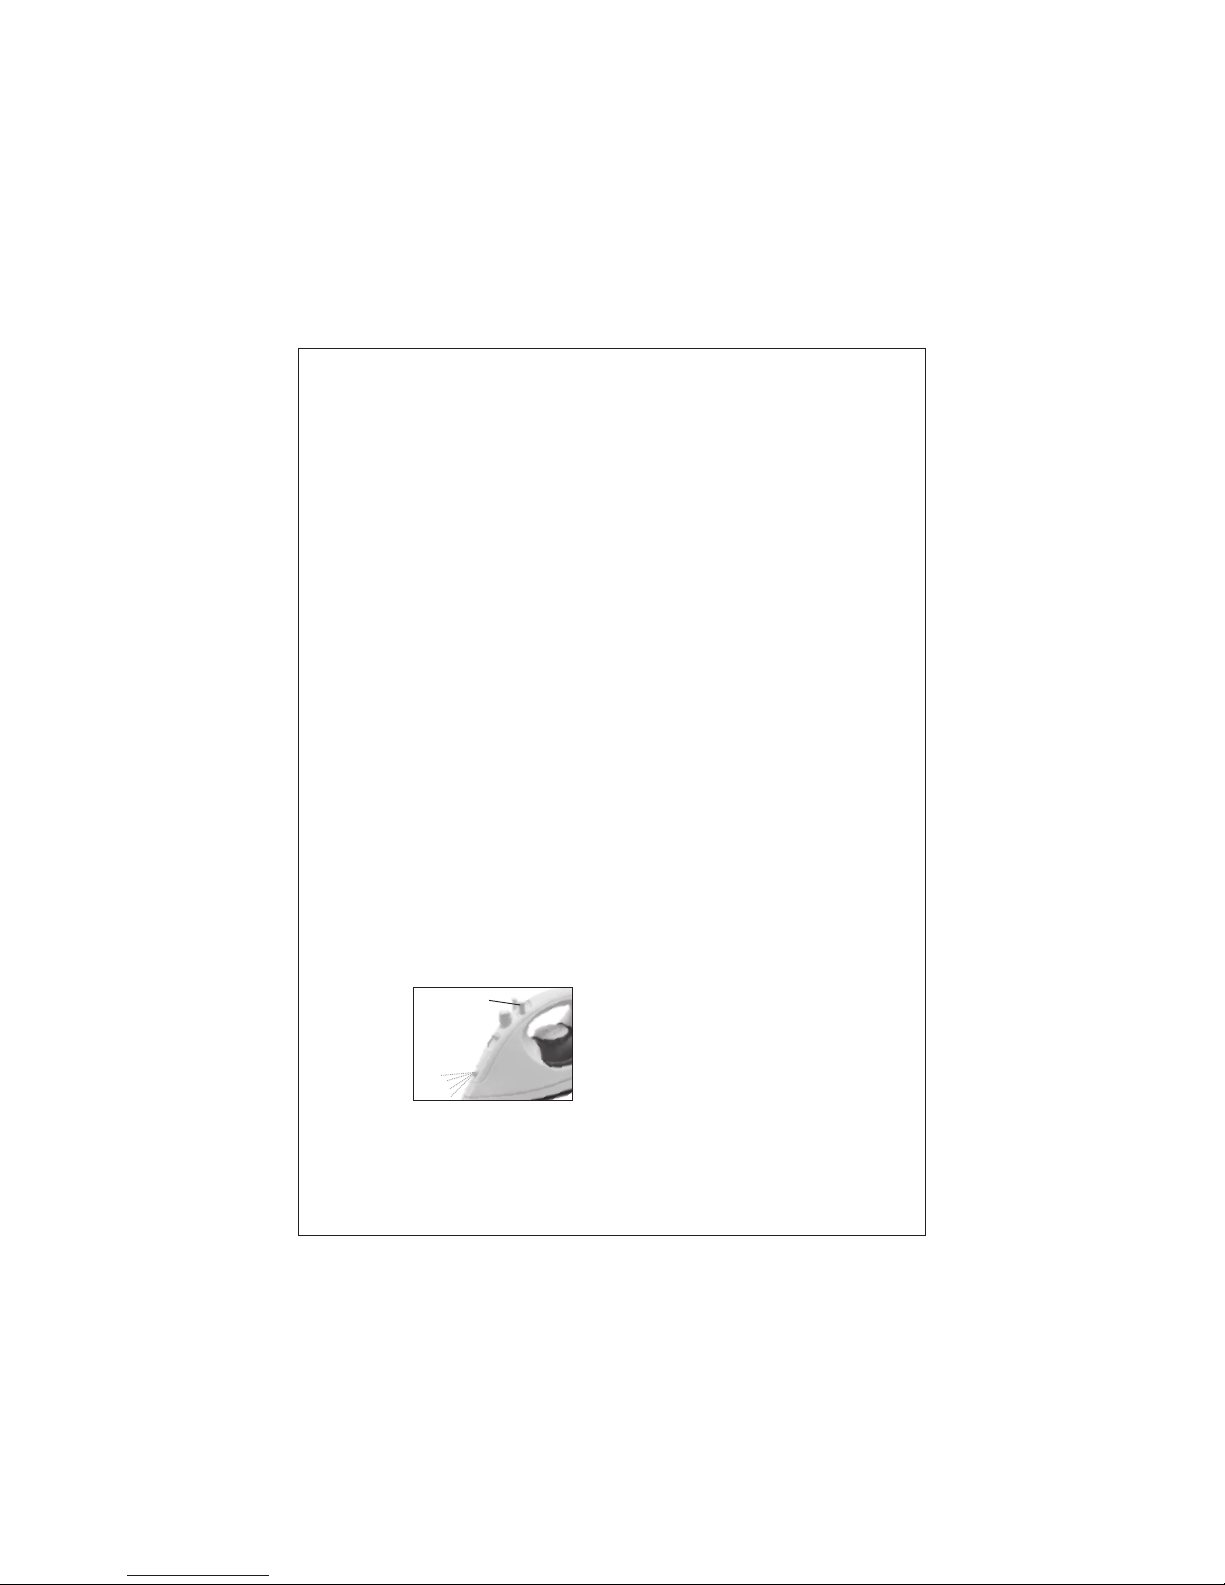
Spraying
At any temperature by pressing on the spray
button (5) a couple of time, the laundry can be
damped down
Ensure that there is enough water in the water
tank.
Steam – Ironing
As indicated on the temperature control dial and
the temperature table, steam ironing is only
possible at higher ironing temperature.
*** or MAX for maximum steam.
Ensure that there is enough water in the water
tank.
Stand the iron on its rear side.
Insert the plug into the wall socket.
Set the temperature control dial (1) at the
requi red posit ion with the hig her ironi ng
temperature range
*** or MAX
Wait a little while for the indication light (7) to go
out and to come on again.
Set the steam control dial (4) to the required
position. Then the steam will emerge from the
vents in the soleplate.
Notice:
Water may leak from the soleplate if the
temperature selected is too low, or if steam is
used continuously for some time. This will then
cause stains if it happens, set the temperature
slide control to the advised position. Steaming will
re-commence as soon as the appropriate
temperature has been reached.
5
fig.4
5
Page 6
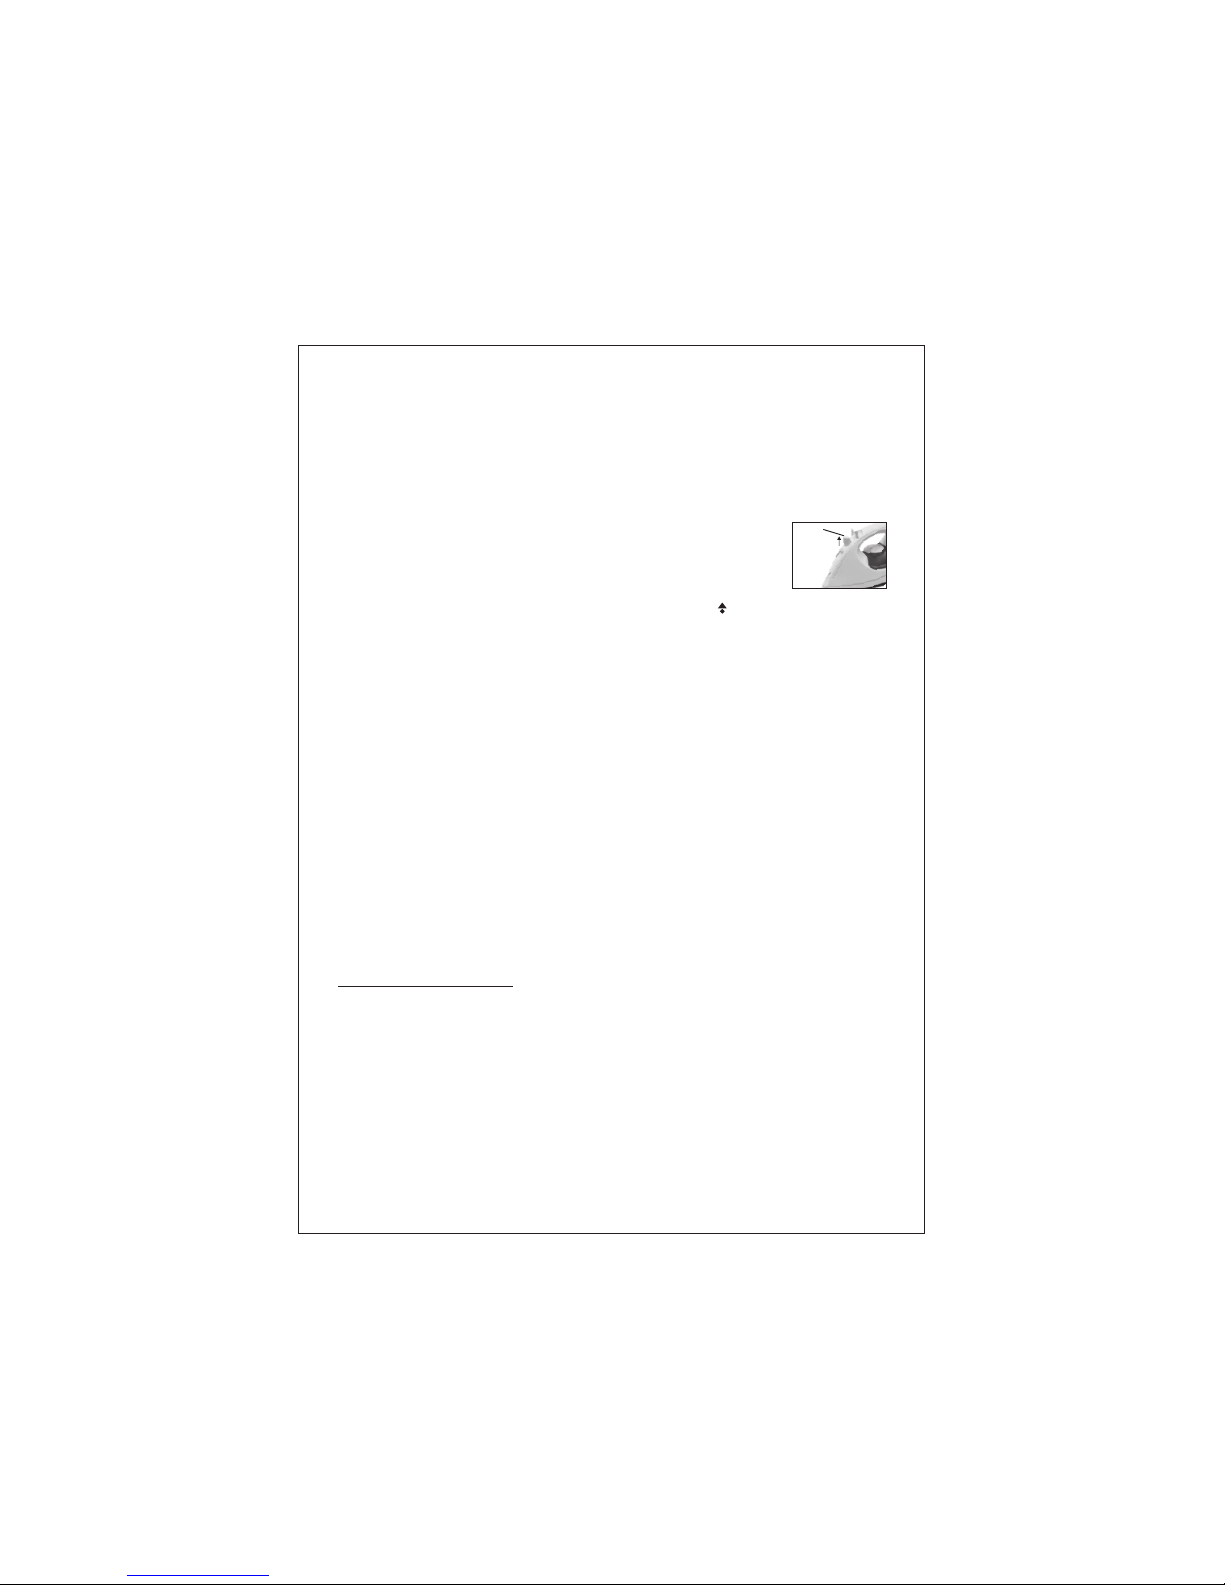
SHOT OF STEAM
Set the temperature control dial (1) to the “MAX”
position.
By pressing the steam button (6) a Shot of Steam
is emitted from the soleplate.
This can be very useful e.g when removing
stubborn creases. The Shot of steam facility can
be used only while ironing with high ironing
temperature (positions *** or “MAX”).
Dry ironing
Insert the main plug into the wall socket.
Ensure that steam dial (4) is in dry position
Select the setting on the temperature control dial
() best suited for the fabric to be ironed.
When the indication light is gone, ironing may
commence.
Self clean
(Auto clean system)
To prolong the life of your iron, we recommend
that this be carried out at regular intervals (once
or twice a month)
Set the steam dial (4) to dry position
Fill the water tank to the symbol “MAX”
Stand the iron on its rear side
Insert the mains plug into the wall socket
Set the temperature control dial (1) to “MAX”
Allow the iron to heat until the indication light (7)
first goes out
Unplug the iron and keep it horizontally over a
sink
Set the steam dial
(4) to self
clean symbol and lift the dial
Impurities and scale
(if any) are washed away from the steam vents in
the sole plate.
When the output of steam has diminished, put the
steam dial back into the position and reset the
steam dial (4) to dry position.
Insert the mains plug into the wall socket and let
the iron heat up again.
Move the iron over an old place of cloth in order to
let the remaining water vaporize.
Remove the plug from the wall socket and wait for
the soleplate to cool down completely.
Make sure that the soleplate is completely dry
before storing it.
Care and cleaning
Be for e cle anin g the iro n, e nsur e i t is
disconnected from the power supply and has
completely cooled down.
Deposits and other residues on the soleplate can
be removed with a rough cloth soaked in a
vinegar/water solution.
6
4
fig.6
Page 7
The casing may wipe with a damp cloth and then
polished with dry one.
Do not use abrasives on soleplate.
Keep soleplate smooth avoid hard contact with
metal objects.
STORAGE
Turn the temperature control dial (1) to “MIN” and
set the steam dial (4) to dry position.
Disconnect the plug from the wall socket.
Pour any remaining water out of the water tank
.Then cover the lid (3).
Stand the iron upright and let it cool down
sufficiently.
The power cord can be wound around the iron.
Always store the iron in an upright position.
In the unlikely event of the thermostat failing the
protection cut out will operate to prevent the iron
overheating .The iron should then be taken to an
authorized repair centre.
Safety protective cut-out
Technical Data
Power supply : 230v~50 Hz
Wattage : 1300W
CL EAR LINE CUSTOM ER SE RVI CE
Th is p ro duct ca rr ie s a wa rrant y fo r 12 m on th s from th e da te o f pu rchase
ag ai ns t defec ts c au se d by faul ty w or km an ship an d ma te ri als.
Th e wa rr anty ex cl ud es d efect s ca us ed b y th e produ ct n ot b ei ng used i n
Ac co rd ance wi th i ns tr uctio ns , mi su se , accid en ta l da mage an d
ta mp er ing wit h by u na ut horiz ed p er so ns ,
In t he e ve nt of any d ef ec t ar ising d ur in g wa rr anty pe ri od , th e same
Sh ou ld b e taken t o yo ur n ea rest de al er o r wh ol esale r. It w il l then be t ak en
Ca re o ff a s pe r discret io n of t he c ompan y’s re pr es en tativ e
7
Page 8
PRODUCT …………………………………...............................................
SERIAL NO.……………………………….................................................
PURCHASER NAME AND ADDRESS…………………………................
………………………………………….......................................................
DEALERS NAME AND ADDRESS ……………………………………......
………………………………………………………………………...............
CASH MEMO NO.
……………………………………………………........................................
WARRANTY CARD
In case of any complaint Please Contact :
Clearline Appliances Limited
177G, Industrial Area Phase 1, Chandigarh. 160002,
Telephone No. 09218404341Email : [email protected]
 Loading...