

Clear2O CWS100A User Manual
PLEASE READ AND SAVE THIS USE AND CARE BOOK.
Models
❑
CWS100A
❑
CWS100B
Accessories/Parts
(USA/Canada)
1-800-738-0245
To order more filters:
Go online
www.clear2o.com
USA/Canada
1-800-231-9786
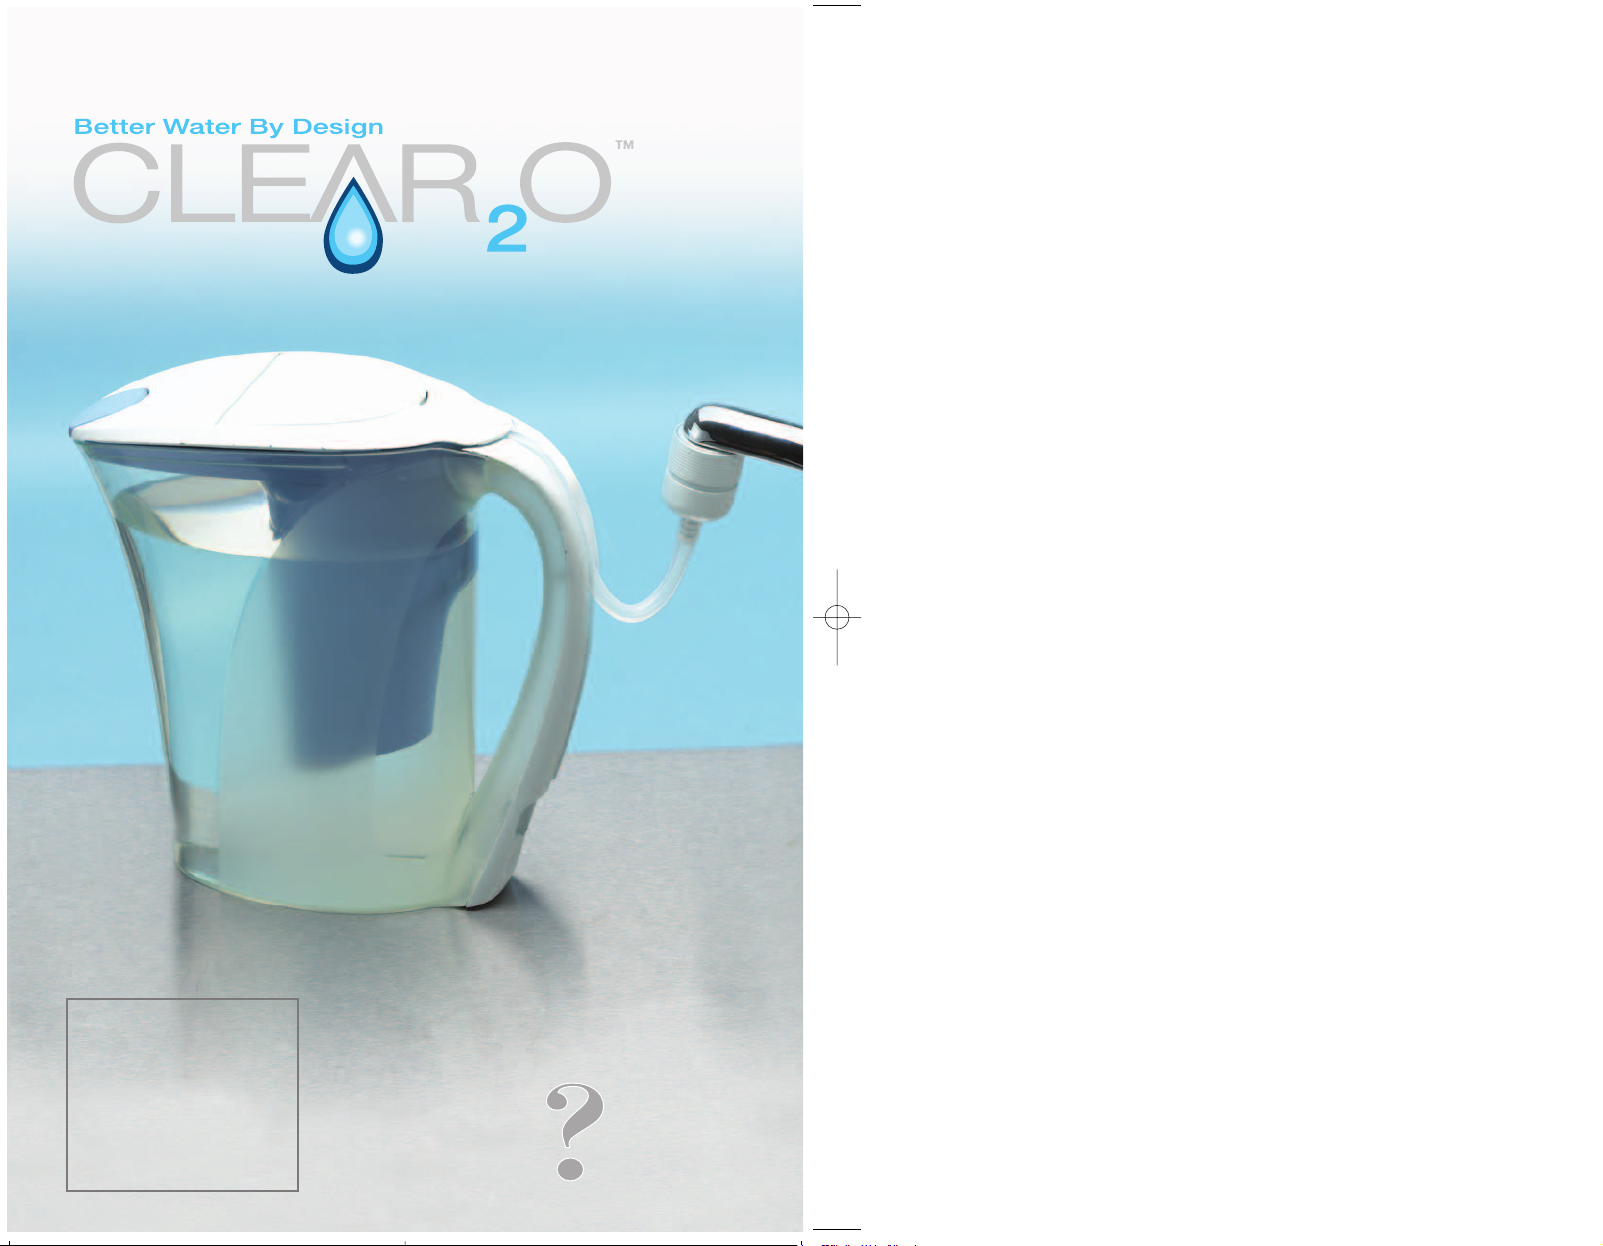
Water Filtration Pitcher

PAGE
INTRODUCTION . . . . . . . . . . . . . . . . . . . . . . . . . . . . . . . . . . .2
GETTING STARTED . . . . . . . . . . . . . . . . . . . . . . . . . . . . . . . . . .4
Installing Filter . . . . . . . . . . . . . . . . . . . . . . . . . . . . . . . . . . . . .4
Before Attaching Connector to Faucet . . . . . . . . . . . . . . . . . . . .5
Attaching Connector to Faucet . . . . . . . . . . . . . . . . . . . . . . . . . .5
READY FOR FILTERED WATER . . . . . . . . . . . . . . . . . . . . . . . . . .6
Replacing the filter . . . . . . . . . . . . . . . . . . . . . . . . . . . . . . . . . .7
CARE AND CLEANING . . . . . . . . . . . . . . . . . . . . . . . . . . . . . . . .7
TROUBLESHOOTING . . . . . . . . . . . . . . . . . . . . . . . . . . . . . . . . .8
PERFORMANCE DATA SHEET . . . . . . . . . . . . . . . . . . . . . . . . . . .9
TECHNICAL SPECIFICATIONS . . . . . . . . . . . . . . . . . . . . . . . . . 12
TABLE OF CONTENTS
INTRODUCTION
Congratulations on your purchase of the Pitcher Filtration
system from Applica—a new easy way to enjoy cleaner, healthier,
great-tasting water…right out of your kitchen faucet.
Water is cleaner. High-performance filter removes 5 times more
contaminants* than the leading brand of pitcher filters.
It saves you time. Advanced, quick-connect design fills pitcher 9 times
faster** than the leading brand's comparable pitcher.
Provides maximum convenience. Superior space-efficient design holds
50% more water*** than the leading brand's comparable model.
State-of-the-art technology. Intelligent-filter-indicator lets you know
exactly when it’s time to change the filter.
The more you use the Filtration Pitcher system, the more you’ll
find it's designed to give you better water.
*Based on contaminants listed by NSF for Pitcher Filter CWF100 vs. Leading
Pitcher Filter model #OB03.
**vs. time for comparable leading pour through pitcher (model #OB32) to fill to stated
capacity.
***vs. leading pitcher’s stated capacity ( pitcher stated capacity 9, 8-oz. glasses.
Leading pitcher comparable model #OB32 stated capacity 6, 8-oz. glasses).
1
2
Product may vary slightly from what is illustrated.
GETTING STARTED
1. Hand-wash pitcher, lid and filter reservoir with a mild detergent and
water. Do not use abrasive cleaners.
2. Rinse well.
Tip: Hand-wash pitcher, lid and filter reservoir periodically. Do not wash
in the dishwasher. For best results cleaning pitcher lid, dilute a
teaspoon of vinegar in a cup of water. Soak a soft sponge in vinegar
solution and wipe clean.
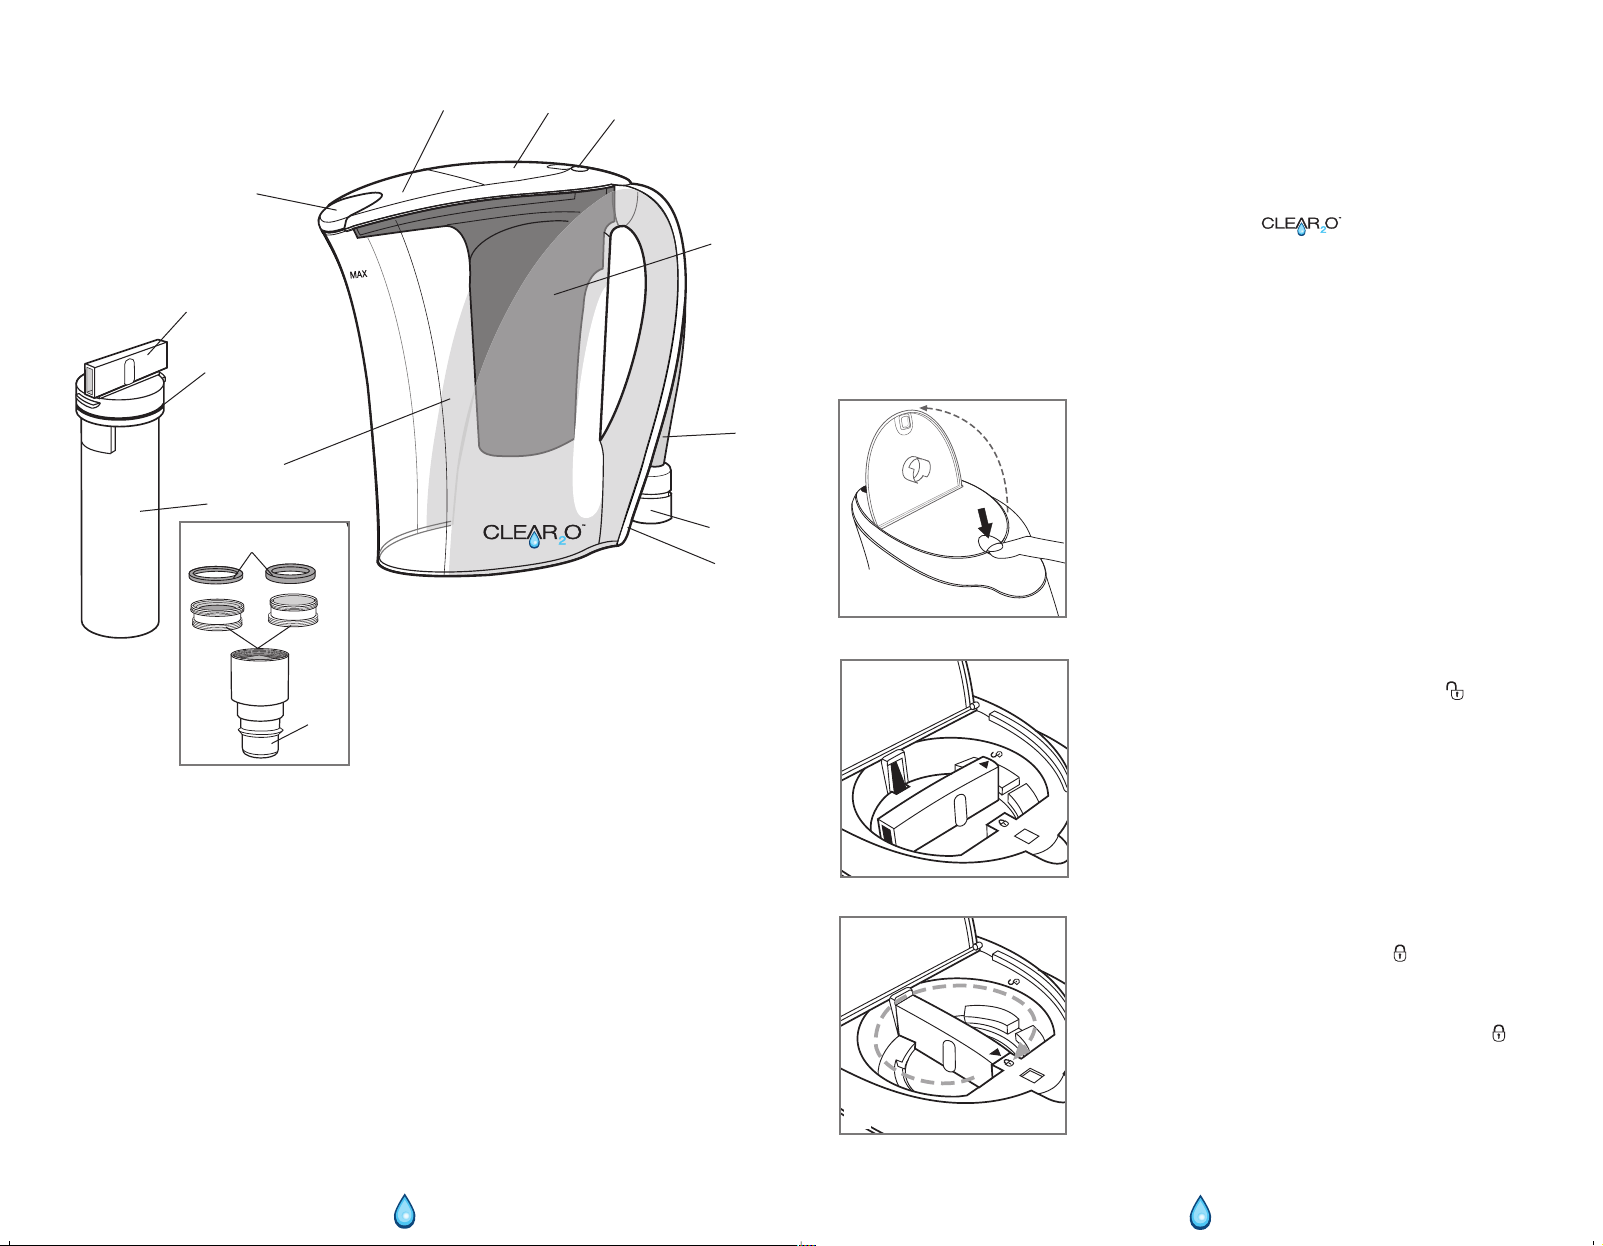
Installing the Filter
1. Wash your hands with soap and water then remove filter from packing
film. Remove clear protective wrap from the filter.
2. Using your index finger, lift the filter lid to
open (A).
3. Insert the filter into the filter reservoir by lining
(up arrow) on the filter bar with (unlock
symbol) on the lid (B).
4. Turn the bar clockwise to the (locked
symbol) position. Be sure filter is locked in
place (C).
Tip: The bar must be fully aligned with the
(locked position) for the filter lid to close.
5. Close the filter lid.
▲
1. Spout cover
2. Pitcher lid
3. Filter lid
4. Intelligent-filter indicator
5. Filter reservoir
6. Quick-connect hose
7. Faucet connector
8. Storage compartment
9. Pitcher (72 oz.)
†10. Filter (Part # CWF100)
11. O-ring seal
12. Bar
†13. Aerator (a) with faucet adapters (b) and 2 rubber washers (c)
(Part # CWS100-02)
† Consumer replaceable/removable parts
A
B
C
3
4
a
b
c
 Loading...