

Page 1
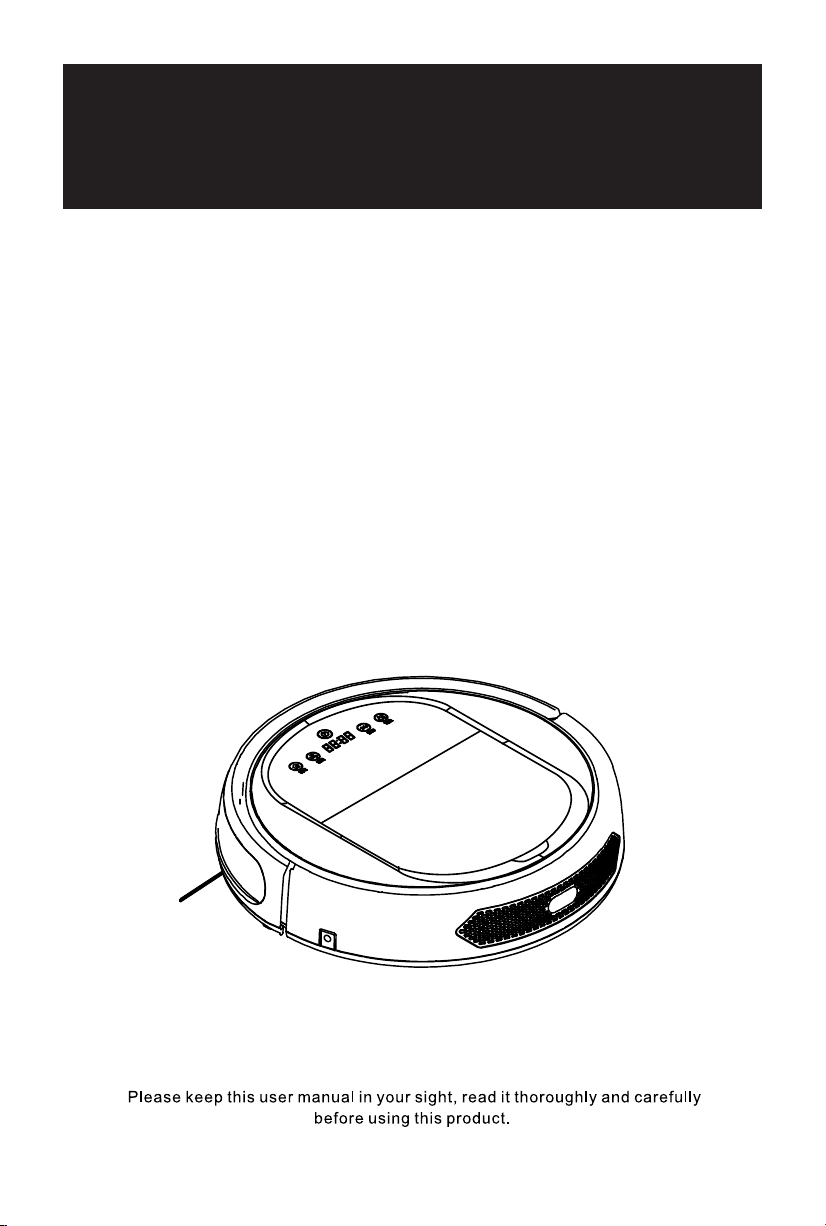
Cleanmate
User Manuel
BL826
User Manuel
BL826
Robotic Vacuum Cleaner
Cleanmate S 1000
USER MANUAL
Page 2
Contents
Safety Instructions -------------------------------------------------2-7
Product Features ----------------------------------------------------8-9
Product Components ---------------------------------------------10-14
9
10
11
12
13
Product Operation -----------------------------------------------14-20
14
15
16-17
17-18
Product Maintenance--------------------------------------------- 19-20
19
19
20
20
Product Maintenance ---------------------------------------------
Cleaning Roller Brush
Product Specifications-----------------------------------------------22
Batter y Removal -------------------------------------------------------22
Troubleshooting ------------------------------------------------------- 23
1
Kit
------------------------------------ ------------21
21
Page 3
Safety Instructions
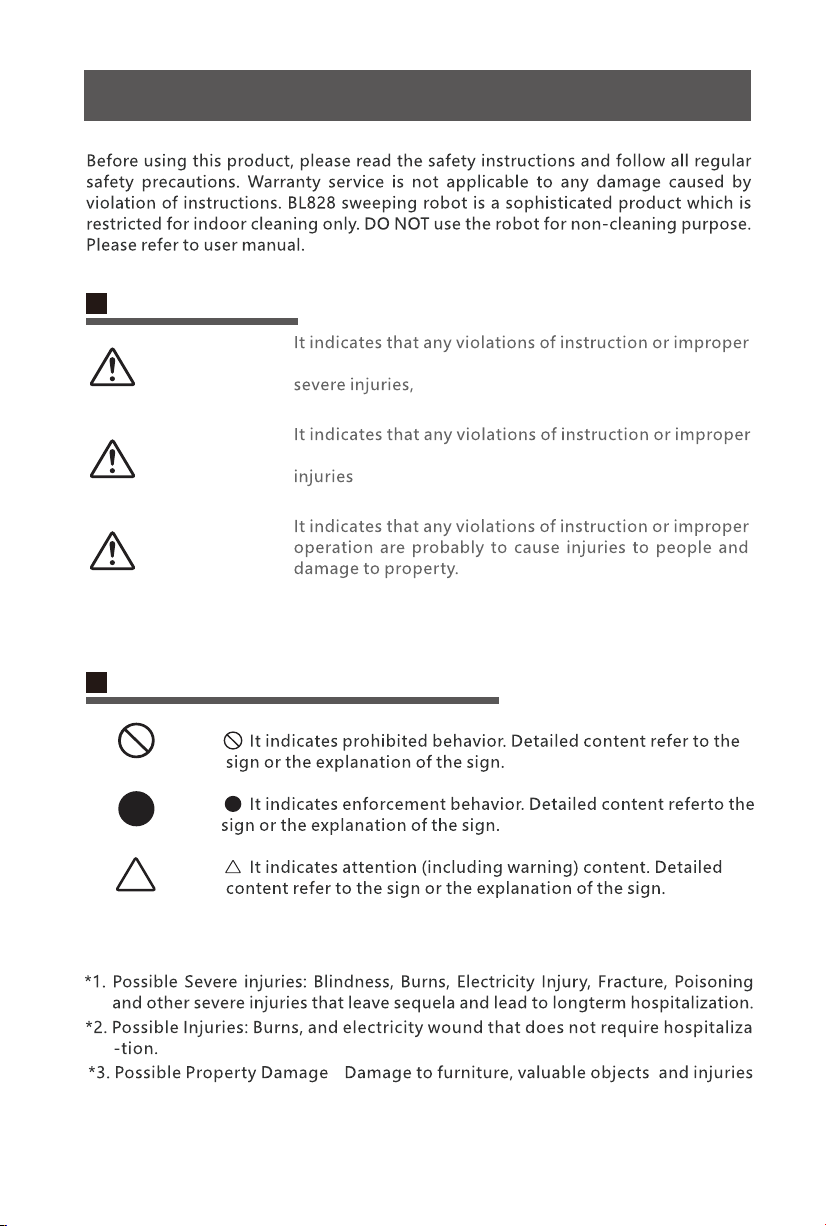
Warning Sign
Danger
Caution
Notice
operati o n a r e p r o b abl y t o cau s e casu alties or
operation are probably to cause casualties or severe
Graphic and Sign explanation
to pets.
:
2
Page 4
Safety Instructions
Safety Instructions of Product, Charging dock,
virtual wall, power adapter and other accessories.
Clean Dirt
Alternating
Current
3
touch.
dang er.
Page 5
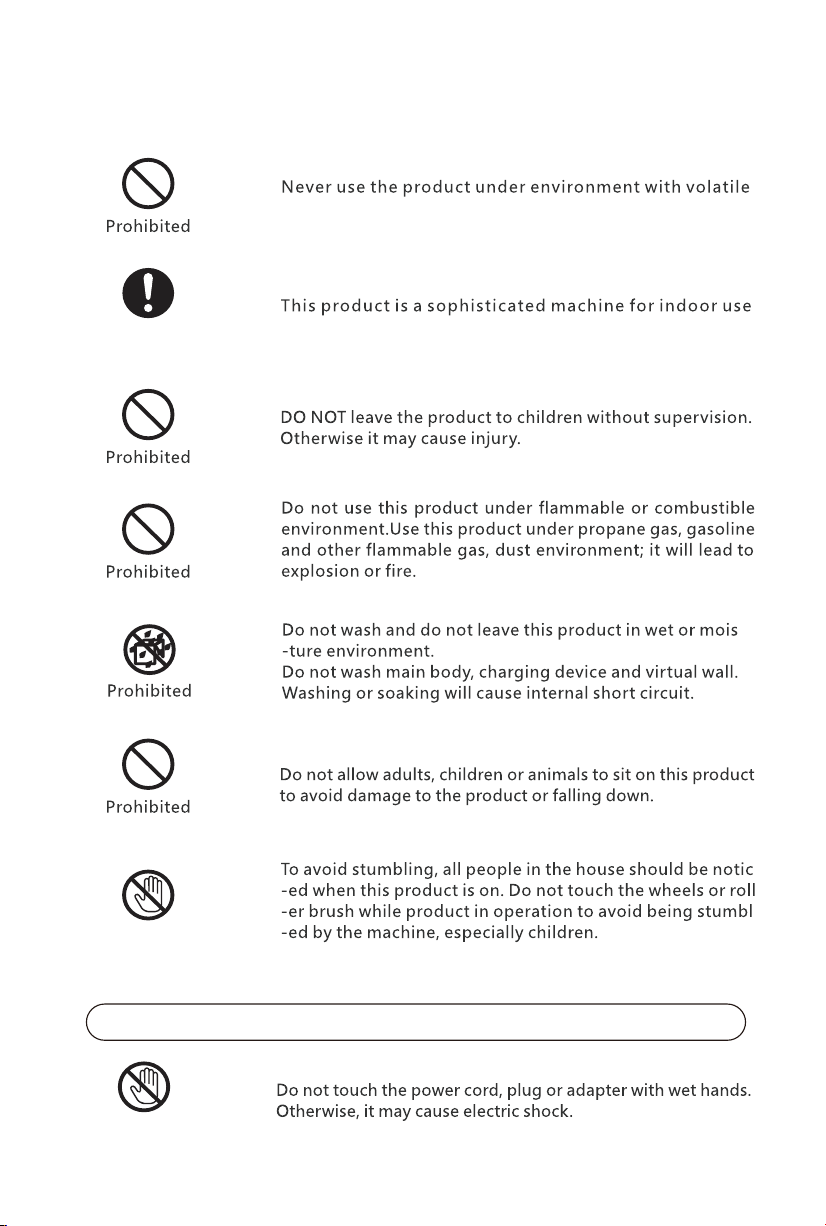
substance to av oid possibility of fire and danger.
Only use the
product indoors.
onl y.
Do not sit on top of this product.
Do not touch.
Do not touch.
Notice
4
Page 6
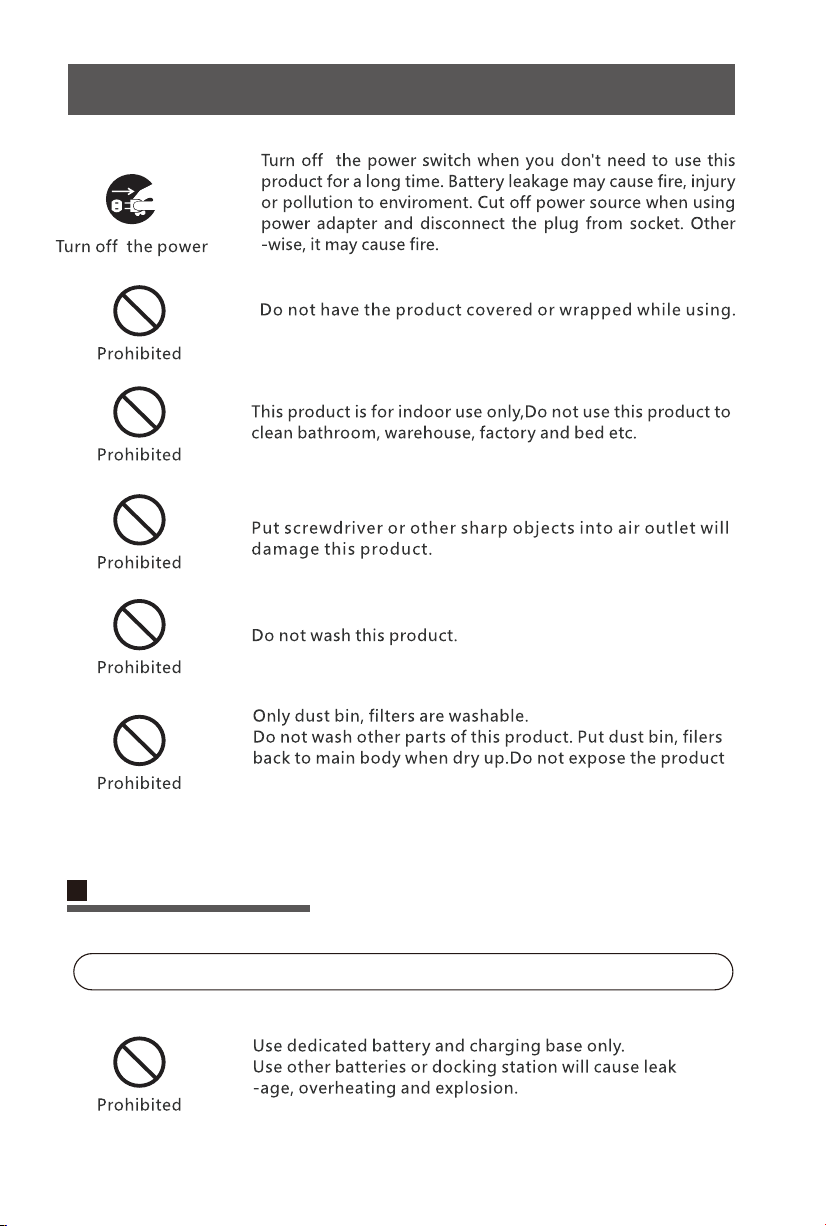
Safety Instructions
Ai r Outlet
Charging Notice
5
under the sun.
Danger
Page 7
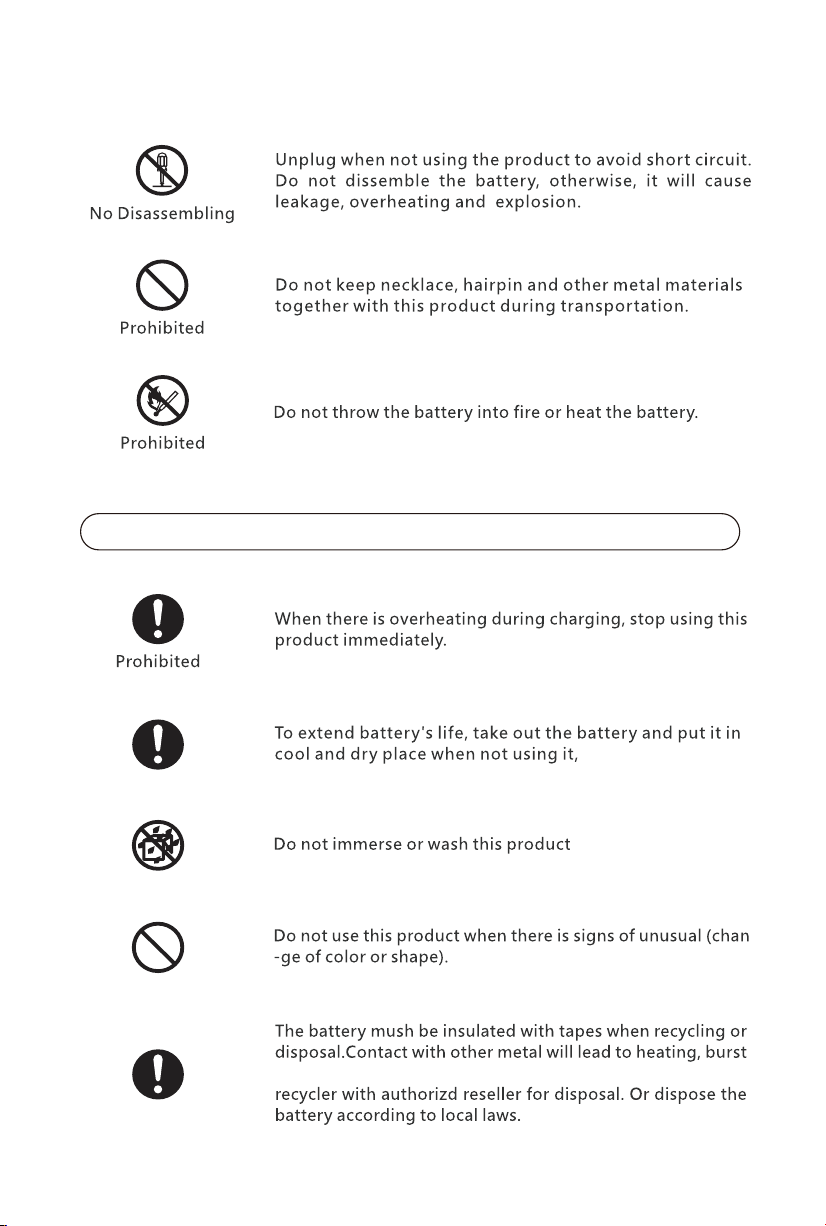
Attention
or fire. Bring the used battery to technical service center or
6
Page 8
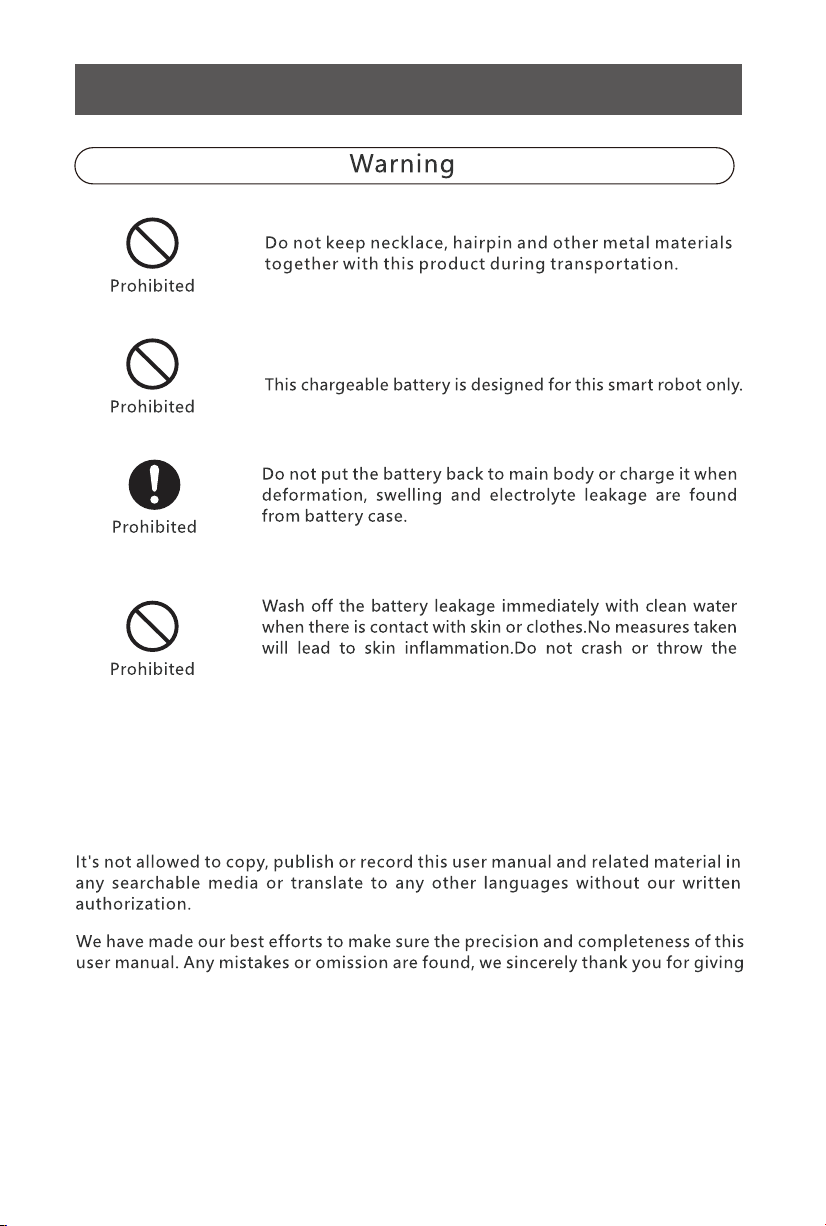
Safety Instructions
Do not charge this battery on other devices
batter y.
us feedback through your local agent.
7
Page 9
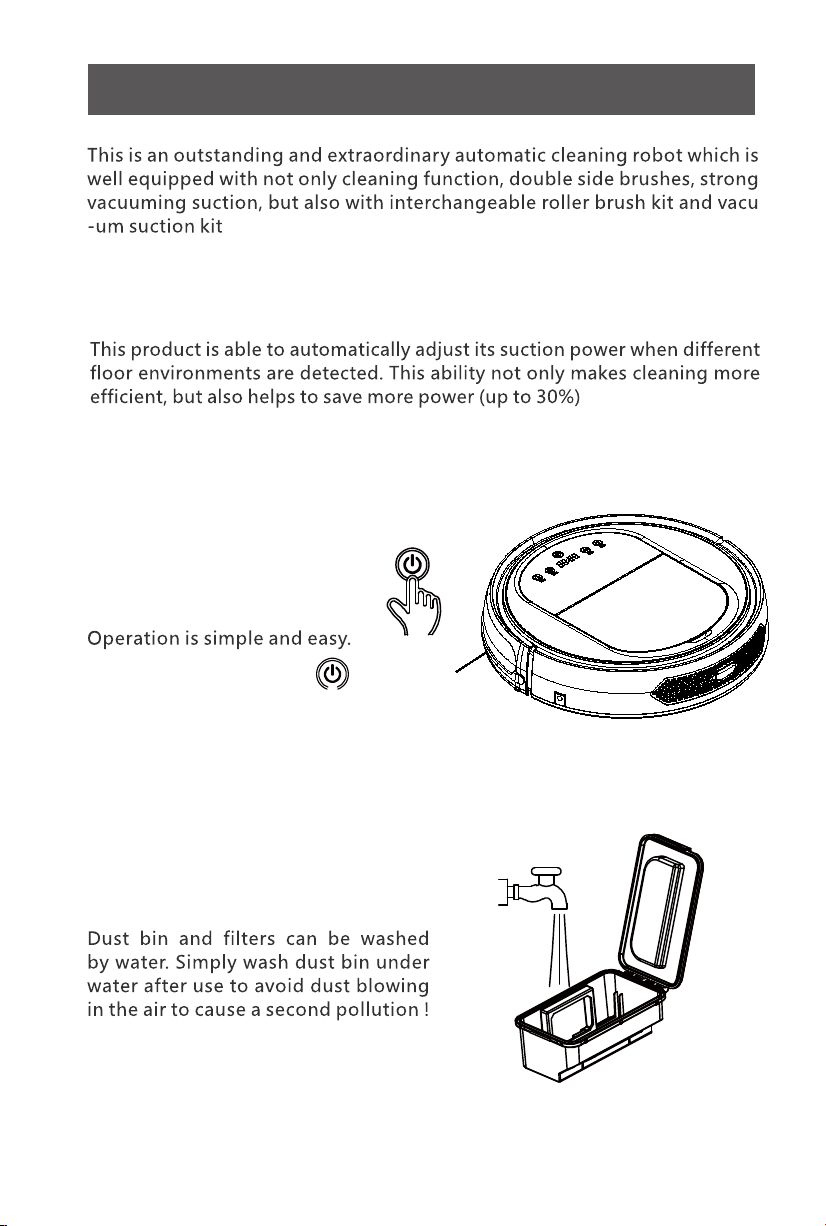
Product Features
Intelligent Suction Adjustment
User Friendly Design
Start the robot by touch button.
Washable Dust bin
8
Page 10
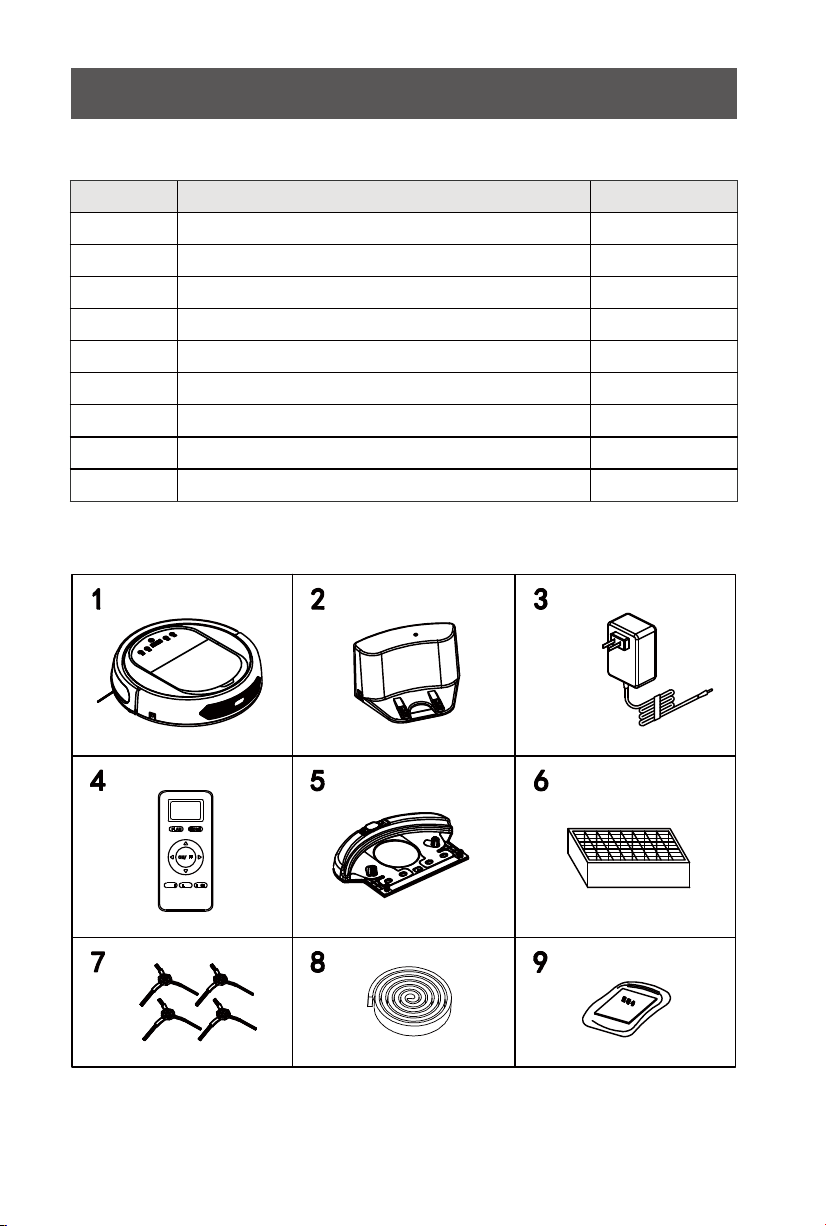
Product Components
Main Body and Accessories
NO.
1
2
3
4
5
6
7
8
9
Description
Main Body
Docking Station
Adapter
Remote Control (battery not included)
Water Tank *1 and Mopping Cloth*2
HEPA Filter
Side Brush
Magnetic Strip
User Manual
Quantity
1
1
1
1
1
1
4
1
1
HOME
PLAN
ON/OFF
MODE CLOCK EDGE
9
Page 11
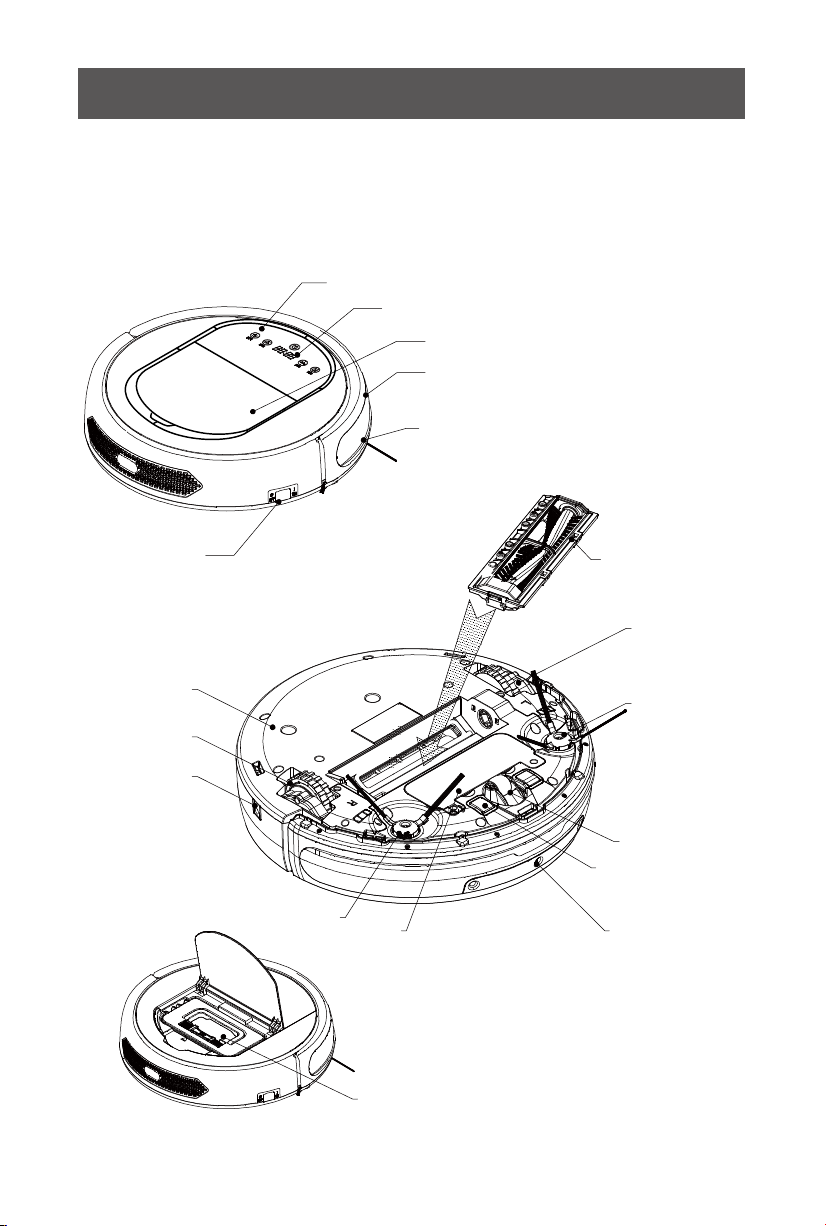
Product Components
Main Body Diagram
Touch Key
LED Display
Cover
Bumper
Bumper Strip
Power Switch
Bottom Cover
Right Wheel
Charging
Socket
Right Side Brush
Battery Cover
Dust Bin
Roller Brush
Component
Left wheel
Left Side
Brush
Front Wheel
Auto Charging
Pole
Ultrasonic
Dectetion End
10
Page 12
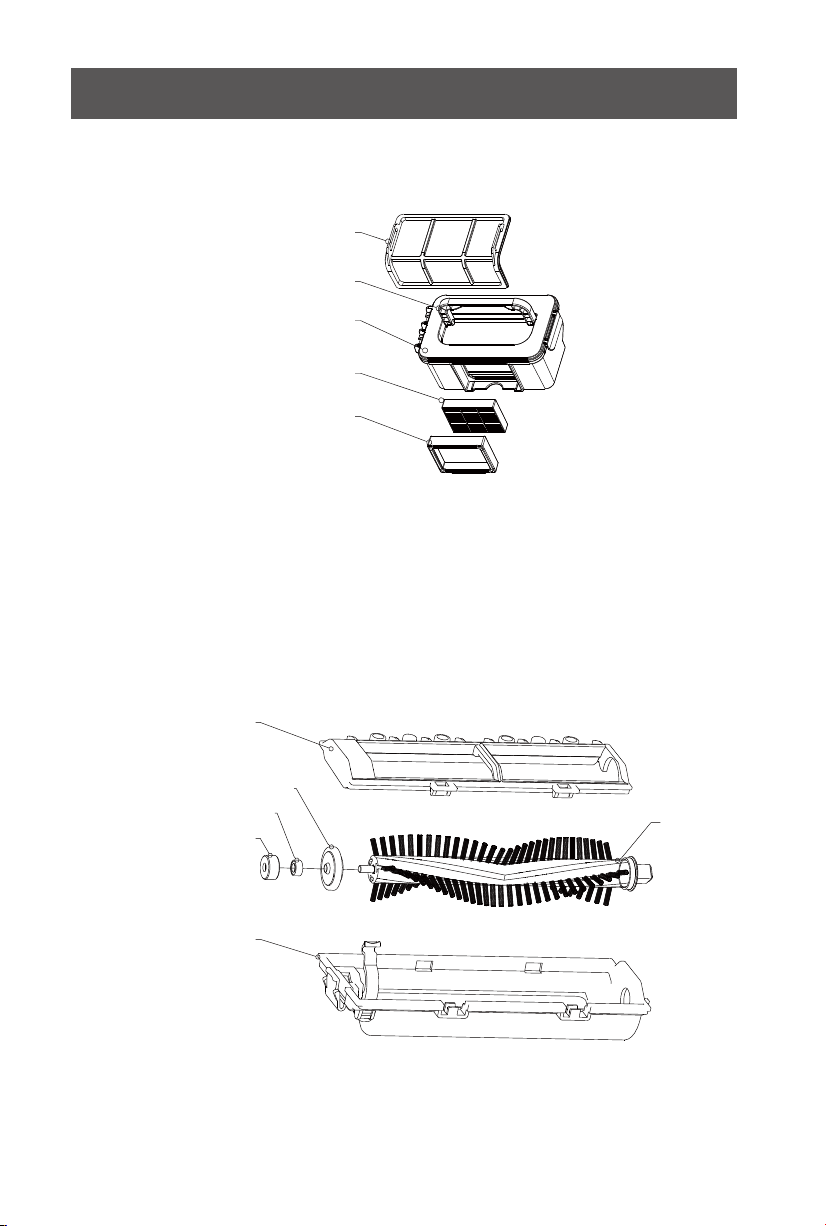
Product Components
Dust Bin Kit
Primary filter
HEPA filter
HEPA filter shelf
Roller Brush Kit
Handle
Dust bin
Roller brush coverplate
Roller brush bushing
Ball bearing
Bearing gluesheath
Roller brush holder
11
Roller brush
Page 13
Product Components
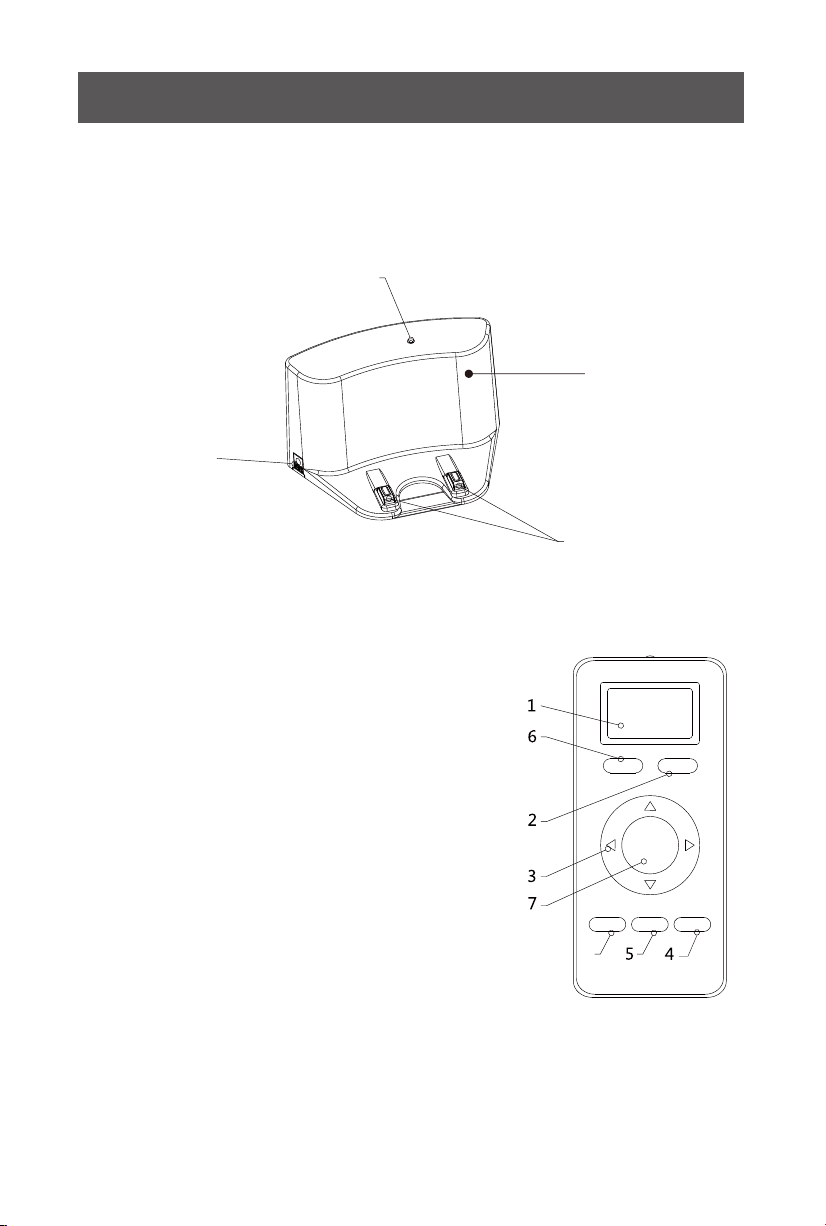
Docking Station
Power Indicator
Charging Poles
Remote
Top Cover
Charging Socket
1. Display Screen
2. Auto Charging
3. Direction Button
(Only Effective in Standby Mode)
PLAN
HOME
4. Max Cleaning
(Only Effective in Standby Mode)
5. Clock Setting
ON/OFF
6. Schedule Setting
7. ON/OF
8. Mode Cleaning
(Only Effective in Standby Mode)
MODE CLOCK MAX
8
Note:
Install two AAA type batteries into the remote control before use, Remove
the batteries if the remote control will be left unused for a long period.
12
Page 14
MAX
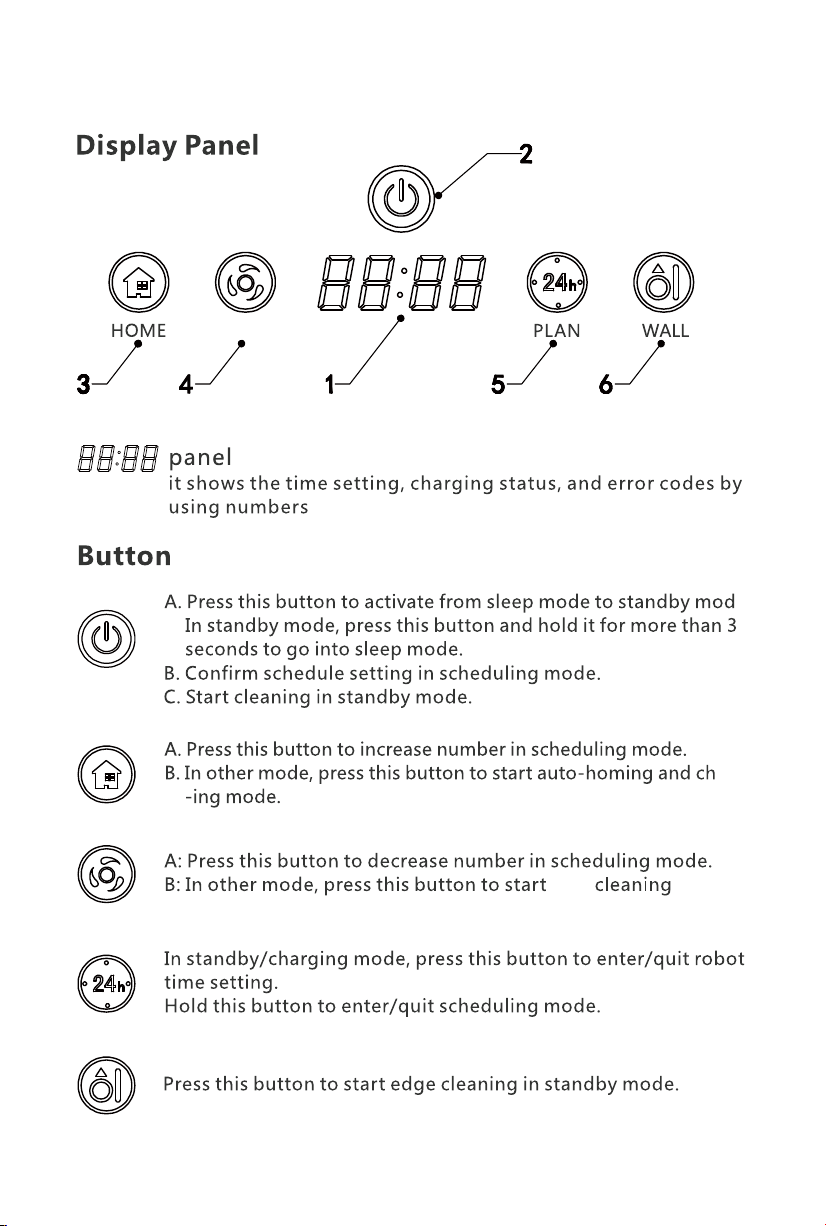
MAX mode.
13
Page 15
Product Operation
Battery Charging
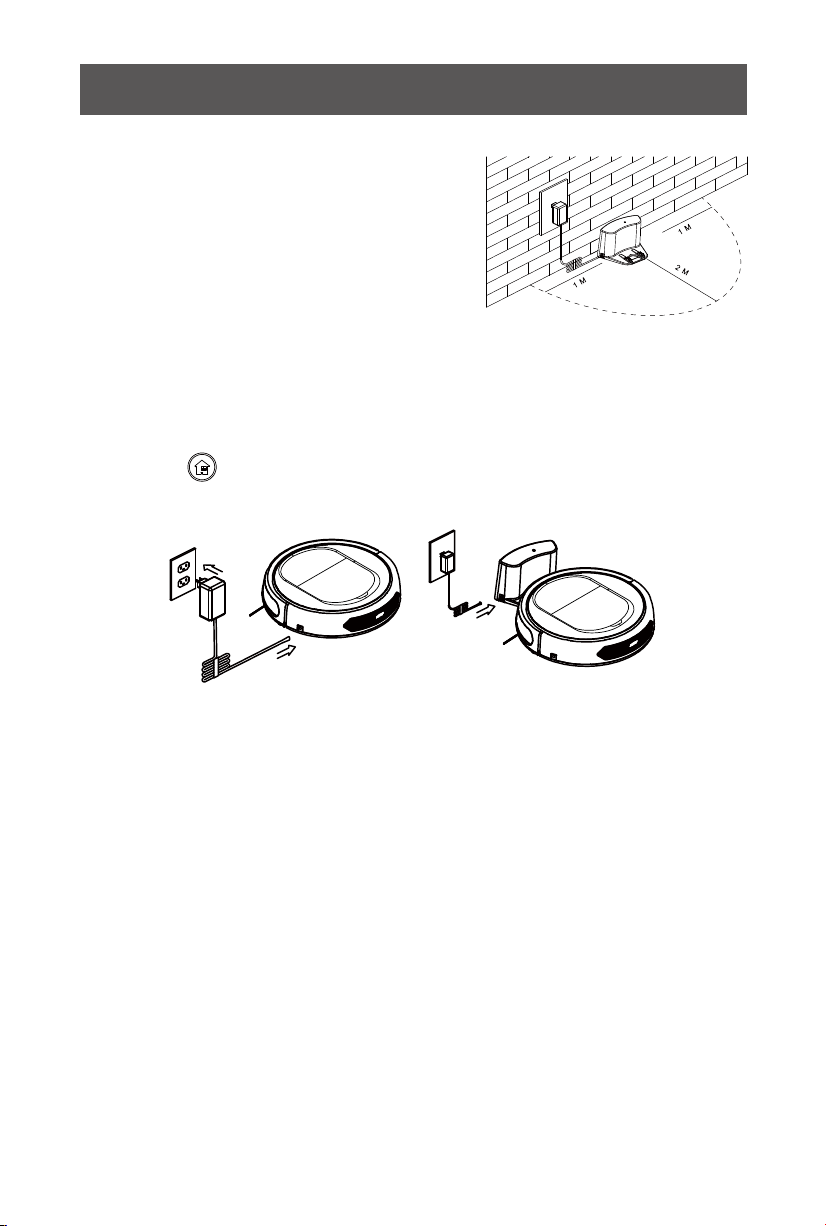
1. Docking station placement
Place docking station against the wall
and remove obstacles from within 1
meter at two sides and about 2 meters
in front of the station, as shown in the
right figure.
If the robot has been shut down, power on the robot by pressing the
power switch. side of the robot for more than 3 seconds.
2. Charge the robot in either way as shown below:
a. Insert the adapter into the robot and the plug at the other end to the
power socket as shown in Figure.a.
b. Press on robot or HOME on remote control to operate the robot
to go back to the charging station for recharging as shown in Figure.b.
a b
Note:
a. When robot is being charged, LED panel will gradually show 1111 from
left to right.
b. Once charging is complete, LED panel will show FULL.
c. In the standby status, the robot will broadcast voice prompt 'Please cha
-rge' when battery power is low.
d. In the working status, the robot will return to charging station automati
-cally when battery power is low.
For extending battery life:
a. Before first use, charge the robot for 12 hours.
b. Charge the robot as soon as possible when battery power is low.
c. The robot will return to charging station automatically when it accompli
-shes cleaning or battery power is low.
d. If the robot is not to be used for a long time, fully charge the battery be
-fore use and turn the power switch off.
e. If the robot is not to be used for more than 3 months, charge the robot
for 12 hours.
14
Page 16

Starting Up / Standby / Sleeping / Power Off
1. Starting up
a. Make sure the power switch is on(The power switch is at the right side
of main body)
b. In standby mode, press on main body or ON/OFF on remote control
to start cleaning.
Note:
If robot is in sleep mode, press on main body to wake up the robot from sleep
mode, then press again, the robot will start cleaning automatically.
2. Standby
Standby means robot has its power switch on, waiting for the user's
operation. It can be changed to standby mode by one of the following
methods:
a. During robot cleaning, press on main body to enter standby mode.
b. During robot cleaning, press ON/OFF button on remote control to po
-wer off the robot.
3. Sleep
In sleep mode, the robot can only be waken up from button on main
body or ON/OFF on remote control. In order to save power, you can turn
the robot into sleep mode from standby mode via either of the following
methods:
a. Press on main body and hold it for 3 seconds.
b. Robot will au
robot unit panel and remote control for more than 2 minutes.
tomatically enter sleep mode if there is no operation on
About Scheduling
You can schedule the robot to start cleaning automatically at a certain
time every day.
Note: The robot can only be set when it is in standby or charging mode.
If the robot is in sleep mode, press on main body or ON/OFF button on
remote control to wake up the robot.
If the robot is in cleaning mode, stop it before scheduling.
15
Page 17

Product Operation
How to schedule the robot
1. Schedule on Display Panel on Robot Unit
A. Setting robot current time (Make sure the robot is in standby or power on
status).
a. Immediately press “PLAN” button to start current time setting. the LED
panel will show the current system time.
b. Then the left two numbers on LED panel will flash . The left two
numbers stands for Hour, Press “HOME” to increase hour or “MAX” to
decrease it.
c. Press shift to minute setting mode, the right two numbers stands for
Minute on LED panel will flash. Press “HOME” to increase it or “MAX” to
decrease it..
d. Press button to save the setting, then press “PLAN” to exit (Before
the setting is saved, if press “PLAN” to exit, the current setting will be
invalid).
B. Setting the scheduling time (Make sure the robot is in standby or power
on status)
a. Press “PLAN” and hold it for 3 seconds to start scheduling, then the left
two numbers on LED panel will flash,
b. Press “HOME button to increase hour or “MAX” button to decrease it.
c. Press to enter minute setting mode, the right two numbers on LED
panel will flash, press “HOME” button to increase it or “MAX” button to
decrease it.
d. Press again to save the setting, then press “PLAN” button to exit
(Before the setting is saved, if press “PLAN” to exit, the current setting will
be invalid).
C. Cancel the scheduling
Follow above step B, set the scheduling time to be 00:00 and exit.
Note:
a. For the scheduled cleaning time through robot panel will
according to robot’s current time. Therefore, please follow step A set the
robot time in accordance with current real time.
b. The robot will automatic start cleaning at the scheduled time every day.
Schedule cleaning need to be reset if the power switch has been turned off.
2.Schedule on Remote Control
A. Schedule cleaning setting
a. Make sure the robot is in standby mode or charging mode. Press “PLAN”
button on remote and hold it for 3 seconds to enter scheduling mode.
be caculated
16
Page 18

b. The left two numbers on remote screen stands for Hour, the right two
numbers stands for Minutes. After enter scheduling mode, the Hour numbers
will flashes. The Hour and Minute can be changed by press “Up” or “Down”
button. Press “Left” and “Right” can shift between Hour and Minute numbers
setting. The numbers flashes is the one under scheduling.
c. When selected the hour and minute, with the remote pointing to the robot,
press “ON/OFF” button on remote.Robot unit display panel will show
corresponding scheduled time if it’s been scheduled successfully.
Note: The numbers show on remote is the time interval for scheduling. And
the time interval is integer times of 30 minutes. For example: If current time is
8:00am, and remote setting number is 01:00. If schedule clening has been
successfully saved, the robot will start working 1 hour later. It means 9:00am
has been seted as schedule cleaning time and the robot will automatic start
cleaning at 9:00am everyday.
B. Cancel schedule cleaning
Press “PLAN” on remote and hold it for 3 seconds to enter scheduling
mode. The left two numbers on remote screen stands for Hour, the right two
numbers stands for Minutes. The Hour and Minute no can be edited by press
“Up” or “Down” button. Press “Left” and “Right” can shift between Hour and
Minute numbers setting. Set the time to be 00:00, then press “ON/OFF”
button. The scheduled cleaning was successfully canceled.
C. Remote control current time setting
Press “CLOCK” on remote and hold it for 3 seconds to enter remote control
current time setting mode. The left two numbers on remote screen stands for
Hour, the right two numbers stands for Minutes. At the top of the LCD panel,
there is Date chooice. After enter current time setting mode, the Hour
numbers will flashes. Press “Right” for one time can shift to Minute editing,
press “Right” for two time, it will shift to “Date” editing. The Hour, Minute no
can be edited by press “Up” or “Down” button. The Date can be edited by
press “Left” and “Right”. Press “CLOCK” button to save the setting.
Note: The remote clock time function is similar to watch to know the time. It
have nothing to do with the schedule time.
Cleaning Modes
Four cleaning modes to meet your different needs.
1. Max cleaning
Press “MAX ” on robot or “MAX” on remote
control to start Max cleaning. Robot will
enters Max cleaning mode. MAX cleaning mode
is with bigger suction power, faster rolling brush
rotation speed and slower wheel rotation speed.
17
Page 19
Product Operation
2. 4 Cleaning Modes
Press MODE button X1, X2, X3, X4, X5 on remote control to shift
between different cleaning modes:
MODE 1: EDGE CLEAN, Robot will start along wall cleaning.
Remote LCD display MODE 1 at lower right corner.
MODE 2: 2mX2m square meters area cleaning in zig-zag pattern.
Remote LCD display MODE 2 at lower right corner.
MODE 3: Random cleaning. Robot will start random cleaning(not
zig-zag pattern). Remote LCD display MODE 3 at lower right corner.
MODE 4: Intensive cleaning mode (only applied to small size room).
Remote LCD display MODE 4 at lower right corner.
Robot will start MAX cleaning mode and cleans twice of the room
for a deeper cleaning.
MODE 5: Robot will stop cleaing and standby. (There is no “MODE
5 displayed on remote LCD panel)
If press MODE button X6, it will goes back to MODE 1.
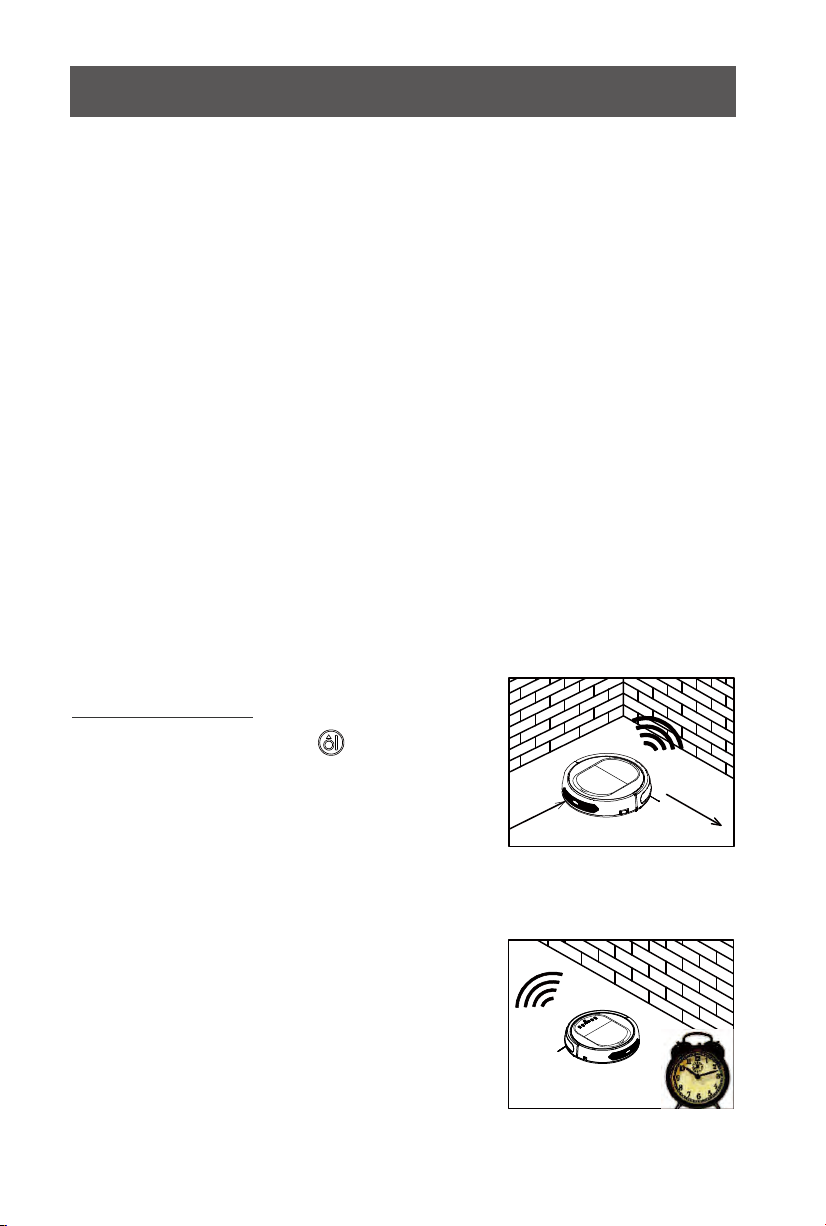
3. Edge cleaning
In cleaning mode, press to enter edge
cleaning mode. The robot will clean
the walls.
4. Schedule cleaning
Schedule the robot's cleaning according
to yourneed. And our robot will start clean
-ing as scheduled.
along
18
Page 20
Product Maintenance
Cleaning Side Brushes
1 .Make sure side brushes are not damaged and no foreign matter among
them.
2. Use cleaning kit or cloth to clean side brushes.
3. Remove side brushed and put them in warm water for five seconds can
solve side brushes tangling and deformation.
4. Replace side brushes when they are worn.
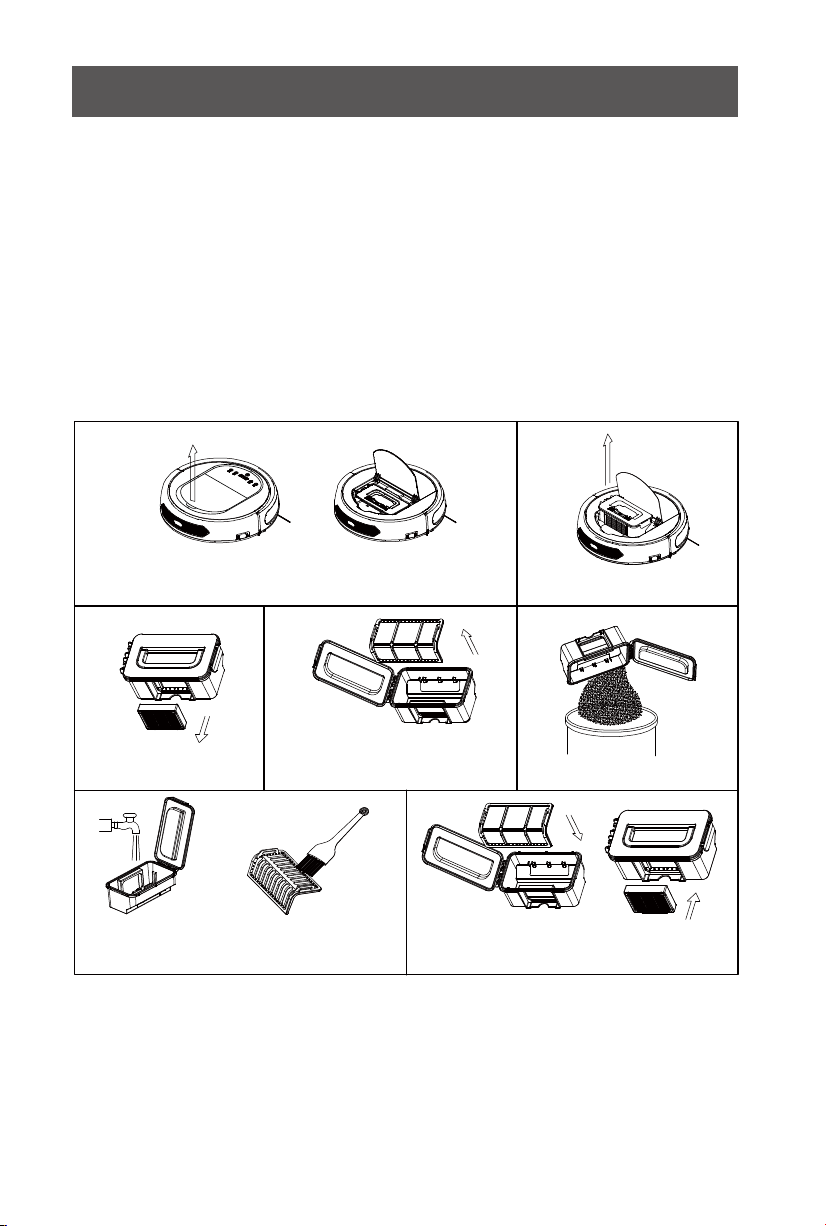
Cleaning Dust Bin and Filters
Empty and clean the dust bin after each use following the steps as shown
in the figures below.
Press
A.Pres s PUS H to ope n the co ver
D.Open dust bin cover,
C.Take out the HEPA.
F.Wash dust bin and filter,
clean t he HEPA with br us h.
Note:
a. Wash the HEPA and primary filter after used for 15~30 days. Max life span for HEPA
and primary filter is 24 months.
b. Reinstall the HEPA and primary filter after they are fully dry.
c. HEPA and primary filter could be replaced if needed.
d. Do not dry the filters under baking sunshine.
19 20
take cut pri ma ry fi lter. E.Empty the dust bin.
G.Install the primary filter and
H EPA ba ck into t he dust b in .
B.Take out the dust bin.
Page 21
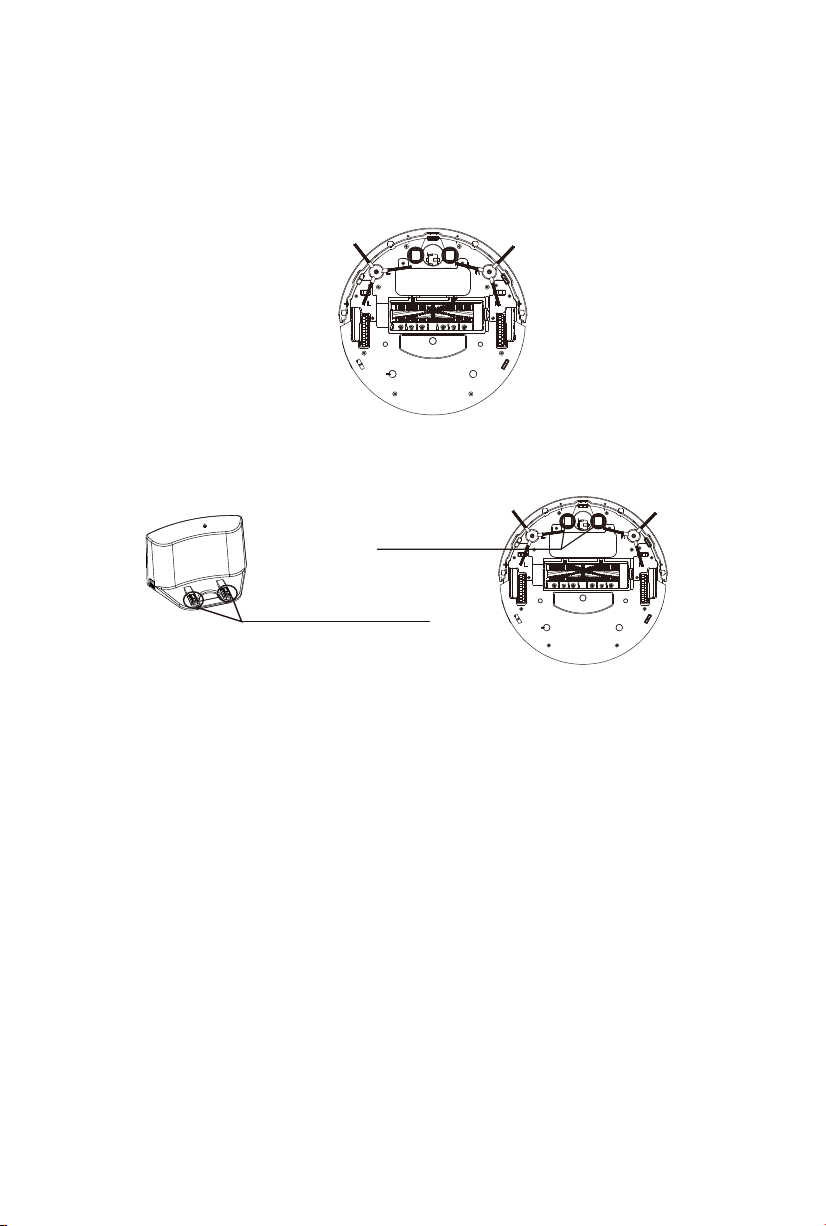
Cleaning Sensors and Wheels
Slightly wipe all the sensors and wheels, as marked in figure below, with soft
cleaning cloth or tool.
Cleaning Charging Poles
Clean the charging poles, as marked in figure below, with soft cleaning cloth
or tool.
Clean the charging poles with
soft dry cloth when there is
bad contact.
Clean the charging poles with
soft dry cloth when there is
bad contact.
Page 22
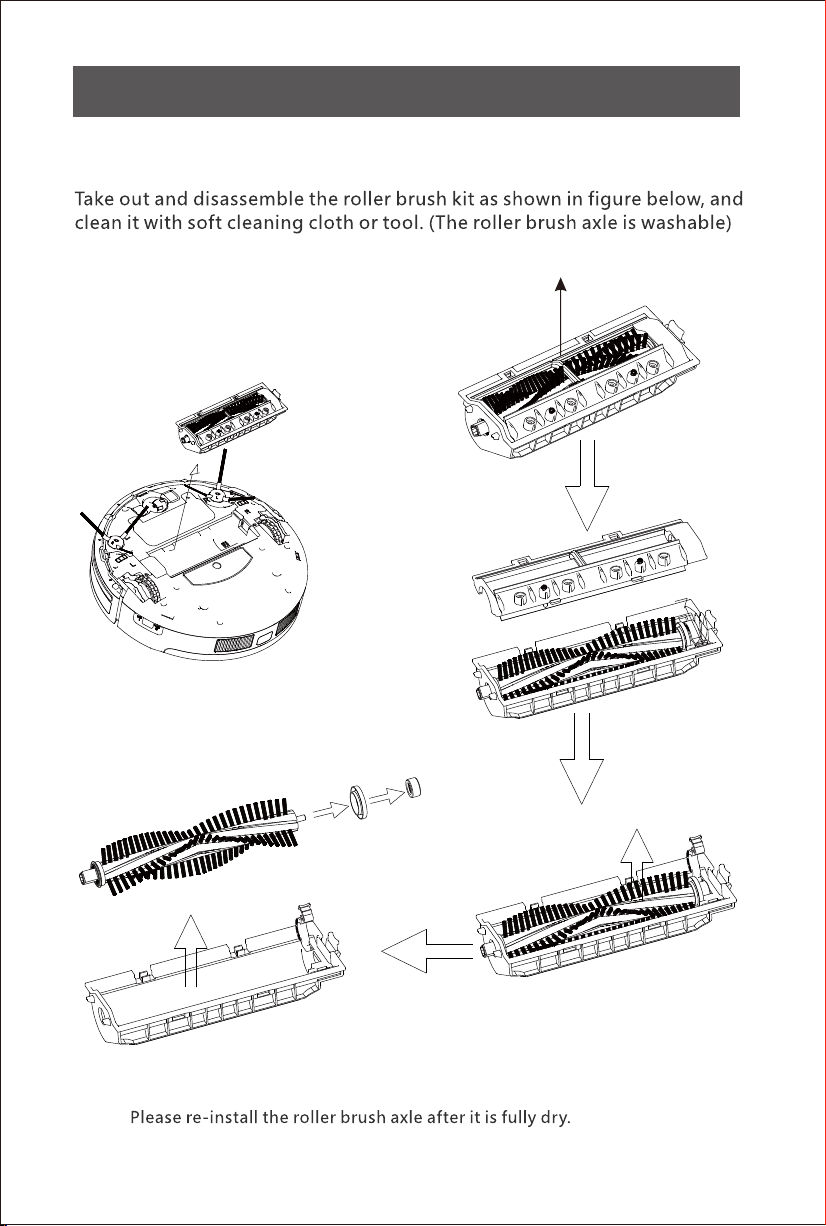
Product Maintenance Kit
Cleaning Roller Brush
Note:
21
Page 23
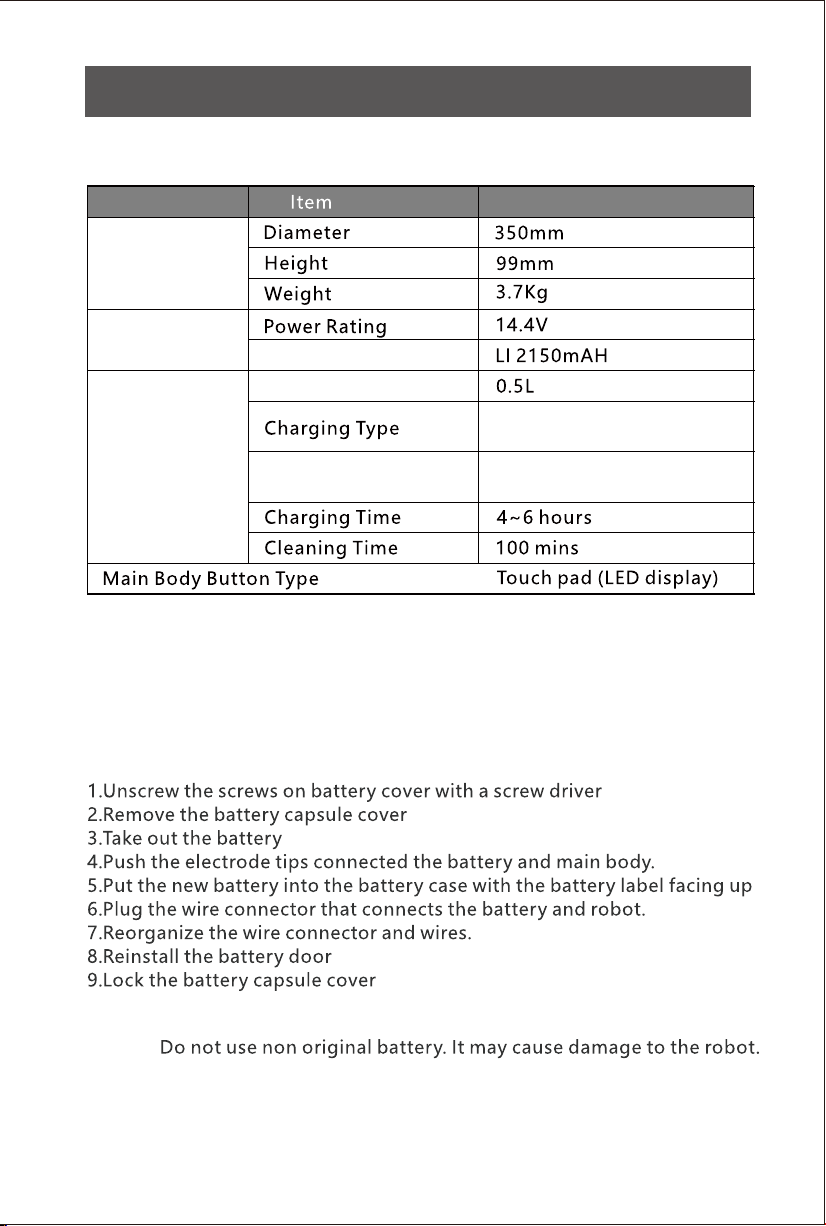
Product Specifi cations
Product Specifications
Classification
Mechanical
Specifications
Electrical
Specifications
Cleanin g
Specifications
Battery Specifications
Dust bin Capacity
Cleanin g Mode
Battery Removal
Detail
Auto Charging/ Manual
Charging
2
Max, Edge, 2*2m
Schedule
, Intensive,
Notice:
22
Page 24
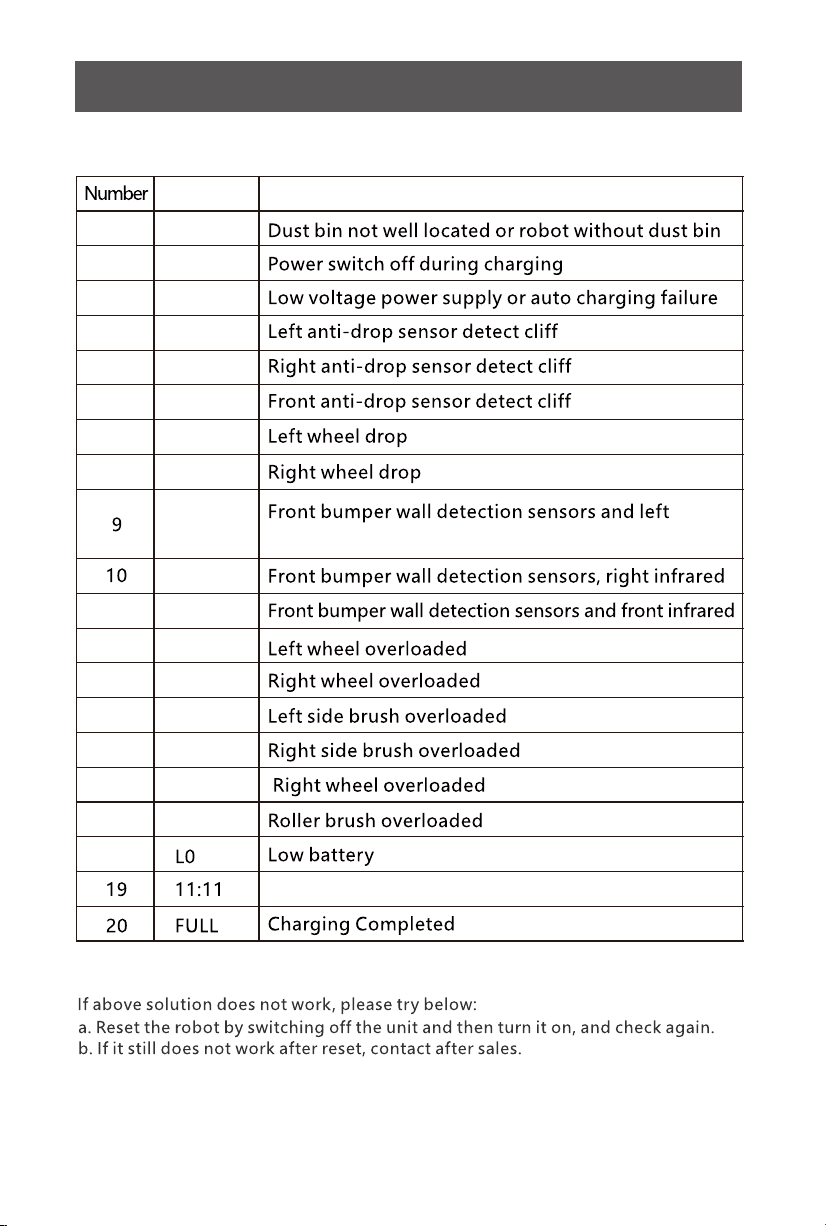
Error Code
Error code Cause
Troubleshooting
11
12
13
14
15
16
17
1
2
3
4
5
6
7
8
E1
E2
E3
E11
E12
E13
E21
E22
E31
E32
E33
E41
E42
E43
E44
E45
E46
infrared sensors detect obstacle
18
Notice:
23
Charging
 Loading...