

Page 1
Software Download & Installation
1. Go to the website http://www.powermatic.co.th
2. Click ViewPower software icon and then choose your required OS to
download the software.
3. Follow the on-screen instructions to install the software.
4. When your computer restarts, the monitoring software will appear as an orange
plug icon located in the system tray, near the clock.
Please follow steps below to download and install monitoring software:
Trouble Shooting
Use the table below to solve minor problems.
POWERMATIC CO., LTD.
w w w . p o w e r m a t i c . c o . t h
Problem Probable Cause Solution
No any words display Low battery. Charge the UPS at least
on the front 6 hours.
panel. Battery fault. Replace the battery with
the same type of battery.
The UPS is not turned on. Press the power switch
again to turn on the UPS.
Alarm continuously The UPS is overload. Remove some loads first.
Before reconnecting
equipment, please verify
that the load matches the
UPS capability specified in
the specs.
sounds when the
mains is normal.
When power fails,
backup time is
shorten.
The UPS is overload. Remove some critical load.
Battery voltage is too low. Charge the UPS at least
6 hours.
Battery defect. It might
be due to high temperature
operation environment,
or improper operation to
battery.
Replace the battery with
the same type of battery.
The mains is normal
but UPS is in battery
mode.
Power cord is loose. Reconnect the power cord
properly.
TEL: 0-2952-4400
User’s Manual
Page 2
Package Contents
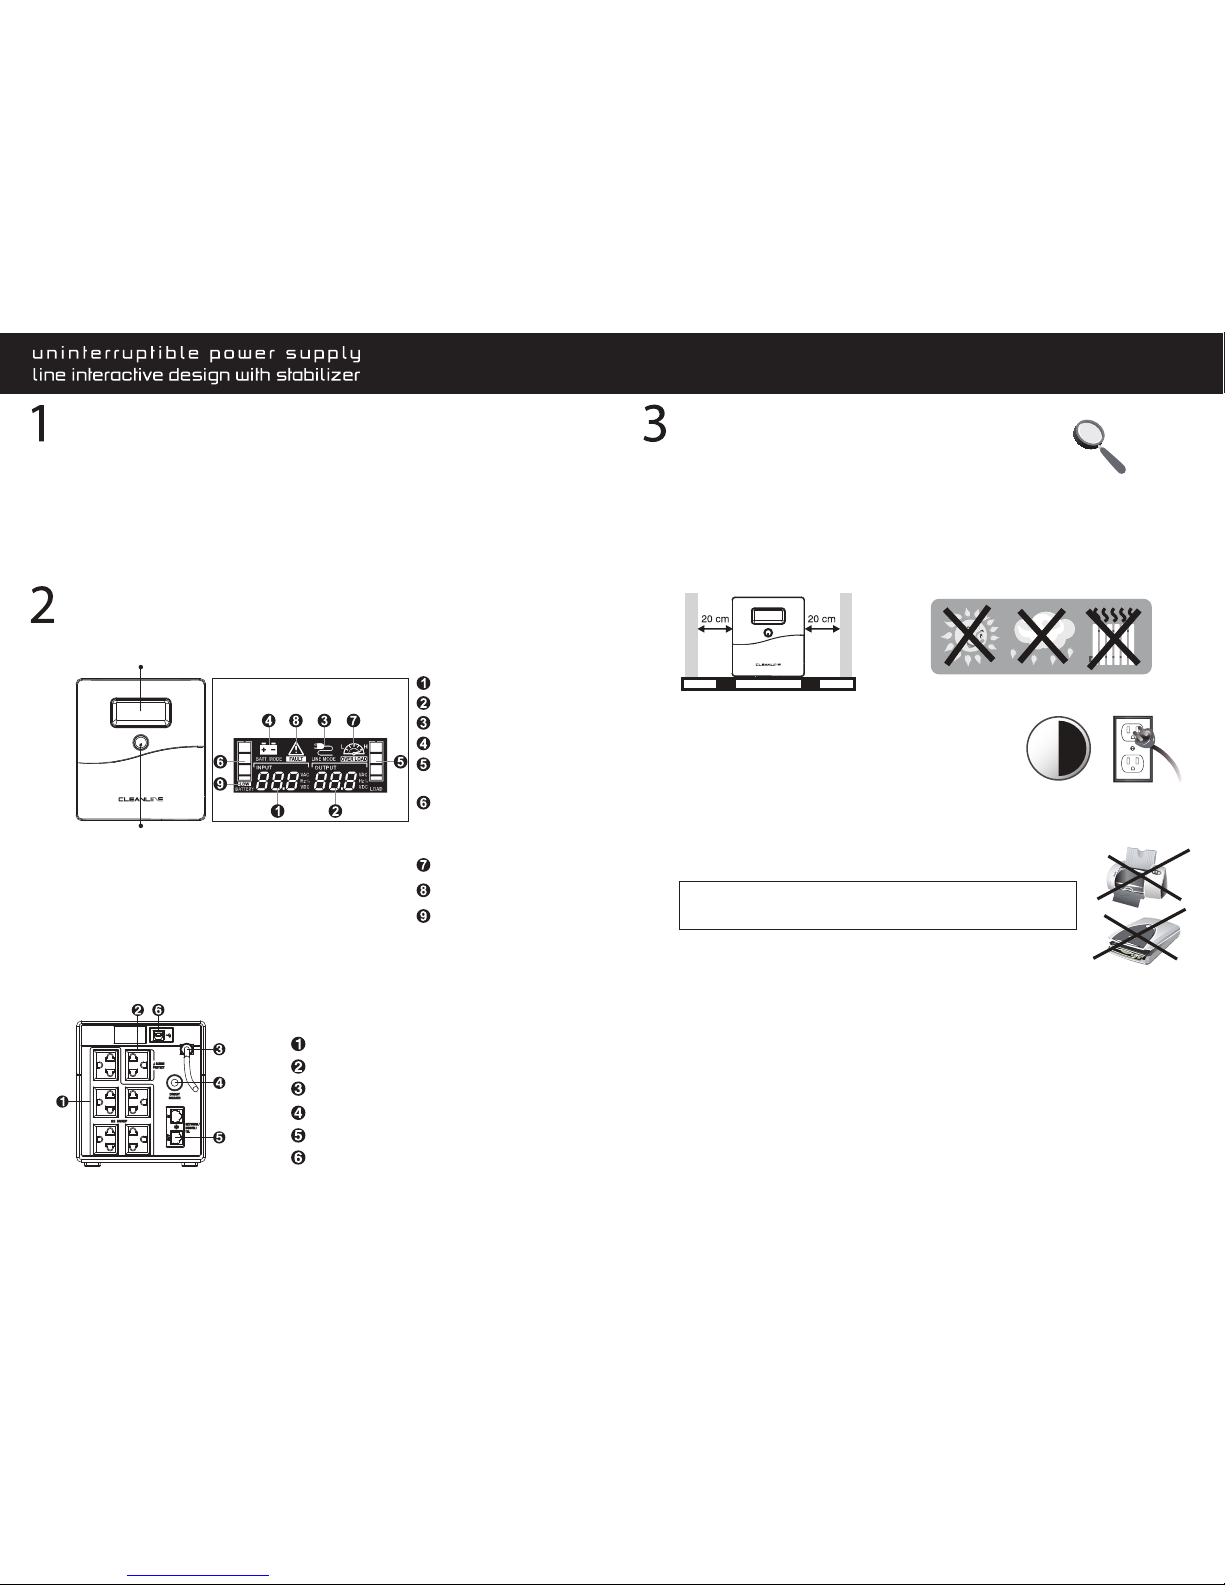
Product Overview
Back View:
You should have received the following items inside of package:
- UPS Unit
- Quick Guide
- Communication cable
- Power cable (only for model)
Installation & Initial Startup
NOTE: Before installation, please inspect the unit. Be sure that
nothing inside the package is damaged.
Connect to Utility and Charging
Connect the Loads
CAUTION: NEVER connect a laser printer or scanner to
the UPS unit. This may cause the damage of the unit.
Connect Modem/Phone
Connect a single modem/phone line into surge-protected “IN”
outlet on the back panel of the UPS unit. Connect from “OUT”
outlet to the computer with another phone line cable.
Options:
Backup
Surge Protect
AC Input
Circuit breaker
Modem/Tel
USB Port
Front View:
6 hours
Connect Communication Cable
To allow for unattended UPS shutdown/start-up and status monitoring,
connect the communication cable one end to the USB port and the other
to the communication port of your PC. With the monitoring software installed,
you can schedule UPS shutdown/start-up and monitor UPS status through PC.
Turn On/Off the Unit
Turn on the UPS unit by pressing the power switch. Turn off the UPS unit by
pressing again the power switch.
Cold Start Function
When the UPS is off and there is no power utility, it's still possible to cold start the
UPS unit to power the loads.
Plug in the loads to output receptacles on the rear panel of the UPS.
Simply turn on the power switch of UPS unit, then devices connected
to the UPS will be protected by UPS unit.
Plug in the AC input cord to the wall outlet. For the
best results, suggest to charge the battery at least
6 hours before initial use. The unit charges its battery
while connecting to the utility.
Placement & Storage Conditions
Install the UPS in a protected area that is free of excessive dust and has
adequate air flow. Please place the UPS away from other units at least
20 cm to avoid interference. Do NOT operate the UPS where the
temperature and humidity is outside the specific limits. (Please check the
specs for the limitations.)
Power Switch
LCD Panel
LCD Pan e l
Input voltage
Output voltage
AC mode indicator
Batt. mode indicator
Load level indicator,
Flashing indicates overload
Battery capacity indicator,
Flashing indicates low
battery level
Overload
Fault
Low battery
 Loading...