

Page 1
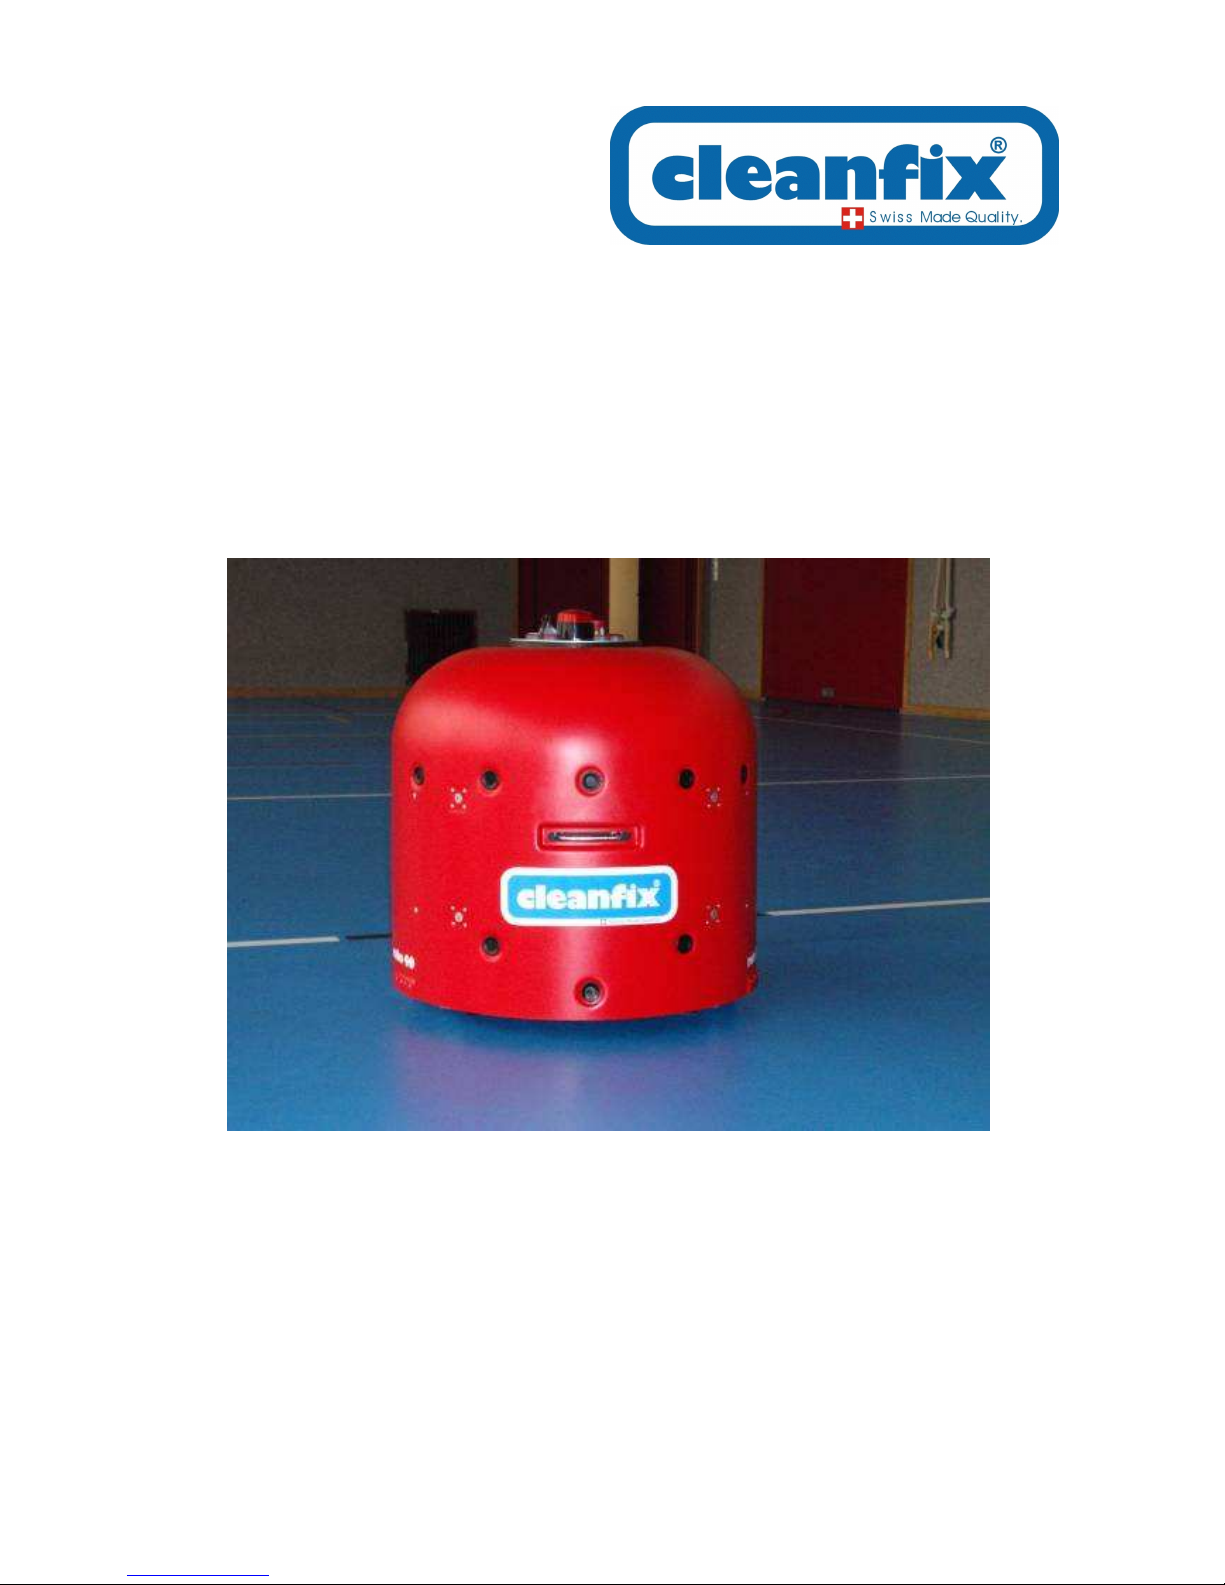
Robo 40
Scrubber Dryer Robot
It is absolutely necessary to read the operating instructions before starting the machine!
Operating instructions
English
Page 2

- INFORMATION -
General information
Please read through these operating instructions carefully.
Knowledge of the contents of the operating instructions is one of the prerequisites of avoiding mistakes and thereby
operating the unit safely and trouble-free.
If any questions arise, please contact our service department using the service hotline, 079 357 40 33.
Under no circumstances should you open the unit yourself and attempt any repairs on your own.
In the event of guarantee claims, please contact your authorized dealer.
During the course of product improvements, we reserve the right to make technical and optical changes to the
product.
To ensure optimum performance, no changes or modifications may be made to the unit unless they have been
expressly approved by the manufacturer.
We recommend that the operator obtain written confirmation from personnel that they have taken note of the contents
of the operating instructions.
These operating instructions must be kept close to the unit and must be accessible to operating and cleaning staff at
all times.
Proper Use
Dependable operation of the unit can only be guaranteed with proper use.
The scrubber dryer robot is exclusively designed for cleaning waterproof and abrasion-proof hard flooring inside
buildings.
Proper use also includes correct compliance with the operating, maintenance, and cleaning instructions.
Any other type of use of the unit or use that goes above and beyond this is not permitted, and is to be
considered as improper! The operator is solely liable for all damage caused by improper use.
Dangers, Warnings
The unit is powered by rechargeable batteries.
In order to avoid damage, the manufacturer recommends exclusively using original batteries.
WARNING!
WARNING!
environments
To charge the batteries, the unit must be connected to the power supply via an external battery charger.
WARNING! Danger from electric current
Electrical energy can cause serious injuries. There is danger to life if the insulation or individual components
are damaged. Therefore:
No wet-cell batteries may be used.
The unit may not be used around escalators, sliding or revolving doors and similar
Unplug the unit before any work.
When charging, do not touch the battery poles and battery charger. Do not place any conductive
items on the batteries.
Check the mains connection for damage before every use.
Cleaning agents can be used when cleaning the floor with the unit.
WARNING! Cleaning agents may be harmful to your health. Therefore, observe the following:
Avoid any skin or eye contact with the cleaning agent.
Observe the dosage instructions and warnings from the cleaning agent manufacturer.
Page 3

ATTENTION: In addition, the general warning and safety instruction of Cleanfix Reinigungssysteme AG apply.
- CHOOSING THE PROGRAM -
Description of the programs
You have a choice of three different programs.
Hall program
The hall program is suitable for surfaces that have a rectangular shape of 200 m2 up to 1200 m2, such as
gymnasiums, conference rooms, lobbies, etc.
To start this program, position the unit in the direction of motion approximately 0.3 m away from the wall.
After pressing the "Run" button, it follows up to the fourth corner. Thereafter, it systematically covers the
hall following a special pattern. It can move around pillars and obstacles so that it returns to the
systematic path that it had taken before the obstacle.
Rooms with walls that are not at right-angles to each other must be divided into rectangular fields with
partitions or the spiral program can be used.
Spiral program
The spiral program is suitable for rooms that have obstacles, and for crooked rooms without any clear
boundaries between 100 m2 and 800 m2. Corridors can also be cleaned with the spiral program.
The robot is started inside the room at equal distance from two walls. The distance from the walls is
oriented around the size of the room. The unit starts moving in a spiral and continues until it reaches an
obstacle that it must go around. After three spiral revolutions in which it must get around an obstacle, the
Robo changes the centre of the spiral and starts moving in a spiral again.
Corridor program
The corridor program is suitable for cleaning hallways or long and narrow rooms. The width of the aisle
should not drop below a width of 3 m.
The robot is started approx. 0.3 m from the right wall at the beginning of the corridor. It cleans crossways
to the corridor in a series of loops, similar to the hall program.
Choosing the quantity of water
The Robo 40 has three cleaning levels in which the quantity of water and suction power can be changed.
Cleaning level L for low level of soiling Capacity min. 1,200 m
Cleaning level N for medium level of soiling Capacity min. 600 m2
Cleaning level H for high level of soiling Capacity max. 300 m2
Note:
Please note that the different cleaning levels also have an effect on the operating time of the battery. The
operating time of the battery is approx. 6 hours. The values given above apply to the hall program.
2
Page 4
B C D
B
C
C
- PREPARATION -
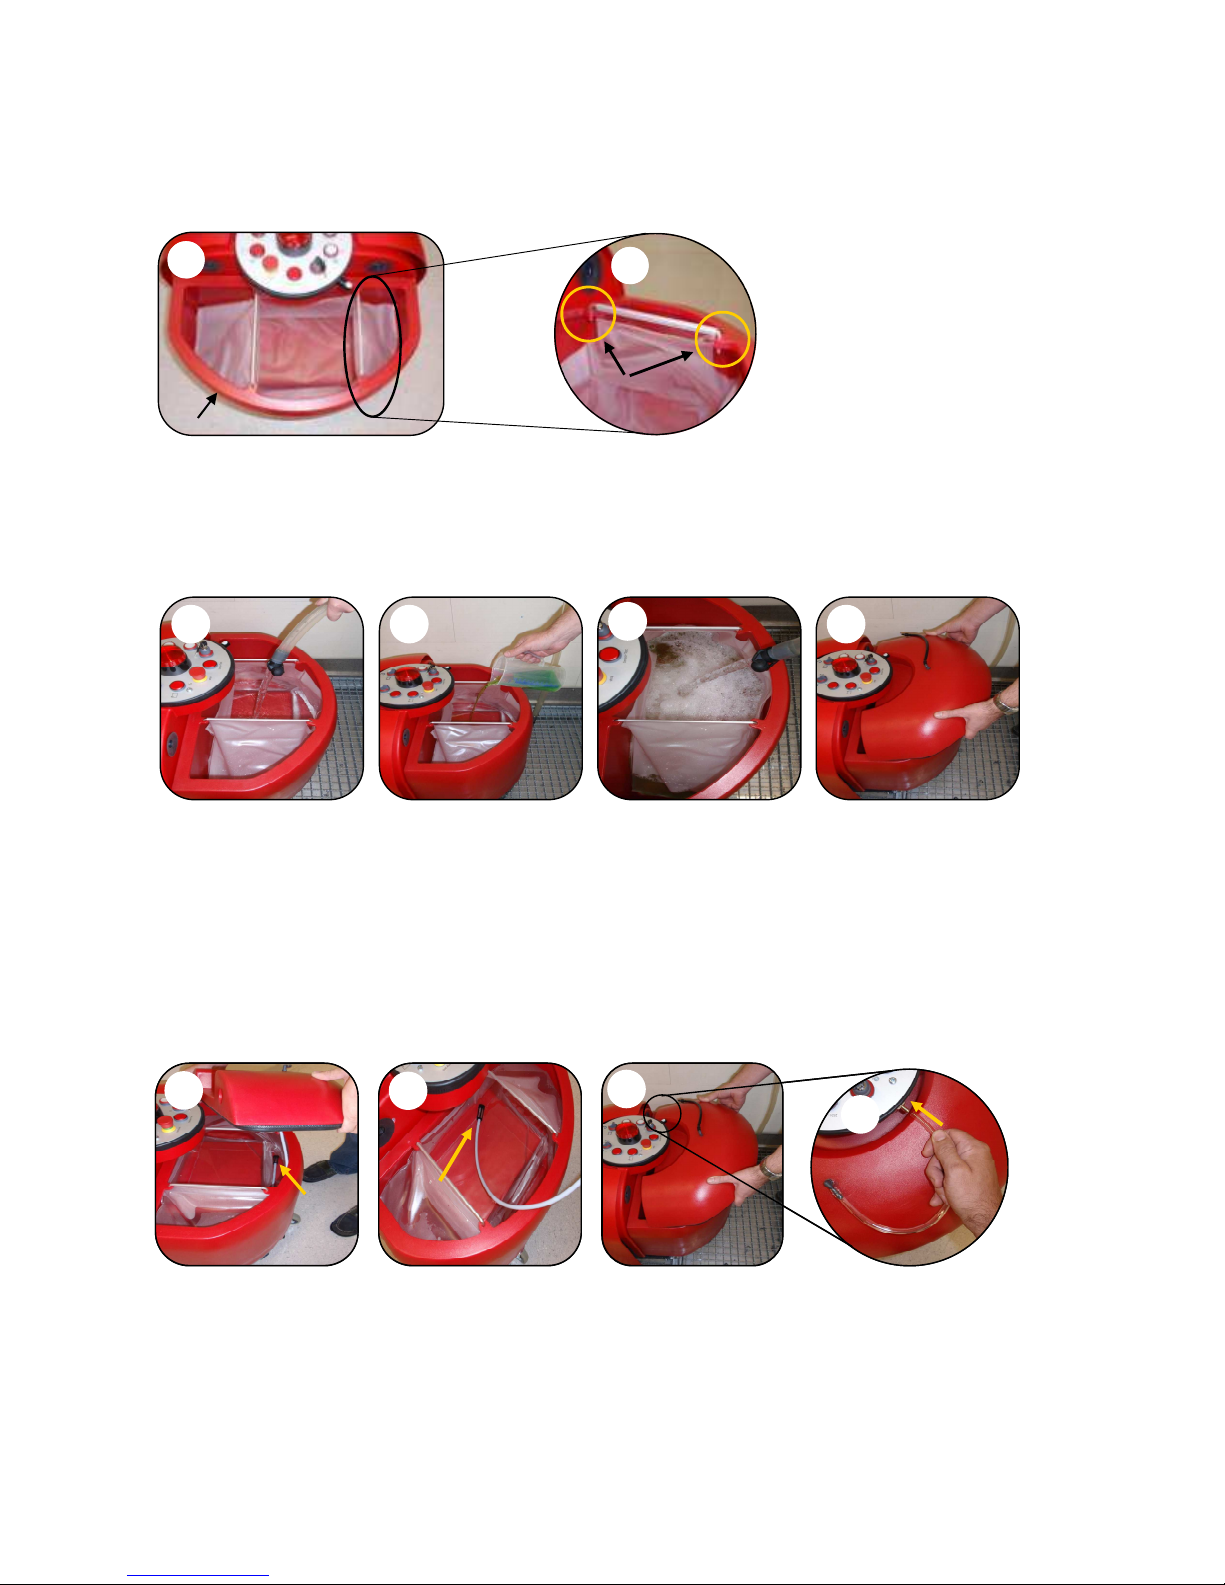
Insert the membrane tank
2
Position the fresh water membrane tank (A1) in the dirty water tank (A2). The support brackets on the
membrane tank are fastened to the dirty water tank as shown in the illustration (B3).
- Fill the fresh water tank -
A
Fill the membrane tank (A) approx. half-way with fresh water. Add the cleaning agent* (B) and then fill the
membrane tank completely to approx. 2cm below the rim (C). Before closing, make sure that the water filter
is at the lowest point of the tank and that the lid is resting tightly on the housing (D).
*We recommend only using the original cleaning agent from the manufacturer. Unsuitable cleaning agents
can lead to the water lines becoming clogged up or to other damage.
Close the fresh water tank
A
A
Insert the suction hose in the membrane tank. Make sure that the filter (A1) is dirt-free and position it at
the lowest point in the tank.
Put the lid on (C) and connect the water hose to the nipple. (D)
1
3
B
B
1
1
falsch
D
D
The Robo 40 is now ready to operate
Page 5

"RUN"
Corridor program
Spiral program
Hall program
"On/Off"
0/l
Key switch
L)
"Sensor test"
"Emergency stop"
"Battery"
"Diagnose“
N)
Water quantities:
3
4
Move Robo 40
Attach
Release
Stop
”
push
-
button
Turn 0/l switch
Press the
“
on/off
”
“
RUN
”
buttons flash
Sensor Test
If the
“
RUN
”
To start the
10
Control Panel
H) high
medium
low
Starting the Robo 40
1
to the location.
Long side
Wall to right, ca. 30cm
Min. 5m before first corner
- START-UP -
6
both hands. Sensor test stops
Push shield back with
flashing.
2
vacuum
“Emergency
5
push-button.
“Sensor Test”
nozzle
to “I”
and
S
7
8
Select
program
Hall program
Spiral program
Corridor program
9
button constantly
lights up, the Robo 40
is ready to start.
cleaning program
press “Run”
Page 6

B
Interrupting operation
A
You can interrupt the cleaning process by pressing the "run" button. To put the Robo 40 back into
operation, press the "run" button again.
Note: If the Robo 40 is working in the hall or corridor program, it will continue with the program that it
started after the interruption. In the spiral program, it will begin a new spiral at the place it was interrupted.
End of program
If the Robo was being operated in the hall program, then after completion of the program, it returns to the
starting place where it switches itself off.
In the spiral program, it switches itself off when it reaches the end of the room or, if it ends up in a dead
end, cannot find its own way out.
In the corridor program, it switches itself off when it reaches the wall at the end of the hallway.
To switch off the Robo 40 manually, press the "Run" (3) button and then the "Start" button. Caution: Do
not switch off the unit with the emergency stop button!
Note:
If the battery is empty, then the battery lamp starts flashing before the unit switches itself off. In this case,
the battery lamp continues to flash.
Emptying the tank
A
1
Disconnect the fresh water supply by pulling the hose off (A).
Remove the lid and clean it with water. Remove the membrane tank and clean it with water.
The dirty water can be drained by opening the shut-off valve (B1). Afterwards, clean the inside of the tank
with a weak jet of water and a soft brush, and then rinse.
Seal the dirty water drain hose tightly and fasten it to the hose holder.
C
Note:
Keep the unit open so that it can dry.
Page 7

A
B
2
1
5
4
B
2
- CARE, MAINTENANCE AND REPAIR -
Suction nozzle
To remove the suction bar, (1) open the wing nut (2). By pulling and twisting to the left, (3) the retaining
pin (4) on the right side can be hooked off. Remove the suction nozzle on the right (5) side.
To install it, push the suction bar from the right side (5) under the unit (between the roller and holder),
hook on the retaining pin, (4) and fasten the suction nozzle with the wing nut (2).
3
Replacing the suction lips
To replace the suction lips, unscrew the thumbscrews (1) and remove the front grip channel (2) as well as
the back grip channel (3). Now the suction lips (A/B) can be replaced. The suction lip with the indentations
must always be installed at the back (C). Then, put the grip channels (2/3) back into position and fasten
them with the thumbscrews (2).
2
3
A
Transport
4
Two ways to move or transport the Robo 40:
Method 1: Push the unit to the destination. When doing so, watch for obstructions in the floor quality and also
make sure that the suction nozzle is raised.
Note: When the unit is switched on, the Robo 40 can only be moved if the "Emergency off" button is pressed.
Method 2: Transport the Robo 40 with the service cart (A/B).
Page 8

A
B
C
D
- CLEANING THE ROBO 40 -
The Robo 40 requires regular cleaning and care. To achieve flawless cleaning results, dirtying such as can
be seen in the illustrations A/B/C must not occur.
Point 1
First of all, remove the suction bar (see "Suction Nozzle" chapter). Then remove the fresh water tank.
Position the Robo 40 on the transport cart (D) and tip it.
Point 2
It is now easy to access the areas that have to be cleaned. By unscrewing the 4 Allen screws, (E) the roller
brushes (1) can be disassembled. Point 2 is not necessary if there is only slight dirtying.
Point 3
Clean the roller brushes,(1) brush strip and housing with water and a cleaning agent.
Point 4
Caution: During each cleaning, check the condition of the water lines to make sure they are secure and
clean.
Point 5
Position the roller brushes (1) and screw them together again with the Allen screws. Clean the suction bar
and install it as described in the chapter entitled "Replacing the suction lips". At the end, use a damp cloth to
clean the sensor shield and the panel of the Robo 40.
Note:
Perform all work with the proper care. Maintenance work as well as repair work of any type may only be
performed by the manufacturer of the unit or by professionals while observing all relevant safety regulations.
Page 9

- MISCELLANEOUS -
Rinsing the water lines
A
B
Description of the rinse function:
Use the switch (A) to select the hall program function.
Start the Robo 40 as described in the "Starting the Robo 40" chapter.
As soon as the "run" and "Start/Stop" lamps are lit permanently, the pump function can be started by
pressing and holding the "run" button (B).
Rinse the water lines for 5 to 10 seconds before each use of the Robo 40. After completion of the rinsing
process, check the water discharge on the ground. This guarantees an intact water flow.
Clogged water line or brush strip:
If no water flows, repeat the procedure 2 to 3 times. If there is still no water flowing, the water line can be
rinsed and cleaned with a concentrated cleaner. To do this, put the suction filter directly into a container
filled with approx. 1 L of cleaning solution (C).
If there is still no water flowing through the water distribution brush even after cleaning the water line, then
call the service hotline.
C
3
Charging the batteries
A
1
2
After cleaning, the Robo 40 can be connected to the charging station (1). To do this, remove the dirty water
tank and connect the charging cable to the socket (2) of the Robo 40.
Pressing the emergency stop button
Only press the emergency stop button in emergencies or to transport the unit when it is "on".
After completion of cleaning, switch off the unit only with the on/off button.
If this is not observed, damage may occur to the roller brushes because they are not raised from the floor.
Page 10

- Eliminating Malfunctions -
Malfunction Cause Remedy
No suction power, the water
stays where it is
Tank lid not closed Close tank lid
Dirty water drain hose not sealed Close seal
Suction bar makes stripes Suction lips worn Renew suction lips
Residual dirt under suction lip Clean suction lip and suction bar
No water on the brush Fresh water pump not in operation Call Cleanfix service hotline
Suction hose not in membrane bag Open lid and put suction hose in right
Water lines plugged Rinse lines (see "Care" chapter)
Fresh water hose kinked Check hose
Machine has no electrical
functions
Suction bar plugged with residual dirt or
suction bar not installed correctly
Battery connecting cable loose Tighten battery connections
Clean suction bar and check installation
position
Battery empty Charge battery
Emergency stop button pressed Reset switch
Key switch not in "on" position Turn key switch to the right
Faulty fuse Install new fuse
(only service personnel)
Leave any other repairs and service work up to a Cleanfix technician.
- NOTES -
Page 11

1200
- TECHNICAL SPECIFICATIONS -
Technical specifications
Scrubber dryer robot Robo 40
Performance data
Power rating (max.) W 400
Suction power W 100 - 200
Brush pressure Kg 17
Cleaning speed m/sec 0.4
Battery charging time H 4
Run time = (battery and water) H approx. 6
Main processor MB RAM 64
Batteries 2x 24V/58Ah
Coverage per charge
Varies depending on the cleaning program
m
2
approx.
Collision avoidance Infrared sensors
Dimensions and weight
Working width of brushes (2 brushes) mm 400
Working width of suction foot mm 500
Fresh water tank Liters 28
Dirty water tank Liters 31
Total weight incl. batteries
not filled with water
kg 105
Page 12

Cleanfix Reinigungssysteme AG
Stettenstrasse
CH-9247 Henau-Uzwil
Tel. 071 955 47 47
Fax 071 955 47 60
www.cleanfix.com
info@cleanfix.com
 Loading...