

Clean City RCPGG6 Assembly Instructions Manual
14.87”
13.25”
13.25”
ASSEMBLY INSTRUCTIONS
RCPG6 Recycled Plastic Picnic Table
TOOLS NEEDED:
Ratchet with 9/16” Socket and 3/8” Socket•
Tape•
Level•
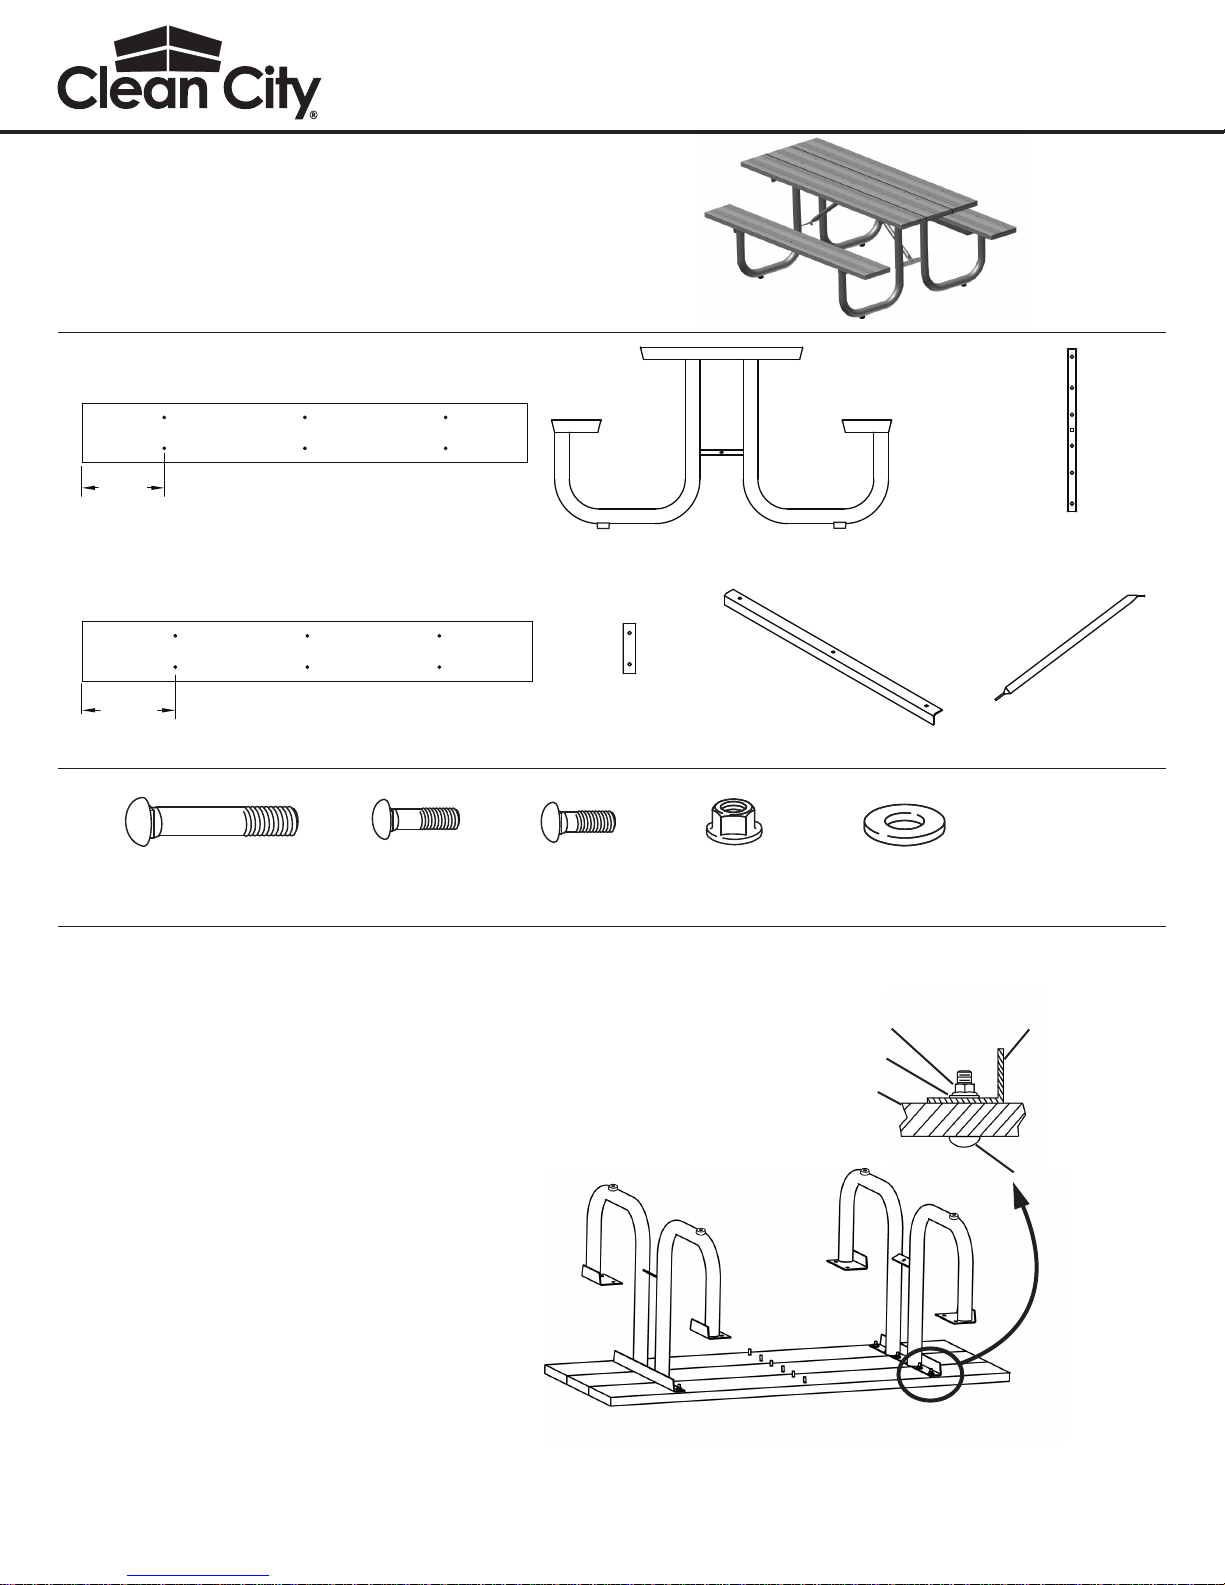
TABLE COMPONENTS:
800-231-1327
www.landscapebrands.com
sales@landscapebrands.com
Landscape Brands
211 North Lindbergh Blvd.
St Louis, MO 63141-7809
Phone: 314-535-5005
Fax: 314-754-0835
3 x Tabletop Plank
2 x Seat Plank
ASSEMBLY HARDWARE:
30 x
3/8” X 2.5”
Carriage Bolt
ASSEMBLY:
The assembly is a two-person operation.
1. Inspect the shipping container contents for damage and to determine that all components and hardware are present.
2. Assemble the Table over the shipping packaging or padded work area to avoid
scratching the product.
Note: Before assembling the Nuts to the Bolts, it is recommended that a light oil or
petroleum jelly be applied to the screw threads
3. Lay the three Tabletop Planks out on the work
area. The Tabletop Planks can be distinguished
from the Seat Planks because the predrilled holes
on either end of the Tabletop Planks are about
1.5” closer to the end of the Plank.
Push a 2.5” long Carriage Bolt through each of the
holes in each of the Tabletop Planks.
Note: It may be helpful to Tape the Bolt heads in place
so the Planks can be adjusted without dislodging
the Bolts.
4. Place one of the Table Under Supports over one of
the lines of Carriage Bolts. Make sure the vertical
ange on the mounting bar of the Under Support
faces outward toward the nearest end of the
table. Place a Flat Washer and Flanged Nut on the
end of each Carriage Bolt and tighten. Repeat for the other Under Support. Be sure to check the alignment of the vertical ange
on the mounting bar before tightening the Flanged Nuts.
ASI_RCPG6-B
4/2011
1 x
3/8-16 X 1.5”
Carriage Bolt
2 x Seat Stiffener
Support
2 x
3/8-16 X 1.0”
Carriage Bolt
2 x Table Under
Support
33 x
3/8-16
Flanged Hex Nut
1 x Center
Brace Mount
2 x Seat Stiffener 2 x Angle Brace
33 x
3/8” Flat Washer
Flanged Nut
Washer
Tabletop
Plank
Vertical ange
oriented out
toward nearest
end of the Table
Carriage Bolt
1 of 4
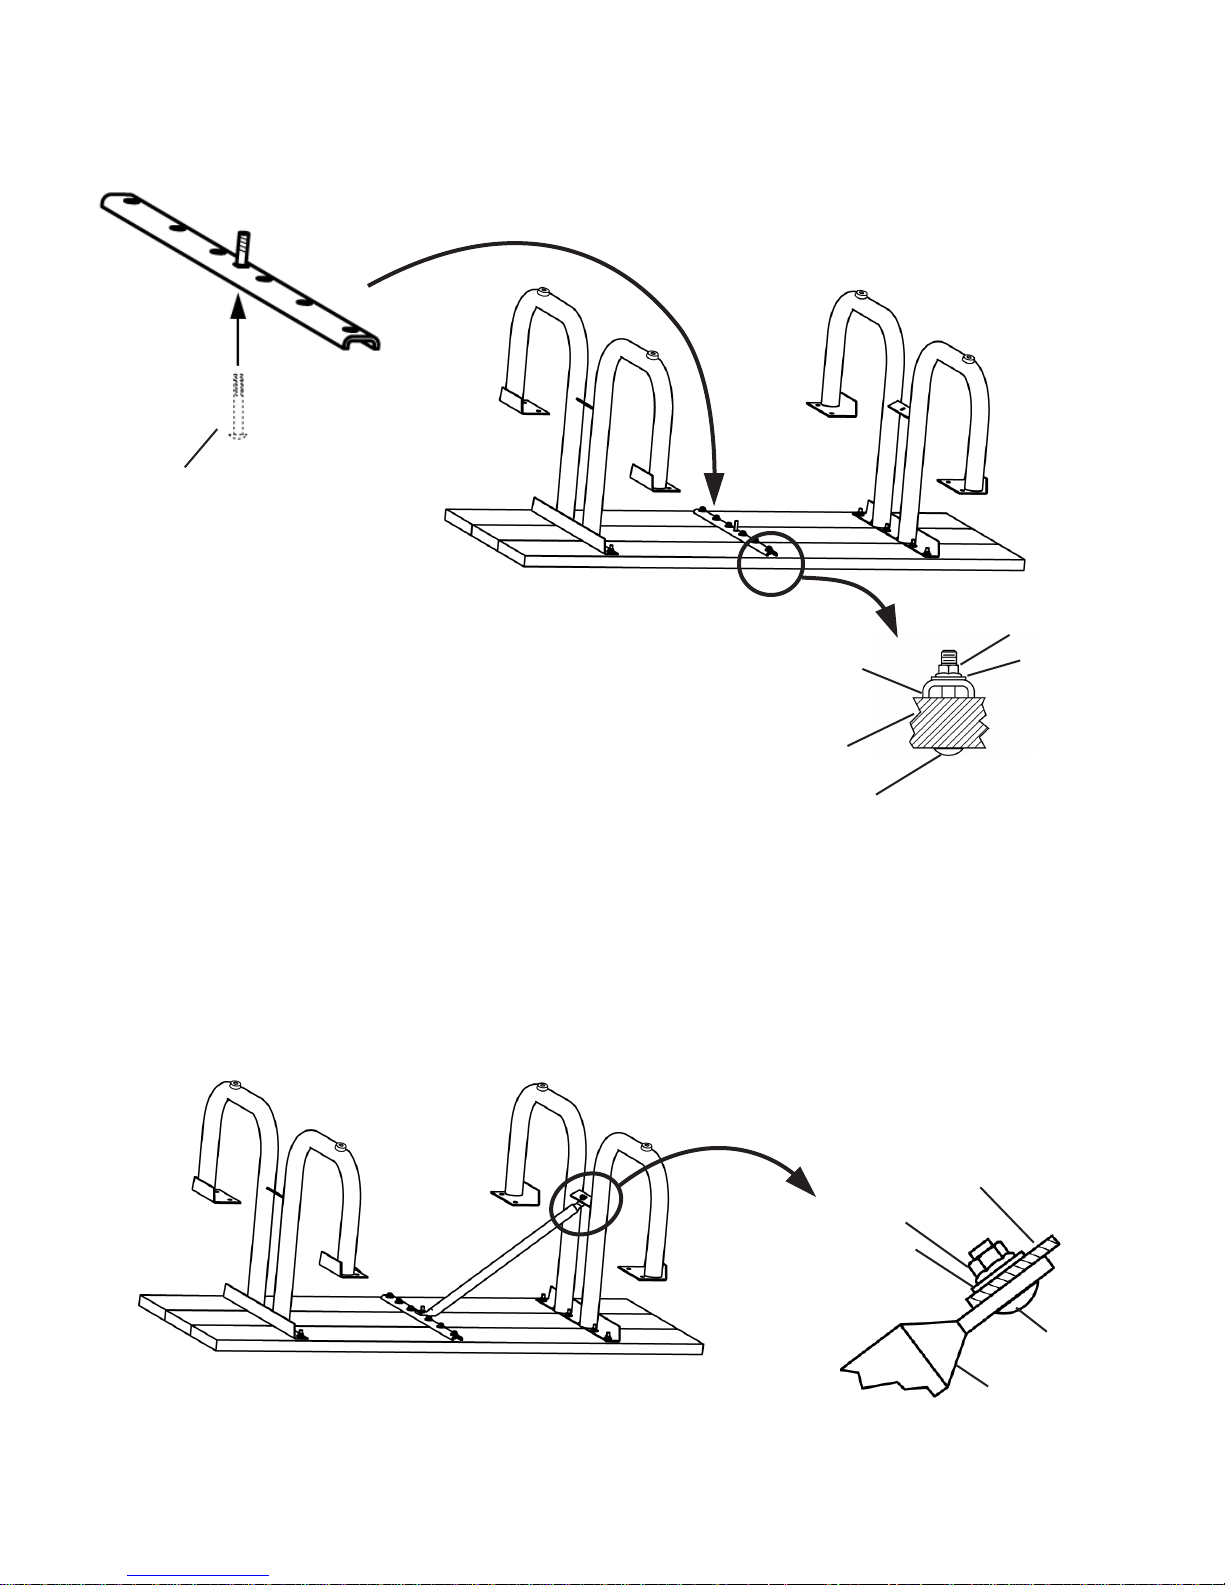
5. Place the 1.5” Carriage Bolt through the hole in the center of the Center Brace Mount and hold (or tape) it in place and position
the Center Brace Mount over the line of Bolts across the center of the Tabletop. Add a Washer and Flanged Nut to each of the
Carriage Bolts, except the center one, and tighten them using the Ratchet and 9/16” Socket.
1.5” long
Carriage Bolt
Center
Brace Mount
Tabletop Plank
2.5” Long
Carriage Bolt
6. Place the mounting hole of one of the Angle Braces over the Carriage Bolt in the middle of the Center Brace Mount. Align the
hole on the other end of the Brace with the hole in the Mounting Plate on the Under Support. Place a Carriage Bolt through the
Mounting Plate and Angle Brace and then add a Flat Washer and Flanged Nut to the end of the Carriage Bolt. Leave the hardware
nger tight so the Tabletop can be adjusted and leveled later.
Mounting Plate on
the Under Support
Flanged Nut
Flat Washer
Flanged Nut
Flat Washer
Carriage Bolt
Angle Brace
2 of 4
 Loading...