

motorized respiratory systems
CleanAIR® CA-40 Safety Helmet
CA-40 | CA-40G | CA-40GW
ENG 3
CZE 9
NL 15
FIN 21
FRA 27
DE 33
ITA 39
NOR 45
POL 51
RUS 57
SPA 63
SWE 69
USER MANUAL
NA-045-R00
Introduction
Protective helmets CA-40, CA-40G a CA-40GW
they are designed exclusively for use with powered air purifying respirators (hereinafter PAPR) CleanAIR®
or with continuous flow compressed air line breathing apparatuses (hereinafter “compressed air systems
CleanAIR®”) and thus provide protection of the respiratory tract.
CleanAIR® is a system of personal respiratory protection based on the principle of overpressure of filtered air
in the breathing zone.
The respirator is placed on the wearer’s belt and filtrates the air which is taken in from the surrounding
environment and then delivers it through a breathing tube into a protective mask or hood. The overpressure
prevents contaminants from entering the breathing zone. This mild overpressure at the same time ensures
the wearer’s comfort, even with long-term use, as the wearer does not have to struggle in their breathing to
overcome the resistance of the filter.
The most appropriate combination of the the head part with PAPR is defined according to the type and concentration of pollutants in the working environment and according to the work performed. The whole series
of CA-401 enables to select suitable protection for most industrial applications where good protection of the
eyes, hearing, and head is also required in addition to the necessary protection of the respiratory tract.
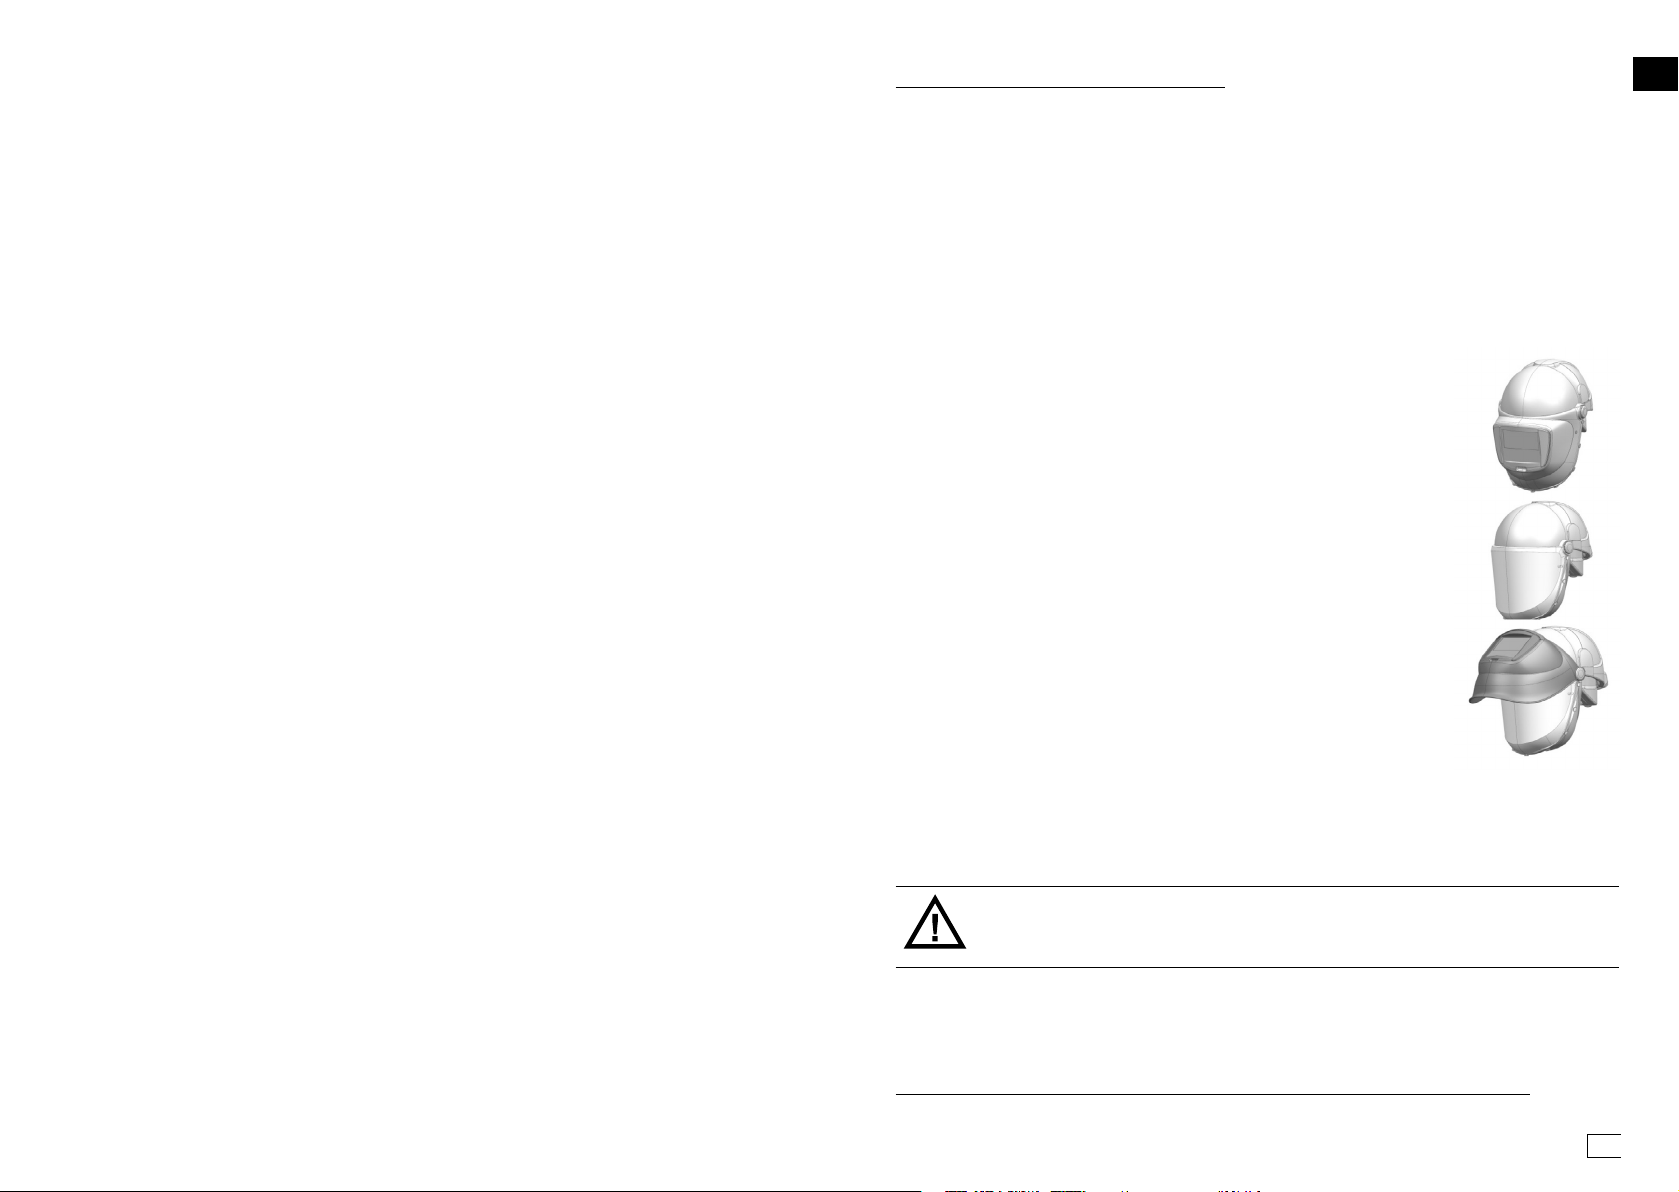
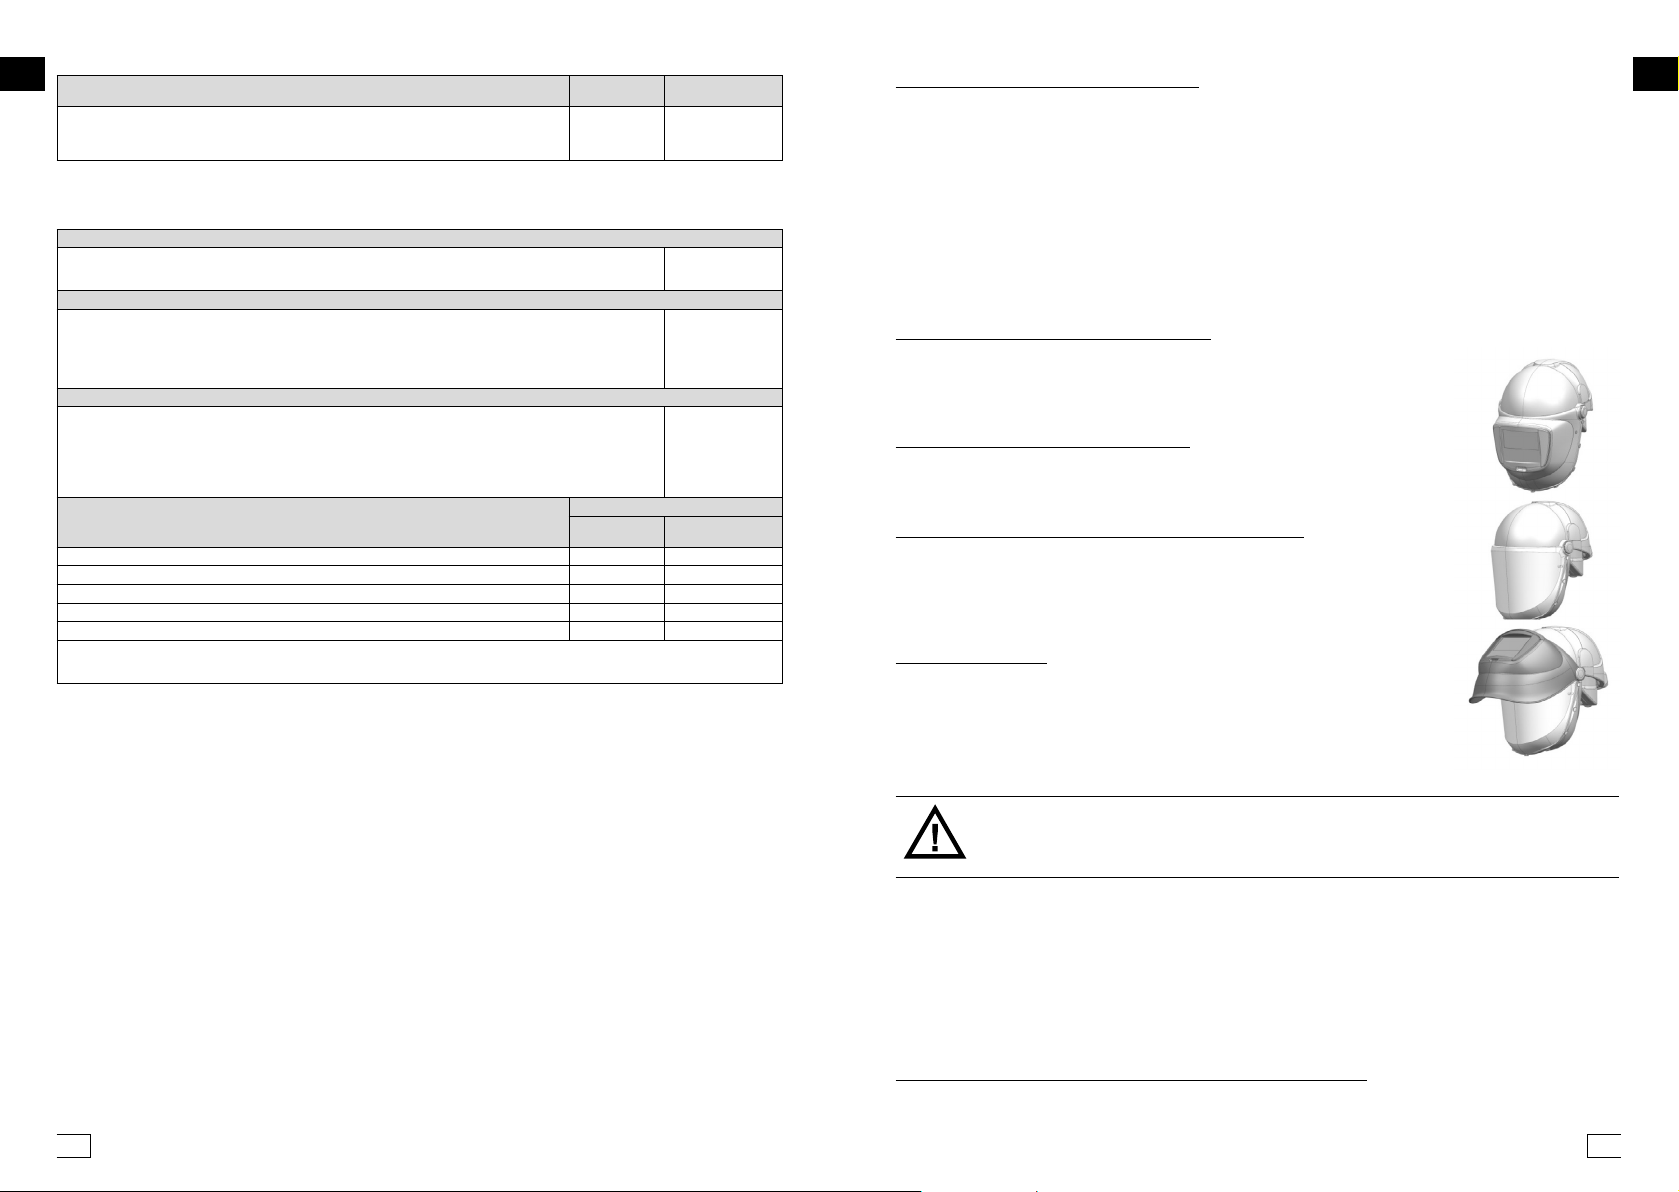
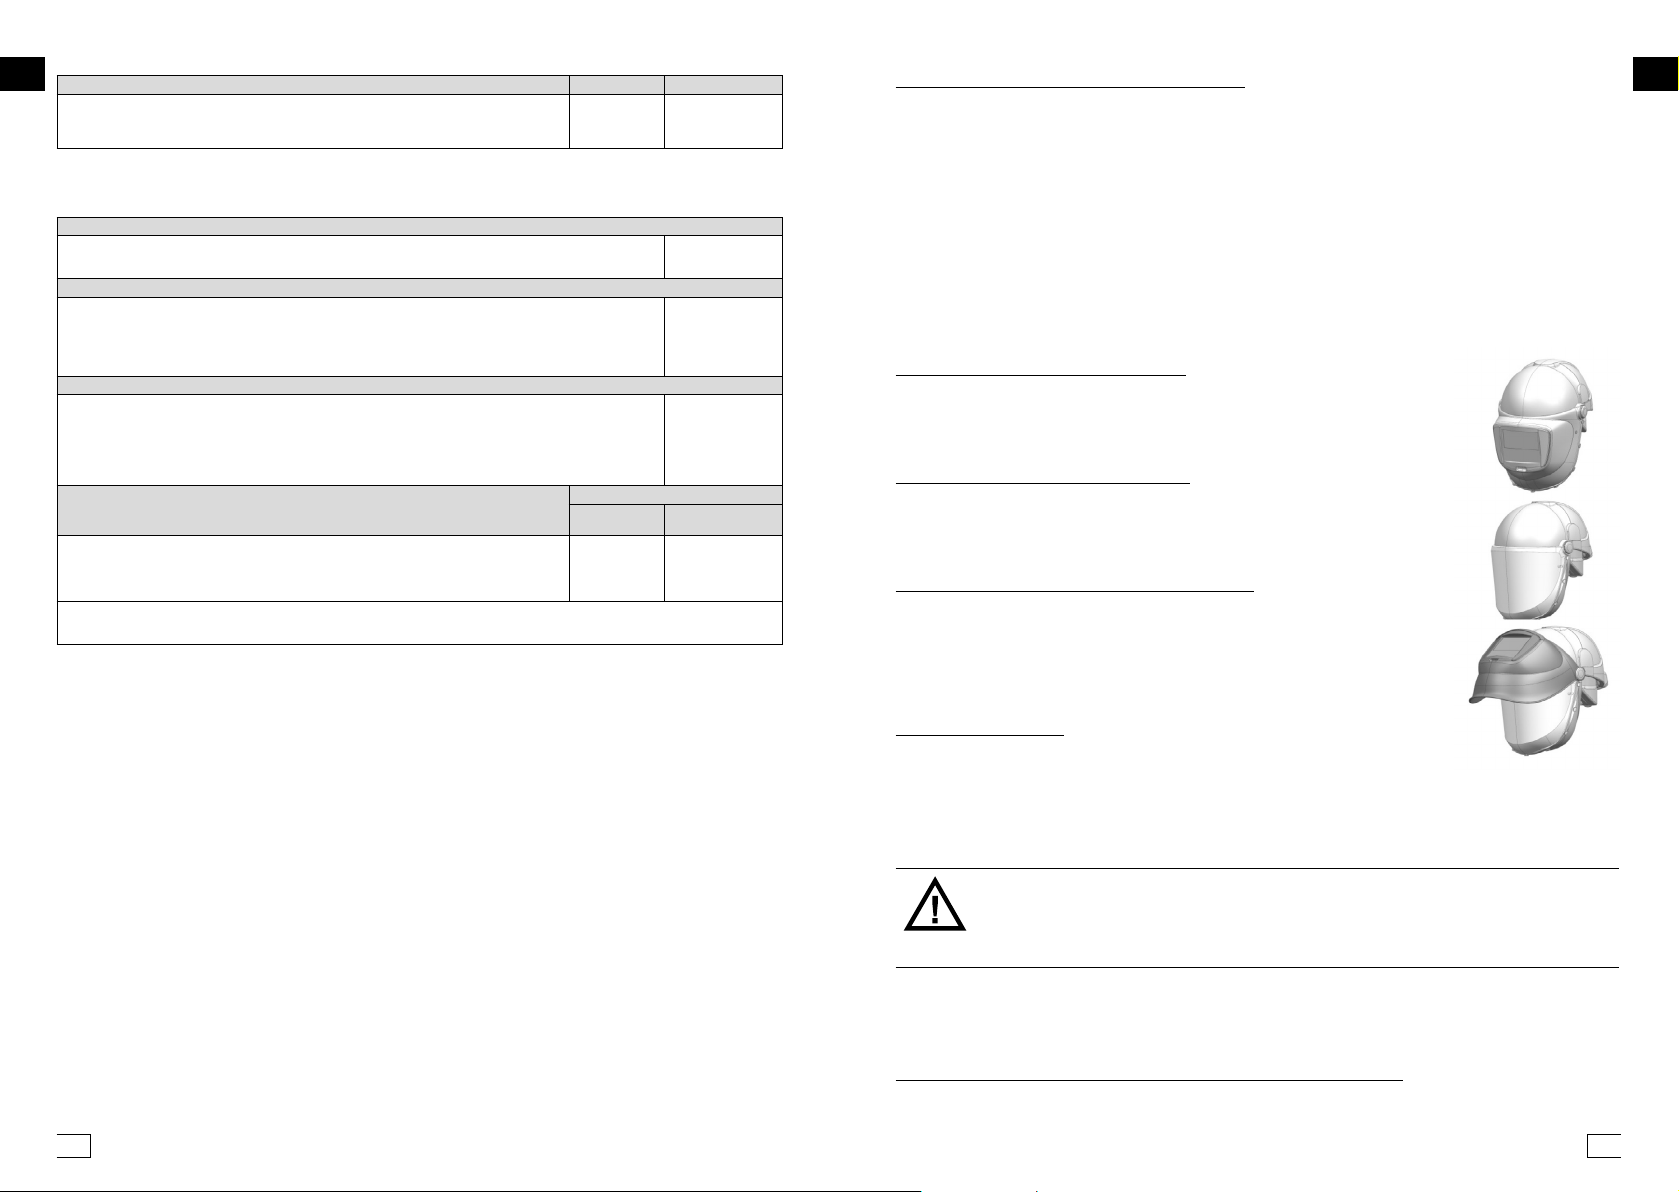
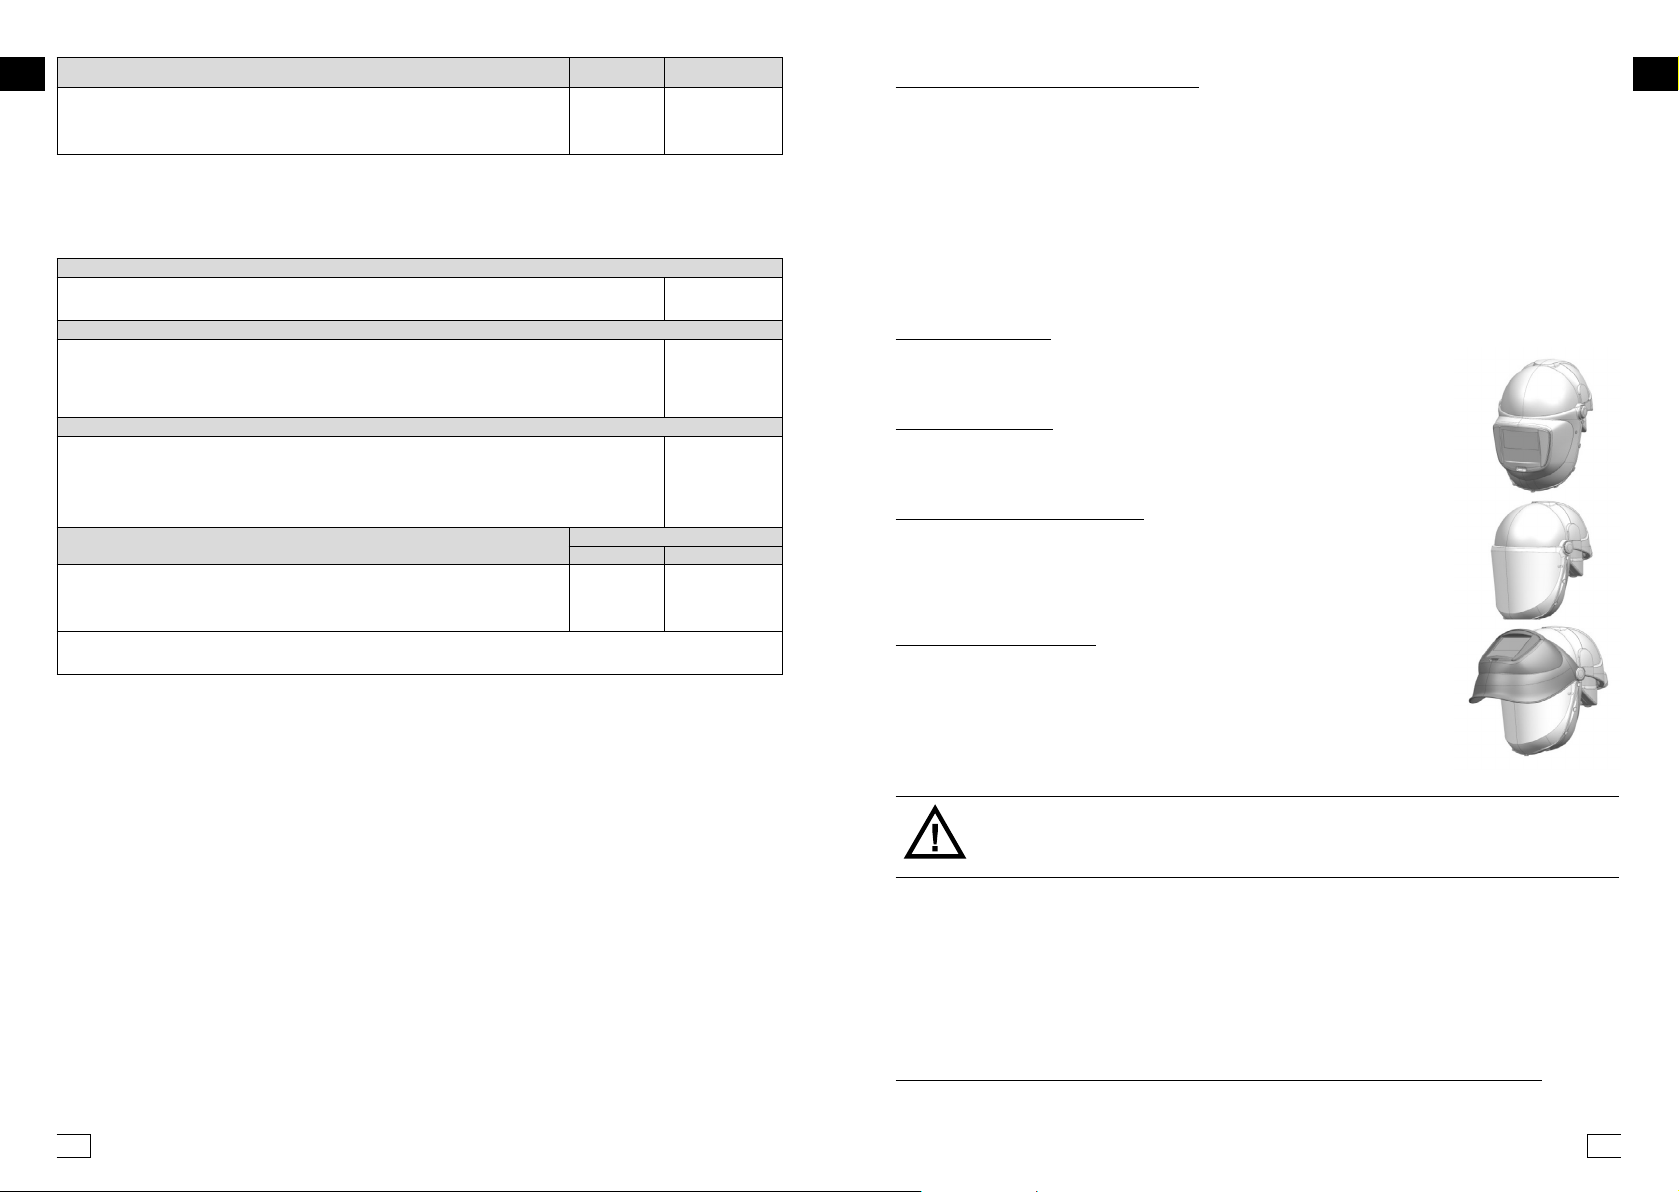
Safety helmet CA-40 with welding shield
(hereinafter CA-40) – in addition to efficient protection of the respiratory tract,
it also protects the head and eyes and face during welding. Welding shield with
auto-darkening filter2 V9-13 DS then provides protection against harmful ultraviolet / infrared radiation and welding spatters.
Safety helmet CA-40G with grinding shield
(hereinafter CA-40G) – in addition to efficient protection of the respiratory tract,
it protects also the head, eyes and face against high speed particles (indicated:
A) and at the same time provides basic protection against harmful ultraviolet
radiation.
Safety helmet CA-40GW with grinding and welding shield
(hereinafter CA-40GW) – in addition to efficient protection of the respiratory
tract, it protects also the head, eyes and face against high speed particles
(indicated: A) and at the same time provides basic protection against harmful
ultraviolet radiation. Welding shield with auto-darkening filter2 V9-13 DS then
provides protection against harmful ultraviolet / infrared radiation and welding
spatters.
EN
Approval, certification
Safety helmet CA-401 is tested and approved in compliance with requirements of the European standard EN
12941/A2 for the use with powered air purifying respirators CleanAIR®, and EN 14594:2005 for the use with
continuous flow compressed air line breathing apparatuses. All parts of the system used must be approved
by the manufacturer and used in compliance with instructions stated herein.
WARNING AND BASIC INSTRUCTIONS FOR USE
Before using the system, the user must become duly familiar with possible risks in the
workplace, and be duly informed of the safe use of the personal protective equipment. In
case of any ambiguities, please contact the manufacturer or your local distributor.
1 including derived variants (CA-40, CA-40G, CA-40GW)
2 welding filters from tampered mineral glass might be used in connection with suitable internal protective plates!
3

EN EN
• Safety helmet CA-401 must be used exclusively with PAPR CleanAIR® or with compressed air systems
CleanAIR®. Therefore read this manual in conjunction with the user manual of PAPR CleanAIR® or user
manual of the compressed air system CleanAIR
®
• Do not use in confined space, in the environment with lack of oxygen (<17%)3, in the oxygen-enriched
environment (>23%), or in case of immediate danger to life or health.
• Do not use in environments where the user does not know the type of contamination or its concentration.
• Do not use when the powered air purifying respirator is turned off or when the compressed air inlet is
Faceseal replacement
Faceseal removal:
• Pull out the rear faceseal section from the adjusting screw.
• Remove the headband from the helmet by unlocking it from the anchoring holes of headband holders
• Carefully pull out the faceseal from individual pins arranged on the perimeter of the helmet shield.
• Remove progressively the plastic edge of the mask from anchoring holes of headband holders located on
the inside perimeter of the helmet.
closed! In this case the respiratory system, incorporating a hood, gives little or no respiratory protection.
Also there is a risk of a high concentration of carbon dioxide (CO2) building up and of oxygen deficiency
occurring inside the headpiece.
• If the PAPR or the compressed air system cease to operate for any reason whatsoever, the user must leave
the contaminated workplace without delay.
• During strenuous work, if the user’s breathing becomes too intensive, the positive pressure inside the hood
may decrease and result in a decrease in the protection factor.
• The protective headpiece must fit tightly to the face to assure the proper level of protection for the user.
If a beard or long hair gets into the sealing line, penetration will increase and the protection provided by the
system will decrease.
Putting the faceseal on:
• Attach the plastic edge of the mask by clipping it on the anchoring holes of headband holders located on
the inside perimeter of the helmet.
(suggested setup – in the front section (at the shield), the hole in the lower line closest to the shield. In the
rear section (at the hose connector), central hole in the lower line.)
• Fit carefully faceseal holes on individual pins arranged on the helmet shield.
• Insert the headband to the helmet by clipping on anchoring holes of the headband.
(suggested setup – central hole at the very top in all holders of the headband)
• Put the rear section of the faceseal on the adjusting screw.
• Do not use, if any part of the system is damaged. The headpiece and the air hose must be checked prior
to each use. Possible cracks or leaks may influence negatively the required level of user protection.
For hygienic reasons, discard the old mask immediately after its replacement to avoid its reuse!
• Scratched or otherwise damaged visors must be replaced immediately.
• Do not remove the helmet from your head or do not turn off the PAPR or the compressed air system
CleanAIR® until you leave the contaminated workplace.
• Use certified original filters designed for your powered air purifying respirator only. Replace filters every
time you detect change of odour in supplied air from the respirator.
• Filters designed for capturing solid and liquid particles (particle filters) do not protect the user against any
gases. Filters designed for capturing gases do not protect the user against any particles. In the workplace
contaminated with both types of pollution, combined filters must be used.
Replacement of protective plates for CA-404
We suggest using protective plates to protect the auto-darkening filter and the visor of the grinding shield.
Timely replacement of protective plates extends the service life of the auto-darkening filter, visor, and ensures
continuous good view.
Protective polycarbonate plate is supplied to protect the auto-darkening filter. The plate is applied from both
sides (outside and inside) of the auto-darkening filter and prevents from the deposition of welding spatter on
the auto-darkening filter.
Check before use, putting on.
1) Before use of the new product, always check that the device is complete and no damage occurred during
transport. If not used, the helmet should be stored in its packing which will protect it against direct
sunlight, chemicals, and abrasive substances, and in which it cannot be damaged by contact with hard
objects/surfaces.
Replacement of external protective plate:
a) Remove the protective plate by pulling its lower part in the area of welding shield indent.
b) Before placing the new protection plates, always remove the thin protection layers from both sides.
c) The protective plate is applied again by inserting it into side grooves in the area in front of the auto-
darkening filter.
2) To ensure required protective features of the helmet, tighten duly the faceseal to your face to copy the face
as tight as possible. Correctly applied head part in combination with the air flow supplied form
overpressure in the face area that prevents from intrusion of harmful substances into the respiratory zone
of the user. Should this helmet provide adequate head protection against falling objects (under EN
Replacement of inside protective plate:
The protective plate can be slides out from fixation grooves, but after the auto-darkening filter is removed
only. To remove the auto-darkening filter unscrew the locking screws inside the welding shield and pull it out.
397+A1), its size must be adapted to the size of the user‘s head (54-65 cm). Therefore ensure that the
helmet fits comfortably but firmly on the head. To set the optimum size of the headband, please use the
adjusting wheel on the scruff.
3) In all head parts, we suggest using a protective hood TYVEK (order no. 70 02 01) for hygienic reasons.
Caution!
Do not clean protective plates dry, it may easily cause their scratching and reduced transparency. Pro-
tective plates are also capable to concentrate the electrostatic charge, therefore the view may be wor-
sened in dusty environment!
Use:
The helmet is manufactured so that it absorbs the impact energy by partial destruction or damage to the
shell and head insert. Even in case when such damage is not immediately apparent, each helmet exposed to
serious impact should be replaced.
Replacement of welding filter:
a) Unscrew locking screws of the welding filter inside the welding shield.
b) Remove the welding filter.
c) Insert the new welding filter and secure it in its original position by screws.
Unless suggested by helmet manufacturer, it is prohibited to make any modifications,
or remove any original parts of the helmet. Helmets should not be modified to fix any
accessories to them in the manner that is not suggested by their manufacturer.
The hood may be used with approved welding filters of 90x110 mm only!
Replacement of welding and grinding shield:
a) Remove screws on sides of the safety helmet.
Do not apply glues, paints, solvents, or do not place any stickers, unless it corresponds with instructions
of the helmet manufacturer.
b) Tilt the shield for easier removal.
c) Pull the shield(s) out of the anchoring pin on one side and then on the other side of the helmet.
d) Apply the new shield(s) in reverse order.
3 concentrations stated may vary in different countries; please monitor local regulations!
1 including derived variants (CA-40, CA-40G, CA-40GW)
4 including derived variants (CA-40, CA-40GW)
4 5
EN EN
Caution:
Scratched or otherwise damaged visors should be replaced in time.
Control and maintenance:
Safety helmet CA-405 is a complete system consisting of the safety cap, grinding/welding shield or their
combination, and the headband. Lifetime of the helmet is influenced by many factors such as: cold, heat,
CA-40
CA-40G
CA-40GW
chemicals, sunlight or incorrect use. The helmet should be checked on a daily basis of possible breakage,
fragility or damage of its inside structure.
CA-401 +
Eye protection
( EN 166 )
CA Basic
2000 FC
CA Basic
2000 DF
Eye protection during
welding ( EN 175 )
CA Chemical 2FCA Chemical 3FCA
AerGO
Head protection
( EN 397 )
CA
CA Flow
Pressure
Master
Protection class TH2 TH1 TH2 TH2 TH2 2A 2B
If any damage is found, the helmet must be replaced with a new one!
After five years of use, it is always necessary to replace the helmet!
Occupational Safety Research Institute, v.v.i. - ZL
Notified person for CE testing:
Testing laboratory no. 1024
Jeruzalémská 9, 116 52 Praha 1
Authorised person 235
Notified person 1024
Notified person for CE testing
(welding shield for combination with grinding
shield, and grinding shield):
Institut pro testování a certifikaci, a.s.
Třída Tomáše Bati 299, 764 21 Zlín
Authorised person 224
Notified person 1023
Selection and area of use: Each item for the protection of eyes and the face is indicated in compliance
with the below table for identification of its area of use and effectiveness according to requirements of EN
166:2001
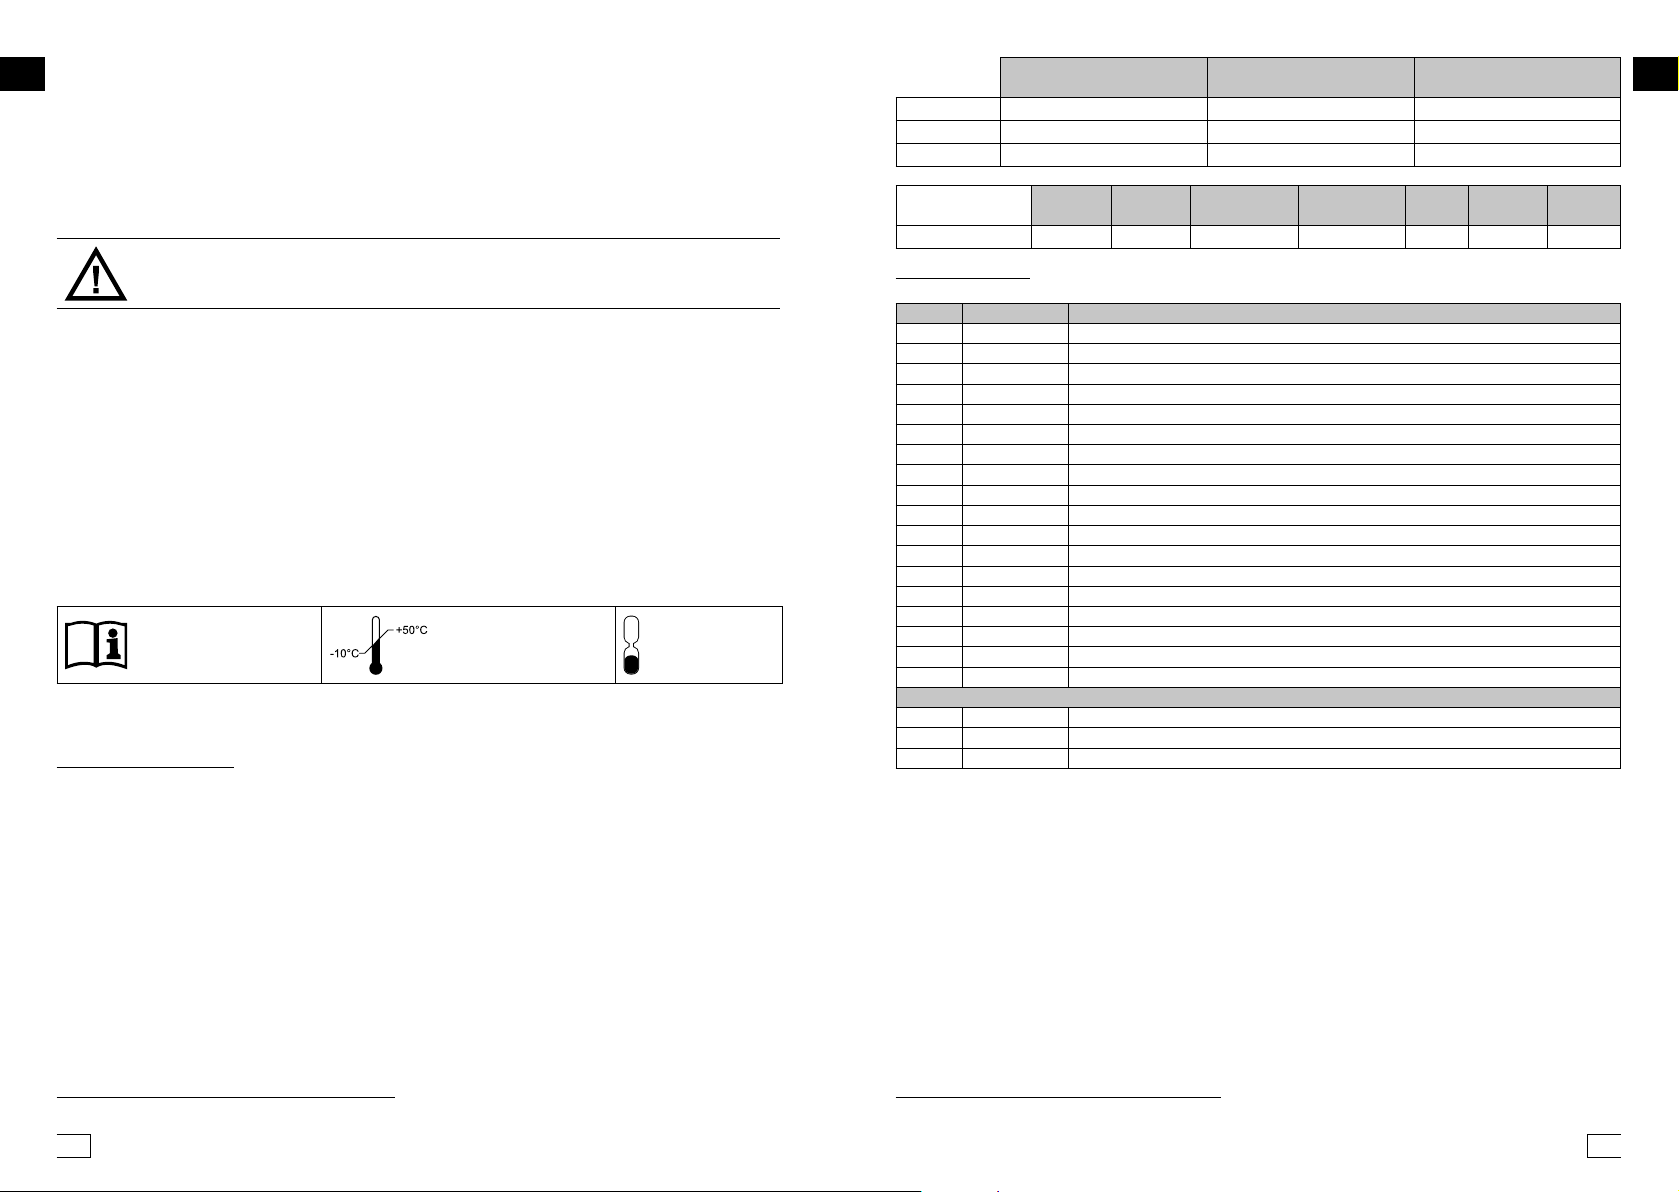
Storage
Storage conditions are indicated on the packing with following symbols:
All CleanAIR
see information supplied
by the manufacturer
®
system components must be stored in premises with air temperature within
storage temperature
range
end of the shelf
life
-10 to 50°C and relative humidity within 20 – 80 % . Max. storage period in undisturbed packing is 2 years.
Cleaning and disinfection
List of spare parts:
(illustrated supplement: 1A)
Position Code indication Description
1 40 50 40 Auto-darkening filter V913 DS ADC
2 70 42 02 Welding shield (for version CA-40GW)
2 70 40 02 CA-40 spare welding shield
3 70 41 01 Spare grinding shield
4 70 40 60 CA-40 face mask (for al types of CA-40)
5 70 40 44 Sweatband CA-40 (for all types of CA-40)
7 70 40 43 Fixing screws 2 pcs (for all types of CA-40)
8 70 40 40 Earmuffs, no. 8 (for all types of CA-40)
8 70 40 41 Earmuffs, no. 10 (for all types of CA-40)
8 70 40 42 Earmuffs, no. 12 (for all types of CA-40)
- COS015 Airduct sealing 37x25x6
- 70 40 80 Outer cover plate polycarb. (10 pcs) for CA-40, CA-40GW
- 70 24 81 Inner cover plate, 107x51 polycarb. (10 pcs) for CA-40, CA-40GW
- 110/90-09 Passive welding filter, shade 9
- 110/90-10 Passive welding filter, shade 10
- 110/90-11 Passive welding filter, shade 11
- 110/90-12 Passive welding filter, shade 12
- 110/90-13 Passive welding filter, shade 13
Complete protective helmets CA-40
- 70 41 00 Safety helmet CA-40G with grinding shield
- 70 42 01 Safety helmet CA-40GW with welding and grinding shield (incl. auto-darkening filter)
- 70 40 01 Safety helmet CA-40 with welding shield (incl. auto-darkening filter)
• After each work, clean the head section, check individual parts, and replace damaged parts.
• Cleaning must be performed in a room with good ventilation. Avoid inhalation of harmful dust deposited
on individual parts!
• For cleaning, use warm water (up to +40°C) with soap or other non-abrasive detergent, and a soft brush.
• It is prohibited to use cleaning agents with solvents.
• After cleaning individual parts with a damp cloth, it is necessary to rub them dry, or let them dry at room
temperature.
• To disinfect parts, which are in contact with the skin, regular preparations may be used, e.g. Ajatin, Incidur,
etc.
• Auto-darkening welding filter may be cleaned with a fine, dry or slightly moistened cloth (in clear water,
soap solution or alcohol).
5 including derived variants (CA-40, CA-40G, CA-40GW) 1 including derived variants (CA-40, CA-40G, CA-40GW)
6 7
Marking importance
EN CZ
Mechanical strength (frame and in-
Increased strength
Low energy impact
Medium energy impact
High energy impact
If visors and its edges have no identical identification marks related to mechanical strength, the whole item for eye protection is classified as the lowest
quality product.
If the level of impact is followed by letter „T“, e.g. „FT“, the item provides protection against high-speed particles at extreme temperatures (-5°C / +55°C)
If the level o impact is NOT followed by letter „T“, the eye protection item must be used for protection against impact at the room temperature only
Optical class
Optical class 1
Optical class 2
Optical class 3 (unsuitable for long-term use)
Optional requirements
Resistance of inspection holes against damage caused by fine particles
Resistance against misting
Increased reflectance
Original inspection hole
Spare inspection hole
For the visors made of laminated glass, instructions for modification are on the rear side
Area of use (of the frame and inspection hole)
Dripping liquids (glasses only)
Splashing liquids (face shields only)
Coarse dust (glasses only)
Gas and fine dust (glasses only)
Electric arc (face shields only)
Melted metals and hot solid particles (glasses or face shields)
In addition to their indication „9“, inspection holes and trimming must be marked also with one of the symbols „F“, „B“ or „A“
Filter marking (inspection holes)
Welding filter - 1.2 to 16
Ultraviolet filters (may influence colour recognition) 2 1.2 to 5
Infrared filter 4 1.2 to 10
Sunlight filter (without infrared specification) 5 1.1 to 4.1
Sunlight filter (with infrared specification) 6 1.1 to 4.1
If filter identification is followed by letter „C“, e.g. „2C“,colour recognition is not impaired.
For further information please see EN 169, EN 170, EN 171, and EN 172 standards.
For welding, use inspection holes marked as welding shields only 1.2 to 16.
spection holes)
(12 m/sec)
(45 m/sec)
(120 m/sec)
(190 m/sec)
Filter
identification
Product marking
Product marking
S
F
B
A
2
3
K
N
R
O
3
3
4
5
8
9
Shade
1
Úvod
Ochranné přilby CA-40, CA-40G a CA-40GW
jsou navrženy výhradně pro použití s filtračně-ventilačními jednotkami (dále jen FVJ) CleanAIR® nebo s hadicovými dýchacími přístroji na tlakový vzduch se stálým průtokem (dále jen “systémy tlakového vzduchu
CleanAIR®”) a poskytují tak ochranu dýchacích cest.
CleanAIR® je systém osobní ochrany dýchacích cest, založený na principu přetlaku filtrovaného vzduchu v
dýchací zóně. FVJ umístěná na opasku uživatele filtruje vzduch nasávaný z okolního prostředí, který je pak
vzduchovou hadicí přiváděn do ochranné kukly. Vzniklý přetlak zabraňuje vniknutí škodlivin do dýchací zóny
a zároveň zajišťuje vysoký uživatelský komfort i při dlouhodobém nošení bez nutnosti překonávat dýchací
odpor filtru. Poskytuje ochranu proti pevným částicím ve formě kapalných i pevných aerosolů, plynům a parám v závislosti na zvoleném typu filtru. Nejvhodnější kombinace hlavového dílu s FVJ se určuje podle druhu
a koncentrace škodlivin v pracovním prostředí a podle prováděné práce. Celá řada CA-40 umožňuje zvolit
vhodnou ochranu pro většinu průmyslových aplikací, kde je krom nutnosti ochrany dýchacích cest potřebná
i řádná ochrana zraku, sluchu a hlavy.
Ochranná přilba CA-40 se svářečským štítem
(dále jen CA-40) – poskytuje mimo účinné ochrany dýchacích cest také ochranu
hlavy a zraku a obličeje při svařování. Svářečský štít se samostmívacím filtrem2
V9-13 DS pak poskytuje ochranu proti škodlivému ultrafialovému / infračervenému záření a svařovacímu rozstřiku.
Ochranná přilba CA-40G s brusným štítem
(dále jen CA-40G) – poskytuje mimo účinné ochrany dýchacích cest také ochranu hlavy, zraku a obličeje proti rychle letícím částicím (značení: A) a zároveň
poskytuje základní ochranu proti škodlivému ultrafialovému záření.
Ochranná přilba CA-40GW s brusným a svářečským štítem
(dále jen CA-40GW) – poskytuje mimo účinné ochrany dýchacích cest také
ochranu hlavy, zraku a obličeje proti rychle letícím částicím (značení: A) a zároveň poskytuje základní ochranu proti škodlivému ultrafialovému záření. Svářečský štít se samostmívacím filtrem2 V9-13 DS pak poskytuje ochranu proti
škodlivému ultrafialovému / infračervenému záření a svařovacímu rozstřiku.
Schválení, certifikace
Ochranná přilba CA-401 je testována a schválena v souladu s požadavky evropské normy EN 12941/A2 pro použití s filtračně-ventilačními jednotkami CleanAIR®
a EN 14594:2005 pro použití s hadicovými dýchacími přístroji na tlakový vzduch
se stálým průtokem. Všechny části používaného systému musí být schváleny
výrobcem a používány v souladu s pokyny uvedenými v této příručce.
VAROVÁNÍ A ZÁKLADNÍ POKYNY PRO POUŽITÍ
Před použitím systému musí být uživatel řádně seznámen s možnými riziky na pracovišti
a být řádně poučen o bezpečném používání osobního ochranného prostředku. V případě
jakýchkoliv nejasností kontaktujte výrobce nebo svého distributora.
1 včetně odvozených variant (CA-40, CA-40G, CA-40GW)
2 svářečské filtry z tvrzeného minerálního skla mohou být používány pouze ve
spojení s vhodnými vnitřními ochrannými fóliemi!
8 9

• Ochranná přilba CA-401 musí být používána výhradně s FVJ CleanAIR® nebo se systémy tlakového
CZ CZ
vzduchu CleanAIR®. Prostudujte proto tento návod společně s návodem k použití FVJ CleanAIR® nebo
s návodem k použití systému tlakového vzduchu CleanAIR
®
• Nepoužívejte v uzavřených prostorách, v prostředí s nedostatkem kyslíku (<17%)3, v kyslíkem obohace ném prostředí (>23%) nebo kde hrozí okamžité ohrožení života nebo zdraví.
• Nepoužívejte v prostředí, kde uživateli není znám druh kontaminace ani její koncentrace.
• Nepoužívejte, pokud je filtračně-ventilační jednotka vypnuta nebo je uzavřen přívod tlakového vzduchu!
Výměna roušky
Sundání roušky:
• Vyvlékněte zadní část roušky z nastavovacího šroubu.
• Vyjměte z přilby hlavový kříž vycvaknutím z kotvících otvorů držáků hlavového kříže
• Opatrně vyvlékněte roušku z jednotlivých pinů umístěných po obvodu štítu přilby.
• Plastový lem roušky postupně vyjměte z kotvících otvorů držáků hlavového kříže umístěných po vnitřním
obvodu přilby.
Při práci s vypnutou FVJ či uzavřeném přívodu tlakového vzduchu je ochrana dýchacích orgánů malá nebo
žádná. Rovněž může dojít uvnitř kukly ke zvýšení koncentrace oxidu uhličitého a snížení obsahu kyslíku.
• Pokud FVJ nebo systém tlakového vzduchu přestane během používání z jakéhokoliv důvodu pracovat,
uživatel musí neprodleně opustit kontaminované pracoviště.
• Při velmi namáhavé práci může dojít uvnitř kukly k vytvoření podtlaku při nadechování a tím snížení
ochranného faktoru.
• Hlavová část musí být vždy správně utěsněna k obličeji, aby byla zaručena dokonalá úroveň ochrany
uživatele. V případě, že se do těsnicí linie dostanou vousy nebo dlouhé vlasy, může dojít vlivem netěsností
k poklesu poskytované ochrany.
Nasazení roušky:
• Plastový lem roušky připevněte nacvaknutím do kotvících otvorů držáků hlavového kříže umístěných po
vnitřním obvodu přilby (doporučené nastavení – v přední části (u štítu) otvor ve spodní řadě nejblíže ke
štítu. V zadní části (u konektoru připojení hadice) prostřední otvor ve spodní řadě.)
• Opatrně navlékněte otvory roušky na jednotlivé piny umístěné na štítu přilby.
• Nasaďte do přilby hlavový kříž nacvaknutím do kotvících otvorů držáků hlavového kříže.
(doporučené nastavení – prostřední otvor zcela nahoře ve všech držácích hlavového kříže.)
• Navlékněte zadní část roušky na nastavovací šroub.
• Nepoužívejte, pokud je jakákoliv část systému poškozena. Hlavová část a vzduchová hadice musí být
zkontrolována před každým použitím. Případné trhliny nebo netěsnosti mohou negativně ovlivnit požado vanou úroveň ochrany uživatele.
• Poškrábané nebo jinak poškozené zorníky je třeba neprodleně vyměnit.
• Nesundávejte přilbu z hlavy ani nevypínejte FVJ či systém tlakového vzduchu CleanAIR® dokud
neopustíte kontaminované pracoviště.
• Používejte pouze certifikované originální filtry určené pro Vaši filtračně-ventilační jednotku. Vyměňte filtry
pokaždé, ucítíte-li změnu pachu přiváděného vzduchu přicházejícího od jednotky.
• Filtry určené k zachycování pevných a kapalných částic (částicové) nechrání uživatele proti žádným
plynům. Filtry určené k zachycování plynů nechrání uživatele proti žádným částicím. Pro pracovní prostředí
kontaminované oběma druhy znečištění je nutno používat kombinované filtry.
Z hygienických důvodů znehodnoťte starou roušku ihned po výměně, aby nemohlo dojít k jejímu
opětovnému použití!
Výměna ochranných fólií u CA-40
4
Ochranné fólie doporučujeme používat pro ochranu samostmívacího filtru a zorníku brusného štítu. Včasná
výměna fólií prodlužuje životnost samostmívacího filtru, zorníků a zaručuje neustálý dobrý průhled.
Pro ochranu samostmívacího filtru se dodává ochranná polykarbonátová fólie. Fólie je nasazena z vnější i
vnitřní strany samostmívacího filtru a zabraňuje usazení kuliček rozstřiku na průzor.
Výměna vnější ochranné folie:
a) Fólii vyjměte zatažením za její spodní část v oblasti vybrání svářečského štítu.
Kontrola před použitím, nasazení.
1) Před použitím nového výrobku vždy zkontrolujte, zda je zařízení kompletní a při přepravě nedošlo
b) Před vlastní instalací ochranné fólie, odstraňte vždy z jejich obou stran tenkou krycí vrstvu. Opětovné
nasazení se provede vsunutím fólie do bočních drážek prostoru před samostmívacím filtrem.
k žádnému poškození. V případě nepoužívání by přilba měla být uložena v obalu, který ji ochrání před
přímým slunečním světlem, chemikáliemi a abrazivními látkami a ve kterém nemůže dojít k jejímu
poškození stykem s tvrdými předměty/povrchy.
2) Pro zajištění požadovaných ochranných vlastností přilby řádně dotáhněte těsnící roušku k obličeji tak, aby
Výměna vnitřní ochranné fólie:
Fólii lze vyjmout snadným vysunutím z fixačních drážek, ale pouze po vyjmutí samostmívacího filtru. Vyjmutí
samostmívacího filtru se provede povolením zajišťovacích šroubů na vnitřní straně svářečského štítu.
co nejtěsněji kopírovala obličej. Správně nasazený hlavový díl v kombinaci s proudem dodávaného
vzduchu vytváří mírný přetlak v obličejovém prostoru, který nedovoluje vniknutí škodlivin do dýchací zóny
uživatele. Aby tato přilba poskytovala odpovídající ochranu hlavy proti padajícím předmětům (dle
EN 397+A1), musí být její velikost přizpůsobena velikosti hlavy uživatele (54-65 cm). Zajistěte proto, aby
Upozornění!
Nečistěte fólie na sucho, jinak snadno dojde k jejich poškrábání a snížení průhlednosti. Fólie jsou též
schopné koncentrovat elektrostatický náboj a v prašném prostředí proto může dojít ke zhoršení průhledu!
přilba seděla na hlavě pohodlně, ale pevně. Pro nastavení optimální velikosti hlavového kříže použijte
nastavovací kolečko na zátylku.
3) Do všech hlavových dílů doporučujeme z hygienických důvodů používat ochrannou kuklu TYVEK
(obj. číslo 70 02 01).
Výměna svářečského filtru:
a) Odmontujte zajišťovací šrouby svářečského filtru z vnitřní strany svářečského štítu přilby.
b) Vyjměte svářečský filtr.
c) Vsuňte nový svářečský filtr a zajistěte jej v původní pozici utažením šroubů.
Použití:
Kuklu lze používat pouze se schválenými svářečskými filtry rozměru 90x110 mm!
Přilba je vyrobena tak, aby pohlcovala energii nárazu částečnou destrukcí nebo poškozením pláště a náhlavní
vložky. I v případě, kdy takové poškození není okamžitě zřejmé, by měla být každá přilba, která byla vystavena
vážnému nárazu vyměněna.
Výměna svářečského a brusného štítu:
a) Odmontujte šrouby na bočních stranách ochranné přilby.
b) Sklopte štít pro snadnější vyjmutí.
Pokud se nejedná o doporučení výrobce přilby, je zakázáno provádět jakékoliv vlastní
úpravy, nebo odstraňovat jakékoliv původní díly přilby. Přilby by neměly být upravovány
za účelem připevnění příslušenství žádným způsobem, který nedoporučuje výrobce.
c) Vyvlékněte štít/y nejprve na jedné a poté i na druhé straně přilby z kotvícího kolíku.
d) Nasaďte nový štít/y postupem v opačném sledu.
Upozornění:
Poškrábané nebo jinak poškozené zorníky by měly být včas vyměněny za nové.
Nenanášejte lepidla, barvy, rozpouštědla nebo neumisťujte samolepící štítky, pokud to neodpovídá pokynům výrobce přilby.
3 uvedené koncentrace se mohou v různých zemích lišit, sledujte místní nařízení!
1 včetně odvozených variant (CA-40, CA-40G, CA-40GW)
Kontrola a údržba:
4 včetně odvozených variant (CA-40, CA-40GW)
10 11
Ochranná přilba CA-405 je kompletní systém, který se skládá z vlastní přilby, brusného/svářečského štítu nebo
CZ CZ
jejich kombinace a hlavového kříže. Užitkovou životnost přilby ovlivňuje mnoho faktorů, jako jsou: chlad, teplo,
chemikálie, sluneční světlo nebo nesprávné užívání. Přilba by se měla denně kontrolovat, jestli nejeví známky
praskání, křehkosti nebo poškození vnitřní konstrukce.
CA-401 +
Třídu ochany TH2 TH1 TH2 TH2 TH2 2A 2B
CA Basic
2000 FC
CA Basic
2000 DF
CA Chemical 2FCA Chemical 3FCA
AerGO
CA
Pressure
CA Flow
Master
Seznam náhradních dílů:
Při zjištění jakéhokoliv poškození je třeba přilbu vyměnit za novou!
Po pěti letech používání je nutné přilbu vyměnit vždy!
Notifikovaná osoba pro testování CE: :
Výzkumný ústav bezpečnosti práce, v.v.i. - ZL
Zkušební laboratoř č. 1024
Jeruzalémská 9, 116 52 Praha 1
Autorizovaná osoba 235
Notifikovaná osoba 1024
Notifikovaná osoba pro testování CE (svářečský štít
pro kombinaci s brusným štítem a brusný štít):
Institut pro testování a certifikaci, a.s.
Třída Tomáše Bati 299, 764 21 Zlín
Autorizovaná osoba 224
Notifikovaná osoba 1023
Volba a oblast použití: Každý prostředek pro ochranu očí a tváře je označený v souladu s níže uvedenou
tabulkou pro identifikaci jeho oblasti použití a účinnosti podle požadavků EN 166:2001
Skladování
Podmínky skladování jsou na obalu značeny těmito symboly:
viz. informace dodané
výrobcem
Všechny součásti systémů CleanAIR
®
je nutné skladovat v prostorách s teplotou vzduchu v rozmezí
teplotní rozsah
skladování
Konec
skladovatelnosti
-10 až 50°C a relativní vzdušnou vlhkostí v rozmezí 20 – 80 % RH. Doba skladování v neporušeném obalu je
max. 2 roky.
Čištění a desinfekce
(obrazová příloha: 1A)
Pozice Kódové
1 40 50 40 Samostmívací filtr V913 DS ADC
2 70 42 02 Svářečský štít (pro verzi CA-40GW)
2 70 40 02 CA-40 náhradní svářečský štít
3 70 41 01 Náhradní brusný štít
4 70 40 60 CA-40 obličejová rouška (pro všechny typy CA-40)
5 70 40 44 Čelová potní páska CA-40 (pro všechny typy CA-40)
7 70 40 43 Upevňovací šrouby 2 ks (pro všechny typy CA-40)
8 70 40 40 Mušlové chrániče sluchu, no. 8 (pro všechny typy CA-40)
8 70 40 41 Mušlové chrániče sluchu, no. 10 (pro všechny typy CA-40)
8 70 40 42 Mušlové chrániče sluchu, no. 12 (pro všechny typy CA-40)
- COS015 Gumové těsnění konektoru vzduchového kanálu
- 70 40 80 Vnější krycí folie CA-40 (10ks) pro CA-40, CA-40GW
- 70 24 81 Vnitřní krycí folie, 107x51 polykarbonát (10ks) pro CA-40, CA-40GW
- 110/90-09 Pasivní svářečský filtr, stupeň tmavosti 9
- 110/90-10 Pasivní svářečský filtr, stupeň tmavosti 10
- 110/90-11 Pasivní svářečský filtr, stupeň tmavosti 11
- 110/90-12 Pasivní svářečský filtr, stupeň tmavosti 12
- 110/90-13 Pasivní svářečský filtr, stupeň tmavosti 13
Kompletní ochranné přilby CA-40
- 70 41 00 Ochranná přilba CA-40G s brusným štítem
- 70 42 01 Ochranná přilba CA-40GW se svářečským a brusným štítem (včetně samostmívacího filtru)
- 70 40 01 Ochranná přilba CA-40 se svářečským štítem (včetně samostmívacího filtru)
označení
Popis
• Po každém ukončení práce hlavový díl očistěte, zkontrolujte jednotlivé části a poškozené díly vyměňte.
• Čištění musí být prováděno v dobře větrané místnosti. Pozor na vdechnutí škodlivého prachu usazeného
na jednotlivých částech!
• K čištění používejte vlažnou vodu (do +40°C) s mýdlem nebo jiným neabrazivním mycím prostředkem
a měkký kartáč.
• Je zakázáno používat k čištění prostředky s rozpouštědly.
• Po vyčištění jednotlivých částí vlhkou látkou je nutné vytřít je do sucha, popř. nechat uschnout při pokojové
teplotě.
• Pro dezinfekci částí, které přicházejí do styku s pokožkou, je možné použít běžné přípravky, např. Ajatin,
Incidur apod.
• Samostmívací svářečský filtr se čistí pouze čistým, suchým nebo jen lehce navlhčeným hadříkem (v čisté
vodě, mýdlovém roztoku nebo alkoholu).
Ochrana očí
( EN 166 )
CA-40
CA-40G
CA-40GW
5 včetně odvozených variant (CA-40, CA-40G, CA-40GW)
Ochrana očí při svařování
( EN 175 )
Ochrana hlavy
( EN 397 )
1 včetně odvozených variant (CA-40, CA-40G, CA-40GW)
12 13
Význam značení
CZ NL
Mechanická pevnost rámu a zorníků Značení produktu
Zvýšená pevnost
Náraz o malé energii
Náraz o střední energii
Náraz o vysoké energii
Pokud zorníky a obruba nemají stejné identifikační značky týkající se mechanické pevnosti, klasifikuje se celý prostředek pro ochranu očí jako nejnižší kvality.
Pokud je stupeň nárazu následovaný písmenem „T“, např. „FT“, poskytuje prostředek ochranu proti vysokorychlostním částicím při extrémních teplotách
(-5°C / +55°C)
Pokud stupeň nárazu NENÍ následován písmenem „T“, musí se prostředek pro ochranu očí používat pro ochranu proti nárazu jen při pokojové teplotě.
Optická třída
Optická třída 1
Optická třída 2
Optická třída 3 (nevhodné pro dlouhodobé použití)
Volitelné požadavky
Odolnost zorníků proti poškození jemnými částicemi
Odolnost proti orosení
Zvýšená reflektance
Původní zorník
Náhradní zorník
U zorníku z laminovaného skla jsou pokyny pro úpravu vyznačeny na zadní straně
Oblast použití (rámečku a zorníku)
Kapající kapaliny (jen brýle)
Odstřikující kapaliny (jen obličejové štíty)
Hrubý prach (jen brýle)
Plyn a jemný prach (jen brýle)
Elektrický oblouk (jen obličejové štíty)
Roztavené kovy a horké pevné částice (brýle nebo obličejové štíty)
Zorníky i obruby musí být mimo označení „9“ být označeny i jedním ze symbolů „F“, „B“ nebo „A“
Označení filtrů (jen zorníky)
Svářecí filtr
Ultrafialové filtry (může ovlivnit rozpoznávání barev)
Infračervený filtr
Sluneční filtr (bez infračervené specifikace)
Sluneční filtr (s infračervenou specifikací)
Pokud po identifikaci filtru následuje písmeno „C“, např. „2C“,není zhoršeno rozpoznávání barev.
Pro další informace si, prosím, přečtěte normy EN 169, EN 170, EN 171 a EN 172.
Pro svářecí práce používejte pouze zorníky označené jako svářecí clony 1.2 až 16.
(12 m/sec)
(45 m/sec)
(120 m/sec)
(190 m/sec)
Identifikace
filtru
2
4
5
6
Značení produktu
S
F
B
A
1
2
3
K
N
R
O
3
3
4
5
8
9
Odstín
1.2 až 16
1.2 až 5
1.2 až 10
1.1 až 4.1
1.1 až 4.1
Inleiding
De veiligheidshelmen CA-40, CA-40G en CA-40GW
zijn exclusief ontworpen voor het gebruik met de ventilerende filtereenheden (verder enkel VFE) van CleanAIR®
of ademapparatuur voor perslucht met een voortdurende doorstroom (verder enkel systemen voor perslucht
van CleanAIR®) en geven zo bescherming voor de luchtwegen.
CleanAIR® is een systeem voor persoonlijke bescherming van de luchtwegen, gebaseerd op het principe van
overdruk van gefilterde lucht in de ademzone. De VFE aan de riem van de gebruiker filtert de aangezogen lucht
uit de omringende omgeving, die vervolgens door een luchtslang geleid wordt naar de beschermende helm.
De verkregen overdruk voorkomt het binnendringen van schadelijke deeltjes in de ademzone en garandeert
tegelijkertijd een groot gebruikerscomfort tijdens langdurig gebruik, zonder dat de weerstand van een filter
moet worden overwonnen. Het biedt bescherming tegen vaste deeltjes in de vorm van vloeibaar evenals
vast aerosol, gassen en dampen afhankelijk van het gekozen filtertype. De meest geschikte combinatie van
het hoofddeel met de VFE wordt bepaald volgens de soort en de concentratie van schadelijke stoffen in de
werkomgeving en afhankelijk van het uitgevoerde werk. De hele serie CA-40 biedt keuzemogelijkheden voor
geschikte bescherming tijdens de meeste industriële toepassingen, waarbij naast de noodzaak van bescherming voor de luchtwegen tevens bescherming vereist wordt van het zicht, het gehoor en het hoofd.
De veiligheidshelm CA-40 met lasmasker
(verder enkel CA-40) biedt tegelijk met de bescherming van de luchtwegen
tijdens laswerkzaamheden ook bescherming van het hoofd, de ogen en het
gezicht. Het lasschild met de zelf verdonkerende filter2 V9-13 DS biedt verder
bescherming tegen schadelijke ultraviolette / infrarode straling en lasvonken.
De veiligheidshelm CA-40G met slijpschild
(verder enkel CA-40G) biedt naast effectieve bescherming van de luchtwegen
ook bescherming van het hoofd, de ogen en het gezicht tegen snel vliegende
deeltjes (markering: A) en biedt tegelijkertijd basisbescherming tegen schadelijke ultraviolette straling.
De veiligheidshelm CA-40GW met slijp- en lasschild
(verder enkel CA-40GW) biedt naast effectieve bescherming van de luchtwegen
ook bescherming van het hoofd, de ogen en het gezicht tegen snel vliegende
deeltjes (markering: A) en biedt tegelijkertijd basisbescherming tegen schadelijke ultraviolette straling. Het lasschild met de zelf verdonkerende filter2 V9-13 DS
biedt verder bescherming tegen schadelijke ultraviolette / infrarode straling en
lasvonken.
Goedkeuring, certificaat
De veiligheidshelm CA-401 werd getest en goedgekeurd in overeenstemming
met de eisen van Europese norm EN 12941/A2 voor gebruik met de ventilerende
filtereenheden CleanAIR® en EN 14594:2005 voor gebruik met ademapparatuur voor perslucht met een voortdurende doorstroom. Alle delen van het gebruikte systeem moeten goedgekeurd zijn door de producent en
gebruikt worden in overeenstemming met de instructies uit deze handleiding.
WAARSCHUWING EN BASISINSTRUCTIES VOOR HET GEBRUIK
Voorafgaand aan het gebruik van het systeem moet de gebruiker naar behoren bekendgemaakt zijn met de mogelijke risico‘s op de werkplaats en naar behoren zijn geïnformeerd
over het veilige gebruik van het persoonlijke beschermingsmiddel. In geval van onduidelijkheid neemt u contact op met de producent of uw leverancier.
1 inclusief de afgeleide varianten (CA-40, CA-40G, CA-40GW)
2 Lasfilters met verhard mineraalglas kunnen alleen gebruikt worden in combinatie met
geschikte binnenfolies voor bescherming!
14 15
• De veiligheidshelm CA-401 mag uitsluitend gebruikt worden met de CleanAIR® VFE of met een CleanAIR®
NL NL
persluchtsysteem. Bestudeert u daarvoor deze handleiding tezamen met de gebruikershandleiding van de
CleanAIR® VFE of de handleiding van het CleanAIR® persluchtsysteem.
• Niet te gebruiken in gesloten ruimtes, in een omgeving met een tekort aan zuurstof (<17%)3, in een
Gebruik:
De helm is zo ontworpen, dat het de energie van een botsing absorbeert door gedeeltelijke destructie of beschadiging van de kap en de vulling. Ook in het geval, wanneer een dergelijke beschadiging niet onmiddellijk
duidelijk zou zijn, dient iedere helm, die blootgesteld werd aan een serieuze botsing, vervangen te worden.
omgeving verrijkt met zuurstof (>23%) of waar een onmiddellijk gevaar voor het leven of de gezondheid
dreigt.
• Niet te gebruiken in een omgeving, waar de gebruiker niet bekend is met het soort van contaminatie en de
concentratie ervan.
• Niet te gebruiken, wanneer de ventilerende filtereenheid uit staat of wanneer de toevoer van perslucht is
afgesloten! Tijdens werk met een uitgeschakelde VFE of afgesloten toevoer van perslucht is de bescher ming van de ademhalingsorganen klein of nihil. Tegelijkertijd kunnen er in de helm een verhoogde
concentratie van stikstof en een verlaagd zuurstofgehalte ontstaan.
• Indien de VFE of het systeem voor perslucht tijdens het gebruik om een of andere reden stopt te functio neren, moet de gebruiker onmiddellijk de gecontamineerde werkplek verlaten.
• Tijdens zeer intensief werk kan er in de helm een onderdruk ontstaan bij het inademen en daarmee wordt
de beschermingsfactor verlaagd.
• Het hoofdgedeelte moet altijd op juiste wijze dicht tegen het gezicht zitten, opdat de gebruiker een
absoluut beschermingsniveau wordt geboden. In het geval van obstructie in de afdichtingslijn door
bijvoorbeeld een baard of lange haren, kan door onvoldoende afdichting de beschermingsgraad afnemen.
• Niet te gebruiken bij beschadiging van een van de systeemonderdelen. Het hoofdgedeelte en de
luchtslang moeten gecontroleerd worden voorafgaand aan ieder gebruik. Eventuele barsten of slechte
afdichting kunnen een negatieve invloed hebben op het beschermingsniveau.
• Bekraste of anders beschadigde kijkvlakken moeten onverwijld worden vervangen.
• Neem de helm niet van het hoofd en zet de VFE of het CleanAIR®-systeem voor perslucht niet uit, voordat
u de gecontamineerde ruimte heeft verlaten.
• Gebruik alleen gecertificeerde oorspronkelijke filters bestemd voor uw filter/ventilatiesysteem. Verwissel
de filters steeds, wanneer u een verandering ruikt in de toegevoerde lucht, die aangevoerd wordt vanuit de
eenheid.
• Filters voor het opvangen van vaste en vloeibare deeltjes beschermen de gebruiker niet tegen gassen.
Filters voor het opvangen van gassen beschermen niet tegen schadelijk deeltjes. Voor een werkomgeving
gecontamineerd met beide soorten van vervuiling is het noodzakelijk gebruik te maken van gecombineer de filters.
Controle voor het gebruik, opzetten.
1) Voorafgaand aan het gebruik van een nieuw product controleert u altijd eerst of de apparatuur compleet is
en er tijdens het transport geen schade is ontstaan. Wanneer de helm niet gebruikt wordt, dient hij
opgeslagen te worden in de verpakking, die hem beschermt tegen direct zonlicht, chemicaliën en
schurende stoffen en waarin de helm niet beschadigd kan worden door contact met harde voorwerpen of
oppervlakken.
2) Ter verzekering van de vereiste beschermingseigenschappen van de helm trekt u het afdichtingsmasker
zodanig tegen het gezicht, dat het zo dicht mogelijk het gezicht kopieert. Een juist opgezet hoofddeel
in combinatie met de stroom van toegevoerde lucht vormen een matige overdruk in de gezichtsruimte,
die het binnendringen van schadelijke stoffen in de ademzone niet toelaat. Opdat de helm de juiste
bescherming van het hoofd biedt tegen vallende voorwerpen (volgens EN 397+A1), moet de grootte ervan
worden aangepast aan de hoofdmaat van de gebruiker (54-65 cm). Zorg er daarom voor, dat de helm
comfortabel en toch stevig op het hoofd rust. Voor de instelling van optimale afmetingen van het
hoofdkruis gebruikt u het stelwieltje aan de achterkant.
3) In alle hoofddelen adviseren we om hygiënische redenen gebruik te maken van het hoofddeksel TYVEK
(bestelnummer 70 02 01).
Verwisseling van het masker
Verwijdering van het masker:
• Trek het achterdeel van het masker van de stelschroef.
• Trek het hoofdkruis van de helm uit de verankeringsopeningen voor het hoofdkruis
• Trek het masker voorzichtig van de afzonderlijke pinnen rondom de helmklep.
• De plastic zoom van het masker trekt u geleidelijk uit de verankeringsopeningen voor het hoofdkruis aan
de binnenrand van de helm.
Plaatsen van het masker:
• De plastic zoom van het masker drukt u in de verankeringsopeningen voor het hoofdkruis aan de
binnenrand van de helm.
(Geadviseerde instelling – in het voorste deel (bij de klep) de opening in de onderste rij het dichtst bij
de klep. In het achterste deel (bij het koppelstuk voor aansluiting voor de slang) de middelste opening in
de onderste rij.)
• Trek de openingen van het masker voorzichtig over de afzonderlijke pinnen op de klep van de helm.
• Druk het hoofdkruis in de helm in de verankeringsopeningen van het hoofdkruis.
(Geadviseerde instelling – middelste opening helemaal bovenaan in alle bevestigingspunten van het
hoofdkruis.)
• Trek het achterdeel van het masker over de stelschroef.
Om hygiënische redenen maakt u het oude masker direct na de verwisseling onbruikbaar, opdat het niet
opnieuw gebruikt zou kunnen worden!
Vervanging van het beschermingsfolie bij de CA-40
Wij adviseren gebruik te maken van beschermende folies voor bescherming van zelf verdonkerende filters
en kijkers van een slijpschild. Tijdige vervanging van het folie verlengt de levensduur van zelf verdonkerende
filters en kijkers en garandeert een voortdurend, goed zicht.
Voor de bescherming van zelf verdonkerende filters wordt beschermfolie van polycarbonaat geleverd. Het fo-
lie wordt geplaatst aan de binnen- en buitenkant van zelf verdonkerende filters en voorkomt het vasthechten
van vonkballetjes op het kijkvlak.
Vervanging van het buitenste beschermfolie:
a) U verwijdert het folie door te trekken aan de onderkant ervan bij het uitneempunt van het lasschild.
b) Voorafgaand aan de eigenlijke plaatsing van het beschermfolie verwijdert u altijd eerst van beide kanten
ervan de dunne afdeklaag. U plaatst het opnieuw door inschuiving van het folie in de zijgleuven in de
ruimte voor de zelf verdonkerende filter.
Voorzover het geen advies van de producent van de helm betreft, is het verboden enige
aanpassingen uit te voeren of enig oorspronkelijk onderdeel van de helm te verwijderen.
De helmen dienen voor versteviging van het toebehoren niet aangepast te worden op
een wijze, die niet wordt aangeraden door de producent.
Breng geen lijm, verf, oplosmiddel of stickers aan, voorzover dit niet overeenkomt met
de instructies van de producent van de helm.
4
Vervanging van het binnenste beschermfolie:
Het folie kan gemakkelijk verwijderd worden door uitschuiving uit de fixeringsgleuven, echter pas na uitname
van de zelf verdonkerende filter. De zelf verdonkerende filter wordt verwijderd door het losmaken van de
zekeringsschroeven aan de binnenkant van het lasschild.
3 De vermelde concentraties kunnen in verschillende landen van elkaar verschillen. Volg de plaatselijke verorde-
1 inclusief de afgeleide varianten (CA-40, CA-40G, CA-40GW)
ningen!
4 inclusief afgeleide varianten (CA-40, CA-40GW)
16 17
Attentie! Maak het folie niet droog schoon, anders kan het gemakkelijk bekrast worden en neemt het
NL NL
zicht af. Folie heeft verder de eigenschap elektrostatische lading op te slaan en in een stoffige omgeving
kan daarom de kwaliteit van het doorzicht verslechteren.
Schoonmaak en desinfectie
Na iedere werkzaamheid maakt u het hoofddeel schoon, controleert de afzonderlijke onderdelen en vervangt
beschadigde onderdelen.
• Het schoonmaken moet uitgevoerd worden in een goed geventileerde ruimte. Let op het inademen van
Vervanging van de lasfilter:
a) Demonteer de zekeringsschroeven van de lasfilter uit de binnenzijde van het lasschild van de helm.
b) Verwijder de lasfilter.
c) Plaats de nieuwe lasfilter en zet hem vast in de oorspronkelijke positie door het aandraaien van de
schroeven.
schadelijk stof op de afzonderlijke onderdelen!
• Voor het schoonmaken gebruikt u lauw water (maximaal +40°C) met zeep of een ander niet schurend
schoonmaakmiddel en een zachte borstel.
• Het is verboden voor het schoonmaken een oplosmiddel te gebruiken.
• Na het schoonmaken met een natte lap is het noodzakelijk droog te wrijven of eventueel te laten drogen
op kamertemperatuur.
Het hoofddeksel kan alleen gebruikt worden met gekeurde lasfilters van 90x110 mm!
• Voor het desinfecteren van onderdelen, die in contact komen met de huid, kan men gangbare middelen
gebruiken, bijv. Ajatin, Incidur en zo voort.
Vervanging van las- en slijpschild:
a) Demonteer de schroeven aan de zijkanten van de beschermingshelm.
• Zelf verdonkerende filters worden alleen schoongemaakt met een droge of weinig vochtige lap (in schoon
water, met een zeepoplossing of alcohol).
b) Doe de klep omlaag om het uitnemen makkelijker te maken.
c) Trek het schild eerste aan een kant en vervolgens aan de ander kant van de helm van de verankeringspen.
d) Plaats het schild in omgekeerde volgorde.
Waarschuwing:
Bekraste of anderzijds beschadigde kijkers dienen op tijd vervangen te worden met nieuwe.
Controle en onderhoud
De veiligheidshelm CA-405 is een compleet systeem, dat bestaat uit de eigenlijke helm, een slijp- of lasschild
of een combinatie ervan en het hoofdkruis. De praktische levensduur van de helm wordt beïnvloed door vele
factoren zoals: koude, warmte, chemicaliën, zonlicht of onjuist gebruik. De helm dient dagelijks gecontroleerd
te worden op barsten, breekbaarheid of beschadiging van de binnenconstructie.
CA-40
CA-40G
CA-40GW
CA-401 +
Beschermings
klasse
Oogbescherming
( EN 166 )
Oogbescherming
bij het lassen ( EN 175 )
Hoofdbescherming
( EN 397 )
CA Basic
2000 FC
CA Basic
2000 DF
CA Chemical 2FCA Chemical 3FCA
AerGO
CA
Pressure
TH2 TH1 TH2 TH2 TH2 2A 2B
CA Flow
Master
Bij enige vorm van beschadiging moet de helm vervangen worden met een nieuwe!
Na vijf jaar gebruik moet de helm altijd vervangen worden!
Aangemelde instantie voor CE-keuring:
Výzkumný ústav bezpečnosti práce, v.v.i.
(Testinstituut voor werkveiligheid) - ZL
Proeflaboratorium nr. 1024
Jeruzalémská 9, 116 52 Praag 1
Geautoriseerde instantie 235
Aangemelde instantie 1024
Aangemelde instantie voor CE-test (lasschild voor
combinatie met een slijpschild en een slijpschild):
Institut pro testování a certifikaci, a.s.
(Test- en certificatieinstituut, a.s.)
Třída Tomáše Bati 299, 764 21 Zlín
Geautoriseerde instantie 224
Aangemelde instantie 1023
Keuze en gebied van gebruik: Ieder middel voor bescherming van de ogen en het gezicht wordt gemarkeerd
in overeenstemming met de hieronder vermelde tabel voor identificatie van het gebied van gebruik en effectiviteit volgens de eisen van EN 166:2001.
Opslag
De voorwaarden voor opslag worden op de verpakking aangegeven met de volgende symbolen:
Zie informatie geleverd
door de producent
Alle onderdelen van de systemen van CleanAIR
®
moeten opgeslagen worden in een ruimte met een tempera-
Warmtebereik van de
houdbarheid
Einde van de
houdbaarheid
tuur van -10 tot 50°C en met een vochtigheid van 20 tot 80 % RH. De duur voor opslag in een onbeschadigde
verpakking is maximaal 2 jaar.
5 inclusief de afgeleide varianten (CA-40, CA-40G, CA-40GW) 1 inclusief de afgeleide varianten (CA-40, CA-40G, CA-40GW)
Lijst van reserveonderdelen:
(bijlage met afbeeldingen: 1A)
Positie Codemarkering Beschrijving
1 40 50 40 Zelf verdonkerende filter V913 DS ADC
2 70 42 02 Lasschild (voor versie CA-40GW)
2 70 40 02 CA-40 reservelasschild
3 70 41 01 Reserveslijpschild
4 70 40 60 CA-40 gezichtsmasker (voor alle types CA-40)
5 70 40 44 Voorhoofdszweetband CA-40 (voor alle types CA-40)
7 70 40 43 Bevestigingsschroeven 2 stuks (voor alle types CA-40)
8 70 40 40 Beschermschelpen voor het gehoor, no. 8 (voor alle types CA-40)
8 70 40 41 Beschermschelpen voor het gehoor, no. 10 (voor alle types CA-40)
8 70 40 42 Beschermschelpen voor het gehoor, no. 12 (voor alle types CA-40)
- COS015 Rubber afdichting voor de koppeling van het luchtkanaal
- 70 40 80 Buitenste dekfolie CA-40 (10 stuks) voor CA-40 en CA-40GW
- 70 24 81 Binnenste dekfolie, 107x51 polycarbonaat (10 stuks) voor CA-40 en CA-40GW
- 110/90-09 Passieve lasfilter, graad van verdonkering 9
- 110/90-10 Passieve lasfilter, graad van verdonkering 10
- 110/90-11 Passieve lasfilter, graad van verdonkering 11
- 110/90-12 Passieve lasfilter, graad van verdonkering 12
- 110/90-13 Passieve lasfilter, graad van verdonkering 13
Complete veiligheidshelm CA-40
- 70 41 00 Veiligheidshelm CA-40G met slijpschild
- 70 42 01 Veiligheidshelm CA-40GW met las- en slijpschild (inclusief zelf verdonkerende filter)
- 70 40 01 Veiligheidshelm CA-40 met lasschild (inclusief zelf verdonkerende filter)
Betekenis van de markering
18 19
Mechanische sterkte (van frame en
NL FIN
Verhoogde stevigheid
Botsing met weinig energie
Botsing met middelmatige hoeveelheid energie
Botsing met grote energie
Wanneer de kijkers en de flens niet dezelfde markering voor identificatie hebben voor wat betreft de stevigheid, wordt het geheel geclassificeerd voor
bescherming van de ogen met de laagste kwaliteit.
Wanneer de graad van de botsing wordt aangegeven met een volgende letter „T“, bijvoorbeeld „FT“, biedt het middel bescherming tegen deeltjes met hoge
snelheid bij extreme temperaturen (-5°C / +55°C).
Wanneer de graad van de botsing NIET gevolgd wordt met een letter „T“, mag het middel voor bescherming
van de ogen alleen gebruikt worden voor bescherming tegen botsing bij kamertemperatuur.
Optische klasse
Optische klasse 1
Optische klasse 2
Optische klasse 3 (niet geschikt voor langdurig gebruik)
Verkiesbare eisen
Weerstand van de kijkers tegen beschadiging door fijne deeltjes.
Weerstand tegen condensvorming
Verhoogde reflectie
Oorspronkelijke kijkfilter
Reservekijker
Bij kijkers van gelamineerd glas staan de instructies voor aanpassing op de achterzijde.
Gebied van gebruik (frame en kijker)
Druppelvloeistoffen (alleen bril)
Straalvloeistoffen (alleen gezichtsschilden)
Grof stof (alleen bril)
Gas en fijn stof (alleen bril)
Elektrische boog (alleen gezichtsschilden)
Gesmolten metalen en hete vaste deeltjes (bril of gezichtsschild)
Kijkers en flenzen moeten buiten de markering „9“ en gemarkeerd met een van de volgende symbolen „F“, „B“ of „A“ zijn.
Filtermarkering (alleen kijkers)
Lasfilter
Ultraviolette filter (kan invloed hebben op het herkennen van kleuren)
Infrarode filter
Zonnefilter (zonder infraroodspecificaties)
Zonnefilter (met infraroodspecificaties)
Wanneer na de filteridentificatie de letter „C“ volgt, bijvoorbeeld „2C“, is er geen sprake van verslechterde kleurherkenning.
Voor verdere informatie leest u alstublieft de normen EN 169, EN 170, EN 171 en EN 172.
Voor laswerkzaamheden gebruikt u alleen kijkers gemarkeerd als lasdiafragma 1.2 – 16.
kijkers)
(12 m/sec)
(45 m/sec)
(120 m/sec)
(190 m/sec)
Filteridentificatie Kleur
2
4
5
6
Productmarkering
Productmarkering
S
F
B
A
1
2
3
K
N
R
O
3
3
4
5
8
9
1.2 tot 16
1.2 tot 5
1.2 tot 10
1.1 tot 4.1
1.1 tot 4.1
Johdanto
CA-40, CA-40G ja CA-40GW suojapäähineet
Suojapäähineet on suunniteltu käytettäviksi ainoastaan CleanAIR® moottoroitujen puhallinsuojainten (jäljempänä MPS) tai vakioilmavirtauksisten paineilmahengityslaitteiden kanssa (jäljempänä CleanAIR® paineilmalaitteet) hengitysteiden suojaamiseen.
CleanAIR® on henkilökohtaiseen käyttöön tarkoitettu hengityksensuojain, jonka toiminta perustuu suodatetun
ilman ylipaineeseen hengitysvyöhykkeellä. Vyölle kiinnitettävä MPS puhaltaa moottorin avulla ilman suodattimen läpi ja letkua pitkin suojapäähineeseen. Siellä muodostunut ylipaine estää haitta-aineiden pääsemisen
hengitysvyöhykkeelle ja samalla turvaa korkean käyttömukavuuden pitkäaikaisessakin käytössä pienemmän
hengitysvastuksen ansiosta. Laite suojaa kiinteiltä ja nestemäisiltä aerosoleilta, kaasuilta sekä höyryiltä
asennetusta suodattimesta riippuen. Sopivin suojapäähineen ja MPS: n yhdistelmä valitaan työympäristön
haitta-ainepitoisuuden ja tyypin, sekä suoritettavan työn mukaan. CA-401 sarja tarjoaa suojan useimpaan
teollisuuskäyttöön, jossa hengitysteiden suojaamisen lisäksi tarvitaan myös laadukas silmien, kuulon ja pään
suojaus.
CA-40 hitsausnaamari
(jäljempänä CA-40) – hengitysteiden lisäksi suojaa myös pään, silmät ja kasvot.
Automaattisesti tummentuvalla V9-13 DS suodattimella2 varustettu hitsausvisiiri
antaa suojan haitallista UV- ja infrapunasäteilyä sekä hitsausroisketta vastaan.
CA-40G hiontanaamari
(jäljempänä CA-40G) – hengitysteiden lisäksi suojaa myös pään, silmät ja kasvot
nopeasti lentäviltä hiukkasilta (merkintä: A) ja antaa samalla perussuojan haitallista UV säteilyä vastaan.
CA-40GW hionta- ja hitsausnaamari
(jäljempänä CA-40GW) – hengitysteiden lisäksi suojaa myös pään, silmät ja kasvot nopeasti lentäviltä hiukkasilta (merkintä: A) ja antaa samalla perussuojan
haitallista UV säteilyä vastaan. Automaattisesti tummentuvalla V9-13 DS suodattimella2 varustettu hitsausvisiiri antaa puolestaan suojan haitallista UV- ja
infrapunasäteilyä sekä hitsausroisketta vastaan.
Tuotehyväksyntä, sertifiointi
CA-40 suojapäähine on testattu ja hyväksytty eurooppalaisen EN 12941/A2 normin mukaisesti käytettäväksi yhdessä CleanAIR® moottoroitujen puhallinsuojainten kanssa, sekä EN 14594:2005 normin mukaisesti vakioilmavirtauksisten
paineilmahengityslaitteiden kanssa. Laitteen kaikkien osien on oltava valmistajan hyväksymiä ja niitä on käytettävä tässä ohjekirjassa annettujen ohjeiden
mukaisesti.
VAROITUS JA KÄYTTÖOHJEET
Käyttäjän on perehdyttävä ennen laitteen käyttöä mahdollisiin työpaikkaan liittyviin vaaratekijöihin ja opittava käyttämään henkilökohtaista suojainta turvallisesti. Mikäli mitä tahansa
epäselvyyksiä ilmenee, ota yhteyttä valmistajaan tai jälleenmyyjääsi.
1 Mukaanluettuna tyypit CA-40, CA-40G ja CA-40GW
2 Kovetetusta mineraalilasista valmistettuja hitsaussuodattimia voi käyttää ainoastaan sopivien suojakalvojen
kanssa!
20 21

• CA-40 suojapäähinettä on käytettävä ainoastaan CleanAIR® MPS:en tai CleanAIR® paineilmalaitteen
FIN FIN
kanssa. Lue siksi tämä käyttöohje yhdessä CleanAIR® MPS:en tai CleanAIR® paineilmalaitteen käyttöo hjeen kanssa.
• Älä käytä suljetuissa tiloissa, happivajeisessa ympäristössä (<17%)3, hapella rikastutetussa ympäristössä
(>23%) tai paikossa, joissa uhkaa välitön terveys- tai hengenvaara.
• Älä käytä ympäristössä, jonka saastepitoisuutta ja saastuneisuustyyppiä et tunne.
• Älä käytä, jos moottoroitu puhallinsuojain on kytketty pois päältä tai jos ilmansaanti on suljettu!
Hengityselinten suojaus on silloin pieni tai olematon. Myös hiilidioxidipitoisuus voi nousta ja happipitoisuus
laskea.
Peittomaskin kiinnitys:
• Kiinnitä peittomaskin muovipäärme napsauttamalla pitimet pääpannan kiinnityskohtiin suojapäähineen
sisäkehällä.
(suositeltu kiinnitystapa – etuosassa, visiirin kohdalla, alarivin aukko lähinnä visiiriä, takaosassa, letkun
kiinnityksen kohdalla, alarivin keskimmäinen aukko)
• Kiinnitä varovasti peittomaski aukoistaan ulkoreunan kiinnittimiin.
• Kiinnitä pääpanta suojapäähineeseen napsauttamalla pitimet kiinnityskohtiin.
(suositeltu kiinnitystapa – keskimmäinen aukko pääpannan kaikissa pitimissä ylimpänä)
• Kiinnitä peittomaskin takaosa säätöruuviin.
• Jos MPS tai paineilmalaite lakkaa mistä tahansa syystä toimimasta, käyttäjän on välittömästi poistuttava
kontaminoidusta työtilasta.
Hävitä vanha peittomaski hygieniasyistä heti vaihdon jälkeen, jottei se voisi tulla uudestaan käyttöön!
• Erittäin raskaan työn aikana voi suojapäähineen sisällä voimakkaan sisäänhengityksen takia muodostua
alipaine, jonka takia suojatoiminto heikkenee.
• Suojapäähineen on aina oltava tiiviisti kiinnitetty täydellisen suojan takaamiseksi. Mikäli reunojen väliin jää
parta tai pitkät hiukset, voi suojataso vuodon takia laskea.
• Älä käytä laitetta, mikäli mikä tahansa sen osa on vahingoittunut. Suojapäähine ja ilmaletku on tarkistettava
ennen jokaista käyttöä. Mahdolliset repeämät tai vuodot voivat alentaa vaadittua suojatasoa.
• Naarmuuntunut tai muuten vahingoittunut visiiri on vaihdettava välittömästi.
• Älä riisu suojapäähinettä äläkä sammuta MPS:ta tai CleanAIR® paineilmalaitetta, ennen kuin olet poistunut
kontaminoidusta työtilasta.
• Käytä moottoroituihin puhallinsuojaimiin ainoastaan sertifioituja alkuperäisiä suodattimia. Vaihda suodatin
aina, kun havaitset muutoksen puhallinsuojaimesta tulevan ilman hajussa.
• Hiukkassuodattimet, jotka estävät nestemäisten ja kiinteiden hiukkasten sisäänpääsyn, eivät suojaa
CA-404 suojapäähineiden suojakalvon vaihto
Suojakalvon käyttöä suositellaan automaattisesti tummentuvan suodattimen sekä hiontanaamarin visiirin
suojaamiseen. Suojakalvon säännöllinen vaihto pidentää automaattisesti tummentuvan suodattimen sekä
visiirin käyttöikää ja takaa jatkuvasti hyvän näkyvyyden. Automaattisesti tummentuvan suodattimen suojaamiseen toimitetaan polykarbonaattisuojakalvo. Kalvo kiinnitetään automaattisesti tummentuvan suodattimen
sisä- ja ulkopuolelle ja se estää roiskeiden tarttumisen visiiriin.
Ulkosuojakalvon vaihto:
a) Irroita kalvo vetämällä se alareunasta ulos visiirin alaosan kohdalta.
b) Poista uuden suojakalvon molemmilta puolilta ohut peitekerros ennen sen asentamista. Uusi suojakalvo
työnnetään sivu-uriin automaattisesti tummentuvan suodattimen eteen.
käyttäjää miltään kaasulta. Kaasusuodattimet eivät suojaa käyttäjää miltään hiukkasilta. Molemmin
saastetyypein kontaminoiduissa työtiloissa on käytettävä yhdistettyjä suodattimia.
Sisäsuojakalvon vaihto:
Ennen kalvon poistamista on irroitettava automaattisesti tummentuva suodatin, tämän jälkeen voi kalvon
Tarkastus ennen käyttöä, asentaminen.
1) Tarkista aina ennen uuden tuotteen käyttöä, ettei mikään järjestelmän osa puutu tai ole vahingoittunut.
vetää ulos kiinnitysuristaan. Automaattisesti tummentuva suodatin irroitetaan löysäämällä kiinnitysruuveja
visiirin sisäpuolelta.
Suojapäähinettä tulisi säilyttää suojakotelossa, joka suojaa sitä suoralta auringonvalolta, kemikaaleilta ja karkeilta aineilta ja jossa se ei voi vahingoittua tullessaan kosketukseen kovien esineiden/pintojen kanssa.
2) Vaaditun suojatason takaamiseksi on suojapäähineen peittomaski painettava kasvoille mahdollisimman
tiiviisti, jotta se jäljittelisi kasvojen muotoa. Oikein asennettu peittomaski muodostaa yhdessä toimitetun ilmavirtauksen kanssa kasvojen kohdalla kevyen ylipaineen, joka ei mahdollista haitta-aineiden sisäänpääsyä
Varoitus!
Älä kuivapuhdista kalvoja, muuten ne voivat naarmuuntua helposti, josta seuraa näkyvyyden heikentymi-
nen. Kalvot voivat kerätä myös staattista sähkövarausta, joka saattaa aiheuttaa näkyvyyden heikenty-
mistä pölyisessä ympäristössä!
käyttäjän hengitysvyöhykkeelle. Jotta suojapäähine takaisi asianmukaisen suojan putoavia esineitä vastaan
(EN 397+A1 normin mukaisesti), on sen koko mukautettava käyttäjän pään kokoon (54-65 cm). Suojapäähineen tulee istua päässä mukavasti, mutta tukevasti. Pääpanta säädetään takaosassa olevan säätönupin avulla.
3) Hygieniasyistä suosittelemme käyttämään kaikkiin suojapäähineisiin TYVEK peittomaskia (tilausnumero 70
02 01).
Hitsaussuodattimen vaihto:
a) Irroita hitsaussuodattimen kiinnitysruuvit visiirin sisäpuolelta.
b) Poista hitsaussuodatin.
c) Aseta uusi hitsaussuodatin paikalleen ja kiinnitä se kiristämällä ruuvit.
Käyttö:
Hitsauspäähineeseen saa asentaa ainoastaan hyväksyttyjä 90x110 mm hitsaussuodattimia!
Suojapäähine on valmistettu siten, että se absorboisi törmäysenergiaa osittaisella vaurioitumisella tai pinnan
ja pääpehmusteen vahingoittumisella. Vaikka vaurio ei olisikaan näkyvä, tulisi jokainen kovan iskun kohteeksi
joutunut suojapäähine vaihtaa.
Hiontavisiirin vaihto:
a) Irroita ruuvit suojapäähineen sivuilta.
b) Sulje visiiri helpomman irroittamisen vuoksi.
Mikäli ei suojapäähineen valmistaja niin suosittele, ovat kaikki itse tehdyt muutokset
suojapäähineeseen sekä alkuperäisten osien poisto kiellettyjä. Suojapäähineisiin ei
myöskään tulisi liittää mitään lisäosia, joita valmistaja ei suosittele.
Älä käytä suojapäähineeseen liimaa, maalia, ohentimia, tai tarroja, mikäli valmistaja ei
niitä suosittele.
Peittomaskin vaihto
Peittomaskin irroittaminen:
• Irroita peittomaskin takaosa säätöruuvista.
• Irroita pääpanta suojapäähineestä vapauttamalla pitimet kiinnityskohdista.
c) Irroita visiiri/visiirit sivuilla olevista kiinnitystapeista yksi puoli kerrallaan.
d) Asenna uusi visiiri/visiirit toimimalla päinvastaisessa järjestyksessä.
Varoitus:
Naarmuuntuneet tai muuten vahingoittuneet visiirit tulisi vaihtaa ajoissa uusiin.
Tarkastus ja ylläpito:
CA-405 on kokonaisuus, johon kuuluu itse suojapäähine, hionta-/hitsausvisiiri (tai niiden yhdistelmä), sekä
pääpanta. Suojapäähineen elinikään vaikuttaa moni tekijä kuten lämpötila, kemikaalit, auringonvalo tai väärä
käyttötapa. Suojapäähine pitäisi tarkistaa päivittäin halkeamien, haurauden tai sisärakenteen vahingoittumi-
sen varalta.
• Irroita peittomaski varovasti ulkoreunan kiinnittimistä.
• Irroita vähitellen peittomaskin muovipäärme pääpannan kiinnityskohdista suojapäähineen sisäkehällä.
3 Mainitut happipitoisuudet voivat maittain vaihdella, noudata oman maasi asetuksia!
4 Mukaanluettuna tyypit CA-40 ja CA-40GW
5 Mukaanluettuna tyypit CA-40, CA-40G ja CA-40GW
22 23

FIN FIN
Minkä tahansa vaurion ilmetessä on suojapäähine vaihdettava uuteen!
Varaosaluettelo:
(kuvaliite: 1A)
Suojapäähine on vaihdettava aina viiden vuoden käytön jälkeen!
CE testaamiseen notifioitu oikeushenkilö:
Výzkumný ústav bezpečnosti práce, v.v.i. - ZL
(Työturvatutkimuslaitos)
Koelaboratorio č. 1024
Jeruzalémská 9, 116 52 Praha 1
Valtuutettu henkilö 235
Notifioitu henkilö 1024
CE testaamiseen notifioitu oikeushenkilö
(hitsausvisiiri asetettavaksi hiontavisiirin kanssa ja
hiontavisiiri):
Institut pro testování a certifikaci, a.s.
(Testaus- ja sertifikaattilaitos oy)
Třída Tomáše Bati 299, 764 21 Zlín
Valtuutettu henkilö 224
Notifioitu henkilö 1023
Valinta ja käyttötarkoitus: Jokainen silmien ja kasvojen suojaamiseen tarkoitettu tuote on merkitty alla olevan taulukon mukaisesti sen käyttötarkoituksen ja toiminnon mukaan EN 166:2001 normia noudattaen
Varastointi
Varastointiolosuhteet on merkitty pakkaukseen alla olevin symbolein:
Se information från
tillverkaren
Förvaringstemperatur lagringstid
Kaikki CleanAIR® järjestelmän osat on varastoitava tilassa jonka lämpötila on -10:stä 50:een °C ja suhteellinen
ilmankosteus 20 – 80 %. Varastoinnin maximi aika vahingoittumattomassa pakkausessa on 2 vuotta.
Puhdistus ja desinfiointi
• Puhdista suojapäähine jokaisen käytön jälkeen, tarkista ja vaihda vaurioituneet osat.
Kuvan
numero
CA-40 suojapäähineet
Koodimerkintä Kuvaus
1 40 50 40 Automaattisesti tummentuva suodatin V913 DS ADC
2 70 42 02 Hitsausvisiiri (tyypille CA-40GW)
2 70 40 02 CA-40 varahitsausvisiiri
3 70 41 01 Varahiontavisiiri
4 70 40 60 CA-40 peittomaski (kaikille CA-40 tyypeille)
5 70 40 44 Otsanauha CA-40 (kaikille CA-40 tyypeille)
7 70 40 43 Kiinnitysruuvit 2 kpl (kaikille CA-40 tyypeille)
8 70 40 40 Kuulosuojaimet, nr. 8 (kaikille CA-40 tyypeille)
8 70 40 41 Kuulosuojaimet, nr. 10 (kaikille CA-40 tyypeille)
8 70 40 42 Kuulosuojaimet, nr. 12 (kaikille CA-40 tyypeille)
- COS015 ilmakanavaliitoskappaleen kumieristys
- 70 40 80 Ulkosuojakalvo CA-40 (10kpl) CA-40 ja CA-40GW tyyppejä varten
- 70 24 81 Sisäsuojakalvo, 107x51 polykarbonaatti (10kpl) CA-40, CA-40GW varten
- 110/90-09 Passiivinen hitsaussuodatin, tummuusaste 9
- 110/90-10 Passiivinen hitsaussuodatin, tummuusaste 10
- 110/90-11 Passiivinen hitsaussuodatin, tummuusaste 11
- 110/90-12 Passiivinen hitsaussuodatin, tummuusaste 12
- 110/90-13 Passiivinen hitsaussuodatin, tummuusaste 13
- 70 41 00 CA-40G suojapäähine hiontavisiirillä
- 70 42 01 CA-40GW suojapäähine hitsaus- ja hiontavisiirillä
- 70 40 01 CA-40 suojapäähine hitsausvisiirillä (sisältää automaattisesti tummentuvan suodattimen)
(sisältää automaattisesti tummentuvan suodattimen)
• Puhdistus on suoritettava hyvin tuuletetussa huoneessa. Varo henkäisemästä tuotteen osiin tarttuneita
haitallisia pölyhiukkasia!
• Käytä puhdistukseen haaleata vettä (max +40°C), saippuaa tai muuta ei hankaavaa puhdistusainetta ja
pehmeätä harjaa.
• Puhdistukseen ei saa käyttää liuotinpitoisia aineita.
• Puhdistuksen jälkeen on osat pyyhittävä kuiviksi tai annettava niiden kuivua huoneen lämmössä.
• Ihon kanssa kosketukseen tulevien osien desinfiointiin voi käyttää tavanomaisia valmisteita, kuten Ajatin,
Incidur jne.
• Automaattisesti tummentuva hitsaussuodatin puhdistetaan vain puhtaalla, kuivalla tai hieman kostutetulla
rätillä (vedessä, saippuavedessä tai alkoholissa).
CA-40
CA-40G
CA-40GW
CA-401 +
Silmäsuoja
( EN 166 )
CA Basic
2000 FC
CA Basic
2000 DF
Silmäsuoja hitsatessa
( EN 175 )
CA Chemical 2FCA Chemical 3FCA
AerGO
Pään iskusuoja
( EN 397 )
CA
Pressure
CA Flow
Master
Suojausluokka TH2 TH1 TH2 TH2 TH2 2A 2B
Merkintöjen selitys
1 Mukaanluettuna tyypit CA-40, CA-40G ja CA-40GW
24 25

Mekaaninen lujuus (runko ja visiiri) Tuotemerkintä
FIN FRA
Vahvistettu lujuus
Heikko isku
Keskivahva isku
Vahva isku
Mikäli rungolla ja visiirillä on eri mekaanista lujuutta koskevat tuotemerkinnät, luokitellaan koko tuote alemman luokan mukaan.
Mikäli iskuluokan kirjainta seuraa „T“ kirjain, esim. „FT“, tuote suojaa myös nopeasti lentäviltä hiukkasilta äärilämpötiloissa (-5°C/+55°C)
Mikäli iskuluokan kirjainta ei seuraa „T“ kirjain, voi silmäsuojaa käyttää iskunvaimentamiseen vain huonelämpötilassa.
Optinen luokka
Optinen luokka 1
Optinen luokka 2
Optinen luokka 3 (ei sovi pitkäaikaiseen käyttöön)
Valinnaiset ominaisuudet
Visiirin kestävyys hienoja hiukkasia vastaan
Kastumattomuus
Kohotettu heijastuskyky
Alkuperäinen viisiiri
Varavisiiri
Laminaattilasista valmistetun visiirin käsittelyohjeet ovat sen takana
Rungon ja visiirin käyttötilanteet
Tippuvat nesteet (vain lasit)
Roiskuvat nesteet (vain visiiri)
Karkea pöly (vain lasit)
Kaasu ja hieno pöly (vain lasit)
Valokaari (vain visiiri)
Sulaneet metallit ja kuumat kiinteät hiukkaset (lasit tai visiiri)
Visiirit ja rungot täytyy merkinnän „9“ lisäksi merkitä myös yhdellä „F“, „B“ tai „A“ symboleista
Suodattimien merkinnät (vain visiirit)
Hitsaussuodatin
UV suodattimet (voi vaikuttaa värien erottelukykyyn)
Infrapunavalon suodatin
Näkyvän valon suodatin (ilman infrapunalisää)
Näkyvän valon suodatin (infrapunalisällä)
Jos suodattimen merkintää seuraa „C“, esim. „2C“, värien erottelu ei heikkene.
Lisätietoja saat lukemalla normit EN 169, EN 170, EN 171 ja EN 172.
Käytä hitsaustöissä ainoastaan 1.2 - 16 hitsaussuojiksi luokiteltuja visiirejä
(12 m/sec)
(45 m/sec)
(120 m/sec)
(190 m/sec)
Suodattimen
identifiointi
2
4
5
6
Tuotemerkintä
S
F
B
A
1
2
3
K
N
R
O
3
3
4
5
8
9
Värisävyt
1.2 tot 16
1.2 tot 5
1.2 tot 10
1.1 tot 4.1
1.1 tot 4.1
Introduction
Les casques de sécurité CA-40, CA-40G et CA-40GW sont conçus pour être exclusivement utilisés avec
les moteurs filtrants à ventilation assistée CleanAIR® ou avec les appareils à adduction d‘air à débit constant
CleanAIR®, pour ainsi fournir une protection des voies respiratoires.
Le système de protection individuel des voies respiratoires CleanAIR® est basé sur le principe de la surpression d‘air purifié à l‘intérieur de la zone de respiration. Le moteur, situé sur la ceinture de l‘utilisateur, aspire
et filtre l‘air environnant et l‘amène à la cagoule ou au casque par l‘intermédiaire d‘un tuyau d‘alimentation en
air. Cette légère surpression empêche la pénétration de substances nocives dans la zone respiratoire tout en
garantissant un confort d‘utilisation élevé même en cas d‘utilisation prolongée ; et ce sans avoir à surmonter
la résistance du filtre. Selon la nature du filtre, la surpression fournit également une protection contre les
particules solides sous forme d‘aérosols solides et liquides, les gaz et les vapeurs. La combinaison la plus
adaptée d‘une pièce faciale et d‘un moteur filtrant se détermine selon le type et la concentration du ou des
contaminant(s) présent(s) dans la zone de travail, et selon le travail à accomplir. La gamme CA-401 offre une
protection adaptée pour la plupart des applications industrielles nécessitant, en plus d‘une protection respiratoire, des protections oculaire, auditive et de la tête appropriées.
Casque de sécurité CA-40 avec bouclier de soudage
Lors de soudage, le CA-40 offre une protection efficace des voies respiratoires
ainsi que de la tête, des yeux et du visage. Le bouclier de soudage avec filtre
auto-obscurcissant2 V9-13 DS fournit une protection contre les rayons nocifs ultraviolets / infrarouges et les gerbes de soudure.
Casque de sécurité CA-40G avec bouclier de meulage
Le CA-40G offre une protection efficace des voies respiratoires, de la tête, des
yeux et du visage, contre les projections de particules (marquages : A) tout en
fournissant une protection de base contre les rayons nocifs ultraviolets.
Casque de sécurité CA-40GW avec bouclier de soudage et bouclier
de meulage
Le CA-40GW fournit une protection efficace des voies respiratoires, de la tête,
des yeux et du visage contre les projections de particules (marquages : A), tout
en offrant une protection de base contre les rayons nocifs ultraviolets. Le bouclier
de soudage avec filtre auto-obscurcissant2 V9-13 DS fournit une protection contre les rayons nocifs ultraviolets / infrarouges et les gerbes de soudure.
Homologation, certification
Le casque de sécurité CA-401 est testé et homologué conformément aux exigences de la norme européenne EN 12941/A2 pour une utilisation avec les moteurs
filtrants à ventilation assistée CleanAIR®, et EN 14594:2005 pour une utilisation avec les appareils à adduction d‘air à débit continu CleanAIR®. Tous les éléments de l‘ensemble utilisé
(système) doivent être homologués par le fabricant et utilisés conformément aux instructions contenues
dans le présent manuel.
AVERTISSEMENT ET INSTRUCTIONS D‘UTILISATION DE BASE
Avant utilisation du système, l‘utilisateur doit être dûment informé des risques potentiels
survenant sur le lieu de travail, et recevoir des instructions sur l‘utilisation de son équipement de protection individuelle. Pour toute question, veuillez contacter le fabricant ou votre
distributeur.
1 La gamme comprend les CA-40, CA-40G et CA-40GW.
2 les filtres de soudage en verre minéral trempé peuvent être utili-
sés uniquement avec un film de protection interne approprié
26 27

• Le casque de soudage CA-401 doit être utilisé exclusivement avec les moteurs filtrants à ventilation
FRA FRA
assistée ou les appareils à adduction d‘air comprimé CleanAIR®. Lisez attentivement le présent manuel
ainsi que celui du moteur filtrant ou de l‘appareil à adduction.
• N‘utilisez pas cet équipement dans des espaces confinés, dans un environnement à faible teneur en
oxygène (< 17 %)3, enrichi en oxygène (> 23 %), ou dans un lieu présentant un danger immédiat pour la
vie ou la santé.
• N‘utilisez pas cet équipement dans les environnements contenant des substances polluantes dont le type
ou la concentration sont inconnus.
Remplacement du joint facial
Retrait du joint facial :
• Dégagez la partie arrière du joint facial de la vis de réglage.
• Retirez le harnais de tête en le déclipsant des ouvertures de fixation des supports.
• Dégagez en douceur le joint facial de chaque agrafe située sur le pourtour du bouclier.
• Retirez progressivement le bord en plastique du joint facial depuis les ouvertures de fixation des supports
du serre-tête situés le long du pourtour intérieur du casque.
• N‘utilisez pas cet équipement si le moteur filtrant à ventilation assistée est éteint ou si l‘alimentation du
système à adduction d‘air comprimé est fermée ! En pareil cas, ils ne fournissent l‘un ou l‘autre qu‘une
très faible voire aucune protection. À l‘intérieur de la pièce faciale, une augmentation de la concentration
en dioxyde de carbone et une réduction de la teneur en oxygène, peuvent se produire.
• Si, pendant l‘utilisation, le moteur filtrant ou l‘appareil à adduction s‘arrêtent de fonctionner pour une
raison quelconque, l‘utilisateur doit immédiatement quitter la zone de travail contaminé.
• Lors d‘un travail intense et éprouvant, à l‘inspiration, une dépression peut se créer à l‘intérieur de la pièce
faciale, le facteur de protection étant alors ponctuellement diminué.
• La pièce faciale doit toujours être correctement ajustée sur le visage afin d‘offrir à l‘utilisateur le plus haut
niveau de protection possible. Les cheveux longs et la barbe peuvent causer des pertes d‘étanchéité
au niveau du joint facial, et diminuer ainsi le niveau de protection délivré.
• N‘utilisez pas cet équipement si une pièce ou un élément du système est endommagé. La pièce faciale et
Mise en place du joint facial :
• Fixez le bord en plastique du joint facial en clipsant les supports dans les ouvertures de fixation du harnais
qui sont placés le long du pourtour intérieur du casque.
(réglage recommandé : dans la partie avant (au niveau de l‘écran,) l‘ouverture dans la rangée inférieure la
plus proche de l‘écran. Dans la partie arrière (au niveau du raccord du tuyau), l‘ouverture du milieu dans la
rangée inférieure.)
• Enfilez soigneusement les ouvertures du joint facial sur les agrafes le long du pourtour du bouclier du
casque.
• Insérez le harnais de tête en clipsant les supports dans leurs ouvertures de fixation. (réglage recommandé
: l‘ouverture inférieure du milieu sur tous les supports du harnais.)
• Placez la partie arrière du joint facial sur la vis de réglage.
le tuyau d‘air doivent être vérifiés avant chaque utilisation. D‘éventuelles fissures ou fuites peuvent affecter
le niveau de protection de l‘utilisateur.
• Les oculaires ou visières rayés ou endommagés doivent être impérativement remplacés.
• N‘ôtez pas la pièce faciale, ne désactivez pas le moteur filtrant ou l‘appareil à adduction d‘air CleanAIR®
avant d‘avoir quitté la zone de travail contaminée.
• Utilisez uniquement des filtres d‘origine, homologués, destinés à votre moteur filtrant. Remplacez les filtres
chaque fois que vous sentez une modification de l‘odeur de l‘air arrivant à la pièce faciale.
• Les filtres conçus pour capturer les particules solides et liquides (filtres à particules) ne protègent pas
l‘utilisateur contre les gaz. Les filtres conçus pour saisir les gaz ne protègent pas l‘utilisateur contre les
particules. Dans un environnement de travail contaminé par les deux types de polluants, utilisez des filtres
combinés.
Pour des raisons d‘hygiène, jeter le joint facial usagé de suite après son remplacement !
Remplacement des feuilles de protection pour CA-40
4
Pour protéger le filtre auto-obscurcissant ou la visière du bouclier de meulage, nous vous recommandons
d‘utiliser des feuilles de protection. Un remplacement régulier de ces feuilles prolonge la durée de vie du filtre
auto-obscurcissant, de la visière, et garantit une bonne visibilité en permanence.
Fournie en standard, une feuille de protection en polycarbonate, permet de protéger le filtre auto-obscurcissant. Elle est positionnée sur la face extérieur du filtre auto-obscurcissant et évite le dépôt de gerbes ou de
projections sur le filtre.
Remplacement de la feuille polycarbonate de protection externe du filtre :
Inspection avant utilisation, mise en place
1) Avant utilisation d‘un casque neuf, vérifiez toujours qu‘il est complet et qu‘il n‘a pas subit de dommages
pendant le transport. En phase de rangement, il devrait toujours être stocké dans son étui le protégeant
des rayons directs du soleil, des produits chimiques, des substances abrasives, des chocs et des rayu-
a) Enlevez la feuille en tirant sa partie inférieure de la zone de retrait du bouclier de soudage.
b) Avant installation de la feuille de protection polycarbonate neuve, retirez la mince couche qui protège
chacune de ses deux faces. Positionnbez la feuille en l‘insérant dans les rainures latérales situées avant le
filtre auto-obscurcissant.
res.
2) Afin d‘obtenir le niveau de protection requis, positionnez et serrez correctement le joint facial afin qu‘il
épouse le plus étroitement possible la forme du visage. Une pièce faciale correctement ajustée permet
de créer une légère surpression à l‘intérieur de la zone respiratoire ; elle évite la pénétration de substances
nocives dans la zone respiratoire. Pour que le casque fournisse une protection adéquate de la tête contre
Remplacement de la feuille de protection interne du filtre :
Le film peut être facilement retiré en l‘enlevant des rainures de fixation, mais seulement après avoir retiré le
filtre auto-obscurcissant. Retirez le filtre auto-obscurcissant en desserrant les vis de blocage à l‘intérieur de
l‘écran de soudage.
les chutes d‘objets (selon l‘EN 397+A1), sa taille doit être adaptée à celle de la tête de l‘utilisateur (de 54
à 65 cm). Assurez-vous que le casque est confortablement et fermement positionné sur la tête. Pour
ajuster la taille du harnais, utilisez la roulette de réglage située au niveau de la nuque.
3) Par mesure d‘hygiène, nous vous recommandons, quelle que soit la pièce faciale, d‘utiliser une cagoule
de protection TYVEK optionnelle (réf. 70 02 01).
Mise en garde !
Ne pas nettoyer les feuilles à sec pour éviter les rayures et, en conséquence, une transparence réduite.
Les feuilles peuvent également concentrer l‘électricité statique, dans un environnement poussiéreux la
visibilité peut ainsi être réduite !
Utilisation
Le casque est conçu pour absorber l‘énergie d‘impact d‘un choc par endommagement ou destruction partiels
de la coque et de son harnais de tête. Même dans le cas où un tel endommagement ne serait pas immédiatement clairement visible, tout casque ayant subi un fort impact devrait être remplacé.
Sauf si elle est suggérée par le fabricant, toute modification ou retrait de pièce(s)
Remplacement du filtre de soudage :
a) Retirez les vis de fixation du filtre de soudage depuis l‘intérieur du bouclier.
b) Retirez le filtre.
c) Positionnez le nouveau filtre et fixez-le dans sa position en serrant les vis.
Le casque ne peut être utilisé qu‘avec les filtres de soudage homologués de 90 x 110 mm !
d‘origine(s) du casque est interdite. Les casques ne devraient pas être modifiés pour
fixer des accessoires d‘une autre façon que celle recommandée par le fabricant.
Ne pas appliquer de colles, de peintures, de solvants ou ne placer aucun autocollant si
cela n‘est pas approuvé par le fabricant.
3 Les concentrations mentionnées peuvent varier selon le pays , respectez la réglementation locale !
1 La gamme comprend les CA-40, CA-40G et CA-40GW.
Remplacement du bouclier de soudage et de meulage :
a) Retirez les vis sur les côtés du casque de sécurité.
4 Les CA-40 et CA-40GW.
28 29

b) Inclinez le bouclier pour faciliter son retrait.
FRA FRA
c) Enlevez le(s) bouclier(s) de la goupille de fixation, d‘abord sur l‘une puis sur l‘autre goupille.
d) Installez le(s) nouveau(x) bouclier(s) en procédant dans l‘ordre inverse.
Mise en garde :
Les visières rayées ou endommagées devraient être remplacées à temps.
Contrôle et entretien :
Le casque de sécurité CA-405 est un système constitué d‘un casque, d‘un bouclier de soudage ou de meulage ou de ces deux boucliers, et d‘un harnais de tête. La durée de vie utile du casque varie selon plusieurs
facteurs tels que le froid, la chaleur, les produits chimiques, les rayonx lumineux ou une mauvaise utilisation.
Le casque devrait être contrôlé quotidiennement afin de vérifier d‘éventuel signes de fissuration, de fragilité
ou d‘endommagement de sa structure interne.
Après constat d‘un dommage, le casque doit être remplacé !
Après 5 ans d‘utilisation, le casque doit impérativement être remplacé !
Organisme notifié chargé de la certification CE :
Research Institute of the Safety at Work, v.v.i.-ZL
(Laboratoire d‘essais)
Laboratoire d‘essais n° 1024
Jeruzalémská 9, 116 52 Prague 1
Organisme autorisé 235
Organisme notifié 1024
Organisme notifié chargé de la certification CE
(écran de soudage pour la combinaison avec le
bouclier de meulage, et bouclier de meulage) :
Institut pro testování a certifikaci, a.s. (Institut
d‘essais et de certification)
Třída Tomáše Bati 299, 764 21 Zlín
Organisme autorisé 224
Organisme notifié 1023
Sélection et domaine d‘application: chaque élément de protection des yeux et du visage est marqué
conformément au tableau ci-dessous, dans le but d‘identifier ses domaines d‘usages et son efficacité selon
la norme EN 166:2001.
Stockage
Les conditions de stockage figurant sur l‘emballage sont les suivants :
Voir les informations
fournies par
le fabricant.
Tous les composants des systèmes CleanAIR
®
doivent être stockés dans des lieux dont la température est
Plage de température
de stockage.
Fin de la durée
de stockage.
comprise entre -10 et +50 °C, et dont le taux d‘Humidité Relative varie entre 20 et 80 %. La durée de stockage
en emballage neuf est, au maximum, de 2 ans.
humide, à l‘eau claire, savonneuse, ou à l‘alcool.
Protection des yeux
(EN 166)
Protection des yeux
pendant le soudage
Protection de la tête
(EN 397)
(EN 175)
CA-40
CA-40G
CA-40GW
CA-401 +
Classe
de protection
CA Basic
2000 FC
CA Basic
2000 DF
CA Chemical 2FCA Chemical 3FCA
TH2 TH1 TH2 TH2 TH2 2A 2B
CA
AerGO
Pressure
Liste des pièces détachées :
Type Code Description
1 40 50 40 Filtre auto-obscurcissant V913 DS ADC
2 70 42 02 Bouclier de soudage (pour la version CA-40 GW)
2 70 40 02 Bouclier de soudage de rechange
3 70 41 01 Bouclier de meulage de rechange
4 70 40 60 Joint facial (pour toutes les variantes de CA-40)
5 70 40 44 Bande de confort pour CA-40 (pour toutes les variantes de CA-40)
7 70 40 43 Vis de fixation, 2 p. (pour toutes les variantes de CA-40)
8 70 40 40 Coussins auditifs n° 8 (pour toutes les variantes de CA-40)
8 70 40 41 Coussins auditifs n° 10 (pour toutes les variantes de CA-40)
8 70 40 42 Coussins auditifs n° 12 (pour toutes les variantes de CA-40)
- COS015 Joint en caoutchouc du connecteur d‘air
- 70 40 80 Feuille de protection externe CA-40 (10 p.) pour CA-40, CA-40 GW
- 70 24 81 Feuille de protection interne, 107 x 54 mm en polycarbonate (10 p.) pour CA-40, CA-40 GW
- 110/90-09 Filtre de soudage passif, teinte 9
- 110/90-10 Filtre de soudage passif, teinte 10
- 110/90-11 Filtre de soudage passif, teinte 11
- 110/90-12 Filtre de soudage passif, teinte 12
- 110/90-13 Filtre de soudage passif, teinte 13
Casques de protection complets CA-40
- 70 41 00 Casque de sécurité CA-40G avec bouclier de meulage
- 70 42 01 Casque de sécurité CA-40GW avec bouclier de soudage et de meulage (filtre auto-obscurcissant
- 70 40 01 Casque de sécurité CA-40 avec bouclier de soudage (filtre auto-obscurcissant compris)
compris)
CA Flow
Master
Nettoyage et désinfection
• À l‘issue de chaque travail, nettoyez le casque, vérifiez toutes les pièces et remplacez celles qui sont
endommagées.
• Le nettoyage doit être effectué dans une pièce correctement aérée. Évitez d‘inhaler la poussière nocive
déposée sur les différents éléments !
• Pour nettoyer, utilisez de l‘eau tiède (jusqu‘à +40 °C) avec du savon – ou un autre détergent non abrasif –,
et une brosse douce.
• Il est interdit d‘utiliser des agents nettoyants à base de solvants.
• Après nettoyage des pièces du casque avec un chiffon humide, il est nécessaire de les essuyer ou de les
laisser sécher à température ambiante.
• Pour la désinfection des pièces qui entrent en contact avec la peau, il est possible d‘utiliser des produits
classiques, tels que Ajatin, Incidur, etc.
• Le filtre auto-obscurcissant doit uniquement être nettoyé à l‘aide d‘un chiffon propre, sec ou légèrement
5 La gamme comprend les CA-40, CA-40G et CA-40GW.. 1 La gamme comprend les CA-40, CA-40G et CA-40GW.
30 31

Signification du marquage
FRA DE
Solidité mécanique (du cadre et de l‘o
Solidité renforcée
Impact à petite énergie
Impact à énergie moyenne
Impact à grande énergie
Si les oculaires et la trame n‘ont pas les mêmes marques d‘identification concernant la résistance mécanique, le produit entier est classé de qualité inférieure
pour la protection des yeux.
Si le degré d‘impact est suivi de la lettre « T », par exemple « FT », le moyen fournit une protection contre les particules à grande vitesse lors des températures extrêmes (-5 °C / 55 °C)
Si le degré d‘impact N‘EST PAS suivi de la lettre « T », le moyen de protection des yeux doit être utilisé pour la protection contre les impacts seulement à la
température ambiante.
Classe optique
Classe optique 1
Classe optique 2
Classe optique 3 (ne convient pas à l‘usage à long terme)
Exigences facultatives
Résistance des oculaires contre l‘endommagement par des particules fines
Résistance contre la condensation
Réflectance accrue
Oculaire d‘origine
Oculaire de rechange
Pour les oculaires de verre feuilleté, les instructions de réglage figurent sur la face arrière
Domaine d‘application (du cadre et de l‘oculaire)
Liquides ruisselants (uniquement lunettes)
Liquide éclaboussants (uniquement boucliers faciaux)
Poussières grossières (uniquement lunettes)
Gaz et poussières fines (uniquement lunettes)
Arc électrique (uniquement boucliers faciaux)
Métaux fondus et particules solides chaudes (lunettes ou boucliers faciaux)
Les oculaires et trames ne doivent pas porter la désignation « 9 » mais doivent être porter l‘un des symboles suivants: « F », « B » ou «
A »
Désignation des filtres (uniquement les oculaires)
Filtre de soudage
Filtres ultraviolets (peuvent affecter la reconnaissance des couleurs)
Filtre infrarouge
Filtre solaire (sans spécification infrarouge)
Filtre solaire (avec spécification infrarouge)
Si l‘identification du filtre est suivie de la lettre „C“, par exemple „2C“; la reconnaissance des couleurs n‘est pas affectée.
Pour plus d‘informations, référez-vous aux normes EN 169, EN 170, EN 171 et EN 172
Pour les travaux de soudage, utilisez seulement les oculaires marqués comme écran de soudage de 1.2 à 16.
culaire)
(12 m/sec)
(45 m/sec)
(120 m/sec)
(190 m/sec)
Marquage du produit
Identification du filtre Teinte
2
4
5
6
Marquage du
produit
S
F
B
A
1
2
3
K
N
R
O
3
3
4
5
8
9
1.2 à 16
1.2 à 5
1.2 à 10
1.1 à 4.1
1.1 à 4.1
Einleitung
Die Schutzhelme CA-40, CA-40G und CA-40GW
sind ausschließlich für die Verwendung mit Gebläse-Filtergeräten CleanAIR® oder mit schlauchgebundenen
Atemgeräten für Druckluft mit permanentem Durchfluss (nachfolgend nur „gebläseunterstützte Systeme CleanAIR®“) entwickelt und gewähren so einen Schutz der Atemwege.
CleanAIR® ist ein System des persönlichen Schutzes der Atemwege, das auf dem Prinzip des Überdrucks der
gefilterten Luft in der Atemzone basiert. Das am Gürtel des Benutzers befindliche Gebläse-Filtergerät filtert
die aus der unmittelbaren Umgebung angesaugte Luft, die dann durch den Luftschlauch in den Schutzhelm
geführt wird. Der entstehende Überdruck verhindert das Eindringen von Schadstoffen in die Atemzone und
sichert gleichzeitig einen hohen Benutzerkomfort auch bei längerem Tragen, ohne Notwendigkeit den Atemwiderstand des Filters zu überwinden. Er gewährt einen Schutz vor festen Partikeln in Form von flüssigen sowie
festen Aerosolen, Gasen und Dämpfen in Abhängigkeit vom gewählten Filtertyp. Die am besten geeignete
Kombination eines Kopfteils mit einem Gebläse-Filtergerät wird nach der Art und der Konzentration der Schadstoffe in der Arbeitsumgebung und nach der durchzuführenden Arbeit bestimmt. Die gesamte Reihe CA-401
ermöglicht es, einen geeigneten Schutz für die meisten industriellen Anwendungen zu wählen, wo außer
der Notwendigkeit eines Schutzes der Atemwege auch ein ordentlicher Schutz des Seh- und Hörvermögens
sowie des Kopfes notwendig ist.
Der Schutzhelm CA-40 mit Schweißschild
(nachfolgend nur CA-40) - gewährt außer einem wirksamen Schutz der Atemwege auch einen Schutz des Kopfes und des Sehvermögens sowie des Gesichts
beim Schweißen. Der Schweißschild mit dem selbsttönenden Filter2 V9-13 DS
gewährt dann einen Schutz gegen schädliche Ultraviolett-/Infrarotstrahlung und
Schweißspritzer.
Der Schutzhelm CA-40G mit Schleifschild
(nachfolgend nur CA-40G) – gewährt außer einem wirksamen Schutz der Atemwege auch einen Schutz des Kopfes, des Sehvermögens und des Gesichts gegen schnell fliegende Partikel (Kennzeichnung: A) und gewährt gleichzeitig einen
Basisschutz gegen schädliche Ultraviolettstrahlung.
Der Schutzhelm CA-40GW mit Schleif- und Schweißschild
(nachfolgend nur CA-40GW) – gewährt außer einem wirksamen Schutz der Atemwege auch einen Schutz des Kopfes, des Sehvermögens und des Gesichts gegen schnell fliegende Partikel (Kennzeichnung: A) und gewährt gleichzeitig einen
Basisschutz gegen schädliche Ultraviolettstrahlung. Der Schweißschild mit dem
selbsttönenden Filter2 V9-13 DS gewährt dann einen Schutz gegen schädliche
Ultraviolett-/Infrarotstrahlung und Schweißspritzer.
Genehmigung, Zertifizierung
Der Schutzhelm CA-401 ist in Übereinstimmung mit den Anforderungen der europäischen Norm EN 12941/A2 für die Verwendung mit Gebläse-Filtergeräten CleanAIR® und der EN 14594:2005
für die Verwendung mit schlauchgebundenen Atemgeräten für Gebläseluft mit ständigem Durchfluss getestet
und genehmigt. Alle Teile des verwendeten Systems müssen durch den Hersteller genehmigt sein und in
Übereinstimmung mit den in diesem Handbuch aufgeführten Anweisungen verwendet werden.
WARNUNGEN UND GRUNDLEGENDE ANWEISUNGEN FÜR DIE VERWENDUNG
Vor der Verwendung des Systems muss der Benutzer gründlich mit den möglichen Risiken
am Arbeitsplatz vertraut sein und ordentlich über eine sichere Verwendung des persönlichen Schutzmittels belehrt sein. Kontaktieren Sie bei Unklarheiten den Hersteller oder Ihren
Händler.
1 einschließlich der abgeleiteten Varianten (CA-40, CA-40G, CA-40GW)
2 die Schweißfilter aus gehärtetem Mineralglas können nur in Verbindung mit geeigne-
ten inneren Schutzfolien verwendet werden!
32 33
• Der Schweißhelm CA-401 darf ausschließlich mit einem CleanAIR®-Gebläse-Filtergerät oder mit einem
DE DE
gebläseunterstützten System CleanAIR® verwendet werden. Lesen Sie sich deshalb diese Anleitung
gemeinsam mit der Benutzungsanleitung zum CleanAIR®-Gebläse-Filtergerät oder mit der Benutzungsan leitung des gebläseunterstützten Systems CleanAIR® durch.
• Nicht in geschlossenen Räumen, in einer Umgebung mit Sauerstoffmangel (<17 %)3, oder in einer mit
Sauerstoff angereicherten Umgebung (>23 %) oder wo eine sofortige Gefährdung des Lebens oder der
Gesundheit droht, verwenden.
• Nicht in einer Umgebung verwenden, wo die Art der Kontaminierung oder deren Konzentration nicht
bekannt ist
• Nicht verwenden, wenn das Gebläse-Filtergerät ausgeschaltet ist oder die Zuleitung der Druckluft
ausgeschaltet ist! Bei der Arbeit mit einem ausgeschalteten Gebläse-Filtergerät sowie bei einer geschlos senen Zuleitung der Druckluft ist der Schutz der Atemorgane gering oder nicht vorhanden. Ebenfalls kann
es innerhalb des Helms zu einer Erhöhung der Konzentration von Kohlendioxid und zu einer Verringerung
des Sauerstoffanteils kommen.
• Wenn das Gebläse-Filtergerät oder das Druckluft unterstützte System während der Verwendung aus
irgendeinem Grund aufhört zu arbeiten, muss der Benutzer unverzüglich den kontaminierten Arbeitsplatz
verlassen.
• Bei einer sehr anstrengenden Arbeit kommt es innerhalb des Helms zu einem Unterdruck beim Einatmen
und dadurch zu einer Verringerung des Schutzfaktors.
• Das Kopfteil muss immer richtig zum Gesicht hin abgedichtet sein, damit ein perfektes Schutzniveau des
Benutzers garantiert wird. Im Fall, dass in die Abdichtkante ein Bart oder lange Haare kommen, kann es
durch den Einfluss von Undichtigkeiten zu einer Verringerung des gewährten Schutzes kommen.
• Nicht verwenden, wenn irgendein Teil des Systems beschädigt ist. Das Kopfteil und der Luftschlauch
müssen vor jeder Verwendung kontrolliert werden. Eventuelle Risse oder Undichtigkeiten können das
geforderte Schutzniveau des Benutzers negativ beeinflussen.
• Zerkratzte oder anderweitig beschädigte Sichtschilder müssen unverzüglich ausgetauscht werden.
• Nehmen Sie den Helm nicht vom Kopf und schalten Sie auch nicht das Gebläse-Filtergerät sowie das
Druckluft unterstützte System CleanAIR® aus, solange Sie nicht den kontaminierten Arbeitsplatz
verlassen haben.
• Verwenden Sie nur zertifizierte originale Filter, die für Ihr Gebläse-Filtergerät bestimmt sind. Tauschen Sie
die Filter jedes Mal, wenn Sie eine Änderung des Geruchs der zugeführten Luft bemerken, die vom Gerät
kommt.
• Filter, die zur Aufnahme von festen und flüssigen Partikeln bestimmt sind, schützen den Benutzer nicht
gegenüber Gasen. Filter, die zur Aufnahme von Gasen bestimmt sind, schützen den Benutzer nicht gegen
Partikel. Für eine Arbeitsumgebung, die durch beide Arten kontaminiert ist, müssen kombinierte Filter
verwendet werden.
Kontrolle vor der Verwendung / dem Aufsetzen
1) Kontrollieren Sie vor der Verwendung eines neuen Produkts immer, ob das Gerät vollständig ist und es
beim Transport nicht zu einer Beschädigung gekommen ist. Bei Nichtverwendung sollte der Helm in einer
Hülle aufbewahrt werden, die ihn vor direkter Sonneneinstrahlung, Chemikalien und abrasiven Stoffen
schützt und in der es nicht zu dessen Beschädigung durch den Kontakt mit harten Gegenständen/
Oberflächen kommen kann.
2) Ziehen Sie zur Absicherung der geforderten Schutzeigenschaften des Helms den Dichtkragen zum
Gesicht so an, dass er so dicht wie möglich das Gesicht umschließt. Ein richtig aufgesetztes Kopfteil in
Kombination mit dem zugeführten Luftstrom bildet einen leichten Überdruck im Raum des Gesichts, der
kein Eindringen von Schadstoffen in die Atemzone des Anwenders erlaubt. Damit dieser Helm einen
entsprechenden Schutz des Kopfes gegen fallende Gegenstände (nach EN 397+A1) gewährt, muss
dessen Größe dem Kopf des Anwenders angepasst sein (54-65 cm). Stellen Sie deshalb sicher, dass der
Helm auf dem Kopf bequem, aber fest sitzt. Verwenden Sie für die Einstellung der optimalen Größe des
Kopfkreuzes das Einstellrädchen im Nacken.
3) In alle Kopfteile empfehlen wir aus hygienischen Gründen einen Helmschutz TYVEK (Best.-Nr. 70 02 01)
zu verwenden.
Verwendung:
Der Helm ist so hergestellt, dass er die Stoßenergie durch eine teilweise Destruktion oder Beschädigung
des Mantels und des Kopfeinsatzes aufnimmt. Auch in dem Fall, dass eine solche Beschädigung nicht sofort
offensichtlich ist, sollte jeder Helm, der einem ernsthaften Stoß ausgesetzt war, ausgetauscht werden.
Wenn es sich nicht um eine Empfehlung des Herstellers des Helms handelt, ist es verboten, irgendwelche eigenen Anpassungen durchzuführen oder irgendwelche ursprünglichen Teile des Helms zu entfernen. Die Helme sollten nicht zum Zweck der Befestigung
von Zubehör in einer Weise angepasst werden, die der Hersteller nicht empfiehlt.
Tragen Sie keine Klebstoffe, Farben sowie Verdünner auf oder kleben Sie selbsthaftende
Etiketten auf, wenn sie nicht den Anweisungen des Herstellers des Helms entsprechen.
Austausch des Kragens:
Entnahme des Kragens:
• Ziehen Sie den hinteren Teil des Kragens von der Einstellschraube.
• Entnehmen Sie das Kopfkreuz durch das Aushaken aus den Verankerungsöffnungen der Kopfkreuzhalter
aus dem Helm.
• Ziehen Sie vorsichtig den Kragen von den einzelnen Pins ab, die sich auf dem Umfang des Helmschilds
befinden.
• Entnehmen Sie schrittweise den Kunststoffrand des Kragens von den Verankerungsöffnungen
der Kopfkreuzhalter, die sich am inneren Umfang des Helms befinden.
Einsetzen des Kragens:
• Befestigen Sie den Rand des Kragens durch das Einklicken in die Verankerungsöffnungen der Kopfkreu zhalter, die sich am inneren Umfang des Helms befinden.
(empfohlene Einstellung - im vorderen Teil (beim Schild) die Öffnung in der unteren Reihe am nächsten zum
Schild. Im hinteren Teil (beim Anschlussstecker des Schlauchs) die mittlere Öffnung in der unteren Reihe.)
• Ziehen Sie vorsichtig die Öffnungen des Kragens auf die einzelnen Pins, die sich am Schild des Helms
befinden.
• Setzen Sie in den Helm das Kopfkreuz durch Einklicken in die Verankerungsöffnungen der Kopfkreuzhalter
ein. (empfohlene Einstellung - mittlere Öffnung ganz oben in allen Kopfkreuzhaltern.)
• Ziehen Sie den hinteren Teil des Kragens auf die Einstellschraube.
Vernichten Sie aus hygienischen Gründen den alten Kragen sofort nach dem Austausch, damit es nicht
zu dessen Wiederverwendung kommen kann.
Austausch der Schutzfolien beim CA-40
4
Wir empfehlen, eine Schutzfolie für den Schutz des selbsttönenden Filters und des Gesichtsfeld des Schleiffilters zu verwenden. Ein rechtzeitiger Austausch der Folie verlängert die Lebensdauer des selbsttönenden
Filters, der Sichtfelder und garantiert eine ständige gute Durchsicht.
Für den Schutz des selbsttönenden Filters wird eine Schutzfolie aus Polycarbonat geliefert. Die Folie wird
von der äußeren sowie inneren Seite des selbsttönenden Filters eingesetzt und verhindert das Anhaften von
Schweißperlen auf dem Visier.
Austausch der äußeren Schutzfolie:
a) Tauschen Sie die Folie durch Ziehen an deren unteren Teil im Bereich der Aussparung des Schweißschilds
aus.
b) Entfernen Sie vor der eigentlichen Installation der Schutzfolie immer von deren beiden Seiten die dünne
Deckschicht. Ein erneutes Einsetzen wird durch das Einschieben der Folie in die seitlichen Halter des
Raums vor dem selbsttönenden Filter durchgeführt.
Austausch der inneren Schutzfolie:
Die Folie lässt sich durch ein einfaches Ausschieben aus den Befestigungsnuten entnehmen, aber nur nach
der Entnahme des selbsttönenden Filters. Die Entnahme des selbsttönenden Filters wird durch das Lösen der
Sicherungsschrauben auf der Innenseite des Schweißschilds durchgeführt.
3 die aufgeführten Konzentrationen können sich in verschiedenen Ländern
unterscheiden, beachten Sie die örtlichen Anordnungen!
1 einschließlich der abgeleiteten Varianten (CA-40, CA-40G, CA-40GW)
4 einschließlich der abgeleiteten Varianten (CA-40, CA-40GW)
34 35

Hinweis!
DE DE
Reinigen Sie die Folie nicht trocken, da es dadurch leicht zu deren Zerkratzen und einer Verringerung
der Durchsichtigkeit kommt. Die Folie können sich ebenfalls elektrostatisch aufladen und in einer
Alle Bestandteile der Systeme CleanAIR® müssen in Räumen mit einer Lufttemperatur im Bereich von
-10 bis 50°C und einer relativen Luftfeuchtigkeit im Bereich von 20 – 80 % RH gelagert werden. Die Lagerungszeit in einer ungeöffneten Verpackung beträgt max. 2 Jahre.
staubigen Umgebung kann es deshalb zu einer Verschlechterung der Durchsichtigkeit kommen!
Reinigung und Desinfektion
Austausch des Schweißfilters:
a) Demontieren Sie die Sicherungsschrauben des Schweißfilters von der Innenseite des Schweißschilds
des Helms.
b) Entnehmen Sie den Schweißfilter.
c) Setzen Sie einen neuen Schweißfilter ein und sichern Sie ihn in der ursprünglichen Position durch
das Anziehen der Schrauben.
• Reinigen Sie nach jeder Beendigung der Arbeit das Kopfteil, kontrollieren Sie die einzelnen Teile und
tauschen Sie beschädigte Teile aus.
• Die Reinigung muss in einem gut belüfteten Raum durchgeführt werden. Achtung auf Einatmen von
schädlichem Staub, der sich auf den einzelnen Teilen abgesetzt hat!
• Verwenden Sie zur Reinigung lauwarmes Wasser (bis +40°C) mit Seife oder einem anderen nicht abrasiven
Waschmittel und eine weiche Bürste.
• Es ist verboten, zur Reinigung Mittel mit Verdünner zu verwenden.
Der Helm lässt sich nur mit genehmigten Schweißfiltern mit einer Abmessung von 90 x 110 mm verwenden!
• Nach der Reinigung der einzelnen Teile mit einem feuchten Lappen müssen sie trocken gerieben werden
bzw. bei Zimmertemperatur trocknen gelassen werden.
• Für die Desinfektion von Teilen, die in Kontakt mit der Haut kommen, können gewöhnliche Mittel, z.B.
Austausch des Schweiß- und Schleiffilters:
a) Demontieren Sie die Schrauben an den Seiten des Schutzhelms.
b) Klappen Sie das Schild zur einfacheren Entnahme auf.
Ajatin, Incidur u.ä. verwendet werden.
• Der selbsttönende Schweißfilter lässt sich nur mit einem sauberen, trockenen oder nur leicht angefeuch-
teten Lappen (in sauberen Wasser, Seifenlösung oder Alkohol) reinigen.
c) Entnehmen Sie das Schild/die Schilde zuerst auf der einen und dann auch auf der anderen Seite des
Helms von den Verankerungsstiften.
d) Setzen Sie ein neues Schild/neue Schilder in umgekehrter Reihenfolge ein.
Hinweis:
Zerkratzte oder anderweitig beschädigte Sichtfelder sollten rechtzeitig durch neue ausgetauscht werden.
Kontrolle und Wartung:
Der Schutzhelm CA-405 ist ein komplettes System, das aus dem eigentlichen Helm, einem Schleif-/Schweißschild oder deren Kombination und einem Kopfkreuz besteht. Die nutzbare Lebensdauer des Helms beeinflussen viele Faktoren wie z.B.: Kälte, Wärme, Chemikalien, Sonnenlicht oder eine falsche Verwendung. Der
Helm sollte täglich kontrolliert werden, ob er Anzeichen von Rissen, Brüchigkeit oder Beschädigungen der
Innenkonstruktion aufweist.
CA-40
CA-40G
CA-40GW
CA-401 +
Schutzklassen TH2 TH1 TH2 TH2 TH2 2A 2B
Augenschutz
(EN 166)
Augenschutz
beim Schweißen
(EN 175)
CA Basic
2000 FC
CA Basic
2000 DF
CA Chemical 2FCA Chemical 3FCA
AerGO
Kopfschutz
(EN 397)
CA
Pressure
CA Flow
Master
Ersatzteilverzeichnis:
Bei Feststellung irgendeiner Beschädigung muss der Helm gegen einen neuen
ausgetauscht werden!
Nach fünf Jahren Verwendung muss der Helm immer ausgetauscht werden!
Notifizierte Person für die CE-Prüfung:
Výzkumný ústav bezpečnosti práce, v.v.i. - ZL
Prüflabor Nr. 1024
Jeruzalémská 9, 116 52 Prag 1
Autorisierte Person 235
Notifizierte Person 1024
Notifizierte Person für die CE-Prüfung (Schweiß-
schild für die Kombination mit einem Schleifschild
und Schleifschild):
Institut pro testování a certifikaci, a.s.
Třída Tomáše Bati 299, 764 21 Zlín
Autorisierte Person 224
Notifizierte Person 1023
Auswahl und Bereich der Anwendung: Jedes Schutzmittel für Augen und Gesicht ist in Übereinstimmung mit
der unten aufgeführten Tabelle zur Identifikation seines Anwendungsbereichs und der Wirksamkeit nach den
Anforderungen der EN 166:2001 gekennzeichnet.
Lagerung
Die Lagerungsbedingungen sind auf der Verpackung durch diese Symbole gekennzeichnet:
Siehe durch den Hersteller zur Verfügung
gestellte Information.
Temperaturbereich der
Lagerung.
Ende der Lagerfähigkeit.
(Bildanhang: 1A)
Position Codebezeich-
1 40 50 40 Selbsttönender Filter V913 DS ADC
2 70 42 02 Schweißschild (für Version CA-40GW)
2 70 40 02 CA-40 Ersatzschweißschild
3 70 41 01 Ersatzschleifschild
4 70 40 60 CA-40 Gesichtskragen (für alle Typen CA-40)
5 70 40 44 Schweißband CA-40 (für alle Typen CA-40)
7 70 40 43 Befestigungsschrauben 2 St.(für alle Typen CA-40)
8 70 40 40 Gehörschutzmuscheln Nr. 8 (für alle Typen CA-40)
8 70 40 41 Gehörschutzmuscheln Nr. 10 (für alle Typen CA-40)
8 70 40 42 Gehörschutzmuscheln Nr. 12 (für alle Typen CA-40)
- COS015 Gummidichtung des Steckers des Luftkanals
- 70 40 80 Äußere Schutzfolie CA-40 (10 St.) für CA-40, CA-40GW
- 70 24 81 Innere Schutzfolie, 107 x 51 Polycarbonat (10 St.) für CA-40, CA-40GW
- 110/90-09 Passiver Schweißfilter, Tönungsstufe 9
- 110/90-10 Passiver Schweißfilter, Tönungsstufe 10
- 110/90-11 Passiver Schweißfilter, Tönungsstufe 11
- 110/90-12 Passiver Schweißfilter, Tönungsstufe 12
- 110/90-13 Passiver Schweißfilter, Tönungsstufe 13
Kompletter Schutzhelm CA-40
nung
Beschreibung
5 einschließlich der abgeleiteten Varianten (CA-40, CA-40G, CA-40GW) 1 einschließlich der abgeleiteten Varianten (CA-40, CA-40G, CA-40GW)
36 37

DE ITA
- 70 41 00 Schutzhelm CA-40 mit Schleifschild
- 70 42 01 Schutzhelm CA-40GW mit Schweiß- und Schleifschild (einschließlich selbsttönender Filter)
- 70 40 01 Schutzhelm CA-40 mit Schweißschild (einschließlich selbsttönender Filter)
Introduzione
I caschi di protezione CA-40, CA-40G e CA-40GW
sono progettati esclusivamente per l‘uso con i respiratori isolanti ad adduzione d‘aria (di seguito solo PAPR)
CleanAIR® oppure con i respiratori ad aria compressa a flusso continuo (di seguito solo “sistemi ad aria
compressa CleanAIR®”) ed offrono così la salvaguardia delle vie respiratorie.
Bedeutung der Kennzeichnung
Mechanische Festigkeit (des Rahmens und der
Erhöhte Festigkeit
Aufprall mit geringer Energie
Aufprall mit mittlerer Energie
Aufprall mit großer Energie
Wenn die Gesichtsfelder und der Rahmen nicht die gleichen Identifikationszeichen haben, welche die mechanische Festigkeit betreffen, wird das ganze
Mittel für den Schutz der Augen wie die geringere Qualität klassifiziert.
Wenn auf die Aufprallstufe der Buchstabe „T“ folgt, z.B. „FT“, gewährt das Mittel einen Schutz gegen Hochgeschwindigkeitspartikel bei extremen Temperaturen
(-5°C / +55°C)
Wenn die Aufprallstufe NICHT vom Buchstaben „T“ gefolgt wird, darf das Mittel für den Augenschutz für den Schutz eines Aufpralls nur bei Zimmertemperatur
verwendet werden.
Optische Klasse
Optische Klasse 1
Optische Klasse 2
Optische Klasse 3 (nicht für eine längerfristige Verwendung geeignet)
Wählbare Anforderungen
Widerstandsfähigkeit des Sichtfelds gegen Beschädigung durch feine Partikel
Widerstandsfähigkeit gegen Taubildung
Erhöhte Entspiegelung
Ursprüngliches Sichtfeld
Ersatzsichtfeld
Bei einem Sichtfeld aus laminiertem Glas sind die Anweisungen für eine Anpassung auf der hinteren Seite gekennzeichnet
Verwendungsbereich (Rahmen und Sichtfeld
Tropfende Flüssigkeiten (nur Brille)
Spritzende Flüssigkeiten (nur Gesichtsschilder)
Grober Staub (nur Brille)
Gas und feiner Staub (nur Brille)
Elektrobogen (nur Gesichtsschilder)
Geschmolzene Metalle und heiße feste Partikel (Brille oder Gesichtsschilder)
Gesichtsfelder sowie Rahmen müssen außer der Kennzeichnung „9“ auch mit einem der Symbole „F“, „B“ oder „A“ gekennzeichnet sein.
Kennzeichnung der Filter (nur Sichtfelder)
Schweißfilter
Ultraviolettfilter (kann die Farberkennung beeinflussen)
Infrarotfilter
Sonnenlichtfilter (ohne Infrarotspezifikation)
Sonnenlichtfilter (mit Infrarotspezifikation)
Wenn nach der Identifikation des Filters der Buchstabe „C“, z.B. „2C“ folgt, wird die Erkennung von Farben nicht beeinflusst.
Lesen Sie sich bitte für weitere Informationen die Normen EN 169, EN 170, EN 171 und EN 172 durch.
Verwenden Sie für Schweißarbeiten nur Sichtfelder, die als Schweißfilter 1.2 bis 16 gekennzeichnet sind.
Gesichtsfelder)
(12 m/sec)
(45 m/sec)
(120 m/sec)
(190 m/sec)
Kennzeichnung des Produkts
Identifikation des
Filters
2
4
5
6
Kennzeichnung
des Produkts
S
F
B
A
1
2
3
K
N
R
O
3
3
4
5
8
9
Farbton
1.2 bis 16
1.2 bis 5
1.2 bis 10
1.1 bis 4.1
1.1 bis 4.1
CleanAIR® è un sistema di salvaguardia personale delle vie respiratorie basato sul principio della pressione
dell‘aria filtrata nella zona respiratoria. Il PAPR collocato sul fianco dell‘utente filtra l‘aria aspirata dall‘ambiente
circostante che poi viene condotta attraverso il tubo nella maschera protettiva. La pressione che viene a
crearsi impedisce l‘infiltrazione delle sostanze dannose e al tempo stesso assicura un elevato comfort per
l‘utente anche in caso di utilizzo prolungato senza necessità di dover superare la resistenza di respirazione
del filtro. Fornisce protezione contro le particelle solide in forma di aerosol liquidi e solidi, contro i gas e i
vapori a seconda del tipo selezionato nel filtro. La combinazione migliore del pezzo della testa con il PAPR
viene stabilita secondo il tipo e la concentrazione di sostanze nocive nell‘ambiente di lavoro e secondo il tipo
di lavoro svolto. L‘intera serie CA-401 consente di selezionare una protezione adatta per la maggior parte delle
applicazioni industriali dove oltre alla salvaguardia delle vie respiratorie è necessaria anche un‘opportuna
salvaguardia della vista, dell‘udito e della testa.
Casco di protezione CA-40 con schermo da saldatura
(di seguito solo CA-40) – oltre alla salvaguardia efficace delle vie respiratorie offre
anche la salvaguardia della testa e della vista e del viso durante la saldatura. Lo
schermo da saldatura con filtro auto-oscurante2 V9-13 DS offre poi protezione
contro le radiazioni ultraviolette / infrarosse e contro gli spruzzi della saldatura.
Casco di protezione CA-40G con schermo abrasivo
(di seguito solo CA-40G) – oltre alla salvaguardia efficace delle vie respiratorie
offre anche la salvaguardia della testa e della vista e del viso contro le particelli
volanti rapide (contrassegno: A) e al tempo stesso offre una protezione di base
contro i raggi nocivi UV.
Casco di protezione CA-40G con schermo abrasivo e da saldatura
(di seguito solo CA-40GW) – oltre alla salvaguardia efficace delle vie respiratorie
offre anche la salvaguardia della testa e della vista e del viso contro le particelli
volanti rapide (contrassegno: A) e al tempo stesso offre una protezione di base
contro i raggi nocivi UV. Lo schermo da saldatura con filtro auto-oscurante2 V9-13
DS offre poi protezione contro le radiazioni ultraviolette / infrarosse e contro gli
spruzzi della saldatura.
Approvazioni, certificazioni
Il casco di protezione CA-401 è testato ed approvato in conformità con i requisiti
della norma europea EN 12941/A2 per l‘utilizzo dei respiratori isolanti ad adduzione
d‘aria CleanAIR® ed EN 14594:2005 per l‘utilizzo dei respiratori ad aria compressa
a flusso continuo. Tutte le parti del sistema utilizzato devono essere approvate dal produttore e devono essere utilizzate conformemente alle istruzioni indicate in questo manuale.
AVVERTENZE E ISTRUZIONI DI BASE PER L‘USO
Prima dell‘uso del sistema l‘utente deve essere adeguatamente messo a conoscenza dei
possibili rischi sul luogo di lavoro e deve essere adeguatamente messo a conoscenza
dell‘uso in sicurezza del dispositivo di protezione personale. In caso di qualsiasi incertezza
contattate il produttore oppure il vostro distributore.
1 comprese le relative versioni (CA-40, CA-40G, CA-40GW)
2 i filtri da saldatura in vetro minerale indurito possono essere utilizzati
soltanto insieme alle opportune pellicole interne di protezione!
38 39
• Il casco di protezione CA-401 deve essere utilizzato esclusivamente con il PAPR CleanAIR® oppure con
ITA ITA
i sistemi di aria compressa CleanAIR®. Per questo studiate queste istruzioni insieme alle istruzioni per
l‘uso del PAPR CleanAIR® oppure insieme alle istruzioni per l‘uso del sistema ad aria compressa
CleanAIR
®
• Non utilizzate in spazi chiusi, in spazi con insufficienza di ossigeno (<17%)3, in ambienti arricchiti di
ossigeno (>23%) oppure dove esiste un pericolo immediato per la vita o la salute.
• Non utilizzate negli ambienti, dove l‘utente non conosce il tipo di contaminazione e la sua concentrazione.
• Non utilizzate se il respiratore isolante ad adduzione d‘aria è spento oppure se l‘afflusso d‘aria compressa
è chiuso! Quando si lavora con il PAPR spento oppure con l‘afflusso di aria compressa chiuso la
protezione degli organi respiratori è bassa o inesistente. Inoltre all‘interno della maschera può avere luogo
una concentrazione maggiore di anidride carbonica e una diminuzione del contenuto di ossigeno.
• Se il PAPR oppure il sistema di aria compressa cessa di funzionare durante l‘utilizzo per qualsiasi motivo,
l‘utente deve abbandonare immediatamente il luogo di lavoro contaminato.
• In caso di lavoro molto faticoso dentro la maschera può crearsi una sottopressione durante l‘inalazione e,
con questo, una diminuzione del fattore protettivo.
• La parte della testa deve sempre essere ben sigillata al viso in modo che sia garantita la salvaguardia
perfetta dell‘utente. Nel caso in cui nella linea di guarnizione entrino dei peli della barba, oppure dei capelli
la protezione offerta può diminuire a causa della permeabilità.
• Non utilizzate se una qualsiasi parte del sistema è danneggiata. Prima di ogni utilizzo la parte della testa
e il tubo dell‘aria devono essere controllati. Le eventuali fessure oppure permeabilità possono influire
negativamente il livello richiesto di protezione dell‘utente.
• Lo schermo graffiato o danneggiato in altro modo deve essere sostituito immediatamente.
• Non levatevi il casco dalla testa né spegnete il PARP oppure il sistema di aria compressa CleanAIR® fino
a quando non avete abbandonato il luogo di lavoro contaminato.
• Utilizzate soltanto filtri originali certificati destinati al Vostro respiratore isolante ad adduzione d‘aria.
Sostituite i filtri ogni volta percepite un cambiamento dell‘odore dell‘aria in afflusso nel dispositivo.
• I filtri progettati per catturare le parti solide e quelle liquide (particelle) non proteggono l‘utente da nessun
gas. I filtri progettati per catturare i gas non proteggono l‘utente da nessuna particella. Negli ambienti
di lavoro contaminati da entrambi i tipi di inquinamento è necessario utilizzare i filtri combinati.
Controllo prima dell‘uso, applicazione.
1) Prima di usare il prodotto nuovo controllate sempre se il dispositivo è completo e se durante il trasporto
non è stato danneggiato. Quando non viene utilizzato il casco dovrebbe essere deposto in un involucro
che lo protegga dalla diretta luce solare e dalle sostanze abrasive e nel quale non può essere danneggiato
dal contatto con oggetti o superfici duri.
2) Per assicurare le proprietà di protezione richieste del casco serrate adeguatamente la maschera sigillante
al viso in modo tale che ricalchi al massimo il viso. La parte della testa applicata correttamente in
combinazione con il flusso di aria in arrivo crea una leggera sovrapressione nello spazio del viso che
impedisce la penetrazione delle sostanze nocive nella zona di respirazione dell‘utente. Affinché questo
casco offra un‘adeguata protezione della testa contro gli oggetti in caduta (ai sensi di EN 397+A1), la sua
grandezza deve essere adeguata alla grandezza della testa dell‘utente (54-65 cm). Assicuratevi, dunque,
che il casco appoggi sulla testa in modo comodo ma stabile. Per impostare in modo ottimale la grandezza
del copricapo utilizzate la rotella di regolazione sulla nuca.
3) Per motivi igienici raccomandiamo di utilizzare la maschera protettiva TYVEK (num. di ordinazione
70 02 01) per tutti i pezzi della testa.
Utilizzo:
PIl casco è prodotto in modo tale da assorbire l‘energia dell‘urto tramite la distruzione o il danneggiamento parziale della calotta e della guarnitura della testa. Anche nel caso in cui tale danneggiamento non sia evidente
subito, ogni casco che ha subito un urto più grande dovrebbe essere sostituito.
Cambio della maschera
Estrazione della maschera:
• Estraete la parte posteriore della maschera dalla vite di regolazione.
• Estraete dal casco il copricapo facendolo scattare dai fori di fissaggio dei sostegni del copricapo
• Estraete con cautela la maschera dai singoli perni collocati lungo il perimetro dello schermo del casco.
• Gradualmente estraete l‘orlo di plastica dai fori di fissaggio dei sostegni del copricapo collocati lungo
il perimetro interno del casco.
Applicazione della maschera:
• Fissate l‘orlo di plastica facendolo scattare nei fori di fissaggio dei sostegni del copricapo collocati lungo
il perimetro interno del casco.
(impostazione raccomandata – nella parte interna (vicino allo schermo) foro nella linea inferiore più vicino
alla schermo. Nella parte inferiore (presso il connettore dell‘attacco del tupo) ultimo foro nella linea
inferiore.)
• Inserite con cautela i fori della maschera nei singoli perni collocati sullo schermo del casco.
• Inserite nel casco il copricapo facendolo scattare nei fori di fissaggio dei sostegni del copricapo.
(impostazione raccomandata - foro anteriore del tutto sopra in tutti i supporti del copricapo.)
• Inserite la parte posteriore della maschera sulla vite di regolazione.
Per motivi igienici danneggiate la vecchia maschera subito dopo la sostituzione in modo che non possa
essere utilizzata nuovamente!
Sostituzione delle pellicole protettive in CA-40
Raccomandiamo di utilizzare le pellicole protettive per la protezione del filtro auto-oscurante e lo schermo
dello schermo abrasivo. La sostituzione rapida delle pellicole prolunga la durata del filtro auto oscurante, degli
schermi e garantisce una buona vista permanente.
Per la protezione del filtro auto-oscurante viene fornita una pellicola protettiva in policarbonato. La pellicola
viene applicata dalla parte esterna ed interna del filtro auto-oscurante ed impedisce che si depositino le palline degli spruzzi sullo spioncino.
Sostituzione della pellicola esterna di protezione:
a) Sostituite la pellicola tirandola per la sua parte inferiore nella zona dello schermo da saldatura.
b) Prima di installare la pellicola protettiva, eliminate sempre da entrambe le sue parti il sottile strato
di copertura. La nuova applicazione viene effettuata inserendo la pellicola nei sostegni laterali dello spazio
davanti al filtro auto-oscurante.
Sostituzione della pellicola interna di protezione:
La pellicola può essere estratta facilmente dai sostegni di fissaggio, ma solo dopo aver estratto il filtro auto-
-oscurante. L‘estrazione del filtro auto-oscurante ha luogo allentando le viti di sicurezza sul lato interno dello
schermo da saldatura.
Attenzione!
Non pulite la pellicola a secco, altrimenti può essere graffiata e la visibilità può diminuire. Le pellicole
A meno che non si tratti di una raccomandazione del produttore del casco, è vietato
eseguire qualsiasi modifica personale, oppure eliminare qualsiasi pezzo originale del
casco. I caschi non dovrebbero essere modificati al fine di fissare qualche accessorio in
un modo che non è raccomandato dal produttore.
Non applicate colle, vernici, solventi e non applicate adesivi a meno che ciò non sia
raccomandato dal produttore del casco.
4
sono anche in grado di concentrare una carica elettrostatica e per questo in un ambiente polveroso può
avere luogo un peggioramento della visibilità.
3 le concentrazioni indicate possono cambiare nei vari paesi, seguite le normative locali!
1 comprese le relative varianti (CA-40, CA-40G, CA-40GW) 4 comprese le relative versioni (CA-40, CA-40GW)
40 41

Sostituzione del filtro da saldatura:
ITA ITA
a) Smontate le viti di sicurezza del filtro da saldatura dalla parte interna della maschera da saldatura
del casco.
b) Estraete il filtro da saldatura.
c) Inserite il nuovo filtro da saldatura e fissatelonella posizione originale stringendo le viti.
• Per la pulizia utilizzate acqua tiepida (fino a +40°C) con sapone oppure con un altro detergente non
abrasivo e una spazzola morbida.
• L‘uso di detergenti con solventi per la pulizia è vietato.
• Dopo aver pulito le singole parti con un tessuto umido è necessario asciugare, eventualmente lasciare
asciugare a temperatura ambiente.
• Per disinfettare le parti che entrano in contatto con la pelle è possibile utilizzare i comuni preparati quali
La maschera può essere utilizzata soltanto con i filtri da saldatura approvati della dimensione 90x110 mm!
Ajatin, Incidur etc.
• Il filtro da saldatura auto-oscurante deve essere pulito solo con un panno pulito, secco, oppure
Sostituzione dello schermo da saldatura e abrasivo:
a) Smontate le viti sulle parti laterali del casco di protezione.
b) Ribaltate lo schermo per un‘estrazione più semplice.
c) Estraete lo schermo/gli schermi prima da una parte e poi dall‘altra del casco dal perno di fissaggio.
d) Inserite il nuovo schermo/schermi nell‘ordine opposto.
Avvertenza:
Lo schermo graffiato o danneggiato in altro modo deve essere sostituito immediatamente.
Controllo e manutenzione:
Casco di protezione CA-405 è un sistema completo composto dal casco, lo schermo abrasivo/da saldatura
oppure dalla loro combinazione e dal copricapo. La durata del casco è influenzato da vari fattori quali: il freddo,
il calco, gli agenti chimici, la luce solare oppure l‘utilizzo scorretto. Il casco dovrebbe essere controllato ogni
giorno se non ci sono segni di crepe, fragilità oppure danneggiamento della costruzione interna.
leggermente umido
Protezione degli occhi
CA-40
CA-40G
CA-40GW
CA-401 +
Classe
di protezione
( EN 166 )
Protezione degli occhi
durante la saldatura
Protezione della testa
( EN 397 )
( EN 175 )
CA Basic
2000 FC
CA Basic
2000 DF
CA Chemical 2FCA Chemical 3FCA
AerGO
CA
Pressure
TH2 TH1 TH2 TH2 TH2 2A 2B
CA Flow
Master
(in acqua pulita, in una soluzione di sapone oppure alcool).
In caso un qualsiasi danneggiamento venga accertato il casco deve essere sostituito
con uno nuovo!
Il casco deve essere sempre sostituito dopo cinque anni di utilizzo!
Organismo notificato per i test CE:
Výzkumný ústav bezpečnosti práce, v.v.i. - ZL
Laboratorio di prova n. 1024
Jeruzalémská 9, 116 52 Praha 1
Persona autorizzata 235
Persona autorizzata 1024
Organismo notificato per i test CE (schermo da
saldatura per la combinazione con lo schermo abra-
sivo e lo schermo abrasivo):
Institut pro testování a certifikaci, a.s.
Třída Tomáše Bati 299, 764 21 Zlín
Persona autorizzata 224
Organismo notificato 1023
Scelta e campo di utilizzo: Ogni mezzo di protezione degli occhi e del viso è contrassegnato conformemente
alla tabella sotto indicata per l‘identificazione del suo campo di utilizzo e dell‘efficacia secondo i requisiti di
EN 166:2001
Stoccaggio
Le condizioni di stoccaggio sulla confezione sono contrassegnate con questi simboli:
Informazioni fornite dal
fabbricante
Tutte le componenti dei sistemi CleanAIR
®
devono essere conservate in spazi la cui temperatura dell‘aria sia
Temperatura
di stoccaggio
Fine durata di
conservazione
nell‘intervallo di -10 fino a 50°C e l‘umidità relativa dell‘aria nell‘intervallo di 20 – 80 % RH. La durata dello
stoccaggio nella confezione integra è di max. 2 anni.
Pulizia e disinfezione
• Ogni volta dopo aver terminato il lavoro pulite il copricapo, controllate le singole parti e sostituite le parti
Elenco dei pezzi di ricambio:
(allegato grafico: 1A)
Posizione
Caschi di protezione completi CA-40
Denominazione
in codice
1 40 50 40 Filtro auto-oscurante V913 DS ADC
2 70 42 02 Schermo da saldatura (per la versione CA-40GW)
2 70 40 02 CA-40 schermo da saldatura di ricambio
3 70 41 01 Schermo da saldatura di ricambio
4 70 40 60 CA-40 maschera per il viso (per tutti i tipi CA-40)
5 70 40 44 Fascia frontale incerata CA-40 (per tutti i tipi CA-40)
7 70 40 43 Viti di fissaggio 2 pz (per tutti i tipi CA-40)
8 70 40 40 Paraorecchie antirumore, num. 8 (per tutti i tipi CA-40)
8 70 40 41 Paraorecchie antirumore, num. 10 (per tutti i tipi CA-40)
8 70 40 42 Paraorecchie antirumore, num. 12 (per tutti i tipi CA-40)
- COS015 Guarnizione in gomma del connettore del canale dell‘aria
- 70 40 80 Pellicola esterna di copertura CA-40 (10pz) per CA-40, CA-40GW
- 70 24 81 Pellicola interna di copertura, 107x51 policarbonato (10pz) per CA-40, CA-40GW
- 110/90-09 Filtro da saldatura passivo, grado di oscurità 9
- 110/90-10 Filtro da saldatura passivo, grado di oscurità 10
- 110/90-11 Filtro da saldatura passivo, grado di oscurità 11
- 110/90-12 Filtro da saldatura passivo, grado di oscurità 12
- 110/90-13 Filtro da saldatura passivo, grado di oscurità 13
- 70 41 00 Casco di protezione CA-40G con schermo abrasivo
- 70 42 01 Casco di protezione CA-40GW con schermo da saldatura e abrasivo (compreso il filtro auto-oscurante)
- 70 40 01 Casco di protezione CA-40 con schermo da saldatura (compreso il filtro auto-oscurante)
Descrizione
danneggiate.
• La pulizia deve essere realizzata in una stanza ben ventilata. Attenzione a non aspirare la polvere nociva
depositata sulle singole parti!
Significato dei contrassegni
5 comprese le relative versioni (CA-40, CA-40G, CA-40GW) 1 comprese le relative varianti (CA-40, CA-40G, CA-40GW)
42 43

Resistenza meccanica (del telaio e degli
ITA NOR
Resistenza meccanica
Urto di piccola energia
Urto di energia media
Urto di energia grande
Se gli schermi e il telaio non hanno lo stesso marchio di identificazione relativo alla resistenza meccanica, l‘intero mezzo di protezione per la protezione degli
occhi viene classificato come di qualità minima.
Se il grado di urto è seguito dalla lettera „T“, ad es. „FT“, il mezzo fornisce protezione contro le parti ad alta velocità a temperature estreme (-5°C / +55°C)
Se il grado di urto NON E‘ seguito dalla lettera „T“, il mezzo di protezione degli occhi può essere utilizzato per la protezione dagli urti soltanto a temperatura
ambiente.
Classe ottica
Classe ottica 1
Classe ottica 2
Classe ottica 3 (non adatto per l‘uso prolungato)
Requisiti opzionali
Resistenza degli schermi contro il danneggiamento causato da particelli sottili
Resistenza contro la condensa
Maggiore riflettanza
Schermo originale
Schermo di ricambio
Lo schermo in vetro laminato ha le istruzioni per le modifiche contrassegnate sul lato posteriore
Campo di utilizzo (della montatura e dello schermo
Liquidi gocciolanti (solo gli occhiali)
Liquidi spruzzanti (solo schermi per il viso)
Polvere grezza (solo gli occhiali)
Gas e polvere fine (solo gli occhiali)
Arco elettrico (solo schermi per il viso)
Metalli fusi e particelle fisse ardenti (occhiali oppure schermi per il viso)
Gli schermi e i telai oltre al contrassegno „9“ devono avere il contrassegno di uno dei simboli „F“, „B“ oppure „A“
Contrassegno dei filtri (solo gli schermi)
Filtro da saldatura
Filtri ultravioletti (può influire sul riconoscimento dei colori)
Filtro infrarosso
Filtro solare (senza specifiche infrarosse)
Filtro solare (con specifiche infrarosse)
Se dopo l‘identificazione del filtro segue la lettera „C“, ad es. „2C“, il riconoscimento dei colori non peggiora.
Per maggiori informazioni vi preghiamo di leggere le norme EN 169, EN 170, EN 171 e EN 172.
Per i lavori di saldatura utilizzate soltanto gli schermi contrassegnati come schermi da saldatura 1.2 fino a 16.
schermi)
(12 m/sec)
(45 m/sec)
(120 m/sec)
(190 m/sec)
Contrassegno del prodotto
Identificazione del
filtro
2
4
5
6
Contrassegno
del prodotto
S
F
B
A
1
2
3
K
N
R
O
3
3
4
5
8
9
Tonalità
1.2 fino a 16
1.2 fino a 5
1.2 fino a 10
1.1 fino a 4.1
1.1 fino a 4.1
Innledning
Vernehjelm CA-40, CA-40G og CA-40GW
skal bare brukes med filtrerings-ventilasjonsenheter (videre kalt bare FVE) CleanAIR® eller med åndedrettsvern
med slange med varig flyt (videre kalt bare trykkluftsystemer CleanAIR®) og beskytter da luftveier.
CleanAIR® er et system for personlig åndedrettsvern. Det bygger på overtrykket til den filtrerte luften i puste-
sonen. FVE som er plassert på brukerens belte, filtrerer luften som suges inn fra omgivelsen. Luften kommer
da gjennom luftslangen inn i beskyttende hette. Overtrykket som blir til, hindrer i at skadestoffer kommer inn
i pustesonen, og samtidig står det for komfort for brukeren selv når systemet brukes lenge. I tillegg trenger
man ikke å overvinne filterets åndemotstand. Systemet beskytter mot faste partikler i form av flytende og
faste aerosoler, gass og damp avhengig av type filter man velger. Man velger den mest passende kombinasjonen av hodeenheten med FVE avhengig av skadestofftype og -konsentrasjon i miljøet og type arbeid som
skal utføres. De mange variantene av CA-401 gjør det mulig å velge passende vern for de fleste anvendelsene
hvor det kreves å beskytte både pusteveier, øyne, hørsel og hode.
Vernehjelm CA-40 med sveiseskjerm
(videre kalt bare CA-40) – gir både åndedrettsvern og beskytter hode, øyne og
ansikt under sveising. Sveiseskjerm med automatisk blendingsfilter2 V9-13 DS gir
beskyttelse mot den skadelige ultrafiolette/infrarøde strålingen og sveisesprut.
Vernehjelm CA-40G med slipeskjerm
(videre kalt bare CA-40G) – gir både åndedrettsvern og beskytter hode, øyne og
ansikt mot raskt flyende partikler (betegnelse: A) og samtidig gir basisbeskyttelse
mot den skadelige ultrafiolette strålingen.
Vernehjelm CA-40GW med slipe- og sveiseskjerm
(videre kalt bare CA-40GW) – gir både åndedrettsvern og beskytter hode, øyne
og ansikt mot raskt flyende partikler (betegnelse: A) og samtidig gir basisbeskyttelse mot den skadelige ultrafiolette strålingen. Sveiseskjerm med automatisk
blendingsfilter2 V9-13 DS gir beskyttelse mot den skadelige ultrafiolette/infrarøde
strålingen og sveisesprut.
Godkjenning, sertifisering
Vernehjelm CA-401 testes og godkjennes i samsvar med den europeiske standarden EN 12941/A2 for bruk sammen med filtrerings-ventilasjonseneheter CleanAIR® og EN 14594:2005 for bruk sammen med åndedrettsvern med slanger med
trykkluft med varig flyt. Alle delene av systemet må være godkjent av produsenten og må brukes i samsvar med anvisningene i denne veiledningen.
VARSLER OG GRUNNLEGGENDE BRUKSANVISNINGER
Før systemet kan brukes, må brukeren være klar over eventuelle risikoer på arbeidsplassen
og bli kjent med trygg bruk av verneenheten. I tilfelle uklarheter vennligst ta kontakt med
produsenten eller din forhandler.
1 inkl. avledede varianter (CA-40, CA-40G, CA-40GW)
2 sveisefiltre av herdet mineralglass kan bare brukes sammen med passende indre vernefolier!
44 45

• Vernehjelm CA-401 må brukes bare med FVE CleanAIR® eller med trykkluftsystem CleanAIR®. Vennligst
NOR NOR
les denne anvisningen og bruksanvisningen til FVE CleanAIR® eller med bruksanvisningen til trykkluftsys tem CleanAIR
®
• Skal ikke brukes på lukkede rom, der hvor det er mangel på oksygen (<17 %)3, i miljøer med tilsatt oksygen
(>23 %) eller hvor det er fare for umiddelbare livs- eller helseskader.
• Skal ikke brukes der hvor brukeren ikke kjenner til type forurensing og konsentrasjon.
Skifte av maske
Hvordan tas masken av:
• Ta maskens bakre del ut av innstillingsskruen.
• Ta hodekorset ut fra hjelmen ved å få det ut fra åpningene for korsets holdere.
• Ta masken forsiktig ut fra de enkelte pinnene som er plassert rundt skjermen.
• Ta plastkanten til masken ut fra åpningene for korsets holdere som er plassert på hjelmens indre krets.
• Skal ikke brukes når FVE er av eller når trykklufttilførselen er lukket! Dersom man arbeider og FVE er av
eller trykklufttilførselen er lukket, er åndedrettsvern lite eller er ikke tilstede i det hele tatt. Konsentrasjonen
til karbondioksid inne i hetten kan også stige og oksygenmengden kan synke.
• Dersom FVE eller trykkluftsystemet slutter å arbeide av en hvilken som helst grunn mens den/det brukes,
skal brukeren forlate det forurensede arbeidsstedet umiddelbart.
• Ved et svært krevende arbeid kan det oppstå undertrykk inni hetten når man puster inn, og hermed
reduseres beskyttelsen.
• Hodedelen må alltid være tett plassert på ansiktet slik at brukeren blir beskyttet på en trygg måte. Dersom
skjegg eller langt hår kommer inn i tetningslinjen, kan mangelen på tetthet føre til at beskyttelsen ikke blir
Hvordan tas masken på:
• Sett plastkanten på masken på korsets holdere som er plassert på hjelmens indre krets.
(Anbefalt innstilling: I fremre del (ved skjermen), åpning i den nedre rekken nærmest skjermen. I bakre del
(ved konnektoren for tilkopling av slange), den midterste åpningen i den nedre rekken.)
• Ta åpningene på masken forsiktig på de enkelte pinnene som er plassert på skjermen.
• Sett hodekorset inn i hjelmen ved å sette den innpå åpningene til korsets holdere.
(Anbefalt innstilling: den mellomste åpningen øverst i alle holderne til korset.)
• Ta maskens bakre del på innstillingsskruen.
tilstrekkelig.
• Skal ikke brukes når en hvilken som helst del av systemet er skadet. Hodedelen og luftslangen må
kontrolleres før hver bruk. Eventuelle sprekk eller utettheter kan påvirke beskyttelsen på en negativ måte.
• Visir med skrap eller en annen skade må byttes med en gang.
• Hjelm skal ikke tas fra hodet og FVE/trykkluftsystem CleanAIR® skal ikke slås av før du forlater det
forurensede stedet.
• Det er tillatt å bruke bare sertifiserte originale filtre som er beregnet for din FVE. Filtre skal byttes hver gang
når du føler at luften som kommer fra enheten, har en annen lukt.
• Filtre beregnet for å fange opp faste og flytende partikler (partikkelfiltre) beskytter ikke brukere mot gass.
Filtre som er beregnet for å fange opp gass, beskytter ikke brukere mot partikler. Dersom man befinner seg
der hvor det finnes begge forurensningstyper, skal kombinasjonsfiltre brukes.
Med hensyn til hygiene skal gammel maske tilintetgjøres like etter utskifting slik at den ikke kan brukes
igjen!
Bytte av vernefolier ved CA-40
4
Vernefolier bør brukes som beskyttelse for automatisk blendingsfilter og visir på slipeskjermen. Når man bytter folier i tide, blir levetiden til automatisk blendingsfilter og visirer lengre, og sikten er og blir hele tida god.
For beskyttelse av automatisk blendingsfilter leveres vernefolie av polykarbonat. Folien er satt på den ytre og
indre siden av automatisk blendingsfilter og hindrer i at sprut fanges opp på visiret.
Bytte av ytre vernefolie:
a) Ta folien ut ved å trekke dens nedre del ned der hvor skjermen har en rille.
Kontroll før bruk, anvendelse.
1) Før nytt produkt brukes, skal det alltid kontrolleres om apparatet er komplett, om det ikke ble skadet under
b) Før vernefolien installeres, skal det tynne beskyttende laget fjernes fra begge sidene. Folien settes inn igjen
ved å skyve folien i siderillene foran det automatiske blendingsfilteret.
transport. Når hjelm ikke brukes, skal den lagres i en emballasje som beskytter den mot direkte sollys,
kjemikalier og abrasive stoff og som beskytter mot ødeleggelse ved kontakt med harde gjenstander/
overflater.
2) Hjelmen gir den nødvendige beskyttelsen når tetningsmasken trekkes fast til ansiktet slik at det kopierer
Bytte av indre vernefolie:
Folie kan tas ut på en enkel måte ved å skyve den ut fra rillene, men bare etter at det automatiske blendingsfil-
teret tas ut. Det gjøres ved at skruene på den indre delen av sveiseskjermen løses.
ansiktet så tett som mulig. En korrekt plassert hodedel kombinert med luftstrøm skaper et lite overtrykk
i ansiktsdelen som ikke gjør det mulig at skadestoff kommer inn i pustesonen til brukeren. Hjelmen gir den
nødvendige beskyttelsen mot fallende gjenstander (i henhold til standard EN 397+A1) når dens størrelse
er tilpasset størrelsen på hodet til brukeren (54-65 cm). Det skal derfor sørges for at hjelmen sitter
Varsel!
Folier skal ikke renses når de er tørre. Det kan føre til skrap og verre sikt. Folier kan også konsentrere
elektrostatisk ladning og det kan føre til verre sikt i støvete miljø!
behagelig, men fast på hodet. Størrelsen på hodekorset innstilles med innstillingshjulet i bakhodet.
3) Med hensyn til hygiene anbefaler vi å bruke hette TYVEK (ordrenr. 70 02 01) i alle hodedeler.
Bytte av sveisefilter:
a) Ta sikringsskruene til filtre fra den indre siden av sveiseskjermen.
Bruk:
Hjelm er produsert for å fange opp støtenergi ved at den blir delvis destruert eller at dekselet og innlegget blir
b) Ta ut sveisefilteret.
c) Ta inn det nye sveisefilteret og sikre den i den opprinnelige posisjonen ved å trekke fast skruene.
skadet. Selv om en slik skade ikke er å se med en gang, bør hver hjelm som er utsatt for alvorlig støt, skiftes.
Hetten kan bare brukes med godkjente sveisefiltre på 90 x 110 mm!
Det er forbudt å foreta justeringer på hjelmen eller fjerne hjelmens originale deler
dersom hjelmprodusenten ikke uttrykkelig anbefaler det. Hjelm bør ikke justeres for
å kunne feste tilbehør på den på en måte som produsenten ikke anbefaler.
Det skal verken påføres lim, farger eller løsemidler på hjelmen. Det skal heller ikke plasseres klebeskilt på hjelmen dersom det ikke er i samsvar med anvisningene fra hjelmprodusenten.
Bytte av sveise- og slipeskilt:
a) Ta av skruer på hjelmens sider.
b) Vipp skjermen ned slik at det blir enklere å ta den ut.
c) Dra skjermen/skjermene ut først på den ene så på den andre siden av skjermen fra ankerpinnen.
d) Sett ny skjerm/nye skjermer med samme framgangsmåte, men i omvendt rekkefølge.
Varsel:
Visir med skrap eller annen skade bør byttes i tide mot nye.
3 de oppgitte konsentrasjonene kan variere i ulike land, ta hensyn til dine lokale anvisninger!
1 inkl. avledede varianter (CA-40, CA-40G, CA-40GW)
4 inkl. avledede varianter (CA-40, CA-40GW)
46 47

Kontroll og vedlikehold:
NOR NOR
Vernehjelm CA-405 er et fullstendig system som består av selve hjelmen, slipe-/sveiseskjerm eller deres
kombinasjon og av kors. Det er mye som påvirker hjelmens levetid, f.eks. kulde, varme, kjemikalier, solstråler
eller ukorrekt bruk. Hjelm skal kontrolleres hver dag om det ikke er tegn på sprekker, skjørhet eller skade på
indre konstruksjon.
CA-40
CA-40G
CA-40GW
Øyevern
(EN 166)
Øyevern
under sveising
(EN 175)
Hodevern
(EN 397)
Oppdager man en hvilken som helst skade, må hjelmen byttes!
Hjelmen skal alltid byttes etter at den har vært i bruk i fem år!
Notifisert person for CE-testing:
Výzkumný ústav bezpečnosti práce, v.v.i. - ZL
(Forskningsinstitutt ved Arbeidstilsynet, offentlig
forskningsinstitusjon)
Prøvelaboratorium nr. 1024
Jeruzalémská 9, 116 52 Praha 1
Autorisert person 235
Notifisert person for CE-testing (sveiseskjerm for
kombinasjon med slipeskjerm, samt slipeskjerm):
Institut pro testování a certifikaci, a.s.
(Institutt for testing og sertifisering, aksjeselskap)
Třída Tomáše Bati 299, 764 21 Zlín
Autorisert person 224
Notifisert person 1023
Notifisert person 1024
Valg og bruksområde: Hvert øye- og ansiktsvern er merket i henhold til tabellen nedenfor som viser
bruksområder og virkning i henhold til kravene definert i EN 166:2001.
Lagring
Lagringsforhold merkes med følgende symboler på emballasje:
Se opplysningene levert
av leverandøren
Alle delene i system CleanAIR
®
må lagres i miljøer med lufttemperatur mellom -10 til 50 °C og den relative luft-
Anbefalt lagringstemperatur
Lagringstidens
slutt
fuktigheten mellom 20 og 80 % RH. Lagringstiden i intakt emballasje er maks 2 år.
Rensing og desinfeksjon:
• Hodedelen skal alltid renses, enkelte deler skal kontrolleres og skadede deler skal byttes hver gang når
man slutter å arbeide med hjelmen.
• Rensing må foretas på et godt luftet rom. Pass på å ikke puste inn det skadelige støvet som er lagret på
de enkelte delene!
• Renses med lunkent vann (opptil +40 °C) med såpe eller et annet ikke-abrasivt vaskemiddel og med myk
børste.
CA-401 +
Verneklasse TH2 TH1 TH2 TH2 TH2 2A 2B
Oversikt over reservedeler:
(vedlegg med figurer: 1A)
Posisjon Kodebetegnelse Beskrivelse
1 40 50 40 Automatisk blendingsfilter V913 DS ADC
2 70 42 02 Sveiseskjerm (for versjon CA-40GW)
2 70 40 02 CA-40 reserveskjerm til sveising
3 70 41 01 Reserveskjerm til sliping
4 70 40 60 CA-40 ansiktsmaske (for alle typer CA-40)
5 70 40 44 Svettebånd CA-40 (for alle typer CA-40)
7 70 40 43 Festeskruer 2 stykker (for alle typer CA-40)
8 70 40 40 Øreklokker, no. 8 (for alle typer CA-40)
8 70 40 41 Øreklokker, no. 10 (for alle typer CA-40)
8 70 40 42 Øreklokker, no. 12 (for alle typer CA-40)
- COS015 Gummitetning for konnektor til luftkanal
- 70 40 80 Ytre beskyttende folie CA-40 (10 stykker) for CA-40, CA-40GW
- 70 24 81 Indre beskyttende folie, 107x51 polykarbonat (10 stykker) for CA-40, CA-40GW
- 110/90-09 Passiv sveisefilter, mørkleggingsgrad 9
- 110/90-10 Passiv sveisefilter, mørkleggingsgrad 10
- 110/90-11 Passiv sveisefilter, mørkleggingsgrad 11
- 110/90-12 Passiv sveisefilter, mørkleggingsgrad 12
- 110/90-13 Passiv sveisefilter, mørkleggingsgrad 13
Komplette vernehjelmer CA-40
- 70 41 00 Vernehjelm CA-40G med slipeskjerm
- 70 42 01 Vernehjelm CA-40GW med sveise- og slipeskjerm (inkl. automatisk blendingsfilter)
- 70 40 01 Vernehjelm CA-40 med sveiseskjerm (inkl. automatisk blendingsfilter)
CA Basic
2000 FC
CA Basic
2000 DF
CA Chemical 2FCA Chemical 3FCA
AerGO
CA
Pressure
CA Flow
Master
• Det er forbudt å foreta rensing med rensemidler med løsemidler.
• Først renses alle deler med våt stoff. Så skal de renses tørre, hhv. kan de bli liggende og tørke selv ved
romtemperatur.
• For å desinfisere deler som kommer i kontakt med hud, kan man bruke vanlige midler, f.eks. Ajatin, Incidur
osv.
• Det automatiske blendingsfilteret renses bare med rent, tørt eller bare litt fuktig stoff (klut med rent vann,
såpevann eller alkohol).
Forklaring
5 inkl. avledede varianter (CA-40, CA-40G, CA-40GW 1 inkl. avledede varianter (CA-40, CA-40G, CA-40GW)
48 49

Mekanisk bestandighet (ramme og visirer) Produktmerking
NOR POL
Økt bestandighet
Støt med liten energi
Støt med middels energi
Støt med høy energi
Dersom visirene og kanten ikke har samme identifikasjonsmerker som gjelder mekanisk bestandighet, klassifiseres hele enheten for øyevern med lavest
kvalitet.
Er støtgraden etterfulgt med bokstav „T“, f.eks. „FT“, gir enheten beskyttelse mot partikler av høy hastighet under ekstreme temperaturer (-5 °C/+55 °C)
Er støtgraden IKKE etterfulgt med bokstav „T“, må enheten for øyevern brukes som vern mot støt bare under romtemperatur.
Optisk klasse
Optisk klasse 1
Optisk klasse 2
Optisk klasse 3 (upassende for langvarig bruk)
Valgbare krav
Visirenes bestandighet mot skade påført ved fine partikler
Bestandighet mot kondensering
Økt reflektans
Opprinnelig visir
Reservevisir
Anvisninger til justering av visir av laminert glass er merket på visirets bakre side.
Bruksområde (ramme og visir)
Dryppende væsker (bare briller)
Sprutende væsker (bare ansiktsskjerm)
Grovt støv (bare briller)
Gass og fint støv (bare briller)
Elektrisk bue (bare ansiktskjermer)
Smeltede metaller og varme faste partikler (briller eller ansiktsskjerm)
Visirer og kanter må ha både merke „9“ og et av symbolene „F“, „B“ eller „A“
Filtermerking (bare visirer)
Sveisefilter
Ultrafiolette filtre (kan påvirke fargegjenkjenning)
Infrarødt filter
Solfilter (uten infrarød spesifikasjon)
Solfilter (med infrarød spesifikasjon)
Når filteridentifikasjonen er etterfulgt med bokstav „C“, f.eks. „2C“, er fargegjenkjenning ikke verre.
For flere opplysninger vennligst les standarder EN 169, EN 170, EN 171 og EN 172.
For sveisearbeider skal det bare brukes visirer merket som sveiseblender 1.2 til 16.
(12 m/sec)
(45 m/sec)
(120 m/sec)
(190 m/sec)
Produktmerking
Filteridentifikasjon Fargenyanse
2
4
5
6
S
F
B
A
1
2
3
K
N
R
O
3
3
4
5
8
9
1.2 til 16
1.2 til 5
1.2 til 10
1.1 til 4.1
1.1 til 4.1
Wstęp
Przyłbice spawalnicze CA-40, CA-40G i CA-40GW
zostały zaprojektowane do użytkowania wyłącznie z jednostką filtracyjno-wentylacyjną (dalej zwaną JFW)
CleanAIR® lub z aparatem oddechowym ze stałym przepływem powietrza podawanego przez wąż ciśnieniowy
(dalej zwanym “systemem nadciśnienia CleanAIR®”), dzięki czemu zapewniają ochronę dróg oddechowych.
CleanAIR® jest systemem osobistej ochrony dróg oddechowych, działającym na zasadzie wytwarzania nad-
ciśnienia filtrowanego powietrza w strefie oddechowej maski twarzowej. JFW umieszczona na pasku użytkownika filtruje powietrze zasysane z otoczenia, które następnie dostarczane jest przewodem powietrznym
do maski spawalniczej. Powstałe nadciśnienie zapobiega przenikaniu szkodliwych zanieczyszczeń do strefy
oddechowej i jednocześnie zapewnia wysoki komfort użytkowania. Nawet, jeśli maska noszona jest przez
dłuższy czas, to delikatne nadciśnienie zapewnia jednocześnie wysoki komfort użytkowania ze względu na
brak konieczności pokonywania oporu oddychania przez filtr. Zapewnia ochronę przed cząsteczkami stałymi
w formie skroplonych i stałych aerozoli, gazów i oparów w zależności od wybranego typu filtra. Najbardziej
odpowiednią kombinację elementu nakładanego na głowę z JFW dobiera się w zależności od typu i koncentracji szkodliwych zanieczyszczeń znajdujących się na stanowisku pracy i w zależności od rodzaju wykonywanej
pracy. Cały zestaw CA-401 umożliwia wybór odpowiedniego typu ochrony w przypadku większości zastosowań przemysłowych, w których oprócz konieczności ochrony dróg oddechowych istnieje również potrzeba
właściwej ochrony wzroku, słuchu i głowy.
Przyłbica spawalnicza CA-40 z osłonką spawalniczą
(dalej zwana CA-40) – oprócz efektywnej ochrony dróg oddechowych zapewnia
również ochronę głowy i wzroku oraz twarzy podczas spawania. Dodatkowo maska spawalnicza z filtrem samościemniającym2 V9-13 DS zapewnia ochronę przed
szkodliwym promieniowaniem ultrafioletowym / podczerwonym oraz odpryskom
powstałym podczas spawania.
Przyłbica spawalnicza CA-40G z osłoną szlifierską
(dalej zwana CA-40G) – zapewnia efektywną ochronę dróg oddechowych, ale
także ochronę głowy, wzroku i twarzy przed latającymi z dużą prędkością drobinkami (znak: A) a jednocześnie zapewnia podstawową ochronę przed szkodliwym
promieniowaniem ultrafioletowym.
Przyłbica spawalnicza CA-40GW z osłoną szlifierską i spawalniczą
(dalej zwana CA-40GW) – zapewnia efektywną ochronę dróg oddechowych, ale
także ochronę głowy, wzroku i twarzy przed latającymi z dużą prędkością drobinkami (znak: A) a jednocześnie zapewnia podstawową ochronę przed szkodliwym
promieniowaniem ultrafioletowym. Dodatkowo maska spawalnicza z filtrem samościemniającym2 V9-13 DS zapewnia ochronę przed szkodliwym promieniowaniem ultrafioletowym / podczerwonym oraz odpryskom powstałym podczas spawania.
Dopuszczenie do użytkowania, certyfikaty
Przyłbica spawalnicza CA-401 jest testowana i zatwierdzona zgodnie z wymogami normy europejskiej EN
12941/A2 do użytku wraz z jednostkami filtracyjno-wentylacyjnymi CleanAIR® oraz normy EN 14594:2005
do użytku z aparatem oddechowym ze stałym przepływem powietrza podawanego przez wąż ciśnieniowy.
Wszystkie części użytkowanego systemu muszą być zatwierdzone przez producenta i stosowane zgodnie z
zaleceniami zawartymi w niniejszej instrukcji.
Ostrzeżenia i podstawowe instrukcje użytkowania
Przed zastosowaniem systemu użytkownik musi być właściwie zaznajomiony z możliwym
ryzykiem na stanowisku pracy i właściwie pouczony odnośnie bezpiecznego użytkowania
osobistych środków ochronnych. W przypadku jakichkolwiek wątpliwości należy skontaktować się z producentem lub dystrybutorem.
1 W tym podtypów (CA-40, CA-40G, CA-40GW)
2 Filtry spawalnicze z hartowanego szkła mineralnego mogą być stosowane jedy-
nie w połączeniu z odpowiednimi wewnętrznymi foliami ochronnymi!
50 51

• Przyłbica spawalnicza CA-401 może być stosowana wyłącznie z JFW CleanAIR® lub z systemem
POL POL
nadciśnienia CleanAIR®. Dlatego oprócz zapoznania się z niniejszą instrukcją należy koniecznie zapoznać
się dodatkowo z instrukcją użytkowania JFW CleanAIR® lub z instrukcją użytkowania systemu nadciśnie nia CleanAIR
®
• Zabrania się korzystania z systemu w zamkniętych pomieszczeniach w środowisku, w którym
koncentracja tlenu jest niższa niż (<17%)3, w środowisku, w którym koncentracja tlenu została
wzbogacona (>23%) lub gdzie istnieje bezpośrednie zagrożenie dla życia lub zdrowia.
• Zabrania się korzystania z systemu w środowisku, w którym typ zanieczyszczenia i jego koncentracja nie
są znane użytkownikowi.
• Zabrania się z korzystania z systemu, jeśli jednostka filtracyjno-wentylacyjna została wyłączona lub został
zamknięty dopływ ciśnienia powietrza! Podczas pracy z wyłączoną JFW lub zamkniętym ciśnieniowym
dopływem powietrza ochrona dróg oddechowych jest znacznie ograniczona bądź żadna. W takiej sytuacji
może również nastąpić podniesienie poziomu koncentracji dwutlenku węgla wewnątrz maski
i jednoczesne obniżenie poziomu tlenu.
• Jeśli JFW lub system nadciśnienia w trakcie użytkowania przestanie z jakiejkolwiek przyczyny pracować,
użytkownik musi natychmiast opuścić zanieczyszczone miejsce pracy.
• Podczas bardzo wyczerpującej pracy może dojść do wytworzenia podciśnienia podczas wdechu
i związanego z tym obniżenia wartości czynnika ochronnego.
• Część maski mocowana na twarzy musi szczelnie przylegać do skóry twarzy, aby w ten sposób zapewnić
najwyższy poziom ochrony użytkownika. Jeśli na linii uszczelnienia będzie znajdować się owłosienie
twarzy lub dostaną się do niej długie włosy użytkownika nastąpi wzrost przenikania i spadek poziomu
ochrony zapewnianej przez system.
• Zabrania się użytkowania, jeśli jakakolwiek część systemu ulegnie uszkodzeniu. Część maski mocowana
na twarzy oraz wąż ciśnieniowy muszą być kontrolowane przed każdym użyciem. Ewentualne pęknięcia
lub nieszczelność mogą negatywnie wpłynąć na żądany poziom ochrony użytkownika.
• Podrapane lub w inny sposób uszkodzone szkła należy bezzwłocznie wymienić.
• Nie należy zdejmować przyłbicy z głowy ani wyłączać JFW lub system nadciśnienia CleanAIR® przed
opuszczeniem zanieczyszczonego miejsca pracy.
• Należy używać jedynie oryginalne filtry z certyfikatem przeznaczone do posiadanej jednostki
filtracyjno-wentylacyjnej. Należy wymieniać filtry za każdym razem, kiedy odczujemy zmianę zapachu
powietrza dopływającego z jednostki.
• Filtry przeznaczone do przechwytywania cząstek stałych i skroplonych (filtry przeciwpyłowe) nie chronią
użytkowników przed żadnymi gazami. Filtry przeznaczone do przechwytywania gazów nie chronią
użytkowników przed żadnymi pyłami. W miejscu pracy zanieczyszczonym dwoma wyżej wymienionymi
typami zanieczyszczeń należy korzystać z filtrów mieszanych.
Kontrola przed użyciem, wdrożenie do użytku.
1) Przed zastosowaniem nowego produktu należy zawsze skontrolować, czy urządzenie jest kompletne
i czy nie doszło do uszkodzenia w trakcie transportu. Jeśli przyłbica nie jest używana powinna być
spakowana w opakowaniu, które chroni przed bezpośrednim wpływem promieni słonecznych, środkami
chemicznymi i środkami o właściwościach ściernych. W opakowaniu zabezpieczającym nie powinno
dochodzić do uszkodzenia maski poprzez kontakt z twardymi przedmiotami / powierzchniami.
2) Dla zapewnienia pożądanych właściwości ochronnych przyłbicy należy właściwie docisnąć krawędź
uszczelniającą do twarzy w taki sposób, aby jak najdokładniej oddawała jej kształt. Właściwie nałożona
część twarzowa w połączeniu z prądem dostarczanego powietrza tworzą lekkie nadciśnienie w przestrzeni
przed twarzą, które nie pozwala przeniknąć szkodliwym czynnikom do strefy oddychania użytkownika.
W celu zapewnienia przez przyłbicę odpowiedniej ochrony głowy przed lecącymi przedmiotami (zgodnie
z normą EN 397+A1), jej wielkość musi być dostosowana do wielkości głowy użytkownika (54-65 cm).
Dlatego należy zadbać o to, aby przyłbica była nałożona na głowę stabilnie, a jednocześnie wygodnie.
W celu dopasowania optymalnego rozmiaru więźby do kształtu głowy należy użyć kółeczka regulacyjnego
na szyi.
3) Z przyczyn higienicznych zalecamy podkładanie pod wszystkie zakładane na głowę elementy ochronnej
kominiarki TYVEK (nr zamówienia 70 02 01).
Zastosowanie:
Przyłbica została wykonana w ten sposób, aby pochłaniała energię uderzenia poprzez częściową destrukcję
lub uszkodzenie płaszcza i nakładki na głowę. Nawet, jeśli w pierwszym momencie uszkodzenie nie jest widoczne, to każda przyłbica, która uległa poważnemu uderzeniu powinna być wymieniona.
Przeprowadzanie wszelkich własnoręcznych zmian lub usuwanie jakichkolwiek
oryginalnych elementów przyłbicy jest zabronione, o ile nie zostało to bezpośrednio
zalecone przez producenta. Przyłbice nie powinny być przerabiane w celu przymocowania
akcesoriów w żaden niezalecony przez producenta sposób.
Nie wolno nakładać klejów, farb, rozpuszczalników lub umieszczać naklejek samoprzylepnych, jeśli nie jest to zgodne z zaleceniami producenta przyłbicy.
Wymiana osłonki twarzy
Zdejmowanie osłonki twarzy:
• Odczepić tylną część osłonki twarzy od regulowanej śruby.
• Wyjąć z przyłbicy więźbę poprzez uwolnienie zatrzasków z otworów zaczepowych uchwytów krzyżyka
na głowę.
• Delikatnie wyczepić osłonkę twarzy z poszczególnych kołków umieszczonych wzdłuż obwodu osłony
przyłbicy.
• Plastikową ramkę osłonki twarzy stopniowo wyjąć z otworów zaczepowych uchwytu więźby
umieszczonych wzdłuż wewnętrznego obwodu przyłbicy.
Montaż osłonki twarzy:
• Plastykową ramkę osłonki twarzy należy przymocować poprzez wciśnięcie zatrzasków do otworów
zaczepowych uchwytu więźby umieszczonych wzdłuż wewnętrznego obwodu przyłbicy (zalecane
ustawienia – w przedniej części (przy osłonie) otwór w dolnym rzędzie najbliżej osłony. W tylnej części
(przy złączce węża ciśnieniowego) środkowy otwór w dolnym rzędzie.)
• Delikatnie zaczepić otwory osłonki twarzy o poszczególne kołki umieszczone na osłonie przyłbicy.
• Włożyć do przyłbicy więźbę poprzez wciśnięcie do otworów zaczepowych uchwytów więźby.
(zalecane ustawienie – środkowy otwór całkowicie na górze we wszystkich uchwytach więźby.)
• Nawlec tylną część osłonki twarzy na śrubę regulacyjną.
Ze względu na higienę należy uszkodzić starą osłonkę twarzy zaraz po jej wymianie, w taki sposób, aby
nie mogła zostać użyta ponownie!
Wymiana folii ochronnych w CA-40
4
Zalecamy stosowanie folii ochronnych w celu ochrony filtra samościemniającego i szkła osłony szlifierskiej.
Odpowiednio wczesna wymiana folii wydłuża żywotność filtra samościemniającego, szkła i zapewnia dobrą
widoczność przez cały czas.
Ochronna folia poliwęglanowa jest dostarczana w celu ochrony filtra samościemniającego. Folia nakładana
jest po wewnętrznej i zewnętrznej stronie filtra samościemniającego i zapobiega przyleganiu kuleczek odpryskującego materiału na powierzchni wizjera.
Wymiana zewnętrznej folii ochronnej:
a) Wyjąć folię poprzez pociągnięcie za jej dolną część w miejscu nacięcia osłony spawalniczej.
b) Przed własnoręcznym montażem folii ochronnej, należy zawsze usunąć z obu jej stron cienką warstwę
kryjącą. Ponowne zamontowanie wykonuje się poprzez wsunięcie folii w boczne rowki przestrzeni przed
filtrem samościemniającym.
Wymiana wewnętrznej folii ochronnej:
Folię można wyjąć poprzez proste wysunięcie z rowków mocujących, ale jedynie po wyjęciu filtra
samościemniającego. Wyjęcie filtra samościemniającego wykonuje się poprzez poluzowanie śrub
mocujących znajdujących się po wewnętrznej stronie osłony spawalniczej.
Ostrzeżenie!
Nie wolno czyścić folii na sucho, inaczej łatwo dojdzie do jej zadrapania i obniżenia przejrzystości. Folie
mogą również skupiać napięcie elektrostatyczne i w zakurzonym środowisku może dochodzić do pogorszenia widoczności!
3 Podane koncentracje mogą się różnić w zależności od kraju, należy kierować się lokalnymi przepisami!
1 w tym podtypów (CA-40, CA-40G, CA-40GW) 4 W tym podtypów (CA-40, CA-40GW)
52 53
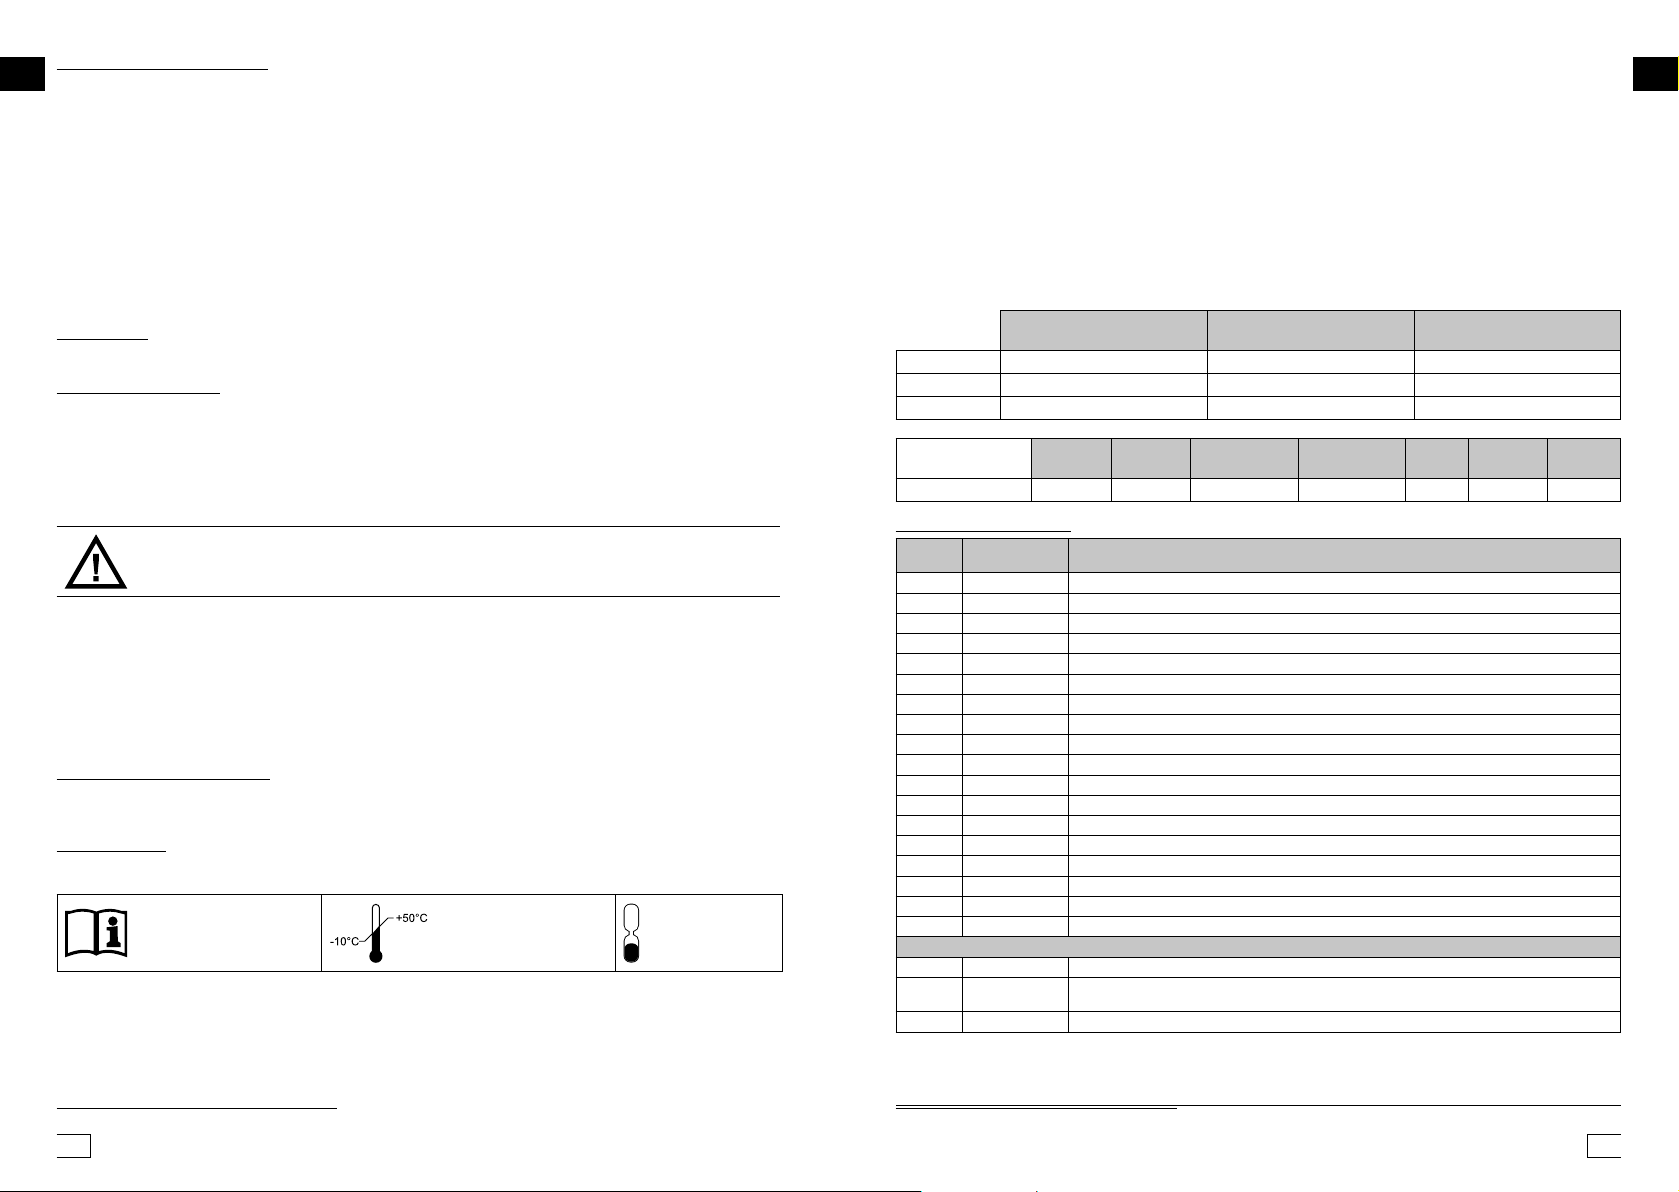
Wymiana filtra spawalniczego:
POL POL
a) Wykręcić śruby zabezpieczające filtra spawalniczego znajdujące się na wewnętrznej stronie osłony
spawalniczej przyłbicy.
b) Wyjąć filtr spawalniczy.
c) Wsunąć nowy filtr spawalniczy i zablokować go w pierwotnej pozycji poprzez dokręcenie śrub.
• Po każdym zakończeniu pracy należy oczyścić element zakładany na głowę, skontrolować poszczególne
elementy i wymienić uszkodzone części.
• Czyszczenie musi być wykonywane w dobrze wietrzonym pomieszczeniu. Należy wystrzegać się
wdychania szkodliwego kurzu, który osadził się na poszczególnych częściach!
• Do czyszczenia należy użyć ciepłej wody (o temp. do +40°C) z mydłem lub innym nieposiadającym
właściwości trących środkiem czyszczącym i miękką szczoteczką.
Kominiarki ochronne można stosować jedynie z zatwierdzonymi filtrami spawalniczymi o rozmiarach 90
x 110 mm!
• Zabrania się używania do czyszczenia środków zawierających rozpuszczalniki.
• Po wyczyszczeniu poszczególnych części wilgotną szmatką należy je wytrzeć do sucha lub ewentualnie
pozwolić im wyschnąć w temperaturze pokojowej.
Wymiana osłony spawalniczej i szlifierskiej:
a) Wykręcić śruby znajdujące się po bokach przyłbicy ochronnej.
b) W celu łatwiejszego wyjęcia należy opuścić osłonę.
c) Wypiąć osłonę/y najpierw z jednej, a następnie z drugiej strony przyłbicy z kołków mocujących.
• W celu zdezynfekowania części, które mają kontakt ze skórą, można zastosować zwykłe środki, np. Ajatin,
Incidur itp.
• Samościemniający filtr spawalniczy należy czyścić jedynie czystą, suchą lub lekko nawilżoną szmatką
(w czystej wodzie, roztworze mydlanym lub w alkoholu).
d) Zamontować nową osłonę/y wykonując te same czynności w odwrotnej kolejności.
Ostrzeżenie:
Podrapane lub w inny sposób uszkodzone szkła powinny być jak najszybciej wymienione na nowe.
Kontrola i konserwacja:
Przyłbica spawalnicza CA-405 stanowi kompletny system, który składa się z korpusu przyłbicy, osłony szlifierskiej / spawalniczej lub ich połączenia oraz więźby dopasowywanej do kształtu głowy. Na przydatność
użytkową przyłbicy ma wpływ wiele czynników, takich jak: niska temperatura, wysoka temperatura, środki
chemiczne, światło słoneczne lub niewłaściwe użytkowanie. Przyłbica powinna być każdego dnia poddawana
kontroli, w celu sprawdzenia, czy nie pojawiają się na niej oznaki pękania, kruchości lub uszkodzeń konstrukcji
wewnętrznej.
Ochrona oczu
( EN 166 )
CA-40
CA-40G
CA-40GW
CA-401 +
CA Basic
2000 FC
CA Basic
2000 DF
CA Chemical 2FCA Chemical 3FCA
Klasa ochrony TH2 TH1 TH2 TH2 TH2 2A 2B
Ochrona oczu
przy spawaniu ( EN 175 )
AerGO
Ochrona głowy
( EN 397 )
CA
Pressure
CA Flow
Master
Lista części zamiennych:
W przypadku stwierdzenia jakichkolwiek uszkodzeń należy wymienić przyłbicę
na nową!
Po pięciu latach użytkowania należy zawsze wymieniać przyłbicę!
Jednostka notyfikowana do wykonywania testów
CE:
Instytut Badań Bezpieczeństwa Pracy, v.v.i. - ZL
Labolatorium testowe nr 1024
ul. Jeruzalémská 9, 116 52 Praga 1, CZ
Autoryzacja nr 235
Jednostka notyfikowana 1024
Jednostka notyfikowana do wykonywania testów
CE (osłona spawalnicza do łączenia z osłoną
szlifierską i osłona szlifierska):
Instytut badań i certyfikacji, a.s.
Třída Tomáše Bati 299, 764 21 Zlín, CZ
Autoryzacja nr 224
Jednostka notyfikowana 1023
Wybór i zakres zastosowania: Każdy środek do ochrony oczu i twarzy posiada oznaczenia zgodne z poniższą tabelą służące zgodnie z wymogami normy EN 166:2001 do identyfikacji jego zakresu zastosowania i
efektywności.
Magazynowanie
Warunki magazynowania są przedstawione na opakowaniu za pomocą poniższych symboli:
Należy zapoznać się z
informacjami dostarczonymi przez producenta.
Wszystkie elementy systemów CleanAIR
Zakres temperatur podczas przechowywania.
®
należy koniecznie przechowywać w pomieszczeniach o tempera-
Koniec okresu
przechowywania.
turze powietrza w zakresie:
od -10 do + 50°C oraz wilgotności względnej powietrza w zakresie od 20 do 80 % RH. Okres przechowywania
Pozycja
Kompletne przyłbice ochronne CA-40
Oznaczenie
kodowe
1 40 50 40 Filtr samościemniający V913 DS ADC
2 70 42 02 Osłona spawalnicza (dla wersji CA-40GW)
2 70 40 02 CA-40 zamienna osłona spawalnicza
3 70 41 01 Zamienna osłona szlifierska
4 70 40 60 CA-40 osłonka twarzy (dla wszystkich typów CA-40)
5 70 40 44 Napotnik czołowy CA-40 (dla wszystkich typów CA-40)
7 70 40 43 Śruby mocujące 2 szt. (dla wszystkich typów CA-40)
8 70 40 40 Aktywne ochronniki słuchu, nr 8 (dla wszystkich typów CA-40)
8 70 40 41 Aktywne ochronniki słuchu, nr 10 (dla wszystkich typów CA-40)
8 70 40 42 Aktywne ochronniki słuchu, nr 12 (dla wszystkich typów CA-40)
- COS015 Gumowa uszczelka złączki kanału powietrznego
- 70 40 80 Zewnętrzna folia osłonowa CA-40 (10szt.) dla CA-40, CA-40GW
- 70 24 81 Wewnętrzna folia osłonowa, 107x51 poliwęglan (10szt.) dla CA-40, CA-40GW
- 110/90-09 Pasywny filtr spawalniczy, stopień zaciemnienia 9
- 110/90-10 Pasywny filtr spawalniczy, stopień zaciemnienia 10
- 110/90-11 Pasywny filtr spawalniczy, stopień zaciemnienia 11
- 110/90-12 Pasywny filtr spawalniczy, stopień zaciemnienia 12
- 110/90-13 Pasywny filtr spawalniczy, stopień zaciemnienia 13
- 70 41 00 Przyłbica spawalnicza CA-40G z osłoną szlifierską
- 70 42 01 Przyłbica spawalnicza CA-40GW z osłoną spawalniczą i szlifierską (razem z filtrem samościemnia-
- 70 40 01 Przyłbica spawalnicza CA-40 z osłoną spawalniczą (razem z filtrem samościemniającym)
jącym)
Opis
w nieuszkodzonym opakowaniu wynosi maks. 2 lata.
Czyszczenie i dezynfekcja
5 W tym podtypów (CA-40, CA-40G, CA-40GW) 1 w tym podtypów (CA-40, CA-40G, CA-40GW)
Znaczenie oznaczeń
54 55

Wytrzymałość mechaniczna (ramy i szkieł) Oznaczenie
POL RUS
Podwyższona wytrzymałość
Uderzenie z małą energią
Uderzenie ze średnią energią
Uderzenie z wysoką energią
Jeśli szkła i oprawki nie mają tego samego numeru identyfikacyjnego odnoszącego się do wytrzymałości mechanicznej, to cała ochrona oczu klasyfikuje się
jako środek najniższej jakości.
Jeśli po oznaczeniu poziomu uderzenia występuje litera „T“, np. „FT“, to wówczas urządzenie zapewnia ochronę przed cząstkami o wysokiej prędkości przy
ekstremalnych temperaturach (-5°C / +55°C)
Jeśli po stopniu uderzenia NIE WYSTĘPUJE litera „T“, to wówczas urządzenie do ochrony oczu może być
stosowane do ochrony przed uderzeniem tylko w temperaturze pokojowej.
Klasa optyczna
Klasa optyczna 1
Klasa optyczna 2
Klasa optyczna 3 (nieodpowiednia do długotrwałego użycia)
Wymagania do wyboru
Odporność szkieł na uszkodzenia drobnymi cząstkami
Odporność na pokrycie rosą
Podwyższony czynnik odbicia
Pierwotne szkło
Zamienne szkło
W przypadku laminowanych szkieł instrukcje dotyczące regulacji znajdują się na odwrotnej stronie
Zakres zastosowań (ramy i szkieł)
Kapiące płyny (tylko okulary)
Odpryskujące płyny (tylko osłony twarzowe)
Pyły dużej średnicy (tylko okulary)
Gazy i drobne pyły (tylko okulary)
Obłok elektryczny (tylko osłony twarzy)
Roztopione metale i gorące cząstki stałe (okulary lub osłony twarzy)
Osłonki twarzy i szkła muszą oprócz oznaczenia „9“ być dodatkowo oznaczone jednym z symboli „F“, „B“ lub „A“
Oznaczenie filtrów (tylko szkła)
Filtr spawalniczy
Filtry ultrafioletowe (może wpłynąć na rozpoznawanie kolorów)
Filtr podczerwony
Filtr słoneczny (bez specyfikacji podczerwonej)
Filtr słoneczny (ze specyfikacją podczerwieni)
Jeśli po identifikacji filtra znajduje się litera „C“, np. „2C“, rozpoznawanie kolorów nie jest ograniczone.
W celu uzyskania dodatkowych informacji należy zapoznać się z treścią norm EN 169, EN 170, EN 171 i EN 172.
Do spawania należy używać tylko szkła oznaczone jako osłony spawalnicze 1.2 do 16.
(12 m/sec)
(45 m/sec)
(120 m/sec)
(190 m/sec)
Oznaczenie produktu
Identifikacja filtra Odcień
2
4
5
6
produktu
S
F
B
A
1
2
3
K
N
R
O
3
3
4
5
8
9
1.2 do 16
1.2 do 5
1.2 do 10
1.1 do 4.1
1.1 do 4.1
ВВВВВВВВ
ЗЗЗЗЗЗЗЗ ЗЗЗЗЗ CA-40, CA-40G З CA-40GW
ВВВВВВВВВВВ ВВВВВВВВВВВВВ ВВВ ВВВВВВВВВВВВВ В ВВВВВВВ ВВВВВВВВВВВВВВ ВВВВВВ ВВВВВВВ (ВВВ) CleanAIR
CleanAIR
ЗЗЗЗЗЗЗЗ ЗЗЗЗ ЗЗЗЗЗЗЗЗЗЗЗЗЗЗЗ ЗЗ-40
(ВВВВВ ВВ ВВВВВВ «ВВ-40») ВВВВВ ВВВВВВВВВВВ ВВВВВВ ВВВВВВВ ВВВВВВВ ВВВВВВВВВВВВ ВВВВВ ВВВВВВ ВВВВВВ, ВВВВ В ВВВВ В ВВВВВВВВ ВВВВВВ. ВВВВВВВВ ВВВВВ В ВВВВВВВВВВВВВВ ВВВВВВВВВ ВВВВВВВВВВВВВ
®
ВВВ ВВ ВВВВВВВВВВ ВВВВВВВВВВВВ ВВВВВВВВВВ ВВ ВВВВВ ВВВВВВВ ВВВВВВВ (ВВВВВ ВВ ВВВВВВ „ВВВВВВВ ВВВВВВВ ВВВВВВВ CleanAIR®“) В ВВВВВВ ВВВ ВВВВВВ ВВВВВВВ ВВВВВВВ, ВВВВВВ, ВВВВ В ВВВВ ВВВВВВВВВВВВ.
®
- ВВВ ВВВВВВВВ ВВВВВВВВВВВВВВ ВВВВВВ ВВВВВВВ ВВВВВВВ (ВВВВВ), ВВВВВВ ВВВВВВВВ ВВВВВВВВ ВВ ВВВВВВВВ ВВВВВВВВВВВ ВВВВВВВВ ВВВВВВВВВВВВВВ ВВВВВВВ В ВВВВВВВВВВВ ВВВВ. ВВВ, ВВВВВВВВВВВВ ВВ ВВВВВ ВВВВВВВВВВВВ, ВВВВВВВВВ ВВВВВВ, ВВВВВВВВВВ ВВ ВВВВВВВВВВ ВВВВВ, ВВВВВВВ ВВВВВ ВВ ВВВВВВВВВВВВВВ ВВВВВВ ВВВВВВВВВ ВВВ ВВВВ. ВВВВВВВВВВВ ВВВВВВВВВВ ВВВВВВВВ ВВВВВВВВВВВВ ВВВВВВВВВВВВВ ВВВВВВВ ВВВВВВВ В ВВВВВВВВВВВ ВВВВ, ВВВВВВВВВВВВ ВВВВВВВВВВВ ВВВВВВВ ВВВВВВВ ВВВВВВВВВВВВ ВВВВ ВВВ ВВВВВВВВВВ ВВВВВВВ ВВВ ВВВВВВВВВВВВВ ВВВВВВВВВВВ ВВВВВВВВВВВВВ ВВВВВВВ. ВВВВВ ВВВВВВВВВВВВ ВВВВВВ ВВ ВВВВВВВ В ВВВВВВ ВВВВВВ В ВВВВ ВВВВВВВВВ, ВВ ВВВВВ В ВВВВВ В ВВВВВВВВВВВ ВВ ВВВВ ВВВВВВВ. ВВВВВВВВ ВВВВВВВВВВ ВВВВВВВВВ ВВВВВ В ВВВ ВВВВВВВВВВВВ В ВВВВВВВВВВВ ВВ ВВВВ В ВВВВВВВВВВВВ ВВВВВВВ ВВВВВВВ В ВВВВВВВ ВВВВВ, В ВВВВВ ВВ ВВВВ ВВВВВВВВВВВ ВВВВВ. ВВВВВВВВВ ВВВ CA-401 ВВВВВВВВВ ВВВВВВВВВВ ВВВВВВВВВВВ ВВВВВВ ВВВ ВВВВВВВВВВВВВ В ВВВВВВВВВВВ ВВВВВВВВ ВВВВВВВВВВВВВВ ВВВ, ВВВ ВВВВВ ВВВВВВ ВВВВВВВ ВВВВВВВ ВВВВВВВВВВ ВВВВВ ВВВВВВВВВВ ВВВВВВВВВВ ВВВВВВ ВВВВВВ, ВВВВВ В ВВВВВВ.
2
V9-13 DS ВВВВВВВВ ВВ ВВВВВВВВ ВВВВВВВВВВВВВВВВВ / ВВВВВВВВВВВВВ ВВВВВВВВВ В ВВВВ.
ЗЗЗЗЗЗЗЗ ЗЗЗЗ CA-40G ЗЗ ЗЗЗЗЗЗЗЗЗЗЗЗ ЗЗЗЗЗЗ
(ВВВВВ ВВ ВВВВВВ „CA-40G“) ВВВВВ ВВВВВВВВВВВ ВВВВВВ ВВВВВВВ ВВВВВВВ ВВВВВВВВВВВВ ВВВВВ ВВВВВВ ВВВВВВ, ВВВВ В ВВВВ ВВ ВВВВВВВВВВВВВВВВ ВВВВВВ (ВВВВВВВВВВ: В), ВВВВВВВВВВВВ ВВВВВВВВВВВ ВВВВВВВ ВВВВВВ ВВ ВВВВВВВВ ВВВВВВВВВВВВВВВВВ ВВВВВВВВВ.
ЗЗЗЗЗЗЗЗ ЗЗЗЗ ЗЗЗЗЗЗЗЗЗЗЗЗЗЗЗCA-40GW ЗЗ ЗЗЗЗЗЗЗЗЗЗЗЗ ЗЗЗЗЗЗ
(ВВВВВ ВВ ВВВВВВ „CA-40GW“) ВВВВВ ВВВВВВВВВВВ ВВВВВВ ВВВВВВВ ВВВВВВВ ВВВВВВВВВВВВ ВВВВВ ВВВВВВ ВВВВВВ, ВВВВ В ВВВВ ВВ ВВВВВВВВВВВВВВВВ ВВВВВВ (ВВВВВВВВВВ: В) В ВВВВВВВВ ВВВВВВВВВВВВВВВВВ ВВВВВВВВВ. ВВВВВВВВ ВВВВВ В ВВВВВВВВВВВВВВ ВВВВВВВВВ ВВВВВВВВВВВВВ2 V9-13 DS ВВВВВВВВ ВВ ВВВВВВВВ ВВВВВВВВВВВВВВВВВ / ВВВВВВВВВВВВВ ВВВВВВВВВ В ВВВВ.
ЗЗЗЗЗЗЗЗЗЗЗЗ
ВВВВВВВВ ВВВВ CA-40 ВВВВВВВВВВВВВВ ВВ ВВВВВВВВВВВВ ВВВВВВВВВВВ ВВВВВВВВВВВ ВВВВВВВВВВ EN 12941/A2 ВВВ ВВВВВВВВВВ В ВВВ В EN 14594:2005 ВВВ ВВВВВВВВВВ В ВВВВВВВВВ ВВВВВВВ ВВВВВВВ CleanAIR®. ВВВ ВВВВВ ВВВВВ ВВВВВВ ВВВВ ВВВВВВВВ ВВВВВВВВВВВВВВ В ВВВВВВ ВВВВВВВВВВВВВВ В ВВВВВВВВВВВВ В ВВВВВВВВВВ, ВВВВВВВВВВВВ В ВВВВВВВВВ ВВВВВВВВВВВ.
ПППППППППППППП П ПППППППП ПППППППППП ПП ПППППППППП
ВВВВВ ВВВВВВВВВВВВВВ ВВВВВ ВВВВВВВВВВВВ ВВВВВВ ВВВВВВВВВВВ ВВВВВВВВВВВВ В ВВВВВВВВВВВВВ ВВВВВВ ВВ ВВВВВВВ ВВВВВ В ВВВВ ВВВВВВВВВВ ВВВВВВВ ВВВВВВВВВВ В ВВВВВВВВВВ ВВВВВВВВВВВ ВВВВВВВВ ВВВВВВВВВВВВВВ ВВВВВВ. ВВВ ВВВВВВВВВВВВВ ВВВВВ ВВВВВВВВ ВВВВВВВВВВВ В ВВВВВВВВВВВВВ ВВВ ВВВВВВВВВВВВВ
1
• ВВВВВВВВ ВВВВ CA-40
ВВВВВВВ ВВВВВВВ CleanAIR®. ВВВВВВВ ВВВВВВВВВВВВ В ВВВВВВ ВВВВВВВВВВВВ ВВВВВВВВВВВВ ВВВВВ
В ВВВВВВВВВВВВ ВВ ВВВВВВВВВВ ВВВ CleanAIR
ВВВВВВВ CleanAIR
®
.
ВВВВВВ ВВВВВВВВВВВВВВ ВВВВВВВВВВВВВ В ВВВ CleanAIR® ВВВ В ВВВВВВВВВ
®
ВВВ В ВВВВВВВВВВВВ ВВ ВВВВВВВВВВ ВВВВВВ ВВВВВВВ
• ВВ ВВВВВВВВВВ ВВВВВ В ВВВВВВВВ ВВВВВВВВВВ, В ВВВВВВВВВВ В ВВВВВВВВВВВ ВВВВВВВВВ (<17%)3,
В ВВВВВВВВВВВ ВВВВВВВВВВ ВВВВВ (>23%), В ВВВВВ ВВВ, ВВВ ВВВВВ ВВВВВВВВВВ ВВВВВВВВВВВВВВВВ
ВВВВВВ ВВВВВ В ВВВВВВВВ.
• ВВ ВВВВВВВВВВВ ВВВВВ ВВВ, ВВВ ВВВВВВВВВВВВ ВВ ВВВВВВВВ ВВВ ВВВВВВВ ВВВВВВВ В ВВ ВВВВВВВВВВВВ.
• ВВ ВВВВВВВВВВВ ВВВВВ ВВВ ВВВВВВВВВВВ ВВВ В ВВВ ВВВВВВВВВВ ВВВВВ ВВВВВВВ ВВВВВВВ! ВВВ ВВВВВВ
В ВВВВВВВВВВВ ВВВ В ВВВ ВВВВВВВВВВ ВВВВВ ВВВВВВВ ВВВВВВВ ВВВВВВ ВВВВВВВ ВВВВВВВ ВВВВВВВВВВВВ
ВВВ ВВ ВВВВВВВВВВ ВВВВВВВВВВВ. ВВВВВ ВВВВ, В ВВВВВ ВВВВВ ВВВВВВВВВВ ВВВВВВВВВВВВ ВВВВВВВВВВВ
ВВВВ В ВВВВВВВВВВ ВВВВВВВВВВ ВВВВВВВВВ.
• ВВВВ В ВВВВВВВВ ВВВВВВ ВВВ ВВВ ВВВВВВВ ВВВВВВ ВВВВВВВ ВВВВВВВ ВВ ВВВВВ-ВВВВ ВВВВВВВ ВВВВВВВВВВ
ВВВВВВВВ ВВВВВВ, ВВВВВВВВВВВВ ВВВВВВ ВВВВВВВВВВВВВВВ ВВВВВВВВ ВВВВВВВВВВВВ ВВВВВВВ ВВВВВВВВВ.
• ВВВ ВВВВВВВВВВ ВВВВВ ВВВВВВВВВВ ВВВВВ ВВВ ВВВВВВ ВВВВВ ВВВВВВВВВВ ВВВВВВВВВВ ВВ ВВВВВ,
ВВВВВВВВВВВВВВ ВВВВВВВВ ВВВВВВВВВВВВ ВВВВВВ.
• ВВВВВВВ ВВВВВ ВВВВВ ВВВВВВ ВВВВ ВВВВВВВ В ВВВВ ВВВВВВВВВВВВ ВВВ, ВВВВВ ВВВ ВВВВВВВВВ
ВВВВВВВВВ ВВВВВВВ ВВВ ВВВВВВ. ВВВВВВВВВ ВВВВВ В ВВВВВВ ВВВВВВВВВ ВВВВВВВВ В ВВВВВВВВ
ВВВВВВВВ ВВВВВВВ ВВ-ВВ ВВВВВВВВ ВВВВВВВВВВВВВ.
• ВВ ВВВВВВВВВВВ ВВВВВ ВВВ ВВВВВВВВВВВ ВВВВВ ВВВ ВВВВВ. ВВВВВ ВВВВВВ ВВВВВВВВВВВВВВ
ВВВВВВВВВВ ВВВВВВВВВ ВВВВВВВ ВВВВВ В ВВВВВВВВВВВВВВ ВВВВВВ. ВВВВВВВ В ВВВВВВВВВВВ ВВВВВ
ВВВВВВВ ВВВВВВВВВВВВВ ВВВВВВВ ВВ ВВВВВВВВВ ВВВВВВВ ВВВВВВ ВВВВВВВВВВВВ.
• ВВВВВВВВВВВВ ВВВ ВВВВВ ВВВВВВВВВВВВ ВВВВВВВВВ ВВВВВВ ВВВВВВВВВВ ВВВВВВВВВВВВВВВ ВВВВВВВВ.
• ВВ ВВВВВВВВ ВВВВ В ВВВВВВ В ВВ ВВВВВВВВВВ ВВВ В ВВВВВВВ ВВВВВВВ ВВВВВВВ CleanAIR® ВВ ВВВ ВВВ,
ВВВВ ВВ ВВВВВВВВ ВВВВВВВВВВВВ ВВВВВВВВВ.
• ВВВВВВВВВВВ ВВВВВВ ВВВВВВВВВВВВВВВВВ ВВВВВВВВВВВВ ВВВВВВВ, ВВВВВВВВВВВВВВВ ВВВВВВВВВВ ВВВ
ВВВВВВ ВВВ. ВВВВВВ ВВВВВВВВВ ВВВВВВВ, ВВВ ВВВВВВ ВВВВВВВВВВВВ ВВВВВВВВВ ВВВВВВ ВВВВВВВВВВВВ
В ВВВВ ВВВВВВВ.
• ВВВВВВВ, ВВВВВВВВВВВВВВВ ВВВ ВВВВВВВВВВВ ВВВВВВВ В ВВВВВВ ВВВВВВ (ВВВВВВВВВВВВВВВВВВ
ВВВВВВВ), ВВ ВВВВВВВВ ВВВВВВВВВВВВ ВВ ВВВВВ. ВВВВВВВ, ВВВВВВВВВВВВВВВ ВВВ ВВВВВВВВВВВ ВВВВВ,
ВВ ВВВВВВВВ ВВВВВВВВВВВВ ВВ ВВВВВВ. В ВВВВВВВ ВВВВВ, В ВВВВВВВ ВВВВВВВ ВВВВВВВ ВВВВВВВВ ВВВВВ
ВВВВВ, ВВВВВВ ВВВВВВВВВВВВВВ ВВВВВВВВВВВВВВВ ВВВВВВВ.
ЗЗЗЗЗЗЗЗ ЗЗЗЗЗ ЗЗЗЗЗЗЗЗЗЗЗЗЗЗ, ЗЗЗЗЗЗЗЗЗ.
1) ВВВВВ ВВВВВВВВВВВВВВ ВВВВВВ ВВВВВВВ ВВВВВВВВВВВ ВВВВВВВВВ В ВВВ ВВВВВВВВВВ ВВВВВВВВВВВВ
В В ВВВ, ВВВ ВВВ ВВ ВВВВ ВВВВВВВВВВ В ВВВВВВВВ ВВВВВВВВВ. ВВВВ ВВВВ ВВ ВВВВВВВВВВВВ, ВВ ВВ
1 ввввввв ввв ввввввввв вввввввв (вA-40, CA-40G, CA-40GW)
2 ввввввввв ввввввв вв ввввввввввв вввввввввввв вввввв ввввв вввввввввввввв вввввв в вввввввввв в вввввввввв (ввввввввввв ввввввввв вввввввв)!
3 ввввввввв вввввввввввв ввввв в ввввввввв ввввввв вввввввввв, вввввввв ввввввв вввввввввввв!
56 57

ВВВВВВ ВВВВВВВВВ В ВВВВВВВВ, ВВВВВВВ ВВВВВВВ ВВВ ВВ ВВВВВВ ВВВВВВВВВ ВВВВВ, ВВВВВВВВВВВ
RUS RUS
ВВВВВВВВВВ В ВВВВВВВВВВ ВВВВВВВ, ВВ ВВВВВВВВВВВ В ВВВВВВВВВВ ВВВВВВВВ В ВВВВВВВВ ВВВВВВВВВВ/
ВВВВВВВВВВВВВ.
a) ВВВВВВВВВ ВВВВВВВВВ ВВВВВ ВВВВВВВВВВ ВВВВВВВ В ВВВВВВВВВВ ВВВВВВВ ВВВВВВВВВВ ВВВВВ.
b) ВВВВВВВВВ ВВВВВВВВВ ВВВВВВ.
c) ВВВВВВВВ ВВВВВ ВВВВВВВВВ ВВВВВВ ВВ ВВВВВ В ВВВВВВВВВ ВВВВВ.
2) ВВВ ВВВВ, ВВВВВ ВВВВ ВВВВВВВВВВВВВ ВВВВВВВВВ ВВВВВВВВ ВВВВВВВВВВВВВВ ВВВВВ, ВВВВВВВВВВ
ВВВВВВВ ВВВВВВВВВ ВВВВВВВВВВВ В ВВВВ ВВВ, ВВВВВ ВВ ВВВ ВВВВВ ВВВВВВВ ВВВВВВВВВ ВВВВ. ВВВ
ЗЗЗЗЗЗЗЗЗЗ ЗЗЗЗЗЗЗЗ ЗЗЗЗЗ ЗЗЗЗЗ ЗЗЗЗЗЗЗЗЗЗЗЗ ЗЗЗЗЗЗ З ЗЗЗЗЗЗЗЗЗЗЗЗЗЗЗЗЗЗ ЗЗЗЗЗЗЗЗЗ ЗЗЗ ЗЗЗЗЗЗ ЗЗЗЗЗЗЗЗ 90З110 ЗЗ!
ВВВВВВВВВ ВВВВВВВВВВВ ВВВВВВВ ВВВВВ ВВВВВ ВВВВВВВВВВВ ВВВВВВВ ВВВВВВВ ВВВ ВВВ ВВВВВВВВВ
ВВВВВВВВВВ ВВВВВВВВ, ВВВВВВВ ВВВВВВВВВВВВ ВВВВВВВВВВВВВ ВВВВВВВ ВВВВВВВ В ВВВВВВВВВВВ ВВВВ
ВВВВВВВВВВВВ. ВВВ ВВВВВВВВВВВ ВВВВВВВВВВ ВВВВВВ ВВВВВВ ВВ ВВВВВВВВ ВВВВВВВВ (ВВВВВВВВ
ВВВВВВВВВ EN 397+A1) ВВВВВВ ВВВВВВВВВВВ ВВВВВВВВВ ВВВВВВ ВВВВ ВВВВВВВВ ВВ ВВВВВВВ ВВВВВВ
ВВВВВВВВВВВВ (54–65 ВВ). ВВВВВВВ ВВВВВВВВВВ ВВВВВВВВВ, ВВВ ВВВВ ВВВВВ ВВ ВВВВВВ ВВВВВВ, ВВ
ВВВВВВ. ВВВ ВВВВВВВВВВВ ВВВВВВВВВВВВ ВВВВВВВ ВВВВВВВВВВВ ВВВВВВВВВ ВВВВВВВВВВВ ВВВВВВВВВ ВВ
ВВВВВВВВВВ ВВВВВ.
ЗЗЗЗЗЗ ЗЗЗЗЗЗЗЗЗЗ З ЗЗЗЗЗЗЗЗЗЗЗЗЗ ЗЗЗЗЗ:
a) ВВВВВВВВВ ВВВВВ, ВВВВВВВВВВВВВ ВВ ВВВВВ ВВВВВВВВ ВВВВВ.
b) ВВВВВВВВ ВВВВВ, ВВВВВ ВВВ ВВВВ ВВВВВ ВВВВВ.
c) ВВВВВВВВВ ВВВВВ/ВВВВВ ВВВВВВВ В ВВВВВ, В ВВВВВ В ВВВВВВ ВВВВВВВ ВВВВВ, ВВВВ ВВВ/ВВ В ВВВВВВВВВВВВ
ВВВВВВ.
d) ВВВВВВВВВВ ВВВВВ ВВВВВ/ВВВВВ ВВВВВ, ВВВВВВВВ ВВВ ВВВВВВВВ В ВВВВВВВВ ВВВВВВВ.
3) ВВ ВВВВВВВВВВВВВ ВВВВВВВВВВВ ВВВВВВВВВВВ ВВВВВВВВВВВВ ВВВВВВВВВВ ВВВВВВВВ ВВВВВВ TYVEK
(ВВВ. ВВВВВ 70 02 01).
ЗЗЗЗЗЗЗЗ:
ЗЗЗЗЗЗЗЗЗЗЗЗ ЗЗЗ ЗЗЗЗЗ ЗЗЗЗЗЗЗЗЗЗЗЗ ЗЗЗЗЗЗЗЗЗ ЗЗЗЗЗЗ ЗЗЗЗЗЗ ЗЗЗЗ ЗЗЗЗЗЗЗЗЗЗЗЗ ЗЗЗЗЗЗЗЗ.
ЗЗЗЗЗЗЗЗЗЗЗЗЗ:
ВВВВВВВВВВВ ВВВВВ ВВВВВВВВВВВВ ВВВВВВВВВВ ВВВВВВВ ВВВВВВВ, В ВВВВВВВВВВ ВВВВВВВВВВВ ВВВВВВВ ВВВВВВВВВВ ВВВВВВВВВ ВВВВВВВВВВ ВВВ ВВВВВВВВВВВ ВВВВВВВ В ВВВВВВВВВВ ВВВВВВВВ. ВВВВ ВВВВ ВВВВВ ВВВВВВВВВВ ВВВВВ ВВ ВВВВВВВ ВВВВВВВВВ ВВВВВВВВВВВ, ВВВВВ (ВВВВВВВВВ ВВВВВ ВВВВВ) ВВВВВВ ВВВВ ВВВВВВВВ.
ЗЗЗЗЗЗЗЗ З ЗЗЗЗ:
ВВВВВВВВ ВВВВ CA-405 ВВВВВВВВВВВВ ВВВВВ ВВВВВВВВВВВ ВВВВВВВВ ВВВВВВВВВВВВВВ ВВВВВВ, ВВВВВВВВВ ВВ ВВВВВ ВВВВВВВВ, ВВВВВ ВВВ ВВВВВВВВВВ ВВВВВВВВВ ВВВ ВВВВВВВВВВВВ ВВВВВ (ВВВ ВВ ВВВВВВВВВ) В ВВВВВВВВВВВ ВВВВВВВВВ. ВВ ВВВВ ВВВВВВ ВВВВВ ВВВВВВ ВВВВВВВВВ ВВВВВВВВ, ВВВВВВВВ, ВВВВВ, ВВВВВ, ВВВВВВВВВ, ВВВВВВВВВ ВВВВ, ВВВВВВВВВВВВ ВВВВВВВВВВВВВ. ВВВВ ВВВВВВВВВВ ВВВВВВВВВ ВВВВВВВВВВВВВВ ВВ ВВВВВВВ ВВВВВВВВВВВВВ ВВВВВВ В ВВВВВВВВВВВ ВВВВВВВВВВ ВВВВВВВВ.
ППП ПППППППППППП ПППППППППППП ППППППП ППППППППП ППППППППП ППППП ППП ППППППППППП, П ППППП ППППППП ППППП ППП ППППП. ПП ППППППППППП ППППППППП ПП ПППП ППППП-ПППП ПППППППППППППП ППП ПППППППППППП ПППППППППППП.
ПП ППППППППППП ПППППППП ПП ПППП ПППП, ПППППП, ППППППППП ПППППППППППП, ПППППП ПППППППП, ПППП ППП ПП ППППППППППППП ППППППППП ПППППППППППП.
ЗЗЗ ЗЗЗЗЗЗЗЗЗ ЗЗЗЗЗ ЗЗЗЗЗЗЗЗЗЗЗ ЗЗЗЗ ЗЗЗЗЗЗЗЗЗЗ ЗЗЗЗЗЗЗЗ!
ЗЗ ЗЗЗЗЗЗЗЗЗ ЗЗЗЗ ЗЗЗ ЗЗЗЗЗЗЗЗЗЗЗЗЗ ЗЗЗЗ ЗЗЗЗЗЗЗЗЗЗ ЗЗЗЗЗЗЗЗ З ЗЗЗЗЗ ЗЗЗЗЗЗ!
ЗЗЗЗЗЗ ЗЗЗЗЗЗЗЗ ЗЗЗЗЗЗЗЗЗЗЗ:
ЗЗЗЗЗЗ ЗЗЗЗЗЗЗЗЗЗЗ:
• ВВВВВВВВВВВ ВВВВВВ ВВВВВ ВВВВВВВВ ВВВВВВВВВВВ ВВ ВВВВВВВВВВВВВ ВВВВВ.
• ВВВВВВВ ВВВВВВВВВВ ВВВВВВВВВ ВВ ВВВВВВВ ВВВВВ.
• ВВВВВВВВВ ВВВВВВВ ВВВВВВВВВВВ ВВ ВВВВВВВ, ВВВВВВВВВВВВВ ВВ ВВВВВВВ ВВВВВ.
• ВВВВВВВВВВВВВ ВВВВВВВВВ ВВВВВВВВВВВ ВВВВВВВВВВ ВВВВВВВ ВВ ВВВВВВВВВ ВВВВВВВВВ ВВВВВВВВВВВ
ВВВВВВВВВ, ВВВВВВВВВВВВВ ВВ ВВВВВВВВВВВ ВВВВВВВ ВВВВВ.
ВВВВВВВВВВВВВВВВ ВВВВ, ВВВВВВВВВВВ ВВВВВВ ВВВВВВВВВВВВ CE:
ЗЗЗЗЗЗЗЗЗЗЗЗЗЗЗЗЗ ЗЗЗЗЗЗЗЗ ЗЗЗЗЗЗ ЗЗЗЗЗ, ЗЗЗЗЗЗЗЗЗЗЗЗ ЗЗЗЗЗЗЗЗЗЗЗЗЗЗЗЗЗ ЗЗЗЗЗЗЗЗЗЗЗ. - ЗЗЗЗЗЗЗЗЗЗЗЗЗ ЗЗЗЗЗЗЗЗЗЗЗ
ВВВВВВВВВВВВВ ВВВВВВВВВВВ В 1024
ВВ. ВВВВВВВВВВВ, 9, 116 52 ВВВВВ-1
ВВВВВВВВВВВВВВ ВВВВ В 235
ВВВВВВВВВВВВВВВВ ВВВВ В 1024
ВВВВВВВВВВВВВВВВ ВВВВ, ВВВВВВВВВВВ ВВВВВВ ВВВВВВВВВВВВ CE (ВВВВВВВВВ ВВВВВ, ВВВВВВВВВВВВВВВ ВВВ ВВВВВВВВВВ ВВ ВВВВВВВВВВВВ ВВВВВВ, В ВВВВВВВВВВВВ ВВВВВ):
ЗЗЗЗЗЗЗЗ ЗЗЗЗЗЗЗЗЗЗЗЗ З ЗЗЗЗЗЗЗЗЗЗЗЗ, З. З.
ВВ. ВВ. ВВВВВВ ВВВВ, 299, 764 21 ВВВВ
ВВВВВВВВВВВВВВ ВВВВ В 224
ВВВВВВВВВВВВВВВВ ВВВВ В 1023
ЗЗЗЗЗЗЗЗЗ ЗЗЗЗЗЗЗЗ ЗЗЗЗЗЗЗЗЗЗЗ:
• ВВВВВВВВВВВВВ ВВВВВВВВВ ВВВВВВВВВВВ ВВВВВВВВВВ В ВВВВВВВВВ ВВВВВВВВВВ ВВВВВВВВВВВ ВВВВВВВВВ,
ВВВВВВВВВВВВВ ВВ ВВВВВВВВВВВ ВВВВВВВ ВВВВВВВ ВВВВВ.
(ВВВВВВВВВВВВ - В ВВВВВВВВ ВВВВВ (В ВВВВВ) ВВВВВВВВВ В ВВВВВВ ВВВВ ВВВВВВВВВВВ ВВВВВВВВВВВ
ЗЗЗЗЗ ЗЗЗЗЗЗЗЗЗЗ ЗЗЗЗЗЗ ЗЗЗЗЗ З ЗЗЗЗЗЗЗ ЗЗЗЗЗЗЗЗЗЗ: ВВВ ВВВВВВВВ ВВВВВВ ВВВВ В ВВВВ ВВВВВВВВВВВ В ВВВВВВВВВВВВ В ВВВВВВВВВВВВВВВ ВВВВВВВВ ВВВВВВВВВВВВВ ВВВВВВВ ВВВВВВВВВВ ВВВВВВВВ В ВВВВВВВВВВВВВ ВВВВВВВВ ВВВВВВВВВВВ EN 166:2001
ЗЗЗЗЗЗЗЗ
ВВВВВВВ ВВВВВВВВ ВВВВВВВВВВ ВВ ВВВВВВВВ ВВВВВВВВВВ ВВВВВВВВВ:
ВВВВВВ В ВВВВВ. В ВВВВВВ ВВВВВ (ВВВВВ ВВВВВВВ ВВВ ВВВВВВВВВВВВВ ВВВВВВ) - ВВВВВВВВВВВ ВВВВВВВВВ
В ВВВВВВ ВВВВ).
• ВВВВВВВВВ ВВВВВВВВ ВВВВВВВВВВВ, ВВВВВВВВ ВВВВВВ, ВВВВВВВВВВВВВ ВВ ВВВВВ, В ВВВВВВВВВ
ВВВВВВВВВВВ.
ВВ. ВВВВВВВВВВ ВВВВВВВВВВВВ ВВВВВВВВВВВВВ ВВВВВВВВ ВВВВВВВВ ВВВВВВВВВ ВВВВВ ВВВВВВВВ
• ВВВВВВВВВВ ВВ ВВВВВ ВВВВВВВВВВ ВВВВВВВВВ, ВВВВВВВВВ ВВВ В ВВВВВВВВВ ВВВВВВВВВВ
(ВВВВВВВВВВВВ - ВВВВВВВВВВВ ВВВВВВВВВ ВВВВ. ВВВВВВВ ВВ ВВВВ ВВВВВВВВВВ ВВВВВВВВ).
• ВВВВВВВВ ВВВВВВ ВВВВВ ВВВВВВВВВВВ ВВ ВВВВВВВВВВВВ ВВВВ.
ЗЗ ЗЗЗЗЗЗЗЗЗЗЗЗЗ ЗЗЗЗЗЗЗЗЗЗЗ ЗЗЗЗЗЗЗЗЗЗЗЗ ЗЗЗЗЗЗ ЗЗЗЗЗЗЗЗЗЗЗ ЗЗЗЗЗ ЗЗ ЗЗЗЗЗ ЗЗЗЗЗЗ, ЗЗЗЗЗ ЗЗЗЗЗЗЗЗЗЗЗЗЗЗЗЗЗ ЗЗЗЗЗЗЗЗЗЗ ЗЗЗЗЗЗЗЗЗЗ ЗЗЗЗЗЗЗЗЗЗЗЗЗ!
4
ЗЗЗЗЗЗ ЗЗЗЗЗЗЗЗ ЗЗЗЗЗЗ ЗЗ CA-40
ВВВВВВВВВВВ ВВВВВВВВВВВВ ВВВВВВВВ ВВВВВВ ВВВ ВВВВВВ ВВВВВВВВВВВВВВВ ВВВВВВВВВВ ВВВВВВВ В ВВВВВВВВВВВВВВ ВВВВВВВВВВВ В ВВВВВВВВВВ ВВВВВВ ВВВВВВВВВВВВВ ВВВВВ. ВВВВВВВВВВВВВ ВВВВВВ ВВВВВВВВ ВВВВВВ ВВВВВВВВВВ ВВВВ ВВВВВВ ВВВВВВВВВВВВВВВ ВВВВВВВВВВ ВВВВВВВ В ВВВВВВВВВВ ВВВВВВ В ВВВВВВВВВВВ ВВВВВВВВВВ ВВВВВВВ ВВВВВВВВ ВВВВВВ.
ВВВ ВВВВВВ ВВВВВВВВВВВВВВВ ВВВВВВВВВВ ВВВВВВВ ВВВВВВВВВВВВ ВВВВВВВВ ВВВВВВ ВВ ВВВВВВВВВВВВВ. ВВВВВВ ВВВВВВВВВВВВВВВ В ВВВВВВВВ В ВВВВВВВВВВ ВВВВВВ ВВВВВВВ В ВВВВВВВВ ВВВ ВВ ВВВВВВВВВВВ ВВВВВВВ.
ЗЗЗЗЗЗ ЗЗЗЗЗЗЗЗ ЗЗЗЗЗЗЗЗЗ ЗЗЗЗЗЗ
a) ВВВВВВВВВ ВВВВВВ, ВВВВВВВ ВВ ВВ ВВВВВВ ВВВВВ В ВВВВВВ ВВВВВВВВВВ ВВВВВ.
b) ВВВВВ ВВВВВВВВВВ ВВВВВВВВ ВВВВВВ В ВВВВВ ВВ ВВВВВВ ВВВВВВВ ВВВВВВ ВВВВВВВВ ВВВВ. В ВВВВВВВВВ
ВВВВВВВВВВВВВВ ВВВВВ ВВВВВВВ ВВВВВВ В ВВВВВВВ ВВВВ ВВВВВ ВВВВВ ВВВВВВВВВВВВВВ ВВВВВВВВВ ВВВВВВВВ.
ЗЗЗЗЗЗ ЗЗЗЗЗЗЗЗЗЗ ЗЗЗЗЗЗЗЗ ЗЗЗЗЗЗ:
ВВВ ВВВВВВВВВВ ВВВВВВВ CleanAIR® ВВВВВВВВВВ ВВВВВВВ В ВВВВВВВВВВ ВВВ ВВВВВВВВВВВ ВВВВВВВ ВВ -10 ВВ 50 °C В ВВВВВВВВВВВВВ ВВВВВВВВВ 20–80 %. ВВВВВВВВВВВВ ВВВВ ВВВВВВВВ В ВВВВВВВВ ВВВВВВВВ: 2 ВВВВ.
ЗЗЗЗЗЗЗ З ЗЗЗЗЗЗЗЗЗЗЗ
• ВВВВВВВВ ВВВВВВ, ВВВВВВВВВ ВВВВ, ВВВВВВВВВ ВВВ ВВВ ВВВВВ, ВВВВВВВВ ВВВВВВВВВВВВ.
• ВВВВ ВВВВВВВВВВ ВВВВВВВ В ВВВВВВ ВВВВВВВВВВВВВВ ВВВВВВВВВ. ВВВВВВ ВВВВВВВВВВВ, ВВ ВВВВВВВВ
ВВВВВВВ ВВВВ, ВВВВВВВ ВВ ВВВВВВВВВ ВВВВВВ ВВВВВ!
• ВВВВ ВВВВВВВ ВВВВВВ ВВВВВ (ВВ +40 °C) В ВВВВВ ВВВ ВВВВВВ ВВВВВВ ВВВВВВВВВ, ВВ ВВВВВВВВВВ ВВВВВВВВ
В ВВВВВВ В ВВВВВВ ВВВВВВВ.
• ВВВВВВВВВВВ ВВВВВВВВВВВВВ ВВВ ВВВВВВ ВВВВВВ ВВВВВВВ, ВВВВВВВВВВ ВВВВВВВВВВВВ.
• ВВВВВ ВВВВВВ ВВВВВВВВВ ВВВВВВ ВВВВВВВ ВВВВВВВ ВВ ВВВВВВВВВВ ВВВВВВВВ ВВВВВВ ВВВ ВВВВВВВВ ВВВВВВВ
ВВВ ВВВВВВВВВ ВВВВВВВВВВВ.
• ВВВ ВВВВВВВВВВВ ВВВВВВ, ВВВВВВВВВВВВВВ В ВВВВВ, ВВВВВ ВВВВВВВВВВВВ ВВВВВ ВВВВВВВВВВ ВВВВВВВВВ ВВВВВВВВ, ВВВВВВВВ, „ВВВВВ“, „ВВВВВВВ“ В В. В.
• ВВВВВВВВВВВВВВ ВВВВВВВВВ ВВВВВВ ВВВВВВВ ВВВВВВВВВ ВВВВВВ ВВВВВВ, ВВВВВ ВВВ ВВВВВВ ВВВВВВВ ВВВВВВВ, ВВВВВВВВВ ВВВВВВ ВВВВВ, ВВВВВВВ ВВВВВВВВВ ВВВ ВВВВВВВ.
ВВВВВВ ВВВВВ ВВВВВВВВВ ВВВВВ ВВВВВВВВВВ ВВ ВВВВВВВВВ ВВВВВ, ВВ ВВВВВВ ВВВВВ ВВВВВВВВВВВВВВВВ ВВВВВВ ВВВВВВВ. ВВВ ВВВВВВ ВВВВВВВ ВВВВВВВВВВ ВВВВВВВВВ ВВВВВ ВВ ВВВВВВВВВВ ВВВВВВВ ВВВВВВВВВВ ВВВВВ.
ЗЗЗЗЗЗЗЗ!
ЗЗ ЗЗЗЗЗЗЗЗЗЗ ЗЗЗЗЗЗЗЗ ЗЗЗЗЗЗ ЗЗЗЗЗ ЗЗЗЗЗЗ, ЗЗЗЗЗЗ ЗЗЗЗЗ ЗЗЗЗЗЗЗЗЗЗ, З ЗЗЗЗЗЗЗЗЗЗ ЗЗЗЗ ЗЗЗЗЗЗЗЗЗЗ ЗЗ ЗЗЗЗЗЗЗЗЗЗЗЗ. ЗЗЗЗЗ ЗЗЗЗ, ЗЗЗЗЗЗ ЗЗЗЗЗЗЗЗЗЗЗ ЗЗЗЗЗЗЗЗЗЗЗЗЗЗЗЗЗЗ ЗЗЗЗЗ, ЗЗЗЗЗЗЗ З ЗЗЗЗЗЗЗ ЗЗЗЗЗ ЗЗЗЗЗ ЗЗЗЗЗЗЗЗЗЗ ЗЗ ЗЗЗЗЗЗЗЗЗЗЗЗ!
ЗЗЗЗЗЗ ЗЗЗЗЗЗЗЗЗЗ ЗЗЗЗЗЗЗ:
4 ввввввв ввв ввввввввв вввввввв (вA-40, CA-40GW)
58 59

RUS RUS
CA-40
CA-40G
CA-40GW
CA-401 +
CA Basic
2000 FC
ЗЗЗЗЗ ЗЗЗЗЗЗ TH2 TH1 TH2 TH2 TH2 2A 2B
ЗЗЗЗЗЗ ЗЗЗЗЗЗЗЗ ЗЗЗЗЗЗ:
ЗЗЗЗЗЗЗ ЗЗЗЗЗЗЗ ЗЗЗЗЗЗЗЗЗЗЗ ЗЗЗЗЗЗЗЗ
1 40 50 40 ВВВВВВВВВВВВВВ ВВВВВВВВВ ВВВВВВ V913 DS ADC
2 70 42 02 ВВВВВВВВВ ВВВВВ (ВВВ ВВВВВВВВ CA-40GW)
2 70 40 02 CA-40 ВВВВВВВВ ВВВВВВВВВ ВВВВВ
3 70 41 01 ВВВВВВВВ ВВВВВВВВВВВВ ВВВВВ
4 70 40 60 CA-40 ВВВВВВВ ВВВВВВВВВВВ (ВВВ ВВВВ ВВВВВ CA-40)
5 70 40 44 ВВВВВВВВВ CA-40 (ВВВ ВВВВ ВВВВВ CA-40)
7 70 40 43 ВВВВВВВВВ ВВВВВ 2 ВВ. (ВВВ ВВВВ ВВВВВ CA-40)
8 70 40 40 ВВВВВВВВВВВВВ ВВВВВВВВ, В 8 (ВВВ ВВВВ ВВВВВ CA-40)
8 70 40 41 ВВВВВВВВВВВВВ ВВВВВВВВ, В 10 (ВВВ ВВВВ ВВВВВ CA-40)
8 70 40 42 ВВВВВВВВВВВВВ ВВВВВВВВ, В 12 (ВВВ ВВВВ ВВВВВ CA-40)
- COS015 ВВВВВВВВВ ВВВВВВВВВВ ВВВВВВВВВВВ ВВВВВВВВВВВ
- 70 40 80 ВВВВВВВВ ВВВВВВВВ ВВВВВВ CA-40 (10 ВВ.) ВВВ CA-40, CA-40GW
- 70 24 81 ВВВВВВВВВВ ВВВВВВВВ ВВВВВВ 107x51 ВВВВВВВВВВВВ (10 ВВ.) ВВВ CA-40, CA-40GW
- 110/90-09 ВВВВВВВВВ ВВВВВВВВВ ВВВВВВВВВВВ, ВВВВВВВ ВВВВВВВВВВ 9
- 110/90-10 ВВВВВВВВВ ВВВВВВВВВ ВВВВВВВВВВВ, ВВВВВВВ ВВВВВВВВВВ 10
- 110/90-11 ВВВВВВВВВ ВВВВВВВВВ ВВВВВВВВВВВ, ВВВВВВВ ВВВВВВВВВВ 11
- 110/90-12 ВВВВВВВВВ ВВВВВВВВВ ВВВВВВВВВВВ, ВВВВВВВ ВВВВВВВВВВ 12
- 110/90-13 ВВВВВВВВВ ВВВВВВВВВ ВВВВВВВВВВВ, ВВВВВВВ ВВВВВВВВВВ 13
ЗЗЗЗЗЗЗЗ ЗЗЗЗЗ CA-40
- 70 41 00 ВВВВВВВВ ВВВВ ВВ-40 ВВ ВВВВВВВВВВВВ ВВВВВВ
- 70 42 01 ВВВВВВВВ ВВВВ CA-40GW ВВ ВВВВВВВВВ В ВВВВВВВВВВВВ ВВВВВВ (ВВ ВВВВВВВВВВВВВ)
- 70 40 01 ВВВВВВВВ ВВВВ CA-40 ВВ ВВВВВВВВВ ВВВВВВ (ВВ ВВВВВВВВВВВВВ)
ЗЗЗЗЗЗ ЗЗЗЗ
(EN 166)
ЗЗЗЗЗЗ ЗЗЗЗ
ЗЗЗ ЗЗЗЗЗЗ (EN 175)
CA Basic
2000 DF
CA Chemical 2FCA Chemical 3FCA
AerGO
ЗЗЗЗЗЗ ЗЗЗЗЗЗ
(EN 397)
CA
Pressure
CA Flow
Master
ЗЗЗЗЗЗЗЗ ЗЗЗЗЗЗЗЗЗЗ
ЗЗЗЗЗЗЗЗЗЗЗЗ ЗЗЗЗЗЗЗЗЗ (ЗЗЗЗЗЗ З ЗЗЗЗЗЗЗ) ЗЗЗЗЗЗЗЗЗЗ ЗЗЗЗЗЗЗ
ВВВВВВВВВВ ВВВВВВВВВ
ВВВВ В ВВВВВВ ВВВВВВВВ
ВВВВ ВВ ВВВВВВВ ВВВВВВВВ
ВВВВ В ВВВВВВВ ВВВВВВВВ
ВВВВ ВВВВВВВВВ ВВВВВВ В ВВВВВ ВВВВВ ВВВВВВ ВВВВВВВВВВВВВВВВВ ВВВВВВВВ ВВВВВВВВВВВВ ВВВВВВВВВ, ВВ ВВВ
ВВВВВВВВ ВВВВВВ ВВВВ ВВВВВВВВВВВВВВВВ ВВ ВВВВВВВ ВВВВВВВВ.
ВВВВ ВВ ВВВВВВВВ ВВВВВВВ ВВВВВВВВВ ВВВВВВВ ВВВВВВ „T“, ВВВВ., „FT“, ВВ ВВВ ВВВВВВВВВВВВ ВВВВВВ ВВ ВВВВВВВВВВВВВВВВ ВВВВВВ ВВВ ВВВВВВВВВВВВВ ВВВВВВВВВВВ (5 °C / +55 °C)
ВВВВ ВВ ВВВВВВВВ ВВВВВВВ ВВВВВВВВВ ВВ ВВВВВВВ ВВВВВВ „T“, ВВ ВВВ ВВВВ ВВВ ВВВВВВ ВВ ВВВВВ ВВВВВ ВВВВВВВВВВВВ ВВВВВВ ВВВ ВВВВВВВВВ ВВВВВВВВВВВ.
ЗЗЗЗЗЗЗЗЗЗ ЗЗЗЗЗ
ВВВВВВВВВВ ВВВВВ 1
ВВВВВВВВВВ ВВВВВ 2
ВВВВВВВВВВ ВВВВВ 3 (ВВ ВВВВВВВВ ВВВ ВВВВВВВВВВВ ВВВВВВВВВВ)
ЗЗЗЗЗЗЗЗЗЗЗЗЗЗ ЗЗЗЗЗЗЗЗЗЗ
ВВВВВВВВВ ВВВВВВВВВВВ ВВВВВВВ В ВВВВВВВВВВ ВВВВВВВВВВВВВВВВ ВВВВВВВВВВ
ВВВВВВВВВ В ВВВВВВВВВВВ
ВВВВВВВВВВ ВВВВВВВВВВ ВВВВВВВВВВВ
ВВВВВВВВВВВВ ВВВВВВВВВ ВВВВВВ
ВВВВВВВВ ВВВВВВВВВ ВВВВВВ
В ВВВВВВВВВ ВВВВВВ ВВ ВВВВВВВВВВВВВВВ ВВВВВВ ВВВВВВВВ ВВ ВВВВВ ВВВВВВВВВ ВВ ВВВВВВ ВВВВВВВ
ЗЗЗЗЗЗЗ ЗЗЗЗЗЗЗЗЗЗ (ЗЗЗЗЗЗ З ЗЗЗЗЗЗЗ)
ВВВВВ ВВВВВВВВ (ВВВВВВ ВВВВ)
ВВВВВВ ВВВВВВВВ (ВВВВВВ ВВВВВВВ ВВВВВ)
ВВВВВВВВВВВВВВВ ВВВВВВВВ (ВВВВВВ ВВВВ)
ВВВВ В ВВВВВВВВВВВВВВВ ВВВВВВВВ (ВВВВВВ ВВВВ)
ВВВВВВВВВВВВВ ВВВВ (ВВВВВВ ВВВВВВВ ВВВВВ)
ВВВВВВВВВВВВВ ВВВВВВ В ВВВВВВВ ВВВВВВВ ВВВВВВВ (ВВВВ ВВВ ВВВВВВВ ВВВВВ)
ВВВВВВ В ВВВВВВ ВВВВВВ ВВВВ ВВВВВВВВВВВ ВВВВВ ВВВВВВВ „9“ ВВВВВ ВВВВВ ВВ ВВВВВВВВ ВВВВВВВ ВВВВВВВВВ
ЗЗЗ ЗЗЗЗЗЗЗ
ВВВВВВВВВ ВВВВВВ
ВВВВВВВВВВВВВВВВ ВВВВВВ
ВВВВВВВВВВВВ ВВВВВВ
ВВВВВВВВВВВВВВ ВВВВВВ ВВВ ВВВВВВВВВВ В ВВ-ВВВВВВ
ВВВВВВВВВВВВВВ ВВВВВВ В ВВВВВВВВВВВВ ВВ-ВВВВВВ
ВВВВ ВВВВВ ВВВВВВВВВВВВВВВВВВ ВВВВВВВВВВВ ВВВВВВВ ВВВВВВВ ВВВВВ „C“, ВВВВ., „2C“, ВВ ВВВВВВ ВВВВВ ВВВВВВВВВВ ВВВВВВВВВВВВВ
ВВВ ВВВВВ ВВВВВВВВВ ВВВВВВВВВВ ВВВВВВВВВВВВ ВВ ВВВВВВВВВВВ EN 169, EN 170, EN 171 В EN 172.
ВВВ ВВВВВВВВВ ВВВВВ ВВВВВВВВВВВ ВВВВВВ ВВВВВВВВВ ВВВВВВ, ВВВВВВВВВВВВ ВВВ ВВВВВВВВВ ВВВВВВВ 1.2–16.
(12 В/В)
(45 В/В)
(120 В/В)
(190 В/В)
ЗЗЗЗЗЗЗЗЗЗ ЗЗЗЗЗЗЗ
ЗЗЗЗЗЗЗЗЗЗЗЗЗ ЗЗЗЗЗЗЗ ЗЗЗЗЗЗЗЗЗЗ
2
4
5
6
1.2 - 16
1.2 - 10
1.1 - 4.1
1.1 - 4.1
S
F
B
A
1
2
3
K
N
R
O
3
3
4
5
8
9
1.2 - 5
5 ввввввв ввв ввввввввв вввввввв (вA-40, CA-40G, CA-40GW) 1 ввввввв ввв ввввввввв вввввввв (вA-40, CA-40G, CA-40GW)
60 61
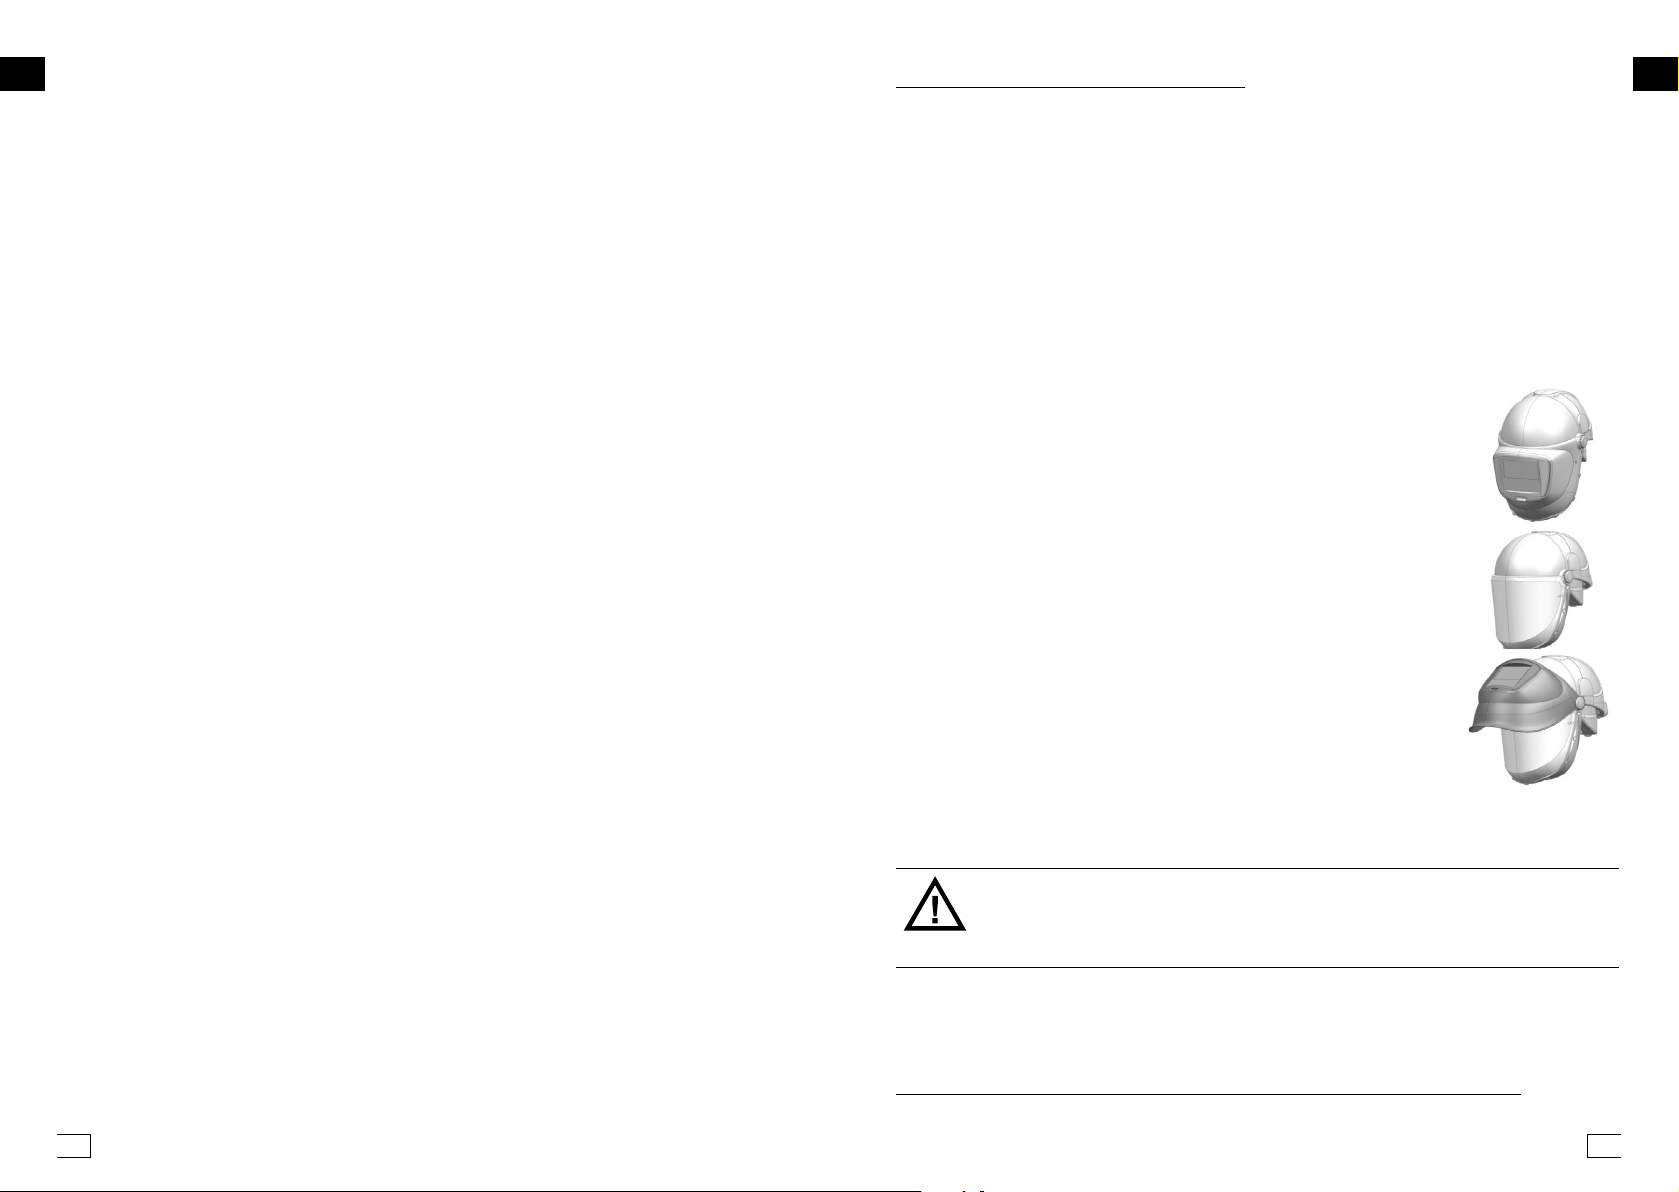
RUS SPA
Introducción
Cascos de protección CA-40, CA-40G y CA-40 GW
están diseñados exclusivamente para su uso con unidades de filtro-ventilación (en lo sucesivo como: UFV)
CleanAIR® o con aparatos de tubo de respiración para el aire comprimido con un flujo constante (en lo sucesivo como: „sistema de aire comprimido CleanAIR®“) y de esta manera proporcionan una protección del sistema
respiratorio.
CleanAIR® es un sistema de protección respiratoria personal basada en el principio de la sobre presión del
aire filtrado a la zona de respiración. La UFV colocada en la cintura del usuario filtra el aire aspirado del
ambiente circundante que es entonces, con la manguera de suministro de aire, llevado a una máscara de
protección. La presión resultante evita a las sustancias nocivas entrar en la zona de respiración al tiempo que
garantiza el confort del usuario, incluso después del desgaste prolongado sin tener que superar la resistencia
a la respiración de filtro. Proporciona protección contra partículas sólidas y líquidas de aerosoles, gases y vapores, dependiendo del tipo de filtro seleccionado. La mejor combinación para la UFV con cabecera se determina por el tipo y concentración de contaminantes en el ambiente de trabajo y de acuerdo con el trabajo. Toda
la serie CA-401 le permite seleccionar la protección adecuada para la mayoría de aplicaciones industriales,
donde también es necesaria la protección respiratoria necesaria y protección para los ojos, oídos y cabeza.
Casco de protección CA-40 con escudo de soldadura
(En lo sucesivo solo como CA-40) - Brinda una protección respiratoria eficaz, así
como la protección de la cabeza, de los ojos y de la cara durante la soldadura.
El escudo de soldadura con un filtro de oscurecimiento automático2 V9-13 DS
a continuación proporciona protección contra los rayos ultravioleta / radiación
infrarroja perjudicial y salpicaduras de soldadura.
Casco CA-40G con escudo abrasivo
(En lo sucesivo solo como CA-40G) - Brinda una protección respiratoria eficaz
como protección para la cabeza, los ojos y la cara contra las rápidas partículas
voladoras (marca: A) y al mismo tiempo proporciona una protección esencial contra los dañinos rayos ultravioleta.
Casco CA-40 GW con el escudo de molienda y de soldadura
(En lo sucesivo solo como CA-40 GW) - Brinda una protección respiratoria eficaz
como protección para la cabeza, los ojos y la cara contra las rápidas partículas
voladoras (marca: A) y al mismo tiempo proporciona una protección esencial contra los dañinos rayos ultravioleta. El escudo de soldadura con un filtro de oscurecimiento automático2 V9-13 DS a continuación proporciona protección contra los
rayos ultravioleta / radiación infrarroja perjudicial y salpicaduras de soldadura.
Aprobación, certificación
El casco de protección CA-40 está probado y aprobado en conformidad con los
requisitos de la norma europea EN 12941/A2 para el uso con las unidades de
filtro-ventilación CleanAIR® y EN 14594:2005 para el uso con aparatos de respiración de tubo de aire comprimido con una velocidad de flujo constante. Todas las partes del sistema utilizado
deben estar aprobadas por el fabricante y utilizarse de acuerdo con las instrucciones de este manual.
ADVERTENCIAS E INSTRUCCIONES BÁSICAS PARA EL USO
Antes de usar, el usuario debe estar debidamente informado de los riesgos potenciales
en el lugar de trabajo y ser instruido debidamente sobre el uso seguro de equipos de
protección personal. Si usted tiene alguna pregunta, por favor póngase en contacto con
el fabricante o con su distribuidor.
El casco CA-40
1 Incluyendo variantes derivadas (CA-40, CA-40G, CA-40 GW) filtros de soldadura de cristal mineral templado.
2 Los filtros de soldadura sólo puede ser utilizados en conjunción películas interiores de protección apropiados!
1
debe ser utilizado exclusivamente con UFV CleanAIR® o con los sistemas de aire compri-
62 63

mido CleanAIR®. Consulte por lo tanto, este manual, junto con el manual de instrucciones UFV CleanAIR® o
SPA SPA
instrucciones para el uso de aire comprimido CleanAIR
®
• No utilizar en espacios reducidos, con una deficiencia de oxígeno (<17%)3, el medio ambiente enriquecido
con oxígeno (> 23%) o donde existe una amenaza inmediata a la vida o la salud.
• No usar en ambientes donde el usuario desconoce el tipo de contaminación o su concentración.
• No utilizar si la unidad de filtro-ventilación se apaga o se cierra el paso del aire comprimido! Cuando se
trabaja con la UFV apagada o el suministro de equipo respiratorio de aire comprimido es poca o ninguna.
También puede aumentar concentración de dióxido de carbono y la reducción del contenido de oxígeno
en el interior de la máscara.
• Si la UFV o el sistema de aire comprimido se detiene, por cualquier motivo, durante el uso, el usuario
deberá abandonar inmediatamente el lugar de trabajo contaminado.
• Durante un trabajo muy intenso puede formarse dentro de la máscara un vacío durante la inhalación y por
lo tanto reducir el factor de protección.
• La sección de la cabeza debe estar siempre bien sellada a la cara para garantizar los niveles máximos
de protección del usuario. En caso de que en la línea de sellado llegue la barba o el cabello largo, se puede
reducir el sellado y por tanto la reducción de la protección proporcionada.
• No utilice si alguna parte del sistema está dañada. La pieza de cabecera y la manguera de aire se deben
controlar antes de cada uso. Cualquier grieta o fuga puede afectar negativamente el nivel de protección
del usuario.
• Los lentes rayados o de otra manera dañados deben ser reemplazados inmediatamente.
• No retire la máscara de soldadura de la cabeza, ni desactive la UFV o el sistema de aire comprimido hasta
que salga del lugar de trabajo contaminado.
• Utilice sólo filtros de aire auténticos certificados para su unidad de filtración de ventilación específica.
Reemplace los filtros de aire cada vez que sienta el cambio de olor del aire suministrado procedente de la
unidad.
• Los filtros diseñados para capturar las partículas sólidas y líquidas (de partículas) no protegen a los
usuarios contra los gases. Los filtros de aire diseñados para atrapar los gases no protegen a los usuarios
contra las partículas. Para entornos de trabajo contaminados con ambos tipos de contaminación,
es necesario utilizar los filtros de aire combinados.
Control antes de su uso, despliegue.
1) Antes de utilizar un nuevo producto, asegúrese siempre de que el equipo está completo y no sufrió ningún
daño durante la entrega. Cuando no se utilice el casco debe ser almacenado en un contenedor que lo
protegerá de la luz solar directa, los productos químicos y sustancias abrasivas, con las que puede ser
dañado por el contacto con objetos/superficies duros.
2) Para garantizar las propiedades de protección requeridas del casco jale el sellado del barbijo de tal
manera que duplique la cara. Un despliegue bueno de la cabecera en conjunto combinado con el flujo de
aire suministrado crea una ligera sobrepresión en el área facial, que no permite la entrada de contaminan tes en la zona de respiración del usuario. Para que el casco pueda proteger la cabeza
adecuadamente contra la caída de objetos (según la norma EN 397+A1) debe tener el tamaño adaptado al
de la cabeza del usuario (54-65 cm). Por lo tanto, asegúrese de que el casco está asentando en la cabeza
con comodidad, pero con firmeza. Para establecer el tamaño óptimo de la banda para la cabeza, utilice el
botón giratorio en la nuca.
3) Para todas las partes de la cabecera, por razones de higiene, se recomienda utilizar un pasamontañas
protector TYVEK (Orden N ° 70 02 01).
Aplicación:
El casco está construido de tal manera que absorbe la energía de impacto por la destrucción parcial o los
daños a la carcasa y el revestimiento de la cabeza. Aun cuando dichos daños no sean evidentes de inmediato, en caso de un casco que ha sido expuesto a impactos severos debe ser reemplazado.
Sustitución de barbijos
Extracción del barbijo:
• Retire de la parte posterior del barbijo del tornillo de ajuste.
• Cambie del casco la banda para la cabeza haciendo clic de los anclajes del sujetador de la banda de la
cabeza.
• Saque con cuidado el barbijo de cada pin que se encuentra en el perímetro del escudo del casco.
• Saque paso gradualmente el borde de plástico del barbijo de los anclajes del sujetador de la banda de
la cabeza por el perímetro del casco.
Aplicación del barbijo:
• Asegure el borde de plástico del barbijo haciendo clic a los anclajes del sujetador de la banda de la cabeza
por el perímetro interior del casco
(Ajuste recomendado - en la parte delantera (en el escudo) el orificio en la línea inferior más cercana
al escudo). En la parte trasera (donde está el conector con la manguera) el orificio del centro en la parte
inferior.)
• Cubrir con cuidado los orificios del barbijo en todos los pin en el escudo de la máscara.
• Ponga la banda de la cabeza haciendo clic a los anclajes del sujetador de la banda de la cabeza.
(Ajuste recomendado - orificio central en la parte superior en todos los sujetadores de la banda de
la cabeza.)
• Pase la parte posterior del barbijo en el tornillo de ajuste.
Por razones de higiene descarte el viejo barbijo inmediatamente después del canje, para evitar su reutilización!
Sustitución de las láminas protectoras para la CA-40
Recomendamos utilizar las laminas protectoras para la seguridad del filtro de atenuación automático del
escudo abrasivo y de la visera. Un cambio a tiempo de la lamina aumenta la vida del filtro de atenuación
automático, del visor y asegura una buena visibilidad constante.
Para proteger el filtro de atenuación automático se suministra una película protectora de policarbonato. La
película está montada en el exterior y en el interior del filtro y evita el establecimiento de bolitas de salpique
en la visera.
Cambio de la lámina exterior protectora:
a) Cambie la lamina tirando de su parte inferior de la pantalla de soldadura receso.
b) Antes de la instalación de la lamina protectora, retire siempre la cubierta delgada de cada uno de sus
lados. Nuevamente la aplicación se realiza insertando la lámina a las ranuras laterales del espacio anterior
al filtro de atenuación automático.
Cambio de la lámina interior protectora:
La lámina se puede quitar fácilmente deslizando desde las ranuras de fijación, pero sólo hasta después de
la eliminación del filtro de atenuación automático. La extracción del filtro de atenuación automático se realiza
liberando los tornillos de bloqueo en la parte interior del escudo de soldadura.
Advertencia!
Si no es recomendado por el fabricante del casco, está prohibido realizar cualquier
personalización o quitar cualquier pieza original del casco. Los cascos no deberían ser
modificados con el fin de asegurar los accesorios de ninguna manera no recomendada
por el fabricante.
No aplique adhesivos, pinturas, disolventes o etiquetas autoadhesivas, si no coincide
con las instrucciones del fabricante del casco.
4
No limpie la lámina en seco, de esa manera fácilmente se rayará y se reducirá su transparencia. Por
tanto, las láminas también son capaces de concentrar carga electrostática y por lo tanto en un ambiente
polvoriento puede verse afectada la visibilidad!
3 las concentraciones indicadas pueden variar en diferentes países, observar los
estatutos!
1 incluyendo variante derivada (CA-40, CA-40G, CA-40 GW) 4 incluidas las variantes derivadas (CA-40, CA-40GW)
64 65

Sustitución del filtro de soldadura:
SPA SPA
a) Retire el filtro de los tornillos de retención de la soldadura desde el interior del escudo casco de la
soldadura.
b) Retire el filtro de soldadura.
c) Inserte un nuevo filtro de soldadura y asegúrelo en su posición apretando los tornillos.
Limpieza y desinfección
• Después del final de cada faena, limpie la pieza de la cabeza, compruebe las piezas y cambie las piezas
dañadas.
• La limpieza debe realizarse en una habitación bien ventilada. Cuidado con la inhalación de polvo nocivo
depositado en las partes componentes!
• Para limpiar, use agua tibia (hasta 40°C) con jabón u otro detergente no abrasivo y un cepillo suave.
Se puede usar la máscara solamente con filtro de soldadura aprobados de tamaño 90x110 mm!
• Está prohibido el uso de productos de limpieza con disolventes.
• Después de limpiar las partes individuales (con un paño húmedo), es necesario limpiarlos hasta secarlos
Sustitución del escudo abrasivo de soldadura:
a) Retire los tornillos de los lados del casco protector.
b) Baje el escudo para facilitar su retiro.
o dejar secarlos a temperatura ambiente.
• El filtro de soldadura de atenuación automática se limpia siempre con un: paño limpio y seco o ligeramente
húmedo (en agua limpia, con jabón o alcohol).
c) Saque el protector(es) primero a un y luego al otro lado del pasador de anclaje del casco.
d) Coloque el nuevo escudo(s) con el procedimiento en orden inverso.
Advertencia:
Lentes rayados o dañados deben ser sustituidos a tiempo por unos nuevos.
Inspección y mantenimiento:
Casco protector CA-405 es un sistema completo que consiste su propio casco, escudo de molienda/soldadura, o sus combinaciones, y la banda de cabecera. La vida útil del casco está influenciada por muchos factores, tales como: frío, calor, productos químicos, la luz del sol o el uso indebido. El casco debe ser revisado
diariamente si no presenta signos de grietas, fragilidad o daños en las estructuras internas.
Cuando se detecta algún daño debe ser reemplazado con un nuevo casco!
Después de cinco años de uso, es necesario sustituir un casco cada vez!
Organismo Notificado para la prueba de CE:
Výzkumný ústav bezpečnosti práce, v.v.i. - ZL
Laboratorio de pruebas número: 1024
Jeruzalémská 9, 116 52 Praha 1
Persona autorizada 235
Persona Notificada 1024
Organismo Notificado para la prueba del CE (escu-
do de soldadura para la combinación con escudo
de abrasivos y escudo de abrasivos):
Institut pro testování a certifikaci, a.s.
Třída Tomáše Bati 299, 764 21 Zlín
Persona autorizada 224
Persona Notificada 1023
Selección y área de aplicación: Cualquier medio para proteger sus ojos y la cara están designados según la
siguiente tabla para identificar sus áreas de uso y la eficacia según los requisitos de la norma EN 166:2001
Almacenamiento:
Las condiciones para el almacenamiento están en la embalaje señalizadas con estos símbolos:
Véase la información
suministrada por el
productor
Todos los componentes del sistema CleanAIR
Rango de temperatura
de almacenamiento
®
se deben almacenar en áreas con temperaturas del aire entre:
Fin de la
propiedad de
almacenaje
-10 hasta 50°C y la humedad relativa de 20 - 80% de humedad relativa (HR). El tiempo de almacenamiento en
envases sin abrir es de hasta máximo 2 años.
CA-40
CA-40G
CA-40GW
CA-401 +
Clase de
protección
Lista de piezas de repuesto:
Posición
1 40 50 40 Filtro de atenuación automática V913 DS ADC
2 70 42 02 Escudo de soldadura (para la versión de CA-40 GW)
2 70 40 02 CA-40 Escudo de soldadura de reemplazo
3 70 41 01 Escudo de abrasivo de reemplazo
4 70 40 60 CA-40 Barbijo para el rostro (para todos los tipos CA-40)
5 70 40 44 Vincha para el sudor CA-40 (para todos los tipos CA-40)
7 70 40 43 2 Tornillos de aseguramiento (para todos los tipos CA-40)
8 70 40 40 Orejeras, no. 8 (para todos los tipos CA-40)
8 70 40 41 Orejeras, no. 10 (para todos los tipos CA-40)
8 70 40 42 Orejeras, no. 12 (para todos los tipos CA-40)
- COS015 Sellos de goma del conector del canal de aire
- 70 40 80 lámina de cubierta exterior CA-40 (10p) para el CA-40, CA-40 GW
- 70 24 81 lámina de cubierta interior, 107x51 policarbonato (10 unidades) para CA-40, CA-40 GW
- 110/90-09 filtro de soldadura pasivo, el grado de oscuridad 9
- 110/90-10 filtro de soldadura pasivo, el grado de oscuridad 10
- 110/90-11 filtro de soldadura pasivo, el grado de oscuridad 11
- 110/90-12 filtro de soldadura pasivo, el grado de oscuridad 12
- 110/90-13 filtro de soldadura pasivo, el grado de oscuridad 13
Cascos protectores completos CA-40
- 70 41 00 Casco CA-40G con escudo abrasivo
- 70 42 01 Casco CA-40 GW con escudo de soldadura y escudo abrasivo (incluyendo el filtro de atenuación
- 70 40 01 Casco CA-40 con escudo de soldadura (incluyendo el filtro de atenuación automática)
Protección de los ojos
( EN 166 )
CA Basic
2000 FC
TH2 TH1 TH2 TH2 TH2 2A 2B
Señalización
del código
Protección de los ojos
Protección de la cabeza
Durante la soldadura
( EN 175 )
CA Basic
2000 DF
automática)
CA Chemical 2FCA Chemical 3FCA
AerGO
Descripción
( EN 397 )
CA
Pressure
CA Flow
Master
5 incluyendo las variante derivadas (CA-40, CA-40G, CA-40 GW) 1 incluyendo variante derivada (CA-40, CA-40G, CA-40 GW)
66 67

Significado de la señalización
SPA SWE
Solidez mecánica (del marco y de los
Solidez elevada
Colisión de poca energía
Colisión de media energía
Colisión de alta energía
Si los visores ni el borde no tienen la misma señal de identificación acerca de la solidez mecánica, se clasifica todo el medio para la protección de los ojos
como el de máxima calidad.
Si es que al grado de colisión le sigue la letra „T“, por ejemplo „FT“, el medio brinda una protección en contra de las partículas de alta velocidad en temperaturas extremas (-5ºC/+55ºC)
Si es que al grado de colisión NO le sigue la letra „T“, el medio se debe usar para la protección de los ojos en contra de las colisiones solamente en temperaturas ambientales.
Clase óptica
Clase óptica 1
Clase óptica 2
Clase óptica 3 (no adecuada para un uso prolongado)
Requerimientos opcionales
Resistencia de los visores contra los daños de partículas ligeras
Resistencia contra el empañado
Reflejado elevado
Visor inicial
Visor de sustitución
Los visores de vidrio laminado tienen las instrucciones para el ajuste señalizado en la parte trasera
Área de uso (del marco y del visor)
Gotas de líquidos (solo lentes)
Líquidos de rocío (solo escudos para la cara)
Polvo grueso (solo lentes)
Gas y polvo fino (solo lentes)
Arco eléctrico (solo escudos para la cara)
Metales fundidos y partículas duras y calientes (lentes o escudos para la cara)
Los visores y también los bordes deben estar aparte de la señalización „9“ también señalizados con uno de los símbolos „F“, „B“ o „A“
Señalización de los filtros
Filtro infrarrojo
Filtro de soldadura
Filtro solar (sin especificación infrarroja)
Filtro ultra violeta (puede influenciar en diferenciar los colores)
Si después de la identificación del filtro sigue la letra „C“, por ej. „2C“, no se empeora el reconocimiento de los colores
Para más información lea por favor las normas EN 169, EN 171 y EN 172.
Para el trabado de soldadura, use solamente los visores marcados como clones de soldadura 1.2 hasta 16.
visores)
(12 m/sec)
(45 m/sec)
(120 m/sec)
(190 m/sec)
Señalización del producto
Identificación del
filtro
2
4
5
6
Señalización del
producto
S
F
B
A
1
2
3
K
N
R
O
3
3
4
5
8
9
Tono
1.2 hasta 16
1.2 hasta 5
1.2 hasta 10
1.1 hasta 4.1
1.1 hasta 4.1
Inledning
Skyddshjälmarna CA-40, CA-40G och CA-40GW
är uteslutande konstruerade för användning med de fläktassisterade filterskydden CleanAIR® (nedan kallade
FS) eller med tryckluftsapparat med kontinuerligt flöde (nedan kallad tryckluftssystemet CleanAIR®) och skyddar då luftvägarna.
CleanAIR® är ett system för personligt andningsskydd. Det bygger på principen om övertryck för den filtrerade
andningsluften. FS på användarens bälte filtrerar den luft som sugs in från omgivningen. Luften leds genom
slangen till skyddshjälmen. Det övertryck som bildas hindrar föroreningar från att tränga in. Detta övertryck
ger samtidigt hög användarkomfort vid långvarig användning, utan att användaren behöver övervinna filtrets
andningsmotstånd. Skyddar mot fasta partiklar i form av vätskeformiga och fasta aerosoler samt gaser och
ångor, beroende på typ av filter. Lämpligaste kombination av huvuddel och FS bestäms på grundval av föroreningarnas typ och koncentration i arbetsmiljön och enligt typ av arbete. Produktserien CA-401 gör det möjligt
att välja lämpligt skydd för de flesta industriella användningsområden, då det förutom skydd av luftvägarna
även krävs ögon-, hörsel- och huvudskydd.
Skyddshjälm CA-40 med svetsskärm
(nedan kallad CA-40) – ger ett effektivt skydd av luftvägarna, men även av huvud,
ögon och ansikte vid svetsning. Svetsskärmen med automatiskt svetsglas2 V9-13
DS skyddar mot skadlig ultraviolett/infraröd strålning och svetsloppor.
Skyddshjälm CA-40G med slipskärm
(nedan kallad CA-40G) – ger förutom ett effektivt skydd av luftvägarna även skydd
av huvud, ögon och ansikte mot partiklar med hög hastighet (märkning: A) och ger
samtidigt grundläggande skydd mot skadlig UV-strålning.
Skyddshjälm CA-40GW med slip- och svetsskärm
(nedan kallad CA-40GW) – ger förutom ett effektivt skydd av luftvägarna även
skydd av huvud, ögon och ansikte mot partiklar med hög hastighet (märkning: A)
och ger samtidigt grundläggande skydd mot skadlig UV-strålning. Svetsskärmen
med automatiskt svetsglas2 V9-13 DS skyddar mot skadlig ultraviolett/infraröd
strålning och svetsloppor.
Godkännande, certifiering
Skyddshjälmen CA-40 är testad och godkänd i enlighet med Europastandarden
EN 12941/A2 för användning med de fläktassisterade filterskydden CleanAIR® och
i enlighet med EN 14594:2005 för användning med tryckluftsapparat med kontinuerligt flöde. Alla delar av det använda systemet ska vara godkända av tillverkaren och användas enligt anvisningarna i denna handbok.
VARNING OCH GRUNDLÄGGANDE BRUKSANVISNING
Innan systemet används måste användaren ta reda på om det finns några risker på arbetsplatsen och lära sig hur den personliga skyddsutrustningen ska hanteras för att vara
säker. Kontakta tillverkaren eller återförsäljaren om du har några frågor.
• Skyddshjälmen CA-40
1
får endast användas med FS CleanAIR® eller med tryckluftssystemet CleanAIR®.
Läs därför igenom denna bruksanvisning samt bruksanvisningen till FS CleanAIR® eller bruksanvisningen
till tryckluftssystemet CleanAIR®.
• Använd inte produkten i slutna utrymmen, i miljöer med otillräcklig mängd syre (<17 %)3, i syreberikad
miljö (>23 %) eller där det finns en direkt livs- eller hälsofara.
• Använd inte i miljöer med okänd typ av förorening i okänd koncentration.
• Använd inte med avstängt fläktassisterat filterskydd eller med avstängd tryckluftsmatning! Om fläkten
eller tryckluftsmatningen stängs av blir skyddet av luftvägarna obefintligt. Dessutom kan koncentrationen
av koldioxid inuti hjälmen öka och syremängden minska.
1 inklusive varianter (CA-40, CA-40G, CA-40GW)
2 svetsglas av härdat mineralglas får enbart användas tillsammans med lämplig inre skyddsfolie!
3 angivna koncentrationer kan variera mellan olika länder, följ lokala föreskrifter!
68 69

• Om FS eller tryckluftssystemet av någon anledning slutar fungera under användning måste användaren
SWE SWE
omedelbart lämna den förorenade arbetsplatsen.
• Vid mycket ansträngande arbete kan det skapas ett undertryck inuti hjälmen vid inandning, vilket leder till
minskat skydd.
• Huvuddelen måste alltid sitta fast ordentligt vid ansiktet, så att skyddet blir optimalt. Om skägg eller långt
hår fastnar under tätningsytorna kan skyddet minska på grund av otätheterna.
• Använd inte systemet om någon del är skadad. Huvuddelen och luftslangen ska kontrolleras före varje
användning. Eventuella sprickor eller otätheter kan påverka det önskade skyddet negativt.
• Repade eller på annat sätt skadade siktglas måste omedelbart bytas ut.
• Ta inte av hjälmen och stäng inte av FS eller tryckluftssystemet CleanAIR® förrän du har lämnat den
förorenade arbetsplatsen.
• Använd endast godkända originalfilter som är avsedda för ditt fläktassisterade filterskydd. Byt ut filtret om
Släng den gamla masken av hygieniska skäl direkt efter bytet, så att den inte används igen!
Byte av skyddsfolie för CA-40
4
Vi rekommenderar skyddsfolie för skydd av automatiska svetsglas och siktglas i slipskärm. Om du byter ut
folien i tid förlängs det automatiska svetsglasets eller siktglasets livslängd och garanteras konstant god sikt.
För skydd av det automatiska svetsglaset medföljer en polykarbonatfolie. Folien sätts fast på yttre och inre
sidan av det automatiska svetsglaset och förhindrar att svetspartiklar fastnar.
Byte av yttre skyddsfolie:
a) Avlägsna den gamla folien genom att dra i den nedre delen vid svetsskärmens urtagning.
b) Ta alltid bort den tunna filmen på båda sidor av den nya skyddsfolien, innan den sätts fast. Folien sätts fast
genom att föras in i sidoskårorna framför det automatiska svetsglaset.
lukten förändras på den luft som kommer från enheten.
• Filter mot fasta och vätskeformiga partiklar (partikelfilter) skyddar inte mot gaser. Filter mot gaser skyddar
inte mot partiklar. I arbetsmiljöer där båda typerna av föroreningar förekommer måste kombinerade filter
användas.
Byte av inre skyddsfolie:
Folien kan enkelt dras ut ur fästskårorna, men först efter att det automatiska svetsglaset har tagits bort. Det
automatiska svetsglaset tas bort genom att man lossar på skruvarna på inre sidan av svetsskärmen.
Kontroll före användning, påtagning
1) Före användning av en ny produkt ska det alltid kontrolleras att utrustningen är komplett och inte har
skadats under transporten. När hjälmen inte används bör den förvaras i förpackningen, som skyddar mot
Obs!
Rengör inte folien med torr metod, eftersom den kan bli repad och därmed ge försämrad sikt. På grund av
elektrostatisk uppladdning kan damm fastna på folien, vilket leder till försämrad sikt!
direkt solljus, kemikalier och slipmedel, och där hjälmen inte kan skadas av hårda föremål/ytor.
2) För att hjälmen ska ge avsett skydd ska masken dras åt mot ansiktet så att den sitter så tätt mot ansiktet
som möjligt. En rätt sittande huvuddel skapar i kombination med luftflödet ett lättare övertryck inuti
ansiktsdelen, vilket hindrar föroreningar från att tränga in. För att hjälmen ska ge tillräckligt skydd av
huvudet mot fallande föremål (enligt EN 397+A1) måste dess storlek vara anpassad till storleken på
Byte av svetsglas:
a) Montera loss svetsglasets fästskruvar från inre sidan av svetsskärmen.
b) Ta ut svetsglaset.
c) Sätt in ett nytt svetsglas och fäst det i ursprungligt läge genom att dra åt skruvarna.
användarens huvud (54–65 cm). Se därför till att hjälmen sitter bekvämt men stabilt på huvudet. Med hjälp
av den bakre ratten ställer du in optimal storlek på bandstället.
Hjälmen får enbart användas med godkända svetsglas med måtten 90x110 mm!
3) Av hygieniska skäl rekommenderar vi användning av skyddshuvan TYVEK (best. nr 70 02 01) i alla
huvuddelar.
Byte av svets- och slipskärm:
a) Montera loss skruvarna på skyddshjälmens sidor.
Användning
Hjälmen är konstruerad så att höljet och hjälmstommen delvis ska förstöras eller skadas och därmed absorbera energin från stöten. Även om en hjälm som har utsatts för en stark stöt inte visar tecken på skador bör
b) Fäll ned skärmen för att underlätta borttagandet.
c) Dra loss skärmen från tapparna, först på den ena och sedan på den andra sidan av hjälmen.
d) Sätt på en ny skärm i omvänd ordning.
den bytas ut.
Obs:
Såvida inte tillverkaren rekommenderar något annat är det förbjudet att utföra några
som helst egna ändringar på eller avlägsna några ursprungliga delar från hjälmen. Utan
tillverkarens rekommendation får hjälmen inte på något sätt ändras för montering av
tillbehör.
Applicera inte lim, färger, lösningsmedel eller klistermärken om det inte överensstämmer med tillverkarens instruktioner.
Repade eller på annat sätt skadade siktglas bör snarast bytas ut.
Kontroll och underhåll:
Skyddshjälmen CA-405 är ett komplett system, som består av själva hjälmen, slip-/svetsskärm eller kombinationer av dessa samt bandställ. Hjälmens livslängd påverkas av många faktorer, exempelvis kyla, värme,
kemikalier, solljus eller felaktigt handhavande. Det bör dagligen kontrolleras om inte hjälmen visar tecken på
sprickor, skörhet eller skador i den inre konstruktionen.
Byte av mask
Avtagning av mask:
• Dra av bakre delen av masken från inställningsskruven.
• Ta ut bandstället från hjälmen genom att dra ut bandställets hållare från hålen.
Om du upptäcker några som helst skador måste hjälmen bytas ut!
Efter fem års användning ska hjälmen alltid bytas ut!
• Dra försiktigt av masken från varje hållare längs skärmens kant.
• Dra loss maskens plastkant från hålen för bandställets hållare längs hjälmens inre kant.
Påtagning av mask:
• Sätt fast maskens plastkant i hålen för bandställets hållare längs hjälmens inre kant.
(Rekommenderad inställning – i främre delen (vid skärmen): hålet i nedre raden närmast skärmen. I bakre
delen (vid slangens anslutningsdon): mittenhålet i nedre raden.)
• Trä försiktigt hålen i masken på varje hållare längs skärmens kant.
Anmält organ för CE-provning:
Výzkumný ústav bezpečnosti práce, v.v.i. - ZL
Zkušební laboratoř č. 1024
Jeruzalémská 9, 116 52 Praha 1
Behörigt organ 235
Anmält organ 1024
Anmält organ för CE-provning (svetsskärm i kombi-
nation med slipskärm samt slipskärm):
Institut pro testování a certifikaci, a.s.
Třída Tomáše Bati 299, 764 21 Zlín
Behörigt organ 224
Anmält organ 1023
• Sätt in bandstället i hjälmen genom att trycka in bandställets hållare i hålen.
(Rekommenderad inställning – mittenhålet högst upp för alla bandställets hållare.)
• Trä bakre delen av masken på inställningsskruven.
4 inklusive varianter (CA-40, CA-40GW)
5 inklusive varianter (CA-40, CA-40G, CA-40GW)
70 71

Val och användningsområde: Alla ögon- och ansiktsskydd är märkta i enlighet med nedanstående tabell för
SWE SWE
att ange användningsområde och verkningsgrad enligt kraven i EN 166:2001.
Förvaring
Förvaringskrav anges på förpackningen med följande symboler:
se information från
tillverkaren
förvaringstemperatur lagringstid
- 110/90-09 Passivt svetsglas, mörkhetsgrad 9
- 110/90-10 Passivt svetsglas, mörkhetsgrad 10
- 110/90-11 Passivt svetsglas, mörkhetsgrad 11
- 110/90-12 Passivt svetsglas, mörkhetsgrad 12
- 110/90-13 Passivt svetsglas, mörkhetsgrad 13
Kompletta skyddshjälmar CA-40
- 70 41 00 Skyddshjälm CA-40G med slipskärm
- 70 42 01 Skyddshjälm CA-40GW med svets- och slipskärm (inkl. automatiskt svetsglas)
- 70 40 01 Skyddshjälm CA-40 med svetsskärm (inkl. automatiskt svetsglas)
Alla delar av systemet CleanAIR® ska förvaras i utrymmen där lufttemperaturen ligger mellan –10 och +50 °C
med relativ luftfuktighet mellan 20 och 80 % Rh. Lagringstiden i oöppnad förpackning är högst 2 år.
Rengöring och desinficering
• Rengör huvuddelen efter varje användning, kontrollera enskilda delar och byt ut skadade delar.
• Rengöringen ska genomföras i ett väl ventilerat rum. Se upp så att du inte andas in skadligt damm från
enskilda delar!
• Använd ljummet vatten för rengöring (upp till +40 °C) tillsammans med tvål eller annat rengöringsmedel
utan slipverkan samt mjuk borste.
• Lösningsmedel får inte användas.
• Efter att enskilda delar har rengjorts med fuktig trasa ska de torkas torra eller självtorka vid
rumstemperatur.
• För desinficering av delar som kommer i kontakt med huden kan vanliga medel användas, t.ex. Ajatin,
Incidur och liknande.
• Det automatiska svetsglaset får enbart rengöras med en ren, torr eller lätt fuktad trasa (i rent vatten,
tvållösning eller alkohol).
CA-40
CA-40G
CA-40GW
CA-401 +
Ögonskydd
(EN 166)
CA Basic
2000 FC
CA Basic
2000 DF
CA Chemical 2FCA Chemical 3FCA
Ögonskydd
vid svetsning (EN 175)
AerGO
Huvudskydd
(EN 397)
CA
Pressure
CA Flow
Master
Skyddsklass TH2 TH1 TH2 TH2 TH2 2A 2B
Reservdelar:
Nummer Märkning Beskrivning
1 40 50 40 Automatiskt svetsglas V913 DS ADC
2 70 42 02 Svetsskärm (för versionen CA-40GW)
2 70 40 02 CA-40 reservsvetsskärm
3 70 41 01 Reservslipskärm
4 70 40 60 CA-40 ansiktsmask (för alla typer CA-40)
5 70 40 44 Pannband CA-40 (för alla typer CA-40)
7 70 40 43 Fästskruvar 2 st. (för alla typer CA-40)
8 70 40 40 Hörselskydd, nr 8 (för alla typer CA-40)
8 70 40 41 Hörselskydd, nr 10 (för alla typer CA-40)
8 70 40 42 Hörselskydd, nr 12 (för alla typer CA-40)
- COS015 Gummitätning för luftkanalens anslutningsdon
- 70 40 80 Yttre skyddsfolie CA-40 (10 st.) för CA-40, CA-40GW
- 70 24 81 Inre skyddsfolie, 107x51 polykarbonat (10 st.) för CA-40, CA-40GW
Märkningsförklaring
Mekanisk hållfasthet (ram och siktglas) Produktmärkning
Förstärkt hållfasthet
Partiklar med låg hastighet
Partiklar med medelhög hastighet
Partiklar med hög hastighet
Om siktglas och ram har olika märkning för mekanisk hållfasthet klassificeras hela ögonskyddet enligt den lägsta skyddsgraden.
Om skyddsgraden följs av bokstaven T, t.ex. FT, avser skyddet partiklar med hög hastighet vid extrema temperaturer (–5 °C / +55 °C).
Om skyddsgraden INTE följs av bokstaven T får ögonskyddet endast användas för skydd mot partiklar vid rumstemperatur.
Optisk klass
Optisk klass 1
Optisk klass 2
Optisk klass 3 (olämpligt för långvarig användning)
Valfria egenskaper
Hållfasthet mot fina partiklar
Motverkar imma
Förstärkt reflexion
Ursprungligt siktglas
Reservsiktglas
För laminerade siktglas anges instruktioner på baksidan
Användningsområde (ram och siktglas)
Droppande vätskor (enbart glasögon)
Sprutande vätskor (enbart ansiktsskärm)
Grovt damm (enbart glasögon)
Gas och fint damm (enbart glasögon)
Svetsbåge (enbart ansiktsskärm)
Smält metall och varma fasta partiklar (glasögon eller ansiktsskärm)
Siktglas och ram ska utöver märkningen 9 även vara märkt med symbolen F, B eller A.
Märkning (enbart siktglas)
Svetsglas
UV-filter (kan påverka färgerna)
IR-filter
Filter mot solljus (utan IR-skydd)
Filter mot solljus (med IR-skydd)
Om märkningen följs av bokstaven C, t.ex. 2C, påverkas inte färgerna.
Ytterligare information finns i standarderna EN 169, EN 170, EN 171 och EN 172.
För svetsning får man enbart använda svetsglas med märkningen 1,2 till 16.
(12 m/sec)
(45 m/sec)
(120 m/sec)
(190 m/sec)
Produktmärkning
Filtermärkning Nyans
2
4
5
6
S
F
B
A
2
3
K
N
R
O
3
3
4
5
8
9
1.2 - 16
1.2 - 5
1.2 - 10
1.1 - 4.1
1.1 - 4.1
1
1 inklusive varianter (CA-40, CA-40G, CA-40GW)
72 73
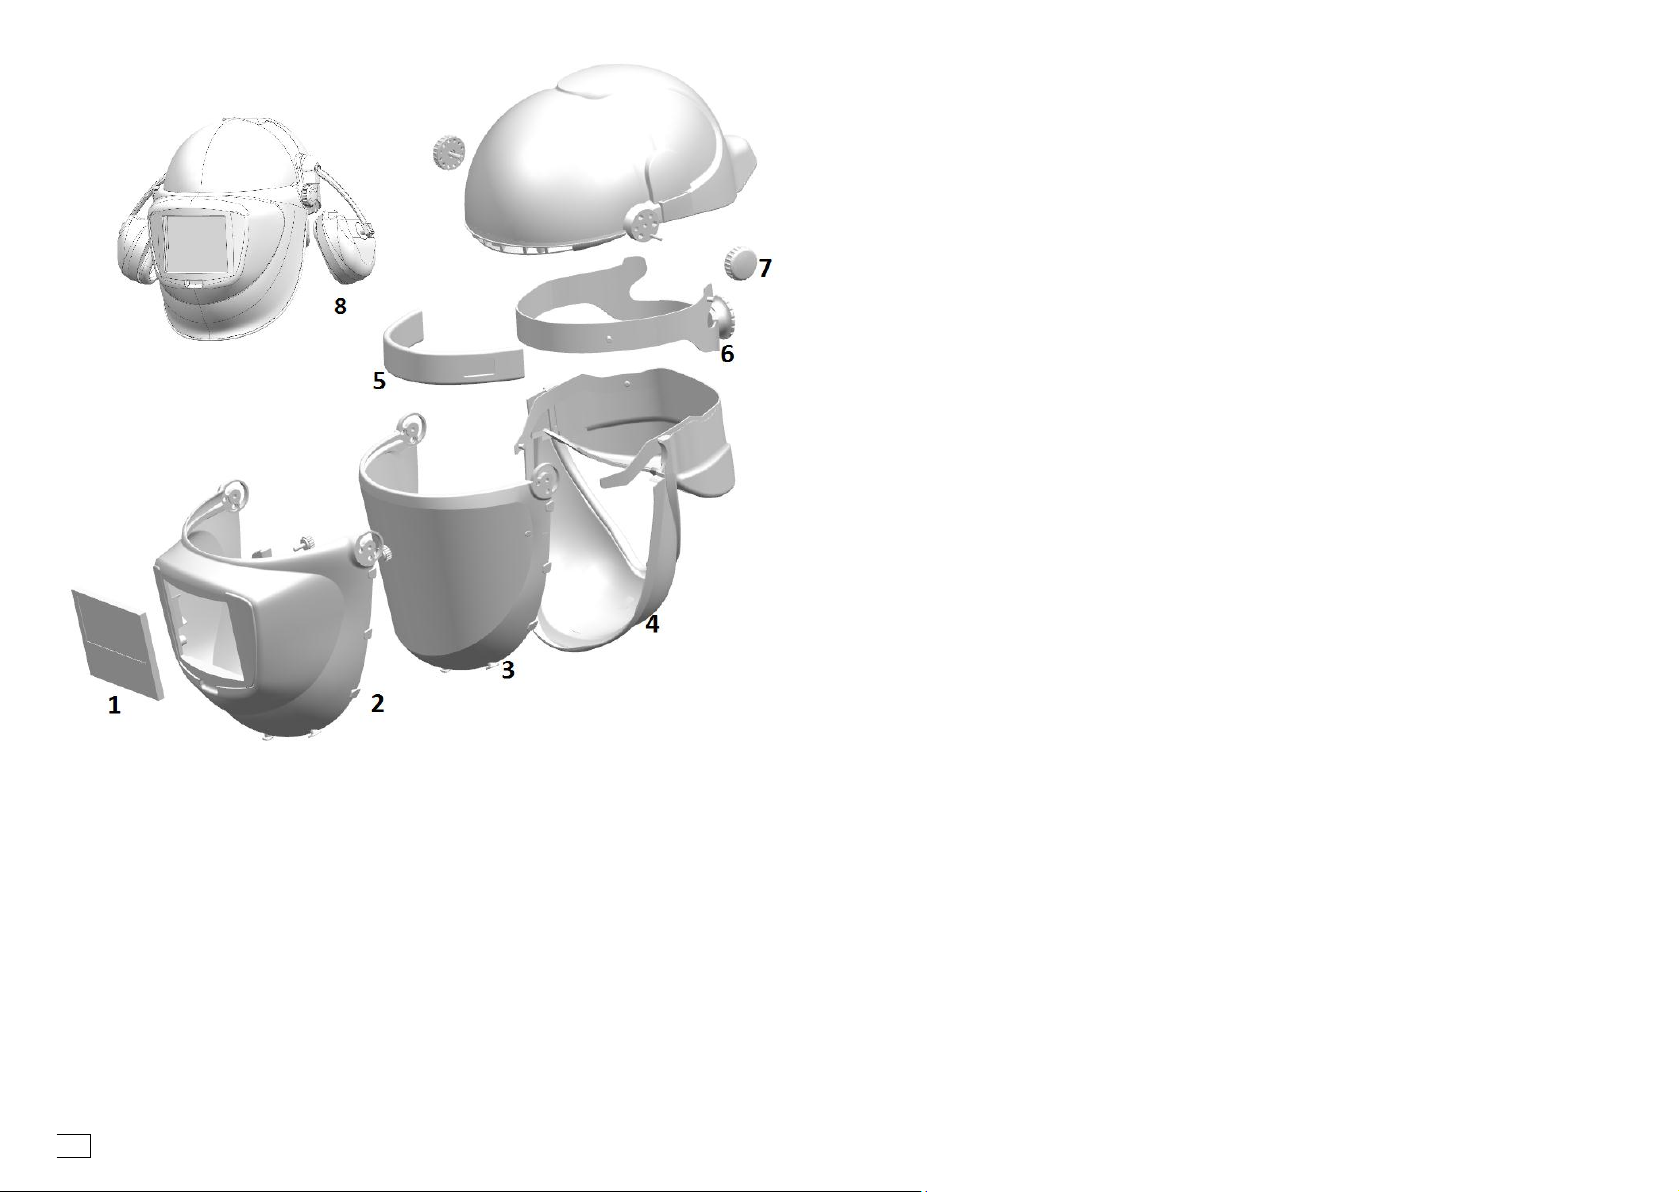
74
Malina-Safety s.r.o.
Luční 11
CZ 466 01 Jablonec n.N.
Czech Republic
tel. +420 483 356 600 | fax.+420 483 356 601
export@malina-safety.cz
www.malina-safety.cz
 Loading...