

Page 1

Link PLUS
Model Name: Z702
Brand Name: plum
FCC ID: Y7WPLUMZ702
Page 2

2
Content
1. Notifications ……………………………………………………………… 4
2. Introduction ……………………………………………………………………5
2.1 Ke y Fu nctio ns……………………… ………………………… …………………….. 5
2.2 Features Overview. ……………… …………………………………………………… 5
2.3 Technical Specifications……………………………………………………………………..5
3. Quick Guide …………………………………………………………………6
3.1 About the Touch screen……………………………………………………………….......6
3.2 Switch On/Off. ………………………………………………………………........................6
3.3 Power Save Modes and lock screen…………………………………………………6
3.4 Battery management and charging. ………………………………………………………6
3.5 Explanation of Function items………….………………………………………………7
3.6 USB HOST Function………………………………………………………………..............7
3.7 TF Card Storage………………………………………………………………....................8
4. Network Access …………………………………………………………………8
4.1 Wi-Fi Network Access ……………………………………………………………….....8
4.2 3G Network Access ………………………………………………………………...........8
5. Storage File Copy……………………..………………………………………9
6. Main Functions ……………. ……………………………………………9
6.1 Audio Function… ……… ……… ……… ……………………………… ……… …...…9
6.2 Video Function………………………… ……………………………………………… 10
6.3 Picture Functio n……………… …………………………… …… … ……………… 10
6.4 Record Function………………………… ………………………………………… … 10
6.5 File Manager…………… …………………………………………………………......... 11
6.6 E-boo k Function………………………… ……… …………………………………… 11
6.7 Interne t Browser……………………… …………………… …… ………………… 11
6.8 E-mail Function………………………………………………………………………12
6.9 Calendar………………………………………………………………………………........12
6.10 Calculator………………………………………………………………………………....13
6.11 Alarm Clock………………………………………………………………………………13
6.12 APK Installer……………………………………………………………………………14
6.1 3 Pic t ures and Vide o … …… … … …… …… …… … … … … … … … …… …… ……1 5
6.14 GPS........................................................................................................16
7. System Settings……………………………………………...............…………17
8. FAQ………………………………………………………………......…..………18
Page 3

3
1. Notifications
①. Please protect the device against moisture and dust.
②. Do not leave the device in a high-temperature environment, especially a closed car in hot
weather.
③. Do not drop or strike the device.
④. Do not shake the device violently, particularly the LCD screen, as this may cause the display to
malfunction.
⑤. Please make sure to carefully adjust the earphone volume; excessive volume may be harmful to
your hearing.
⑥. Please charge the device when
(1) The power icon shows that the battery is nearly empty
(2) The device turns itself off automatically and will not come back on.
(3) There is no response when operating the buttons.
Attention: Please use only the charger provided by the manufacturer; other chargers may
damage the device.
Input: 100-240V ~ 50/60 Hz
Output: 5V 1500 mA
⑦. Do not disconnect the device from your PC when downloading, uploading or formatting as this
may cause programming errors in the device.
⑧. Do not disassemble the device yourself; only allow an expert to do so.
⑨. Do not use alcohol, thinner or benzene-based chemicals to clean the surface of the device.
⑩. Do not use the device in places where its use is prohibited, like aircraft.
⑪. Please make sure to always back up your device. The manufacturer is not responsible for lost
files or data after the device has been damaged or repaired.
⑫. The manufacturer reserves all the rights to the technology and design of the device and has no
obligation to inform the user if new versions or designs have been developed.
⑬. The device is NOT waterproof; please keep it away from moisture at all times.
This device will take approximately 20 seconds to power up; please don't try to operate the
device during this period.
Page 4
4
Name
Description
POWER
Press this button briefly for sleep/wake up mode, press and
hold for several seconds to turn device ON or OFF
MENU
Press this button briefly to access the submenu
ESC
Press briefly to exit current mode
TF Card Slot
For external TF card, 128 MB to 32 GB
Stereo earphone jack
Stereo jack for earphone
DC Socket
To connect device to 5V DC charger
MICRO USB Port
Micro 5-pin USB Port
USB Host Port
Port for external USB driver, 3G dongle, mouse, keyboard,
etc. (2.0)
Display
HD Display area
Screen
7 inch Capacitive Touch Screen.
IPS, Resolution: 1024x600
CPU
Chipset: ROCKCHIP 3188; Processor: Cortex A9; Frequency: 1.8 GHz
RAM
DDR3: 1 GB
Storage
8 GB
External TF card increase storage from 128 MB to 32 GB.
System
Android 4.2.2
Network
Built-in Wi-Fi Module 2.4G. IEEE 802.11 b/g/n.
3G: External 3G by USB Dongle.
Applications
APK format applications
2.1 Key functions
2. Introduction
2.2 Features Overview
CPU: Rockchip 3188 Cortex A9, 1.8 GHz. With ANDROID 4.2.2 operating system.
7 touch screen LCD display, IPS, 1024x600 pixel resolution.
8 GB built-in Flash Memory, support 128 MB - 32 GB external TF card.
Media support for video, audio, pictures, E-books, etc.
Built-in Wi-Fi supports external 3G USB DONGLE wireless network card (3G card or USB
Dongle are not provided by the Tablet PC manufacturer).
Dual Camera Front: 0.3 M Pixels; Rear: 2.0 M Pixels with photoflash
Various applications are available in the ANDROID 4.2.2 OS (APK applications only).
Supports built-in microphone recording function
Supports external U-disk, MP3, MP4, mouse, keyboard, etc.
Support WIFI 2.4G
Supports G-sensor screen rotation function.
Supports stereo earpieces and speaker.
The device can be used as a USB portable hard disk, driver not needed for WIN 2000 or
above.
2.3 Technical Specifications
Page 5
5
GPS
GPS navigation function
Video
AVI, MOV, WMV, MP4, ASF, 3GP, TS, MKV, MPEG, etc. All videos
support HD 1080P.
Music
MP3, WMA, WAV, APE, FLAC, AAC, OGG, etc.
Pictures
JPG, BMP, PNG, TIFF, etc.
E-books
TXT, PDF, CHM, HTML, PDB, UMD, FB2, LRC, EPUB.
Office Files
Supported files: Word, Excel, PDF, etc.
PC
Connection
micro USB 2.0 x 1
Battery
Built-in Lithium Battery
3. Quick Guide
3.1 About the Touch screen
The screen is a capacitive touch screen; you can use five fingers to touch the screen at the same
time.
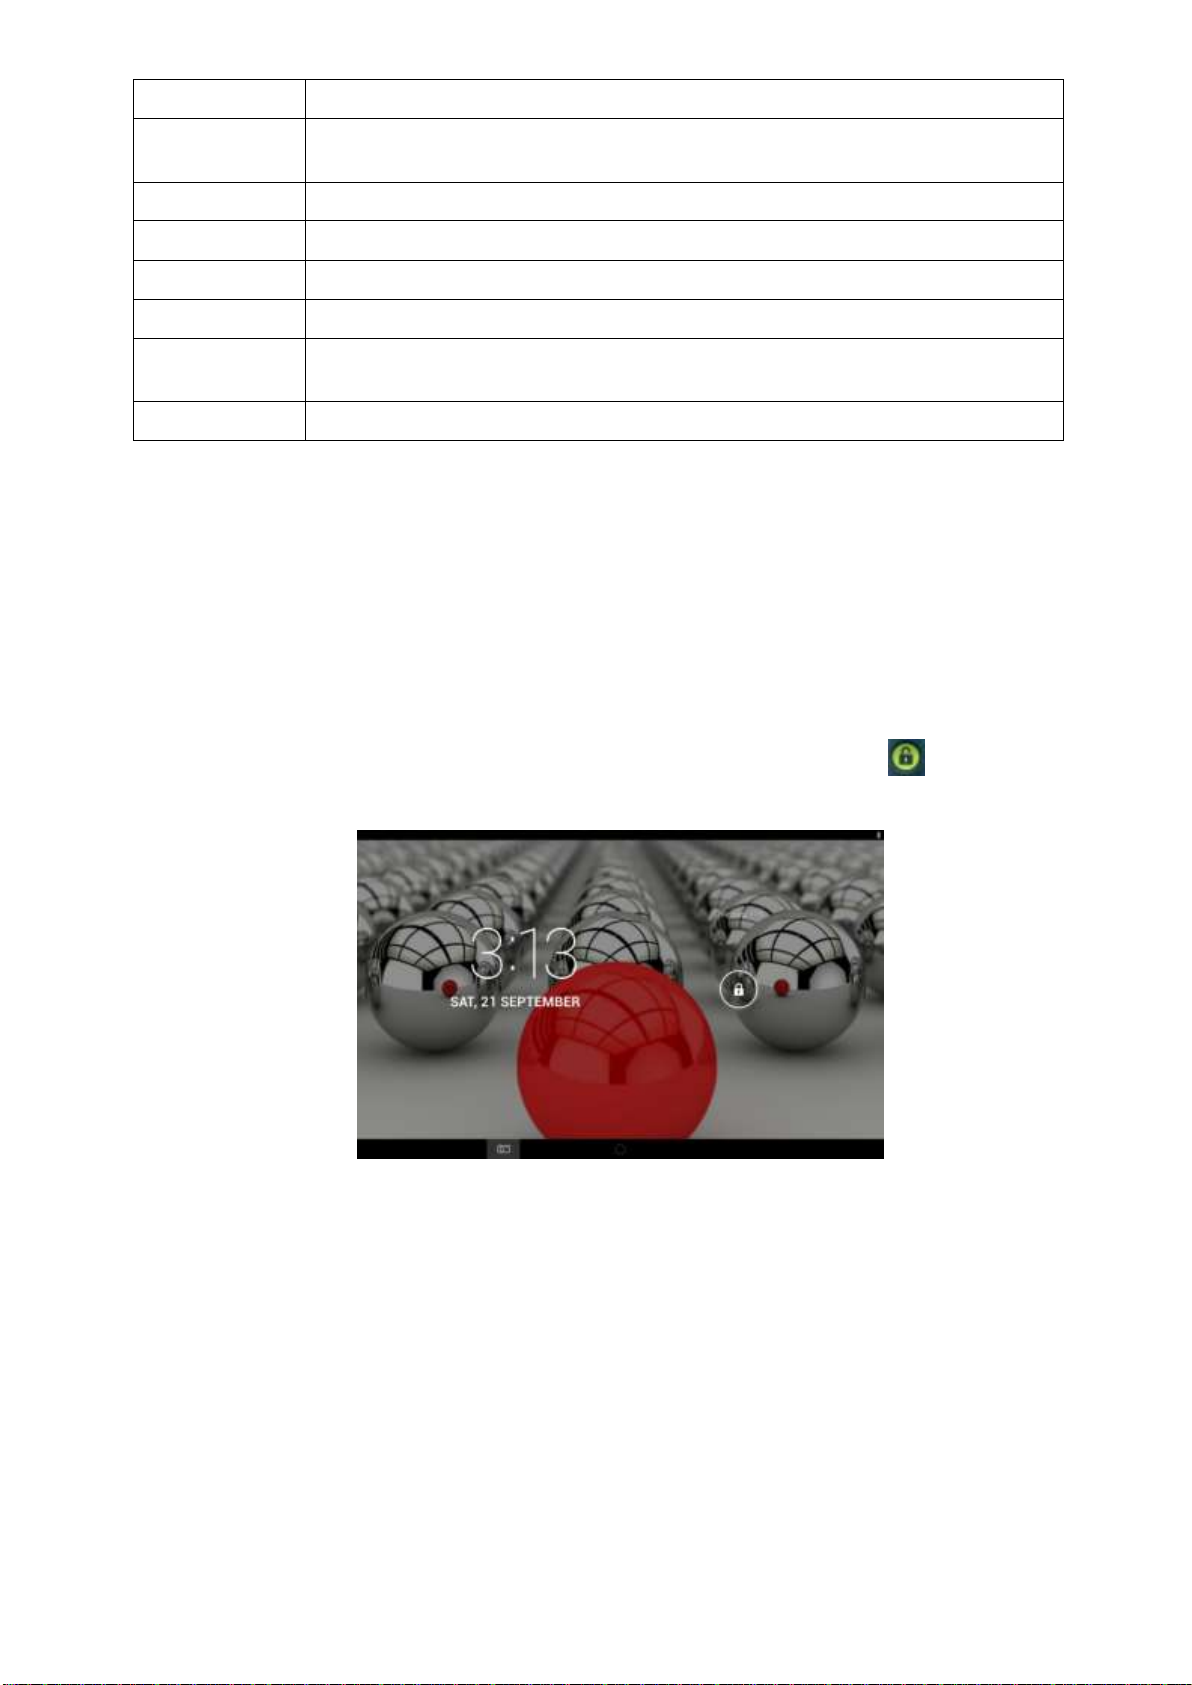
3.2 Switch On/Off.
Switch On and Unlock: When the device is in the OFF mode press and hold the Power key for 3
seconds to enter the Android start-up progress bar; it takes approx. 20 seconds to display the
system desktop. When the LCD is in locked mode please press and drag the icon to the green
point and the LCD will unlock automatically (see the illustration below):
3.3 Power save Modes and lock screen.
Briefly press the 'POWER' key after starting up for the system to switch to power save and
lock mode.
Briefly press the 'POWER' key or tap the touch screen and system will return to bright in 1
second
The primary functions of the device – e.g. playing music, movies, etc. – will not stop in the
power save mode; only the LCD is turned off and shows a black screen.
Switch OFF: When the device is in the OFF mode, press and hold the 'POWER' key for 3
seconds. The screen will display the power off interface; select the power off icon to confirm
and the system will shut down automatically.
【Note】When the battery is low, the device will give a continuous alarm and shut off
automatically if it is not charged. If the device will not start up, please check to see if the battery is
Page 6
6
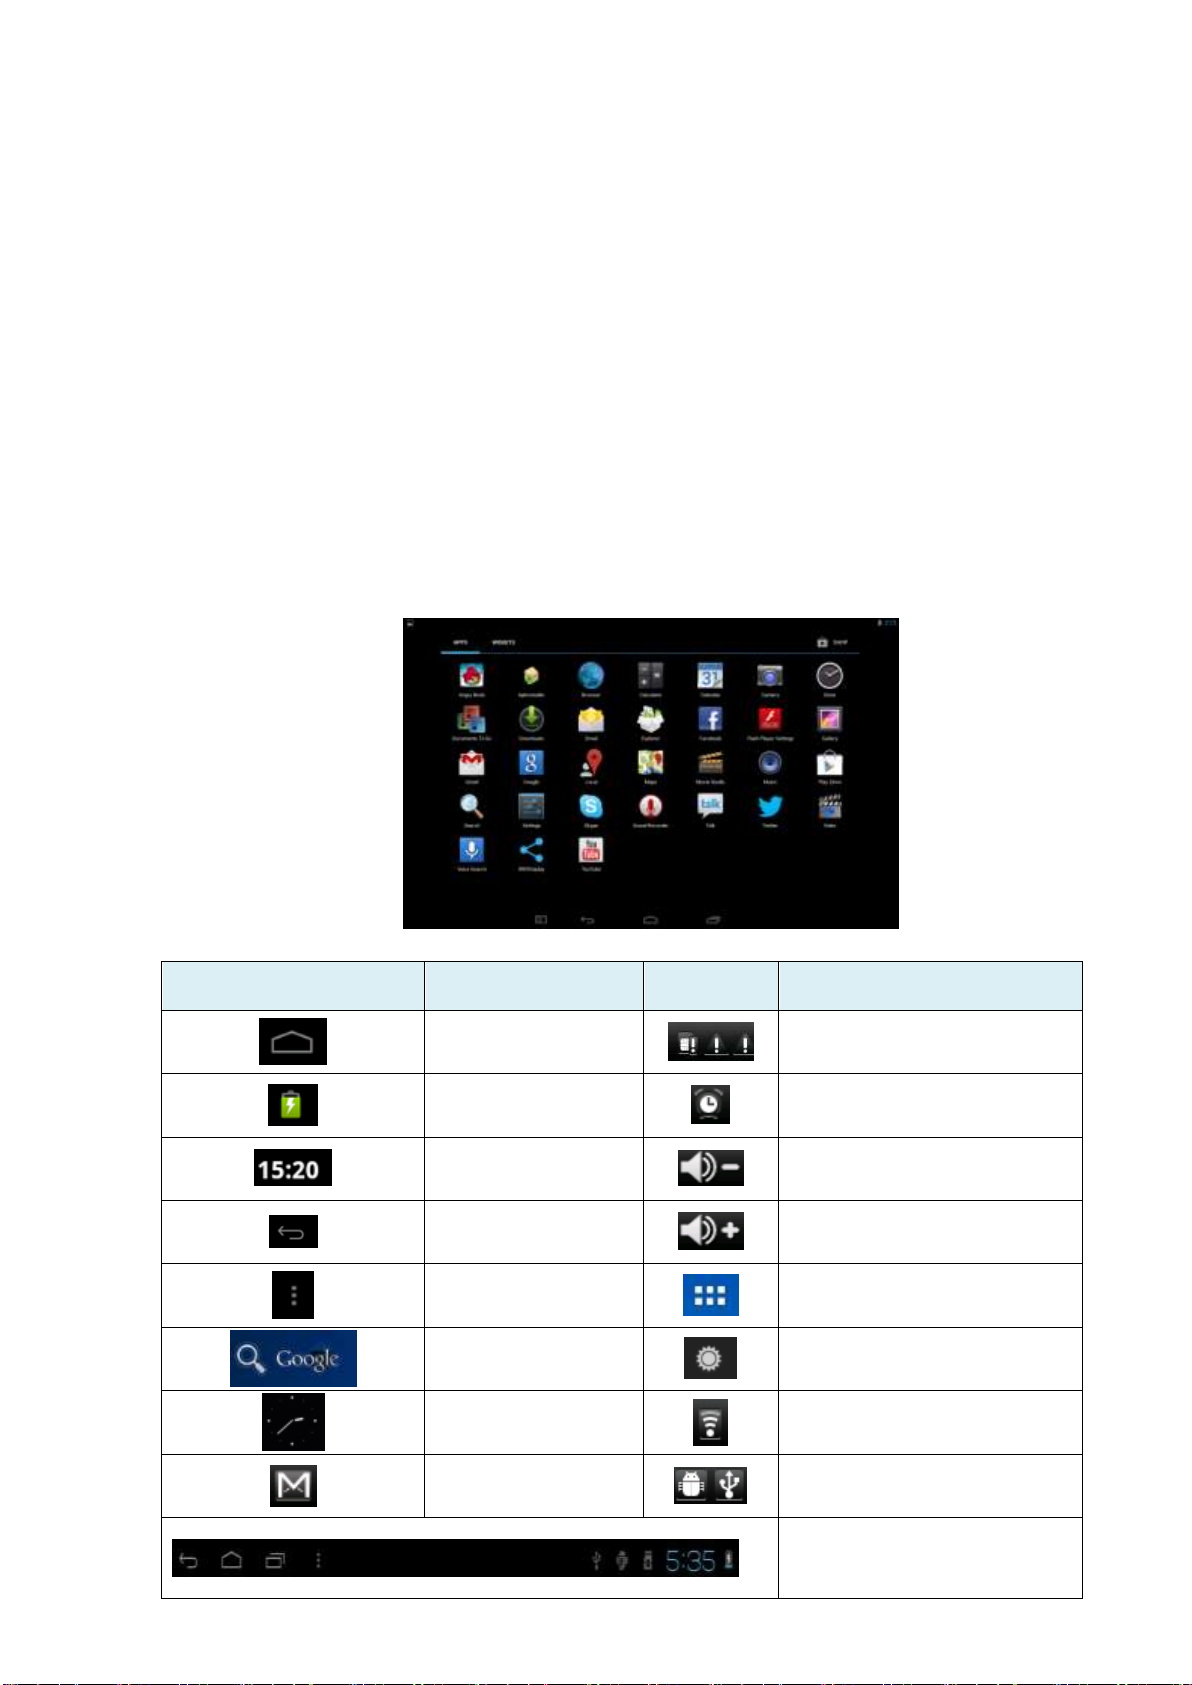
Icon
Function
Icon
Function
Back to main menu
Indicates when the system
finds new devices.
Show current
power status
Set the alarm
The current
system time
Reduce the volume
Back
Increase the volume
Menu
Menu for Function Block.
Google search
Adjust screen brightness
System clock
WI-FI on/off
New mail
USB Connection
Status Bar
low and try again after the battery has been charged.
3.4 Battery management and charging.
3.4.1 Before using your device for the first time, charge the battery for 8-12 hours to give the
device a full charge.
3.4.2 Insert the micro port of the battery adaptor into the DC slot on the device and connect the
other side to a power socket. The battery icon on the desktop icon will show the device is charging;
please wait until the battery is fully charged before disconnecting. The icon on the desktop will
show when the battery is fully charged.
【Note】In order to keep the battery functioning in optimal condition please note the following:
Don’t charge the battery in high temperatures.
No need to fully discharge the battery, the device can be charged even if there is some battery
power remaining.
In order to keep the battery in good condition please make sure to charge it once every two
weeks if the device is not used for an extended period of time.
3.5 Explanation of function icons
Page 7

7
3.6 USB HOST Function
3.6.1 USB HOST Definition
The Micro USB on the device can be used as USB Host.
3.6.2 Read U-disk:
Insert the U-disk into the HOST port, press the Resource manager on the desktop, press USB
enter into u-disk.
3.6.3 External 3G USB Dongle. (See network access guide item 4)
3.7 TF Card Storage
The device has a TF card slot and supports the reading of files on the TF card. Insert the TF card
into the card slot (can only be inserted one way); to remove the TF card press down on the card
and it will pop out.
3.7.1 Insert the TF into the card slot in the right side of the device.
3.7.2 Don’t eject the card when operating (reading, copying) as this may cause data errors.
3.7.3 Don’t use the TF card in high temperature conditions.
3.7.4 Protect the TF card from liquids and corrosive materials.
4. Network Access
The device supports a Wi-Fi network and external 3G network.
4.1 Wi-Fi Network Access
4.1.1 Turn on Wi-Fi and access Wi-Fi settings. The device will scan automatically for available
Wi-Fi networks.
4.1.2 Choose the Wi-Fi network that you want to connect to.
4.1.3 Press Connect. Some network may require you to enter a password.
4.1.4 In the Wi-Fi settings screen press the Menu key and touch Advanced; this will give you
an increased number of Wi-Fi settings.
4.2 3G Network Access
4.2.1 Turn OFF Wi-Fi if it is on.
4.2.2 Access Mobile network setting and make sure Data enabled is selected. Then go back to
Wireless & Networks.
4.2.3 Insert External 3G by USB host.
4.2.4 Select the Mobile network and wait for the 3G network connection after which you can
access the network via 3G.
5. Storage File Copy
Page 8

8
A) Connect the device to a computer using a USB cable; the status bar will show USB connected.
B) Select USB Connected
C) Select USB Connected, then, Turn on USB storage.
The left picture shows that the device storage content can be viewed and modified from the computer.
The right picture means that device storage content can NOT be viewed or modified from the computer.
6. Main Functions
6.1 Audio Function
To access the music player: in music player mode, double-click the item in the playlist you wish to
play, as shown in the following picture
Drag the music progress bar to adjust the progress.
Page 9

9
Button
Instruction
button
Instruction
Artist
Album
Song
Play playlist
Random Play
Continuous playback
Play the previous song
Play the next song
Pause
Play
Explanation of the buttons in the Music player
If there are no music files in the audio player playlist, the system will automatically upload the
music files from the card to the audio player playlist after the audio player is turned on (the
device supports the following audio file formats: mp3, wav, midi, wma). The playlist is shown
in the above figure.
If there are two or more songs in the Music playlist area slide the touch screen up/down to
move the page up/down
Double-click the item in the playlist you wish to play.
In the music playing interface, click to enter the audio playlist.
Drag the playback progress bar to adjust audio playback progress.
6.2 Video Function
Click the Video player icon to enter the video player interface and open the video files
The device supports the following video file formats: MKV, AVI, MP4, MOV, VOB, DAT, FLV,
3GP, etc.
If there are no music files in the video player playlist the system will automatically upload the
video files from the card to the video player playlist after the video player is turned on.
Drag the playback progress bar to adjust video playback progress.
6.3 Picture Function
Click the HD Video Player to enter the viewing interface
Add image(supports the following picture formats: BMP, JPG, JPEG, PNG, GIF)
If there are no files in the photo list, the system will automatically load the image files from the
card to the photo browser list after the photo browser is opened.
Open the corresponding folder, find the image file and add the picture you want.
Click the menu button to set the photo as your wallpaper.
6.4 Record Function
Page 10

10
Click the record icon to enter the recording interface, click the record button to start
recording, click the stop button to stop recording. The system will ask you if you wish to
store or delete this recording, please select manually.
Recording playback: select audio player to play the recording. First select the record files from the
explorer, then click on them and play; for further details please refer to Audio Function.
6.5 File Manager
In file manager you can view all the files in the device, including files in the internal memory and
on external memory cards. There is also a quick view for pictures and videos.
6.6 E-book Function.
Supports the following E-Book formats: TXT, LRC, PDF, HTML, HTM, EPUB, etc.
6.7 Internet Browser
Before you use the Internet browse function please make sure your network is connected. See
the network access section of this manual.
Click IE Browser icon to enter the IE interface, click on the address bar and type in the
website you wish to access, followed by Go.
Click on the icon to view bookmarks and history.
Click on the menu icon to access settings
Page 11

11
The device also supports other Internet browsers; please see the instructions for the Internet
browsers in question.
6.8 E-mail Function
Before you use the e-mail function please make sure your network is connected. See the
network access section of this manual.
When using this function for the first time you will need to add an e-mail account to the device.
The device supports the use of several e-mail accounts.
The methods for adding web-based e-mail accounts and enterprise e-mail accounts are
different.
Add portal sites e-mail accounts.
Take Google e-mail account for an example here.
Account: 123456@gmail.com
Password: *********
For portal sites e-mail accounts enter your e-mail address and password, then click next.
After you have been successfully connected enter Account Name and Your Name. Account
Name means the name of this account in the device, Your Name means the displayed name of
your e-mail in the recipient's account.
You can now access the account. Click on the e-mail titles to read emails, press and hold
e-mail titles to access options.
Click the menu icon to access settings
Refresh: Check for new emails.
Compose: Write new emails.
Folders: Manage/Move emails to different folders.
Accounts: View accounts in the device, add new accounts, delete accounts, set main account.
Accounts settings: More options for e-mail accounts.
6.9 Calendar
Click the Calendar icon to enter the calendar interface.
In calendar mode, press and drag the screen up/down to move between months or to turn the
pages.
When the month changes from December to January the device will automatically change the
year.
Enter the interface; the number in the orange form is today's date. You can change the date in
Page 12

12
the Settings function; for details see the Settings section.
Click to return to the main menu.
6.10 Calculator
Click on the Calculator icon to enter the calculator interface.
6.11 Alarm Clock
Click on the Clock icon to enter the time interface, then click on the clock to access the alarm
function; you can now add new alarms or edit existing alarms.
Press and hold existing alarms to select turn alarm on/off, edit alarm, and delete alarm. Click
on individual alarms to edit them.
You can edit the alarm time, repeat mode, ringtone and label.
In the alarm interface click on the menu icon to access settings. The following
items can be set.
6.12 APK Installer
This device supports third party apps (APK format) based on the Android OS. Many different
apps can be downloaded from the Internet or copied from other devices.
If you are not downloading the app from Google Android Market you should take the
following steps before the installation. Please check Settings – Applications and make sure
Unknown sources is selected.
Click on the Explorer icon and select the app you want to install, then click the install
prompt
6.12.1 Install: Click Install and enter the app installer interface.
Internal Memory means built-in Flash memory, SD card means inserted T-Flash;
After entering, select the app format setting program on the right side, click on the
application to install, return to the main interface when this operation has been completed;
the installation will be finished and you will see the app icon in your application list.
6.12.2 Manage: Click settings and Choose APPS
Click on APPS and select the file/software you want to uninstall
Click on the software, then uninstall the software.
Page 13

13
6.12.3 Exit: Return to the main interface.
Note: All the installed apps will be displayed in the application list menu. These applications
include games, chat TM, Internet browser, media player, system tools, etc.
6.13 PICTURES AND VIDEO
The machine is with a front and a rear camera, you can take pictures and video clips, and you
can take photographs and record video clips.
Click on the applications tab to display all the applications, then select the 'photo' or 'video'
setting.
Before taking pictures or recording video you can click on the camera settings to adjust the
white balance, picture size, photo quality, point mode etc.
Click on the button to start or stop the recording.
The photographs or video can be previewed in the preview window.
If you want play the video you have recorded turn on the video player and select the video you
want to play.
If you want to view photographs, select the picture viewer and choose which pictures you
want to see.
Into the camera, and click on the screen with two fingers, will the pixel scaling function box
appears, when two fingers and outward or inward sliding, can realize the pixel scaling
function.
The tablet is available for autofocus function.Open the rear camera, touch slightly screen one
time, then the will appear, right now the camera is proceeding the autofocus
function,when the focus is clear, you can shoot high-definition photos.
Page 14

14
If you take pictures in low light condition, the flash function is available.
6.14 GPS function
In the open space, there is no building block. Click on the icon to enter the GPS
satellite positioning software, you can quickly receive GPS satellite signals and positioning.
Page 15

15
NOTE: Users can purchase from a third party map Site map and navigation APK (Android),
installed APK, you can use the GPS function. This product is not to provide maps and navigation
APK.
7. System Settings
Click the Settings icon to enter system settings. You can now change wireless & networks,
sound, display, location & security, applications, accounts & sync, privacy, storage, language &
keyboard, voice input & output, and date & time.
7.1 Wireless & Network Setting, See item 4.
7.2 Sound Setting. You can adjust Silent mode, Volume, Notification ringtone, Audible selection,
Screen lock sounds, and Haptic feedback.
7.3 Display Setting. You can adjust Brightness, Auto-rotate screen, Animation, Screen timeout.
7.4 Location & Security Setting. Here you can set up screen lock and device administrators and
enter a TF card password.
7.5 Application Setting. Here you manage your apps and check storage & battery usage.
Please note: If you want to install applications that you are not downloading from the Google
Android Market you should first turn on Unknown sources.
7.6 Accounts & sync Setting. Here you can manage accounts in the device.
7.7 Privacy Setting. In this setting you can back up data and reset factory defaults.
7.8 Storage Setting. Here you can check storage use and insert & erase TF cards.
Please note: Before you remove the TF Card (if you have inserted a TF card), please use the 'safely
remove hardware and uninstall media' function before ejecting the TF card; if you fail to do so this
may cause a problem for some applications.
7.9 Language & Keyboard Setting. In this setting you can change the system language and select
keyboard inputs.
Please note: if you have installed an input and want to use it please remember to turn it on in this
setting (all inputs can be turned on here). Press and hold the blank where you want to type and you
will see a popup to choose inputs.
Android Keyboard
The Android keyboard can be configured. To change the settings:
(1) Open the 'Settings' menu
(2) Select the 'Language and input' submenu, then tap on 'Default''
(3) Tap 'Configure input methods.' The following options will appear:
(4) Tap the icon. The following options will appear:
Page 16

16
(5) Select 'Input language'
(6) Check the 'Use system language' box
The default keyboard will be set to the selected language.
For example, when 'French (French)' is set as the default language the default keyboard will be
French.
7.10 Date & time Setting: In this setting you can adjust the date and time.
7.11 About device. Check device information.
8. FAQ
1) How can I change languages if I mistakenly choose an unknown language?
·Find the Settings icon in the Menu Page to enter Settings.
·Then select the icon to enter the language & keyboard setting; the first option is the
language setting.
2) How can I change the input when I am typing?
Press and hold the blank where you want to type and you will see a popup to choose inputs.
3) I already installed some applications but now I can't find them, why is this?
·By default some applications are installed on an external TF card, so if you have removed the TF
card from the device you will not see these applications.
4) I can't get the device to turn on.
·Check the battery and charge the device if there is no power.
·Connect the device to an AC adapter.
·Contact the seller if the device still won't turn on after it has been charged.
5) I can't hear any sound through the earphones.
·Check if the device is in Mute mode.
·Check the volume setting, in case it is 0.
·Check the earphone connector.
6) Why can't I install apps?
Please check Settings – Applications and make sure you have selected Unknown sources.
7) There is an Error Code on the screen.
·System error, restart the device.
·The language you are browsing in is not supported by built-in languages; please contact the
original manufacturer for a bug fix.
8) I'm having system problems, I get a lot of error messages.
Please press reset. The device will turn off. Press the power key to restart the device.
If you have restarted the device and you are still getting error messages please check open
Page 17

17
applications to see if there is an unknown application. If so, uninstall.
Your device may have a virus. Please install a security application to protect your device.
If you are still experiencing problems after trying the above solutions the firmware on your
device needs to be rebuilt (this operation is called 'flashing'). Please note: Before you flash
the device, please back it up. The flashing operation will return all the settings and files
to the factory defaults. The flashing operation requires a flashing tool and firmware. Please
contact the original manufacturer for assistance.
Page 18

18
Page 19

Changes or modifications to this unit not expressly approved by the party responsible for compliance
could void the user's authority to operate the equipment.
FCC statement
This device complies with Part 15 of the FCC Rules: Operation is subject to
the following two conditions:
1. This device may not cause harmful interference and
2. This device must accept any interference that is received, including any interfer
ence that may cause undesired operation.
*RF warning for Portable device: The device has been evaluated to meet general
RF exposure requirement. The device can be used in portable exposure condition
without restriction.
This device is acting as slave and operating in the 2.4 GHz (2412 ~2462 MHz)
band.
Ad Hoc function is supported but not able to operate on non-US frequencies.
Do not use the device with the environment which below minimum -10℃ or maximum
over 50℃ .
NOTE: This equipment has been tested and found to comply with the limits for
a Class B digital device, pursuant to part 15 of the FCC Rules. These limits are
designed to provide reasonable protection against harmful interference in a
residential installation. This equipment generates uses and can radiate radio
frequency energy and, if not installed and used in accordance with the
instructions, may cause harmful interference to radio communications.
However, there is no guarantee that interference will not occur in a particular
installation. If this equipment does cause harmful interference to radio or
television reception, which can be determined by turning the equipment off and
on, the user is encouraged to try to correct the interference by one or more of
the following measures:
- Reorient or relocate the receiving antenna.
- Increase the separation between the equipment and receiver.
-Connect the equipment into an outlet on a circuit different from that to which
the receiver is connected.
-Consult the dealer or an experienced radio/TV technician for help
 Loading...