

Page 1
User Manual
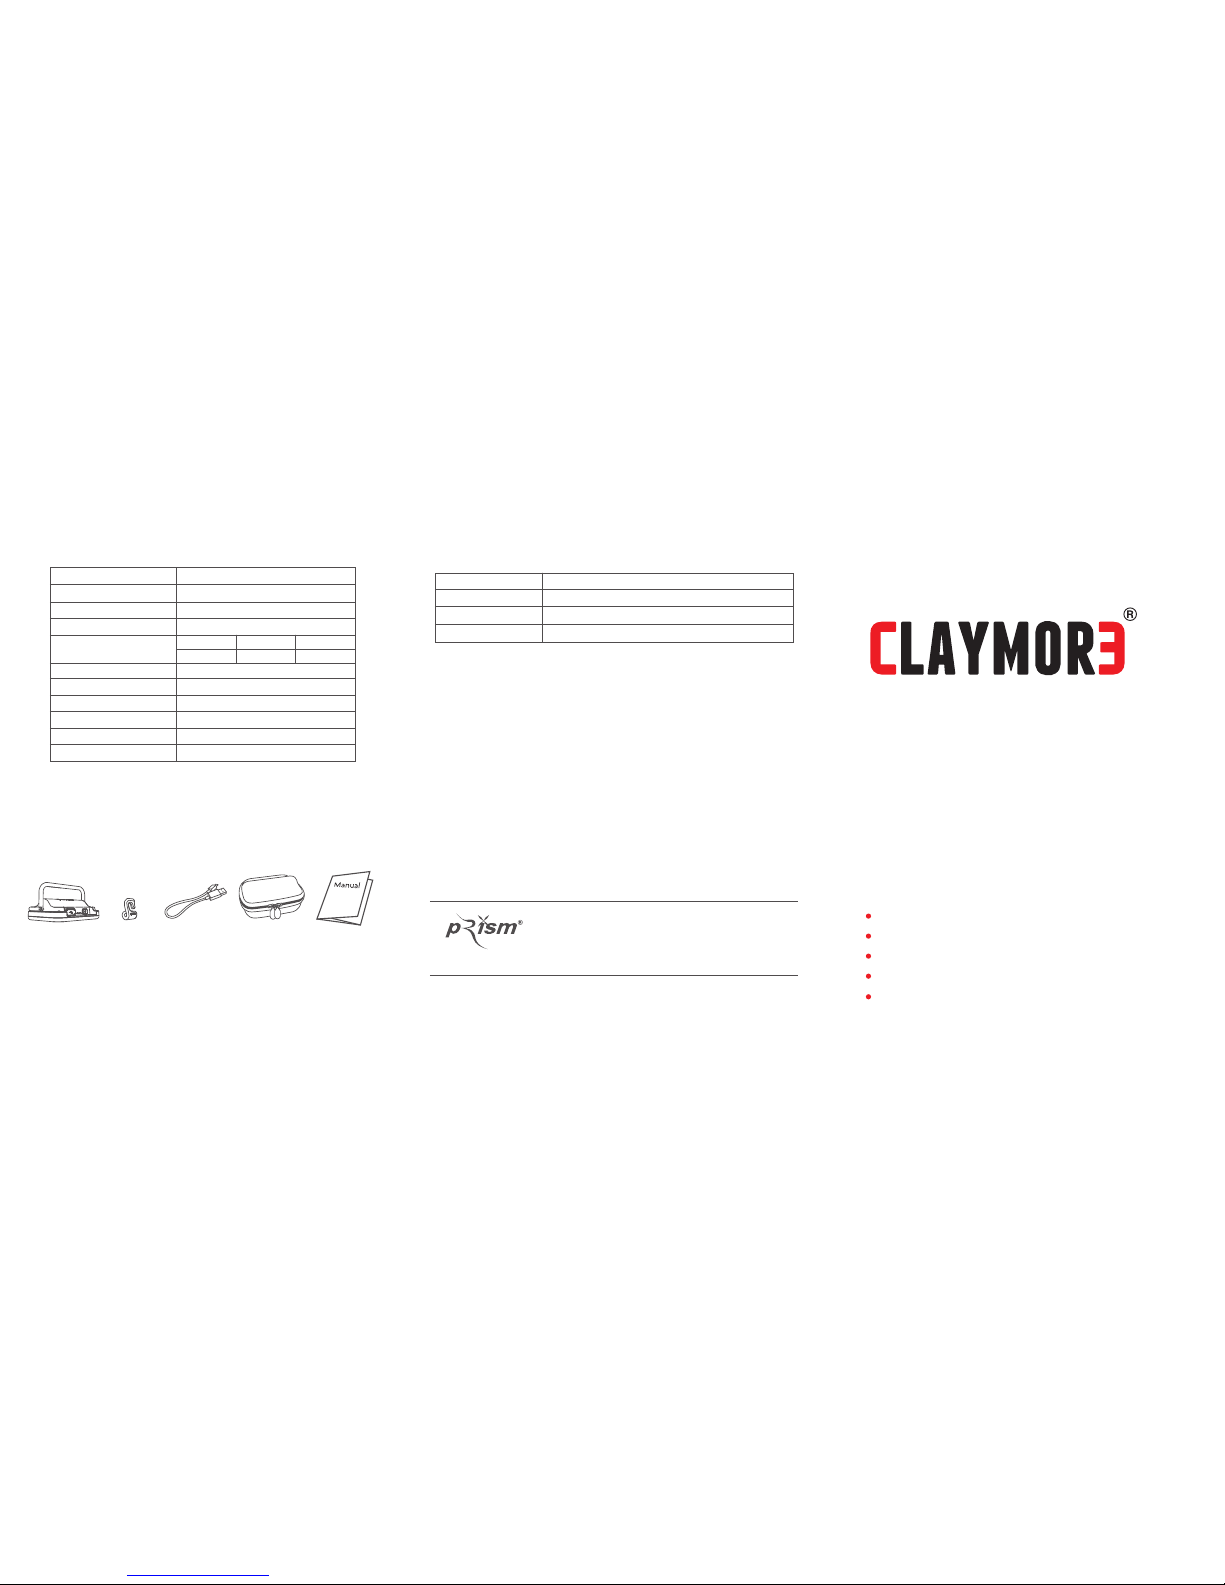
5. Specification
ITEM
Model No.
LED CCT (optional)
Brightness (Lumen)
Using time (hrs)
Size (mm)
Weight (g)
Rechargeable Battery (pcs)
Charging time (hrs)
INPUT
Origin
CL-350(WH/WA)
100Lm~350Lm
85×66×27mm
112g
3,000mAh
5hrs
USB 5V 800mA
White (5,700K) / Warm (3,500K)
CLAYMORE mini (1 Cell)
6. LED Color Temperature
7. Packages
※ Caution when storing
* WH (White) : High color temperature (5,700K), feels cool like fluorescent light
* WA (Warm) : Low color temperature (3,500K), feels warm like normal gas lantern
* Please 100% charging when storing long time.
* Storing -10°C could affect the life span of battery so please care for that when storing.
* Please store in dry place.
① LED lantern
MADE IN KOREA
MINI
Warranty
Manufacturer
Service Center
Please contact Prism dealer or service center
1. Thank you for purchasing CLAYMORE series of Prism Co., Ltd.
2. This product has passed strict quality control and testing process. When you find some
inappropriate working on the product, please contact authorized service center as below.
Free Service
1) Failure of the product under normal operating conditions during the warranty period may
be repaired by Prism or authorized service center free of charge. Some shipping or handling
charges may be involved.
2) Warranty period: 2 years
Charged Service
1) Damage caused when the warranty period is over
2) Damage caused due to the user’s mishandling, abuse, or improper operation
3)
Damage caused by arbitrary or personal repair or disassemble other than authorized service center
4) Damage from input electricity or cable defect
5) Damage caused by natural disaster
Item
Model No.
Seller
Date of Purchase
CL-350
CLAYMORE mini
Prism Co., Ltd. www.prismlight.co.kr
101-1501, Chunui-Technopark, Bucheon-ro 198 Road, 36,
Wonmi-gu, Bucheon-si, Gyeonggi-do, Korea (420-857)
TEL: +82-32- 652-2207 FAX: +82-32-652-4405
Prism Co., Ltd. www.prismlight.co.kr
101-1501, Chunui-Technopark, Bucheon-ro 198 Road, 36,Wonmi-gu, Bucheon-si, Gyeonggi-do,
Korea (420-857) TEL: +82-32- 652-2207 FAX: +82-32-652-4405
③ micro 5 pin cable② Hanger
④ Case
⑤ Manual
Ultra light weight camping (back packing) lantern
Multi functional handle wire
Battery indicator / SOS-flash function
Made in Korea LED packages of LG innotekk
Rechargeable Li-ion batteries of Samsung SDI
6hrs 12hrs
3 step 2 step 1 step
24hrs
Page 2
INSTRUCTIONS
Thank you for purchasing the CLAYMORE outdoor lantern. This product is portable lantern
including Li-ion rechargeable battery. Before using the lantern, please make sure that you
read through these operating instructions to ensure that you will use the lantern correctly.
If you find trouble, please contact Prism dealer or service center.
1. Caution
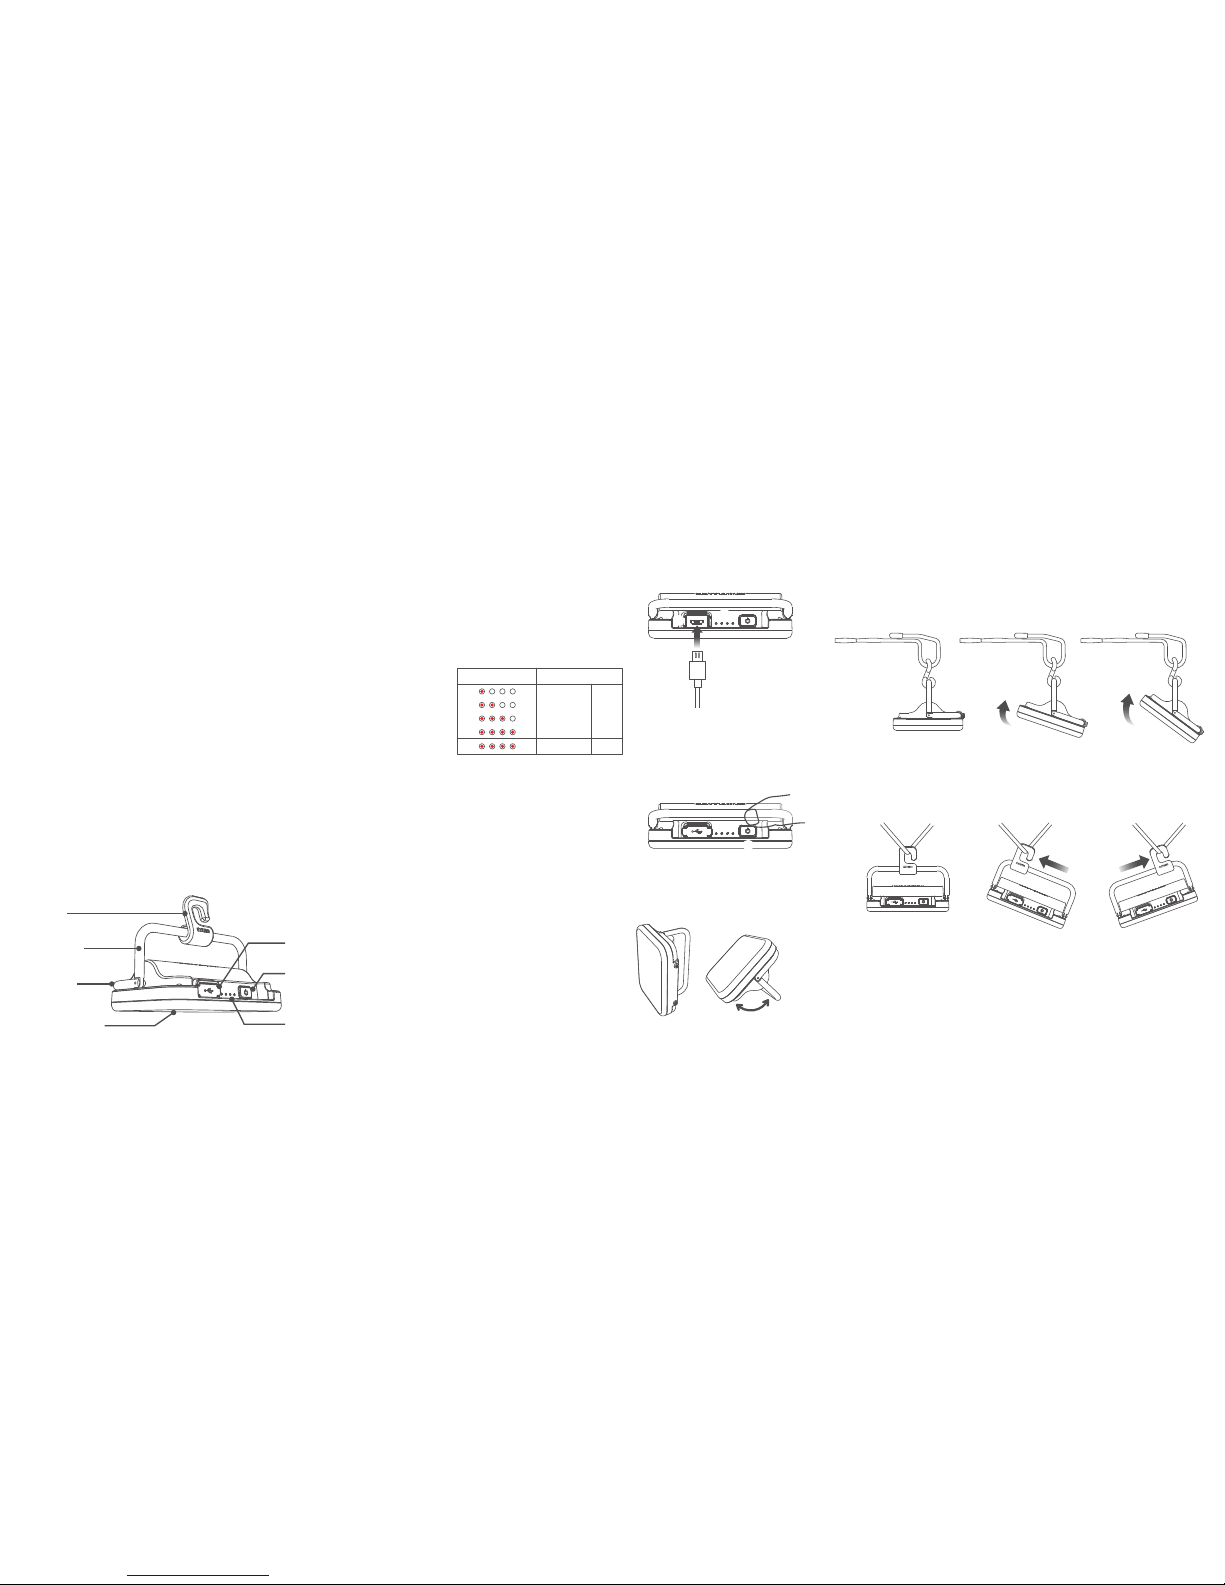
2. Name of each part
① Hanger
② Handle wire
③ Fixed wire
④ LED lighting filter
⑦ Battery indicator
⑥
Power button (1-2-3, SOS)
① Do not place near any heat sources or in direct sunlight.
② This product is not water-proof item. Do not use at any location where liquids are present
or touch electrical appliances with wet hands.
③ Do not place or use near heated vehicles exposed direct sunlight.
④ It’s hot when it’s working so please grab handle wire and move.
⑤ Do not use under and over the using temperature (-10°C~40°C).
⑥ Use only the supplied power adapter and cigar jack.
⑦ Keep away from baby or children for safety.
⑧ Monitor while children using the item.
⑨ Keep away metals from connectors and USB port.
⑩ Do not repair, disassemble, or modify under any circumstances.
⑪ Do not touch electrical appliances with wet hands.
⑫ Turn it off and place safety area when using is over.
⑬ Do not turn handle wire too much.
⑭ Take care not to fall or break on to the ground and not to be shocked.
⑤ Micro 5 pin USB port
3. How to operate
● Charging the lantern
1. Connect USB cable to the charging port of the lantern
body opening ⑤ the cover.
2. The ④battery indicator flickers in 4 steps when charging.
● LED lantern function (On/off, Battery indicator, SOS-flash)
Push the ⑥ on/off button one by one with working
1st-2nd-3rd-off turn.
1) Battery indicator:
Push ⑥on/off button once to turn on and check 4 indicating LEDs show battery capacity.
2) SOS-flash: Push ⑥on/off button for over 2 seconds to flickers as Morse code term.
4. How to install
● Lift up on the table or flat surface
1. You can place the lantern to necessary direction
vertically or horizontally.
Adjust the angle
3) Clear the function: Push ⑥on/off button again to turn off the lantern.
⑥
⑦
⑤
*Every specification or function can be modified by the situation of manufacturers.
2. Turn the ②handle wire as shown for necessary
direction to adjust optimal angle.
②
● Hang on the lantern hanger or string
2.
Slide ①hanger to light for necessary direction.
1. ②Adjust the angle of handle wire to light for necessary direction.
Battery indicator Charging
0~25%
25~50%
50~75%
75~100%
Fully charged
* All 4 indicators turn on when fully charged.
Flickers
Stops
Before using the lantern, please familiarize yourself with each part while referring to the figure below.
 Loading...