

Clavitech TB5200 User Manual


Your T 5200 is a high-quality electronic keyboard with 76 standard touchB
Thanks for using our electronic keyboard
sensitive keys, which employs the most advanced PCM tone generation
and DSP
technology. Your TB5200 has 187 accompaniment styles which can be used
to provide a fully-orchestrated Auto Accompaniment. The multi-function
LCD (MULTI DISPLAY) provides easy to read performance information.
The RECORD function allows easy recording and playback of your musical
performance. The REGISTRATION MEMORY can store up to 8 banks of 6
stored presets of VOICE and AUTO ACCOMPANIMENT settings. This
convenient storage method enables the player to instantly access /recall
favorite settings at a touch of a button. Stored settings are retained even
the power is turned off.whilst
In order to obtain maximum performance and enjoyment, please read this
manual thoroughly whilst trying out the various features described.
1

Precaution
Thank you for purchasing this digital TB5200. For perfect operation and security,
please read the manual carefully and keep it for future reference.
Safety Precautions
CAUTION
RISK OF ELECTRIC SHOCK
DO NOT OPEN
The lightning icon inside a triangle is intended to alert the user to the presence
of exposed dangerous voltages within the product s enclosure, that could cause
electric shock.
The lightning icon inside a triangle is intended to alert the user to read important
operating and maintenance(servicing) instructions within the literature accompanying
this product.
Important Safety Instructions
1) Read these instructions.
2) Keep these instructions.
3) Heed all warnings.
4) Follow all instructions.
5) Do not use this apparatus near water.
6) Clean only with dry cloth.
7) Do not block any ventilation openings, install in accordance with the manufacturer's instructions.
8) Do not near any heat sources such as radiators, heat registers, stoves, or other apparatus (includingplace
amplifiers) that produce heat.
9) Do not the safety purpose of the polarized or grounding-type plug. A polarized plug has two bladesbypass
with one wider than the other. A grounding type plug has two blades and a third grounding prong. The
wide blade or the third prong are provided for your safety, if the provided plug does not fit into your outlet.
consult an electrician for replacement of the obsolete outlet.
10) Protect the power cord from being walked on or pinched particularly at plugs, convenience receptacles,
and the point where they exit from the apparatus.
11) Only use attachments/accessories specified by the manufacturer.
12) Use only with the , stand, tripod, bracket, or table specified by the manufacturer, or sold with thetrolley
apparatus. When a cart is used, use caution when moving the cart/apparatus combination to avoid injury
from (Figure 1).tipping over
13) Unplug this during lightning storms or when unused for a long periods fo time.equipment
14) Refer all servicing to qualified service personnel. Servicing is required when the has beenequipment
damaged in any way, such as power-supply cord, or plug is damaged, liquid has been spilled or objects
have fallen into the , the has been exposed to rain or moisture, does not operateequipment equipment
normally, or has been dropped.
To reduce the risk of fire or electric shock, do not expose this to rain or moisture.WARNING: equipment
E must not be exposed to or splashing and also no objects filled withCAUTION: quipment liquid dripping
liquids, such as vases,
or beverages may be placed.
Always make sure all batteries are .inserted the correct way around to match the +/- polarity markings
Always replace at the same time.all of the batteries
types, as this can cause overheating, or fire, or battery fluid leakage.
Remove the batteries from the instrument if it is not to be used for a long time.
Do not combine old and new batteries, also do not mix battery
(Figure 1)
2

Table of Contents
Panel controls ....................................................................................................................................
Preparation ........................................................................................................................................
Power Supply ................................................................................................................................
Using Headphones or MIKE .........................................................................................................
The Sustain Pedal ..........................................................................................................................
The Express Pedal .........................................................................................................................
MIDI IN/OUT ...............................................................................................................................
LINE IN/OUT ...............................................................................................................................
USB MIDI/Audio...........................................................................................................................
Panel Display Indications .............................................................................................................
Listening to the Demo .......................................................................................................................
Selecting and Playing the Voices ......................................................................................................
Select a Main Desired Voice .........................................................................................................
Keyboard Percussion ....................................................................................................................
Split Mode ....................................................................................................................................
Overall Control .............................................................................................................................
User Voice Control.........................................................................................................................
Save User Voice.............................................................................................................................
Load User Voice............................................................................................................................
Auto Accompaniment .......................................................................................................................
Selecting a Style ...........................................................................................................................
Setting the Auto Accompaniment Chord Point ............................................................................
Turn CHORD ON/OFF ...............................................................................................................
Auto Accompaniment control ......................................................................................................
Accompaniment Volume ..............................................................................................................
Tempo Control .............................................................................................................................
Metronome ...................................................................................................................................
PAD................................................................................................................................................
Function .............................................................................................................................................
Registration Memory .......................................................................................................................
Song Recording..................................................................................................................................
MIDI ..................................................................................................................................................
Appendix ...........................................................................................................................................
Main Percussion List ....................................................................................................................
Voice List ......................................................................................................................................
Style List .......................................................................................................................................
Midi implementation chart ...........................................................................................................
Specifications ................................................................................................................................
4
6
6
6
6
6
6
7
7
7
9
10
10
10
11
12
18
20
20
21
21
22
23
24
26
26
27
27
28
38
41
46
48
48
50
55
57
58
3

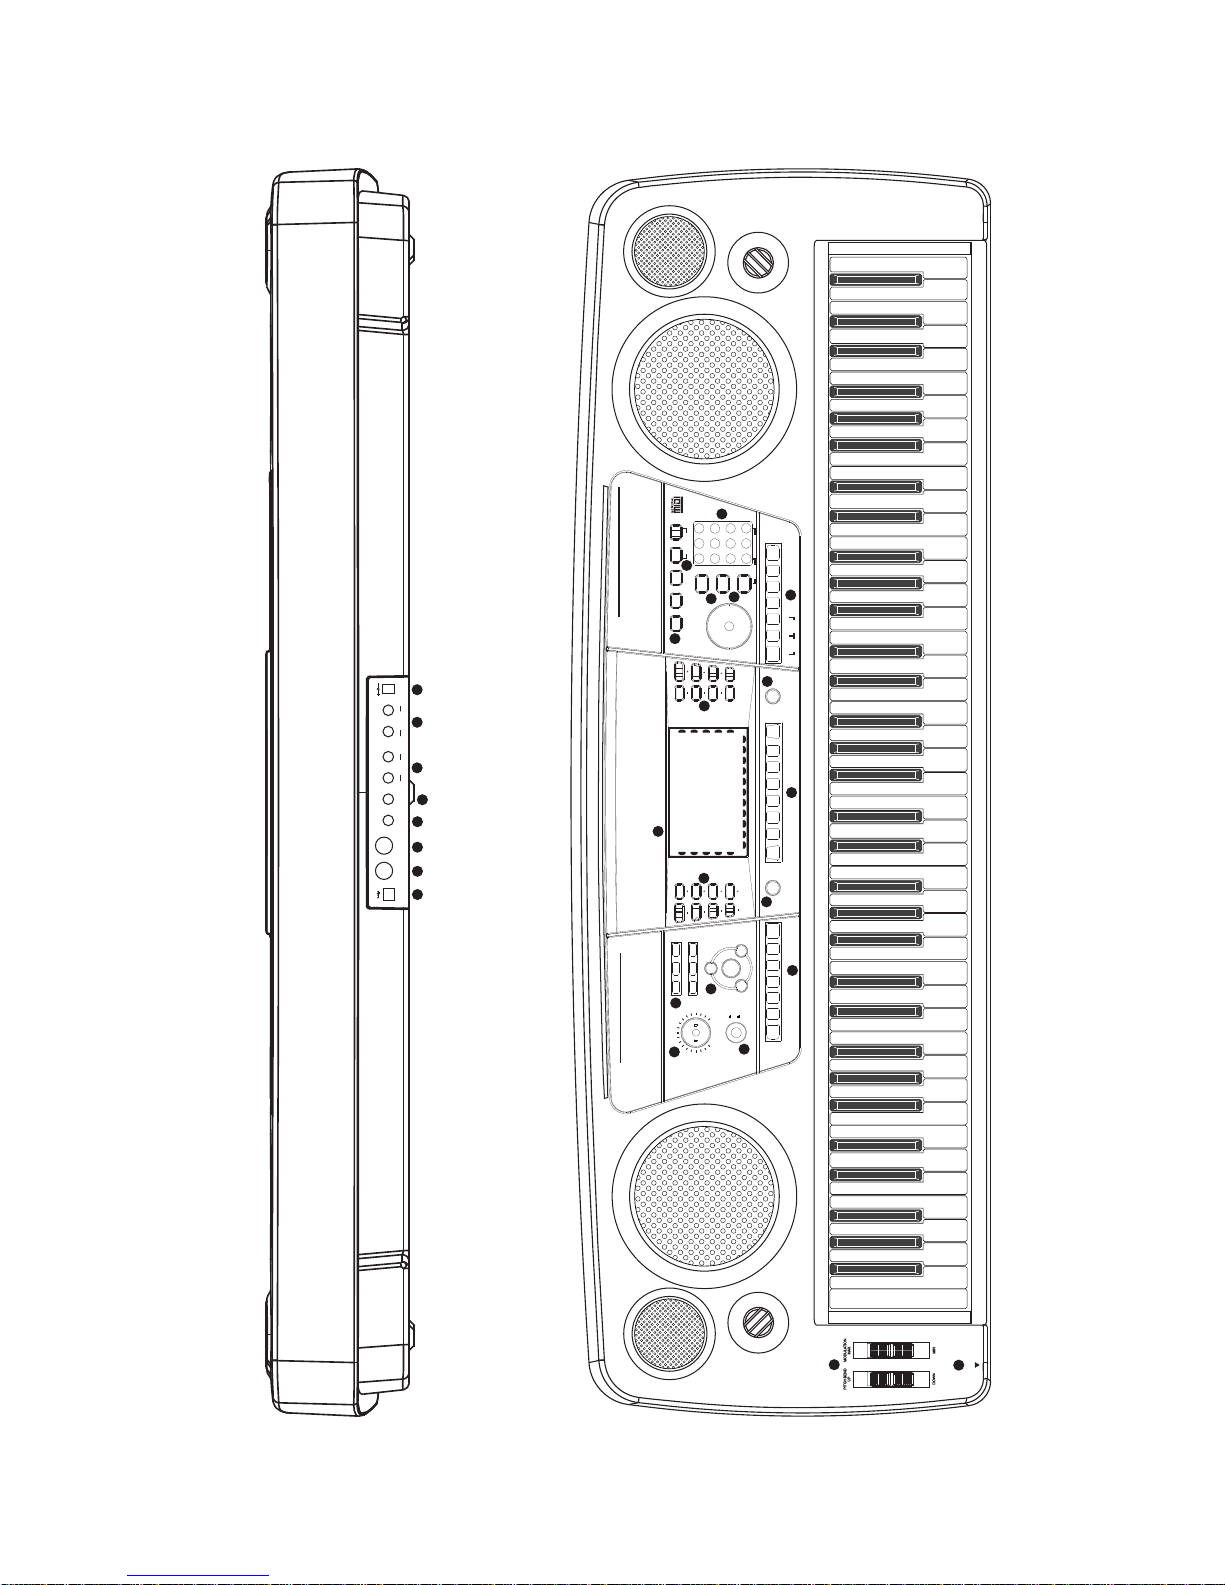
Panel Controls
Top Panel Controls
1) POWER ON/OFF
2) MASTER VOLUME Control
3) SUSTAIN button
NORMAL button
HARMONY button
SPLIT button
DUAL button
TWIN button
4) PAD cotrol
SAVE button
1, 2 ,3 buttons
5) AUTO ACCOMPANIMENT
CHORD button
SYNCHRO button
INTRO/ENDING button
START/STOP button
FUNCTION button
ENTER button
11) O.T.S button
12) ENVELOPE button
13) DSP effect
VIBRATO button
FILTER button
SAVE TO button
LOAD FROM button
14) VOICE/STYLE buttons
15) DEMO button
16) Number 0-9, [+], [-] buttons
17) MULTI RECORD
USB FILE button
RECORD button
PLAY/LOAD button
FILL IN 1 button
FILL IN 2 button
METRONOME button
6) Other controls
TRANS +/- buttons
TUNE +/- buttons
OCTAVE +/- buttons
TEMPO +/- buttons
7) TOUCH button
8) MULTI LCD Display
9) REGISTRATION MEMORY
STORE/BANK button
[M1]-[M6] buttons
FREEZE button
10) VOICE controls
KB.VOL +/- buttons
USB VOL +/- buttons
4
ACC.VOL +/- buttons
SAVE MEM button
REVERB button
CHORUS button
GRAND PIANO
18) PITCH BEND
MODULATION
19) PHONES1, PHONES 2 jacks
Rear Panel Controls
20) USB jack
21) MIDI OUT jack
22) MIDI IN jack
23) SUSTAIN jack
24) EXP. jack
25) LINE IN jacks
26) LINE OUT jacks
27) DC 12V jack
OICES
V
SEYNTH FFECTS
PERCUSSIVE
SEOUND FFECTS
PERCUSSIONS
USER
527-570
571-608
609-665
666-676
677-686
STRINGS
BRASS
REEDS
PIPE
SLYNTH EAD
SPYNTH AD
327-389
390-425
426-459
460-487
488-507
508-526
OICE
V
GM
PIANO
PERCUSSION
ORGAN
GUITAR
BASS
01-128
VOICES
129-174
175-200
201-244
245-285
286-326
DC 12V
27
26
LINE OUT
RIGHT L/MONO
LEFT
LINE IN
25
RIGHT
EXPRESSION
SUSTAIN
MIDI IN
MIDI OUT
USB
24
23
22
21
20
STYLES
TRADITIONAL
WALTZ
157-178
179-187
S&JWING AZZ
R&B
62-76
77-93
EAT
EAT
B
B
8
16
01-13
14-26
COUNTRY
94-105
BALLAD
27-36
T 5200B
8
LATIN
BALLROOM
106-123
124-156
DANCE
DISCO
37-51
52-61
ROM
F
LOAD
SAVETO
R
E
T
IL
F
VIBRATO
ENVELOPE
HARMONY
NORMAL
SUSTAIN
16
6
3
9
+
OICE
2
V
0
8
5
USER
13
VOICE
12
L
O
.V
B
K
VOICE
STYLE
CHORD
HARMONY
S
N
A
R
T
TWIN
DUAL
SPLIT
3
VOLUME
2
RIGHT
GRAND
1
4
STYLE
14
L
L
O
O
V
V
B
C
S
C
U
A
10
DEMO
REVERB
DUAL
SPLIT
6
E
E
AV
N
T
U
C
T
O
1
PAD
4
AX
M
MIN
PIANO
-
7
LEFT
CHORUS
DEMO
REVERB
M
E
17
M
15
E
V
A
S
E
PLAY/
LOAD
T
E
L
E
D
RECORD
MULT
ILE
F
USB
R
E
T
N
E
11
N
IO
T
C
N
U
O.T.S
F
CHORUS
E
Z
FREEZE
E
E
R
F
M6
L
A
M
R
O
N
M5
M4
9
K
IS
M3
D
U
T
M2
U
I O
ID
M
M1
I IN
ID
M
STORE/BANK
TWIN
TOUCH
O
P
M
E
7
T
METRONOME
2
3
FILLIN
1
FILLIN
SAVE
5
START/
STOP
2
INTRO/
ENDING
ON
OFF
SYNCHRO
CHORD
POWER
1
18
PHONES2
19
PHONES1
5
Preparation
This section contains information about setting up your TB5200 and preparing to play.
Be sure to go through this section carefully before using this .instrument
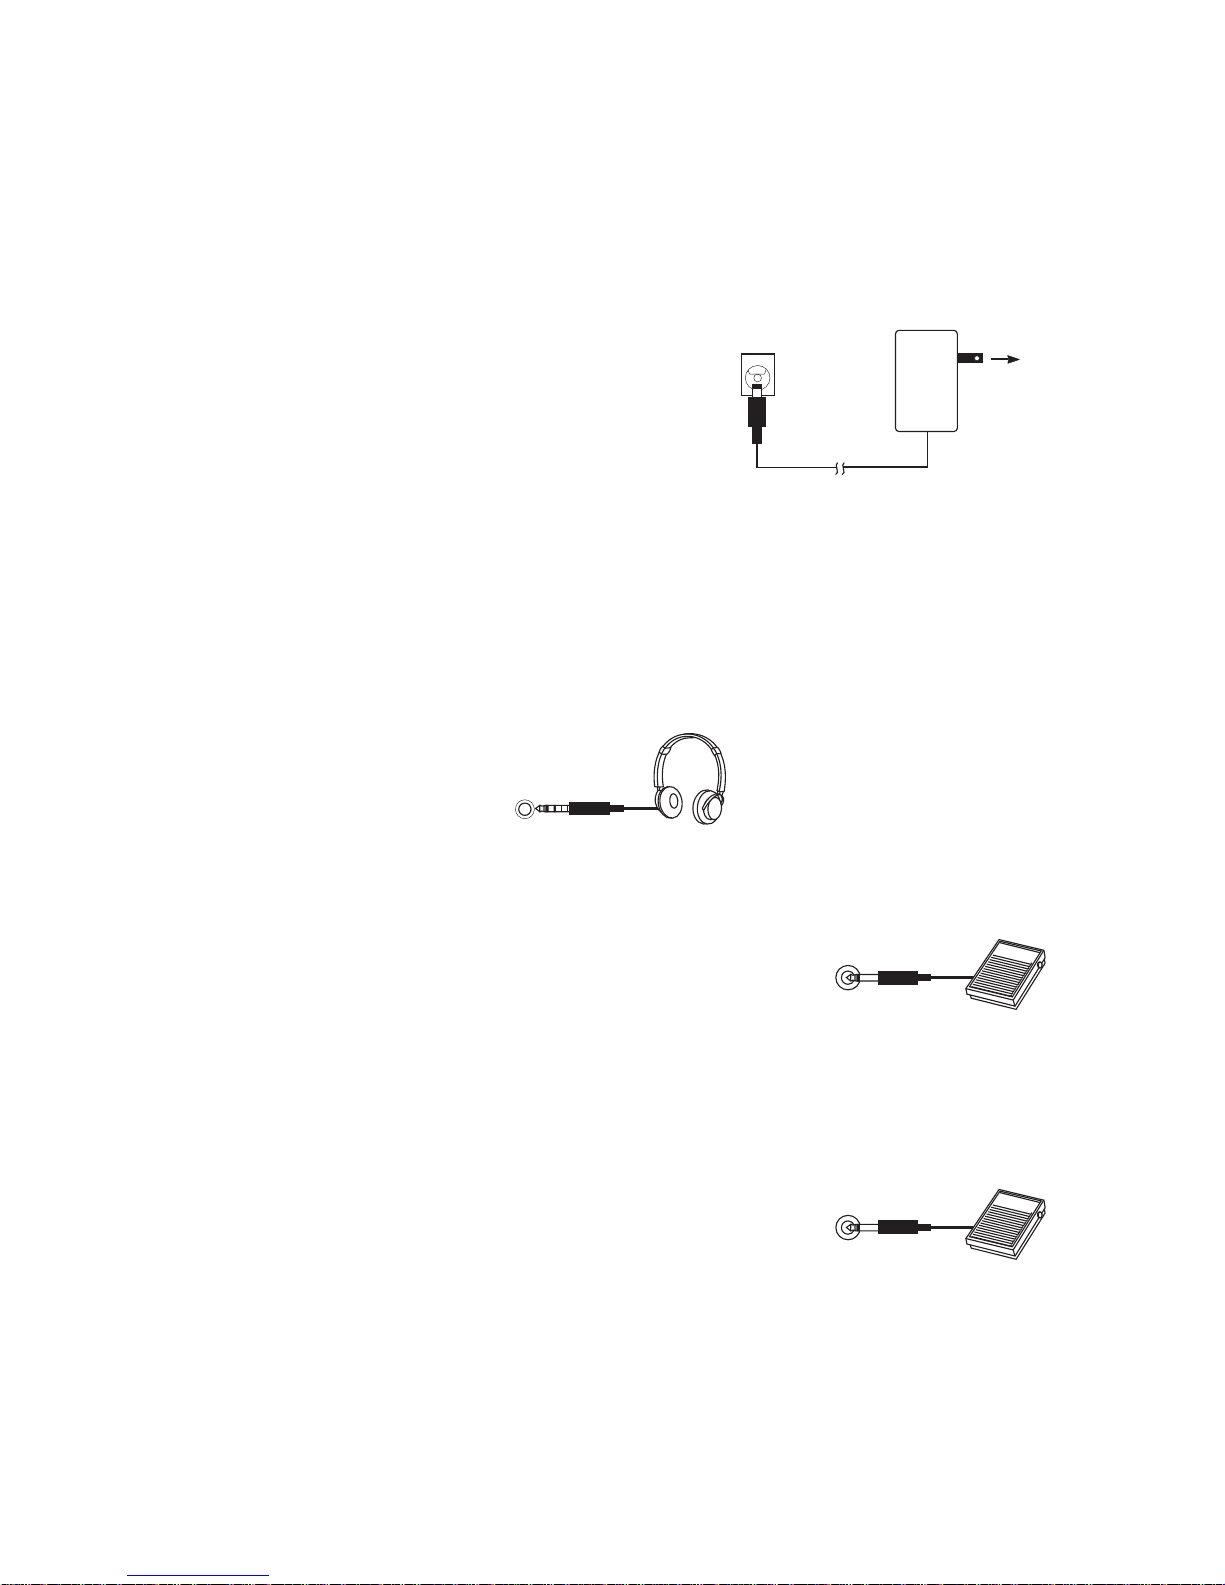
1.Power Supply
Your TB5200 will operate by means of a power
adaptor rated at DC 12V, 2500mA. Carefully and
gently plug the AC POWER power adaptor cable
.
into the DC IN jack on the rear panel of your
T 5200 , then insert the power adaptor into aB
convenient wallAC power socket.
2 .Using Headphones
A standard pair of stereo headphones can be plugged into the rear-panel PHONES jack for
private practice or late-night playing. The internal speaker system is automatically shut off
when a pair of headphones is plugged into the PHONE jack. (Caution: If the tip of the
headphone's jack breaks off inside the instrument's headphone plug, you will have no sound.
Please make sure that the headphone's plug and cable are in good condition.)
AC POWER
PHONE
3 .The Sustain Pedal
A foot-switch can be plugged into the rear-panel SUSTAIN
PEDAL jack socket. The Sustain Pedal triggers the sustain
SUSTAIN
PEDAL
function. Depressing the pedal will sustain the notes after the
keys are released. This product auto-senses the sustain pedal
type whilst powering up. In order to prevent incorrect auto-sense setting, avoid pressing the
sustain pedal whilst inserting the plug into the SUSTAIN PEDAL jack or whilst turning the
power on.
4 .The Express Pedal
The foot-switch is used to control volume similar in
function to an acoustic piano's left pedal, depressing the
pedal will decrease the volume slightly.
EXPRESS
PEDAL
5 .MIDI In/Out
MIDI IN: Receives the MIDI data from an external MIDI device such as a computer or
other MIDI keyboard. The DIGITAL MIDI data is played by your TB5200.
MIDI OUT: Transmits the MIDI data of this TB5200 to control other MIDI device.
6
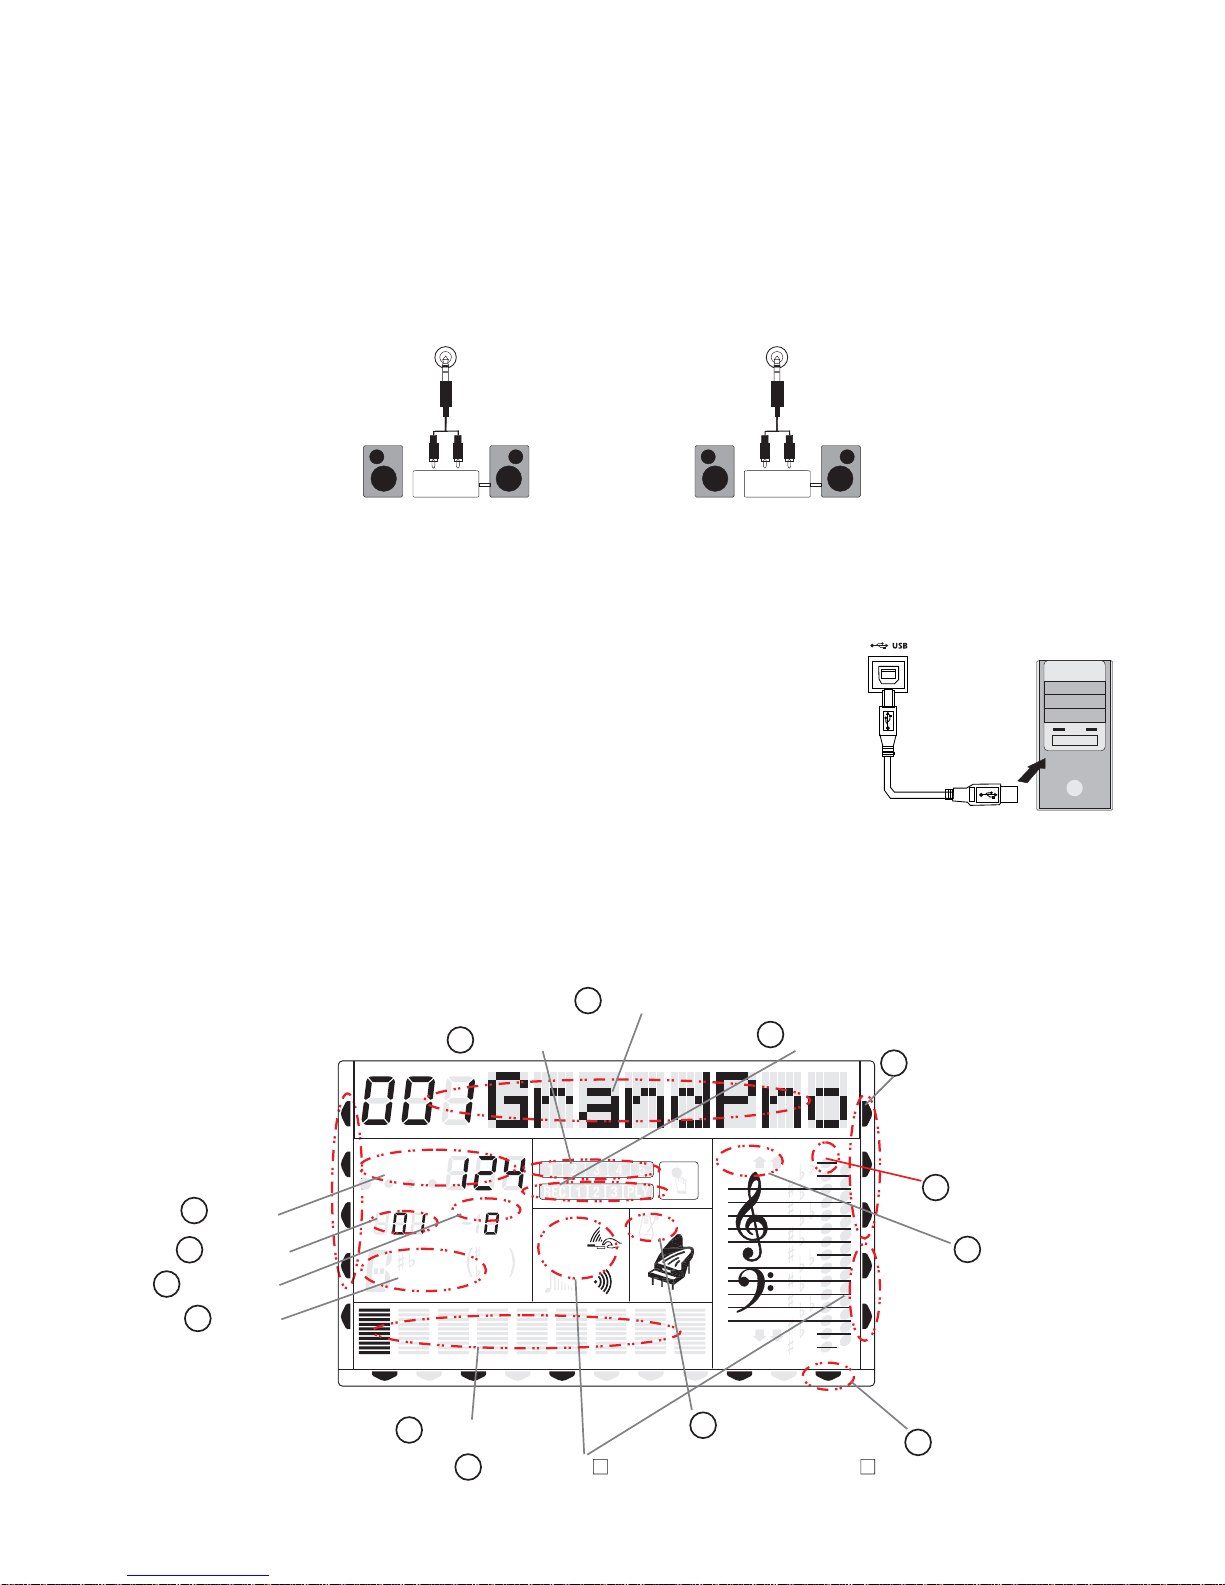
6 .LINE IN and LINE OUT
LINE IN: The sound from an external sound source, for example a CD Player, iPod or
other audio device can be connected to the TB5200. This makes it possible to play along to
the music played by the CD-Player, iPad, Mp3 player.
LINE OUT: The Line Out jack provides the TB5200 audio output to a keyboard amplifier,
stereo sound system, mixing console or recording device. The Line out level is not affected
by the MASTER VOLUME setting.
knob
LINE IN
LINE OUT
Stereo
System
Stereo
System
7 .USB MIDI/Audio
USB MIDI: Connects the TB5200 to computer by means of a USB (Printer) cable. The
advantage is that the TB5200 operates as its own USB MIDI interface, no external MIDI
interface is needed for PC connectivity. Special USB drivers are not needed, as they are
already part of the Microsoft Windows and Apple OSX
specification.
USB Audio: The USB Audio interface allows transfer of high
quality digital audio from the to aTB5200 which can be transferred
computer for recording and further editing.
8.Panel Display Indications
Your TB5200 features a large multi-function display (MULTI DISPLAY) which shows the
important settings and status of the TB5200. The section below briefly explains the various
icons and indicators on the display.
1
Message Display
13
12
Registration Memory
Record
2
Active Input
CHORD
TEMPO
MEASURE
m
ACC
ACC
MIDI IN MIDI OUT FREEZE
10
Temp o
9
Measure
Transpose
7
8
HARMONY
Chord
SPLIT
DUAL
TWIN
6
TRANSPOSE
11
6
augsus4
7
RHY2RHY1
5
BASS
9
13
dim
M
Track Volume
Voice Effect touch/sus/dsp/reverb/chorus
5
DUAL
SUSTAIN
CHORD2CHORD1
U DISK
TOUCH
DSP
PAD
O.T.S
METRONOME
PORTABLE GRAND
PHR2PHR1
8va
8va
NORMAL
4
Metronome
VOICE
STYLE
3
DEMO
REVERB
CHORUS
14
Note Display
11
Octave
Freeze Status
7

(1) Message Display
This section displays the demo song, voice or style name and number you havewhich
selected. Other important function are also displayed in this section.names and their parameters
(2) Active Input
,.Whilst playing the TB5200 you will want to change voices, styles, chord,harmony etc.
If you would like to change a voice or rhythm, or other setting type, you need to be sure that the
ACTIVE INPUT MODE is set to the parameter (e.g.: Voice or Style) which you would like to
change / modify. The arrow indicates to whichever parameter type will be altered by the data
wheel or numeric buttons. Example: If you would like to change a sound from piano to strings,
first make sure that the voice button is yourActive Input Mode (AIM), otherwise you might
change a rhythm instead.
(3) Note Display
When you play keys on the keyboard, these notes will be shown on the musical staff section
of the LCD display. Notes above and below the grand stave, are indicated as 8va up and 8va
down respectively.
(4) Metronome
When the Metronome function is turned ON, the icon will be shown on the screen.
(5) Voice Effect
These icons display the ON/OFF status of the Sustain, DSP and Touch Sensitivity functions.
(6) Track Volume
Displays the volume of each track dynamically when the demo song or style is playing.
(7) Transpose
Displays the current transpose setting of the keyboard. The number 00 indicates transpose
is off. +1 +2 +3 or -1 -2 -3 etc. Indicates the transposed interval in + or - semitones from
standard concert pitch.
(8) Chord Type
Displays the current auto chord type, these types being, Single or Fingered mode.
(9) Measure
Displays the current measure of the demo song, style or record/play back.
(10) Tempo
Displays the tempo of the demo song, style or recording/playback.
(11)Octave
Displays the octave value. +1 -1 +2 -2 etc means octave shift amount..
(12)Registration Memory
Displays the registration memory whilst storing a memory location.
(13)Record and Play
Displays the record and playback status.
.
(14)Freeze
Displays the freeze status .
8
Listening to the Demo
Once you've set up your TB5200, try listening to the pre-programmed demonstration
songs - they'll give you a good idea of what the TB5200 is capable of.
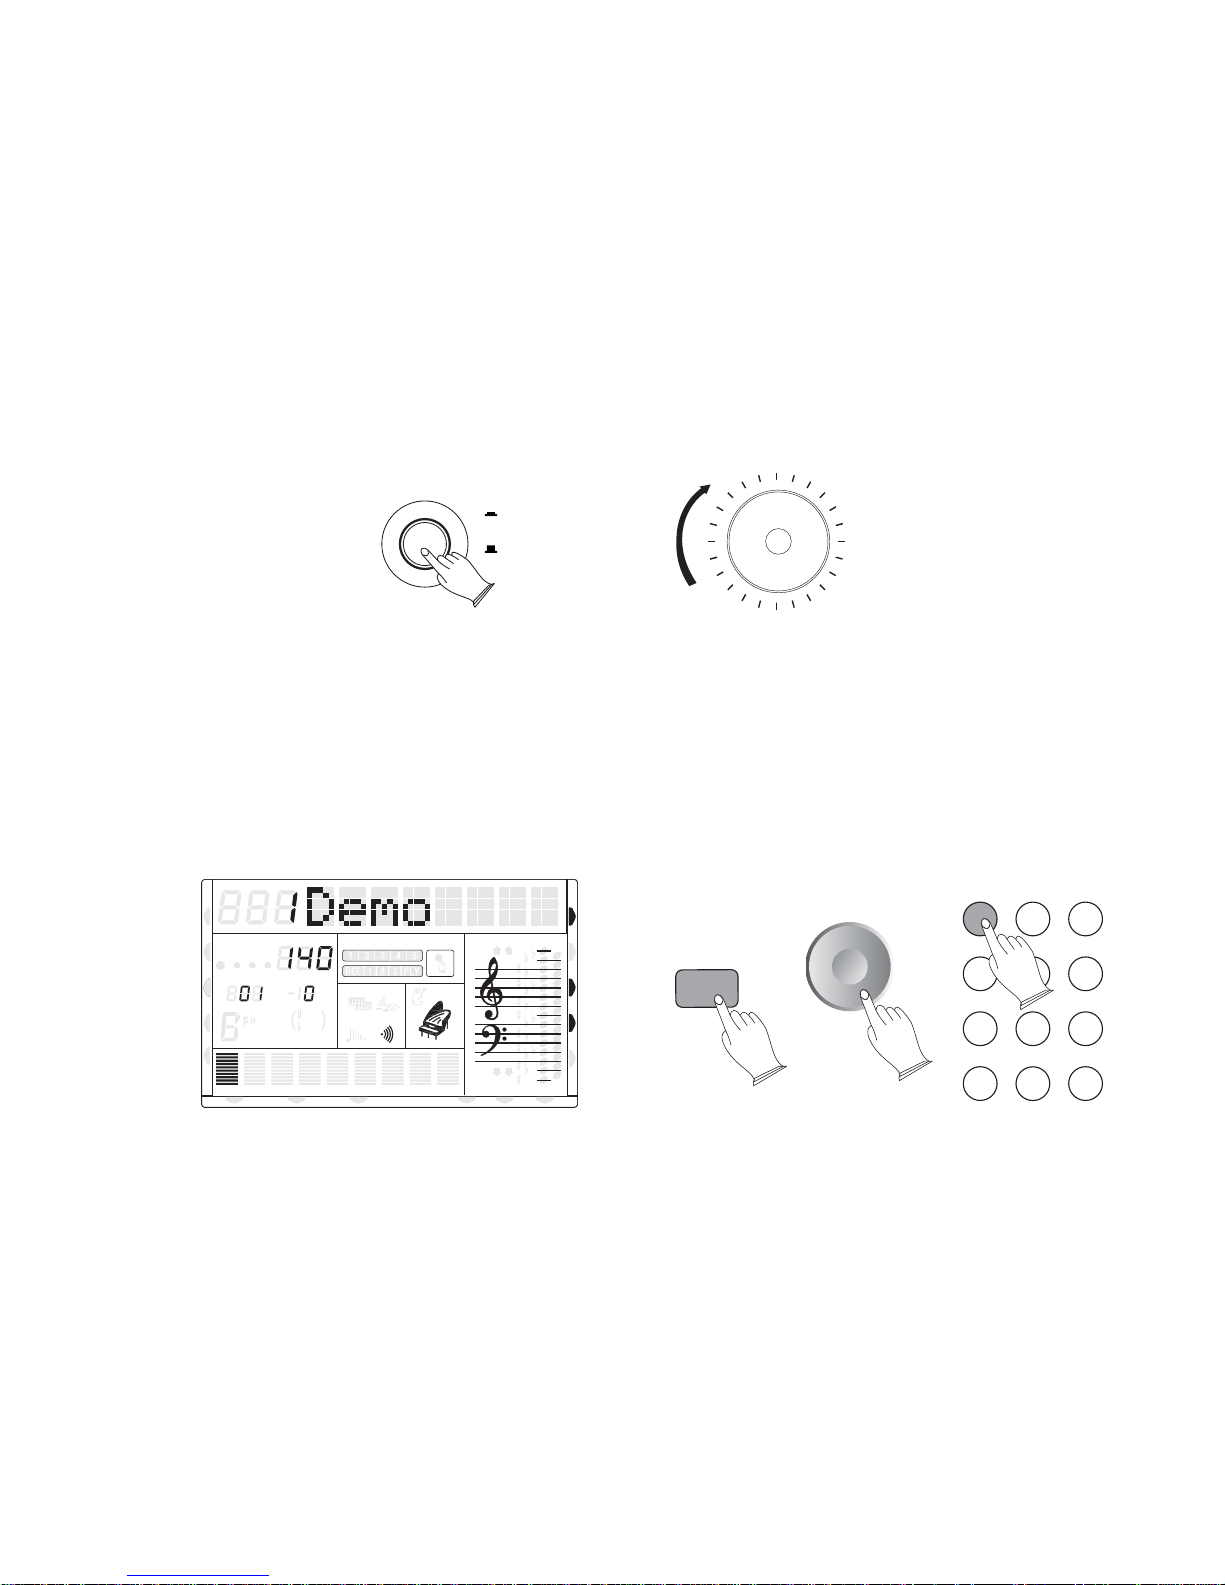
1.Turn the Power ON and Set the Volume
Before playing the demo, turn the power on by pressing the POWER switch (the MULTI
DISPLAY will light up) and set the MASTER VOLUME about half way between the "MIN"
and "MAX" settings.You can adjust the volume to match your playing. Take care in setting
optimum sound level. If the sound is set too loud distortion or unclear sound may result. High
audio levels can permanently damage one's hearing.
MASTER VOLUME
ON
OFF
POWER
MIN MAX
2.Press DEMO to start
Press [DEMO] button to start playback and use the MASTER VOLUME control to set the
ideal listening volume. The [X Demo] will appear on the MULTI DISPLAY( X(1~20) shows
the current demo). Now all demonstrations will play in sequence repeatedly. You can select
any one of the demonstrations by using the data dial or the numeric pad buttons. [0]~[9], [+/-].
CHORD
HARMONY
SPLIT
DUAL
TWIN
TOUCH
DSP
PAD
O.T.S
METRONOME
PORTABLE GRAND
PHR2PHR1
NORMAL
8va
8va
TEMPO
TRANSPOSE
MEASURE
dim
6
M
m
augsus4
7
RHY2RHY1
ACC
ACC
MIDI IN MIDI OUT FREEZE
BASS
DUAL
11
9
SUSTAIN
13
5
CHORD2CHORD1
U DISK
VOICE
STYLE
DEMO
REVERB
CHORUS
DEMO
12
4
789
-
3
5
6
+
0
3.Press DEMO to stop
Press [DEMO] button again to stop demo playback.
4.Learn Songs
There are 100 21-120 songs built into this instrument for your musical pleasure. These
songs have separate right and left-hand parts which . Whilstcan be individually turned on or off
simultaneously pressing the [DEMO]button and[+/-] buttons you can mute the left-hand or
right-hand playback track so that you can practice the corresponding muted part.
9

Selecting and Playing the Voices
Your TB5200 has 128 GM standard voices, 11(General Midi Patch Number 01 - 128) (Midi
Patch Number 666- 676) (Midi Patch Number 677 - 686)different drum percussion kits and 10
User Voices which you can select and play. Main, Dual and Split.There are three voice modes:
Whilst in the Main voice mode, you can play a single voice over the entire range of the keyboard.
The Dual voice mode allows you to play two different voices layered together for rich, complex
sounds, an example of Dual Voice would be a layered combination sound of Piano and Strings
layered together. The Split voice mode lets you set up two different voices for playing on
separate sections of the keyboard, a good example of this would be Piano in the right-hand
section of the keyboard, and String bass on the left-hand side of the keyboard. Each mode
features special effect sections which let you enhance the sound of the Voice and Voices.
These include Reverb, Chorus, and so on.
1.Select a Main Desired Voice
.Press the [VOICE] button, the voice mode is selected and the current voice number and
name will display on the Message Display section. (If "DUAL" or "SPLIT" indicator is
flashing, the Active Input will be DUAL voice or SPLIT voice. )
.Press the numeric pad buttons to select the required voice number according[0]-[9], or [+/-]
to the Voice List. The buttons on the keypad, allow direct entry of the desired value,numeric
the fastest way to edit in many situations. To select a voice, for example, choose oneand is
of the ٦٨٦ voices numbered "٠١" through "٦٨٦" shown on the VOICE list, then enter its number
using . To select "Harmonica" (number ٢٣)،for example, first Press the [٢[numeric pad buttons
then Press the [٣]٫ The number "٢٣" .select "Seashore " owill appear on the MULTI DISPLAY
for example١٢٣)،(number , Press the [1], then [2], then [3] and the corresponding number 123
will appear on the MULTI DISPLAY.
CHORD
HARMONY
SPLIT
DUAL
TWIN
TEMPO
TRANSPOSE
MEASURE
dim
6
M
m
augsus4
7
RHY2RHY1
ACC
ACC
MIDI IN MIDI OUT FREEZE
BASS
DUAL
11
9
SUSTAIN
13
5
CHORD2CHORD1
U DISK
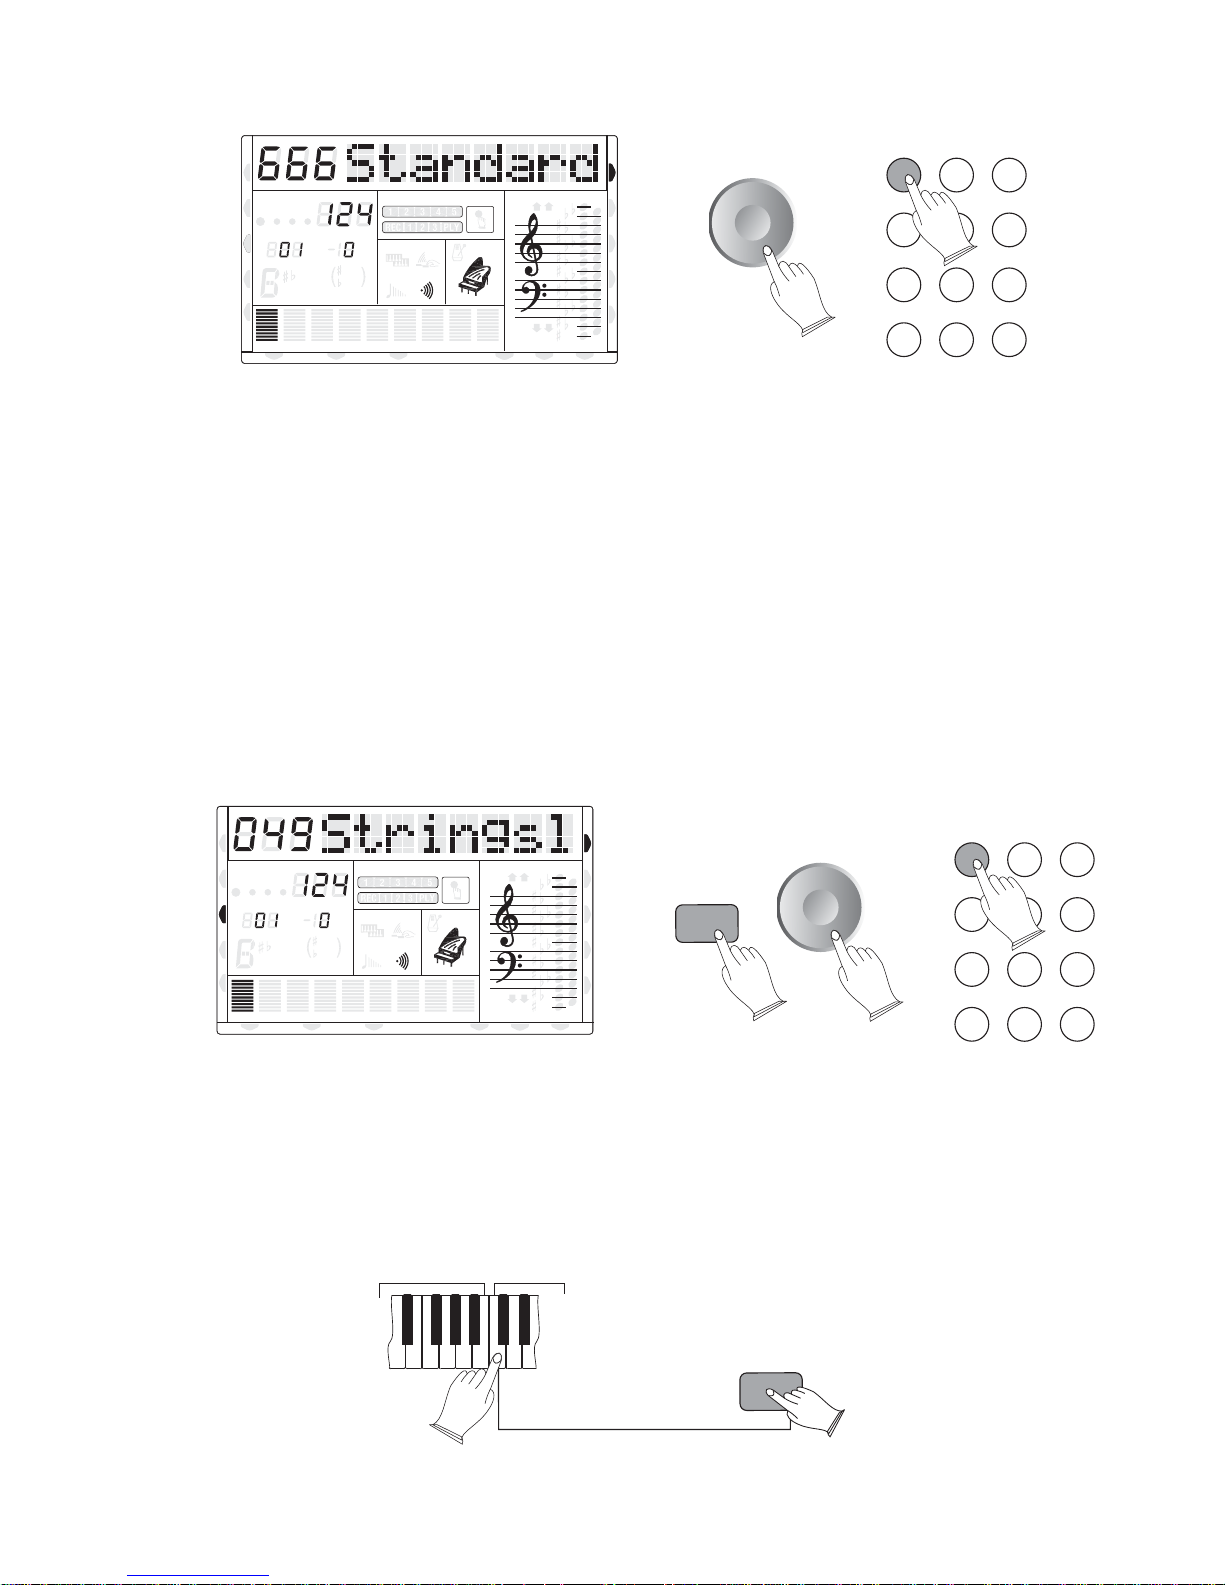
2.Keyboard Percussion
Your TB5200 has 11 different and percussion kits - instrumentsthe individual percussion
can be played on the keyboard by selecting the voice number 666 through 676 .The various
drum and percussion instruments are assigned to each keyboard key.individual
10
TOUCH
DSP
PAD
O.T.S
METRONOME
PORTABLE GRAND
PHR2PHR1
NORMAL
8va
8va
VOICE
STYLE
DEMO
REVERB
CHORUS
VOICE
12
4
789
-
3
5
6
+
0
CHORD
HARMONY
SPLIT
DUAL
TWIN
TOUCH
DSP
PAD
O.T.S
METRONOME
PORTABLE GRAND
PHR2PHR1
NORMAL
8va
8va
TEMPO
TRANSPOSE
MEASURE
ACC
ACC
dim
6
M
m
7
RHY2RHY1
11
9
13
5
augsus4
BASS
DUAL
SUSTAIN
CHORD2CHORD1
MIDI IN MIDI OUT USB FREEZE
VOICE
STYLE
DEMO
REVERB
CHORUS
12
4
789
-
3
5
6
+
0
3. Split Mode
Your instrument's keyboard can be split into two sections, which means different voices
can be (A good example isAcousticplayed by the left and right hands at the same time.
Bass on the left-hand side, and Piano on the right hand side.
.Select a Split Voice
Pressing [SPLIT] button, the "SPLIT" indicator arrow will flash on the screen, the split
voice number and name is displayed. When the indicator arrow is flashing, use the [+] and [-]
buttons or the Numeric keypad buttons to select the required split voice number (01 through 686).
If the SPLIT mode is turned on and the "SPLIT" indicator arrow has stopped flashing, you
can use the[VOICE] button to set current Active Input Mode (AIM) to Split Voice, and the
"SPLIT" arrow indicator will flash again.
CHORD
HARMONY
SPLIT
DUAL
TWIN
TOUCH
DSP
PAD
O.T.S
METRONOME
PORTABLE GRAND
PHR2PHR1
NORMAL
8va
8va
TEMPO
TRANSPOSE
MEASURE
dim
6
M
m
augsus4
7
RHY2RHY1
ACC
ACC
MIDI IN MIDI OUT FREEZE
BASS
DUAL
11
9
SUSTAIN
13
5
CHORD2CHORD1
U DISK
VOICE
STYLE
DEMO
REVERB
CHORUS
SPLIT
12
5
4
789
-
0
.Split Point Change
Hold the [SPLIT] button continuously for more than three seconds, then press any note on
the keyboard between E0 and G6 to select split indicator (0 through 75), the left side of this
key (this key is not included) will become left section and the right side of this key (this key
is included) will become the right hand section. The LCD displays the split indicator (0-75)
and "S.Indicator" .
Left section
rigth section
SPLIT
3
6
+
11
4. Overall Control
1). Sustain
Press the [SUSTAIN] button so that its indicator arrow shows Sustain ON. Sustain causes
the played notes to linger on for a time after the key has been released.
Press the [SUSTAIN] button again to turn Sustain off.
CHORD
HARMONY
SPLIT
DUAL
TWIN
TOUCH
DSP
PAD
O.T.S
METRONOME
PORTABLE GRAND
PHR2PHR1
NORMAL
8va
8va
TEMPO
TRANSPOSE
MEASURE
dim
6
M
m
augsus4
7
RHY2RHY1
ACC
ACC
MIDI IN MIDI OUT FREEZE
BASS
DUAL
11
9
SUSTAIN
13
5
CHORD2CHORD1
U DISK
VOICE
STYLE
DEMO
REVERB
CHORUS
SUSTAIN
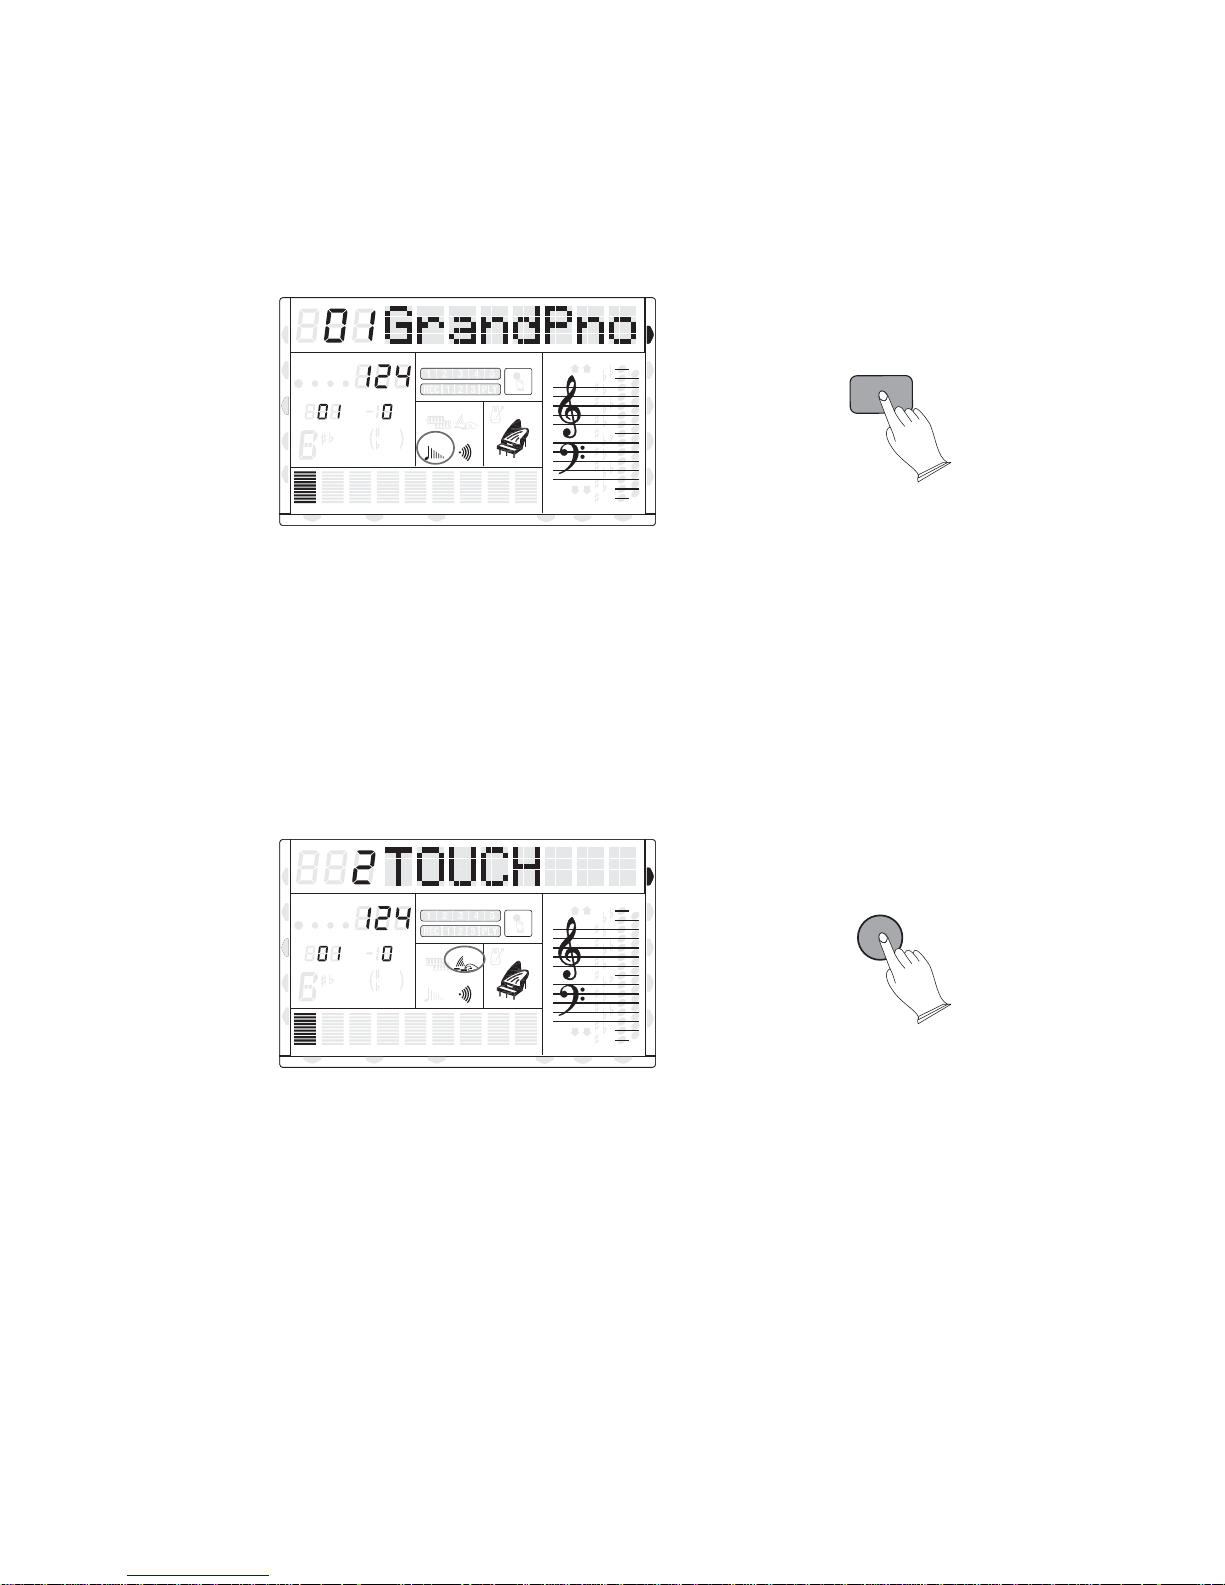
2). Touch
The touch-sensitivity function provides four different degrees of keyboard touch
sensitivity which can be chosen to match different playing styles.
Press the [TOUCH] sensitivity button, use [+] and [-] buttons to select the touch
sensitivity type between the range of 1 to 3. Default: 2 .
When the [TOUCH] sensitivity is off, the indicator is off, meaning that regardless of how
hard you play, the keyboard will , range: 0-127transmit a MIDI velocity value of 100
CHORD
HARMONY
SPLIT
DUAL
TWIN
TOUCH
DSP
PAD
O.T.S
METRONOME
PORTABLE GRAND
PHR2PHR1
NORMAL
8va
8va
TEMPO
TRANSPOSE
MEASURE
dim
6
M
m
augsus4
7
RHY2RHY1
ACC
ACC
MIDI IN MIDI OUT FREEZE
BASS
DUAL
11
9
SUSTAIN
13
5
CHORD2CHORD1
U DISK
VOICE
STYLE
DEMO
REVERB
CHORUS
TOUCH
3). Dual
Press the [DUAL] button, the "DUAL" indicator will flash, the voice number and name
displays on the message area. When the indicator is flashing, use the [+] and [-] buttons or the
Numeric pad buttons to select the desired voice number (01 through 686). In this mode, you
can layer two different voices. Press the [DUAL] button again to turn dual voice off.
If DUALmode is turned on and the "DUAL" indicator has stopped flashing, you can use
[VOICE] button to set current to dual voice, and the "DUAL"Active Input Mode (AIM)
indicator will flash again.
12
CHORD
HARMONY
SPLIT
DUAL
TWIN
TOUCH
DSP
PAD
O.T.S
METRONOME
PORTABLE GRAND
PHR2PHR1
NORMAL
8va
8va
TEMPO
TRANSPOSE
MEASURE
dim
6
M
m
7
RHY2RHY1
ACC
ACC
MIDI IN MIDI OUT FREEZE
11
9
13
5
augsus4
BASS
DUAL
SUSTAIN
CHORD2CHORD1
U DISK
VOICE
STYLE
DEMO
REVERB
CHORUS
DUAL
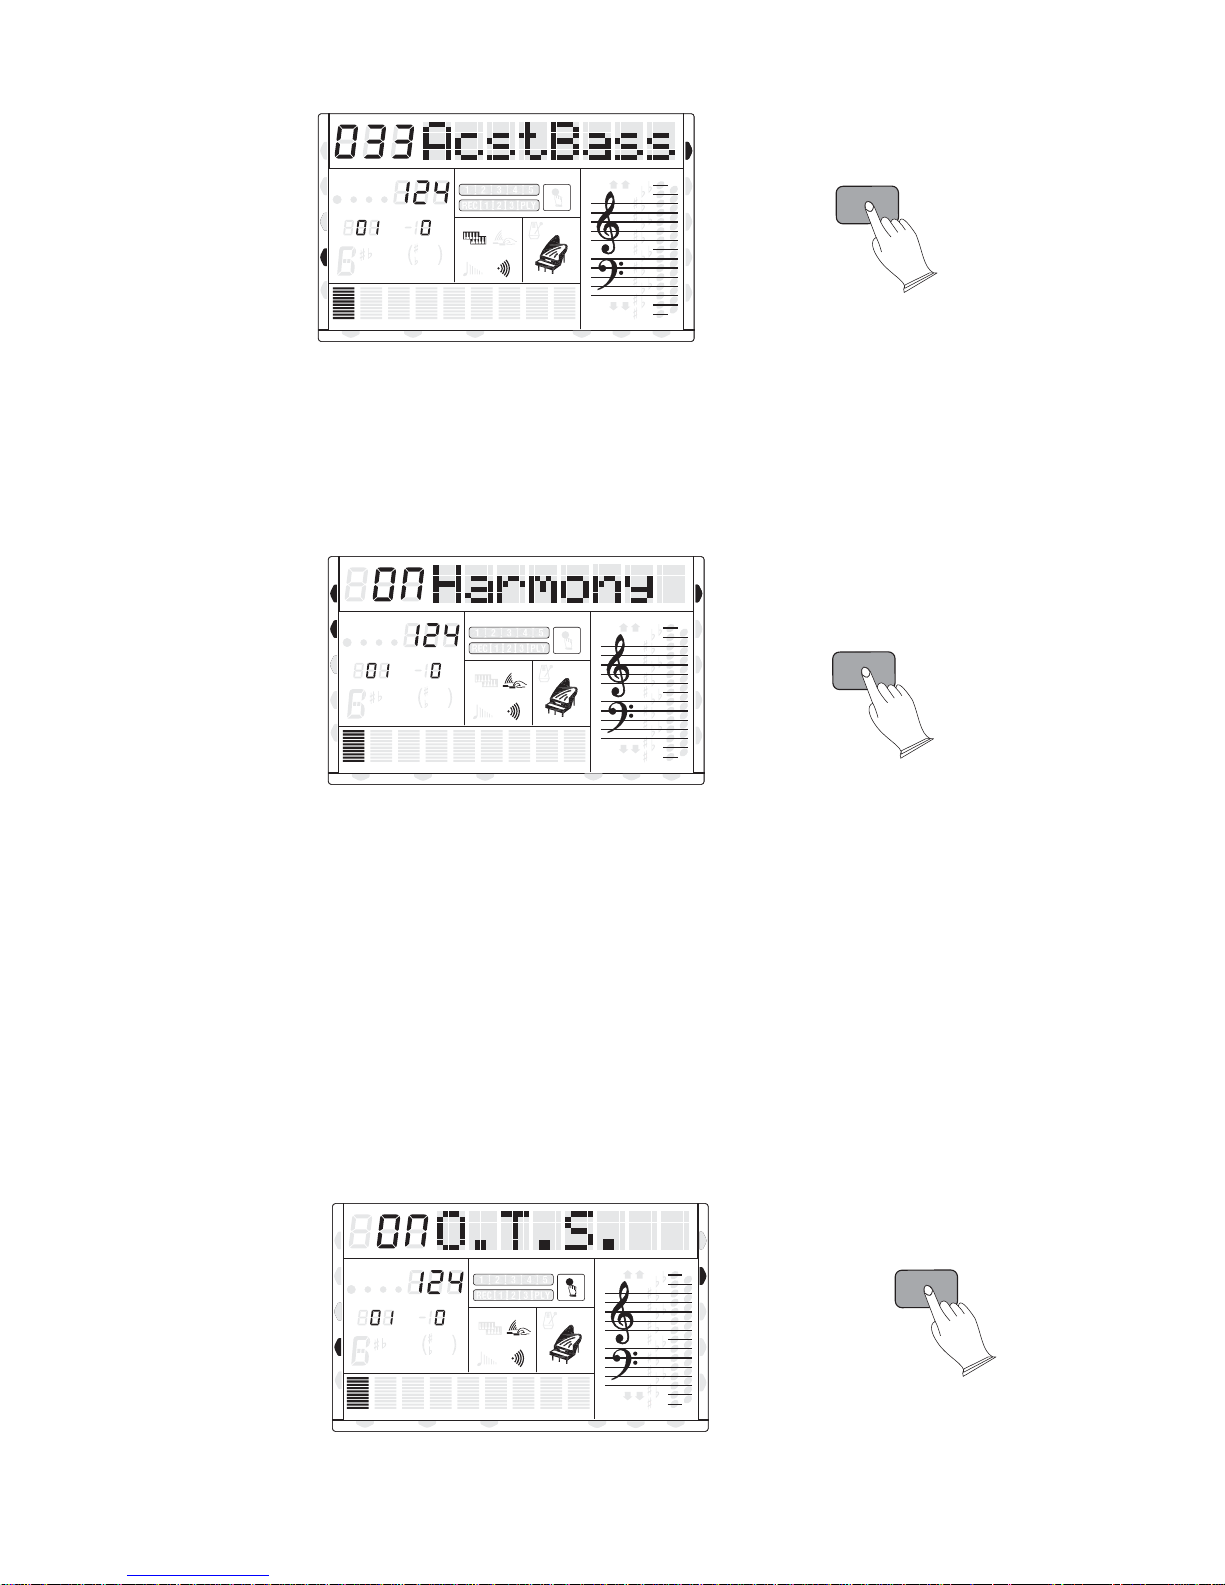
4). Harmony
Pressing [HARMONY] button, indicator "HARMONY"Active Input Mode (AIM) Arrow
will display on the LCD. When playing single finger melody lines in the right hand, the
HARMONY function automatically adds chords to your right hand section of the keyboard.
The automatic harmonies generated in the right hand are derived from the chord played in the
left hand.
CHORD
HARMONY
SPLIT
DUAL
TWIN
TOUCH
DSP
PAD
O.T.S
METRONOME
PORTABLE GRAND
PHR2PHR1
NORMAL
8va
8va
TEMPO
TRANSPOSE
MEASURE
dim
6
M
m
augsus4
7
RHY2RHY1
ACC
ACC
MIDI IN MIDI OUT FREEZE
BASS
DUAL
11
9
SUSTAIN
13
5
CHORD2CHORD1
U DISK
VOICE
STYLE
DEMO
REVERB
CHORUS
HARMONY
5). NORMAL
Press the [NORMAL] button. Your TB5200 returns to normal full keyboard mode.
6). O.T.S
Each Accompaniment style has a suitable preset voice and other settings which can be
instantly accessed by pressing the [O.T.S] button. This makes it simple to access the optimum
settings for each style in one quick button press.
To make use of the O.T.S function: select a style, then press the [O.T.S] button. The LCD
display will show that the O.T.S is enabled, and an optimal preset sound combination will
instantly be available.
As long as the [O.T.S] is turned on, the optimal voice and other settings will be automatically
recalled whenever you select a new style.
CHORD
HARMONY
SPLIT
DUAL
TEMPO
MEASURE
m
dim
M
6
7
TWIN
RHY2RHY1
ACC
ACC
MIDI IN MIDI OUT FREEZE
TRANSPOSE
11
5
augsus4
BASS
VOICE
O.T.S
8va
TOUCH
DUAL
9
SUSTAIN
13
CHORD2CHORD1
U DISK
DSP
PAD
METRONOME
PORTABLE GRAND
PHR2PHR1
NORMAL
8va
STYLE
DEMO
REVERB
CHORUS
O.T.S
13
D.S.P (Digital Signal Processor)
The TB5200 keyboard is equipped with a high quality D.S.P. or Digital Signal Processor
which is used to add effects or enhance the sounds. .
The D.S.P effect types are listed below
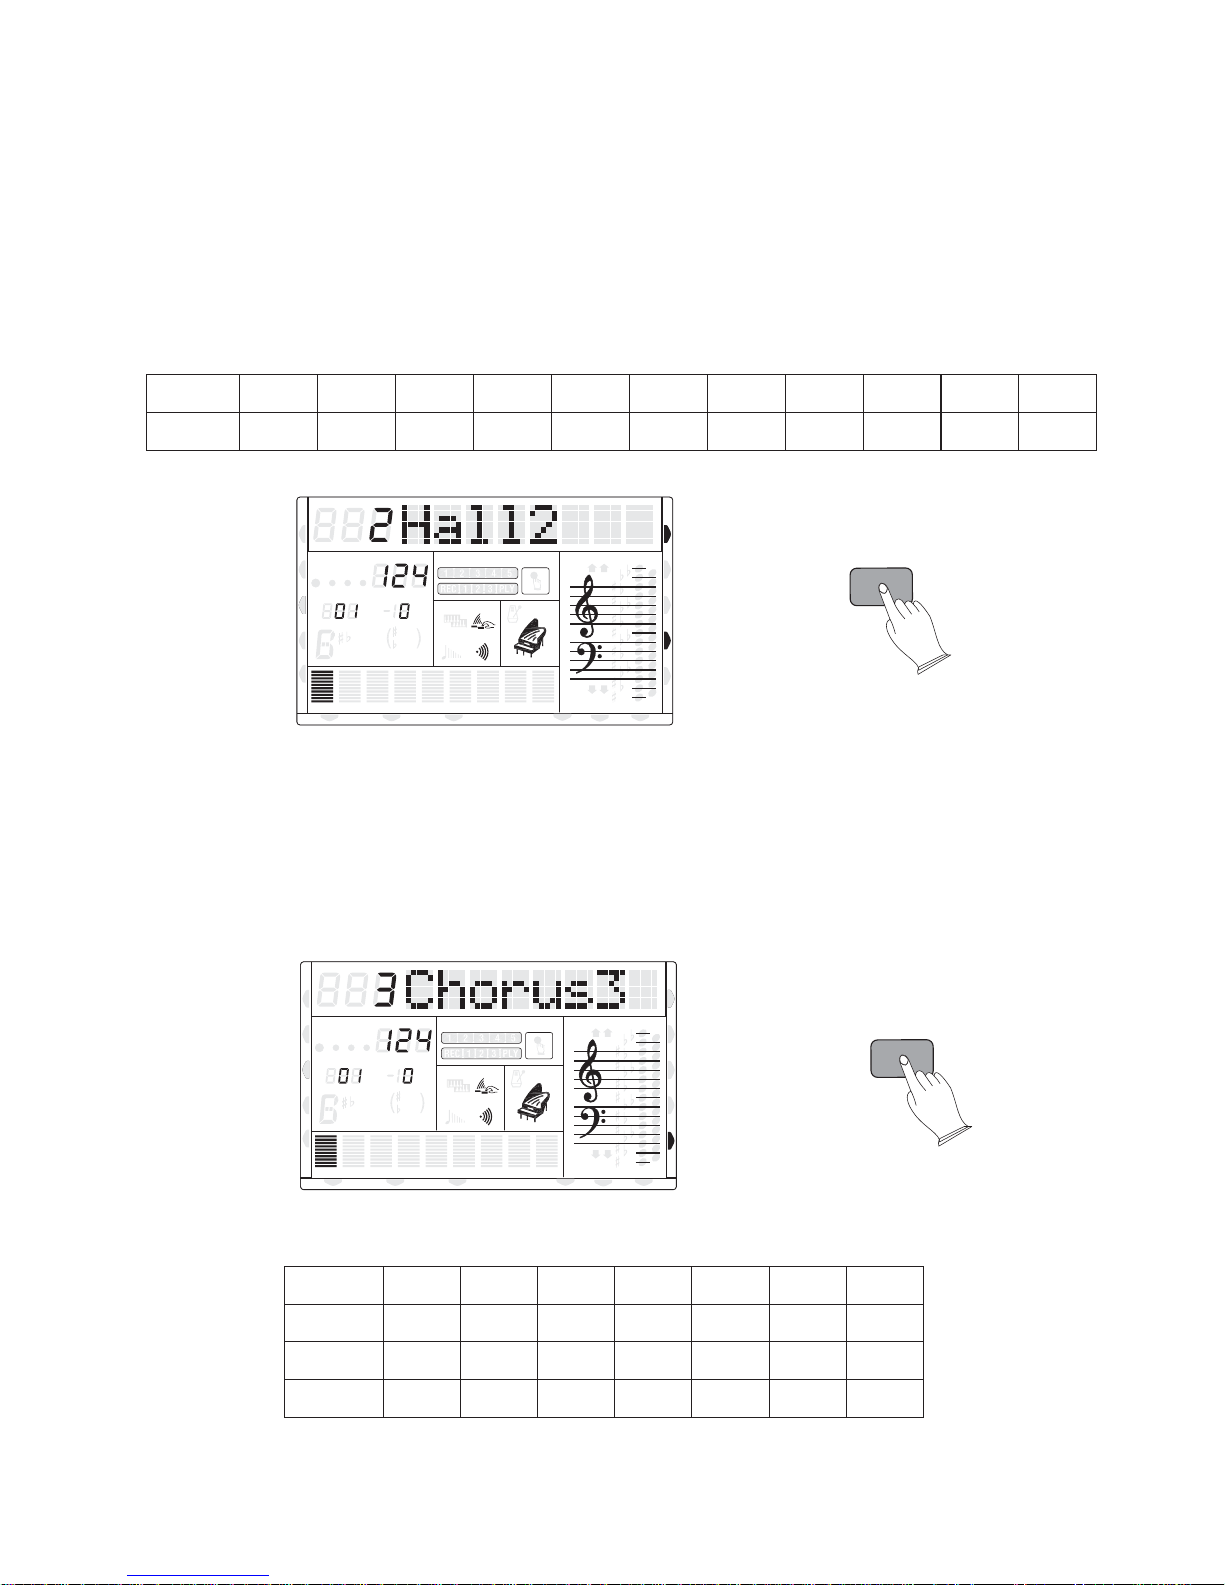
7). REVERB
Pressing [REVERB] button, activates the REVERB function, then use the [+/-] buttons
or the rotary data dial to select from 10 kinds of DSP type. The LCD will display the DSP type.
DSP effect can simulate the ambience of stage, room, hall and many other spatial areas. This
reverb function adds a very natural, warm acoustic space to your instrument's sound.
TYPE
TYPE NAME
HARMONY
00
Rev Off
CHORD
SPLIT
DUAL
TWIN
01
HALL1
TEMPO
MEASURE
dim
M
m
ACC
ACC
MIDI IN MIDI OUT FREEZE
02
HALL203Room104Room205Room306Stage107Stage208Plate
O.T.S
8va
TRANSPOSE
6
augsus4
7
RHY2RHY1
11
5
BASS
13
9
DUAL
SUSTAIN
CHORD2CHORD1
U DISK
TOUCH
DSP
PAD
METRONOME
PORTABLE GRAND
PHR2PHR1
NORMAL
8va
VOICE
STYLE
DEMO
REVERB
CHORUS
09
Delay10Echo
REVERB
8). CHORUS
Pressing [CHORUS] button, activates the CHORUS function, then use [+/-] buttons data
dial to select 13 kinds of chorus type. The LCD will be display the chorus type.DSP (Digital
Signal Processor) effect. This Chorus effect is useful in enhancing Electric Piano and Guitar
type sounds, as well as ensemble and synthesizer sounds.
CHORD
HARMONY
SPLIT
DUAL
TEMPO
MEASURE
m
dim
M
TRANSPOSE
6
augsus4
7
11
13
5
TWIN
RHY2RHY1
ACC
ACC
BASS
MIDI IN MIDI OUT FREEZE
TYPE
TYPE NAME
Chors Off
TYPE
TYPE NAME
ShrtDely
14
VOICE
O.T.S
9
00
DUAL
SUSTAIN
CHORD2CHORD1
U DISK
TOUCH
DSP
PAD
01
8va
METRONOME
PORTABLE GRAND
8va
PHR2PHR1
NORMAL
02 03 04 05 06
STYLE
DEMO
REVERB
CHORUS
Chorus1 Chorus2 Chorus3 Chorus4 Feedback Flanger1
07
08
ShrtdlFb
09
Flanger2
10 11 12
Celeste1 Celeste2Flanger3
CHORUS
13
Celeste3
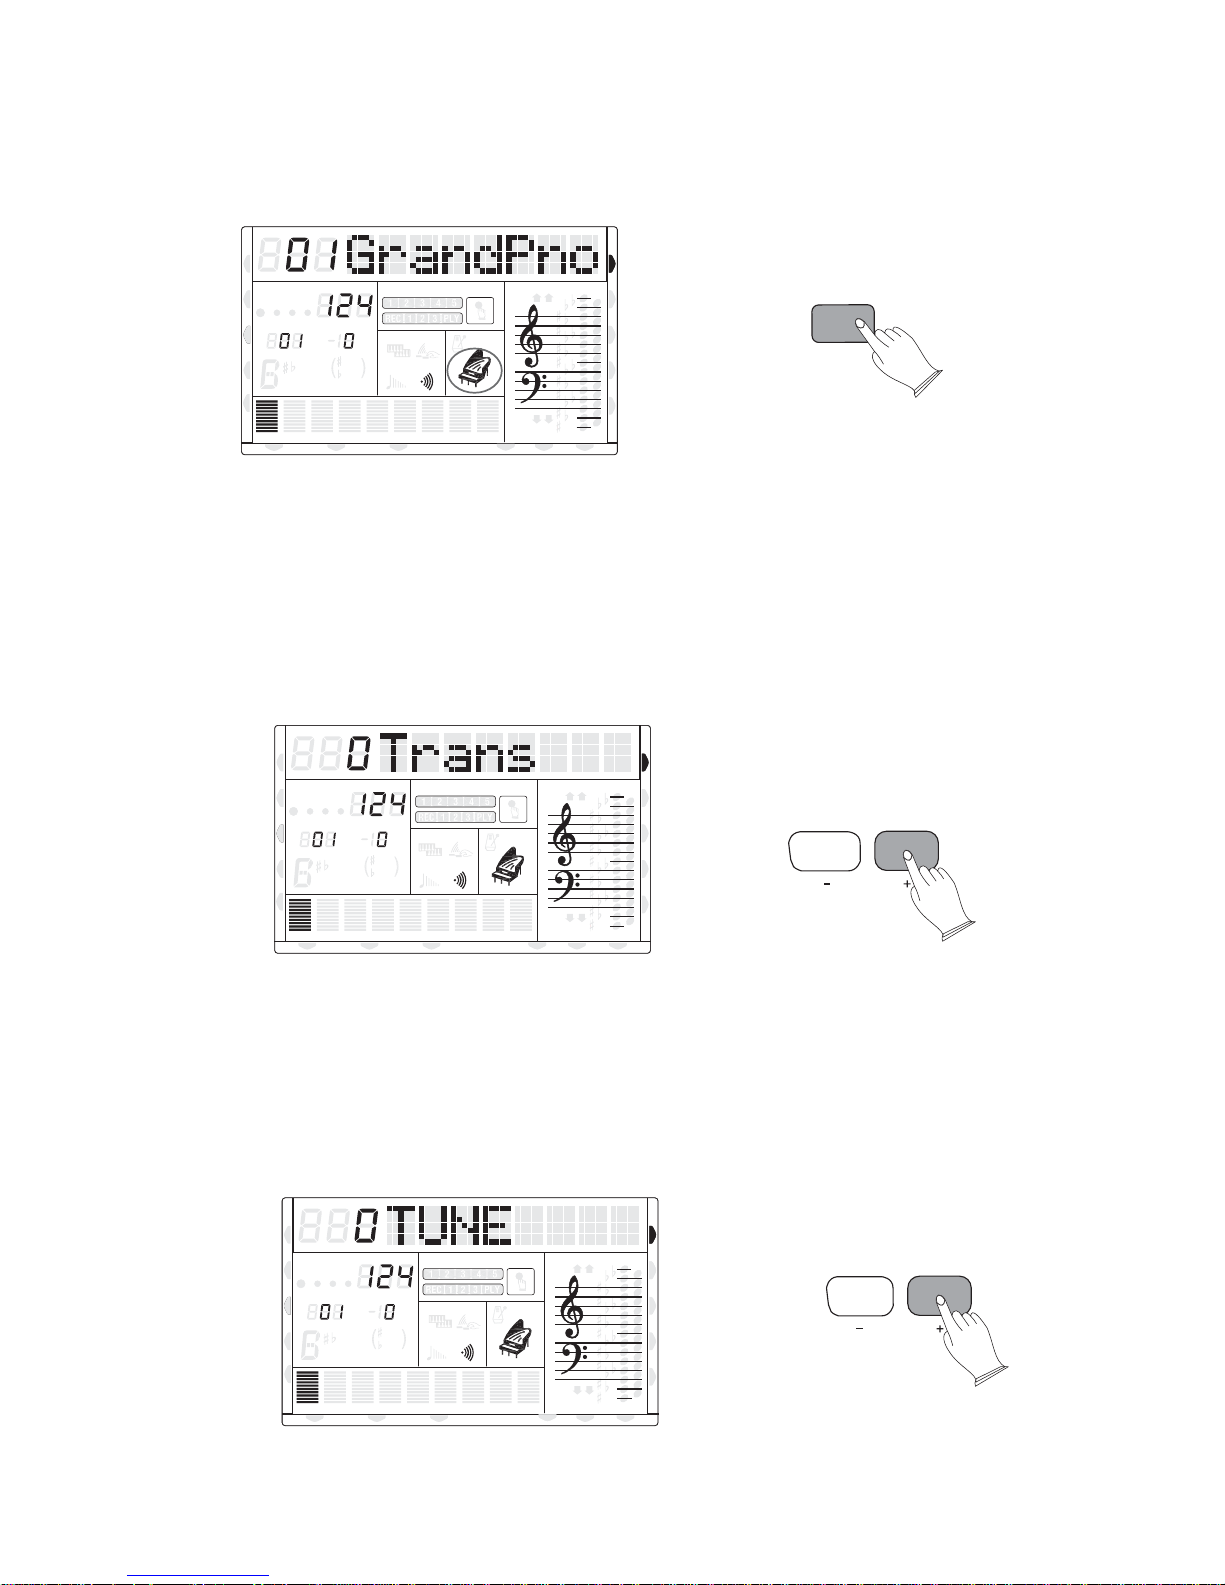
9). P PORTABLE IANO
Pressing [GRAND PIANO] button, you access the portable piano voice immediately.
CHORD
HARMONY
SPLIT
DUAL
TWIN
TOUCH
DSP
PAD
O.T.S
METRONOME
PORTABLE GRAND
PHR2PHR1
NORMAL
8va
8va
TEMPO
TRANSPOSE
MEASURE
dim
6
M
m
augsus4
7
RHY2RHY1
ACC
ACC
MIDI IN MIDI OUT FREEZE
MIDI IN MIDI OUT FREEZE
BASS
DUAL
11
9
SUSTAIN
13
5
CHORD2CHORD1
U DISK
VOICE
STYLE
DEMO
REVERB
CHORUS
GRAND
PIANO
10). TRANSPOSE
Your [-TRANS+] function makes it possible to shift the pitch of this TB5200 upTB5200's
or down in semitone intervals up to a maximum of 12 semitones (one octave). By transposing
the pitch of your TB5200 keyboard makes it possible to play in easier or keymore familiar
signatures, and to have the TB5200 transpose the sound to match difficult key signatures.
This is sometimes useful match the range of a singer or other instruments.
CHORD
HARMONY
SPLIT
DUAL
TWIN
TOUCH
DSP
PAD
O.T.S
METRONOME
PORTABLE GRAND
PHR2PHR1
NORMAL
8va
8va
TEMPO
TRANSPOSE
MEASURE
dim
6
M
m
augsus4
7
RHY2RHY1
ACC
ACC
MIDI IN MIDI OUT FREEZE
MIDI IN MIDI OUT FREEZE
11
5
BASS
13
9
DUAL
SUSTAIN
CHORD2CHORD1
U DISK
VOICE
STYLE
DEMO
REVERB
CHORUS
TRANS
11). TUNE
Your [-TUNE+] function makes it possible to tune the pitch of your TB5200 toTB5200's
match other instruments. TUNING can be accomplished over +50-cents range (that's 100
cents total, or one semitone) in 128 steps (approximately 0.8 cents per step).
The default tuning is set to concert pitch whereA=440Hz, and does not normally have to
be altered.
CHORD
HARMONY
SPLIT
DUAL
TWIN
TEMPO
TRANSPOSE
MEASURE
11
9
dim
6
13
5
M
m
augsus4
7
RHY2RHY1
ACC
ACC
BASS
MIDI IN MIDI OUT FREEZE
DUAL
SUSTAIN
CHORD2CHORD1
U DISK
TOUCH
DSP
PAD
O.T.S
METRONOME
PORTABLE GRAND
PHR2PHR1
NORMAL
8va
8va
VOICE
STYLE
DEMO
REVERB
CHORUS
TUNE
15
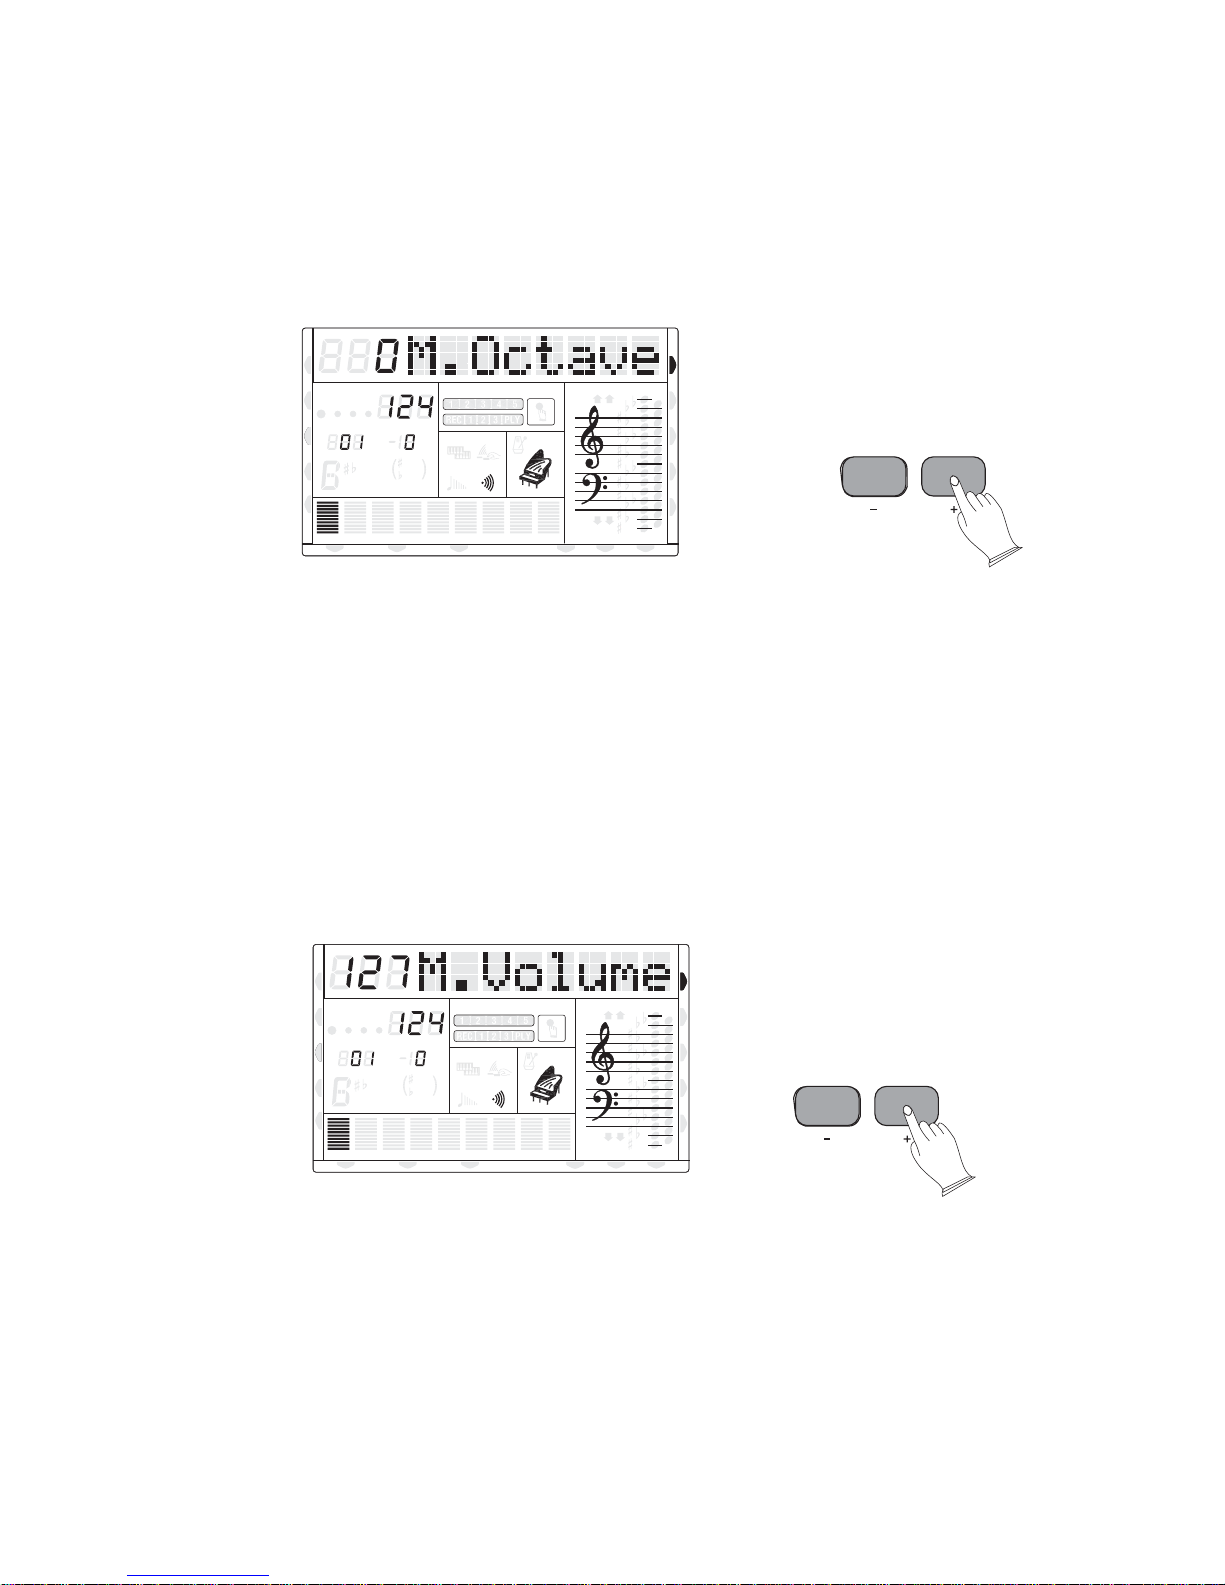
12). OCTAVE
Press [-OCTAVE+] buttons to set the octave value: -2 to 2.
In Split mode, [-OCTAVE+] buttons to adjust the split voice octave whilst the split cursor
is flashing.
In Dual mode, press [-OCTAVE+] buttons to adjust the dual voice octave whilst the dual
cursor is flashing.
CHORD
HARMONY
SPLIT
DUAL
TWIN
TOUCH
DSP
PAD
O.T.S
METRONOME
PORTABLE GRAND
PHR2PHR1
NORMAL
8va
8va
TEMPO
TRANSPOSE
MEASURE
dim
6
M
m
augsus4
7
RHY2RHY1
ACC
ACC
MIDI IN MIDI OUT FREEZE
BASS
DUAL
11
9
SUSTAIN
13
5
CHORD2CHORD1
U DISK
VOICE
STYLE
DEMO
REVERB
CHORUS
OCTAVE
13). TEMPO
Press[-TEMPO+] buttons, or the rotary data dial, to decrease or increase the tempo of
songs metronome and auto accompaniment styles. (See page26.)
14)KB.VOL
Press[-KB.VOL+] buttons to adjust the main voice volume: 0-127.
In Split mode, [-KB.VOL+] buttons to adjust the split voice octave whilst the split
cursor is flashing.
In Dual mode, press [-KB.VOL+] buttons to adjust the dual voice octave whilst the dual
cursor is flashing.
CHORD
HARMONY
SPLIT
DUAL
TWIN
TOUCH
DSP
PAD
O.T.S
METRONOME
PORTABLE GRAND
PHR2PHR1
NORMAL
8va
8va
TEMPO
TRANSPOSE
MEASURE
dim
6
M
m
augsus4
7
RHY2RHY1
ACC
ACC
MIDI IN MIDI OUT FREEZE
BASS
DUAL
11
9
SUSTAIN
13
5
CHORD2CHORD1
U DISK
VOICE
STYLE
DEMO
REVERB
CHORUS
KB VOL
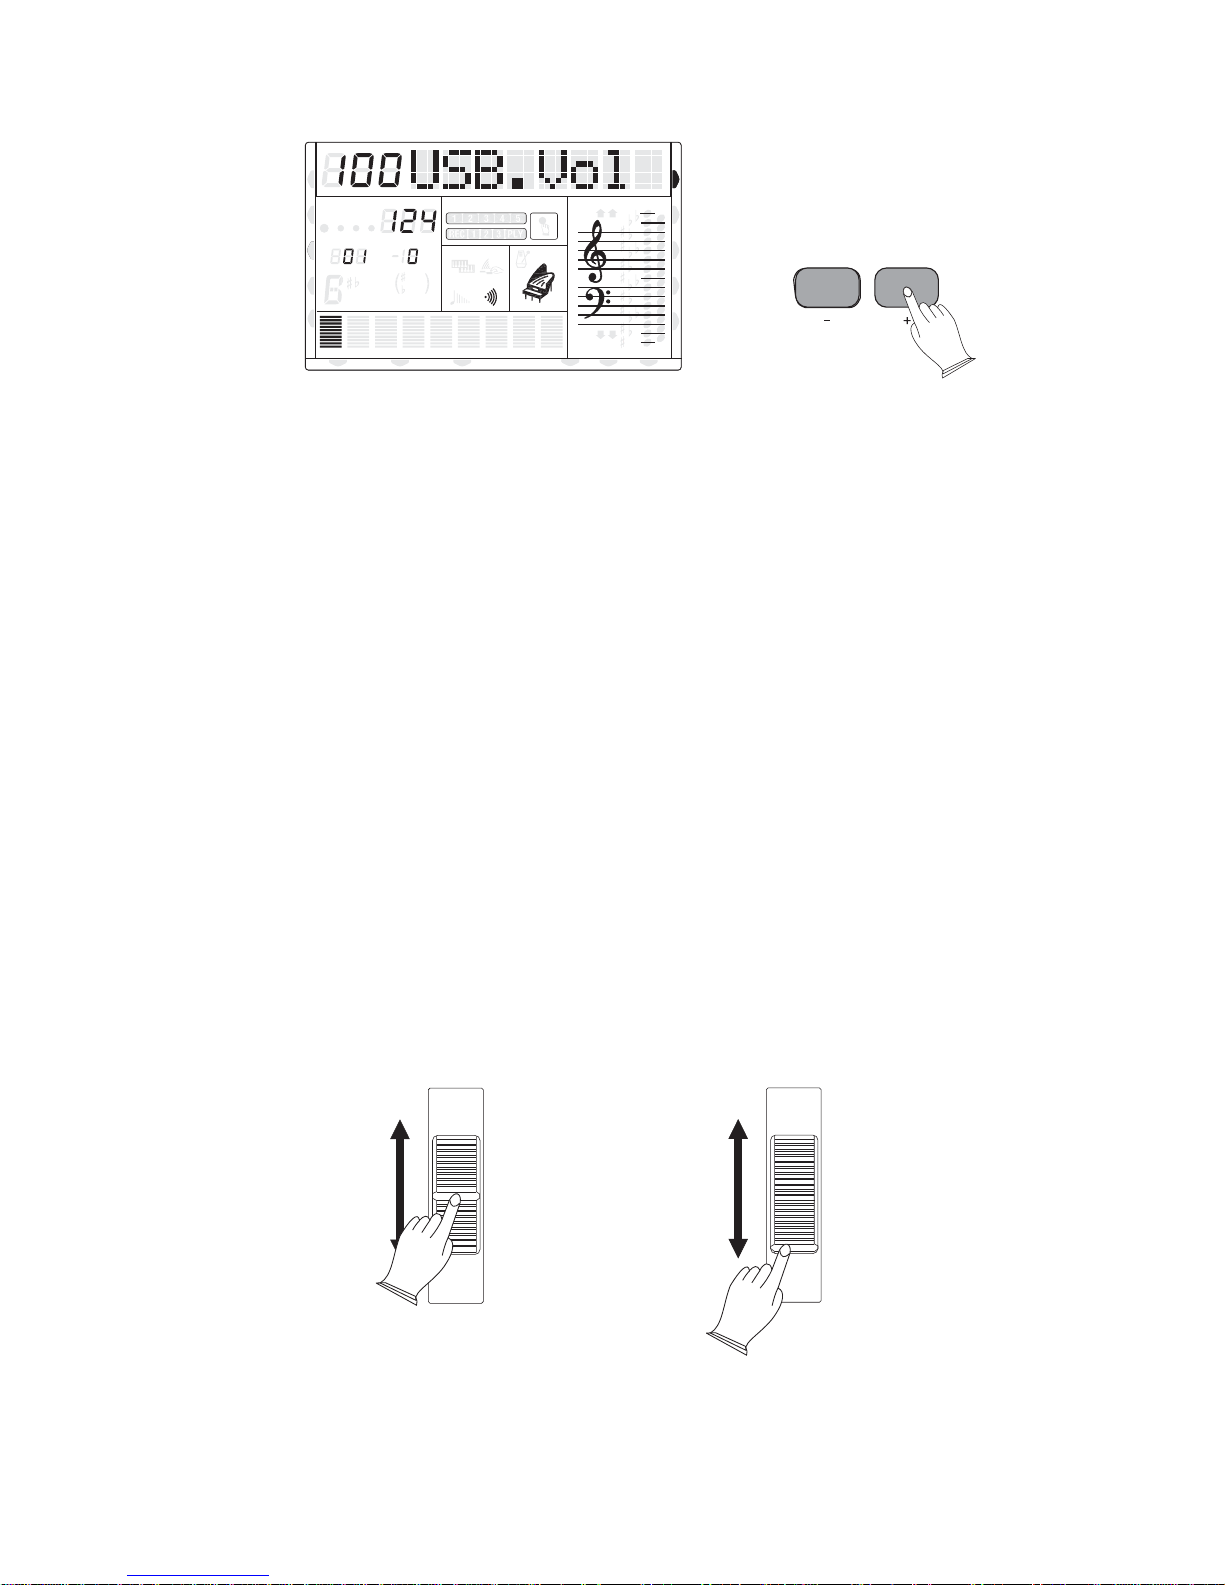
15)USB.VOL
Press [-USB.VOL+] buttons to adjust the USB / MIDI file's volume: 0-127.
16
CHORD
HARMONY
SPLIT
DUAL
TWIN
TOUCH
DSP
PAD
O.T.S
METRONOME
PORTABLE GRAND
PHR2PHR1
NORMAL
8va
8va
TEMPO
TRANSPOSE
MEASURE
dim
6
M
m
augsus4
7
RHY2RHY1
ACC
ACC
MIDI IN MIDI OUT FREEZE
BASS
DUAL
11
9
SUSTAIN
13
5
CHORD2CHORD1
U DISK
VOICE
STYLE
DEMO
REVERB
CHORUS
USB VOL
16)ACC.VOL
Press [-ACC.VOL+] buttons to adjust the accompaniment volume: 0-127.(see page 26).
17). P BITCH END
1) The PITCH BEND wheel is located on the left side of your keyboard which can be used
to vary the pitch of the keyboard. Pushing the wheel away from you will cause the keyboard
pitch to go sharp, and pulling the wheel towards you will cause the pitch to be lowered.
2) Moving the wheel to the top position (Away from you) and holding it there for about 2
seconds, will allow you to set the PITCH BEND SENSITIVITY, the LCD will display the
current pitch range (pitch sensitivity). You can modify this sensitivity from 1~12 semitones,
by using the rotary data dial to set the pitch sensitivity. When the power is turned ON, the
preset sensitivity is +/- 2 semitones. (Hint: Pitch bend is often used by orchesteral players,
when playing Trombone / Trumpet / Clarinet).
18). MODULATION
The modulation function applies vibrato effects to the voices played on the keyboard.
Push the wheel to the MIN, the voices will play in normal.(Hint - This modulation wheel
should be set to minimum position for normal playing, and used conservatively Some sounds
such as Piano are not suited to modulation at all. )
PITCH BEND
UP
DOWN
MODULATION
MAX
MIN
DEFAULT POSITION FOR PITCH BEND:Wheel is in the middle (Spring loaded).
DEFAULT POSITION FOR MODULATION:Wheel is set to bottom position (This wheel is
not spring loaded and will remain where it is positioned by the player).
17
5. ControlUser Voice
It is possible to modify any of the TB5200's existing voices, and then save the modified
voice to a memory location.The various parameters such as Envelope, Vibrato, Filter are
editable and save-able to the User Voce Bank (More information on how to save and recall
these edited voices is given in this manual, please refer to the instructions on page . [SAVE TO]
and [LOAD FROM] button.)
Select the voice you want to edit and then use the parameters pertaining to Envelope,
Vibrato and Filter to perform the edit.
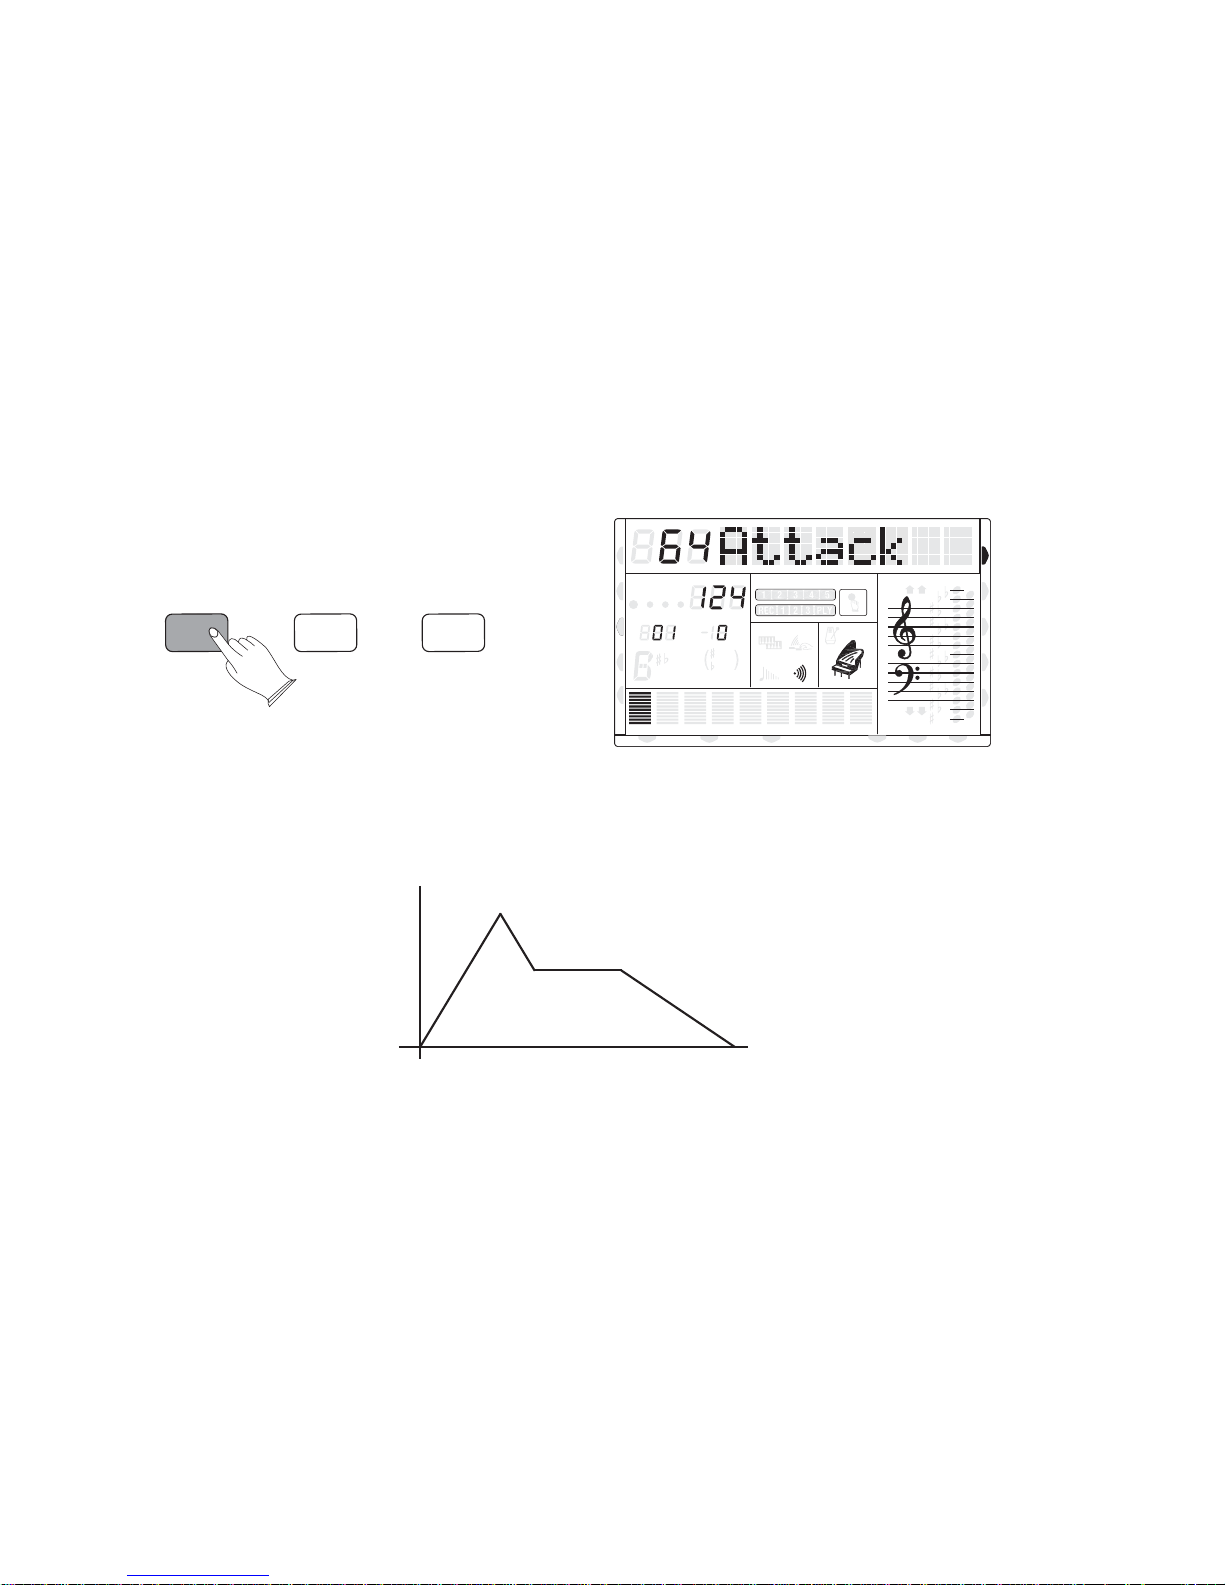
Envelope1).
You can control the parameters of how fast a sound is produced after the player presses the
key. The initial part of the sound is calledATTACK. (Hint-An accordion has a slow attack, as
does a pipe organ, but a Bell or Gong or Piano or Jazz organ has a fast attack.)
Repeatedly press the [ENVELOPE] button to scroll the parameters ofthough, and select
Attack, Decay and Release.
ENVELOPE VIBRATO FILTER
CHORD
HARMONY
SPLIT
DUAL
TWIN
TOUCH
DSP
PAD
O.T.S
METRONOME
PORTABLE GRAND
PHR2PHR1
NORMAL
8va
8va
TEMPO
TRANSPOSE
MEASURE
dim
6
M
m
7
RHY2RHY1
ACC
ACC
MIDI IN MIDI OUT FREEZE
11
9
13
5
augsus4
BASS
DUAL
SUSTAIN
CHORD2CHORD1
U DISK
VOICE
STYLE
DEMO
REVERB
CHORUS
Use the rotary data dial or numeric pad buttons to set their values. Range: 0~127. Their
default values are all 64. (without any effect).
The parameters of Envelope' s variations are as follows:
Decay
Release
Attack
Attack: How quickly the sound is produced after playing the note. HigherAttack value
numbers indicated in the LCD, cause the note to build up to full volume, more slowly. (Like
an Accordion) Lower Attack value numbers in the LCD screen, produces faster key response.
(Like a bell or gong or piano or jazz organ). The sound is immediate.
Decay: Sets how quickly the sound produced dies away whilst holding the note down.
Guitars, bells, and other plink type sounds have a quick decay. Whereas a slow decay or even
zero decay would be an organ-like effect. If the key is held down the sound will be produced
for the entire time that the key is held down.
Release: The release time is how long the sound continues after the note is let go. (Hint a
Trumpet has a short release time, meaning the sound produced stops immediately, but a gong
has a very long release.After the strike of the gong, the sound carries on for many seconds
before fading away.
18
 Loading...