

Clavitech RP8810 Owner's Manual

Precaution
Thank you for purchasing this digital instrument.For perfect operation and security,please
read the manual carefully and keep it for future reference.
Safety Precautions
CAUTION
RISK OF ELECTRIC SHOCK
DO NOT OPEN
The lightning flash with arrowhead symbol within an equilateral triangle is in
tended to alert the user to the presence of uninsulated dangerous voltage¡¡
within the product s enclosure that may be of sufficient magnitude to constitute a
risk of electric shock to persons.
The exclamation point within an equilateral triangle is intended to alert the user
to the presence of important operating and maintenance(servicing) instructions in
the literature accompanying the product.
Important Safety Instructions
1) Read these instructions.
2) Keep these instructions.
3) Heed all warnings.
4) Follow all instructions.
5) Do not use this apparatus near water.
6) Clean only with dry cloth.
7) Do not block any ventilation openings, install in accordance with the manufacturer s instructions.
8) Do not install near any heat sources such as radiators, heat registers, stoves, or other apparatus (including
amplifiers) that produce heat.
9) Do not defeat the safety purpose of the polarized or grounding-type plug. A polarized plug has two blades
with one wider than the other. A grounding type plug has two blades and a third grounding prong. The wide blade
or the third prong are provided for your safety, if the provided plug does not fit into your outlet, consult an
electrician for replacement of the obsolete outlet.
10) Protect the power cord from being walked on or pinched particularly at plugs, convenience receptacles, and
the point where they exit from the apparatus.
11) Only use attachments/accessories specified by the manufacturer.
12) Use only with the cart, stand, tripod, bracket, or table specified by the manufacturer, or sold with the
apparatus. When a cart is used, use caution when moving the cart/apparatus combination to avoid injury from
tip-over (Figure 1).
13) Unplug this apparatus during lightning storms or when unused for a long periods fo time.
14) Refer all servicing to qualified service personnel. Servicing is required when the apparatus has been dam
aged in any way, such as power-supply cord or plug is damaged, liquid has been spilled or objects have fallen
into the apparatus, the apparatus has been exposed to rain or moisture, does not operate normally, or has been
dropped.
¡
(Figure 1)
¡
WARNING: To reduce the risk of fire or electric shock, do not expose this apparatus to rain or moisture.
CAUTION: Apparatus shall not be exposed to dripping or splashing and no objects filled with liquids, such
as vases, shall be placed on the apparatus.

Thank you for choosing our Digital Piano
Your digital piano is a high-quality digital piano with 88 standard
touch sensitivity keyboard and combines the most advanced PCM
tone generation technology. This digital piano lets you record your
performances. We recommend that you read through this owner's
manual carefully, so you can get the most performance and enjoy-
ment from your new piano.

Contents
Panel Control
Connection
Using Line Out Jacks
Using Midi In/Out Jacks
Using Headphones
USB-MIDI/USB AUDIO
Using Foot Pedals
DC IN
Basic Operation
Power Switch
Adjusting the Volume
Demo Play
Voices
Function
.............................................
Selecting a Voice
Dual Button
Split Button
Sustain Mode
Harmony Button
Full Keyb. Button
Twin Button
Touch Button
Tempo Button
Effect Button
............................................
Dual
Dual Voice
............................................
OTS
Split and Chord Point
............................................
Local
Transpose
............................................
Tune
..............................................
Pan
................................
....................................
.......................
........................
.........................................
............................
..............................
...................................
..........................
.................................
...................................
............................
............................
.........................
..................................
..................................
..............................
.................................
........................................
...................................
....................................
....................
...............
.............
...................
...................
2
4
4
4
5
5
6
6
7
7
7
7
8
8
8
8
10
10
11
11
12
12
13
14
15
16
16
17
18
18
19
20
Octave
Volume
Reverb
Chorus
Reverb and Chorus Depth
MIDI In
MIDI Main/Left/Dual
Auto Accompaniment
Selecting a Style
Starting a Style
Chord Button
Synchro Button
Intro/Ending Button
Fill In Button
Adjusting the Accompaniment Volume
....................................................
Metronome Button
Registration Memory
Memory
Recording
Record
Listening to your Recording
Clear
Factory Set
Appendix
Auto Accompaniment Fingering
Percussion Voice List
Voice List
Style List
MIDI Implementation Chart
Specifications
Assembly Instructions
........................................
........................................
........................................
........................................
........................................
...........................................
............
......................................
..................
...................
..........................
............................
...............................
............................
.....................
...............................
.......................
.....................
.......................................
.....................................
.........
...................................
......................................
.....
...................
....................................
....................................
.........
..............................
..................
21
21
22
23
23
24
25
26
26
27
27
28
28
29
30
30
32
32
33
33
34
34
35
36
36
38
39
42
44
45
46
1

Panel Control
MASTER VOLUME
MIN MAX
CHOR
D
SYNCHR
O
IN
TRO/
ENDING
START/
STOP
FILLIN 1
FILLIN 2
METRONOME
D
UAL
DATAC
ONTROL
ACC.VOL
TEMPO
TOUCH
SUSTAIN
EFFECT
DEMO
SPLIT
HARMONY
FULL
KEYB.
FUNCTION
TWIN
SPLIT
HARM
ONY
FULLKEYB.
TWIN
E
NTER
MASTER V
OLUME
MIN MAX
CHORD
SYNCHRO
INTRO/
ENDING
STAR
T/
STOP
FILLIN 1
FILLIN 2
METRONOME
DUAL
TWIN
-
+
GUITAR
DANC
E
PIANO
8 BEAT
ORGAN
BALLAD
BASS
DISCO
ENSEMBLE
SWING&
JAZZ
BRASS
R&B
LEAD
COUNTRY
SYNTH
LATIN
EFFECT
BALLROOM
PERC.
WALTZ
VOICE
STYLE
STORE
M1
M2
M3
RECORD/PLAY
ME
LODY2
ME
LODY1
AC
COMP.
DA
TACONTROL
-
+
GUITAR/
DANCE
PIANO/
8 BEAT
ORGAN/
BALLAD
BASS/
DISCO
ENSEMBLE/
SWING&JAZZ
BRASS/
R&B
LEAD/
COUNTRY
SYNTH/
LATIN
EFFECT/
BALLROOM
PERC./
WALTZ
VOICE/
STYLE
STORE
M1
M2
M3
RECORD/PLA
Y
MELODY2MELOD
Y1
ACCOMP.
D
i
g
i
ta
l
U
prig
h
t P
ia
n
o
DC 12V
LINE OUT
LINE IN
38
37
39
29
28
27
25
24
ENSEMBLE/
SWING&JAZZ
BASS/
DISCO
DANCE
GUITAR/
BALLAD
ORGAN/
8 BEAT
PIANO/
STYLE
VOICE/
26
PERC./
EFFECT/
SYNTH/
LEAD/
BRASS/
ACCOMP.
RECORD/PLAY
WALTZ
BALLROOM
LATIN
COUNTRY
R&B
32
31
30
o
n
ia
t P
h
rig
p
l U
ita
ig
D
2
MELODY
1
MELODY
.
ACCOMP
RECORD/PLAY
PERC.
WALTZ
ENSEMBLE
SWING&JAZZ
BASS
DISCO
EFFECT
BALLROOM
LATIN
SYNTH
DANCE
GUITAR
LEAD
ORGAN
BALLAD
COUNTRY
R&B
PIANO
8 BEAT
BRASS
VOICE
STYLE
36
DC12V
LINEOUT
LINEIN
USB
PEDAL
MIDIIN
MIDIOUT
USB
PEDAL
MIDI IN
MIDI OUT
34
33
35
20
19
18
17
9
8
7
6
5
4
FUNCTION
FULLKEYB.
HARMONY
SPLIT
DEMO
EFFECT
SUSTAIN
TOUCH
TEMPO
ACC.VOL
MASTER VOLUME
3
ENTER
23
22
21
16
METRONOME
15
14
STOP
START/
13
INTRO/
12
ENDING
11
SYNCHRO
10
MASTER VOLUME
DUAL
HARMONY
SPLIT
EFFECT
FILLIN 1
STOP
START/
INTRO/
ENDING
PHONES 1
PHONES 2
40
2

Panel Control
Top Panel
1. Power On/Off
2. MASTER VOLUME
3. LCD DISPLAY
4. [ ACC.VO L ] Button
5. [ TEMPO] Button
6. [ TOUCH] Button
7. [SUSTAIN] Button
8. [ EFFECT] Button
9. [ DEMO] Button
10. [CHORD] Button
11. [SYNCHRO] Button
12. [INTRO/ENDING] Button
13. [START/STOP] Button
14. [FILL IN 1] Button
23.[ENTER] Button
24. [DATA CONTROL] Knob
25. [+/-] Buttons
26. [VOICE/STYLE] Button
27. VOICE and STYLE SELECT
28. [STORE] Button
29. [M1-M3] Buttons
30. [RECORD/PLAY] Button
31. [ACCOMP.] Button
32. [MELODY 1] Button
[MELODY 2] Button
Rear Panel
33. MIDI OUT Jack
34. MIDI IN Jack
15. [FILL IN 2] Button
16. [METRONOME] Button
17. [SPLIT] Button
18. [HARMONY] Button
19. [FULL KEYB.] Button
20. [FUNCTION] Button
21. [DUAL] Button
22. [TWIN] Button
35. PEDAL Jack
36. USB-MIDI Jack
37. LINE IN Jack
38. LINE OUT Jack
39. DC 12V Jack
40. PHONES Jack
3

Connection
Using Line In/Out Jacks
The audio output from other sound system connected to the LINE IN jack on the
rear panel can be mixed with the sound of the unit. This function is convenient
when you want to play along with a favourite song.
LINE IN
Stereo
System
The LINE OUT jack can be used to deliver the output of the piano to a keyboard
amplifier, stereo sound system, mixing console or tape recorder.
LINE OUT
Stereo
System
Using Midi In/Out Jacks
MIDI (Musical Instrument Digital Interface) is a world-standard communication interface which allows electronic musical instruments to communicate with
each other by sending and receiving compatible note, program change and other
types of MIDI data.
MIDI IN MIDI OUT
MIDI OUT MIDI IN
4
NOTE
USB
MIDI IN Receives MIDI data from another MIDI device.
MIDI OUT Transmits MIDI data to another MIDI device.
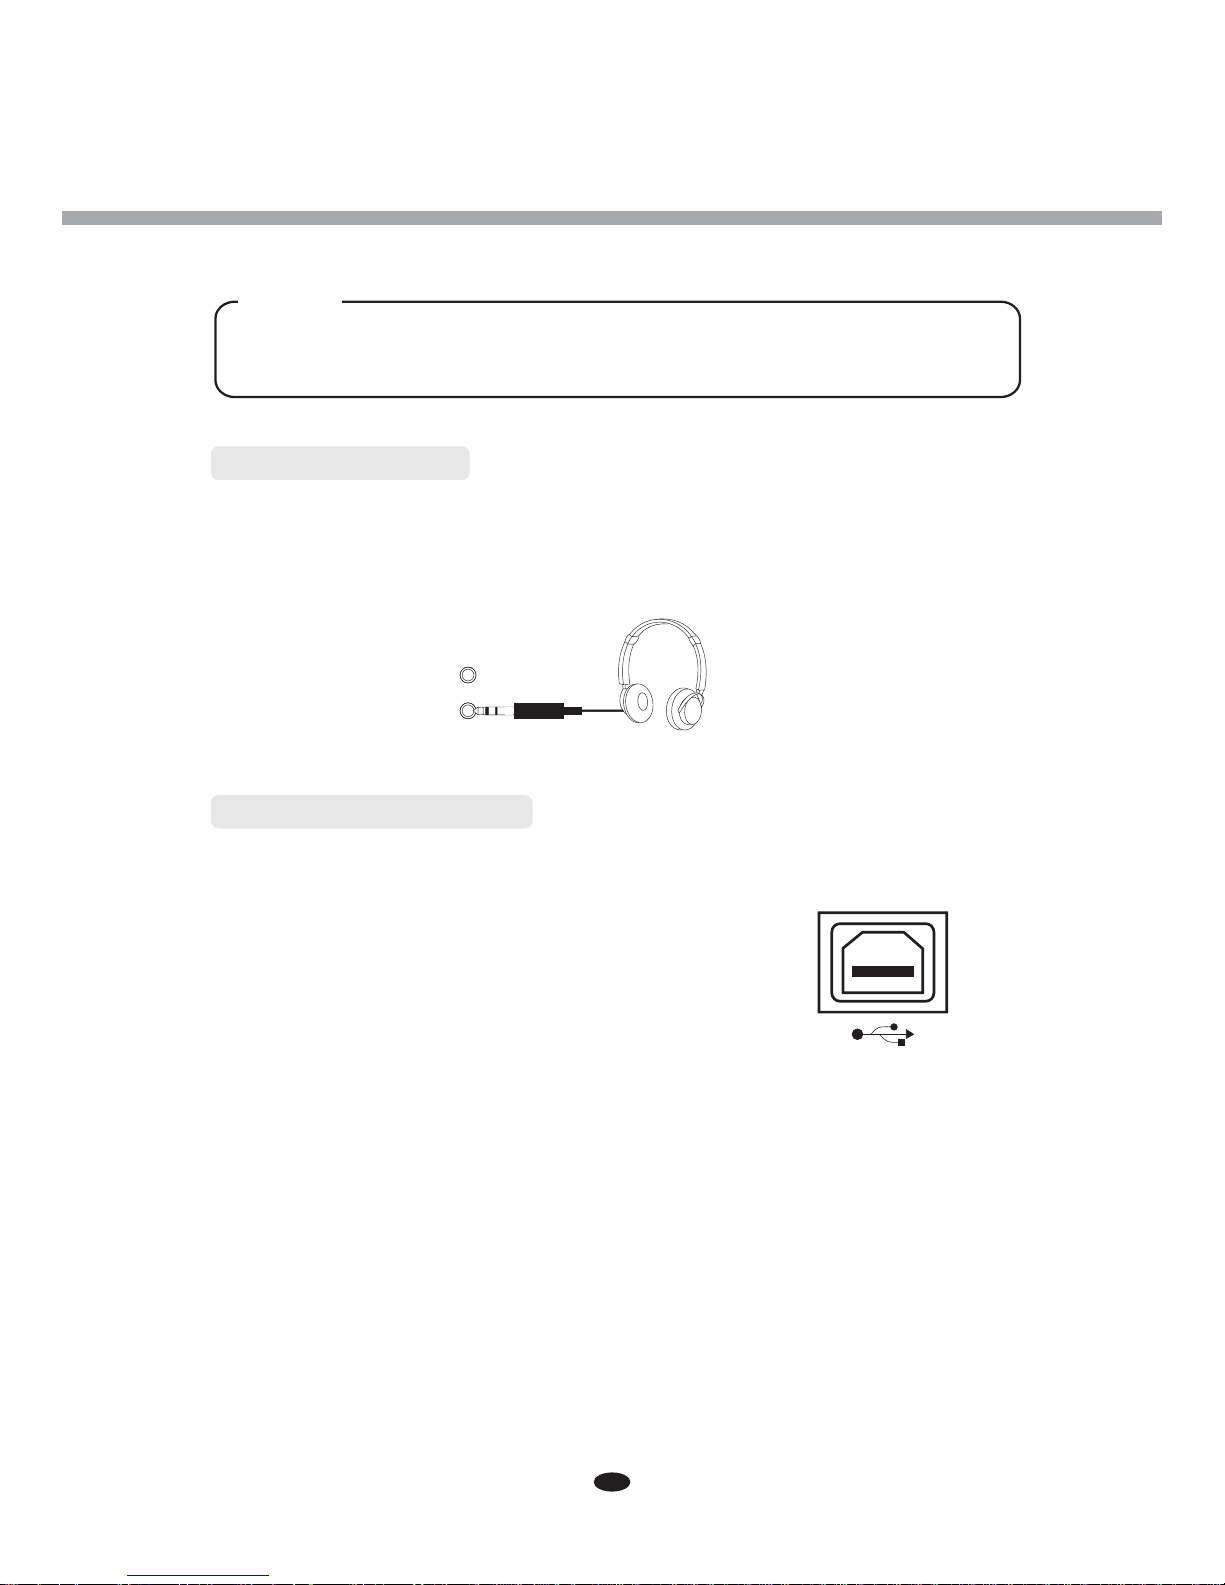
Using Headphones
Two sets of standard stereo headphones can be plugged in here for private
practice or late-night playing. The internal speaker system is automatically shut
off when a pair of headphones is plugged into PHONES jacks.
PHONES 2
PHONES 1
USB-MIDI/USB AUDIO
This product allows the transfer of MIDI information over USB.
There is a specific way in which the MIDI information are
routed for maximum flexibility. In a standard Digital
Piano, the built-in keyboard sends MIDI information to
the internal sound bank as well as the 5-pin MIDI output.
In this digital piano, the keyboard not noly sends MIDI
information to the internal sound bank (just like normal)
but also sends MIDI information simultaneously to the
internal MIDI connection which hooks up inside the
device to the Audio Interface.
USB AUDIO interface is a digital audio interface. By USB cable, you can digitally
transfer intact audio signals of PC to this instrument, and enjoy it on this instrument
or use it for accompanywhen you play this instrument; likewise, you can transfer
intact audio signals of the instrument to PC to record and edit music.
5
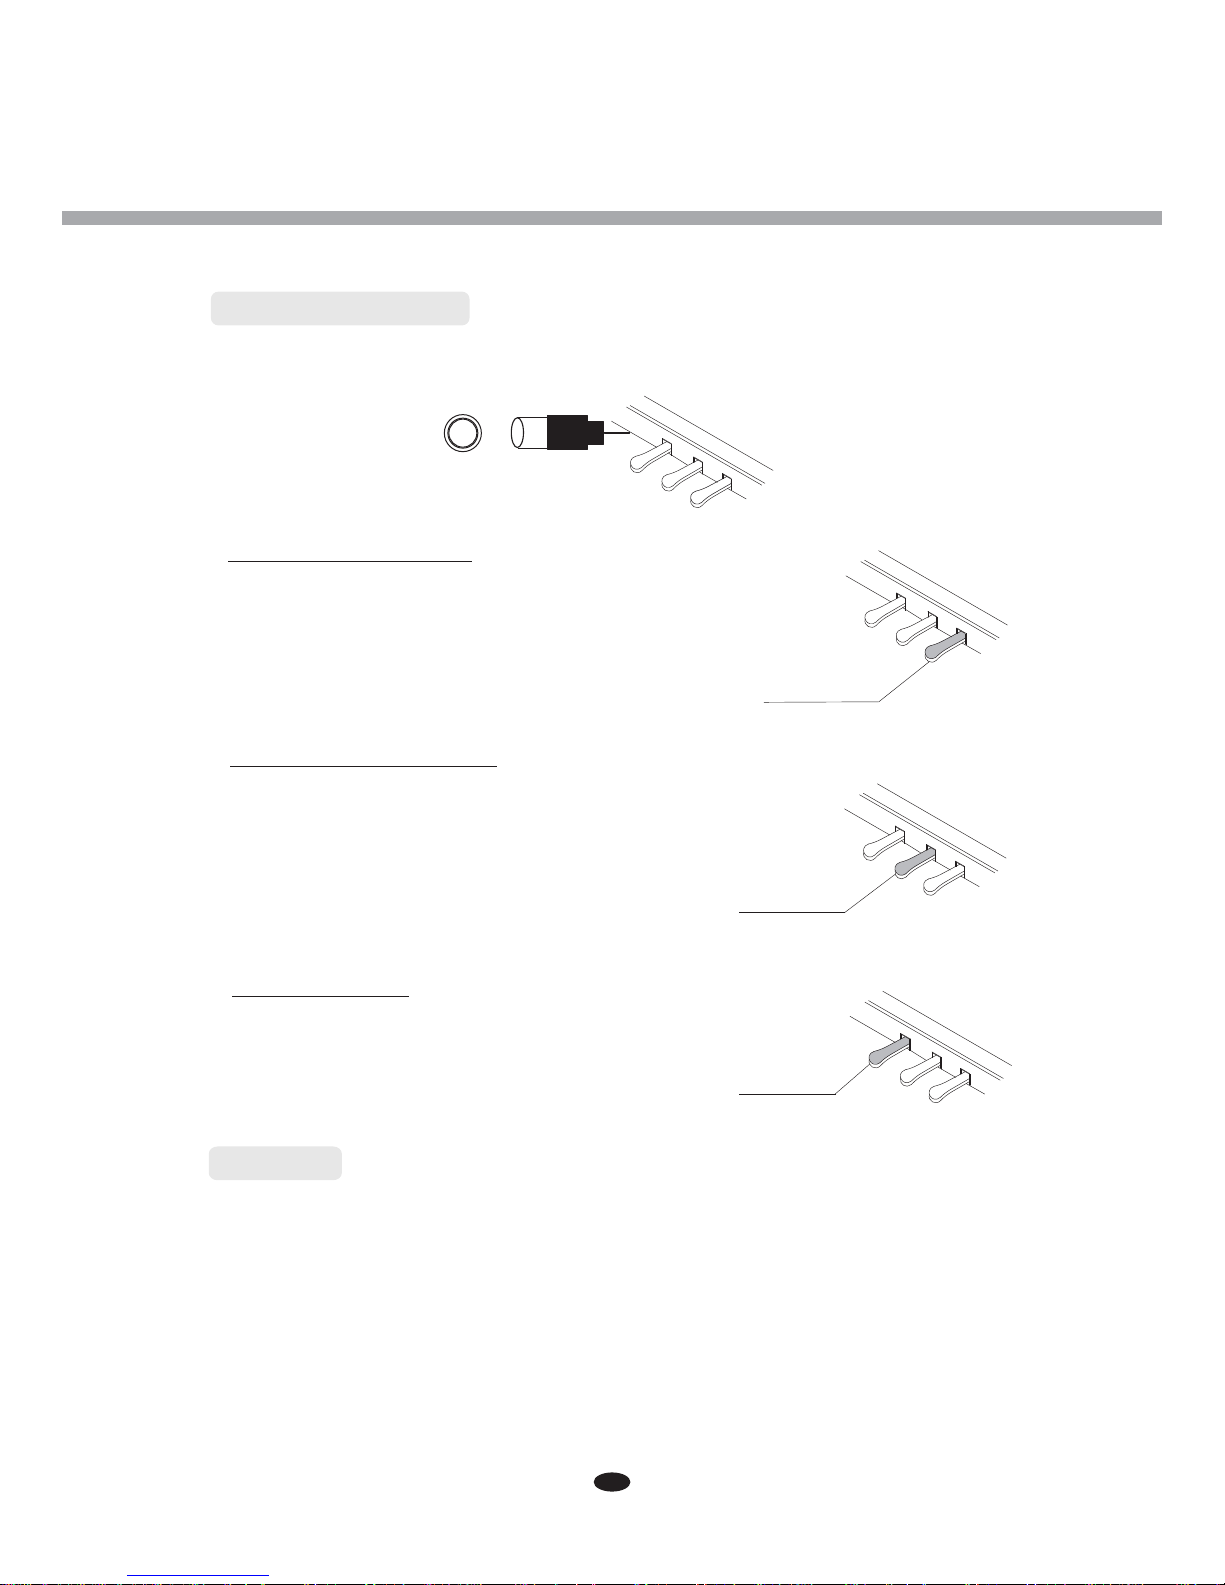
Using Foot Pedals
Connect the plug of the foot pedal unit to the PEDAL jack on the rear panel.
Damper Pedal (Right)
It performs the same function as the damper pedal
on an actual acoustic piano, letting you sustain the
sound of the voices even after releasing your fingers
from the keys.
Sostenuto Pedal (Center)
If you play a note or chord on the keyboard and press
the sostenuto pedal while the notes are held, those
notes will be sustained as long as the pedal is held,
but all subsequently played notes will not be
sustained.
SUSTAIN
SOSTENUTO
Soft Pedal (Left)
The Soft Pedal controls the sound volume. Press the
pedal to decrease the output sound volume.
DC IN
Plug the DC output cable from the power adapter into DC IN jack in the rear panel
of your instrument, then plug the AC cable of your power adapter into a convenient
wall AC power socket.
SOFT
6
MAST ER VOL UME
MIN MAX
SPLIT
HARMONY
FULL KEYB.
TWIN
Basic Operation
SPLIT
HARMONY
FULL KEYB.
TWIN
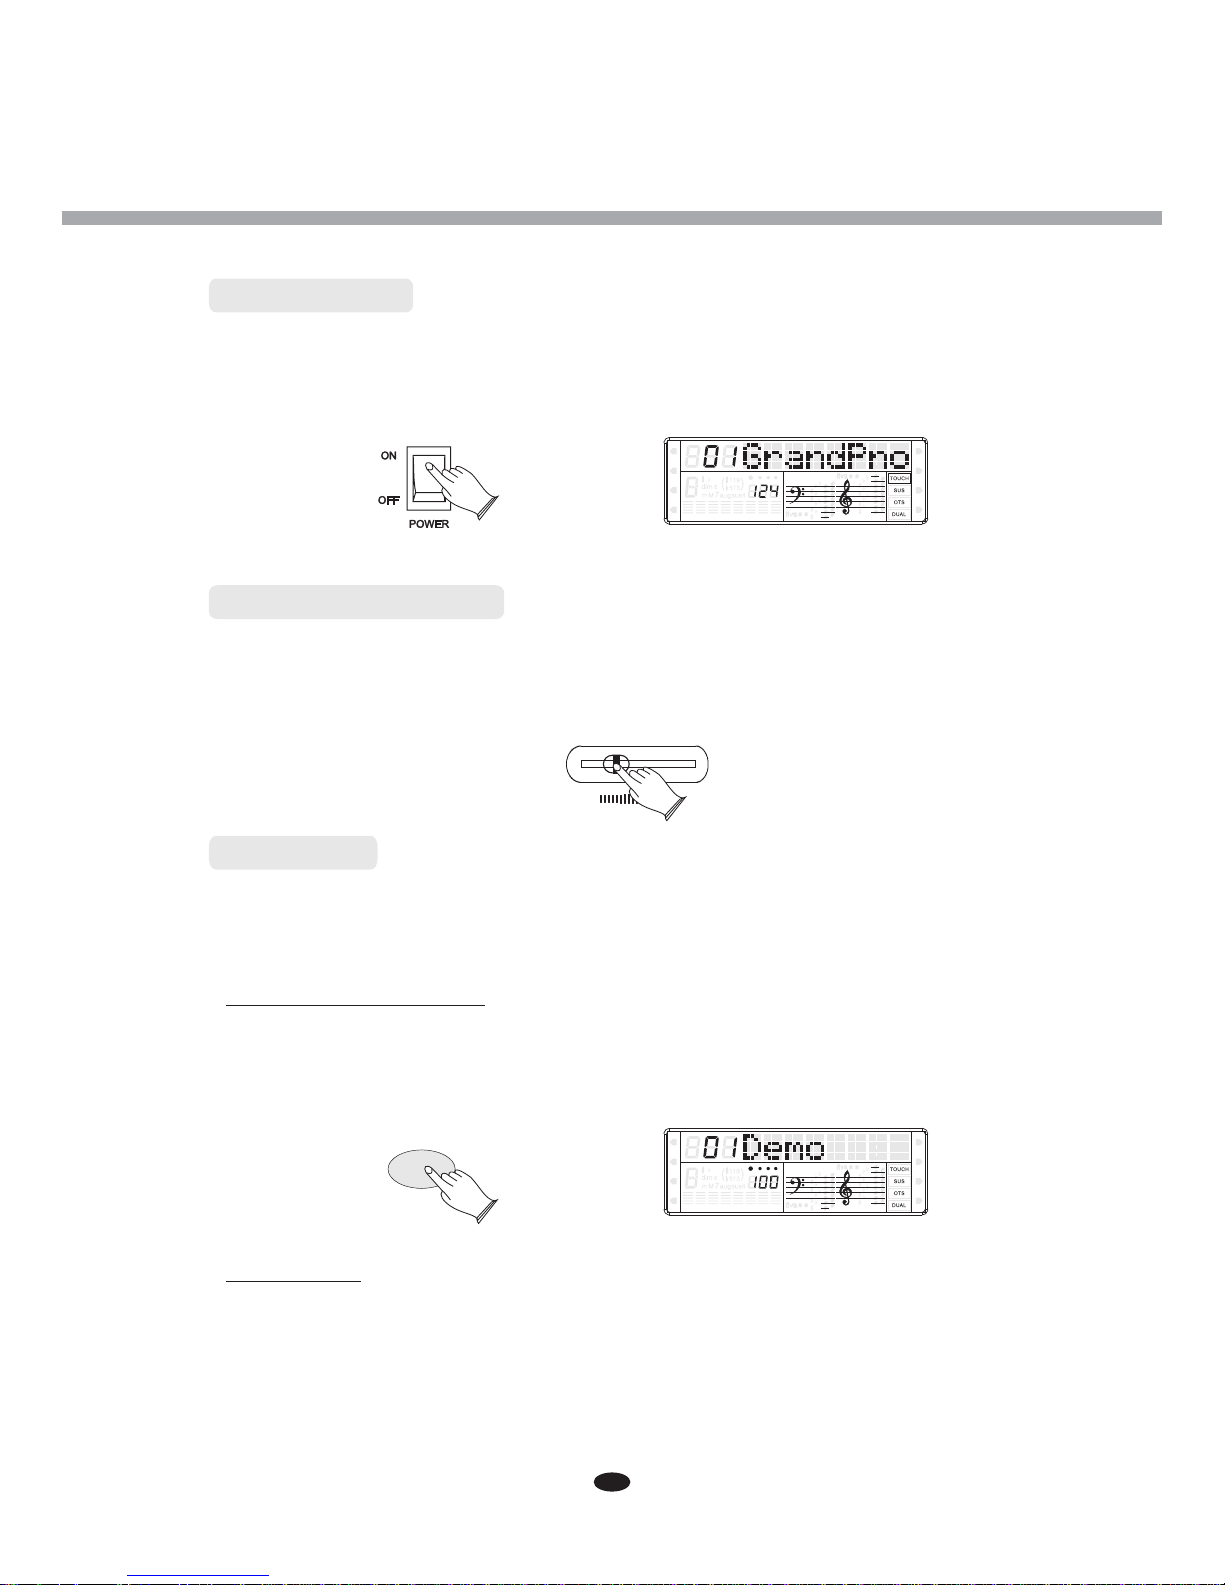
Power Switch
Turn on the power by pressing the POWER switch before playing, the panel LCD
display will light.
R2HY
R1HY
Adjusting the Volume
Initially set the [MASTER VOLUME] at the middle between the"MIN" and
"MAX" . You can adjust the volume to accommodate your playing.
BASS C 1RD C 2RD
P1HR P 2HR
PAD
Demo Play
There are 10 demo songs that you can play individually. Here's how you can
select and play the demo songs.
Listen to the Demo Song
Press [DEMO] button to Play the demo songs in sequence. Use [+] and [-] buttons
or [DATA CONTROL] knob to select the number of the song you want to play.
DEMO
Stop Playing
Press [DEMO] button again to stop playing.
R2HY
R1HY
BASS C 1RD C 2RD
P1HR P 2HR
PAD
7
Voices
SPLIT
HARMONY
FULL KEYB.
TWIN
SPLIT
HARMONY
FULL KEYB.
TWIN
SPLIT
HARMONY
FULL KEYB.
TWIN
VOICE/
STYLE
-
+
GUITAR/
DANCE
PIANO
8 BEAT
ORGAN
BALLAD
BASS
DISCO
ENSEMBLE
SWING&JAZZ
BRASS
R&B
LEAD
COUNTRY
SYNTH
LATIN
EFFECT
BALLROOM
PERC.
WALTZ
VOICE
STYLE
DATACONTROL
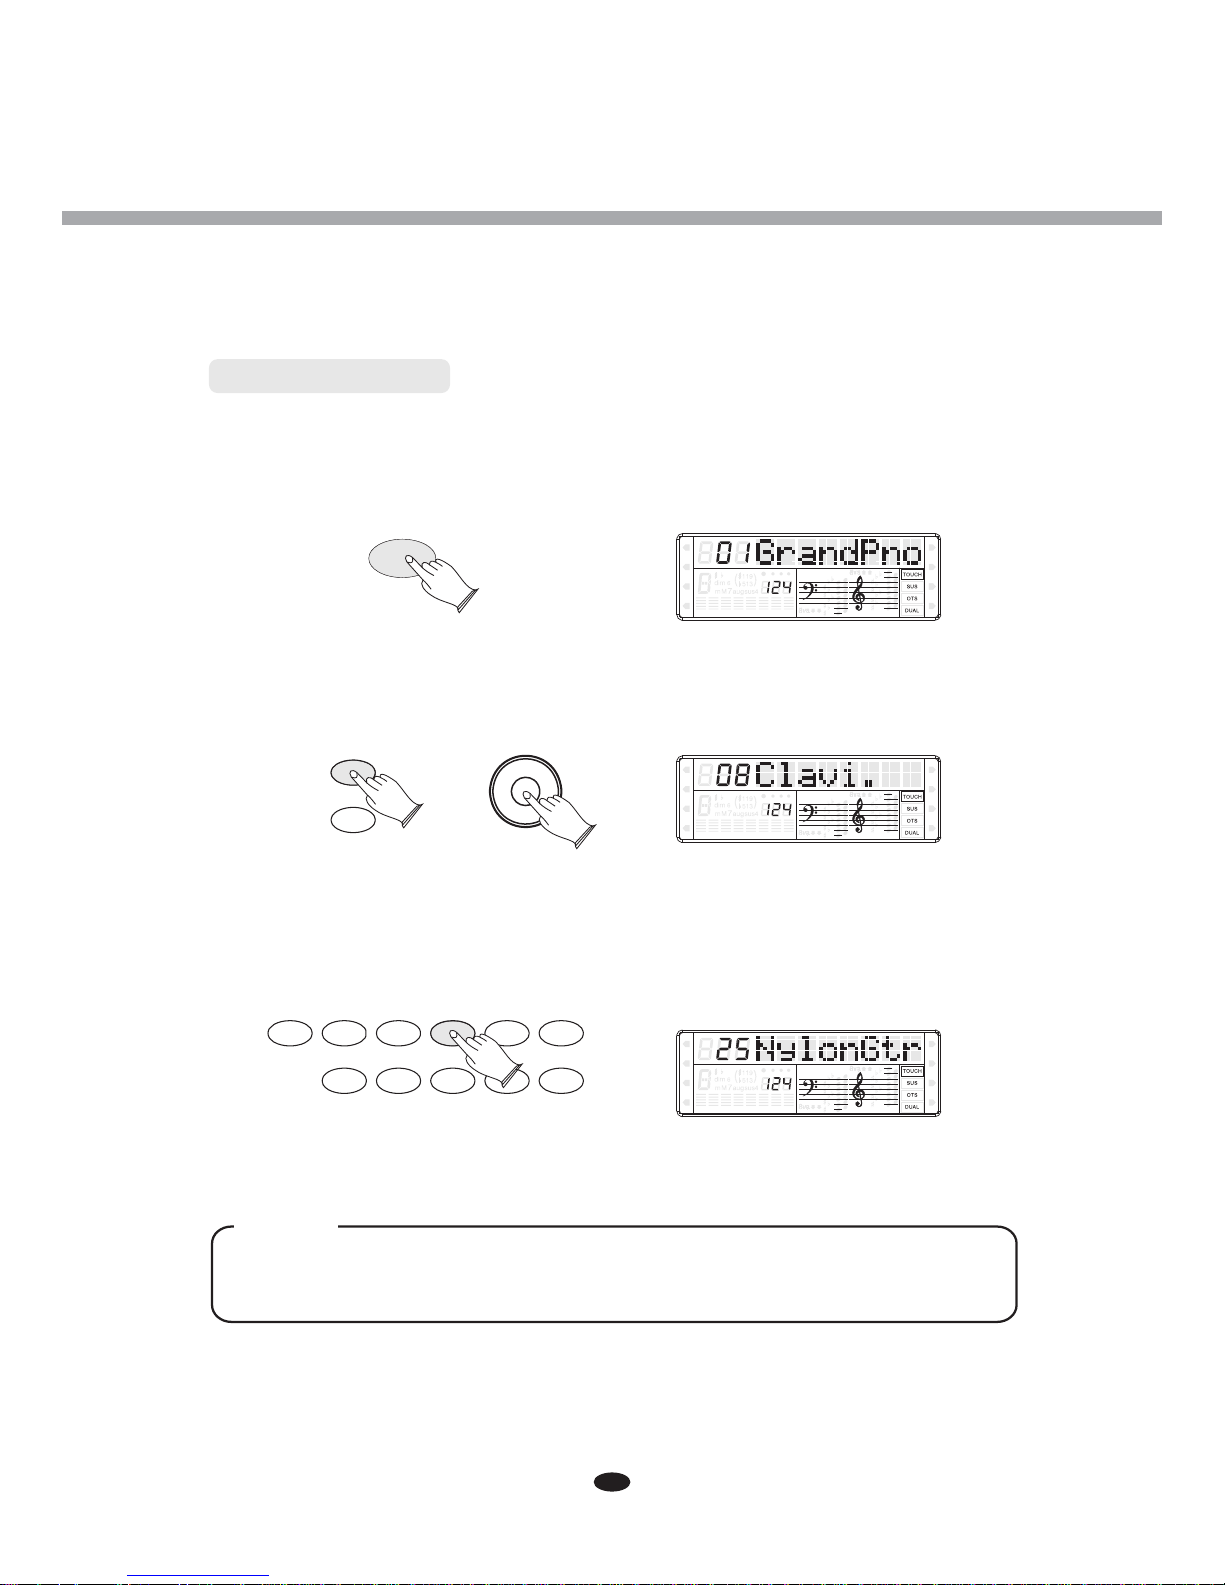
Your instrument has 459 voices,include 128(01-128) GM standard voices.
Selecting a Voice
Press [VOICE/STYLE] button, the button is unlighted, the voice mode is selected
and the current voice number and the name will display on the LCD Display section.
VOICE/
STYLE
Use [+] and [-] buttons or [DATA CONTROL] knob to select the desired voice
according to the voice list.
DATACONTROL
R2HY
R1HY
R2HY
R1HY
BASS C 1RD C 2RD
BASS C 1RD C 2RD
P1HR P 2HR
PAD
P1HR P 2HR
PAD
When [VOICE/STYLE] button is unlighted, you can use the Direct Select Button to
select a voice.
VOICE
STYLE
PIANO
8 BEAT
BRASS
R&B
ORGAN
BALLAD
LEAD
COUNTRY
GUITAR/
DANCE
SYNTH
LATIN
BASS
DISCO
EFFECT
BALLROOM
ENSEMBLE
SWING&JAZZ
PERC.
WALTZ
R2HY
R1HY
BASS C 1RD C 2RD
P1HR P 2HR
PAD
NOTE
The name above the Direct Select Button is the voice name.
8

Voices
DUAL
SPLIT
HARMONY
FULL KEYB.
TWIN
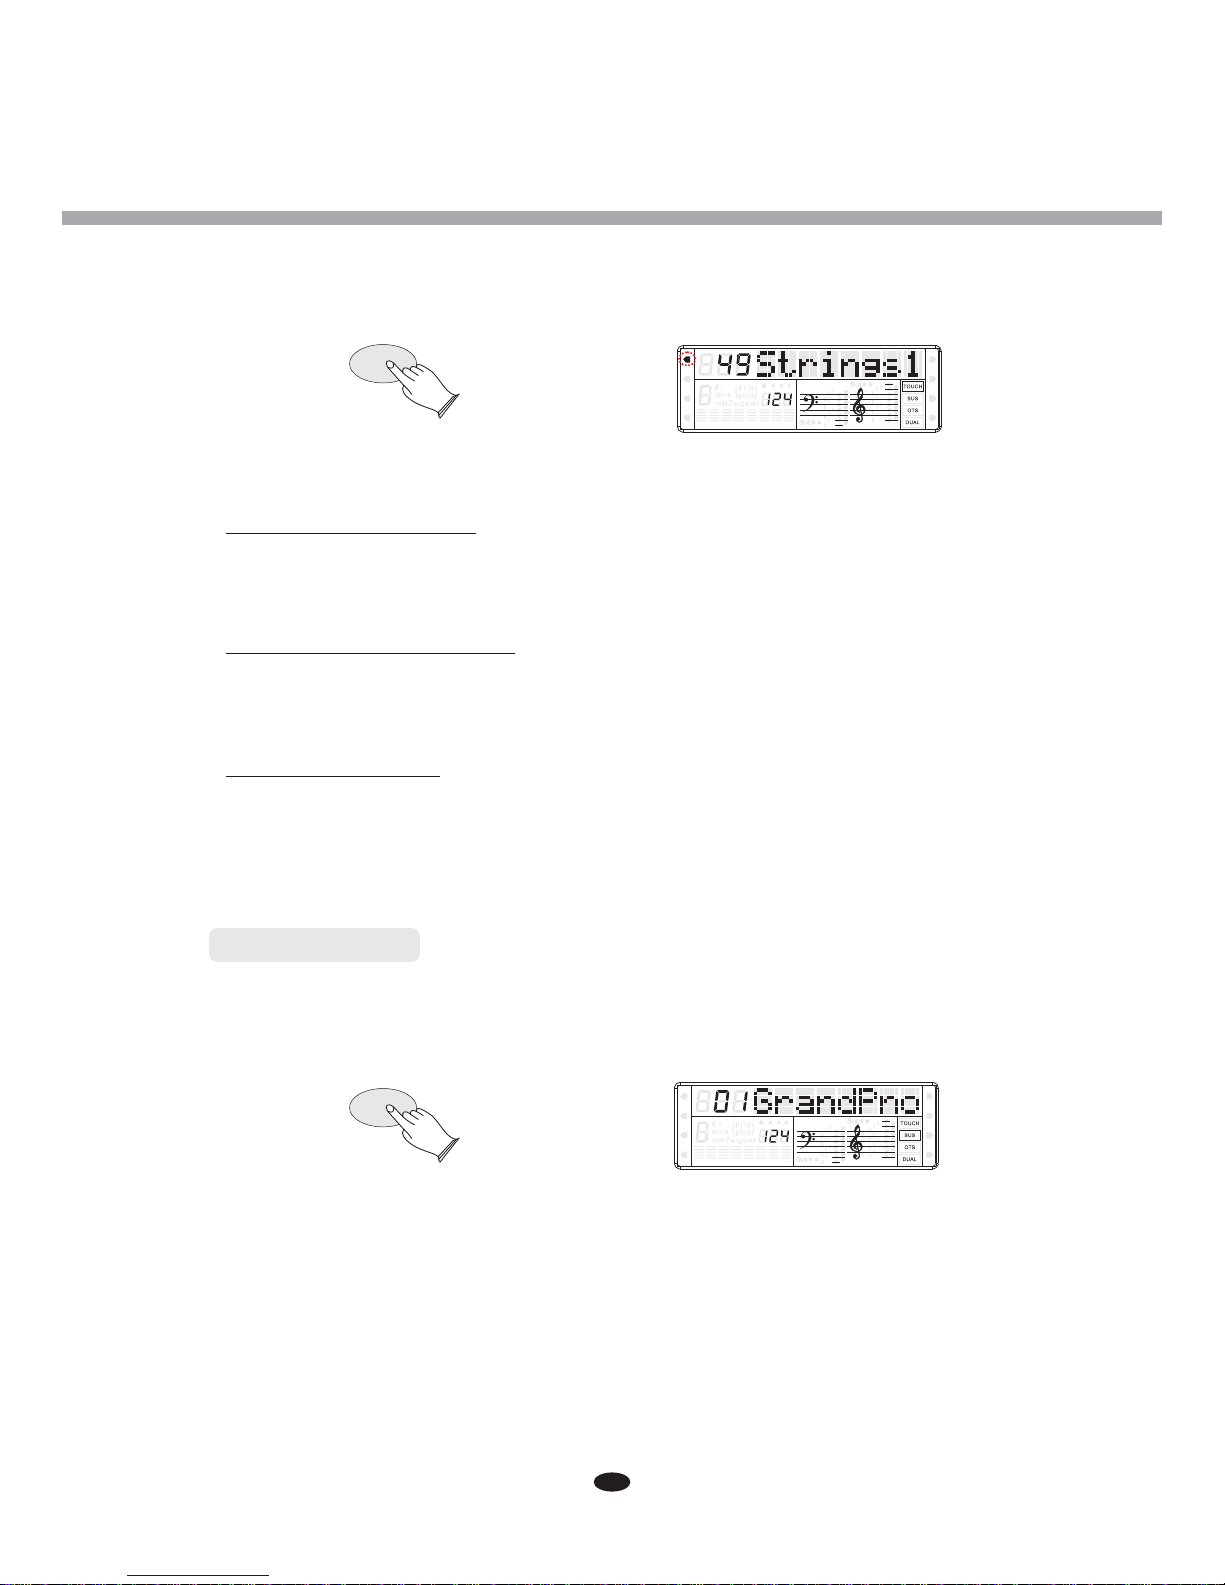
Dual Button
Press [DUAL] button to select layer voice mode, two voices will sound
simultaneously when you play keyboards.
Select Dual Voice
Press [DUAL] button and Dual Cursor will flash, use [+] and [-] buttons or [DATA
CONTROL] knob to select the second voice. If you don' t choose the second
voice within 4 seconds, the LCD Display will go back to the first voice mode.
Set the Dual Voice Volume
R2HY
R1HY
BASS C 1RD C 2RD
P1HR P 2HR
PAD
Reference: Volume(P.21).
Exit the Dual Mode
Press [DUAL] again, the Dual Cursor will turn off and the Dual mode will be
inactive.
Split Button
Press [SPLIT] button to select split mode, then your keyboard will be split into two
sections which means different voices can be played with the left and right hands
at the same time.
Select Split Voice
Press [SPLIT] button, the Split cursor will flash, and the split voice will appear
in the message display for 4 seconds, and use [+] and [-] buttons or [DATA
CONTROL] knob to select the left voice.
9
SPLIT
Voices
SPLIT
HARMONY
FULL KEYB.
TWIN
SPLIT
HARMONY
FULL KEYB.
TWIN
SUSTAIN
Change the Split Point
Reference: Split and Chord Point(P.17).
Set the Split Voice Volume
Reference: Volume(P.21).
Exit the Split Mode
FULL KEYB.
R2HY
R1HY
P1HR P 2HR
PAD
C1RD C 2RD
BASS
Press [SPLIT] again, the Split Cursor will turn off and the Dual mode will be
inactive.
Sustain Button
Press [SUSTAIN] button, the button will light. It can be used as a damper pedal.
Turn sustain on to sustain notes after the keys are released.
Press [SUSTAIN] button again to turn sustain off.
R2HY
R1HY
BASS C 1RD C 2RD
P1HR P 2HR
PAD
10
Voices
SPLIT
HARMONY
FULL KEYB.
TWIN
HARMONY
FULL KEYB.
SPLIT
HARMONY
FULL KEYB.
TWIN
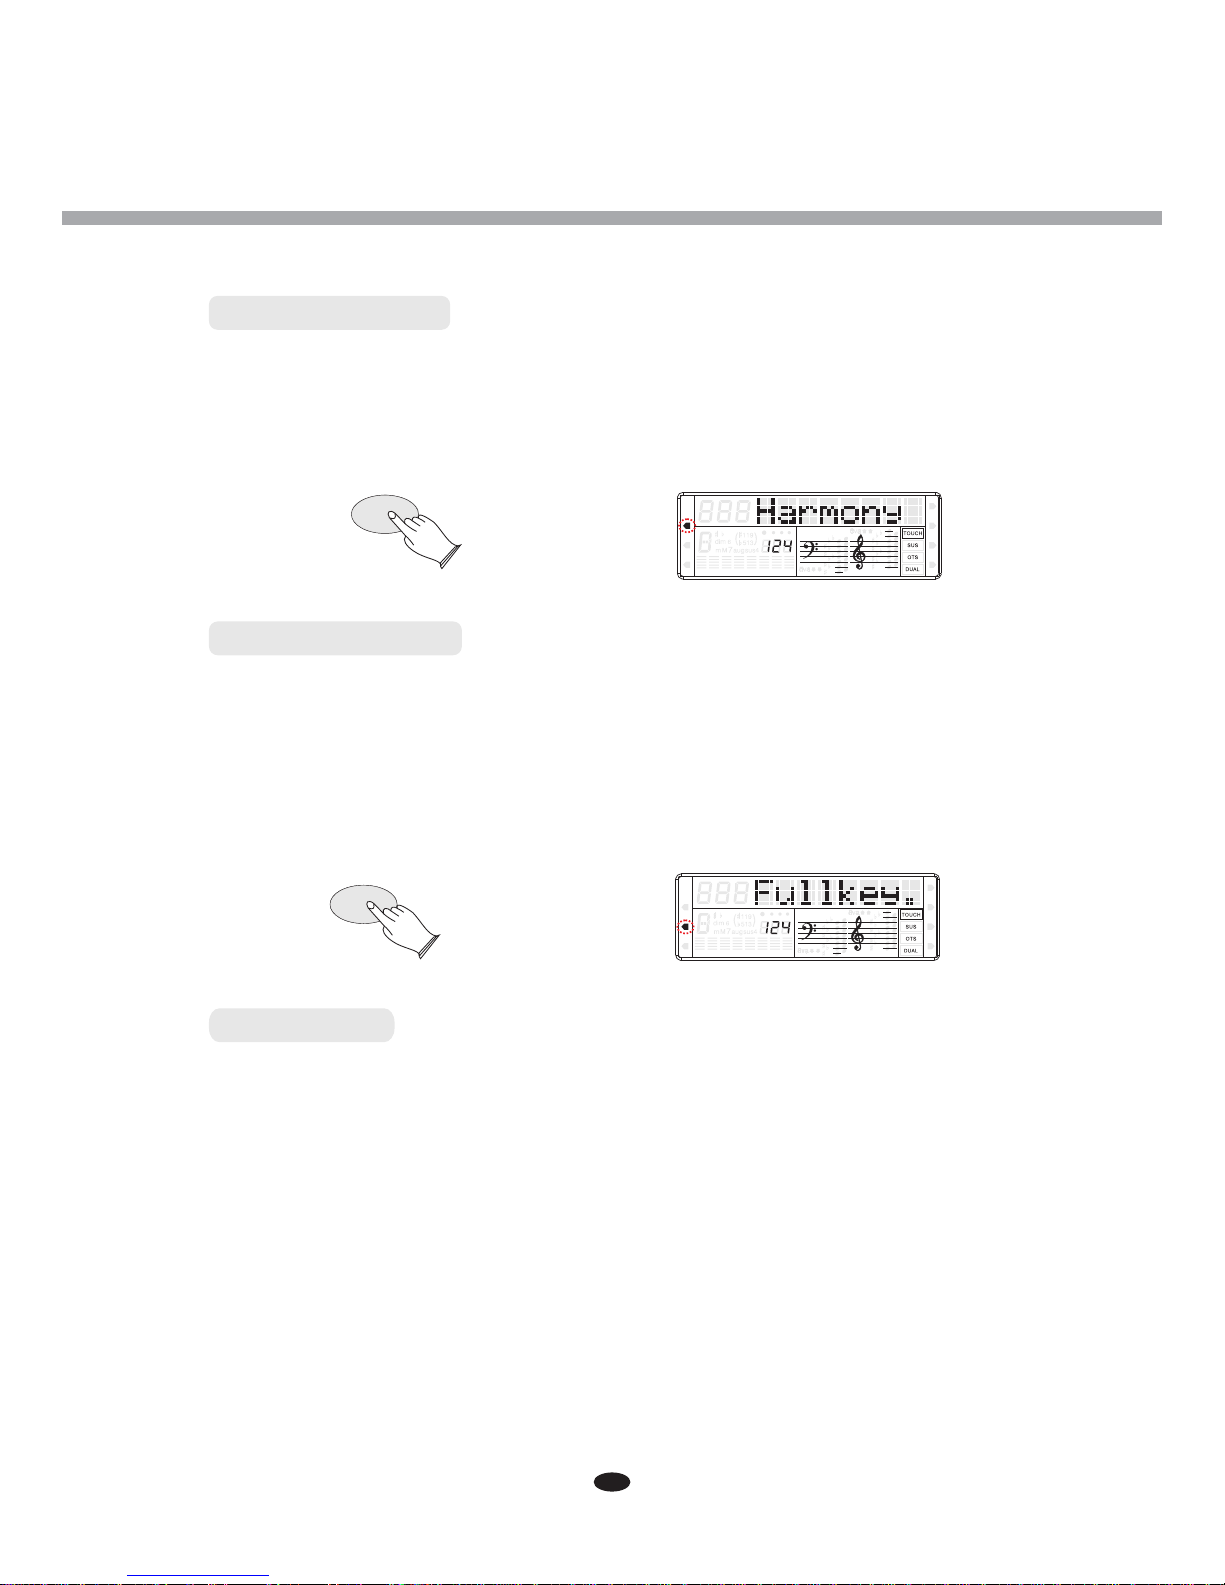
Harmony Button
Press [HARMONY] button to enter Harmony mode, the Harmony cursor onwill light
the display.
The Harmony is derived from the chords you have played if you use Automatic
Accompaniment or turn on the Chord function.
FULL KEYB.
Full Keyb. Button
This feature allows you to play automatic chords in the full length of the keyboard.
Press the button and dedicated arrow will indicate it on the display.
In the Full Keyboard mode, the chords played by the Auto Accompaniment System
will not be displayed on the screen.
Press [FULL KEYB.] button to enter Full Keyboard mode, the Full Keyboard
cursor on the display.will light
R2HY
R1HY
BASS C 1RD C 2RD
P1HR P 2HR
PAD
FULL KEYB.
R2HY
R1HY
BASS C 1RD C 2RD
P1HR P 2HR
PAD
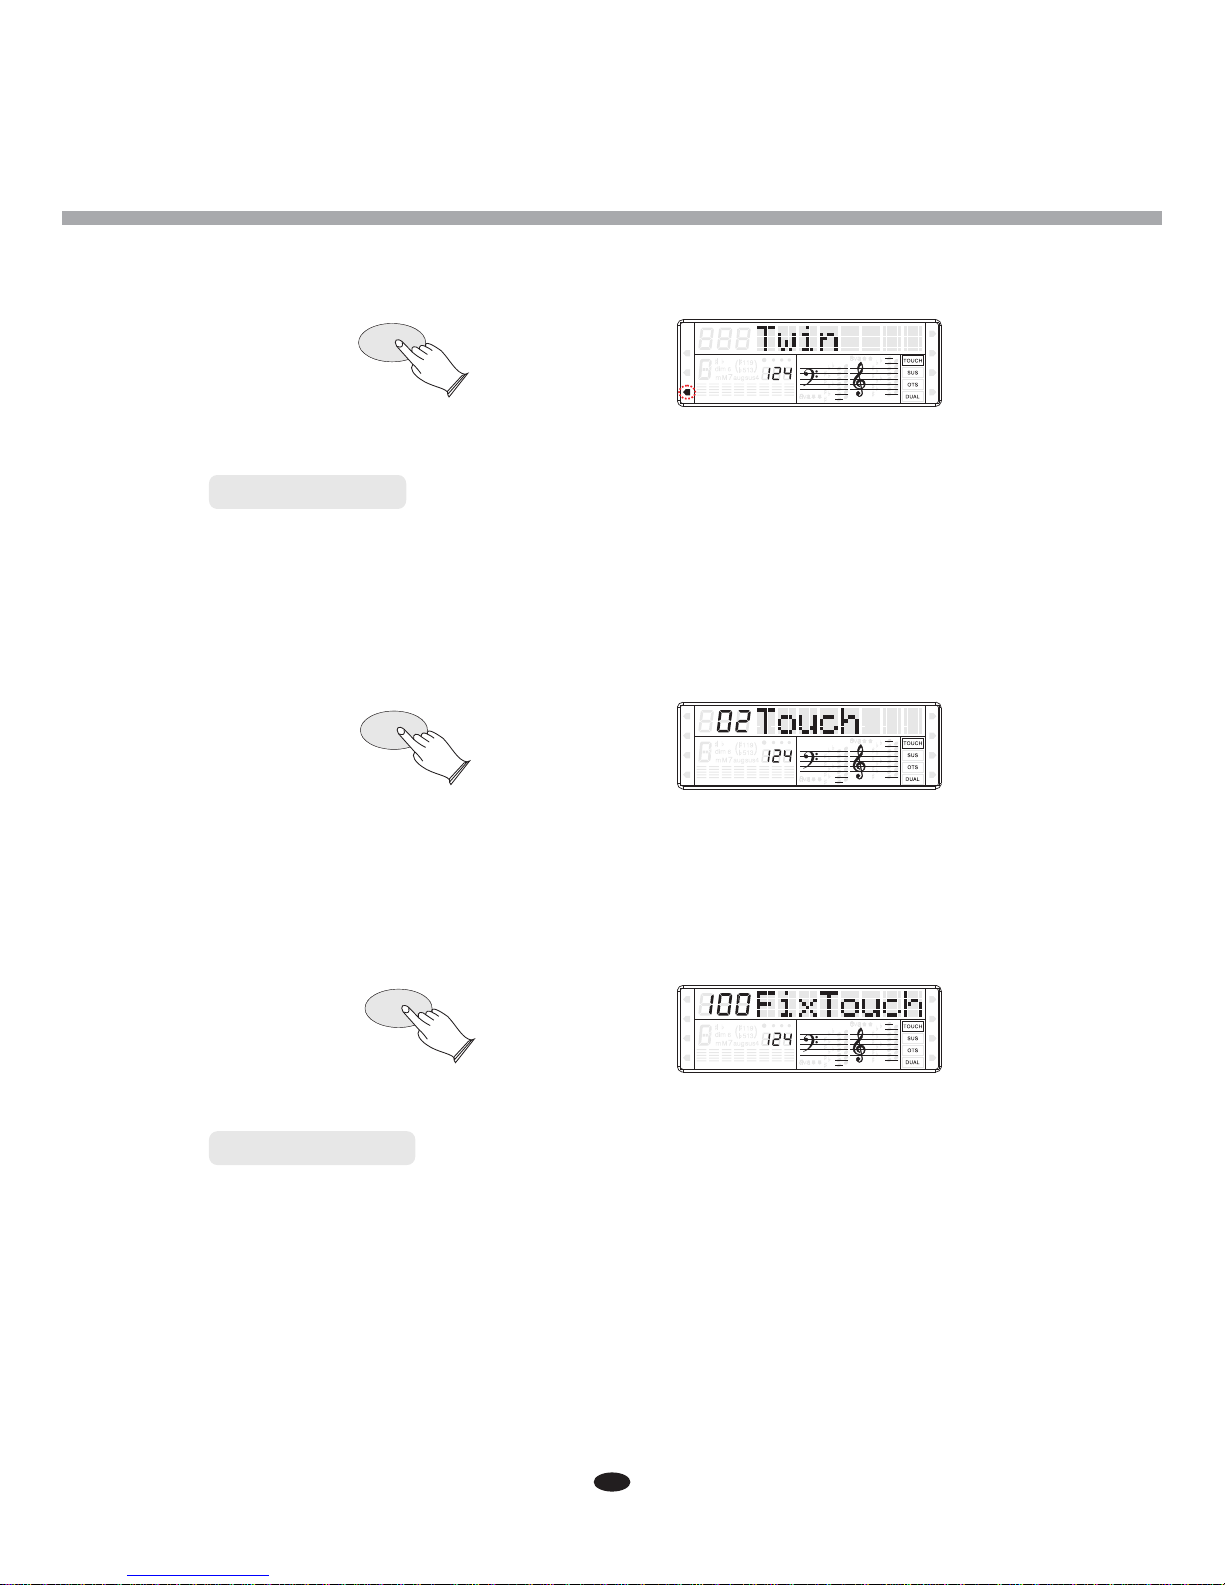
Twin Button
Press [TWIN] button again to enter TWIN mode. In this mode, the keyboard
will be separated into two playing areas.
Right: from C#3 to C7 Left: from A-1 to C3
This will be very helpful when the instrument is used by two players at the same
time (example: Teacher and Student) and they will be able to play the same piano
sound in the same octave.
When the Twin mode is selected, use the optional 3 level pedal and the pedals will
automatically switch in a different configuration where there are 2 Sustain pedals,
one for the left and anther for the right part of the keyboard.
11
Voices
TOUCH
TOUCH
SPLIT
HARMONY
FULL KEYB.
TWIN
SPLIT
HARMONY
FULL KEYB.
TWIN
SPLIT
HARMONY
FULL KEYB.
TWIN
TWIN
FULL KEYB.
Touch Button
The touch function provides 3 different types of keyboard touch sensitivity that
can be selected to match different playing styles.
Press the [TOUCH] button and use [+]and [-] buttons or turn the [DATA CONTROL] knob
to select the touch sensitivity type in the range of 01 to 03. Default:02 Touch.
FULL KEYB.
R2HY
R1HY
R2HY
R1HY
BASS C 1RD C 2RD
BASS C 1RD C 2RD
P1HR P 2HR
PAD
P1HR P 2HR
PAD
When touch is set to off, the same volume is produced no matter how strongly or
softly you play the keyboard. You can press [TOUCH] for a few seconds. LCD will
show this volume value and you can adjust it by [+] or [-] button.
FULL KEYB.
R2HY
R1HY
BASS C 1RD C 2RD
P1HR P 2HR
PAD
Tempo Button
The tempo of style can be adjusted over a range of 20~280 bmp (beats per minute).
Press the [TEMPO] button, then use the [DATA CONTROL] knob or [+] and[-] button to
increase or decrease the value.
12
 Loading...