

ClassCo ML-300ad Owner's Manual
ML-300ad
Jumbo LCD Display
Caller ID on Call Waiting
Name & Number
90 Name & Number Memory
Owner's Manual
Installation and operation instruction
Please read
this manual
carefully
before use.
Keep for
your reference.
DELETE DIAL VM REVIEW DIAL FLASH
MSG NEW
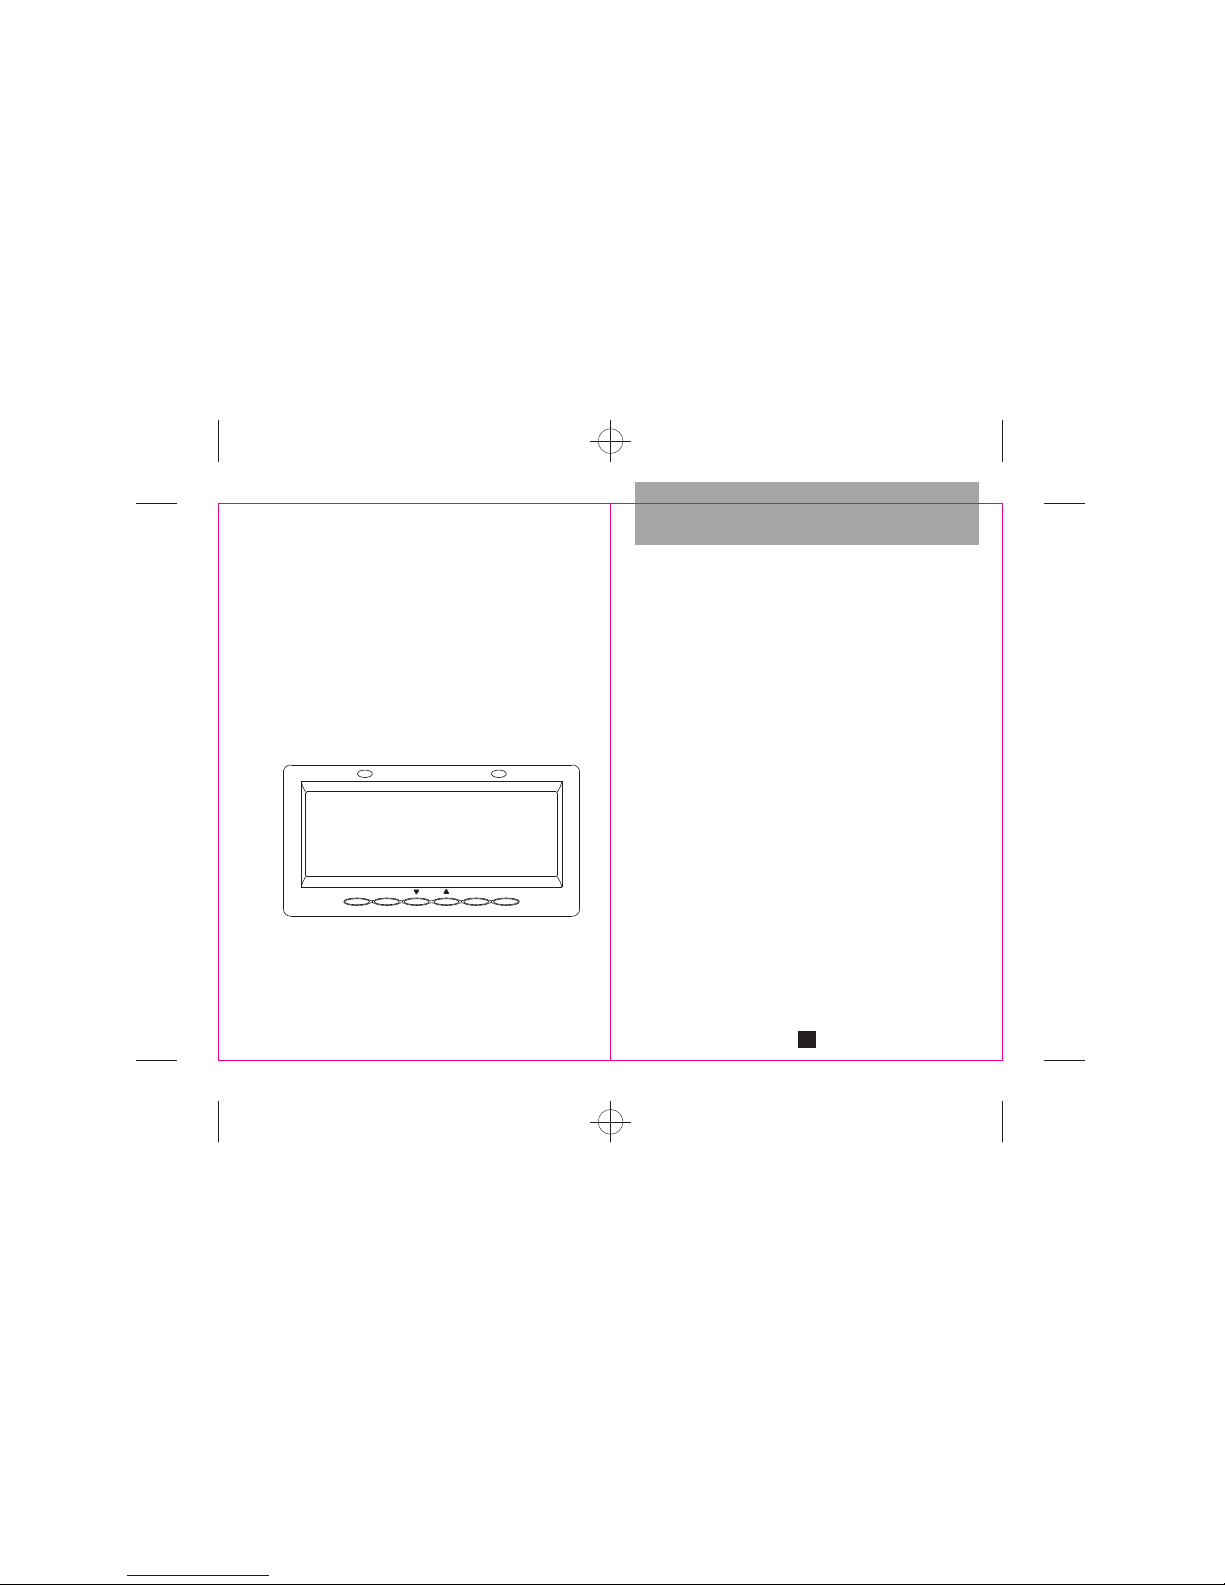
6.5" x 2.25" Large Liquid Crystal
Display - displays three full lines of
information including time of the call.
Caller ID Record* - stores up to 90
Caller ID records each of which up
to 14 digits number and 15
characters name.
Caller ID on Call Waiting** - allows
you to view incoming Caller ID even
when you are on the phone. The
waiting caller's name and number
are shown on the LCD display.
Area Code Setting - sets your local
area code.
New Call Light Indicator (Green
LED)* - lights up steadily when there
is a new call.
Message Waiting Light Indicator
(Red LED)*** - lights up steadily
when there are voice mail messages
in your mailbox.
Review Scrolling - easily scroll
through the Caller ID records.
Dial Button - dials the number
shown on the LCD display.
Delete Button - allows you to delete
one or all Caller ID record.
DIAL VM Button*** - dials to your
voice mail access number.
Languages - English, Spanish or
French display prompts.
Real Time Clock - shows the current
time on the LCD display.
LCD Display Contrast Control -
allows you to adjust the display
contrast.
Wall Mountable - allows you to
mount your ML-300ad on the wall.
Backlit LCD Display
Note:
* You must subscribe to the Caller
ID service from your local
telephone company.
** You must subscribe to the Caller
ID on Call Waiting service from
your local telephone company.
*** Y ou must subscribe to the Voice
Mail service from your local
telephone company to retrieve
voice mail messages.
IMPORTANT :
a) THE AC POWER ADAPTOR (INCLUDED) MUST BE CONNECTED
TO OPERATE ML-300ad.
b) 4 X AAA BATTERIES ARE RECOMMENDED TO BE INSTALLED TO
RETAIN ML-300ad's MEMORY.
Special Features
2
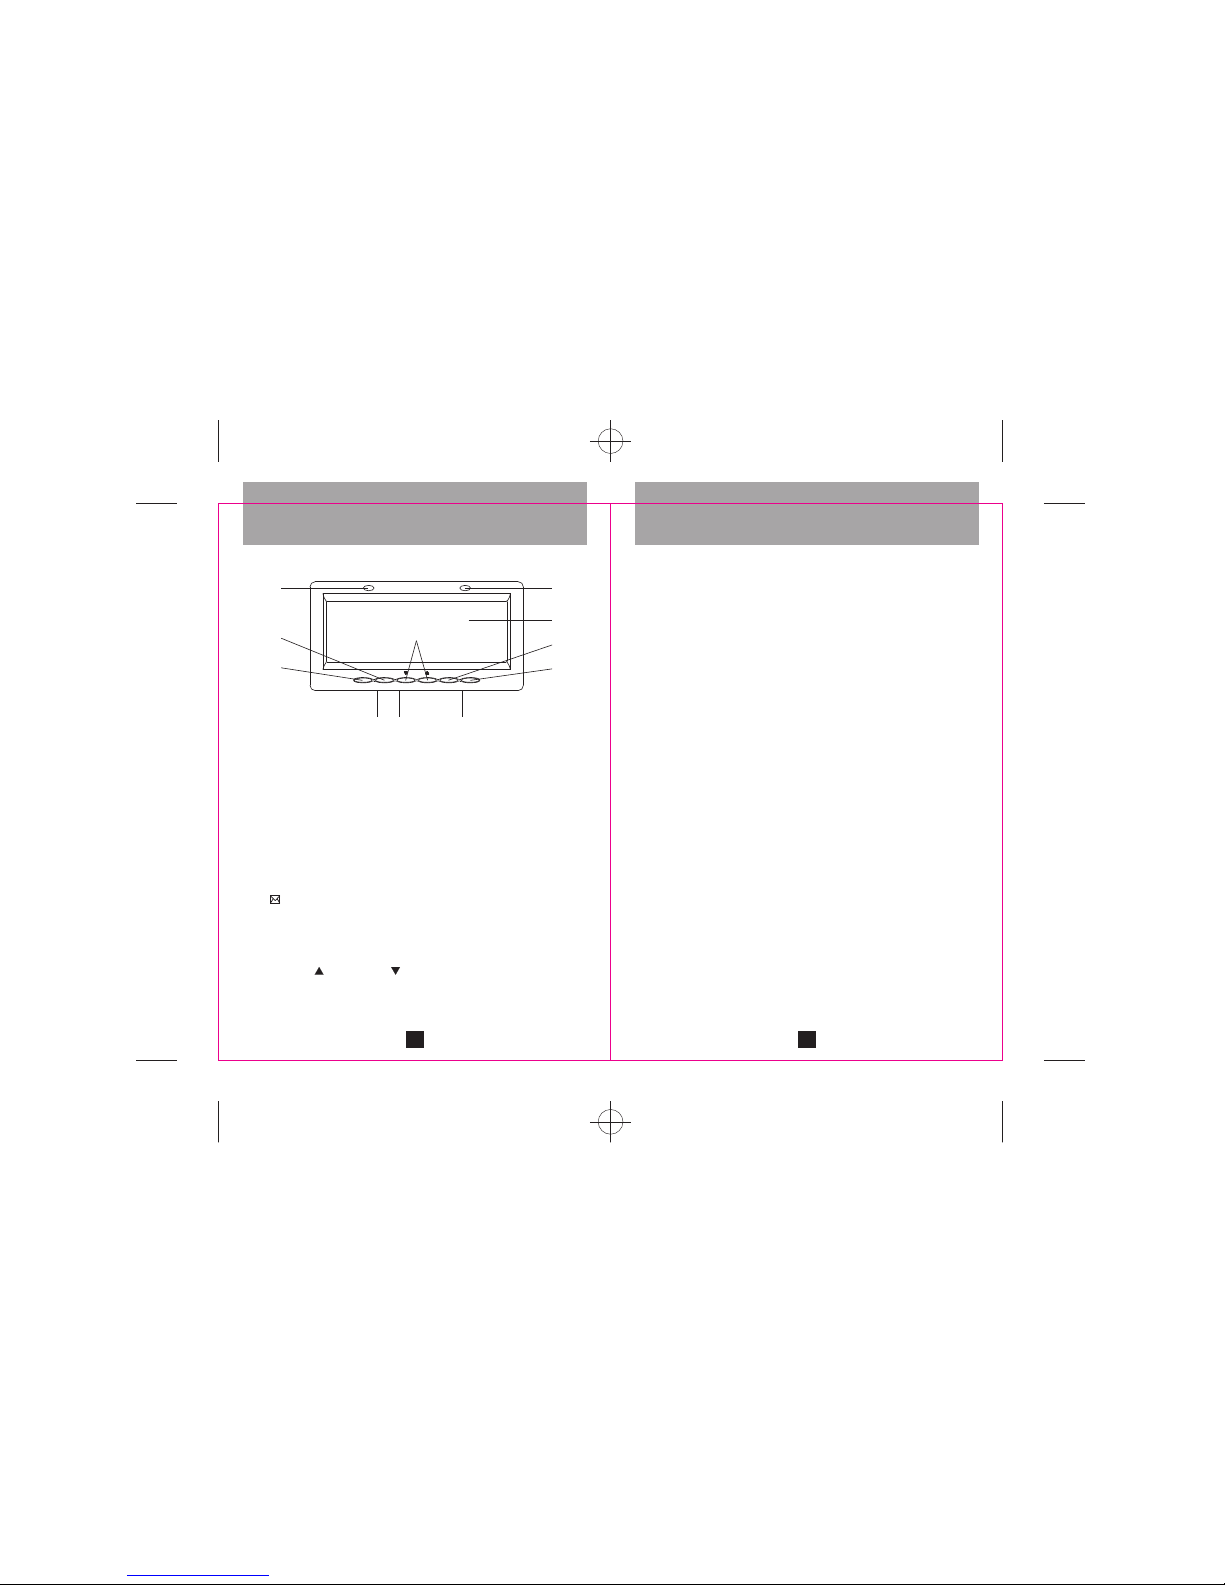
1. Message Waiting Light
Indicator (red LED) - lights up
steadily when you have new
voice mail messages.
2. New Call Light Indicator
(green LED) - lights up steadily
when new calls are received.
3. Visual Display Panel - shows
the caller’s name and / or
number, incoming call time &
date, Call Counter, New Call
icon (NEW) and Voice Mail icon
(
).
4. [DIAL VM] Buttons - dials to
your voice mail access number.
5. [DELETE] Button - deletes
Caller ID records.
6. [REVIEW
] / [REVIEW ]
Buttons - views the Caller ID
records.
7. [DIAL] Button - dials the
number shown on the display.
You also use this button to set
language, area code, time and
date and LCD display contrast.
8. [FLASH] Button - activates 3-
way conference or Call Waiting
calls.
9. TELEPHONE Jack - connect
line cord from your telephone
into the jack labeled PHONE at
the back of ML-300ad.
10. TEL LINE Cord Jack - insert
one end of the telephone line
cord into the jack labeled TEL.
LINE and the other end into your
wall jack.
11. DC Jack - the AC adaptor must
be connected for the ML-300ad
to operate. Plug the adaptor
into the DC 9V jack at the back.
Control Location
6
1
2
3
4
5
7
8
9 10 11
DELETE DIAL VM REVIEW DIAL FLASH
MSG NEW
3
THE AC POWER ADAPTOR
THAT COMES WITH ML-300ad
IS REQUIRED FOR THE
OPERATION OF THE UNIT.
HOWEVER, IT IS
RECOMMENDED TO INSTALL
4 X AAA SIZE BATTERIES TO
PREVENT LOSS OF MEMORY
WHEN THERE IS A POWER
FAILURE.
Please check to be sure all supplied
accessories come with ML-300ad.
If there is anything missing or visible
damage, please contact the original
place of purchase. Do not attempt
to operate ML-300ad if it is damaged.
a) ML-300ad unit 1 pc
b) Stand studs 2 pcs
c) AC power adaptor 1 pc
d) Long phone line cord 1 pc
e) Short phone line cord 1 pc
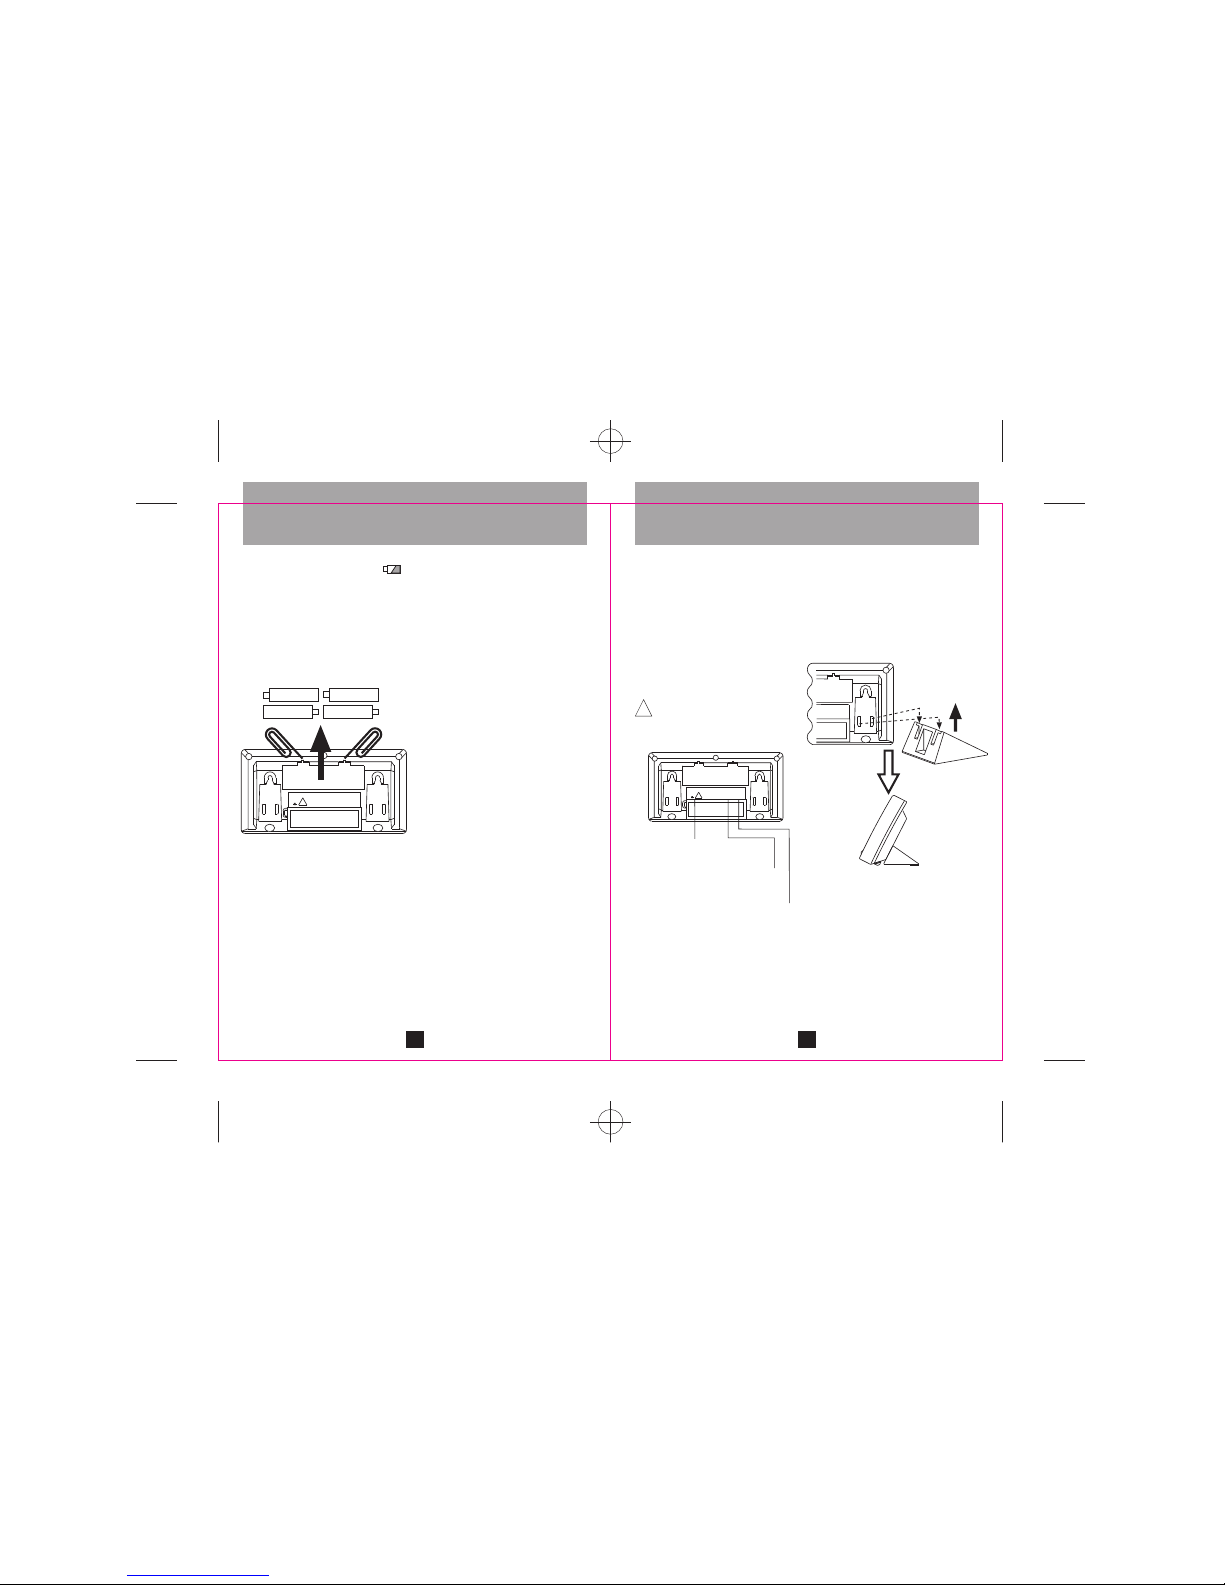
INSTALLING BATTERIES
Please install 4 x AAA batteries
(alkaline batteries are
recommended) to retain the Caller
ID records and keep real time clock
running in case there is a power
failure.
IMPORTANT :
a) Use only fresh batteries of the
required size and
recommended type.
b) Do not mix old and new
batteries, different types of
batteries (standard, alkaline or
rechargeable) or rechargeable
batteries of different capacities.
c) When replacing the batteries, if
you do not install the new
batteries within one minute after
removing the old ones, you may
lose all information stored in
your unit.
d) If you do not plan to use your
unit with batteries for a month
or longer, remove the batteries.
Batteries can leak chemicals
that can destroy electronic parts.
e) Dispose of old batteries
promptly and properly. Do not
burn or bury them.
Installation
4
When the Low Battery icon ( )
appears, replace the batteries.
1. Disconnect the telephone line.
2. Open the batteries cover by
inserting a sharp object (such
as a clip or a pencil) into the
two slots at the top of the battery
compartment cover on the
bottom of the ML-300ad.
3. Place the new batteries in the
compartment following the
polarity symbols (+ and -)
marked inside.
4. Replace the batteries cover.
5. Reconnect the telephone line.
IMPORTANT :
When replacing the batteries, if you
do not install the new batteries within
30 seconds after removing the old
ones, you may lose all Caller ID
records stored in your ML-300ad.
CONNECTING TO A
TELEPHONE AND/OR
ANSWERING MACHINE
After installing 4 x AAA batteries,
connect one end of the line cord
provided into ML-300ad’s jack
labeled TEL. LINE and connect the
other end of the line cord into the
telephone wall jack. Connect the
existing line cord on your telephone
into ML-300ad’s jack labeled
PHONE. If you have a telephone
answering machine, connect a line
cord from ML-300ad’s PHONE jack
to the answering machine LINE jack.
Connect another line cord from the
answering machine PHONE jack to
the jack on your telephone.
Installation
PHONETEL. LINE
DC 9V
+
-
!
+ AAA -
- AAA + - AAA +
+ AAA -
5
!
PLACING ON THE DESK
Insert the slots of the two Stand
Studs into the matching tabs on the
bottom cabinet respectively. Then
slide the Stand Studs along the tabs
until they are locked to the bottom
cabinet.
MOUNTING ON THE WALL
1. Drill two 1/8-inch diameter
holes, 5-1/8 inches (130 mm)
apart, into the wall. Thread a
screw (not included) into each
hole, letting the heads extend
1/8 inch from the wall.
2. Align the keyhole slots (on the
bottom of ML-300ad) with the
mounting screws and slide ML300ad downward to secure it.
Installation
CONNECTING THE AC
ADAPTOR
THE AC ADAPTOR MUST BE
CONNECTED FOR ML-300ad TO
OPERATE.
Plug the adaptor’s barrel plug into
ML-300ad’s DC 9V jack and plug
the adaptor into a standard AC outlet.
The AC adaptor must be a
Class 2 Power Source, 9V DC,
200mA
PHONETEL. LINE
Connected to the wall jack
Connected to telephone
Connected to AC Power Adaptor
PHONETEL. LINE
DC 9V
+
-
!
6
 Loading...