

Page 1
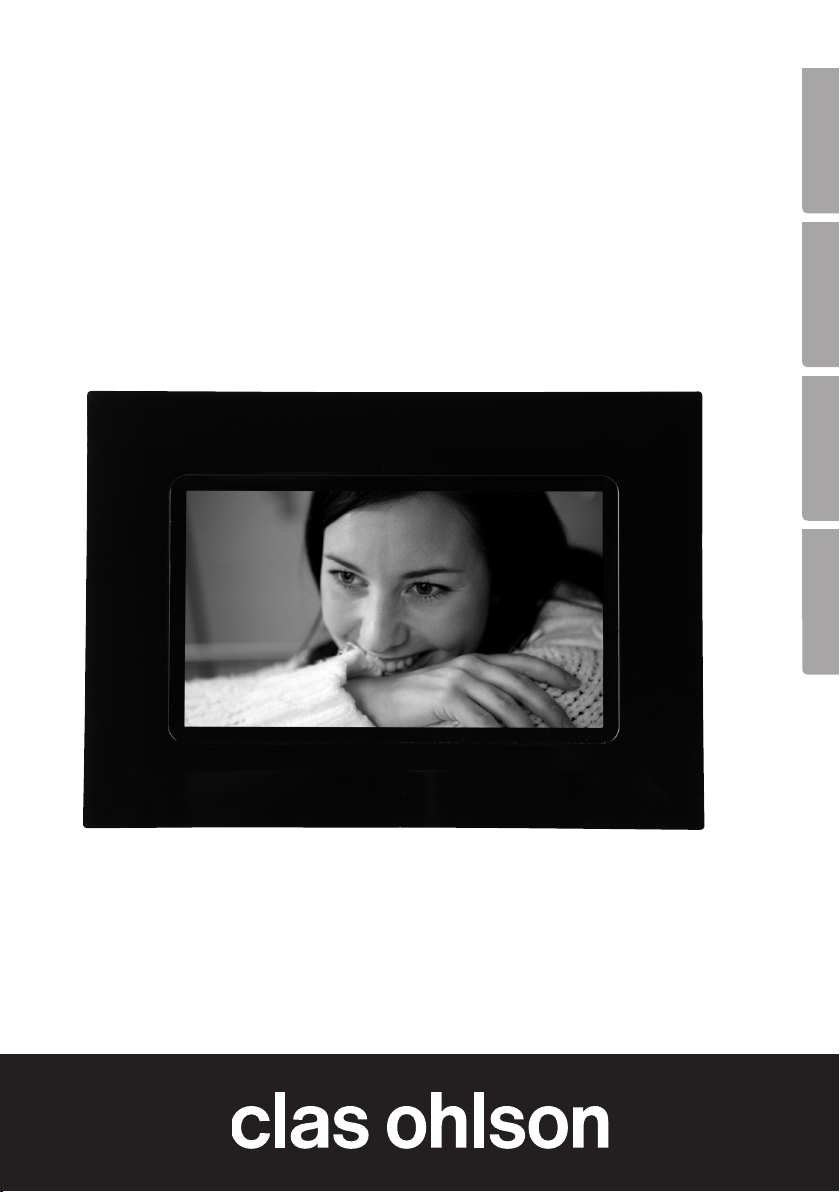
Digital Picture Frame
Digital fotoram
Digital fotoramme
Digitaalinen valokuvakehys
EnglishSvenskaNorskSuomi
Art.no. Model
18-8114 PF-7AW-103-UK
38-3426 PF-7AW-103
Ver. 200906
Page 2

2
Page 3

Digital Picture Frame
Art.no. 18-8114 Model PF-7AW-103-UK
38-3426 PF-7AW-103
Please read the entire instruction manual before using the product and save it for
future reference. We reserve the right for any errors in text or images and any necessary changes made to technical data. If you have any questions regarding technical
problems please contact Customer Services.
Contents
1. Safety 4
2. Product description 4
3. Buttons and functions 5
4. Getting started 6
5. Operation 7
6. Settings 9
7. Care and maintenance 10
8. Troubleshooting guide 10
9. Disposal 10
10. Specifications 10
English
3
Page 4

1. Safety
Caution: Do not open the casing! Certain components within the product’s casing
English
contain dangerous currents. Contact with these may give you an electric shock.
- The product should only be repaired by qualified service technicians.
- The product should not be taken apart or modified.
- Do not place the product where it can fall into water or other liquids. Do not place
any objects which contain liquid on top of product, e.g. flower vases or drinks.
- Do not cover the ventilation holes. Do not place the product close to heat
sources such as on top of the radiator, TV, or on e.g. the sofa where the
ventilation holes risk being blocked.
- Always unplug the adaptor from the electrical outlet if the product is not be used
for an extended period.
- The product is designed for 8 – 10 hours of continuous operation. Avoid any
prolonged use. Let the product sit for a while before re-using.
- The product is intended for indoor use only.
- Do not expose the product to direct sunlight for extended periods of time.
- Do not use the product in damp, dusty, or dirty environments.
- Only use a lightly moistened soft cloth with a little washing up liquid to clean
the screen.
- Handle the screen carefully to avoid scratching it.
- Do not disconnect the adaptor while the frame is in use. The attached memory
may be damaged. Neither should the connected memory be removed when the
frame is in use.
2. Product description
- 7˝ Widescreen Digital Photo Frame.
- Displays your digital photos without the need for OF computer.
- USB memory and memory card slots (SD/MMC/MS)
- Power adaptor.
4
Page 5
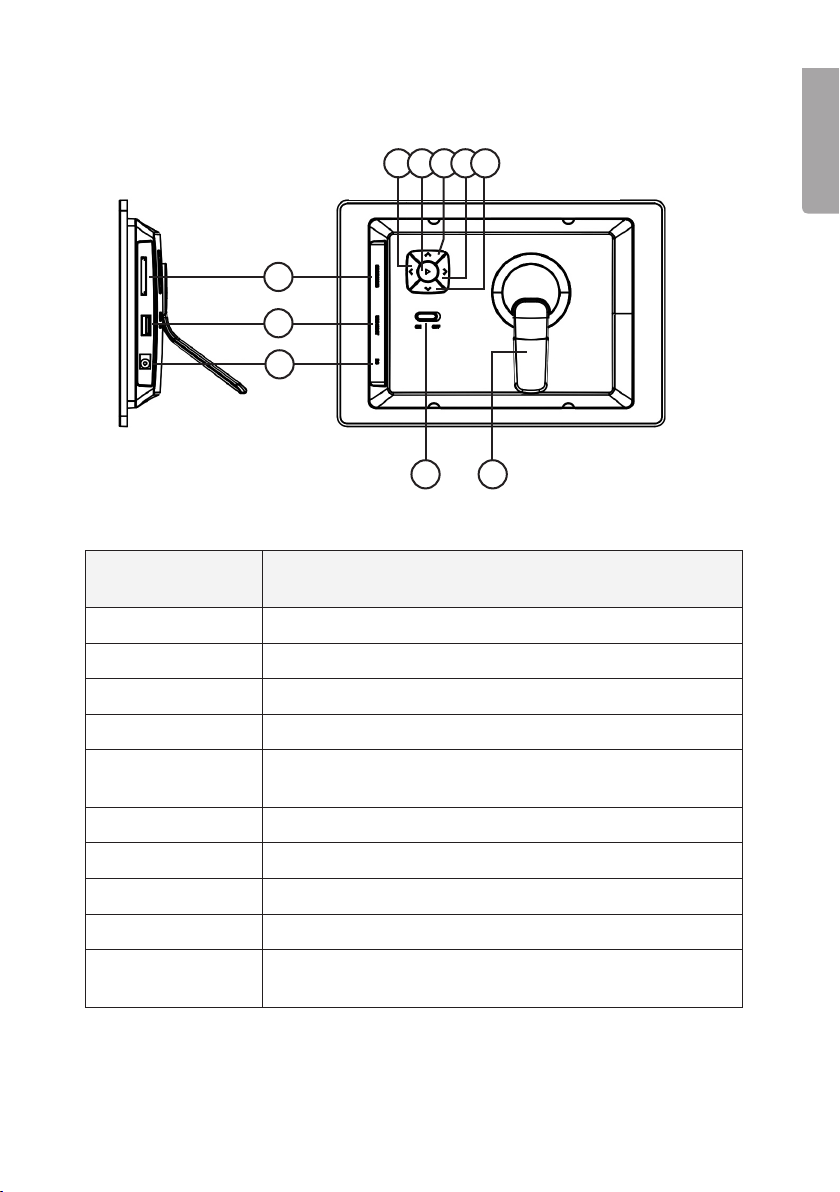
3. Buttons and functions
1
2
3
4
5 6 7 8
9 10
English
Button/
Connection
1. SD/MMC/MS Memory card slot
2. USB HOST Connection for USB memory, MP3 players, etc. (USB 2.0)
3. DC Adaptor connection (5 V DC, 1 A)
4. <
5. ►
6.
Λ
7. >
8. v
9. ON/OFF Power switch.
10. Support stand Adjustable Can be adjusted to lie in both landscape and
Function
Goes to the next image.
[Play/Pause/Confirm. Depress and hold to reach
the main menu.
Up arrow. Goes to the preview menu (miniature).
Goes to the previous image.
Down arrow Rotates image when pressed.
portrait modes.
5
Page 6

4. Getting started
4.1 Assembling the table stand
English
A B
C D
4.2 Power supply
ON OFF
1. Connect the adaptor’s DC plug to the DC connection on the photo frame.
2. Plug the adaptor into a wall socket.
3. Set the On/Off switch (9) to ON to turn it on or OFF to turn it off.
6
Page 7
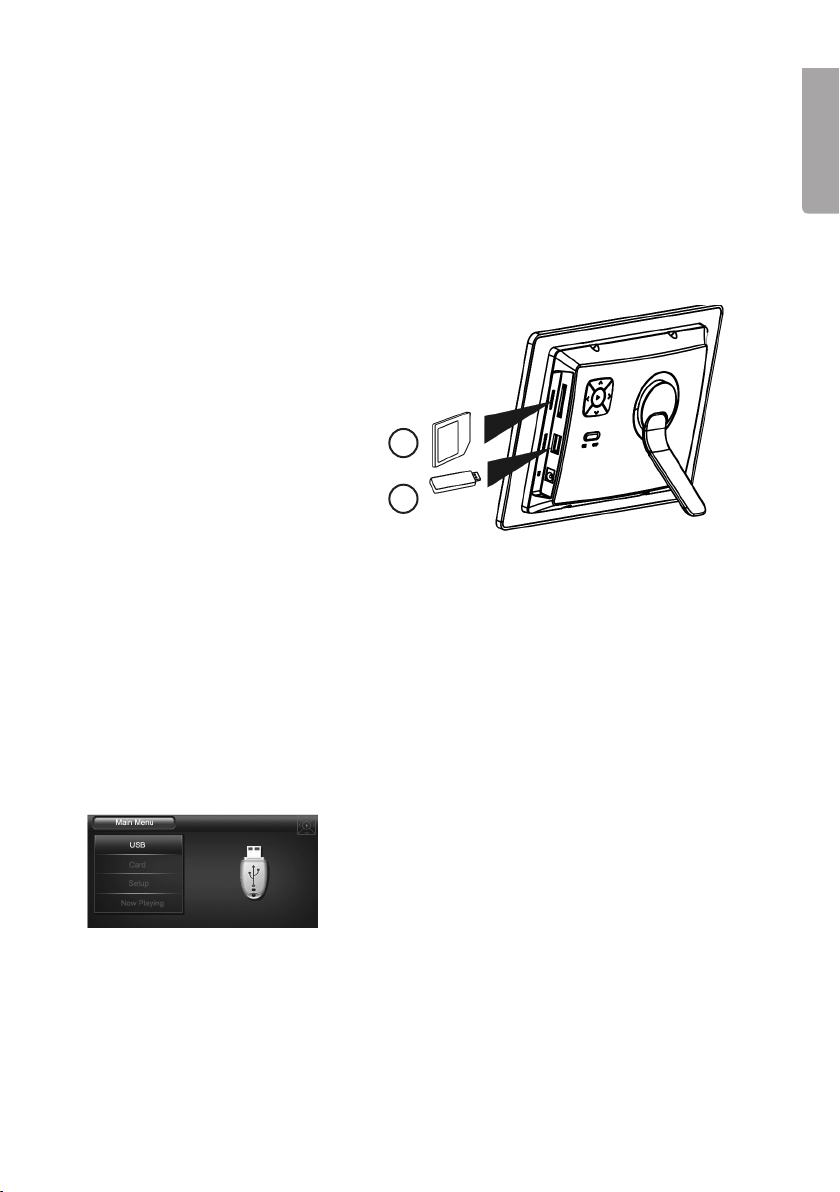
4.3 Inserting a memory card or a USB memory
Memory cards
The following memory cards are compatible:
- Secure Digital (SD)
- Multimedia Card (MMC)
- Memory Stick (MS)
If your digital camera uses any of the above mentioned memory cards you can
connect the camera’s memory card directly to the photo frame.
1. Insert the memory card into the
slot marked SD/MMC/MS (A).
Be careful when inserting.
2. Remove the card by pulling it
straight out.
A
B
USB memory
USB equipment such as a USB flash memory or MP3 players with a USB connection
can be connected directly to the USB HOST (B) connection.
English
5. Operation
5.1 Main menu key
Depress and hold ► to reach the main menu.
Buttons for devices, setup and Now Playing (current slideshow) are displayed.
USB Highlighted when a USB memory
is selected.
Card Highlighted when a SD/MMC/MS
card is selected.
Setup Picture frame settings.
Now Playing Plays current slideshow.
Use [ Λ ]and [ v ] to navigate the main menu. Press ► to confirm and to enter
the submenus. In the upper right hand corner of the display you will see a button
indicator that mirrors the actual button you are pushing on back of the picture frame.
If you insert a USB or memory card when you are in main menu mode the slideshow
will start immediately.
7
Page 8
5.2 Slideshow
Starting a slideshow:
English
1. Connect a USB memory or a memory card containing JPG/JPEG image files.
2. Highlight USB, CARD or Now Playing in the main menu and then press ►
to confirm.
3. The slideshow should now begin.
When the slideshow starts the display menu will appear at the bottom portion of the
display. Quickly pressing ► during a slideshow playback will also bring up the
display menu.
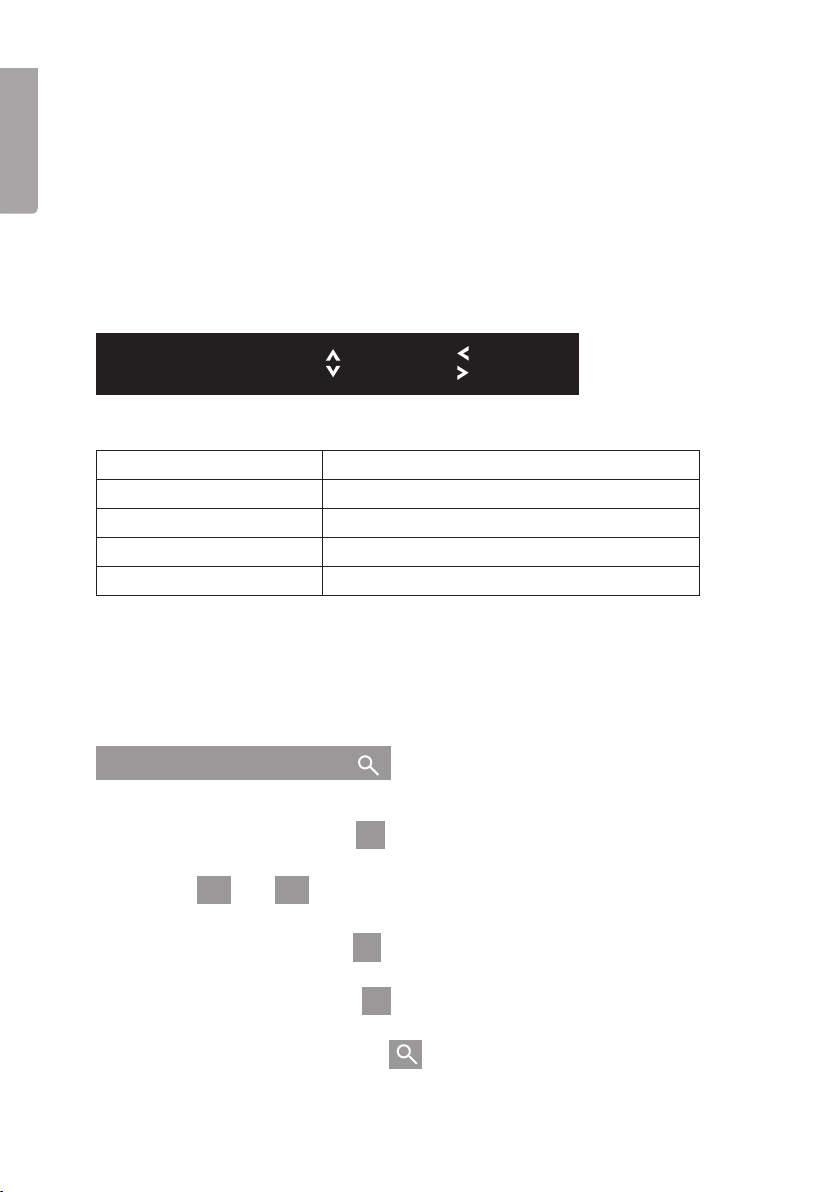
[ ►] Play/OSD menu [ ] Preview [ ] Previous
(Hold ) [ ►]: Main Menu [ ] Rotate [ ] Next
Controls (used during slideshow playback):
Λ
</>
v
Quickly pressing ►
Depressing and holding ►
Preview (miniatures)
Selects the previous or next image.
Rotates the image.
Pauses the slideshow.
Brings up the main menu.
5.3 Display Menu commands
You may also use the display menu to display pictures one at a time. During slideshow playback quickly press ► to bring up the display menu. The slideshow should
now pause.
I◄ ► ►I
Use < and > to advance through the commands.
To start a slideshow, highlight
picture frame.
Highlight
►-button on back of the picture frame.
To rotate an image, highlight and then press the ►-button on back of the
picture frame.
To preview an image, highlight
picture frame.
To zoom in on an image, highlight and then press the ►-button the desired
number of times to enlarge the image.
I◄
or
►I
►
and then press the ►-button on back of the
to select the next or previous image and then press the
and then press the ►-button on back of the
8
Page 9
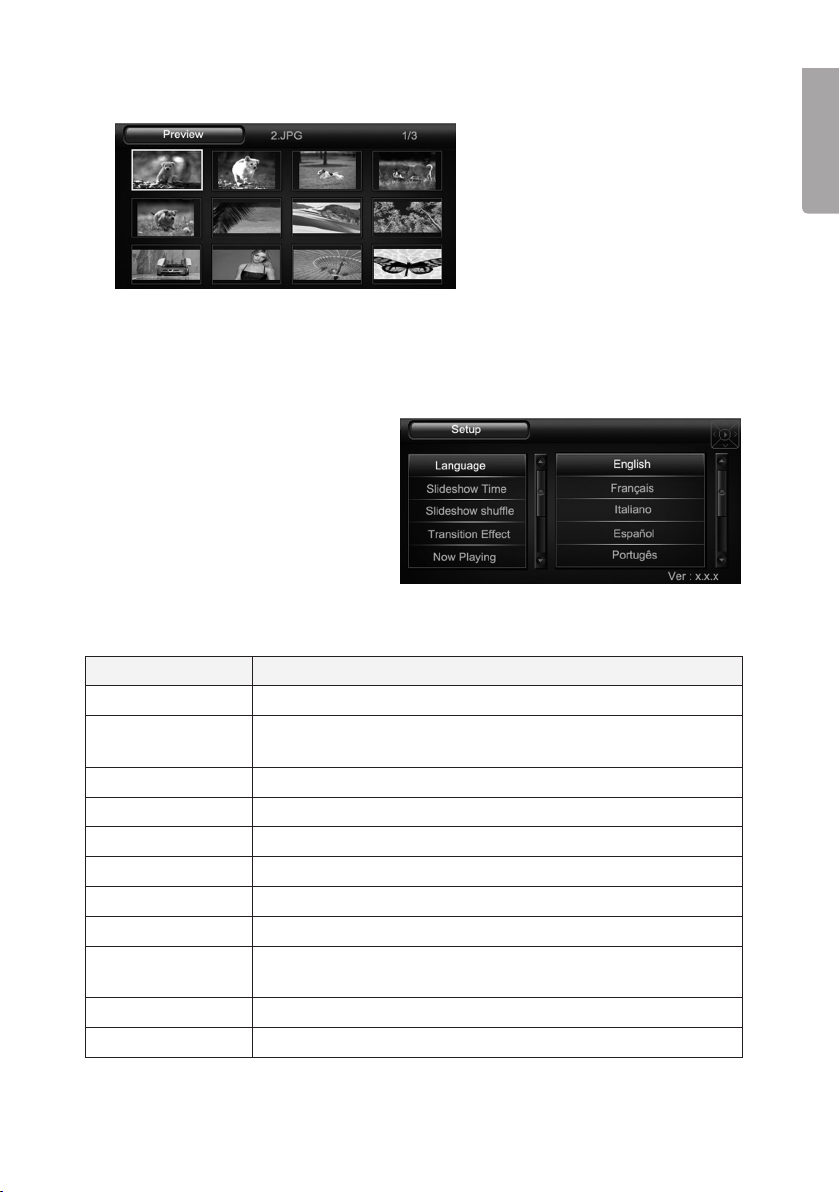
5.4 Preview mode
During slideshow playback press
Λ to reach preview mode. Navigate between the images using
Λ, v, > and <.
Depress and hold ► to reach
the main menu.
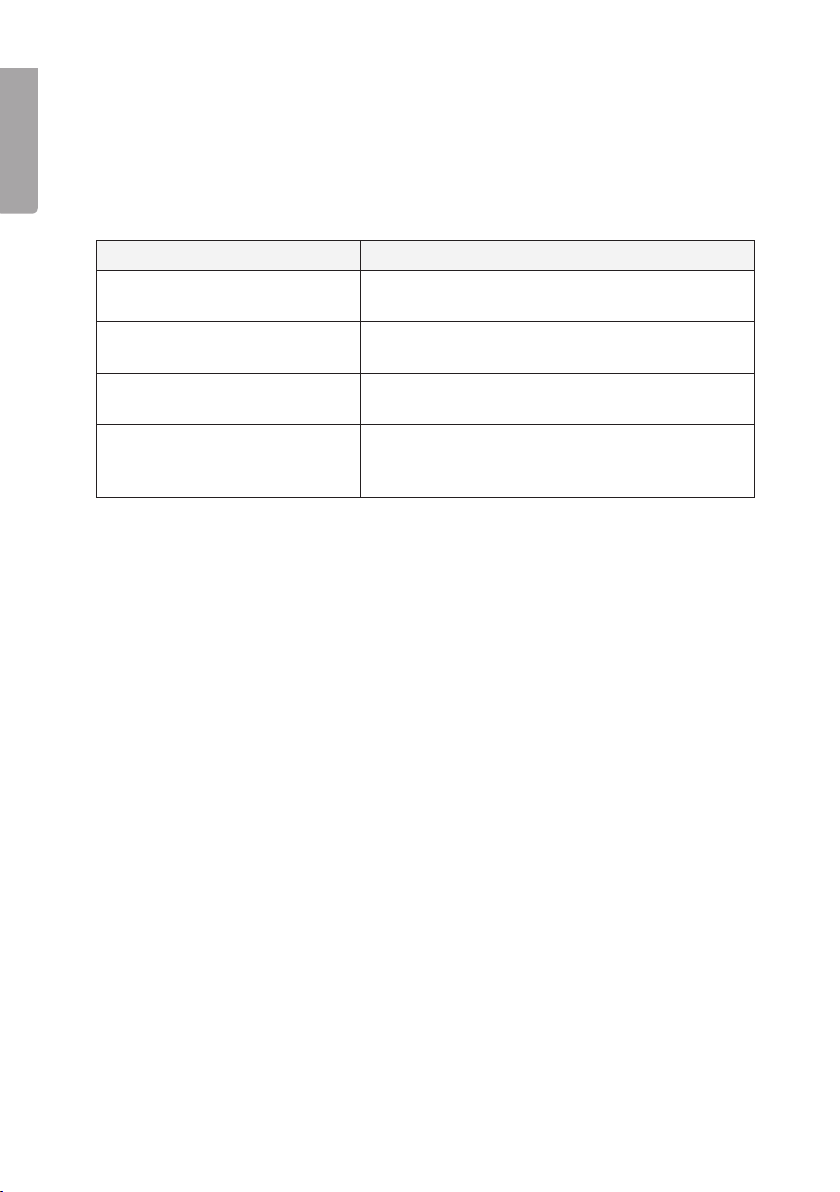
6. Settings
1. Highlight Setup in the main menu and press ► to confirm. The setup menu will
be shown.
2. Use [ Λ ] and [ v ] to navigate
the menu and press ► to
select the chosen setting.
3. Use the [ Λ ] and [ v ] to select
a value. Press ► to confirm.
4. Depress and hold ► to return
to the main menu.
6.1 Setup options
Settings Description
Language Sets the menu language.
Slideshow Time Sets the duration of each image. (3 sec, 5 sec, 15 sec,
1 min, 15 min or 1 hour.)
Slideshow shuffle Displays images randomly or in predetermined order.
Transition Effect Selects transition effects.
Now Playing Displays slideshow immediately.
Brightness Light – dark.
Contrast Sharp – diffuse.
Saturation Colour intensity.
Hint Time Sets the duration of the on-screen button command during
slideshow playback.
Photo Mode Sets the aspect ratio to full-screen or normal mode.
Default Settings Resets the device to factory settings.
English
9
Page 10
7. Care and maintenance
Use a soft damp cloth to clean the product. Never use solvents or strong detergents.
English
8. Troubleshooting
Problem Solution
The device does not start/no
photo is shown.
The device automatically
switches to standby mode.
Cannot read the memory card. Make sure that the files on the memory card are
Some photos are uploaded
quicker than others.
Check that the adaptor is correctly connected.
Disconnect the adaptor and re-connect.
supported by the device. See Specifications.
Photos with high resolution take longer to
upload. Use photos with lower resolution for
quicker display.
9. Disposal
Follow local ordinances when disposing of this product. If you are unsure of how
to dispose of this product, please contact your municipality.
10. Specifications
Display 7˝ colour analogue LCD, 16:9
Resolution 480 (h) x 234 (v)
Operating voltage 5 V DC, 1 A via the supplied mains adaptor
(100-240 V AC, 50/60 Hz)
USB port 2.0 (support for USB memory)
Memory card slot SD (Secure Digital), MMC (Multimedia Card),
MS (Memory Stick)
Picture format JPEG (Max. resolution 8000 x 8000 pixels)
Storage temperature: - 20 °C ~ 60 °C
Operating temperature 0 °C ~ 45 °C
Size 219 x 152 x 29 mm
Weight 380 g
10
Page 11

Digital fotoram
Art.nr 18-8114 Modell PF-7AW-103-UK
38-3426 PF-7AW-103
Läs igenom hela bruksanvisningen före användning och spara den sedan för framtida
bruk. Vi reserverar oss för ev. text- och bildfel samt ändringar av tekniska data.
Vid tekniska problem eller andra frågor, kontakta vår kundtjänst (se adressuppgifter
på baksidan).
Innehållsförteckning
1. Säkerhet 12
2. Produktbeskrivning 12
3. Knappar och funktioner 13
4. Komma igång 14
5. Användning 15
6. Inställningar 17
7. Skötsel och underhåll 18
8. Felsökningsschema 18
9. Avfallshantering 18
10. Specifikationer 18
Svenska
11
Page 12

1. Säkerhet
Varning! Öppna inte höljet! Farlig spänning finns oskyddat på vissa komponenter
inuti produktens hölje, kontakt med dessa kan ge elektrisk chock.
- Produkten får endast repareras av kvalificerad servicepersonal.
- Produkten får inte demonteras eller ändras.
- Placera inte produkten så att den kan falla ner i vatten eller annan vätska, ställ
inte några föremål som innehåller vätska på produkten, t.ex. blomvas eller dryck.
- Täck inte för ventilationsöppningarna. Placera inte heller produkten i närheten
av varma ställen som ovanför element, ovanpå en tv eller i t.ex. i en soffa där
Svenska
ventilationsöppningarna blockeras.
- Ta alltid ur nätadaptern från eluttaget om inte produkten ska användas under
en längre tid.
- Produkten är konstruerad för 8 till 10 timmars kontinuerlig drift, undvik att
använda den under längre tid än så. Låt produkten vila en stund innan den
används igen.
- Produkten är endast avsedd för inomhusbruk.
- Undvik att utsätta produkten för direkt solljus under längre tid.
- Använd inte produkten i fuktiga, dammiga eller smutsiga miljöer.
- Använd endast en mjuk tvättduk som är svagt fuktad med vatten och milt
diskmedel vid rengöring av skärmen.
- Var försiktig vid hantering av skärmen så att inte ytan repas eller skadas
på annat sätt.
- Koppla inte ifrån nätadaptern samtidigt som uppspelningen pågår. Risk finns
för att det anslutna minnet skadas. Ta inte heller bort det anslutna minnet när
uppspelning pågår.
2. Produktbeskrivning
- Digital fotoram med 7˝ widescreen.
- Visar dina digitala bilder utan en dator.
- Anslutning för usb-minne eller minneskort (SD/MMC/MS).
- Lev. med nätadapter.
12
Page 13

3. Knappar och funktioner
4
1
5 6 7 8
2
3
9 10
Knapp/Anslutning Funktion
1. SD/MMC/MS Anslutning för minneskort.
2. USB HOST Anslutning för usb-minne, mp3-spelare etc. (USB 2.0).
3. DC Anslutning för medföljande nätadapter (5 V DC, 1 A).
4. <
5. ►
6. Λ
7. >
8. v
9. ON/OFF Strömbrytare.
Gå till nästa bild.
Play/Pause/Bekräfta. Håll in för att komma till huvudmenyn.
Pil upp. Gå till förhandsgranskning (miniatyrer).
Gå till föregående bild.
Pil ned. Tryck för att rotera bilden.
Svenska
10. Stöd Justerbart stöd. Du kan placera fotoramen både liggande
och stående.
13
Page 14

4. Komma igång
4.1 Montering av bordsstöd
A B
Svenska
C D
4.2 Spänningsanslutning
ON OFF
1. Anslut den medföljande nätadapterns DC-kontakt till anslutningen märkt DC
på fotoramen.
2. Anslut sedan nätadaptern till ett vägguttag.
3. Sätt strömbrytaren (9) i läge ON för att slå på fotoramen, och läga OFF för
att slå av den.
14
Page 15

4.3 Sätta i ett minneskort eller ett usb-minne
Minneskort
Följande minneskort kan användas:
- Secure Digital (SD)
- Multimedia Card (MMC)
- Memory Stick (MS)
Om din digitalkamera använder något av ovanstående minneskort kan du ansluta
kamerans minneskort direkt till fotoramen.
1. Sätt i minneskortet i anslutningen
märkt SD/MMC/MS (A) enligt
bilden. Tryck försiktigt in kortet
i korthållaren.
2. Ta ur minneskortet genom
att dra det rakt ut.
A
B
Usb-minne
Till anslutningen USB HOST (B) kan usb-utrustning som t.ex. ett usb-minne eller en
mp3-spelare med usb-anslutning anslutas.
5. Användning
5.1 Förklaring av huvudmenyn
Håll in ► för att komma till huvudmenyn.
Ikoner för alla anslutna media samt inställningar och aktuellt bildspel visas.
USB Aktiveras när du väljer usb-minne.
Card Aktiveras när du väljer
ett SD/MMC/MS-kort.
Setup Inställningar för fotoramen.
Now Playing Spela upp ett bildspel direkt.
Svenska
Använd [Λ] och [v] för att navigera i menyn. Tryck sedan på ► för att bekräfta och
gå till undermenyn. Uppe i högra hörnet på displayen finns en illustration som visar
vilken knapp som trycks in på fotoramens baksida.
Om du sätter i ett usb-minne eller minneskort när du är i huvudmenyn startar bildspelet automatiskt.
15
Page 16

5.2 Bildspel
Att starta ett bildspel:
1. Anslut ett usb-minne eller ett minneskort innehållande bildfiler med filformatet
JPG/JPEG.
2. Markera USB, CARD eller Now Playing i huvudmenyn och tryck sedan
► för att bekräfta.
3. Bildspelet startar.
När du startar ett bildspel kommer en displaymeny upp i den nedre delen av
displayen. Du kan också under pågående bildspel trycka snabbt på ► för
Svenska
att komma till displaymenyn.
[ ►] Play/OSD menu [ ] Preview [ ] Previous
(Hold ) [ ►]: Main Menu [ ] Rotate [ ] Next
Kontrollera (under pågående bildspel):
Λ
</>
v
Snabbt tryck på ►
Håll in ►
Förhandsgranskning (miniatyrer).
Väljer föregående eller nästa bild.
Roterar bilden.
Pausar bildspelet.
Gå till huvudmenyn.
5.3 Förklaring av displaymenyn
Du kan också använda displaymenyn för att se bilderna en och en. Under pågående
bildspel, tryck snabbt på ► för att komma till displaymenyn. Bildspelet pausas.
I◄ ► ►I
Använd < och > för att vandra mellan ikonerna på displaymenyn.
För att starta bildspel, markera
fotoramens baksida.
För att välja föregående eller nästa bild, markera
på ►-knappen på fotoramens baksida.
För att rotera en bild, markera och tryck sedan på ►-knappen på
fotoramens baksida.
För att gå till förhandsvisning, markera
fotoramens baksida.
För att zooma i en bild, markera och tryck sedan upprepade gånger på
►-knappen på fotoramens baksida.
►
och tryck sedan på ►-knappen på
I◄
och tryck sedan på ►-knappen på
eller
►I
och tryck sedan
16
Page 17

5.4 Förhandsvisning
Under pågående bildspelkan du
trycka på Λ för att komma till
förhandsvisning.
Navigera mellan bilderna med Λ,
v, >, och <.
Håll in ► för att komma till
huvudmenyn.
6. Inställningar
1. Markera Setup i huvudmenyn och tryck ► för att bekräfta.
Inställningsmenyn visas.
2. Använd [Λ] och [v] för att navigera
i menyn och tryck ► för att välja
det du vill ställa in.
3. För att göra din inställning, använd
[Λ] och [v] för att välja värde.
Tryck ► för att bekräfta.
4. Håll in ► för att återgå till
huvudmenyn.
6.1 Inställningsmöjligheter
Inställning Beskrivning
Language Ställer in språket i menyerna.
Slideshow Time Väljer hur länge varje bild ska visas. (3 sek, 5 sek, 15 sek,
1 min, 15 min eller 1 tim.)
Slideshow shuffle Väljer att visa bilder i slumpvis eller bestämd ordning.
Transition Effect Väljer visningseffekt för bildspelet.
Now Playing Visar ett bildspel direkt.
Brightness Ljusstyrka.
Contrast Kontrast.
Saturation Färgmättnad.
Hint Time Ställer in hur lång tid displayen ska visa knappkommandon
under pågående bildspel.
Photo Mode Ställer in bildformatet i fullskärmsläge eller standardläge.
Default Settings Återställning till leveransläget.
Svenska
17
Page 18

8. Skötsel och underhåll
Torka av med en mjuk lätt fuktad trasa. Använd inga lösningsmedel eller
starka rengöringsmedel.
9. Felsökning
Symptom Åtgärd
Enheten startar ej/Ingen
Svenska
bild visas.
Produkten ställs automatiskt
om till standbyläge.
Det går inte att läsa från
minneskortet.
Vissa bilder laddas fortare
än andra.
Kontrollera att nätadaptern är korrekt ansluten.
Koppla ifrån nätadaptern och anslut den
sedan igen.
Kontrollera att filerna på minneskortet stöds av
enheten. Se Specifikationer.
Bilder med hög upplösning tar längre tid att ladda.
Använd bilder med lägre upplösning för
snabbare visning.
10. Avfallshantering
När du ska göra dig av med produkten ska detta ske enligt lokala föreskrifter.
Är du osäker på hur du ska gå tillväga, kontakta din kommun.
11. Specifikationer
Skärm 7˝ färg analog LCD, 16:9
Upplösning 480 (h) x 234 (v)
Drivspänning 5 V DC, 1 A via medföljande nätadapter
(100-240 V AC, 50/60 Hz)
Usb-anslutning 2.0 (stöd för usb-minne)
Minneskortanslutning SD (Secure Digital), MMC (Multimedia Card),
MS (Memory Stick)
Bildformat JPEG (Max. upplösning 8000 x 8000 pixlar.)
Förvaringstemperatur - 20 °C ~ 60 °C
Användningstemperatur 0 °C ~ 45 °C
Storlek 219 x 152 x 29 mm
Vikt 380 g
18
Page 19

Digital fotoramme
Art.nr 18-8114 Modell PF-7AW-103-UK
38-3426 PF-7AW-103
Les bruksanvisningen nøye før bruk av produktet, og ta vare på den for ev. framtidig
bruk. Vi reserverer oss mot ev. tekst- og bildefeil, samt forandringer av tekniske data.
Ved tekniske problemer eller andre spørsmål, ta kontakt med vårt kundesenter.
(Se opplysninger om kundesenteret i denne bruksanvisningen).
Innholdsfortegnelse
1. Sikkerhet 20
2. Produktbeskrivelse 20
3. Knapper og funksjoner 21
4. Kom i gang 22
5. Bruk 23
6. Innstillinger 25
7. Stell og vedlikehold 26
8. Feilsøkingsskjema 26
9. Avfallshåndtering 26
10. Spesifikasjoner 26
Norsk
19
Page 20

1. Sikkerhet
Advarsel! Åpne ikke dekselet. Farlig spenning finnes ubeskyttet på visse
komponenter inne i produktet. Kontakt med disse kan gi elektrisk støt.
- Produktet må kun repareres av kyndig servicepersonell.
- Produktet må ikke demonteres eller endres på.
- Plasser ikke produktet slik at den kan komme i kontakt med vann eller annen
væske. Plasser ikke gjenstander som kan søle væske (f.eks. blomstervase eller
leskedrikk) oppå produktet eller i produktets umiddelbare nærhet.
- Ventilasjonsåpningene må ikke tildekkes. Plasser heller ikke produktet for nær
varmekilder som varmeelement, oppå tv-apparat eller f.eks. i en sofa hvor
ventilasjonsåpningene blokkeres.
- Ta nettadapteren ut fra strømuttaket dersom produktet ikke skal brukes
på en lang stund.
- Produktet er konstruert for 8 til 10 timers kontinuerlig drift.
Deretter bør produktet hvile en stund før det startes opp igjen.
Norsk
- Produktet er kun beregnet for innendørs bruk.
- Produktet må ikke eksponeres for direkte sollys over lang tid.
- Bruk aldri dette produktet i støvete, fuktige eller skitne miljøer.
- Benytt kun en myk, lett fuktet klut og mildt vaskemiddel ved rengjøring
av skjermen.
- Vær forsiktig ved håndtering av produktet, så ikke skjermen ripes opp eller
skades på annen måte.
- Nettadapter må ikke kobles fra, mens spilling pågår. Det er fare for at det
tilkoblede minnet skades. Ta heller ikke bort det tilkoblede minnet når
spilling pågår.
2. Produktbeskrivelse
- Digital fotoramme med 7˝ widescreen.
- Viser dine digitale bilder uten datamaskin.
- Tilkobling for usb-minne eller minnekort (SD/MMC/MS).
- Leveres med nettadapter.
20
Page 21

3. Knapper og funksjoner
4
1
2
3
5 6 7 8
9 10
Knapper/ Utstyr Funksjon
1. SD/MMC/MS Tilkobling for minnekort.
2. USB HOST Tilkobling for usb-minne, mp3-spiller etc. (USB 2.0)
3. DC Tilkobling for nettadapter (5 V DC, 1 A).
4. <
5. ►
6. Λ
7. >
8. v
9. ON/OFF Strømbryter.
10. Støtte Justerbar støtte. Fotorammen kan plasseres både liggende
Gå til neste bilde.
Play/Pause/Bekrefte. Hold inne for å komme
til hovedmenyen.
Pil opp. Gå til forhåndsvisning/miniatyrvisning.
Gå til foregående bilde.
Pil ned. Trykk for å rotere bildet.
og stående.
Norsk
21
Page 22

4. Kom i gang
4.1 Montering av bordstøtte
A B
C D
Norsk
4.2 Strømtilkobling
ON OFF
1. Adapterens DC-kontakt kobles til uttaket merket DC på fotorammen.
2. Koble deretter strømadapteren til et strømuttak.
3. Sett strømbryteren (9) i ON-posisjon for å skru fotorammen på eller OFF
for å skru den av.
22
Page 23

4.3 Sett i et minnekort eller et usb-minne
Minnekort
Følgende minnekort kan brukes:
- SD (Secure Digital)
- MMC (Multimedia Card)
- MS (Memory Stick)
Hvis ditt digitalkamera bruker et av de ovenstående minnekortene, kan du koble
kameraets minnekort direkte til fotorammen.
1. Plasser minnekortet i kontakten
merket SD/MMC/MS (A) som
vist på bildet. Trykk kortet
forsiktig inn i kortholderen.
2. Fjern kortet igjen, ved å trekke
det rett ut.
A
B
Usb-minne
Til uttaket USB HOST (B) kan usb-utstyr som f.eks. usb-minne eller mp3-spiller med
usb-tilkobling plugges til.
Norsk
5. Bruk
5.1 Forklaring av hovedmenyen
Hold ► inne for å komme til hovedmenyen.
Ikoner for samtlige tilkoblede installasjoner og aktuell bildefremvisning vises.
USB Aktiveres når du velger usb-minne.
Card Aktiveres når du velger et SD/MMC/
MS-kort.
Setup Innstillinger for fotorammen.
Now Playing Spille av en bildeframvisning direkte.
Bruk [ Λ ] og [ v ] for å navigere i menyen. Trykk på ► for å bekrefte og å gå til neste
undermeny. I det øvre høyre hjørnet på skjermer er det en illustrasjon som viser hvilken knapp som trykkes inn på fotorammens bakside.
Hvis man setter i et usb-minne eller minnekort når en er i hovedmenyen, vil
bildeframvisningen starte automatisk.
23
Page 24

5.2 Bildeframvisning
Å starte en bildeframvisning:
1. Koble til et usb-minne eller et minnekort som inneholder bildefiler med
filformatene jpg/jpeg.
2. Marker USB, CARD eller Now Playing i hovedmenyen og trykk deretter ►
for å bekrefte.
3. Bildespillet starter.
Når en bildeframvisning startes vil det komme opp en meny på skjermens nedre
del. En kan også trykke hurtig på ► under pågående bildevisning for å komme til
denne menyen.
[ ►] Play/OSD menu [ ] Preview [ ] Previous
(Hold ) [ ►]: Main Menu [ ] Rotate [ ] Next
Norsk
Kontroller (under pågående bildeframvising):
Λ
</>
v
Hurtig trykk på ►
Hold inne ►
Forhåndsvisning (miniatyrer).
Velger foregående eller neste bilde.
Roterer bildet.
Stopper bildeframvisningen for pause.
Gå til hovedmenyen.
5.3 Forklaring på skjermmenyen
En kan også benytte skjermmenyen til å se bildene et og et. En kan også trykke
hurtig på ► under pågående bildevisning for å komme til skjermmenyen. Stopper
bildeframvisningen for pause.
I◄ ► ►I
Bruk < og > til å navigere mellom ikonene på displaymenyen.
For å starte bildeframvisningen, marker
fotorammens bakside.
For å velge foregående eller neste bilde, marker
deretter på ►-knappen på fotorammens bakside.
For å rotere bildeframvisningen, marker og trykk deretter på ►-knappen på
fotorammens bakside.
For å gå til forhåndsvisning (miniatyrer), marker
►-knappen på fotorammens bakside.
For å zoome i et bilde, marker og trykk deretter på ►-knappen på
fotorammens bakside.
►
og trykk deretter på ►-knappen på
I◄
og trykk deretter på
eller
►I
og trykk
24
Page 25

5.4 Forhåndsvisning
En kan også trykke på Λ under
pågående bildevisning for å
komme til forhåndsvisning.
Navigere mellom bildene med
Λ, v, >, og <.
Hold ► inne for å komme
til hovedmenyen.
6. Innstillinger
1. Marker Setup i hovedmenyen og trykk deretter ► for å bekrefte.
Innstillingsmenyen vises.
2. Bruk [ Λ ] og [ v ] for å navigere
i menyen og trykk ► for å velge
det du vil stille inn.
3. For å foreta din innstilling, benytt
[ Λ ] og [ v ] til å velge verdi. Trykk
på ► for å bekrefte.
4. Hold ► inne for å gå tilbake til
hovedmenyen.
6.1 Innstillingsmuligheter
Norsk
Innstilling Beskrivelse
Language Stiller inn meny-språket.
Slideshow time Velg hvor lenge hvert bilde skal vises. (3 sek, 5 sek,
15 sek, 1 min, 15 min eller 1 time.)
Slideshow shuffle Velger å vise bildene i tilfeldig eller bestemt rekkebølge.
Transition Effect Velger visingseffekt for bildeframvisingen.
Now Playing Viser en bildeframvisning direkte.
Brightness Lysstyrke.
Contrast Kontrast.
Saturation Fargemetning.
Hint Time Stiller inn hvor lang tid displayet skal vise tastekommando-
ene under pågående bildespeil.
Photo Mode Stiller inn bildeformatet i fullskjermposisjon eller
standardposisjon.
Default Settings Stille tilbake til fabrikkinnstillingene.
25
Page 26

7. Stell og vedlikehold
Rengjør med en myk og lett fuktet klut. Bruk aldri løsningsmiddel eller sterke
løsemiddel.
8. Feilsøking
Symptom Tiltak
Enheten starter ikke / Det kommer
ikke opp noe bilde på skjermen.
Produktet skrur seg automatisk til
standby-posisjon.
Minnekortet kan ikke leses. Kontroller at lene på minnekortet støttes
Norsk
Enkelte bilder lades fortere
enn andre.
Kontroller at strømledningen er riktig satt i.
Koble fra strømledning og koble den på
igjen senere.
av bilderammen. Se Spesikasjoner.
Bilder med høy oppløsning tar lengre
tid å laste ned. Bruk bilder med lavere
oppløsning for raskere vising.
9. Avfallshåndtering
Når produktet skal kasseres, må det skje i henhold til lokale forskrifter.
Ved usikkerhet, ta kontakt med de lokale myndighetene.
10. Spesifikasjoner
Skjerm: 7˝ farge analog LCD, 16:9
Oppløsning: 480 (h) x 234 (v)
Spenning: 5 V DC, 1 A (via medfølgende nettadapter
(100 -240 V AC, 50/60 Hz)
Usb-tilkobling: 2.0 (støtte for usb-minne)
Minnekorttilkobling: SD (Secure Digital), MMC (Multimedia Card),
MS (Memory Stick)
Bildeformat: JPEG (Maks. oppløsning 8000 x 8000 piksler)
Oppbevaringstemperatur: - 20 °C ~ 60 °C
Brukstemperatur: 0 °C~ 45 °C
Størrelse: 219 x 152 x 29 mm
Vekt: 380 g
26
Page 27

Digitaalinen valokuvakehys
Tuotenumero 18-8114 Malli PF-7AW-103-UK
38-3426 PF-7AW-103
Lue käyttöohjeet ennen tuotteen käyttöönottoa. Säilytä käyttöohjeet tulevaa tarvetta
varten. Pidätämme oikeuden teknisten tietojen muutoksiin. Emme vastaa mahdollisista
teksti- tai kuvavirheistä. Jos laitteeseen tulee teknisiä ongelmia, ota yhteys myymälään
tai asiakaspalveluun (yhteystiedot käyttöohjeen lopussa).
Sisällysluettelo
1. Turvallisuus 28
2. Tuotekuvaus 28
3. Painikkeet ja toiminnot 29
4. Käytön aloittaminen 30
5. Käyttö 31
6. Asetukset 33
7. Huolto ja ylläpito 34
8. Vianhakutaulukko 34
9. Kierrätys 34
10. Tekniset tiedot 34
Suomi
27
Page 28

1. Turvallisuus
Varoitus! Älä avaa laitteen koteloa! Kotelon sisällä on vaarallista jännitettä sisältäviä
suojaamattomia komponentteja, jotka voivat aiheuttaa sähköiskun.
- Laitteen saa korjata vain valtuutettu huoltoliike.
- Älä pura tai muuta laitetta.
- Älä aseta tuotetta paikkoihin, joista se voi tipahtaa veteen. Älä aseta tuotteen
läheisyyteen tavaroita, joista voi läikkyä nestettä.
- Älä peitä ilmastointiaukkoja. Älä aseta tuotetta lämpimien paikkojen läheisyyteen,
esim. lämmittimen tai tv:n päälle tai sohvalle, jossa ilmastointiaukot ovat
vaarassa peittyä.
- Poista muuntaja aina pistorasiasta, jos et käytä tuotetta vähään aikaan.
- Tuote on suunniteltu 8–10 tunnin jatkuvaan käyttöön, vältä käyttämästä sitä
pidempään yhtäjaksoisesti. Anna laitteen levähtää hetki, ennen kuin käytät sitä
uudestaan.
- Tuote on tarkoitettu vain sisäkäyttöön.
- Älä altista laitetta suoralle auringonvalolle pitkäksi aikaa.
- Älä käytä laitetta kosteissa, pölyisissä tai likaisissa ympäristöissä.
- Puhdista näyttö vain miedolla tiskiaineella kostutetulla pehmeällä liinalla.
- Ole varovainen, kun käsittelet näyttöä, jotta näytön pinta ei naarmuunnu
tai vahingoitu.
Suomi
- Älä kytke muuntajaa pois toiston aikana. Tämä voi vahingoittaa kehykseen
liitettyä muistia. Älä myöskään poista liitettyä muistia toiston aikana.
2. Tuotekuvaus
- Digitaalinen valokuvakehys, 7˝:n laajakuvanäyttö.
- Katsele digikuviasi ilman tietokonetta.
- Liitäntä USB-muistille tai muistikortille (SD/MMC/MS).
- Mukana muuntaja.
28
Page 29

3. Painikkeet ja toiminnot
4
1
2
3
Painike/Liitäntä Toiminta
5 6 7 8
9 10
1. SD/MMC/MS
2. USB HOST
3. DC
4. < Siirtyy seuraavaan kuvaan.
5. ► Play/Pause/Vahvista Siirry päävalikkoon
6. Λ Nuoli ylös Siirry esikatseluun (pienoiskuvat).
7. > Palaa edelliseen kuvaan.
8. v Nuoli alas. Käännä kuvaa painamalla painiketta.
9. ON/OFF
10. Tuki
Liitäntä muistikortille.
Liitäntä USB-muistille, mp3-soittimelle jne. (USB 2.0).
Liitäntä pakkauksen muuntajalle (5 V DC, 1 A).
painamalla pitkään.
Virtakytkin.
Säädettävä tuki. Valokuvakehyksen voi asettaa pysty- tai
vaaka-asentoon.
29
Suomi
Page 30

4. Käytön aloittaminen
4.1 Pöytätuen asentaminen
A B
C D
4.2 Virtaliitäntä
Suomi
ON OFF
1. Liitä pakkauksen muuntajan DC-pistoke valokuvakehyksen
DC-merkittyyn liitäntään.
2. Liitä muuntajan pistoke seinäpistorasiaan.
3. Käynnistä valokuvakehys asettamalla virtakytkin (9) asentoon ON tai sammuta se
asettamalla virtakytkin asentoon OFF.
30
Page 31

4.3 Muistikortin tai USB-muistin liittäminen
Muistikortit
Voit käyttää seuraavia muistikortteja:
- Secure Digital (SD)
- Multimedia Card (MMC)
- Memory Stick (MS)
Jos digitaalikamerassasi on jokin edellä mainituista muistikorteista, voit liittää
kameran muistikortin suoraan valokuvakehykseen.
1. Aseta muistikortti SD/MMC/MS-
merkittyyn liitäntään (A) kuvan
osoittamalla tavalla. Paina kortti
varovaisesti korttipidikkeeseen.
2. Poista muistikortti vetämällä sitä
suoraan ulospäin.
A
B
USB-muistit
USB HOST -liitäntään (B) voit liittää USB-laitteesi, kuten USB-muistin tai
mp3-soittimen.
Suomi
5. Käyttö
5.1 Päävalikon selitykset
Siirry päävalikkoon painamalla pitkään ►.
Kaikkien liitettyjen medioiden kuvakkeet ja kuvaesitys näkyvät näytöllä.
USB Aktivoituu, kun valitset usb-muistin.
Card Aktivoituu, kun valitset
SD/MMC/MS-kortin.
Setup Valokuvakehyksen asetukset.
Now Playing Aloita kuvaesitys.
Siirry valikossa painikkeilla [ Λ ] ja [ v ]. Vahvista valinta ja siirry alavalikkoon painamalla
►. Näytön oikeassa yläkulmassa näytetään kuvallisesti mitä painiketta valokuvake-
hyksen takana painetaan.
Kuvaesitys käynnistyy automaattisesti, kun asetat usb-muistin tai muistikortin
kehykseen, kun päävalikko on auki.
31
Page 32

5.2 Kuvaesitys
Kuvaesityksen käynnistäminen:
1. Liitä laitteeseen USB-muisti tai muistikortti, joka sisältää kuvatiedostoja JPG/
JPEG-muodossa.
2. Valitse päävalikosta USB, CARD tai Now Playing ja vahvista valinta painamalla ►.
3. Kuvaesitys käynnistyy.
Kun käynnistät kuvaesityksen, näytän alaosaan ilmestyy näyttövalikko. Pääset näyttövalikkoon myös painamalla kuvaesityksen aikana nopeasti ►.
Toiminnot (kuvaesityksen aikana):
[ ►] Play/OSD menu [ ] Preview [ ] Previous
(Hold ) [ ►]: Main Menu [ ] Rotate [ ] Next
< Esikatselu (pienoiskuvat).
/
v
Λ
> Kuvan kääntäminen.
Nopea painallus ►
Pitkä painallus ►
Edellinen tai seuraava kuva.
Kuvaesityksen keskeyttäminen
Siirtyminen päävalikkoon.
Suomi
5.3. Näyttövalikon toiminta
Voit katsoa kuvia yksitellen näyttövalikon kautta. Pääset näyttövalikkoon painamalla
kuvaesityksen aikana nopeasti ►. Kuvaesitys keskeytyy.
I◄ ► ►I
Siirry näyttövalikon kuvakkeiden välillä painikkeilla < ja >.
Aloita kuvaesitys valitsemalla
►-painiketta.
Valitse edellinen tai seuraava kuva painamalla
valokuvakehyksen takana olevaa ►-painiketta.
Käännä kuvaa valitsemalla ja paina sitten valokuvakehyksen takana olevaa
►-painiketta.
Siirry esikatselutilaan valitsemalla
olevaa ►-painiketta.
Zoomaa kuvaa valitsemalla ja paina sitten valokuvakehyksen takana olevaa
►-painiketta useita kertoja.
ja paina sitten valokuvakehyksen takana olevaa
►
I◄
ja paina sitten valokuvakehyksen takana
32
tai
►I
ja paina sitten
Page 33

5.4 Esikatselu
Voit siirtyä esikatseluun kuvaesityksen aikana painamalla Λ. Siirry
kuvien välillä painikkeilla Λ, v, >,
ja <.
Siirry päävalikkoon painamalla
pitkään ►.
6. Asetukset
1. Valitse päävalikosta Setup ja vahvista valinta painamalla ►. Asetusvalikko avautuu.
2. Liiku valikossa painikkeilla [ Λ ] ja
v ] ja vahvista asetus painamalla ►.
3. Valitse haluamasi arvo painikkeilla
[ Λ ] ja [ v ]. Vahvista valinta
painamalla ►.
4. Palaa päävalikkoon painamalla
pitkään ►.
6.1 Asetusvaihtoehtoja
Asetus Kuvaus
Language Valikoiden kielen valinta
Slideshow time Kuvan esilläolon pituus. (3 s, 5 s, 15 s, 1 min, 15 min
tai 1 t.)
Slideshow shuffle Kuvien esitys satunnaisessa tai valitussa järjestyksessä.
Transition Effect Kuvaesityksen efektit.
Now Playing Kuvaesityksen aloittaminen välittömästi.
Brightness Valonvoimakkuus.
Contrast Kontrasti
Saturation Värinkylläisyys.
Hint Time Pikakomentojen näyttöaika ruudulla kuvaesityksen aikana.
Photo Mode Koko kuvaruutu tai standardinäyttö
Default Settings Tehdasasetusten palauttaminen.
Suomi
33
Page 34

7. Huolto ja ylläpito
Pyyhi kevyesti kostutetulla liinalla. Älä käytä voimakkaita puhdistusaineita
tai liuottimia.
8. Vianetsintä
Vika Toimenpiteet
Laite ei mene päälle/Siinä ei näy
kuvaa.
Laite menee automaattisesti
valmiustilaan.
Muistikortilta lukeminen ei onnistu. Varmista, että laite tukee muistikortin tie-
Jotkut kuvat latautuvat nopeammin
kuin toiset.
Varmista, että muuntaja on liitetty oikein.
Irrota muuntaja ja liitä se sitten takaisin.
dostoja. Katso kohdasta Tekniset tiedot.
Kuvien, joiden erottelukyky on korkea,
latautuminen kestää kauemmin. Matalaerottelukykyisten kuvien näyttäminen on
nopeampaa.
9. Kierrätys
Suomi
Kierrätä tuote asianmukaisesti, kun poistat sen käytöstä. Kysy tarkempia kierrätysohjeita kuntasi jäteneuvonnasta.
10. Tekniset tiedot
Näyttö 7˝:n analoginen väri-LCD, 16:9
Erottelukyky 480 (H) x 234 (V)
Käyttöjännite 5 V DC, 1 A muuntajan kanssa (100–240 V AC, 50/60 Hz)
USB-liitäntä 2.0 (liitäntä USB-muistille)
Muistikortin liitäntä SD (Secure Digital), MMC (Multimedia Card),
MS (Memory Stick)
Kuvaformaatti JPEG (Erotuskyky enintään 8000 x 8000 kuvapistettä)
Säilytyslämpötila - 20 °C ~ 60 °C
Käyttölämpötila 0 °C ~ 45 °C
Mitat 219 x 152 x 29 mm
Paino 380 g
34
Page 35

35
Page 36

Sverige
Kundtjänst Tel: 0247/445 00
Fax: 0247/445 09
E-post: kundtjanst@clasohlson.se
Internet www.clasohlson.se
Post Clas Ohlson AB, 793 85 INSJÖN
Norge
Kundesenter Tlf.: 23 21 40 00
Faks: 23 21 40 80
E-post: kundesenter@clasohlson.no
Internett www.clasohlson.no
Post Clas Ohlson AS, Postboks 485 Sentrum, 0105 OSLO
Suomi
Asiakaspalvelu Puh: 020 111 2222
Faksi: 020 111 2221
Sähköposti: info@clasohlson.fi
Internet www.clasohlson.fi
Osoite Clas Ohlson Oy, Yrjönkatu 23 A, 00100 HELSINKI
Great Britain
For consumer contact, please visit
www.clasohlson.co.uk and click on
customer service.
Internet www.clasohlson.co.uk
 Loading...