

Page 1
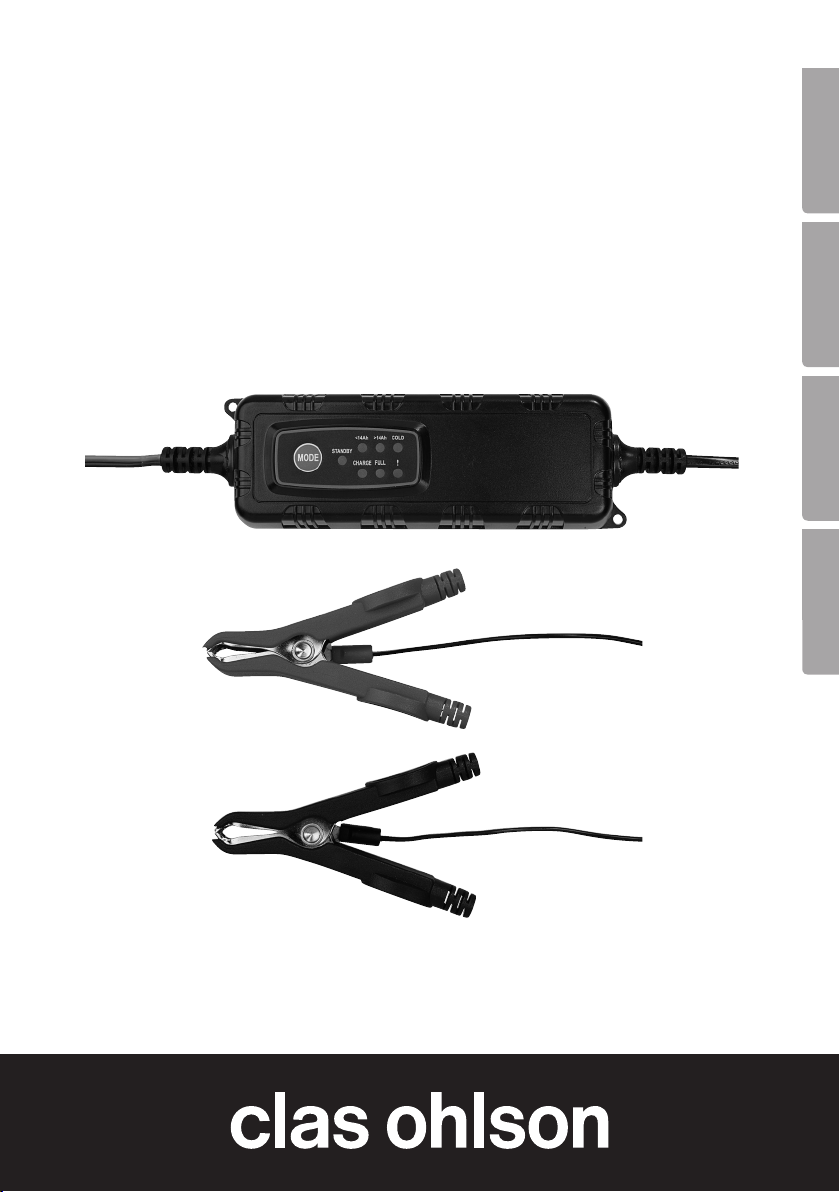
Battery charger
Batteriladdare
Batterilader
Akkulaturi
EnglishSvenskaNorskSuomi
Art.no. Model
18-1223 CB5-5L-BS
36-4049 CB5-5L-VD
Ver. 200912
Page 2

Page 3

Battery charger
Art.no 18-1223 Model CB5-5L-BS
36-4049 CB5-5L-VD
Please read the entire instruction manual before use and save it for future reference.
We reserve the right for any errors in text or images and for making any necessary
technical changes to this document. If you should have any questions concerning
technical problems please contact our Customer Services.
1. Safety
• This product must not be used by anyone (including children) suffering from
physical or mental impairment. This product should not be used by anyone without
sufficient experience or knowledge if they have not been instructed in its use by
someone who will take responsibility for their safety.
• Never let children play with the product.
• Warning! Lead-acid batteries contain corrosive battery acid. If the acid comes into
contact with skin or eyes immediately rinse with lots of water and contact your
doctor at once.
• Warning! Never attempt to charge batteries that cannot be charged!
• Intended for use indoors.
• The charger is intended only for charging lead-acid batteries of the type: WET, GEL, AGM
etc. Charging other battery types can damage the charger, battery or other property.
• The battery charger is not intended as a power-supply for other products.
• Do not attempt to charge dry-cell batteries as they may explode and cause damage.
• Do not use the charger if the mains cable is damaged. If the mains cable is
damaged and has to be replaced, to avoid any risk it must either be replaced by
the manufacturer, his/her service department or other qualified personnel.
• Do not operate the battery charger if the casing is damaged. To avoid any risk
repairs should be carried out by qualified personnel.
• Do not place the charger near batteries that are charging. The battery emits a gas
which can corrode the charger. Place the charger as far away from the battery as
the charger cables reach.
• Do not disassemble or modify the charger in any way.
• Make sure the charging clamps do not come in contact with each other when charging.
• First remove the plug before removing the charging clamps from the battery.
• Wear protective goggles and turn your face away when connecting the charger clamps.
• The battery can emit combustible gases when charging. That is why it is important
to avoid sparks near the battery. Make sure that the charging clamps do not come
into contact with each other. Avoid smoking near the battery when charging.
• Never cover the charger.
• Ensure good ventilation when charging.
• The battery charger may only be used by someone who has read and understood
the manual.
• A frozen battery must never be charged. Bring it indoors and let it defrost first.
English
3
Page 4

2. Product description
• Automatic battery charger for 12 V lead batteries.
English
• Intended for use with lead batteries (WET, GEL, AGM etc.) with a capacity of
1.2Ah to 120 Ah.
• Protection against spark emissions and short circuiting.
• LED indicates charging status and incorrect connection.
• Protection against damp and dust - IP65.
• Charging at 0.8/4 A.
• Switches automatically to maintenance charging when the battery is fully charged.
3. Functions
A. Re-setting
When the charger is connected to an electric socket it is automatically reset and
charging does not commence until you have started the charger manually.
B. <14Ah – Charge setting 1
Suitable for motorcycle batteries and other smaller batteries (14.4 V/0.8 A).
Setting 1 is to be used for batteries with a lower capacity than 14Ah. Connect the
charging clamps to the battery (red to + and black to -), then press [MODE] to select
the desired function and start charging.
• <14Ah flashes. If you do not press any button CHARGE will light up and charging
will commence at 0.8 A (+/-10 %).
• If everything is OK CHARGE will light up during the entire charging cycle until the
voltage reaches 14.4 V (+/-0.25 V).
• When charging is complete CHARGE will switch off and FULL will be lit.
Charging will switch to conservation charging.
C. >14Ah – Charge setting 2
Suitable for car batteries, regular batteries etc. (14.4 V/4A).
Setting 2 is to be used for batteries with a higher capacity than 14Ah. Connect the
charging clamps to the battery (red to + and black to -), then press [MODE] to select
the desired function and start charging.
• >14Ah flashes. If you do not press [MODE] again CHARGE will light up and
charging will commence at 4A (+/-10 %).
• If everything is OK CHARGE will light up during the entire charging cycle until the
voltage reaches 14.4 V (+/-0.25 V).
• When charging is complete CHARGE will switch off and FULL will be lit.
Charging will switch to maintenance charging.
4
Page 5

D. COLD – Charge setting 3
Suitable for large batteries or if charging commences at low temperatures (14.7 V/4A).
Setting 3 is to be used for batteries with a much higher capacity than 14Ah (or if commences at low temperatures). Connect the charging clamps to the battery (red to +
and black to -), then press [MODE] to select the desired function and start charging.
• COLD flashes. If you do not press [MODE] again CHARGE will light up and
charging will commence at 4A (+/-10 %).
• If everything is OK CHARGE will light up during the entire charging cycle until the
voltage reaches 14.7 V (+/-0.25 V).
• When charging is complete CHARGE will switch off and FULL will be lit.
Charging will switch to maintenance charging.
F. Reconditioning of battery (pulse charging) (7.5 V to 10.5 V)
The charger automatically enters this setting for weak batteries and which do not respond to normal charging. Connect the charging clamps to the battery (red to + and
black to -), then press [MODE] to select the desired function and start charging.
The charger automatically detects the battery’s voltage. If the voltage is 7.5 V (+/-0.5) to
10.5 V (+/-0.5) pulse charging commences until the voltage reaches 10.5 V (+/-0.5) and
then the charger switches over to the charge setting you selected when charging began.
• When everything is OK CHARGE will light up during the entire charging cycle until
the voltage reaches 14.4 V (+/-0.25 V).
• When charging is complete CHARGE will switch off and FULL will be lit.
Charging will switch to maintenance charging.
• Weak batteries can often be “Recharged” using this method.
G. Protection features
The charger has a protection features which switch the charger off automatically in the
event of:
• Reversed polarity
• Low voltage in batteries (under 7.5 V +/-0.5 V)
• Short circuiting
• Charging clamps are not connected
If the battery is connected with reversed polarity, the ! lamp lights up.
English
H. Temperature protection
The charger has a protection feature which reduces charging automatically if the
temperature in the charger gets too high. The charging current returns to normal when
the temperature is reduced.
5
Page 6

I. Switch between charging settings 1 (<14Ah) – 2 (>14Ah) – 3 (COLD)
Press [MODE] several times to select the desired charge setting. In this order:
English
STANDBY – Charge setting 1 - Charge setting 2 - Charge setting 3 – STANDBY etc.
Attention! If the battery is fully charged, continue maintenance charging even if the
user selects another charge setting. The protection feature prevents over-charging
of the battery.
4. Use
Attention!
Read the vehicle’s manual before commencing charging or loosening a battery cable.
Check if there are any particular instructions for charging batteries in your vehicle.
1. Always remove the power supply plug from the wall socket before connecting the
charging clamps to the battery.
2. Check that the battery can be charged before charging commences. The capacity
of the battery ought to be between 1.2 Ah and 120 Ah. Clean the battery terminals
if necessary. Use protective goggles when cleaning.
3. Connect positive (RED) battery clamp to the battery’s positive terminal (+) and
negative (BLACK) battery clamp to the battery’s negative terminal (-).
4. Connect the power supply plug to a socket when STANDBY flashes.
5. Press [MODE] several times to select the desired charge setting. In this order:
• STANDBY
• Charge setting 1 <14Ah
• Charge setting 2 >14Ah
• Charge setting 3 COLD
• STANDBY etc.
6. The LED on the charger shows the charging status.
7. Interrupt charging in the correct way. Do as follows:
1. First remove plug from the socket.
2. Then remove the charger clamp connected to the minus terminal (-) (or to the chassis).
3. Lastly remove the charger clamp connected to the plus terminal (+).
The LED displays
Display Charge setting Note
STANDBY Charging has not commenced Connection error, no charging
<14Ah Setting 1, low charge Setting 1 (14.4 V/0.8 A)
>14Ah Setting 2, high charge Setting 2 (14.4 V/4A)
COLD Setting 3, high charge Setting 3 (14.7 V/4A)
!
CHARGE Charging Charging commenced
FULL Conservation charging Battery fully charged
Connection error Incorrect polarity, check
6
Page 7

5. Care and maintenance
Cleaning: Remove plug from socket and wipe the device with a soft cloth and possibly
a mild cleaning solution. Never use abrasive cleaners or solvents.
6. Disposal
When you dispose of the product it should be done in accordance with local regulations.
If you are unsure of how to proceed, please contact the local authorities.
7. Specifications
Power supply: 220 – 240 V AC, 50/60 Hz
Effect: 0.7A RMS (65 W)
Discharging: <5 mA (not connected to 230 V AC)
Max voltage charge: 14.4 V (+/-0.25 V) or 14.7 V (+/-0.25 V)
Charging: 4.0 A (+/-10 %) or 0.8 A (+/-10 %)
Ripple: 150 mV (max)
Battery types: 12 V chargeable lead batteries with capacity 1.2 Ah to 120 Ah
Sealing: IP65
Noise: < 50 dB (test at distance of 500 mm)
Dimensions: 180 x 60 x 45 mm
Weight: 0.5 kg
English
7
Page 8

Batteriladdare
Art.nr 18-1223 Modell CB5-5L-BS
36-4049 CB5-5L-VD
Läs igenom hela bruksanvisningen före användning och spara den sedan för framtida
bruk. Vi reserverar oss för ev. text- och bildfel samt ändringar av tekniska data. Vid tekniska problem eller andra frågor, kontakta vår kundtjänst (se adressuppgifter på baksidan).
Svenska
1. Säkerhet
• Produkten får inte användas av personer (inklusive barn) med begränsad fysisk
eller mental förmåga. Den får inte heller användas av personer utan tillräcklig erfarenhet och kunskap om de inte fått instruktioner om användningen av någon som
ansvarar för deras säkerhet.
• Låt aldrig barn leka med produkten.
• Varning! Blybatterier innehåller batterisyra som är frätande. Om syra kommer ikontakt
med hud eller ögon, skölj omedelbart med mycket vatten och kontakta läkare omgående.
• Varning! Försök aldrig att ladda upp batterier som inte är laddbara.
• Avsedd för användning inomhus.
• Laddaren är endast avsedd för laddning av uppladdningsbara blybatterier av typ
gel, AGM etc. Laddning av andra batterier än dessa kan leda till skador på laddare,
batteri eller annan egendom.
• Batteriladdaren är inte avsedd som strömförsörjning till andra produkter.
• Försök inte ladda upp torrbatterier, de kan explodera och orsaka skada.
• Använd inte laddaren om nätsladden är skadad. Om nätsladden blir skadad
och måste bytas ut skall detta göras av tillverkaren, dess serviceställe eller
motsvarande behörig person för att undvika fara.
• Använd inte laddaren om höljet är skadat, reparation ska göras av behörig person
för att undvika fara.
• Placera inte laddaren nära batteriet som laddas, batteriet avger gaser som kan leda till
korrosion på laddaren. Placera laddaren så långt bort från batteriet som laddkablarna når.
• Demontera inte eller modifiera inte laddaren på något sätt.
• Se till att laddningsklämmorna inte kommer i kontakt med varandra under laddningen.
• Dra först ur stickproppen innan du tar bort laddningsklämmorna från batteriet.
• Bär skyddsglasögon och vänd bort ansiktet när du ansluter laddningsklämmorna.
• Under laddning kan batteriet avge explosiva gaser. Därför är det viktigt att undvika
gnistor närhet av batteriet. Se därför till att batteriklämmorna inte kommer i kontakt
med varandra. Undvik att röka i närheteten av batteriet under pågående laddning.
• Laddaren får inte övertäckas.
• Sörj för god ventilation vid laddning.
• Batteriladdaren får endast användas av den som har läst och förstått bruksanvisningen.
• Ett fruset batteri får aldrig laddas, ta in det och låt det tina upp först.
8
Page 9

2. Produktbeskrivning
• Helautomatisk batteriladdare för 12 V blybatterier.
• Avsedd för blybatterier gel, AGM etc. med kapacitet från 1,2 Ah till 120 Ah.
• Skydd mot gnistbildning, kortslutning.
• Lysdiodindikering för laddstatus och felkoppling.
• Skyddad mot fukt och damm - IP65.
• Laddström 0,8/4 A.
• Övergår automatiskt till underhållsladdning när batteriet är fulladdat.
3. Funktioner
A. Återställning
När laddaren ansluts till ett eluttag återställs den automatiskt, och laddningen påbörjas
inte förrän du har startat det manuellt på laddaren.
B. <14Ah - Laddningsläge 1
Lämpligt för MC-batterier och andra mindre batterier (14,4 V/0,8 A).
Läge 1 är avsett för att användas till batterier med lägre kapacitet än 14 Ah. Anslut
laddningsklämmorna till batteriet (röd till + och svart till -), tryck sedan på [MODE] för
att välja önskad funktion och starta laddningen.
• <14Ah lyser. Om du inte trycker på någon knapp kommer CHARGE att tändas
och laddningen startar med 0,8 A (+/-10 %).
• Om allt är OK kommer CHARGE att lysa under hela laddningstiden tills
spänningen når upp till 14,4 V (+/-0,25 V).
• När laddningen är klar kommer CHARGE att slockna och FULL tänds, laddningen
kommer att övergå till underhållsladdning.
C. >14Ah - Laddningsläge 2
Lämpligt för bilbatterier, fritidsbatterier etc. (14,4 V/4 A).
Läge 2 är avsett för att användas till batterier med högre kapacitet än 14 Ah. Anslut
laddningsklämmorna till batteriet (röd till + och svart till -), tryck sedan på [MODE] för
att välja önskad funktion och starta laddningen.
• >14Ah lyser. Om du inte trycker på [MODE] igen kommer CHARGE att tändas
och laddningen startar med 4 A (+/-10 %).
• Om allt är OK kommer CHARGE att lysa under hela laddningstiden tills
spänningen når upp till 14,4 V (+/-0,25 V).
• När laddningen är klar kommer CHARGE att slockna och FULL tänds.
Laddningen kommer nu att övergå till underhållsladdning.
Svenska
9
Page 10

D. COLD - Laddningsläge 3
Lämpligt för stora batterier eller om laddningen pågår i låg temperatur (14,7 V/4 A).
Läge 3 är avsett för att användas till batterier med mycket högre kapacitet än 14 Ah
(eller om laddningen pågår i låg temperatur). Anslut laddningsklämmorna till batteriet
(röd till + och svart till -), tryck sedan på [MODE] för att välja önskad funktion och
starta laddningen.
• COLD lyser. Om du inte trycker på [MODE] igen kommer CHARGE att tändas och
laddningen startar med 4 A (+/-10 %).
• Om allt är OK kommer CHARGE att lysa under hela laddningstiden tills
spänningen når upp till 14,7 V (+/-0,25 V).
Svenska
• När laddningen är klar kommer CHARGE att slockna och FULL tänds.
Laddningen kommer nu att övergå till underhållsladdning.
F. Rekonditionering av batteri (pulsladdning) (7,5 V till 10,5 V)
Detta läge används automatiskt till batterier som är dåliga och inte tar emot normal
laddning. Anslut laddningsklämmorna till batteriet (röd till + och svart till -), tryck sedan
på [MODE] för att välja önskad funktion och starta laddningen.
Laddaren känner automatiskt av batteriets spänning. Om spänningen är 7,5 V
(+/-0,5V) till 10,5 V (+/-0,5V) påbörjas pulsladdning som pågår tills spänningen når
över 10,5 V (+/-0,5V) då övergår laddaren till det laddningsläge som du har valt när
laddningen startade.
• När allt är OK kommer CHARGE att lysa under hela laddningstiden tills spänningen
når upp till 14,4 V (+/-0,25 V).
• När laddningen är klar kommer CHARGE att slockna och FULL tänds, laddningen
kommer nu att övergå till underhållsladdning.
G. Skyddsläge
Laddaren har skyddsfunktion som stänger av laddningen automatiskt vid:
• Fel polaritet
• Underspänning hos batteriet (under 7,5 V +/-0,5 V)
• Kortslutning
• Laddningsklämmorna inte är anslutna
Vid inkoppling med fel polaritet lyser !-lampan.
H. Temperaturskydd
Laddaren har skyddsfunktion som minskar laddningen automatiskt om temperaturen
iladdaren blir för hög. Laddningsströmmen återgår till normalt när temperaturen sjunker.
10
Page 11

I. Växla mellan laddningslägen 1 (<14Ah) – 2 (>14Ah) – 3 (COLD)
Tryck flera gånger på [MODE] för att välja önskat laddningsläge, i den här ordningen:
STANDBY - Laddningsläge 1 - Laddningsläge 2 - Laddningsläge 3 – STANDBY o.s.v.
Obs! Om batteriet är fulladdat fortsätter underhållsladdningen, även om användaren väljer
annat laddningsläge. Det är en skyddsfunktion som förhindrar överladdning av batteriet.
4. Användning
Obs! Läs fordonets handbok innan du påbörjar laddningen eller lossar någon kabel till
batteriet, kontrollera om det finns några särskilda anvisningar för laddning av batteriet
iditt fordon.
1. Drag alltid ur nätsladdens stickpropp från vägguttaget innan du ansluter
laddningsklämmorna till batteriet.
2. Kontrollera att batteriet är laddningsbart innan laddningen påbörjas. Batteriets
kapacitet bör vara mellan 1,2 Ah och120 Ah. Rengör batteriets poler vid behov,
använd skyddsglasögon vid rengöring.
3. Anslut positiv (RÖD) batteriklämma till batteriets pluspol (+) och negativ (SVART)
batteriklämma till batteriets minuspol (-).
4. Anslut nätsladdens stickpropp till ett eluttag STANDBY lyser.
5. Tryck flera gånger på [MODE] för att välja önskat laddningsläge, i den här ordningen:
• STANDBY
• Laddningsläge 1 <14Ah
• Laddningsläge 2 >14Ah
• Laddningsläge 3 COLD
• STANDBY o.s.v.
6. Lysdioderna på laddaren visar laddningens status.
7. Avbryt laddningen på rätt sätt. Gör så här:
1. Ta först ur stickproppen ur eluttaget.
2. Ta sedan bort laddningsklämman som är ansluten till minus (-) (eller till chassiet).
3. Ta slutligen bort laddningsklämman som är ansluten till plus (+).
Svenska
Lysdiodernas visning
Visning Laddningsläge Anmärkningar
STANDBY Ingen laddning pågår Felkoppling, ingen laddning
<14Ah Läge 1, låg laddström Läge 1 (14,4 V/0,8 A)
>14Ah Läge 2, hög laddström Läge 2 (14,4 V/4A)
COLD Läge 3, hög laddström Läge 3 (14,7 V/4A)
! Felkoppling Fel polaritet, kontrollera
CHARGE Laddning Laddning pågår
FULL Underhållsladdning Batteriet är fulladdat
11
Page 12

5. Skötsel och underhåll
Rengöring: Ta bort stickkontakten från eluttaget och torka sedan av apparaten
med en mjuk trasa och eventuellt ett milt rengöringsmedel. Använd aldrig slipande
rengöringsmedel eller lösningsmedel.
6. Avfallshantering
När du ska göra dig av med produkten ska detta ske enligt lokala föreskrifter.
Är du osäker på hur du ska gå tillväga, kontakta din kommun.
Svenska
7. Specifikationer
Drivspänning: 220 – 240 V AC, 50/60 Hz
Strömförbrukning: 0,7A RMS (65 W)
Urladdning: <5 mA (ej ansluten till 230 V AC)
Max laddspänning: 14,4 V (+/-0.25 V) eller 14,7 V (+/-0.25 V).
Laddström: 4,0 A (+/-10 %) eller 0,8 A (+/-10 %).
Rippel: 150 mV (max)
Batterityper: 12 V laddningsbara blybatterier med kapacitet 1,2 Ah till 120 Ah
Kapsling: IP65
Ljud: <50 dB (test på 500 mm avstånd)
Mått: 180 x 60 x 45 mm
Vikt: 0,5 kg
12
Page 13

Batterilader
Art.nr. 18-1223 Modell CB5-5L-BS
36-4049 CB5-5L-VD
Les nøye igjennom hele bruksanvisningen og ta vare på den til senere bruk. Vi reserverer
oss mot ev. tekst- og bildefeil, samt forandringer av tekniske data. Ved tekniske problemer
eller andre spørsmål, ta kontakt med vårt kundesenter (se opplysninger på baksiden).
1. Sikkerhet
• Produktet må ikke benyttes av personer (inkl. barn) med begrensede fysiske
eller mentale ferdigheter. Det må heller ikke benyttes av personer som ikke har
tilstrekkelig erfaring og kunnskap eller ikke har fått instruksjon om bruken av
personen som har ansvaret for deres sikkerhet.
• La aldri barn leke med produktet.
• Advarsel! Blybatterier inneholder batterisyre, som er etsende. Hvis syren kommer
i kontakt med hud eller øyne, må man skylle umiddelbart med mye vann og ta
kontakt med lege omgående.
• Advarsel! Lad aldri opp batterier som ikke er oppladbare.
• Kun for innendørs bruk.
• Laderen er kun beregnet til lading av ladbare blybatterier av typen: WET, GEL,
AGM etc. Lading av andre typer batterier kan føre til skader på lader og andre
gjenstander i den umiddelbare nærhet.
• Batteriladeren er ikke beregnet til strømforsyning av andre produkter.
• Tørrbatterier må ikke lades opp. De kan eksplodere og forårsake skader.
• Bruk aldri laderen hvis strømledningen er skadet. Dersom strømledningen blir skadet skal
den skiftes ut og dette skal utføres av produsenten, deres servicested eller tilsvarende.
• Laderen må ikke brukes dersom deksel er skadet. Reparasjon skal utføres av
kyndige fagpersoner.
• Plasser ikke laderen nær batteriet som skal lades. Batteriet avgir gasser som
kan føre til korrosjon på laderen. Plasser laderen så langt borte fra batteriet som
ladekablene tillater.
• Det må ikke utføres modifikasjoner eller inngrep på laderen.
• Påse også at ledningsklemmene ikke kommer i kontakt med hverandre under lading.
• Trekk ut støpselet før klemmene tas av fra batteriet.
• Bruk vernebriller og vend ansiktet bort når klemmene kobles til.
• Under lading kan batteriet avgi eksplosive gasser. Derfor er det viktig å unngå
gnister nær batteriet. Påse derfor at batteriklemmene ikke kommer i kontakt med
hverandre. Unngå tobakksrøyking nær batteriet under lading.
• Laderen må ikke tildekkes!
• Sørg for god ventilasjon under ladingen.
• Batteriladeren må kun brukes av voksne personer som har lest og
forstått bruksanvisningen.
• Et frosset batteri må aldri lades. Ta det inn i varmen og la det tine opp først.
Norsk
13
Page 14

2. Produktbeskrivelse
• Helautomatisk batterilader for 12 V blybatterier.
• Beregnet til lading av blybatterier (WET, GEL, AGM etc.) med kapasitet fra
1,2 Ah til 120 Ah.
• Beskyttet mot kortslutning.
• Lysdiodeindikering for ladestatus og feilkobling.
• Beskyttet mot fuktighet og støv, IP65.
• Ladestrøm 0,8/4 A.
• Laderen går automatisk over til vedlikeholdslading når batteriet er fulladet.
3. Funksjoner
A. Innstilling
Når laderen kobles til strømuttaket stilles den automatisk inn, men ladingen starter ikke
Norsk
før laderen startes manuelt.
B. <14Ah - Lademodus 1
Passer for mc- og andre mindre batterier (14,4 V / 0,8 A).
Lademodus 1 er beregnet til bruk på batterier med lavere kapasitet enn 14 Ah. Koble
klemmene til batteriet (rød til + og svart til -). Trykk deretter på [MODE] for å velge modus og start ladingen.
• <14Ah lyser: Hvis ikke [MODE] trykkes inn vil CHARGE tennes og ladingen starter
med 0,8A (+/- 10 %).
• Hvis alt er riktig, kommer CHARGE til å lyse under hele ladeprosessen til
spenningen kommer opp til 14,4 V (+/- 0,25 V).
• Når ladingen er ferdig vil CHARGE slukke og FULL tennes. Laderen går nå over
på vedlikeholdslading.
C. >14 Ah - Lademodus 2
Passer for bilbatterier etc. (14,4 V/4 A).
Lademodus 2 er beregnet til bruk på batterier med høyere kapasitet enn 14 Ah. Koble
klemmene til batteriet (rød til + og svart til -). Trykk deretter på [MODE] for å velge modus og start ladingen.
• >14Ah lyser: Hvis ikke [MODE] trykkes inn vil CHARGE tennes og ladingen starter
med 4A (+/- 10 %).
• Hvis alt er riktig, kommer CHARGE til å lyse under hele ladeprosessen til
spenningen kommer opp til 14,4 V (+/- 0,25 V).
• Når ladingen er ferdig vil CHARGE slukke og FULL tennes. Laderen går nå over
på vedlikeholdslading.
14
Page 15

D. COLD - Lademodus 3
Passer for store batterier eller når ladingen pågår ved lav temperatur (14,7 V / 4 A).
Modus 3 er beregnet til bruk på batterier med kapasitetstørre enn 14 Ah (eller lading
ved lave temperaturer). Koble klemmene til batteriet (rød til + og svart til -). Trykk deretter på [MODE] for å velge modus og start ladingen.
• COLD lyser: Hvis ikke [MODE] trykkes inn vil CHARGE tennes og ladingen starter
med 4A (+/- 10 %).
• Hvis alt er riktig, kommer CHARGE til å lyse under hele ladeprosessen til
spenningen kommer opp til 14,7V (+/- 0,25 V).
• Når ladingen er ferdig vil CHARGE slukke og FULL tennes. Laderen går nå over
på vedlikeholdslading.
F. Rekondisjonering av batteri (pulslading) (7,5 V til 10,5 V)
Denne modusen brukes automatisk til batterier som er dårlige og ikke kan ta i mot
vanlig lading. Koble klemmene til batteriet (rød til + og svart til -). Trykk deretter på
[MODE] for å velge modus og start ladingen.
Laderen registrerer automatisk batteriets spenning. Hvis spenningen er 7,5 V(+/-0,5) til
10,5 V (+/-0,5) vil pulsladingen starte. Den vil pågå til spenningen når over 10,5 V, og
da går ladingen over til lademodusen som du har forhåndsinnstilt laderen på.
• Hvis alt er riktig, kommer CHARGE til å lyse under hele ladeprosessen til
spenningen kommer opp til 14,4 V (+/- 0,25 V).
• Når ladingen er ferdig vil CHARGE slukke og FULL tennes. Laderen går nå over
på vedlikeholdslading.
• Med denne ladingen kan ofte dårlige batterier ”gjenopplives”.
G. Beskyttelsesmodus
Laderen har en automatisk beskyttelse som stenger ladingen når:
• Polariteten er feil
• Batteriet har for lav spenning, dvs. mindre enn 7,5 V
• Kortslutning
• Ladeklemmene ikke er koblet til
Ved kobling til feil polaritet lyser !-lampen.
Norsk
H. Temperaturbeskyttelse
Laderen har en beskyttelsesfunksjon som reduserer ladingen automatisk hvis temperaturen i laderen blir for høy. Ladestrømmen starter igjen når temperaturen har sunket.
15
Page 16

I. Skifte mellom lademodus 1, 2 og 3
Trykk gjentatte ganger på [MODE] for å velge ønsket lademodus. Det vises i denne
rekkefølgen: STANDBY - 1 - 2 - 3 - STANDBY o.s.v.
Obs! Hvis batterier er fulladet fortsetter vedlikeholdsladingen selv om annen modus
velges. Det er en beskyttelse for å hindre overlading i batteriet.
4. Bruk
Obs! Les bilens brukerhåndbok før ladingen startes. Kontroller at det eksisterer spesi-
elle anvisninger for lading av batteriet.
1. Trekk alltid strømledningens støpsel ut fra strømuttaket før du kobler ladekablene
til batteriet.
2. Kontroller at batteriet er beregnet for lading, før ladingen startes. Batteriets
kapasitet bør ligge mellom 1,2 Ah og 120 Ah. Rengjør batteriets poler ved behov.
Bruk alltid vernebriller ved rengjøring.
3. Koble positiv (RØD) batteriklemme til batteriets plusspol (+) og negativ (SVART)
batteriklemme til batteriets minuspol (-).
Norsk
4. Koble støpselet til et strømuttak og STANDBY vil lyse.
5. Trykk gjentatte ganger på [MODE] for å velge ønsket lademodus. Det vises
i denne rekkefølgen:
• STANDBY
• Lademodus 1 <14Ah
• Lademodus 2 >14Ah
• Lademodus 3 COLD
• STANDBY osv.
6. Lysdiodene på laderen viser ladingens status.
7. Avslutt ladingen riktig. Det gjøres på følgende måte:
1. Trekk først støpselet ut av stømuttaket.
2. Ta deretter av ladeklemmen som er koblet til minus (-).
3. Tilslutt fjernes ladeklemmen som er koblet til pluss (+).
Lysdiodenes vising
Visning Lademodus Anm.
STANDBY Ingen lading pågår Feilkobling, ingen lading
<14Ah Posisjon 1, lav ladestrøm Posisjon 1 (14,4 V/0,8 A)
>14Ah Posisjon 2, høy ladestrøm Posisjon 2 (14,4 V/4 A)
COLD Posisjon 3, høy ladestrøm Posisjon 3 (14,7 V/4 A)
! Feilkobling Feil polaritet, kontroller
CHARGE Lading Lading pågår
FULL Vedlikeholdslading: Batteriet er fulladet
16
Page 17

5. Stell og vedlikehold
Rengjøring: Laderen kobles fra strømuttaket og tørkes med en myk klut. Benytt eventuelt et mildt rengjøringsmiddel. Bruk aldri slipende rengjøringsmidler eller løsemidler.
6. Avfallshåndtering
Når produktet skal kasseres, må det skje i henhold til lokale forskrifter. Ved usikkerhet,
ta kontakt med lokale myndigheter.
7. Spesifikasjoner
Spenning: 220-240 V AC, 50/60 Hz
Strømforbruk: 0,7A RMS (65 W)
Utlading: <5 mA (ikke koblet til 230 V AC)
Maks ladespenning: 14,4 V (+/-0,25 V) eller 14,7 V (+/-0,25 V)
Ladestrøm: 4,0 A (+/-10 %) eller 0,8 A (+/-10 %)
Rippel: 150 mV (maks.)
Batterityper: 12 V ladbare blybatterier med kapasitet fra 1,2 Ah til 120 Ah
Kapsling: IP65
Lyd: <50 dB (test på 500 mm avstand)
Mål: 180 x 60 x 45 mm
Vekt: 0,5 kg
Norsk
17
Page 18

Akkulaturi
Tuotenro 18-1223 Malli CB5-5L-BS
36-4049 CB5-5L-VD
Lue käyttöohjeet ennen tuotteen käyttöönottoa. Säilytä käyttöohjeet tulevaa tarvetta
varten. Pidätämme oikeuden teknisten tietojen muutoksiin. Emme vastaa mahdollisista
teksti- tai kuvavirheistä. Jos laitteeseen tulee teknisiä ongelmia, ota yhteys myymälään
tai asiakaspalveluun (yhteystiedot käyttöohjeen lopussa).
1. Turvallisuus
• Tuotetta saavat käyttää aikuiset, joilla ei ole fyysisiä tai psyykkisiä rajoitteita.
Henkilöt, joilla ei ole riittävästi kokemusta ja taitoja, eivät saa käyttää tuotetta ilman
turvallisuudesta vastaavan henkilön antamia ohjeita.
• Älä koskaan anna lasten leikkiä tuotteella.
• Varoitus! Lyijyakut sisältävät syövyttävää akkuhappoa. Jos happoa joutuu iholle tai
silmiin, huuhtele välittömästi runsaalla vedellä ja ota yhteys lääkäriin.
• Varoitus! Älä lataa laturissa kertakäyttöparistoja.
• Tuote on tarkoitettu sisäkäyttöön.
• Laturilla saa ladata ainoastaan seuraavan tyyppisiä lyijyakkuja: WET, GEL, AGM jne.
Muuntyyppisten akkujen tai kertakäyttöparistojen lataus voi johtaa henkilötai omaisuusvahinkoihin.
Suomi
• Akkulaturia ei ole tarkoitettu muiden tuotteiden virtalähteeksi.
• Älä lataa kuivaparistoja, sillä ne voivat räjähtää ja aiheuttaa vahinkoa.
• Älä käytä laturia, jos sen johto on vioittunut. Vioittuneen johdon saa vaihtaa
ainoastaan valmistaja, sen määräämä huoltopiste tai valtuutettu ammattilainen.
• Älä käytä laturia, jos sen kotelo on vioittunut. Laturin kotelon saa korjata ainoastaan
valtuutettu ammattilainen.
• Älä sijoita laturia ladattavan akun läheisyyteen. Akusta vapautuu kaasuja, jotka voivat
aiheuttaa korroosiota. Sijoita laturi niin kauas akusta kuin latauskaapelit yltävät.
• Älä pura laturia osiin tai muuta sitä millään tavalla.
• Varmista, etteivät akkupuristimet pääse kosketuksiin toistensa kanssa latauksen aikana.
• Irrota ensin pistoke ja vasta sitten akkupuristimet akusta.
• Käytä suojalaseja ja käännä kasvosi poispäin, kun liität akkupuristimia.
• Akku voi erittää räjähdysherkkiä kaasuja latauksen aikana. Siksi on erittäin tärkeää
välttää kipinöitä akun läheisyydessä. Varmista tämän vuoksi, etteivät akkupuristimet
kosketa toisiaan. Älä tupakoi latauksen aikana.
• Laturia ei saa peittää.
• Huolehdi hyvästä ilmanvaihdosta latauksen aikana.
• Akkulaturia saavat käyttää vain sellaiset henkilöt, jotka ovat lukeneet ja
ymmärtäneet sen käyttöohjeen.
• Jäätynyttä akkua ei saa ladata. Anna sen sulaa ennen latauksen aloittamista.
18
Page 19

2. Tuotekuvaus
• Täysautomaattinen akkulaturi 12 V:n lyijyakuille.
• Lyijyakuille (WET, GEL, AGM jne.), joiden kapasiteetti on 1,2 Ah–120 Ah.
• Kipinöinti- ja oikosulkusuoja.
• Lataustilan ja vikakytkennän merkkivalot.
• Suojattu kosteudelta ja pölyltä, IP65.
• Latausvirta 0,8/4 A.
• Siirtyy automaattisesti ylläpitolataukseen akun latauduttua täyteen.
3. Toiminnot
A. Asetusten palautus
Kun liität laturin sähköpistorasiaan, sen asetukset palautuvat automaattisesti.
Lataus alkaa vasta kun olet käynnistänyt sen manuaalisesti laturista.
B. <14Ah - Lataustila 1
Soveltuu moottoripyörän akuille ja muille pienemmille akuille (14,4 V/0,8 A).
Lataustila 1 on tarkoitettu akuille, joiden kapasiteetti on alle 14 Ah. Liitä akkupuristimet
akkuun (punainen plussaan ja musta miinukseen). Valitse sitten haluamasi toiminto
painamalla [MODE] ja aloita lataus.
• <14Ah palaa. Jos et paina mitään painiketta, CHARGE syttyy ja lataus alkaa
0,8A:lla (+/- 10 %).
• Jos kaikki on kunnossa, CHARGE-valo palaa latauksen ajan, kunnes jännite
saavuttaa 14,4 V (+/- 0,25 V).
• Kun lataus on valmis, CHARGE sammuu ja FULL syttyy. Laturi siirtyy ylläpitolataukseen.
Suomi
C. >14 Ah - Lataustila 2
Soveltuu auton akuille, vapaa-ajan akuille ym. (14,4 V/4 A)
Lataustila 2 on tarkoitettu akuille, joiden kapasiteetti on yli 14 Ah. Liitä akkupuristimet
akkuun (punainen plussaan ja musta miinukseen). Valitse sitten haluamasi toiminto
painamalla [MODE] ja aloita lataus.
• >14Ah palaa. Jos et paina uudestaan [MODE]-painiketta, niin CHARGE syttyy ja
lataus alkaa 4 A:lla (+/-10 %).
• Jos kaikki on kunnossa, CHARGE-valo palaa latauksen ajan, kunnes jännite
saavuttaa 14,4 V (+/- 0,25 V).
• Kun lataus on valmis, CHARGE sammuu ja FULL syttyy. Laturi siirtyy ylläpitolataukseen.
19
Page 20

D. COLD - Lataustila 3
Soveltuu suurille akuille tai lataukseen matalissa lämpötiloissa (14,7 V/4 A).
Lataustila 3 on tarkoitettu akuille, joiden kapasiteetti on paljon suurempi kuin 14 Ah
(tai jos lataus tapahtuu matalassa lämpötilassa). Liitä akkupuristimet akkuun (punainen
plussaan ja musta miinukseen). Valitse sitten haluamasi toiminto painamalla [MODE] ja
aloita lataus.
• COLD palaa. Jos et paina uudestaan [MODE]-painiketta, niin CHARGE syttyy ja
lataus alkaa 4 A:lla (+/-10 %).
• Jos kaikki on kunnossa, CHARGE-valo palaa latauksen ajan, kunnes jännite
saavuttaa 14,7 V (+/- 0,25 V).
• Kun lataus on valmis, CHARGE sammuu ja FULL syttyy. Laturi siirtyy ylläpitolataukseen.
F. Akun virkistyslataus (7,5 V–10,5 V)
Laturi siirtyy automaattisesti virkistyslataukseen, jos normaalilataus ei onnistu. Liitä ak- Liitä ak-Liitä akkupuristimet akkuun (punainen plussaan ja musta miinukseen). Valitse sitten haluamasi
toiminto painamalla [MODE] ja aloita lataus.
Laturi tunnistaa automaattisesti akun jännitteen. Jos jännite on 7,5 V (+/-0,5) - 10,5 V
(+/-0,5), laturi aloittaa virkistyslatauksen, joka jatkuu, kunnes jännite ylittää 10,5 V
(+/-0,5). Sen jälkeen laturi siirtyy siihen lataustilaan, jonka valitsit latauksen alussa.
• Kun kaikki on kunnossa, CHARGE palaa latauksen ajan, kunnes jännite saavuttaa
14,4 V (+/- 0,25 V).
• Kun lataus on valmis, CHARGE sammuu ja FULL syttyy. Laturi siirtyy ylläpitolataukseen.
• Tällä tavalla huonot akut saadaan yleensä toimimaan.
Suomi
G. Suojatoiminto
Laturissa on suojatoiminto, joka keskeyttää latauksen automaattisesti
seuraavissa tapauksissa:
• Väärä napaisuus
• Akun alijännite (alle 7,5 V +/-0,5 V)
• Oikosulku
• Akkupuristimia ei ole liitetty
Jos liität puristimet vääriin napoihin, !-valo syttyy.
H. Lämpötilasuoja
Laturissa on suojatoiminto, joka vähentää latausta automaattisesti, jos laturin lämpötila
nousee liian korkeaksi. Latausvirta palaa normaaliksi, kun lämpötila laskee.
20
Page 21

I. Lataustilojen vaihtaminen 1 (<14Ah) – 2 (>14Ah) – 3 (COLD)
Valitse haluamasi lataustila [MODE]-painikkeella. Tilat vaihtuvat seuraavassa järjestyksessä: STANDBY - Lataustila 1 - Lataustila 2 - Lataustila 3 – STANDBY jne.
Huom.! Jos akku on ladattu täyteen, laturi siirtyy ylläpitolataukseen, vaikka valitset
toisen lataustilan. Näin estetään akun ylilataus.
4. Käyttö
Huom.! Lue ajoneuvon käsikirja ennen kuin aloitat akun latauksen tai irrotat jonkin
akun kaapeleista. Tarkista, liittyykö ajoneuvon akun lataukseen erityisiä ohjeita.
1. Irrota aina verkkojohdon pistoke pistorasiasta, ennen kuin liität akkupuristimet akkuun.
2. Varmista, että akkua saa ladata, ennen kuin aloitat lataamisen. Akun kapasiteetin
on oltava 1,2 Ah–120 Ah. Puhdista akun navat tarvittaessa. Käytä suojalaseja
puhdistamisen aikana.
3. Liitä positiivinen (PUNAINEN) akkupuristin akun plusnapaan (+) ja negatiivinen
(MUSTA) akkupuristin akun miinusnapaan (-).
4. Liitä virtajohdon pistoke verkkopistorasiaan. STANDBY palaa.
5. Valitse haluamasi lataustila [MODE]-painiketta. Tilat vaihtuvat seuraavassa
järjestyksessä:
• STANDBY
• Lataustila 1 <14Ah
• Lataustila 2 >14Ah
• Lataustila 3 COLD
• STANDBY jne
6. Laturin etupuolella olevat latausmerkkivalot kertovat latauksen tilan.
7. Keskeytä lataus oikealla tavalla:
1. Irrota ensin pistoke pistorasiasta.
2. Irrota sitten miinusnapaan (tai koteloon) liitetty akkupuristin.
3. Irrota lopuksi plusnapaan liitetty akkupuristin.
Suomi
Merkkivalot
Näyttö Latauksen tila Selitys
STANDBY Ei latausta käynnissä Virhekytkentä, ei latausta
<14Ah Lataustila 1, matala latausvirta Tila 1 (14,4 V/0,8 A)
>14 Ah Lataustila 2, korkea latausvirta Tila 2 (14,4 V/4 A)
COLD Lataustila 3, korkea latausvirta Tila 3 (14,7 V/4A)
! Vikakytkentä Väärä napaisuus
CHARGE Lataus Lataus käynnissä
FULL Ylläpitolataus Akku täynnä
21
Page 22

5. Huolto ja ylläpito
Puhdistus: Irrota pistoke pistorasiasta. Pyyhi laturi pehmeällä liinalla ja käytä tarvittaes- Irrota pistoke pistorasiasta. Pyyhi laturi pehmeällä liinalla ja käytä tarvittaes-Irrota pistoke pistorasiasta. Pyyhi laturi pehmeällä liinalla ja käytä tarvittaessa mietoa puhdistusainetta. Älä käytä voimakkaita puhdistusaineita tai liuottimia.
6. Kierrätys
Kierrätä tuote asianmukaisesti, kun poistat sen käytöstä.
Kysy tarkempia kierrätysohjeita kuntasi jäteneuvonnasta.
7. Tekniset tiedot
Käyttöjännite: 220–240 V AC, 50/60 Hz
Virrankulutus: 0,7 A RMS (65 W)
Purkaus: <5 mA (ei liitetty 230 V AC:hen)
Suurin latausjännite: 14,4 V (+/-0,25 V) tai 14,7 V (+/-0,25 V)
Latausvirta: 4,0 A (+/-10 %) tai 0,8 A (+/-10 %)
Hurinajännite: 150 mV (enintään)
Akkutyypit: 12 V:n ladattavat lyijyakut, joiden kapasiteetti on 1,2 Ah–120 Ah
Suomi
Kotelointi: IP65
Melutaso: <50 dB (testattu 500 mm:n etäisyydeltä)
Mitat: 180 x 60 x 45 mm
Paino: 0,5 kg
22
Page 23

Page 24

Sverige
Kundtjänst Tel: 0247/445 00
Fax: 0247/445 09
E-post: kundtjanst@clasohlson.se
Internet www.clasohlson.se
Post Clas Ohlson AB, 793 85 INSJÖN
Norge
Kundesenter Tlf.: 23 21 40 00
Faks: 23 21 40 80
E-post: kundesenter@clasohlson.no
Internett www.clasohlson.no
Post Clas Ohlson AS, Postboks 485 Sentrum, 0105 OSLO
Suomi
Asiakaspalvelu Puh.: 020 111 2222
Sähköposti: info@clasohlson.fi
Internet www.clasohlson.fi
Osoite Clas Ohlson Oy, Annankatu 34–36 A, 00100 HELSINKI
Great Britain
For consumer contact, please visit
www.clasohlson.co.uk and click on
customer service.
Internet www.clasohlson.co.uk
 Loading...