

Page 1
Installation Guide
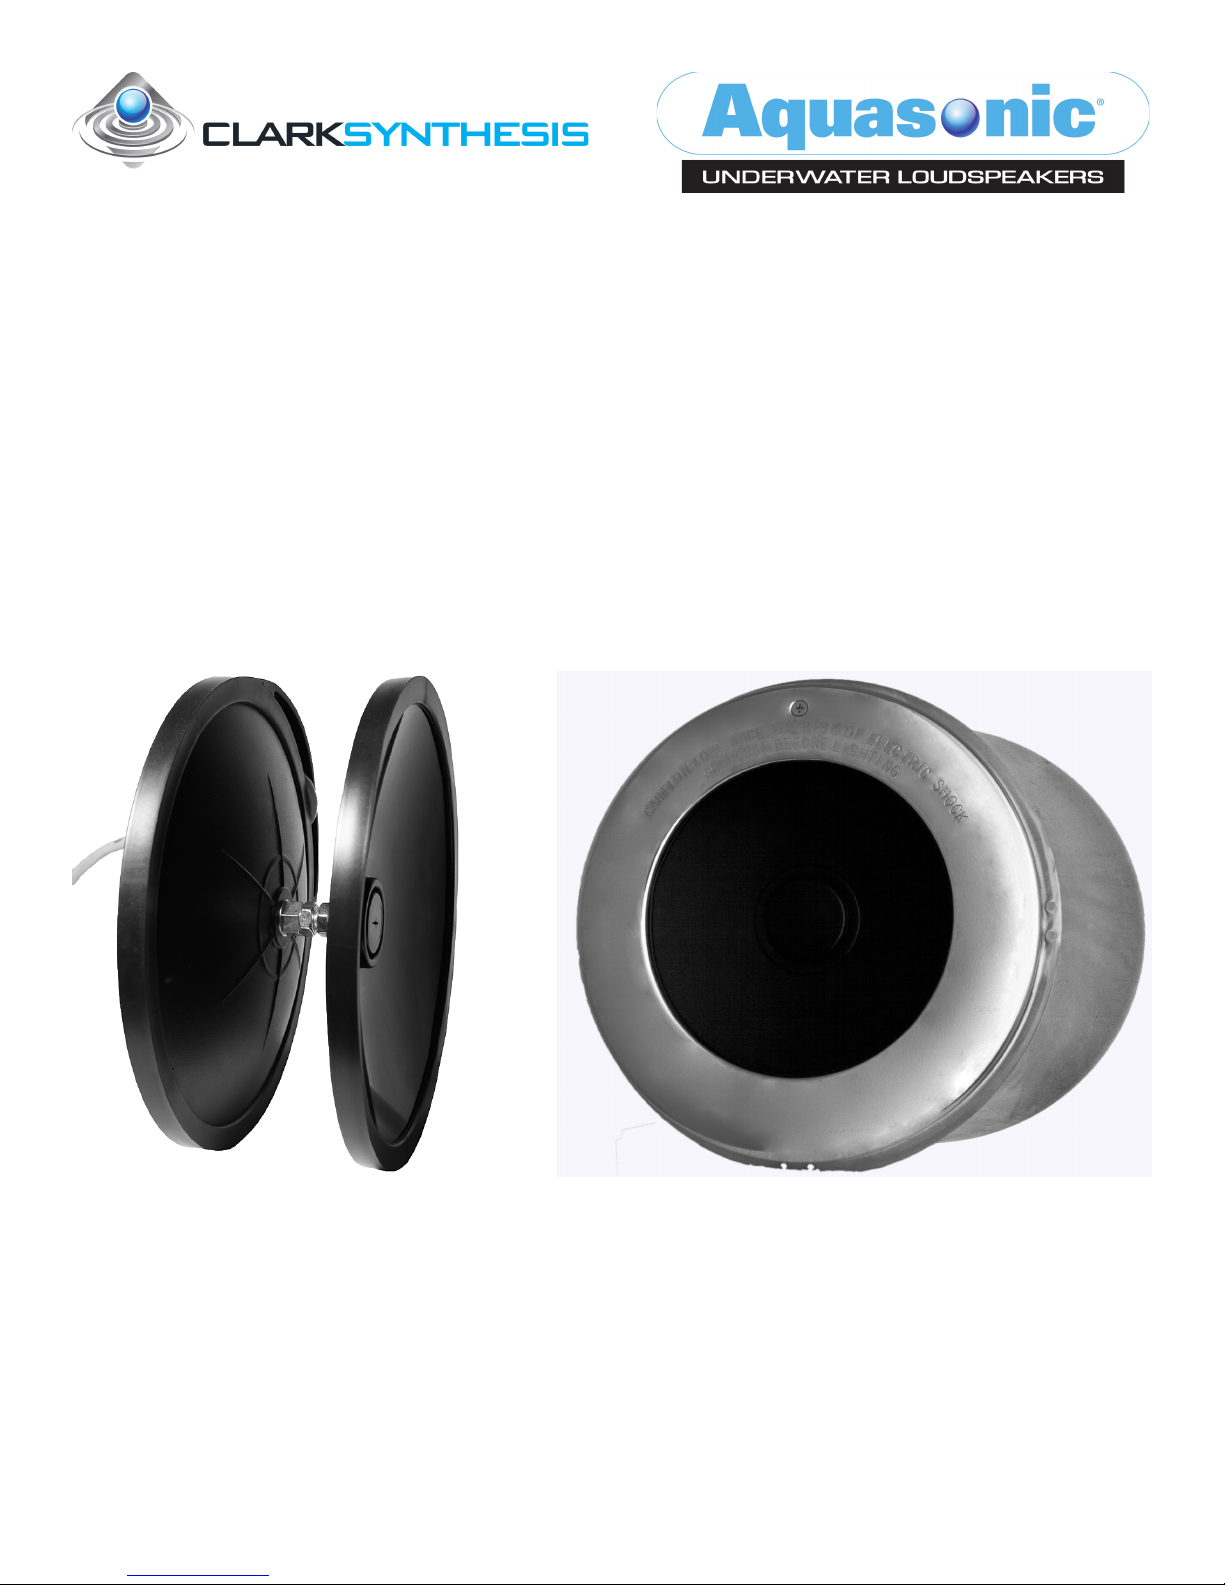
Diluvio™ Underwater Loudspeaker
Installed in a Hayward Face Rim
is procedure uses the following parts:
• Diluvio™ Underwater Loudspeaker
• Hayward Stainless Steel Face Rim, Part Number SPX0580AS
• Hayward Assembly Clamp with Screw, Nut, and Washer, Part Number SPX0580BS
• Hayward Face Rim Lockscrew, Part Number SPX0980Z3
Page 2
Diluvio™ INSTALL- HAYWARD FACE RIM
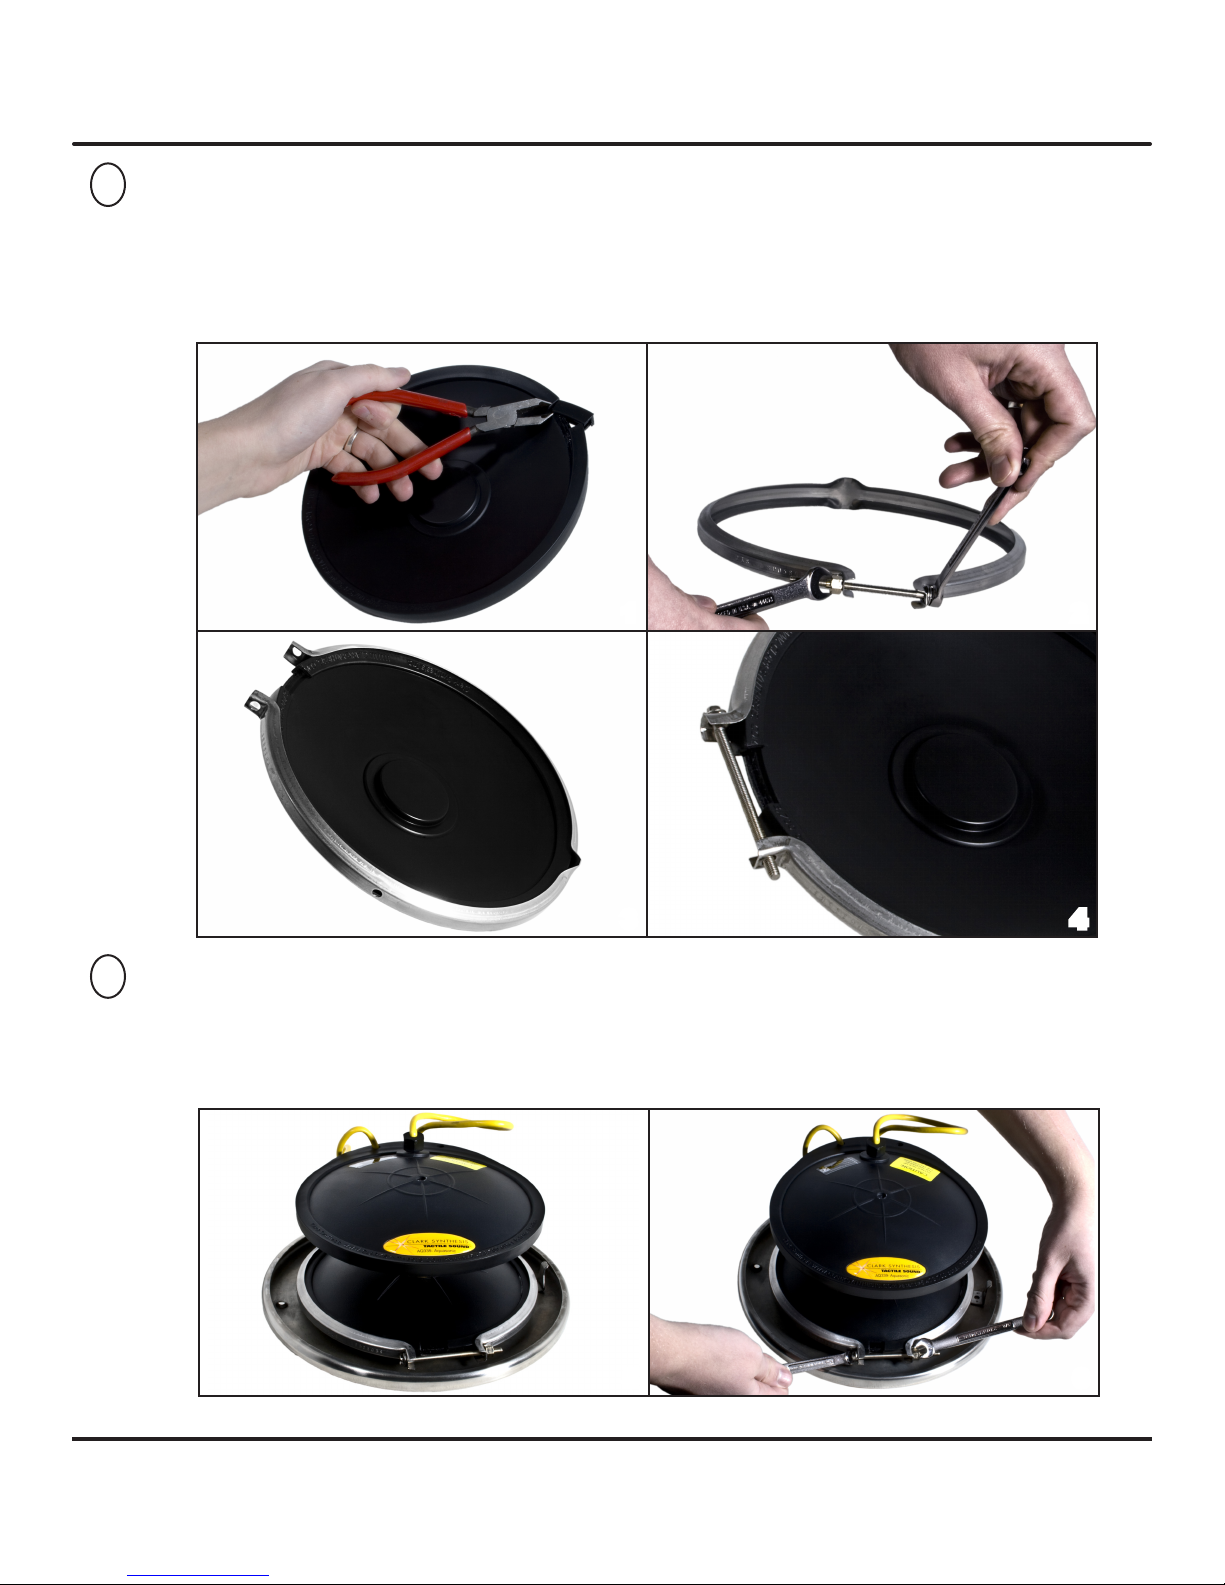
Remove the Diluvio™ Loudspeaker from its box. Using a pair of wire cutters, carefully remove 1 inch (2.54
1
cm) of the sound lens rubber ring (see Photo #1 below). DO NOT CUT the rubber ring that holds the
speaker wire. Next, remove the screw, nut, and washer from the assembly clamp (#2). Carefully spread the
assembly clamp so it can go around the sound lens rubber ring. Place the assembly clamp around the sound
lens rubber ring leaving the 1 inch (2.54 cm) gap in the rubber ring exposed (#3). Reinstall the screw, nut
, and washer in the assembly clamp (#4).
1 2
3 4
Carefully place the Hayward face rim (chrome side down) on a non-abrasive surface, and place the speaker
2
and assembly clamp on the Hayward face rim (#5). Align the assembly clamp screw so that it does not
cover the mounting tab or the face rim lockscrew. Once aligned, tighten the assembly clamp screw until
the speaker is securely attached to the face rim (#6). Do not overtighten. e gap in the rubber ring will
be reduced.
5 6
Underwater Speaker- Hayward Page 2 of 4
www.clarksynthesis.com
Page 3
Diluvio™ INSTALL- HAYWARD FACE RIM
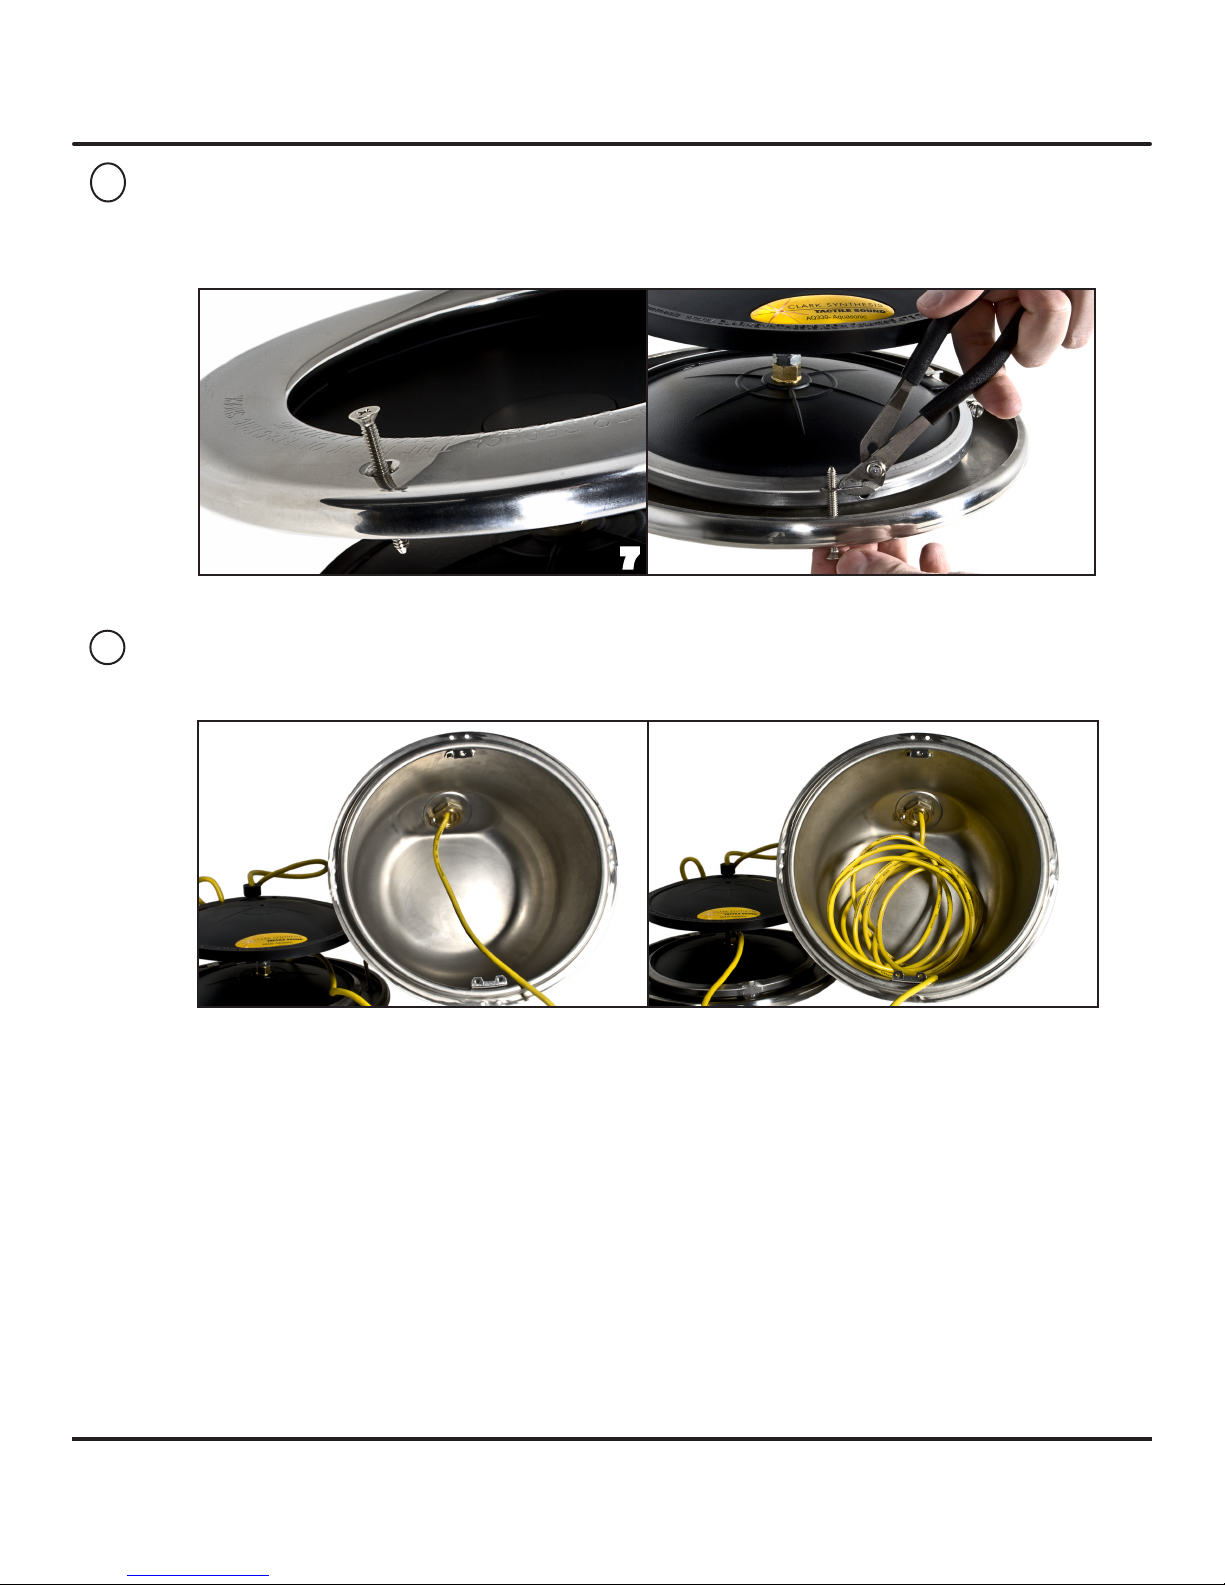
Insert the lockscrew in the face rim (#7). Place the lockwasher onto the screw threads and turn the screw
3
until the lockwasher is seated against the inside of the face rim (#8).
Note: In actual applications, the niche will already be mounted in the wall of the pool.
7 8
Take the end of the speaker wire and pull it through the conduit hole in the back of the niche using a wire
4
puller (#9). Leave 10 to 12 . of wire in the niche to allow for easier access during future servicing of the
speaker (#10).
www.clarksynthesis.com
9
Page 3 of 4 Underwater Speaker- Hayward
10
Page 4
Diluvio™ INSTALL- HAYWARD FACE RIM
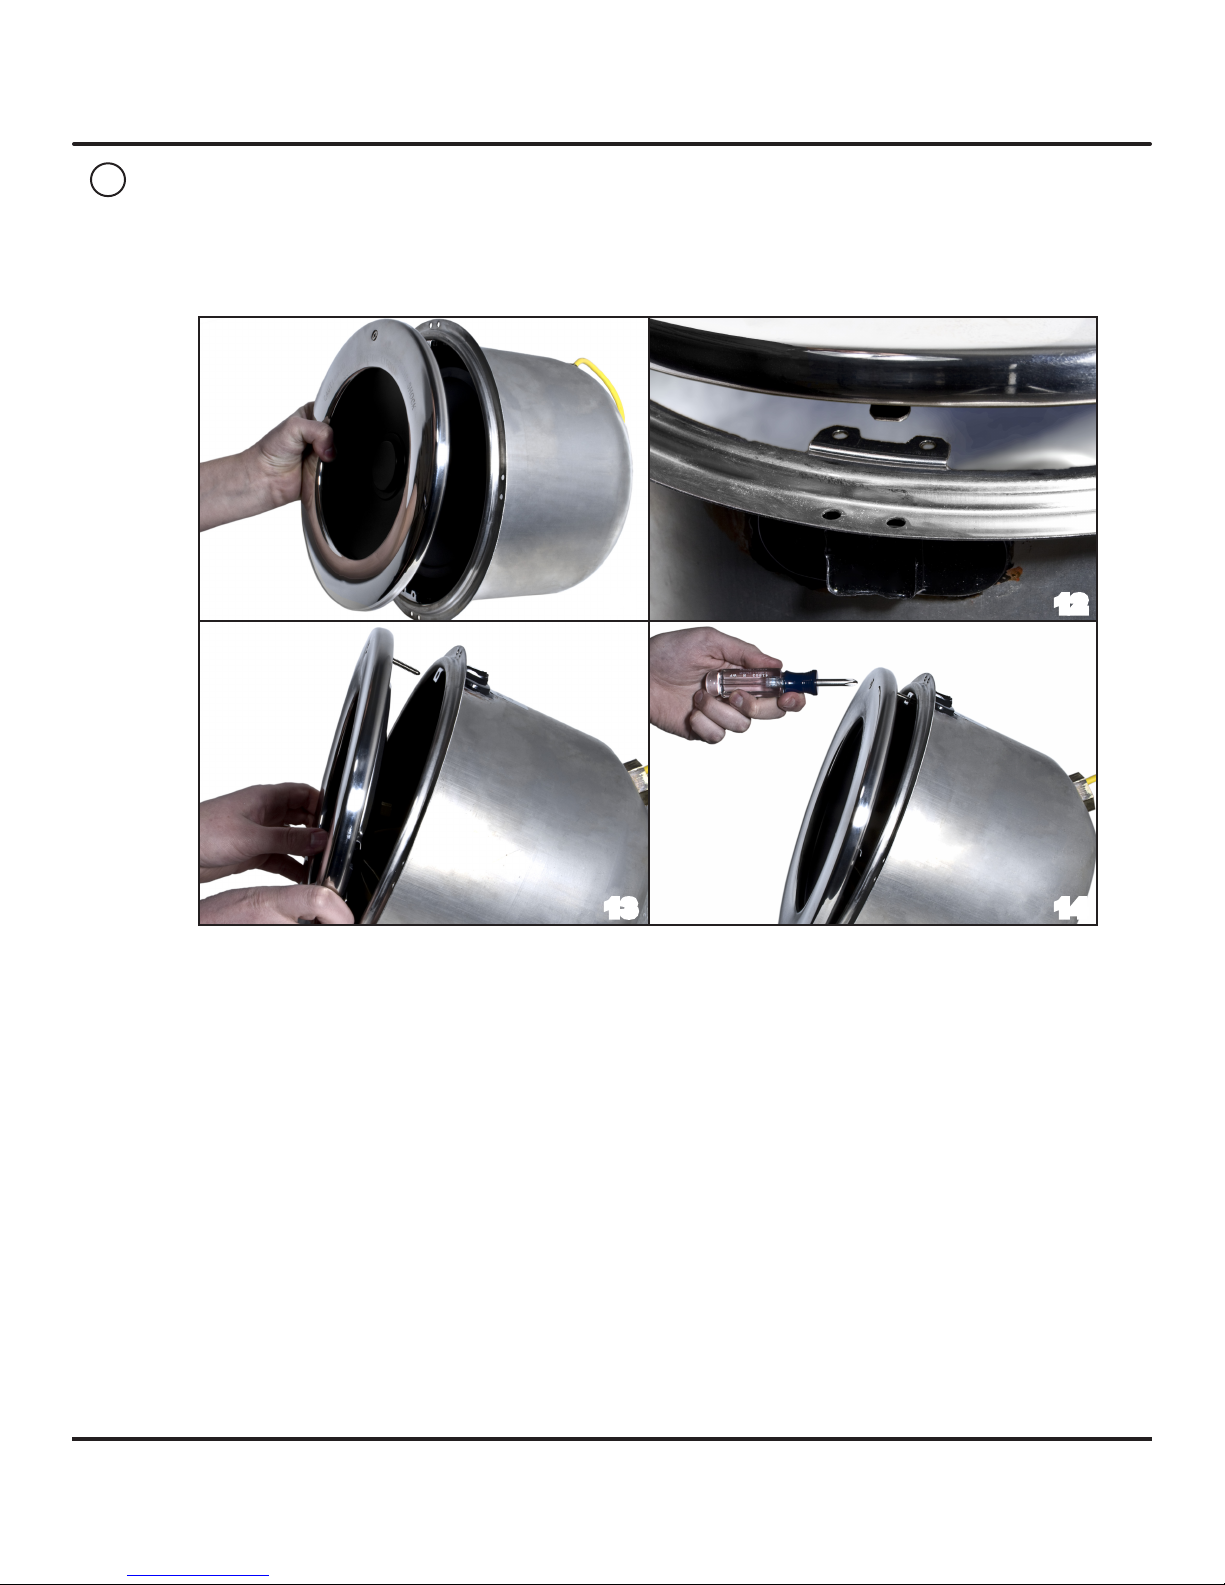
Place the speaker inside the light niche (#11). While inserting the speaker, carefully set the lock tab located
5
on the bottom of the face rim behind the receiving plate located on the bottom of the niche (#12). Align
the lockscrew on the face ring with the threaded receiving hole on the niche (#13). Attach the trim ring
securely to the niche by gently tightening the screw (#14). You are now ready to connect the speaker to
your audio system.
11
13 14
12
Underwater Speaker- Hayward Page 4 of 4
www.clarksynthesis.com
 Loading...