

Page 1
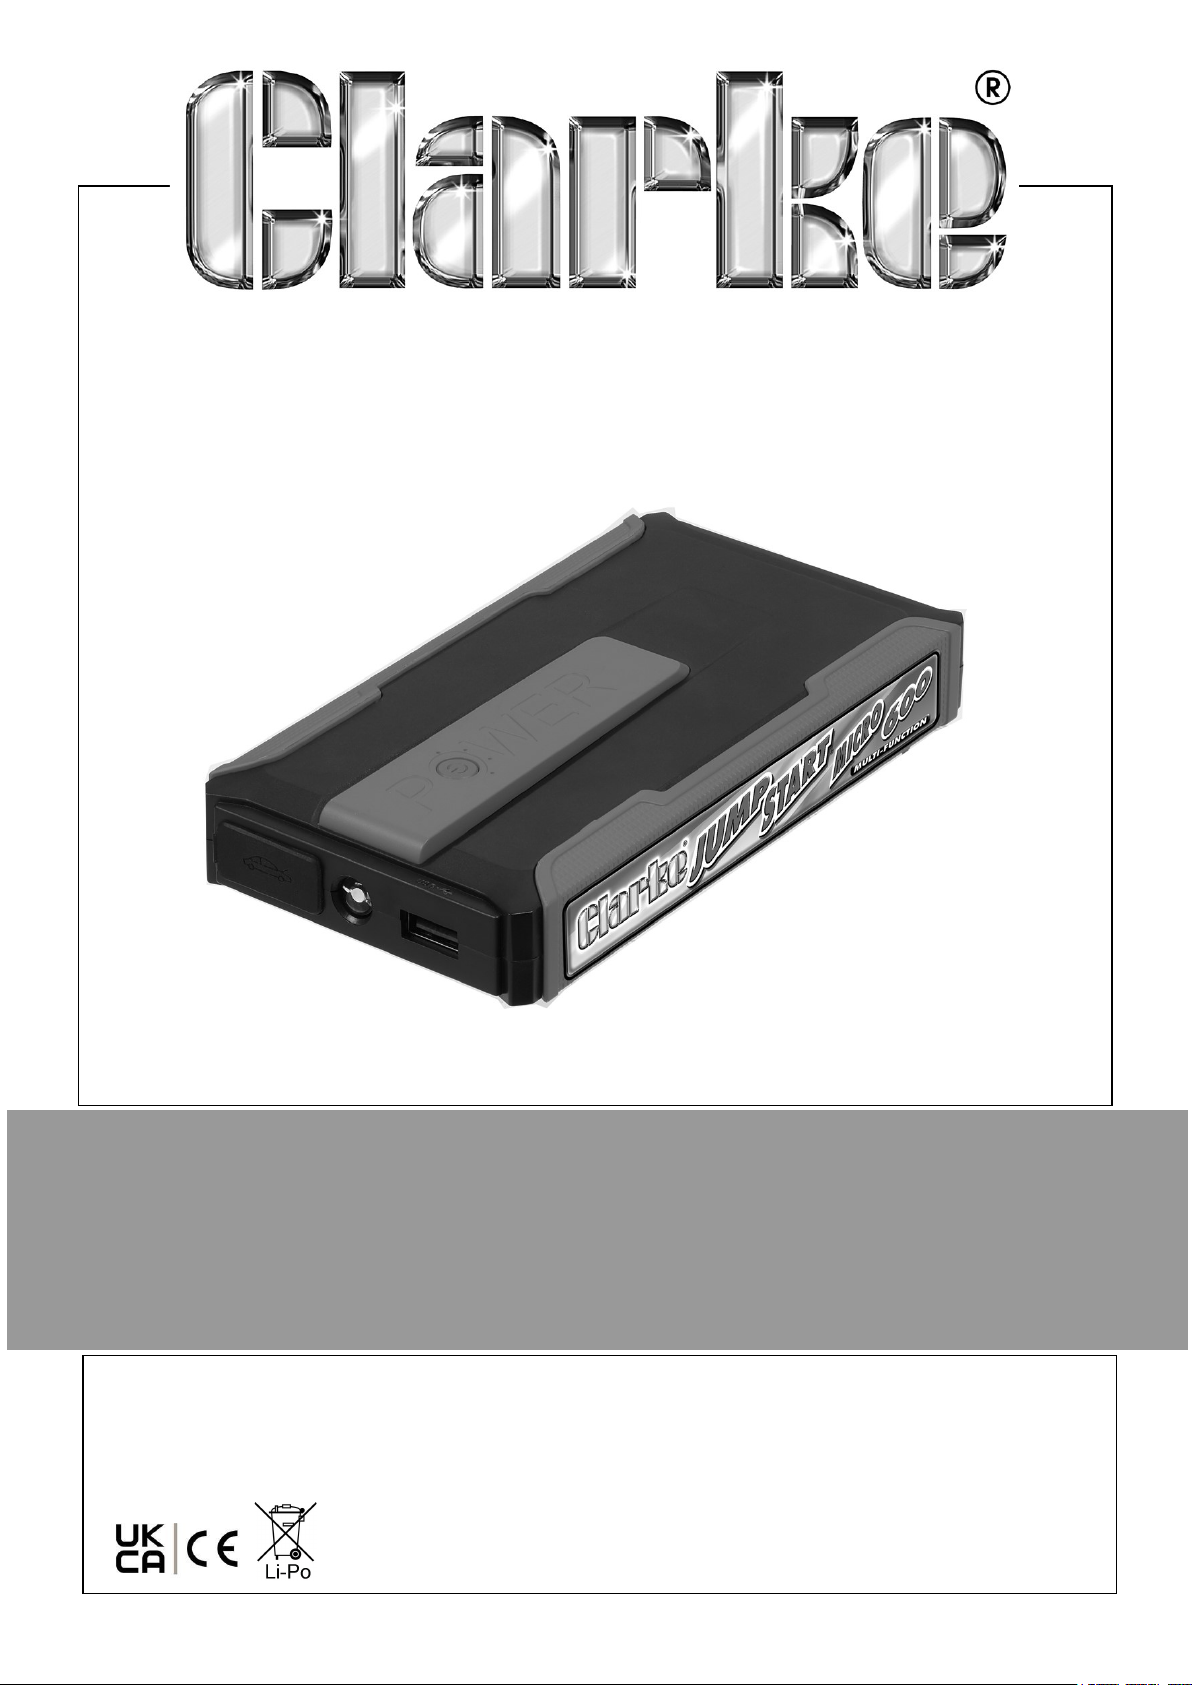
JUMPSTARTER
MODEL NO: JSM600
PART NO: 6239020
OPERATING & MAINTENANCE
INSTRUCTIONS
ORIGINAL INSTRUCTIONS GC12/25 Rev 2
Page 2
INTRODUCTION
Thank you for purchasing this CLARKE Jump-starter.
Before attempting to use this product, please read this manual thoroughly and follow
the instructions carefully. In doing so you will ensure the safety of yourself and that of
others around you, and you can look forward to your purchase giving you long and
satisfactory service. Please keep these instructions in a safe place for future
reference.
SPECIFICATIONS
Item Specification
Weight 300g
Size (L x W x H) 150mm x 80mm x 27mm
Output voltage (open circuit) 14.8V
Starting current 300A
Peak current 600A
Input Voltage/Current 5 V / 1.5A
Battery Type Sealed re-chargeable lithium-polymer
7200 mAh
USB output Power Supply 5 V DC - 2A
Estimated engine starting capacity Up to 2 litres (diesel) or 4 litres (petrol)
Lifetime 1000 cycles
Full charging time 6 -7 hours from flat
Duration possible before recharging 3 months
Max number of starts before re-charging Approx 20
Protection features Short circuit proof, over-charge protection
and discharge protection
USB Cable Plugs 1 x USB C, 1 x Micro USB, 1 x Lighting
Work Light LED, 3V, 1W.
Ingress Protection IP20
Please note that the details and specifications contained herein, are correct at the
time of going to print. However, CLARKE International reserve the right to change
specifications at any time without prior notice.
2
Parts & Service: 020 8988 7400 / E-mail: [email protected] or [email protected]
Page 3

GENERAL SAFETY
WARNING: ALL LEAD ACID BATTERIES GENERATE HYDROGEN GAS
DURING NORMAL OPERATION. THIS PROCESS INCREASES DURING
A PERIOD OF RAPID DISCHARGE.
WARNING: HYDROGEN GAS AND BATTERY ACID (SULPHURIC ACID)
CAN BE EXPLOSIVE, CORROSIVE TO SKIN, EYES AND HAIR,
DAMAGING TO CLOTHING AND METALS, FLAMMABLE, POISONOUS
TO BREATHE.
1. DO NOT leave the device exposed to the elements. Avoid direct sunlight, direct
heat, rain/moisture etc.
2. The device must only be used indoors or completely protected from the rain.
This also applies to any device being powered by the device.
3. DO NOT operate the device if any of the cables are damaged. Consult your
CLARKE dealer for repair or replacement of the parts.
4. DO NOT operate the device if the case is damaged. Consult your CLARKE dealer
or a qualified person for inspection and repair.
5. To prevent the battery from overheating and consequent damage, DO NOT
exceed our recommendations for the duration of jump starting.
6. The unit is NOT designed to be used as a replacement for a vehicle battery.
7. NEVER allow the battery to become completely discharged.
8. NEVER jump start the engine whilst the unit is being charged.
9. NEVER attempt any repairs yourself. If you have a problem with the unit contact
your local CLARKE dealer.
10. ALWAYS keep your body and clothing dry. NEVER work in a damp area without
adequate insulation against electric shock.
11. ALWAYS wear safety glasses when working with lead acid batteries.
12. If splashed by battery acid, immediately flush the area of the splash with clean
water. If a burning sensation is felt or any blistering occurs, seek medical help.
13. If battery acid comes into contact with the eyes, flush the eyes with clean water
continuously and seek medical help.
14. ALWAYS ensure that there is air circulating around the unit when in use.
15. When not in use, store in a safe dry place out of reach of children.
16. NEVER allow the jump-start leads to touch each other or to touch the same
metal object.
3
Parts & Service: 020 8988 7400 / E-mail: [email protected] or [email protected]
Page 4
17. Ensure the vehicle battery posts and battery clamps are perfectly clean before
use.
18. Connect the red clamp to the unearthed battery terminal first, (this is usually the
positive (+ve) terminal and coloured RED); then connect the black clamp to the
earthed battery terminal, (this is usually the negative (-ve) terminal and coloured
BLACK).
19. Only use this charger on lead acid batteries.
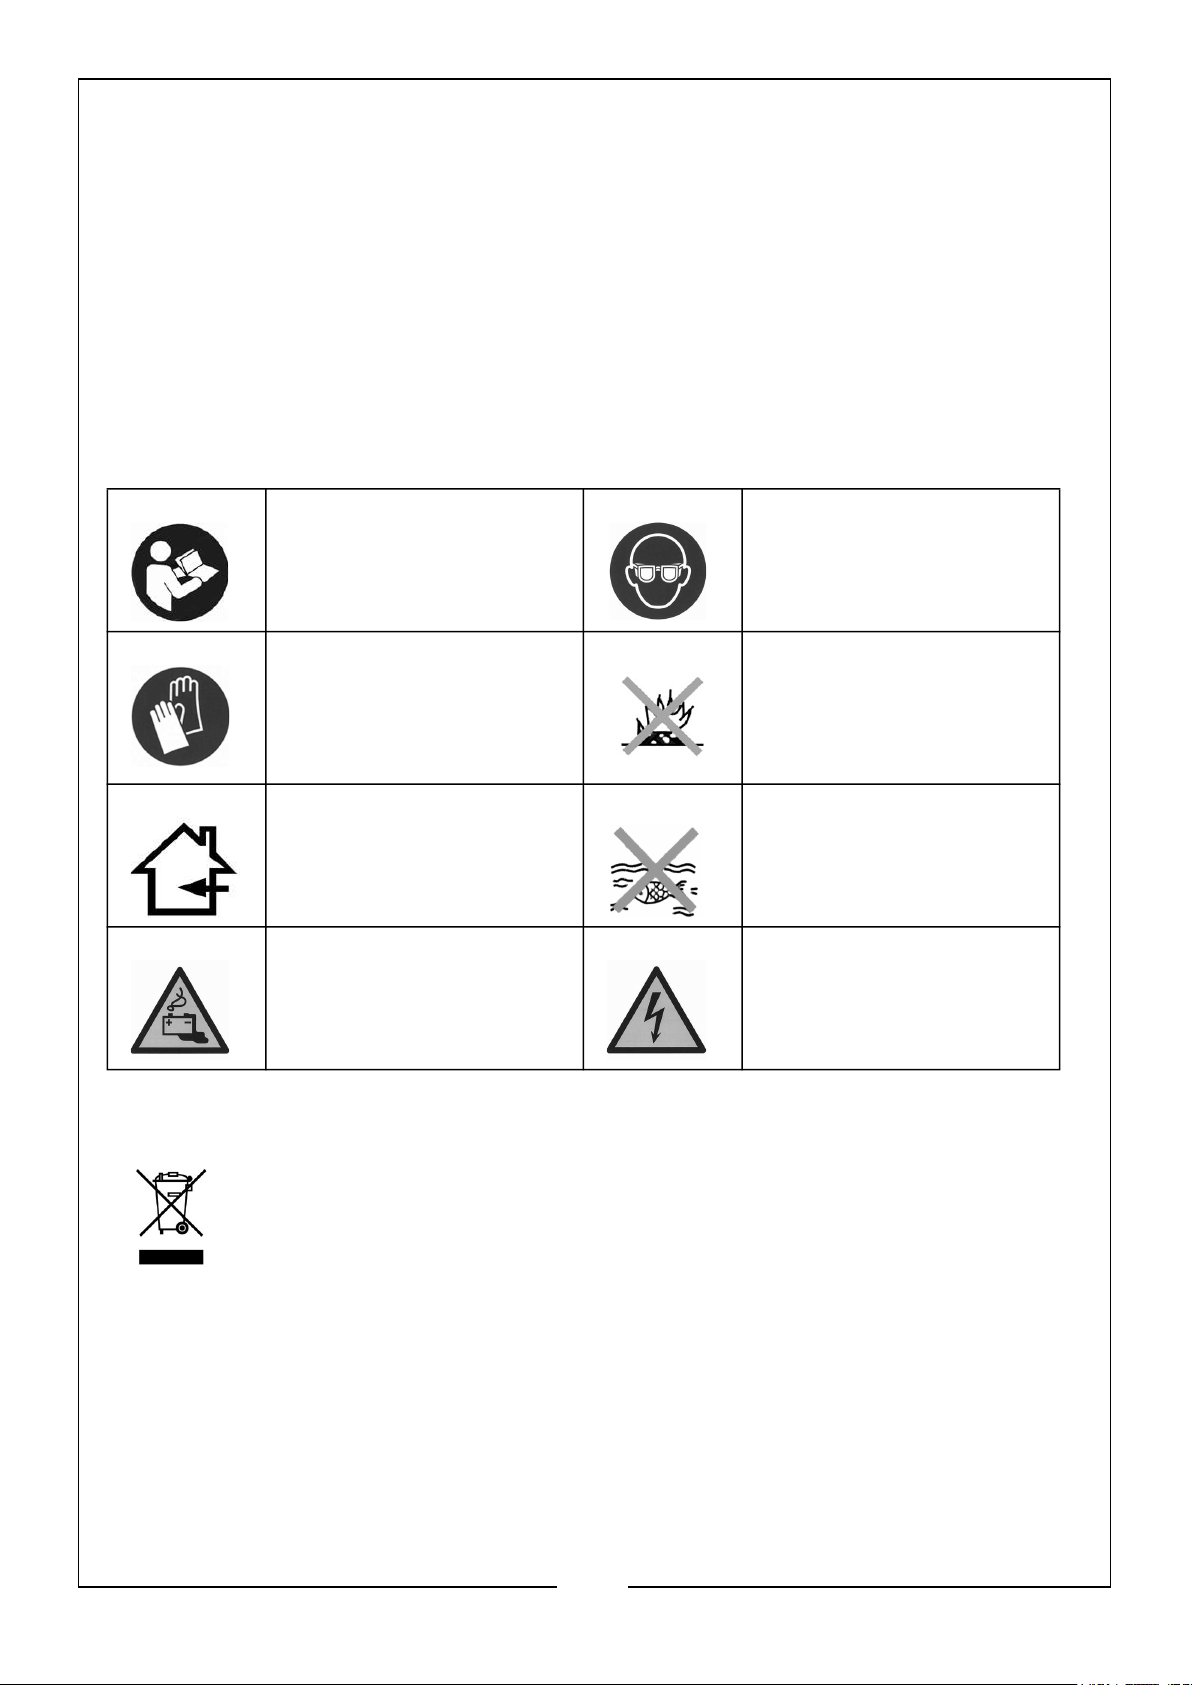
THE FOLLOWING SAFETY SYSMBOLS ARE SHOWN ON THE
PRODUCT
Read the instructionmanual
Wear Protective Gloves Do not incinerate
Indoor use only Harmful to aquatic life
Warning: Battery
Charging
Wear Eye Protection
Warning: Risk of
electrical shock
ENVIRONMENTAL RECYCLING POLICY
Through purchase of this product, the customer is taking on the obligation
to deal with the WEEE in accordance with the WEEE regulations in relation
to the treatment, recycling & recovery and environmentally sound disposal
of the WEEE.
In effect, this means that this product must not be disposed of with general
household waste but in accordance with the laws governing Waste Electrical and
Electronic Equipment (WEEE) at a recognised disposal facility.
4
Parts & Service: 020 8988 7400 / E-mail: [email protected] or [email protected]
Page 5
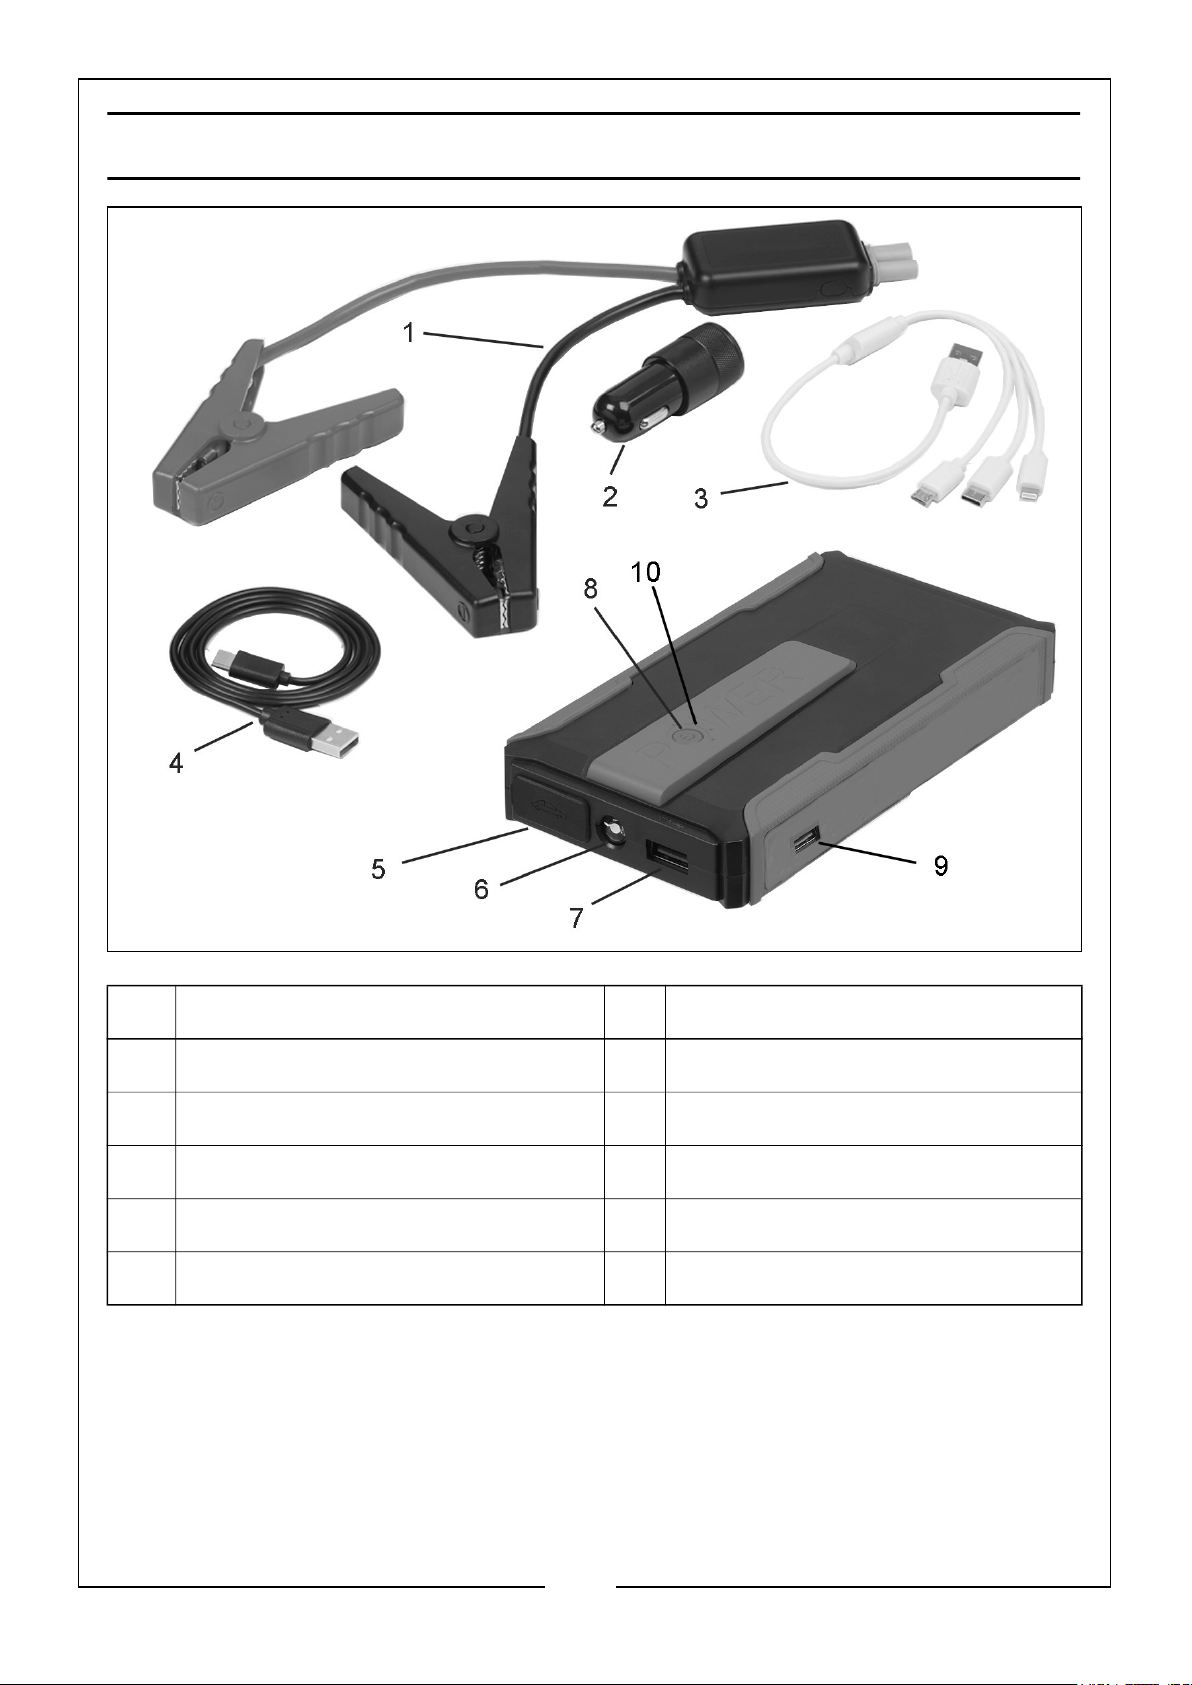
OVERVIEW
NO DESCRIPTION NO DESCRIPTION
1 Smart Jumper Cable with Clamps 6 LED Flashlight
2 12V USB Car Adapter 7 USB-A Input Socket
3 USB 3 in 1 Adapter Cable 8 On/Off Button
4 USB Charging Cable 9 USB-C Input Charging Socket
5 Jump-start Lead Socket 10 Charge indicator LEDs
5
Parts & Service: 020 8988 7400 / E-mail: [email protected] or [email protected]
Page 6
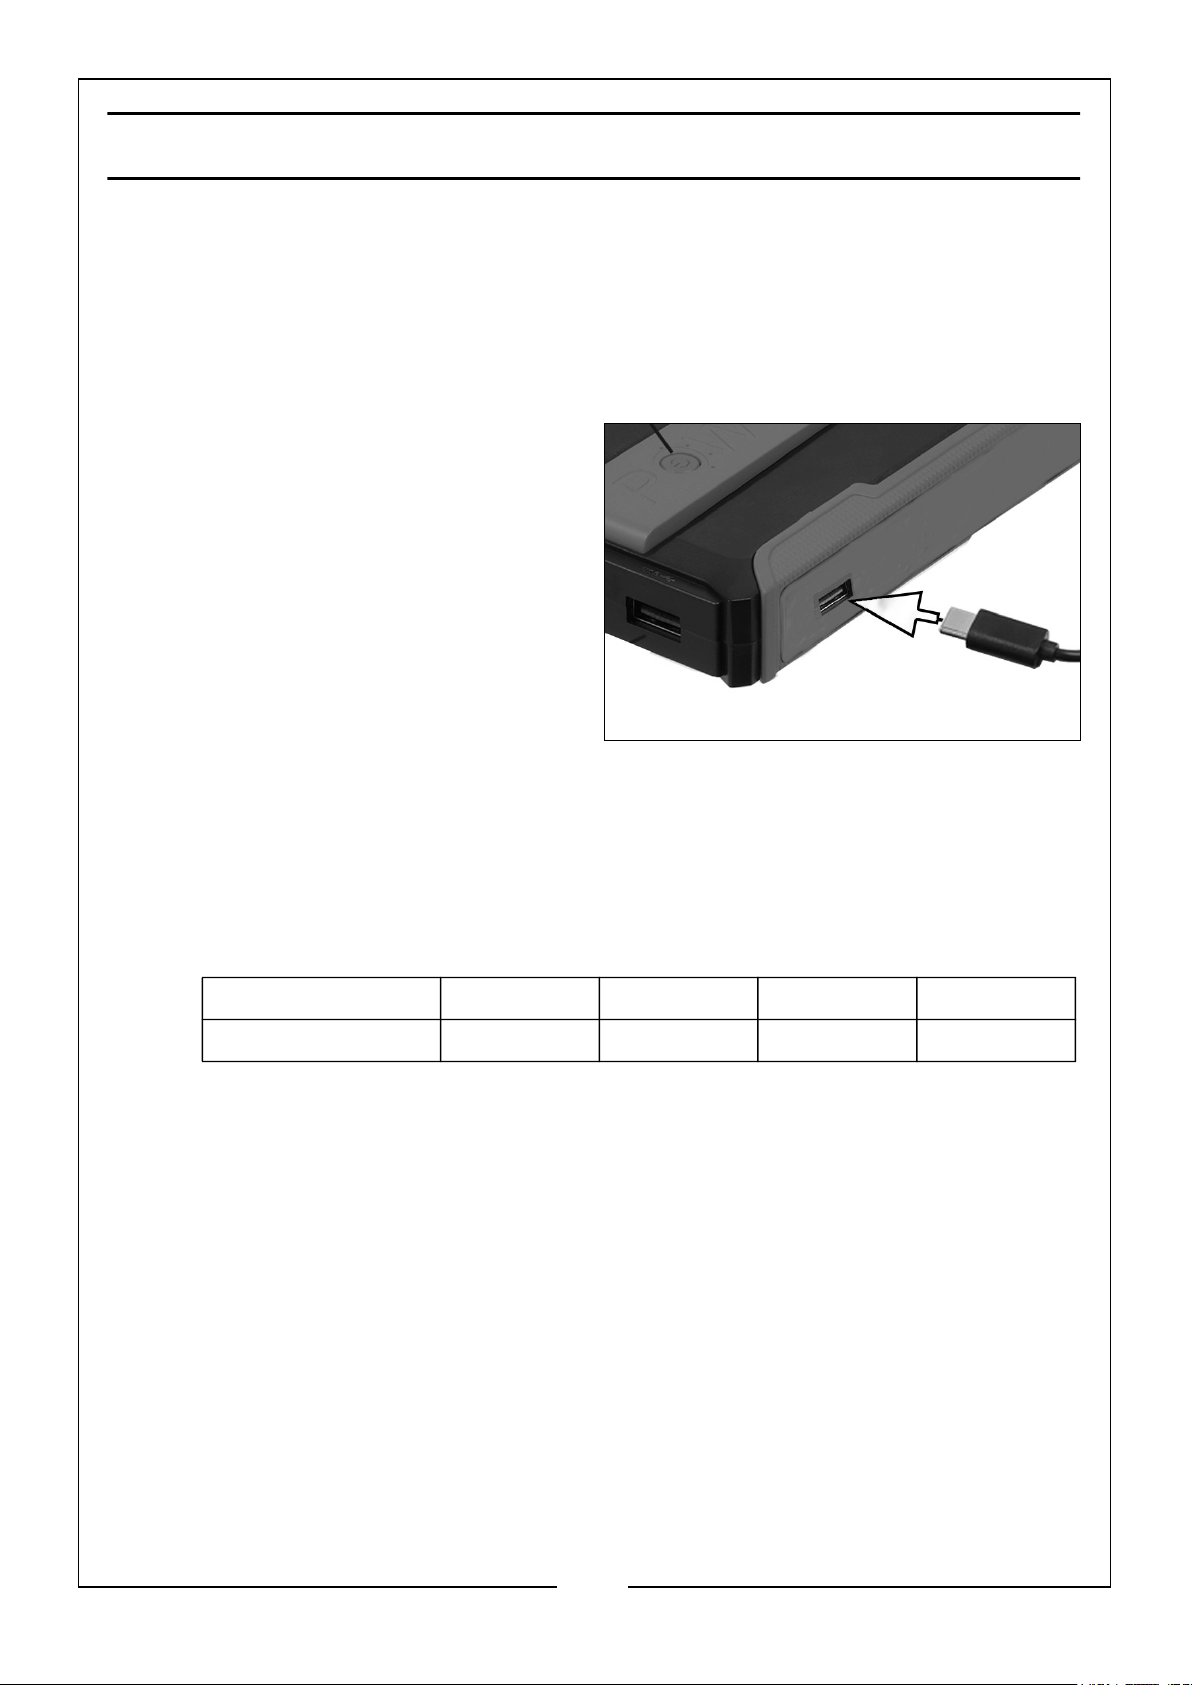
CHARGING THE DEVICE
CHARGING
You can charge the power pack using:
• The 12V DC car adapter.
• A device with a USB output socket.
1. Switch the power pack off.
2. Plug the USB charging cable into the
charger input socket and the other
end to the car adapter socket using
the supplied adaptor, or else to a
suitable appliance.
• If you are using the car adapter
socket you will need to start the
engine.
3. Disconnect the charger when fully
charged.
THE CHARGE INDICATOR
• When jumpstarting, the power indicator lights located on top of the device
must be lit. Recharge the device if required.
Indicator 1 Solid 2 Solid 3 Solid 4 Solid
Storage Level 25% 50% 75% 100%
4. The indicators will flash one by one during charging and all will be lit when fully
charged.
• The unit should hold a charge for 3-6 months but we recommend
recharging every 3 months and after each use.
TO GET THE MAXIMUM LIFE FROM THE BATTERY
• Charge the jumpstarter before first use.
• DO NOT leave in a state of discharge.
6
Parts & Service: 020 8988 7400 / E-mail: [email protected] or [email protected]
Page 7
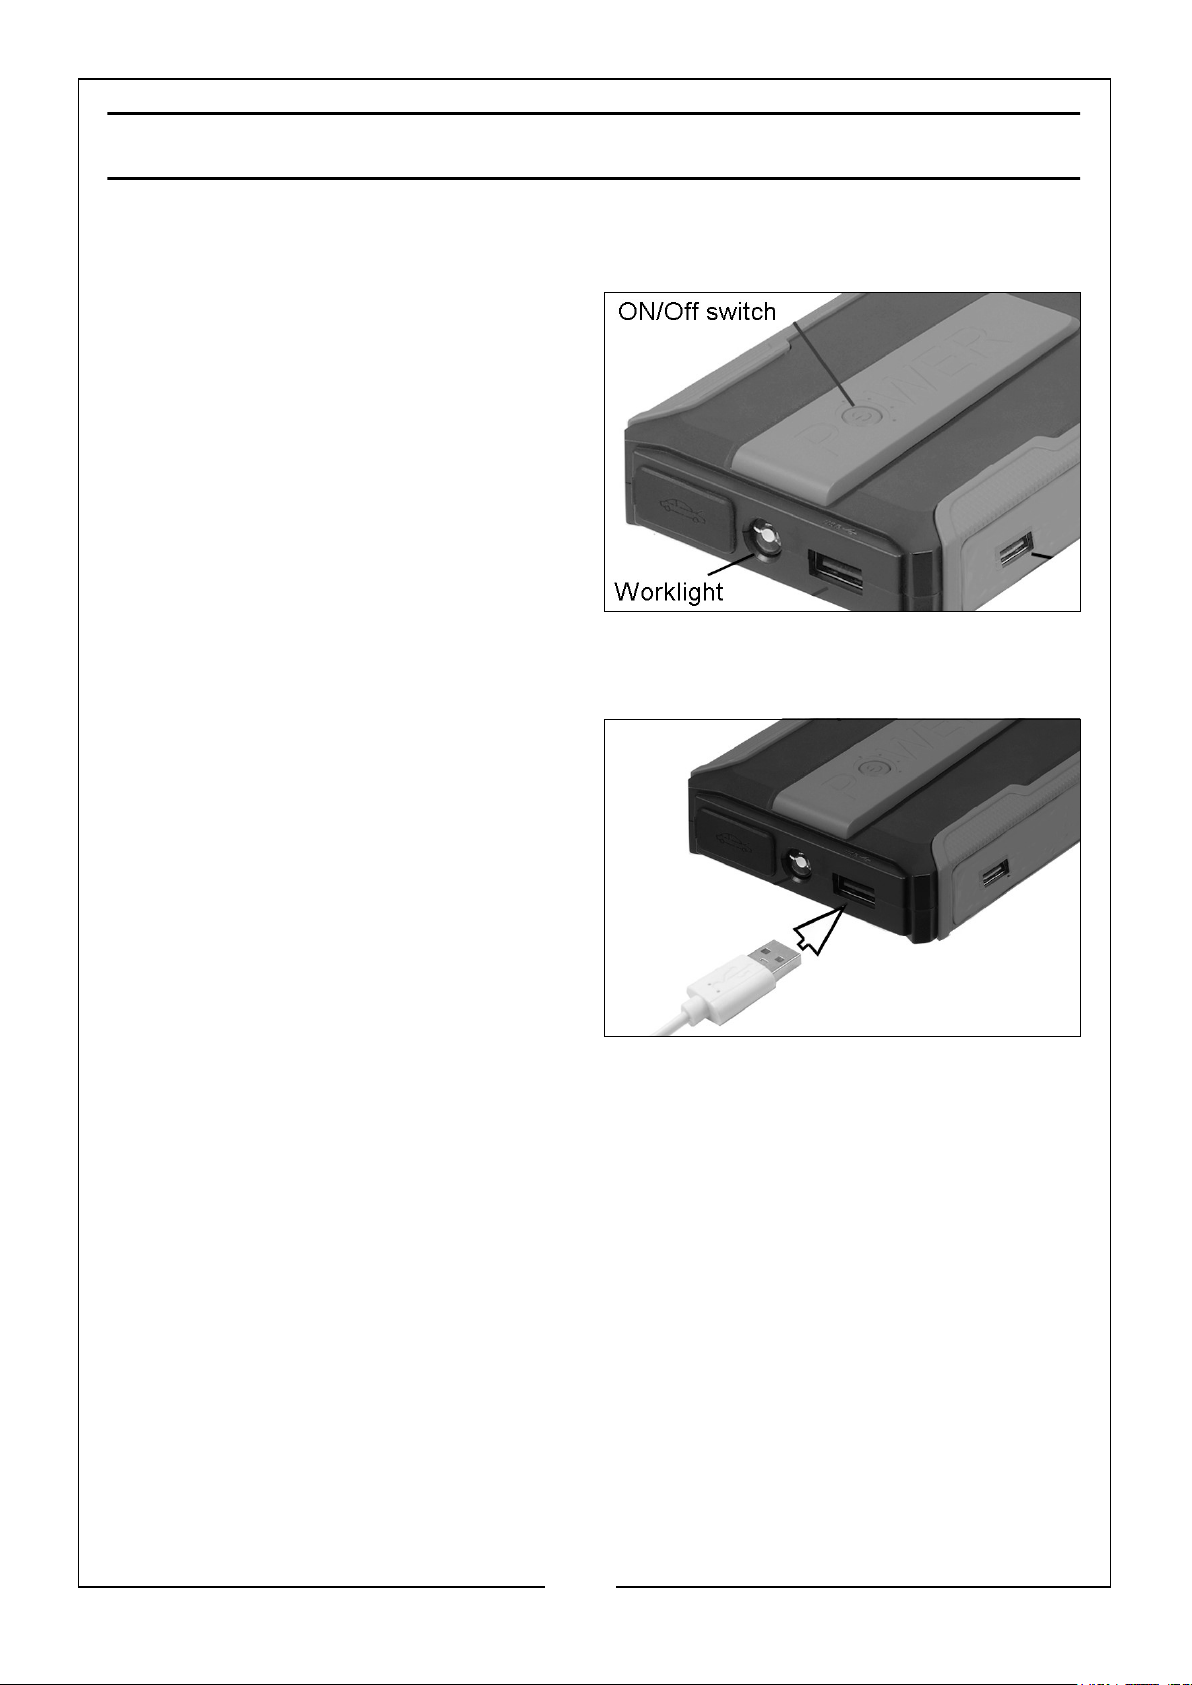
OPERATION
WORK LIGHT
1. Push and hold the ON/OFF button for
3 seconds to turn the work light on.
2. Push the ON/OFF button again.
• The worklight flashes on and off.
3. Push the ON/OFF button again.
• The work light flashes with the
morse code S-O-S pattern.
4. Push the ON/OFF button again to
turn the work light off.
USB POWER SUPPLY
The socket supplies a maximum of 2A at
5V.
1. Plug the 3 in 1 USB cable into the
USB socket.
2. Connect the other end of the cable to
your device(s).
3. Push the ON/OFF button to start
supplying power.
RUNNING/CHARGING DC APPLIANCES
1. Verify the jumpstarter is fully charged. Recharge if needed.
2. Make sure the appliance to be powered is turned off.
3. Connect the appliance into the outlet socket.
4. Turn on the appliance.
5. When finished, turn off and unplug the appliance.
6. Recharge the jump starter.
• The jumpstarter will power off automatically when no load is found.
7
Parts & Service: 020 8988 7400 / E-mail: [email protected] or [email protected]
Page 8
JUMP STARTING VEHICLES
WARNING: IT IS POSSIBLE THAT SOME ELECTRONIC EQUIPMENT
COULD BE DAMAGED BY JUMP STARTING. ALWAYS CHECK WITH
THE CAR MANUFACTURER’S HANDBOOK TO DETERMINE WHAT
PRECAUTIONS IF ANY SHOULD BE TAKEN.
WARNING: FAILURE TO FOLLOW THE INSTRUCTIONS BELOW AND
THE SAFETY INSTRUCTIONS ON PAGES 3/4 MAY RESULT IN
PERSONAL INJURY, DAMAGE TO THE VEHICLE, OR BATTERY. NEVER
ATTEMPT JUMP STARTING WITH DAMAGED CABLES.
CAUTION: TO AVOID DAMAGE TO THE VEHICLE'S ELECTRICAL SYSTEM, DO
NOT USE THE JUMP STARTER ON A VEHICLE THAT HAS NO BATTERY
INSTALLED.
CAUTION: DO NOT TOUCH POSTIVE AND NEGATIVE BATTERY CLAMPS
TOGETHER.
NOTE: This device will not jump-start a vehicle if the battery is very low. Check
the indicators around the on/off button to determine the charge status.
NOTE: Make sure that the jumpstarter power pack is at least 75% charged (3
power indicator lights are lit) before you attempt to jump-start.
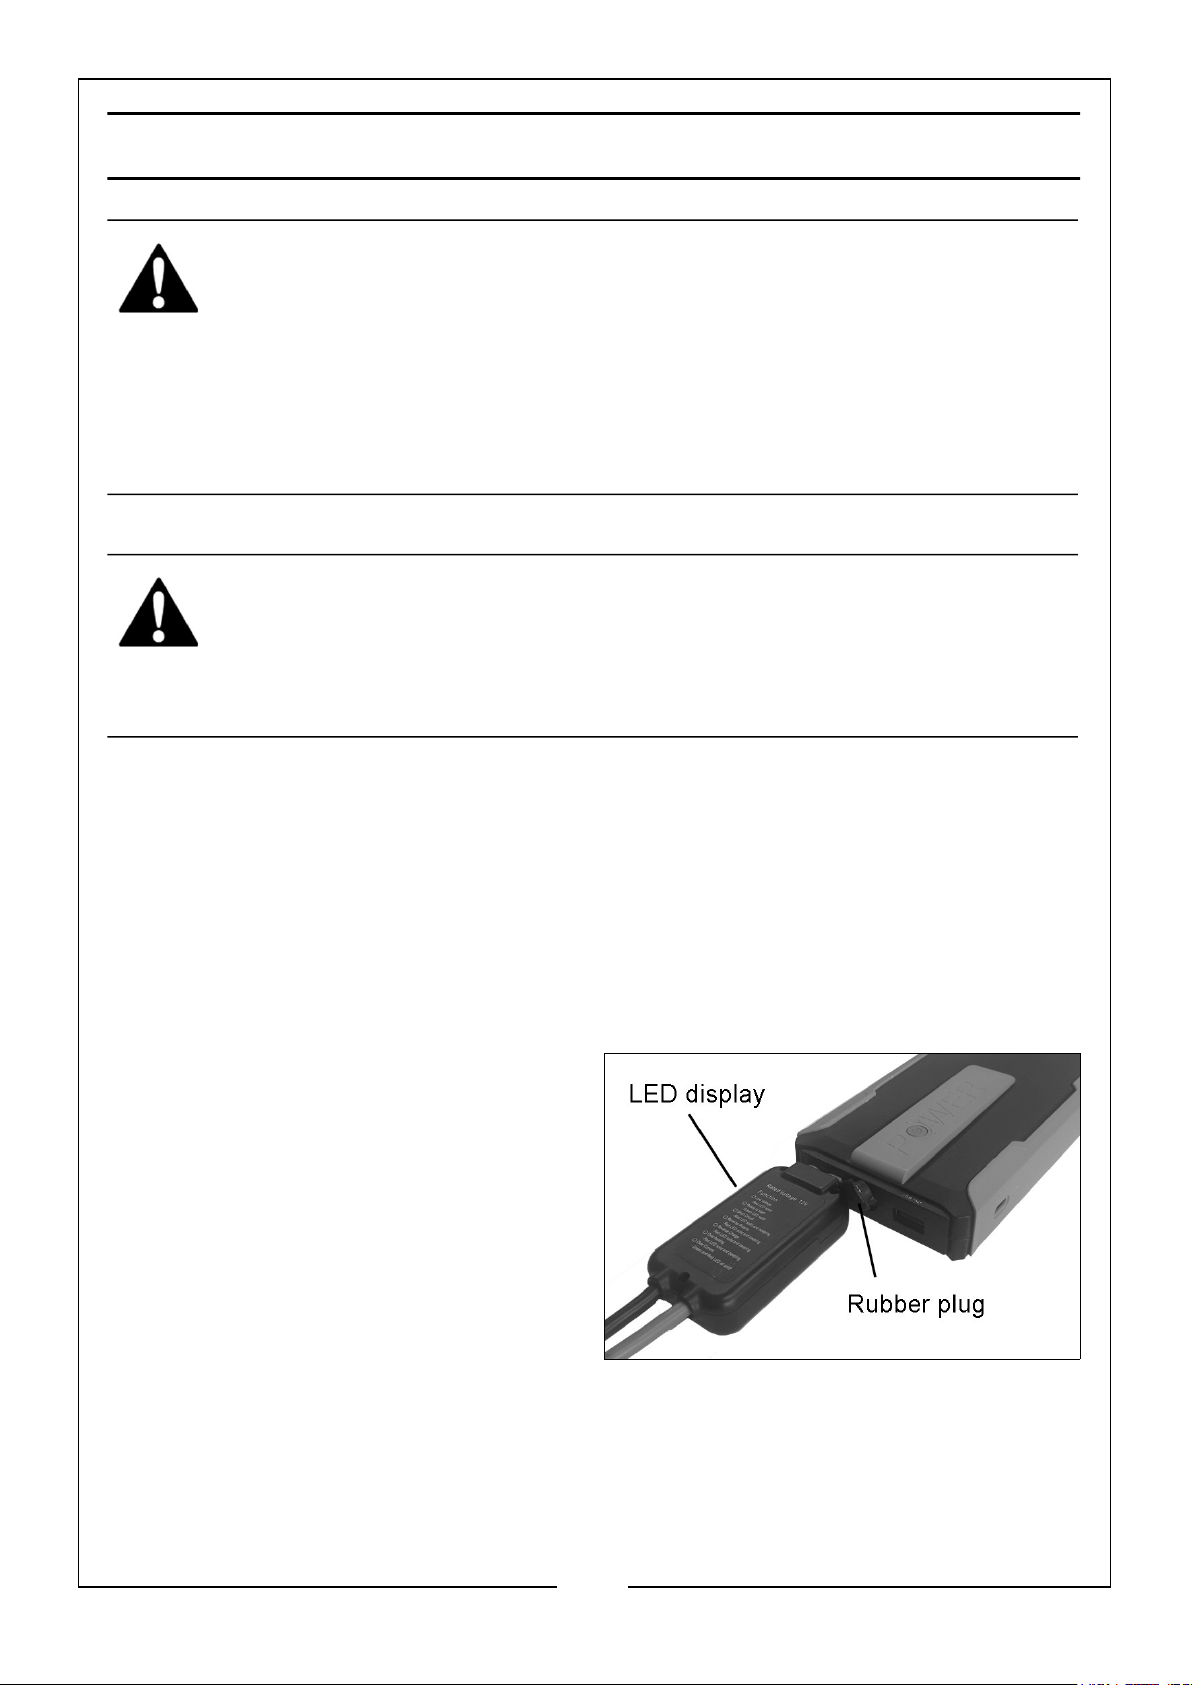
CONNECTING THE JUMPER CABLE TO THE JUMPSTARTER
1. When jumpstarting, the power indicator lights located on top of the device must
be lit. Recharge the device if required.
2. Lift the rubber plug and insert the
yellow connector of the jumper cable
into the power pack.
• The LEDs on the smart cable will
flash to indicate the status.
SMART CABLE STATUS DIS-
PLAY
The status of the device is shown by the
LED display on the smart jumper cable
as follows;
• Low voltage - Red LED solid
• Ready to start - Green LED solid
• Short circuit - Red LED solid and bleeping
8
Parts & Service: 020 8988 7400 / E-mail: [email protected] or [email protected]
Page 9

• Reverse polarity - Red LED solid and bleeping
• Reverse charge - Red LED solid and bleeping
• Overheating - Red LED solid and bleeping
• Over-current - Green and red LED both solid
CONNECTING JUMP START LEADS TO THE VEHICLE BATTERY
ALWAYS carry out the following preliminary checks before connecting the jump-start
to the car battery:
• Switch off the vehicle ignition and ALL ancillary equipment (lighting, radio etc.)
• Ensure the vehicle battery is rated at 12V and not damaged in any way.
• Ensure the area is well ventilated.
• Make sure that the battery terminals are clean and the clamps are firm and
secure.
• If fitted, remove any vehicle battery filler plugs and check the electrolyte
level. If necessary, top up with distilled water.
• Verify the jump starter is fully charged and recharge if needed.
• Make sure that the jump-start is OFF.
1. Connect the red positive (+) clamp to the positive (+) battery terminal first. Take
care the clamp does not touch any moving parts or fuel lines.
2. Connect the black clamp to the earthed battery terminal, (this is usually the
negative (-ve) terminal and coloured BLACK) or to a suitable earthing point on the
vehicle chassis ensuring the connections are firm and secure.
STARTING THE ENGINE
1. Push the ON/OFF button on the jumpstarter to start supplying power.
2. Switch or press the ignition to ‘start’. If the engine does not start SWITCH OFF the
ignition and wait for at least 30 seconds before trying again.
3. If the vehicle does not start after 3 attempts, investigate any problems with the
vehicle systems.
4. Once the engine is running, disconnect the earthed clamp FIRST i.e. that
connected to the chassis or Negative (-) terminal etc, and return it to its storage
position, then disconnect the Positive (+) clamp from the battery terminal,. You
should remove the connections within 30 seconds of starting.
5. Leave the vehicle engine running for a while to let the alternator recharge the
battery.
• Take great care not to touch the red positive (+) clamp against the black
negative (-) clamp.
9
Parts & Service: 020 8988 7400 / E-mail: [email protected] or [email protected]
Page 10
6. Leave the jumpstarter for 30 minutes before re-charging following jumpstarting a
vehicle.
• If the battery is allowed to remain in a discharged state its life may be
reduced.
• The jumpstarter will power off automatically when no load is found.
TROUBLESHOOTING
PROBLEM CAUSE SOLUTION
No response when
pressing the On
button
Unit fails to jumpstart vehicle
If these remedies are unsuccessful, consult your CLARKE dealer.
Low voltage protection in
operation
Broken clamps/cable
Low battery.
Unit damaged internally
Plug the charging cable into the
input port to recharge and
reactivate.
Have damaged items replaced
Recharge the jumpstarter.
Take the unit to your Clarke dealer
for repair.
CARE & MAINTENANCE
Always ensure the cables & clamps are in good condition and the clamps are clean
and corrosion free. If damaged they should be replaced. Keep the unit clean by
wiping with a dry cloth. DO NOT use solvents as a cleaning agent.
Keep the unit fully charged at all times and store away from direct sunlight, moisture
or sources of extreme heat or cold.
NEVER attempt any repair unless your are a qualified technician. Your jump-start has
been designed to give long and trouble free service. If, however, having followed the
instructions in this booklet carefully, you encounter problems, take the unit to your
local CLARKE dealer.
10
Parts & Service: 020 8988 7400 / E-mail: [email protected] or [email protected]
Page 11

DECLARATIONS OF CONFORMITY
11
Parts & Service: 020 8988 7400 / E-mail: [email protected] or [email protected]
Page 12

 Loading...