

Page 1
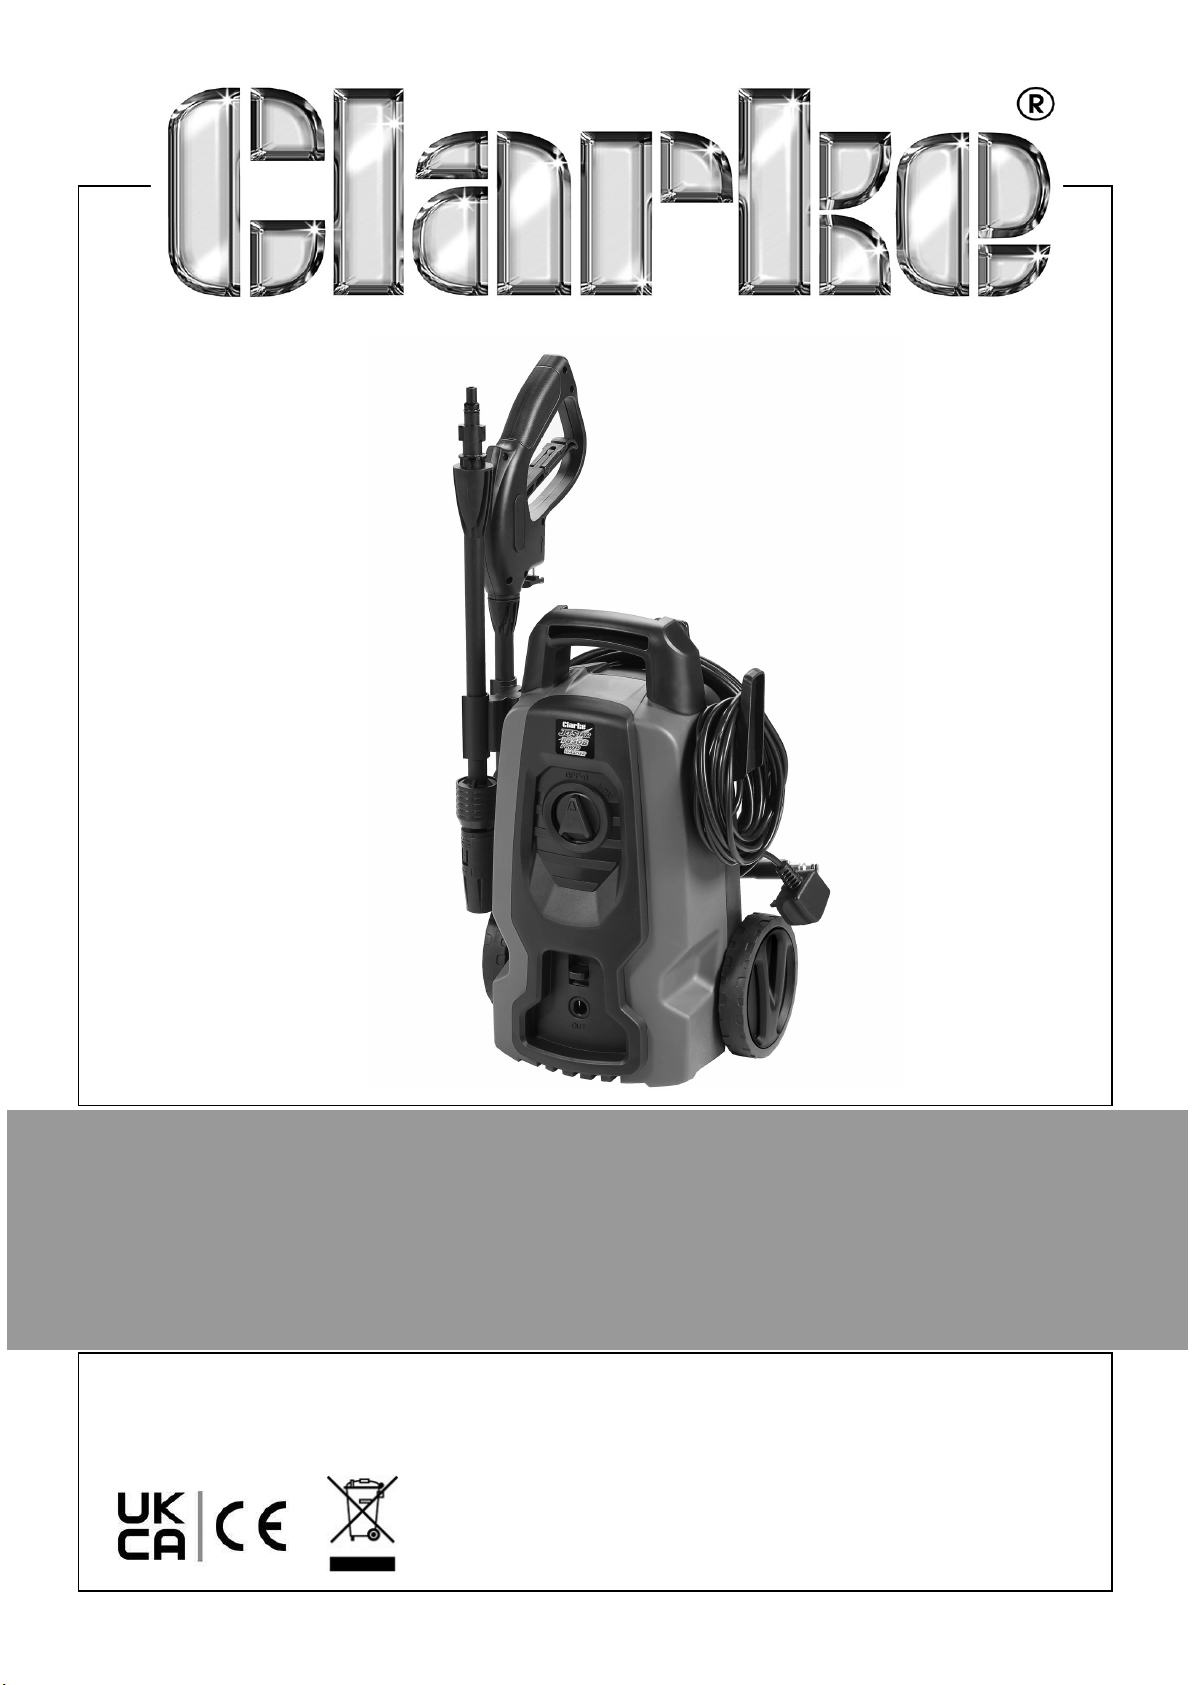
POWER WASHER
MODEL NO: JETSTAR 1850B
PART NO: 7336015
OPERATION & MAINTENANCE
INSTRUCTIONS
ORIGINAL INSTRUCTIONS
DL0126 Rev 1
Page 2
INTRODUCTION
Thank you for purchasing this CLARKE Power Washer.
This pressure washer is designed for cleaning machines, vehicles, buildings, boats,
facades, terraces, gardening tools, etc. by means of a high-pressure water jet (if
necessary, with additional cleaning agents).
Only use accessories, replacement parts and cleaning agents recommended by
CLARKE International.
Before attempting to use this product, please read this manual thoroughly.
GUARANTEE
This product is guaranteed against faulty manufacture for a period of 12 months from
the date of purchase. Please keep your receipt which will be required as proof of
purchase.
This guarantee is invalid if the product is found to have been abused or tampered
with in any way, or not used for the purpose for which it was intended.
Faulty goods should be returned to their place of purchase, no product can be
returned to us without prior permission.
This guarantee does not effect your statutory rights.
ENVIRONMENTAL RECYCLING POLICY
Through purchase of this product, the customer is taking on the obligation
to deal with the WEEE in accordance with the WEEE regulations in relation
to the treatment, recycling & recovery and environmentally sound disposal
of the WEEE.
In effect, this means that this product must not be disposed of with general
household waste. It must be disposed of according to the laws governing Waste
Electrical and Electronic Equipment (WEEE) at a recognised disposal facility.
2
Parts & Service: 020 8988 7400 / E-mail: [email protected] or [email protected]
Page 3
GENERAL SAFETY RULES
WARNING: WATER AT HIGH PRESSURE CAN BE DANGEROUS AND
CAN CAUSE DAMAGE IF THE OPERATOR IS CARELESS. NEVER
ALLOW ANYONE TO OPERATE THIS PRESSURE WASHER UNLESS
THEY ARE FAMILIAR WITH THE SAFETY PRECAUTIONS.
1. NEVER direct the spray towards any person or animal.
2. NEVER direct the spray towards electrical wiring or equipment.
3. NEVER hold your finger over the high pressure nozzle.
4. NEVER allow children or untrained personnel to use this machine.
5. NEVER operate the machine with any of the covers removed.
6. NEVER attempt any repairs to this machine. ALWAYS refer to your CLARKE
dealer.
7. NEVER supply any liquid other than water to the water inlet.
8. NEVER use the detergent bottle to introduce flammable liquids/solvents, e.g.
paint thinners, petrol, oil as there is a risk of explosion.
9. NEVER direct the jet at electrical equipment or the machine itself.
10. NEVER use the pressure washer if the supply cable or important parts of the
machine are damaged.
11. ALWAYS release any residual pressure in the system by turning off the water
supply and operating the trigger before disconnecting any hose or accessory.
12. ALWAYS keep the machine itself dry and well clear of water spray.
13. ALWAYS wear protective clothing and safety glasses. Loose particles and other
debris may be propelled at high speed by the water jet.
14. ALWAYS grip the gun firmly and expect the spray gun to ‘kick’ when starting.
15. ALWAYS respect the requirements of the local water company. Pressure washers
may only be connected to the mains drinking water supply, if a system separator
(known as a backflow preventer) is installed in the supply hose.
16. ALWAYS disconnect from the water supply, and ensure the system is completely
drained when not in use. Store in a cool dry location.
17. ONLY use chemical cleaning agents (detergents), that are approved for pressure
washers. See page 13 for the full CLARKE range of detergents.
18. WARNING: High pressure water jets can be dangerous if subject to misuse. The
jet must not be directed at a person or anything that they are wearing.
19. WARNING: High pressure hoses, fittings and couplings are important for the
safety of the machine. Use only hoses, fittings and couplings recommended by the
manufacturer.
3
Parts & Service: 020 8988 7400 / E-mail: [email protected] or [email protected]
Page 4
20. WARNING: Water that has flowed through a system separator (known as a
backflow preventer) is considered non-drinkable.
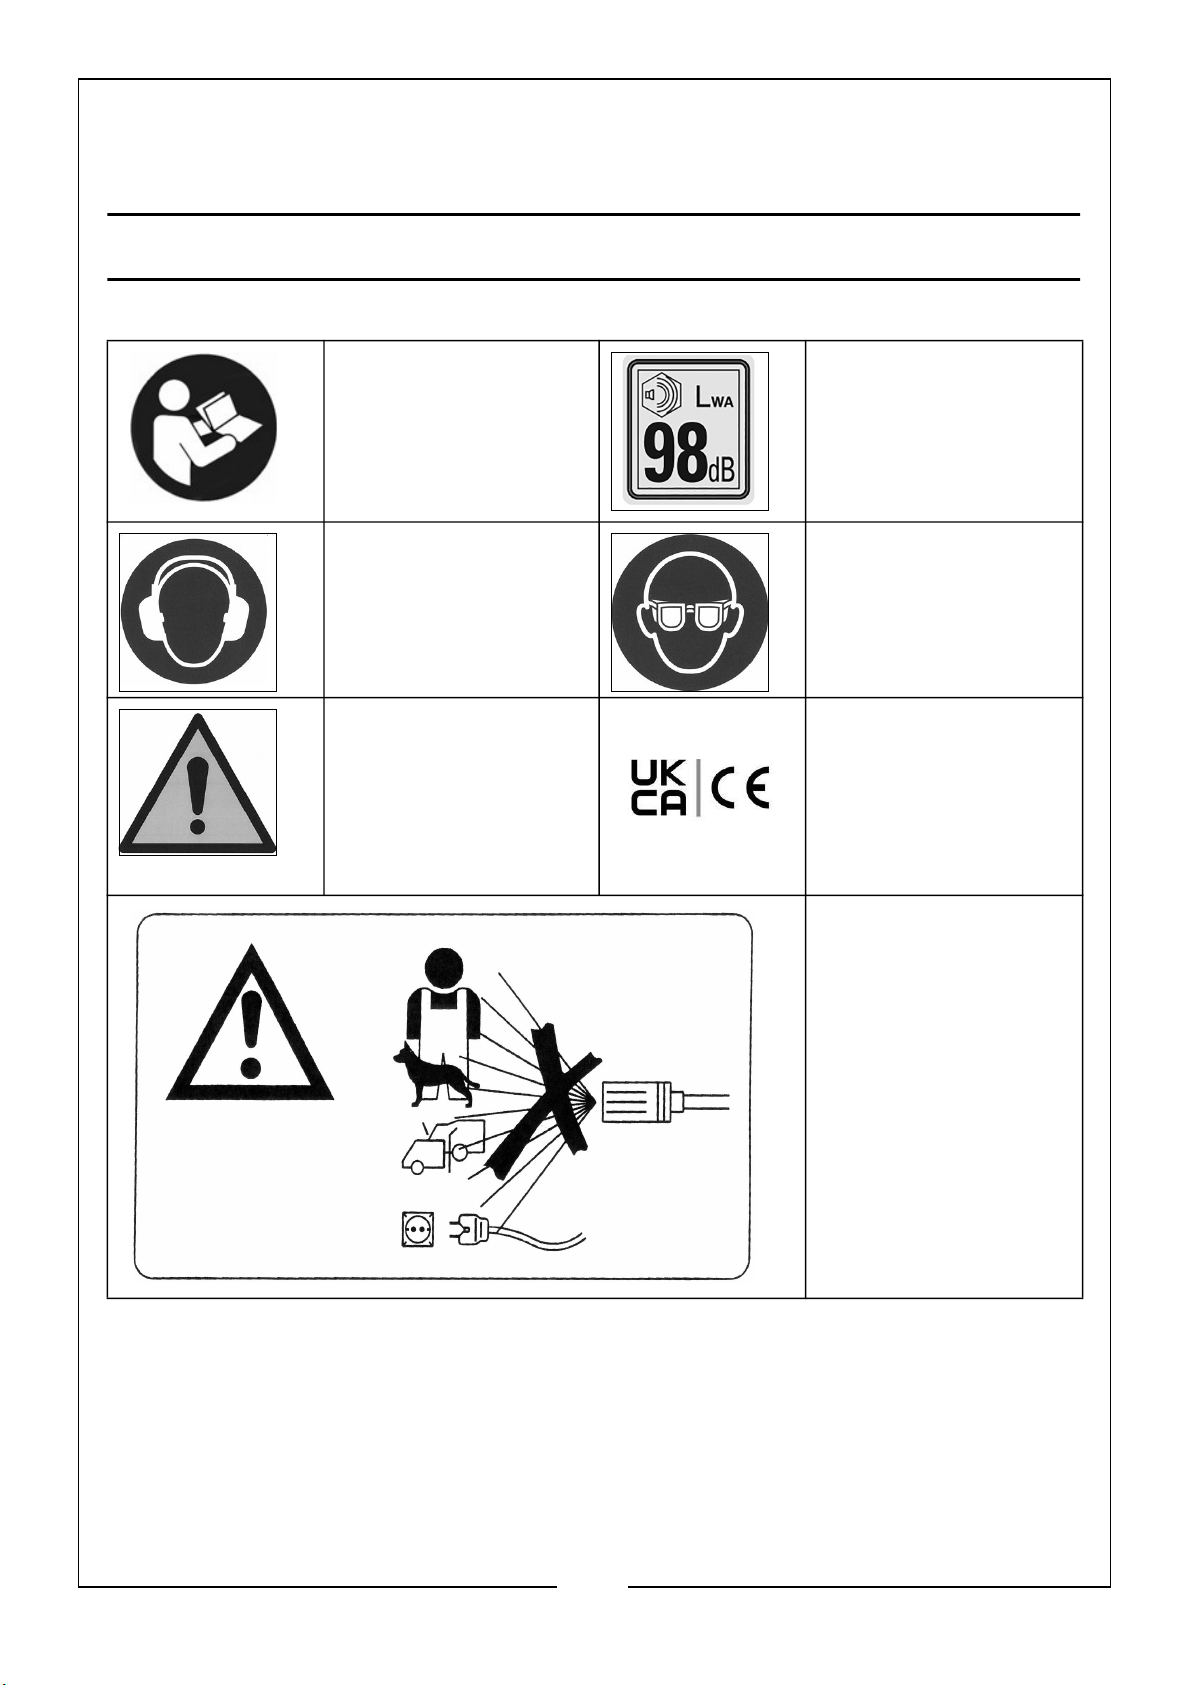
SYMBOLS ON THE MACHINE
Read the manual
before use.
Wear ear protection
when using this
machine.
Failing to follow these
instructions could
result in injury or
damage to the
machine.
Warning: High level of
noise when in use.
Wear safety glasses
when using this
machine.
Conforms to UKCA &
CE Regulations.
The high pressure jet
must not be directed at
persons, animals, live
electrical equipment or
at the appliance itself.
4
Parts & Service: 020 8988 7400 / E-mail: [email protected] or [email protected]
Page 5
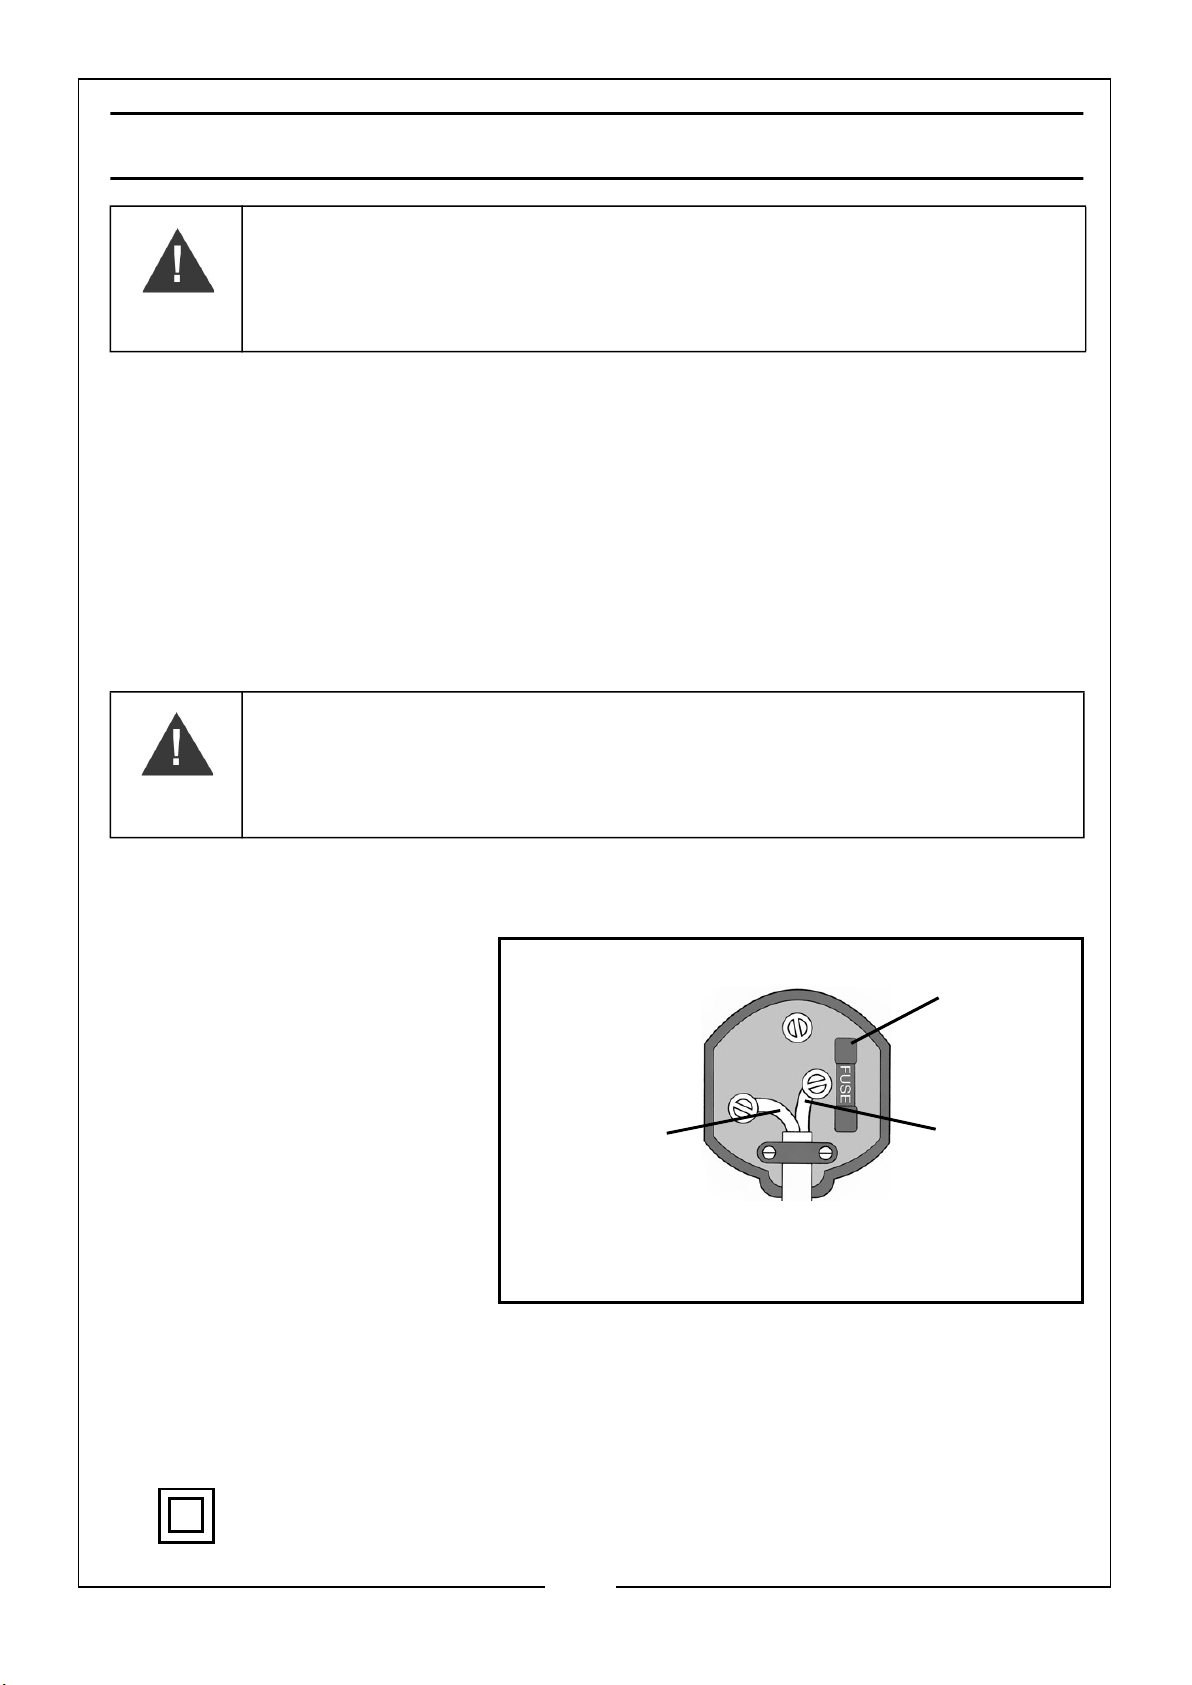
ELECTRICAL CONNECTIONS
Plug must be BS1363/A approved.
WARNING: READ THESE ELECTRICAL SAFETY INSTRUCTIONS
THOROUGHLY BEFORE CONNECTING THE PRODUCT TO THE
MAINS SUPPLY.
Before switching the product on, make sure that the voltage of your electricity supply
is the same as that indicated on the rating plate. Connecting it to any other power
source may cause damage.
If it is necessary to change the fuse in the plug, the fuse cover must be refitted. If the
fuse cover becomes lost or damaged, the plug must not be used until a suitable
replacement is obtained.
If the plug has to be changed due to damage, a replacement should be fitted,
following the wiring instructions shown below. The old plug must be disposed of as
insertion into a mains socket could cause an electrical hazard.
WARNING: THE WIRES IN THE POWER CABLE OF THIS
PRODUCT ARE COLOURED IN ACCORDANCE WITH THE
FOLLOWING CODE:
BLUE = NEUTRAL BROWN = LIVE
If the colours of the wires in the power cable of this product do not correspond with
the markings on the terminals of your plug, proceed as follows.
• The wire which is
coloured Blue must be
connected to the
terminal which is
marked N or coloured
Black.
• The wire which is
coloured Brown must
be connected to the
terminal which is
marked L or coloured
Red.
We strongly recommend that this machine is connected to the mains supply
via a Residual Current Device (RCD) that will interrupt the supply if the
leakage current to earth exceeds 30 rnA for 30 ms
Neutral
(Blue)
Ensure that the outer sheath of
the cable is firmly held by the clamp
Always fit
a 13 Amp
fuse.
Live
(Brown)
If in any doubt, consult a qualified electrician. DO NOT attempt any repairs yourself.
This symbol indicates that this is a Class II product, and does not require an
earth connection.
Parts & Service: 020 8988 7400 / E-mail: [email protected] or [email protected]
5
Page 6
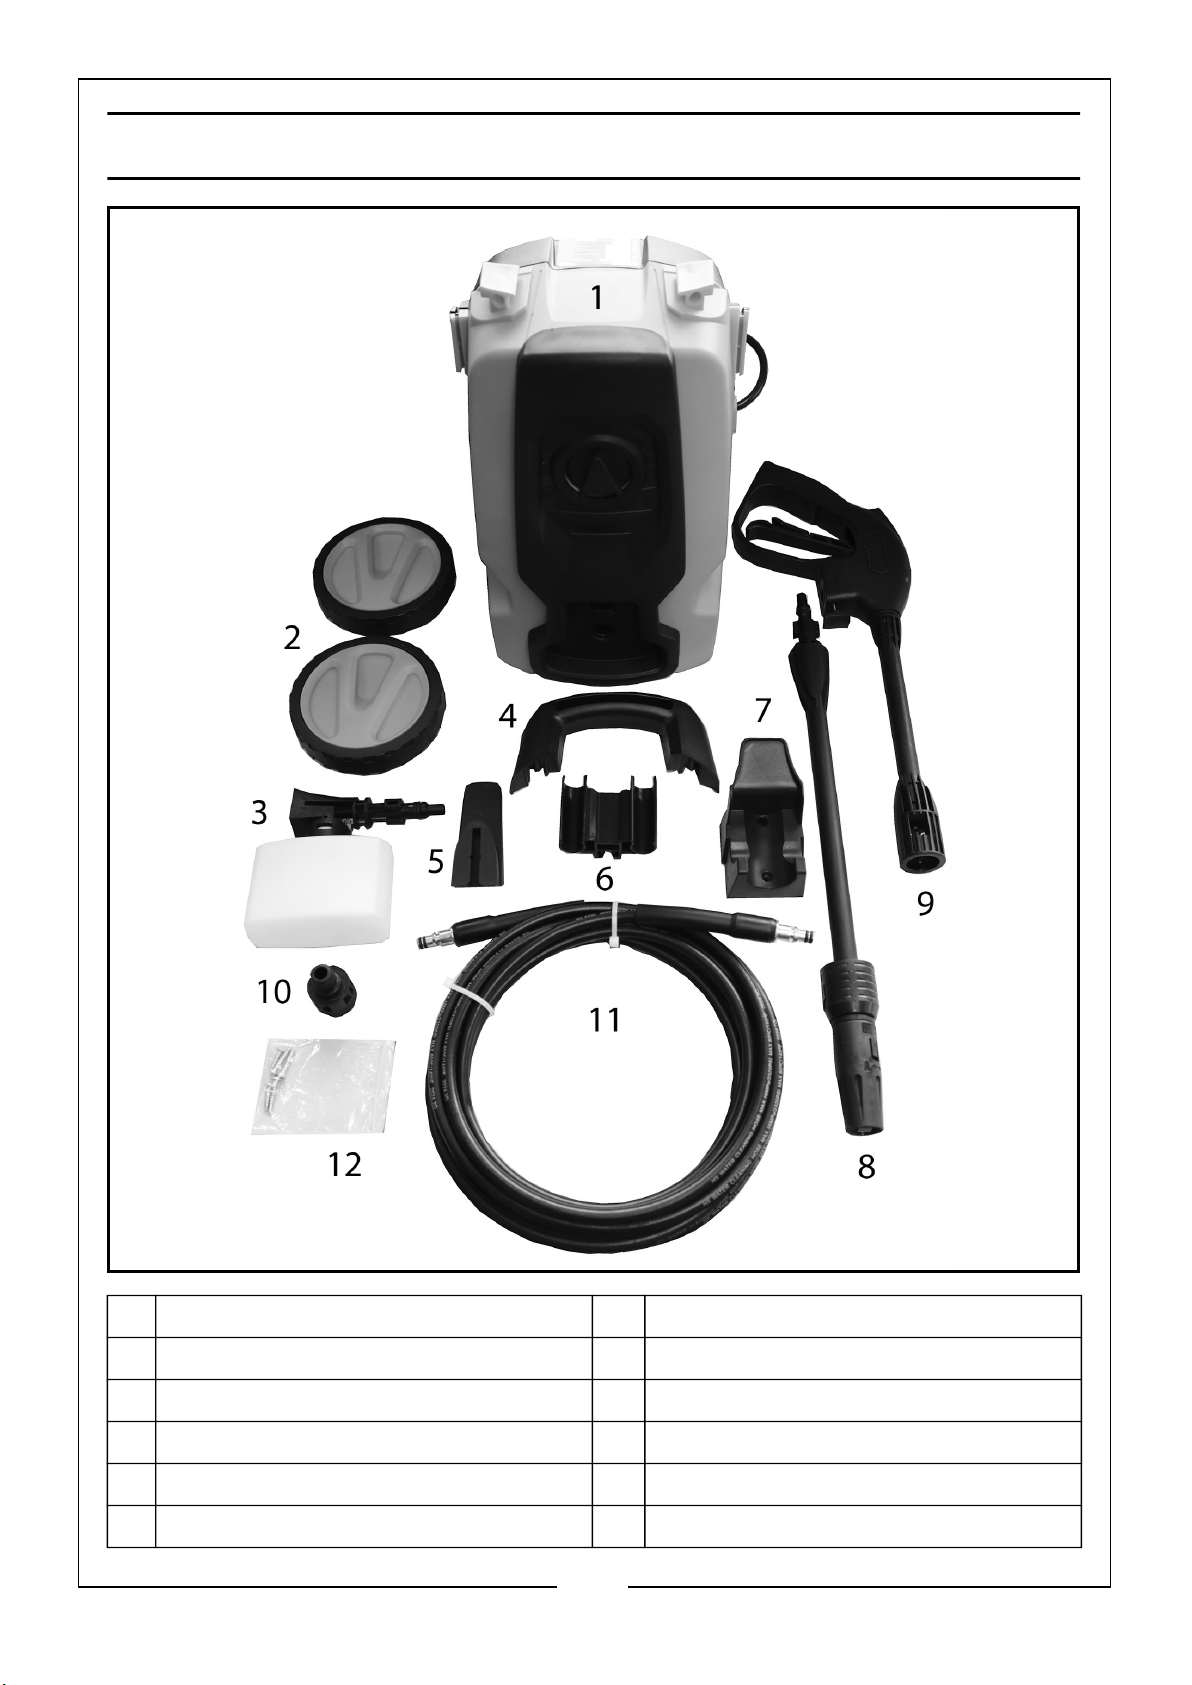
OVERVIEW
1 Main Body of Power Washer 7 Detergent Bottle & Hose Holder
2 Wheels 8 Lance
3 Detergent Bottle 9 Spray Gun
4 Handle 10 Inlet Connector with Filter
5 Cable Holder 11 High Pressure Hose
6 Spray Gun & Lance Holder 12 Bag of Screws & Nozzle Cleaning Tool
6
Parts & Service: 020 8988 7400 / E-mail: [email protected] or [email protected]
Page 7
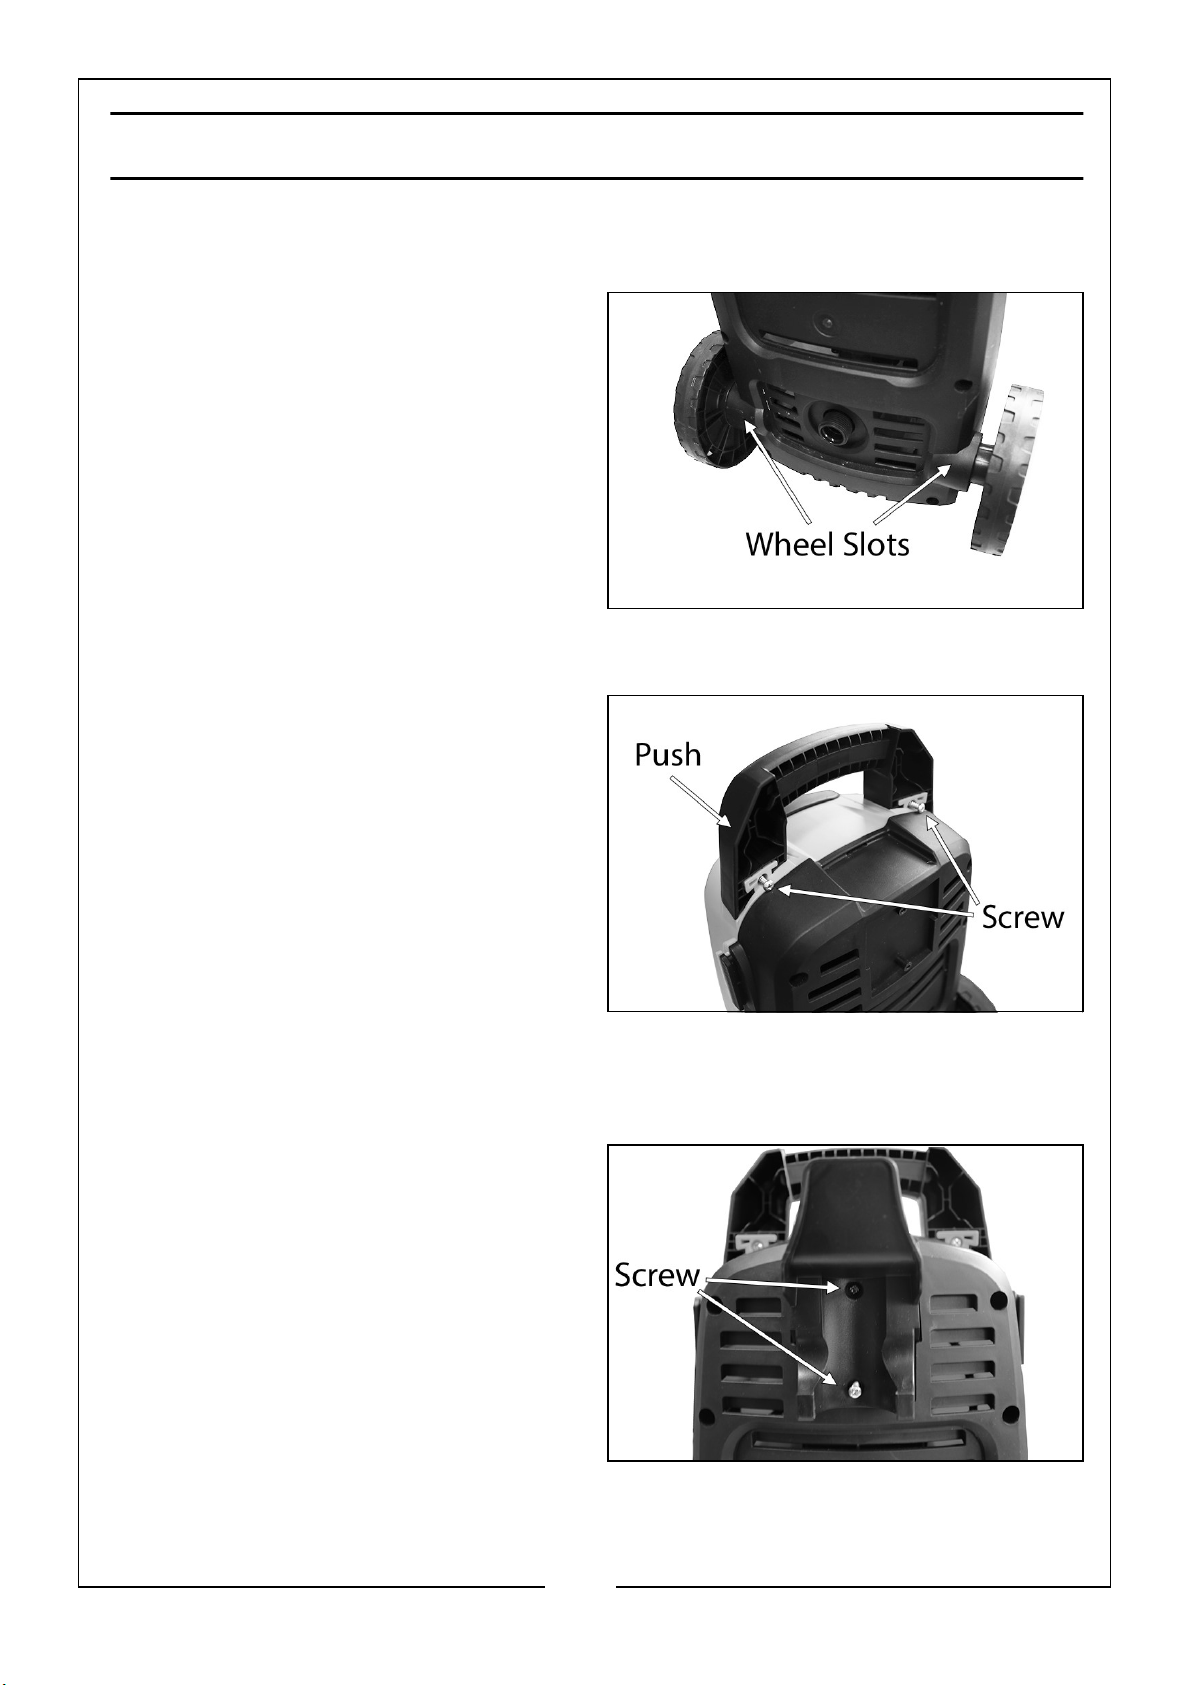
ASSEMBLY
WHEELS
1. Fit the wheels into the wheel slots at
the bottom of the main body.
2. Push the wheels into the slots so they
sit flush.
HANDLE
1. Slide the handle onto the brackets
located on top of the main body of
the washer.
2. When flush with the front of the main
body, using 2 screws supplied, secure
the handle in place.
ACCESSORY HOLDERS
DETERGENT BOTTLE & HOSE HOLDER
1. Fit the detergent bottle & hose holder
on to the rear of the main body of
the washer.
2. Using the 2 screws provided, secure
the holder in position, as shown.
7
Parts & Service: 020 8988 7400 / E-mail: [email protected] or [email protected]
Page 8
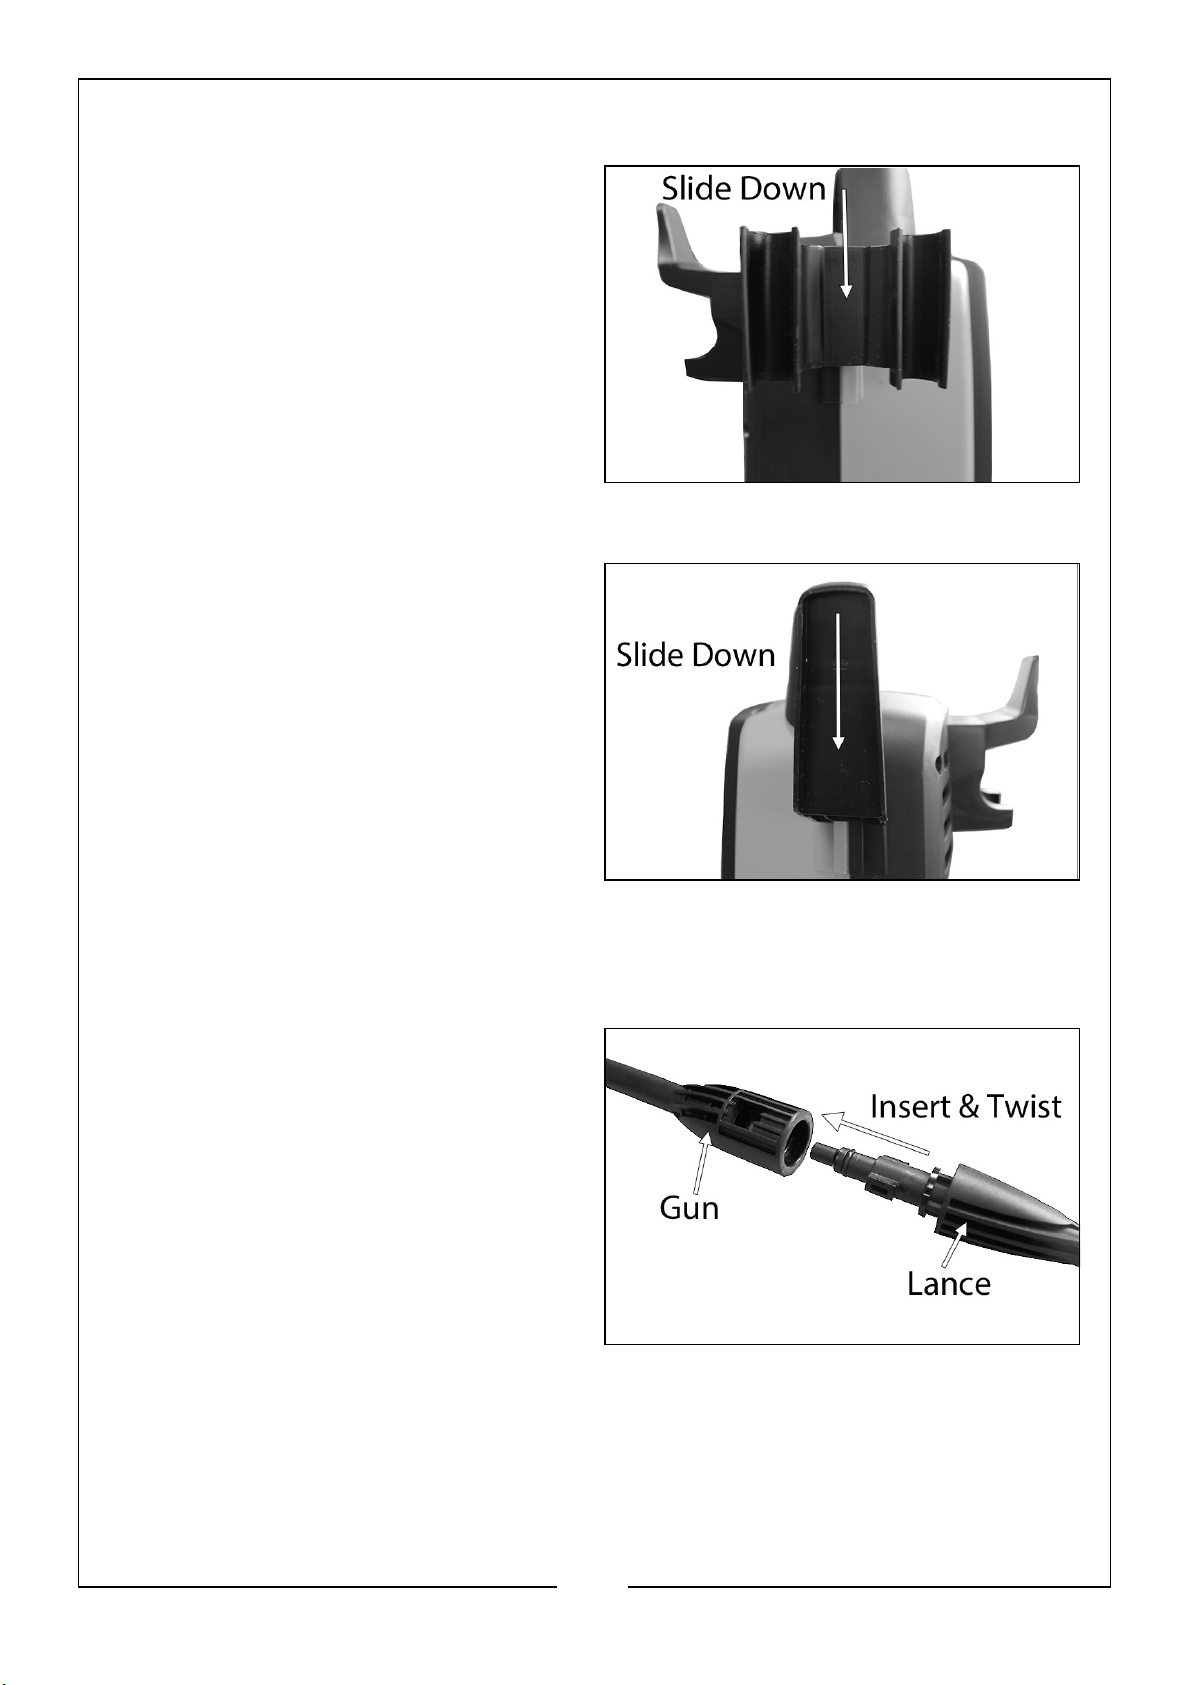
GUN AND LANCE HOLDER
1. Slide the gun & lance holder on to
the bracket on the side of the washer,
as shown.
CABLE HOLDER
1. Slide the cable holder on to the
bracket on the side of the washer,
making sure it is on the side that the
cable exits the main body of the
washer, as shown.
ASSEMBLING THE SPRAY GUN & HOSE
1. Insert the lance into the gun as
shown and twist to lock in place.
8
Parts & Service: 020 8988 7400 / E-mail: [email protected] or [email protected]
Page 9
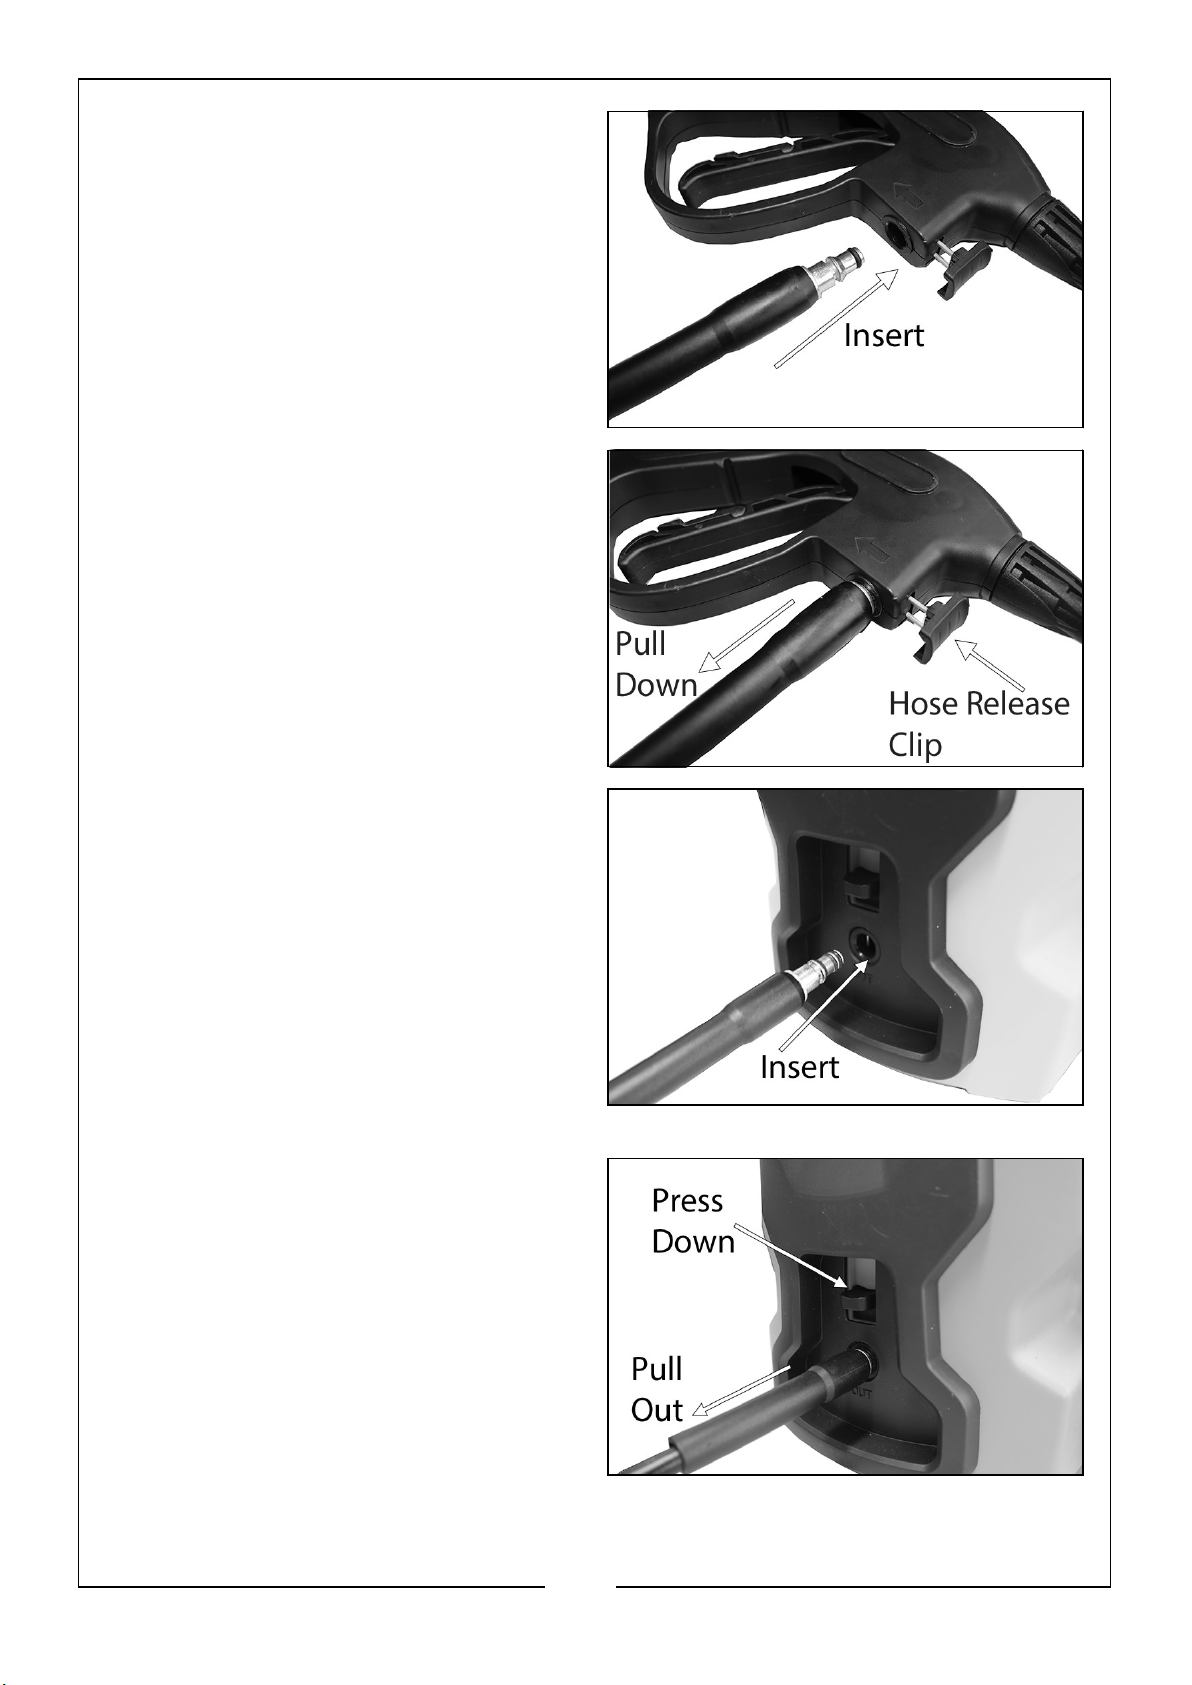
2. Insert the hose into the hose
connection port on the underside of
the gun, as shown.
3. To release the hose, press the hose
release clip in and pull down on the
hose.
4. Insert the high pressure hose into the
water outlet on the front of the
pressure washer and push in until
you hear a click, as shown.
5. To release the hose, press down on
the release clip and pull the hose out
of the water outlet.
9
Parts & Service: 020 8988 7400 / E-mail: [email protected] or [email protected]
Page 10
SAFETY FEATURES
THERMAL SENSOR
A thermal sensor protects the motor against overloading. The machine will restart
after a few minutes, once the thermal sensor has cooled down.
GUN TRIGGER LOCK
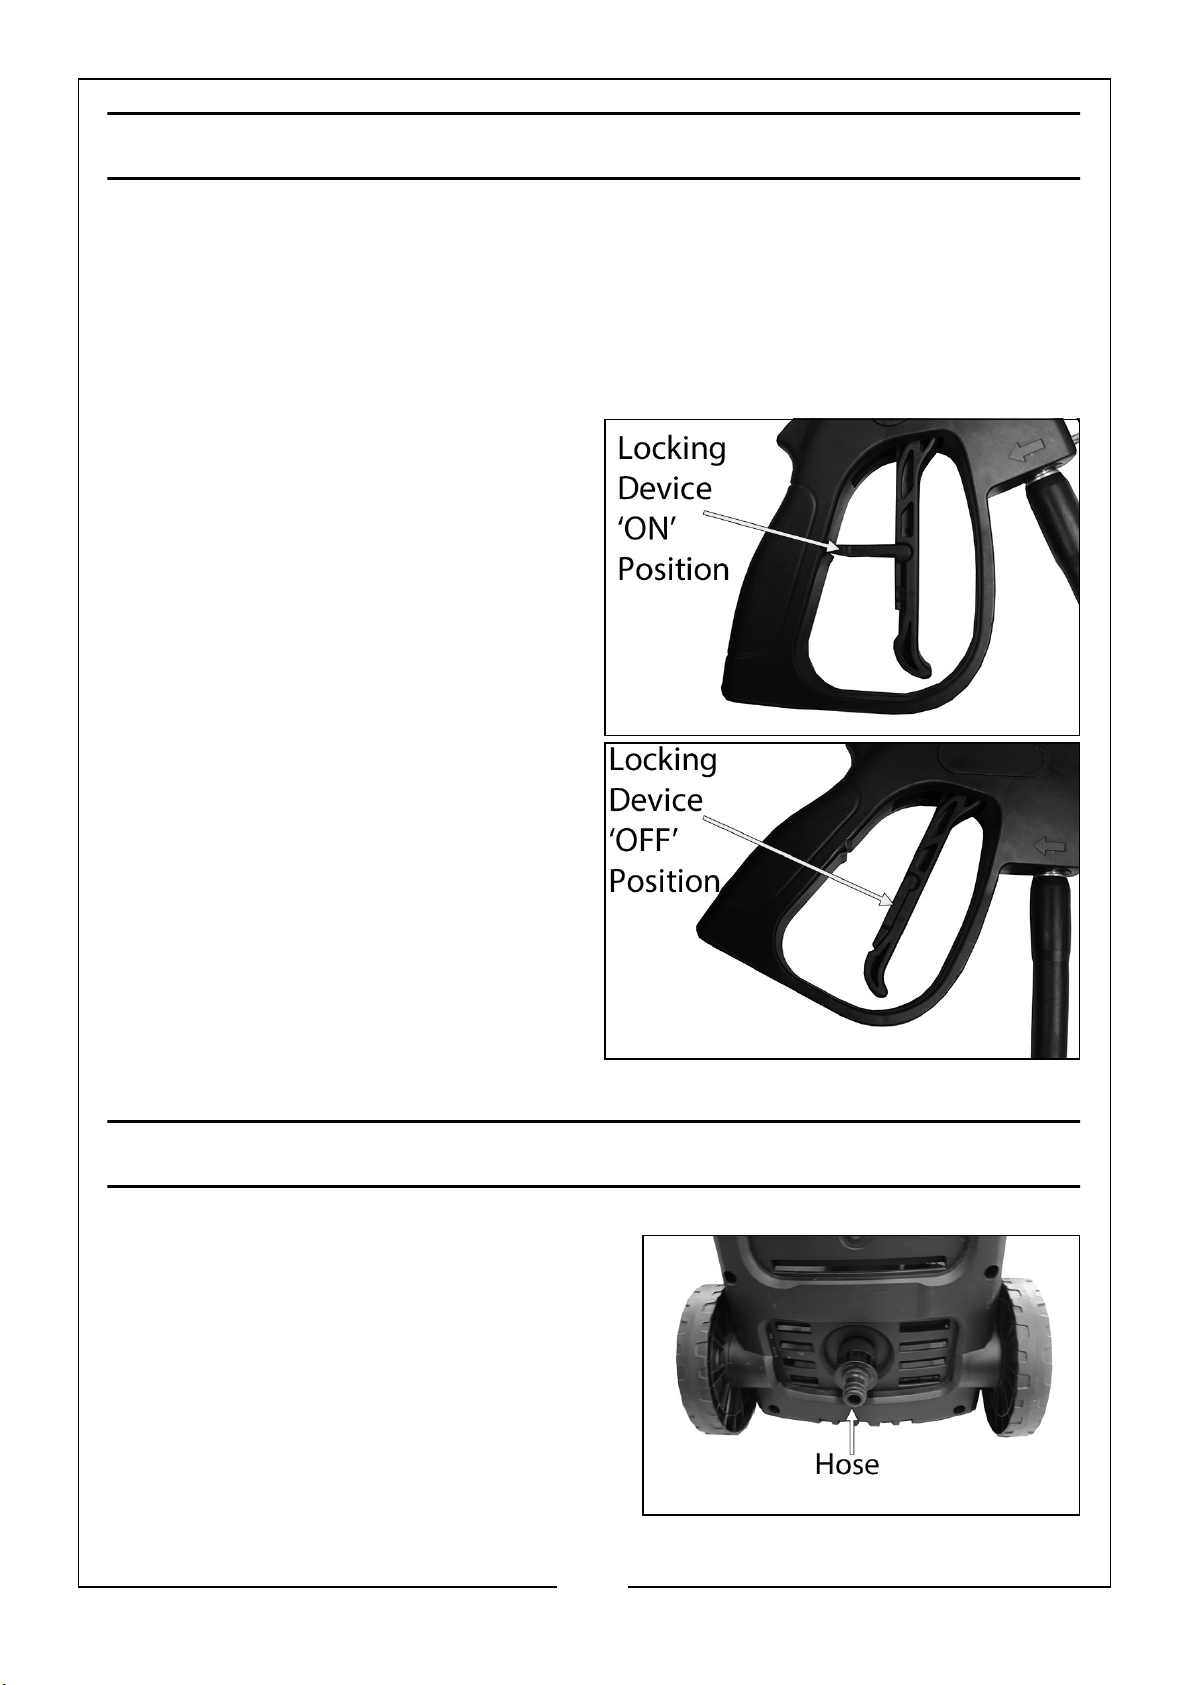
The gun trigger has a locking device, as
shown. When the device is raised and
locked into the grooves on the rear of
the handle, the gun can not be operated.
This locking device should always be in
the locked ‘ON’ position when the washer
is not in use.
CONNECTING THE MAINS WATER SUPPLY
NOTE: Always follow the regulations of your
local water supplier.
1. Make sure the filter is in the end of the
water inlet connector.
2. Hand tighten the inlet connector to the
water inlet on the rear of the washer, as
shown.
3. Connect the supply hose to the inlet
connector.
10
Parts & Service: 020 8988 7400 / E-mail: [email protected] or [email protected]
Page 11
• A standard garden hose connector or a reinforced hose with an inner diameter
of at least 10 mm available from your CLARKE dealer will be suitable.
4. Connect the supply hose to the water supply.
• The water supply must provide a maximum of 5 litres per minute at a
maximum of 40°C.
5. Open the water tap fully.
OPERATION
1. Turn the water supply on, making sure that the tap is fully open.
WARNING: FAILURE TO TURN ON THE WATER FULLY COULD CAUSE
DAMAGE TO THE POWER WASHER INTERNAL COMPONENTS.
WARNING: DO NOT USE THE POWER WASHER IF THE SUPPLY
CABLE OR IMPORTANT PARTS OF THE MACHINE ARE DAMAGED,
E.G. SAFETY DEVICES, HIGH PRESSURE HOSES, TRIGGER.
WARNING: WE RECOMMEND THAT THIS MACHINE IS CONNECTED
TO THE MAINS SUPPLY VIA A RESIDUAL CURRENT DEVICE (RCD).
2. Plug the mains power cable into the electricity supply.
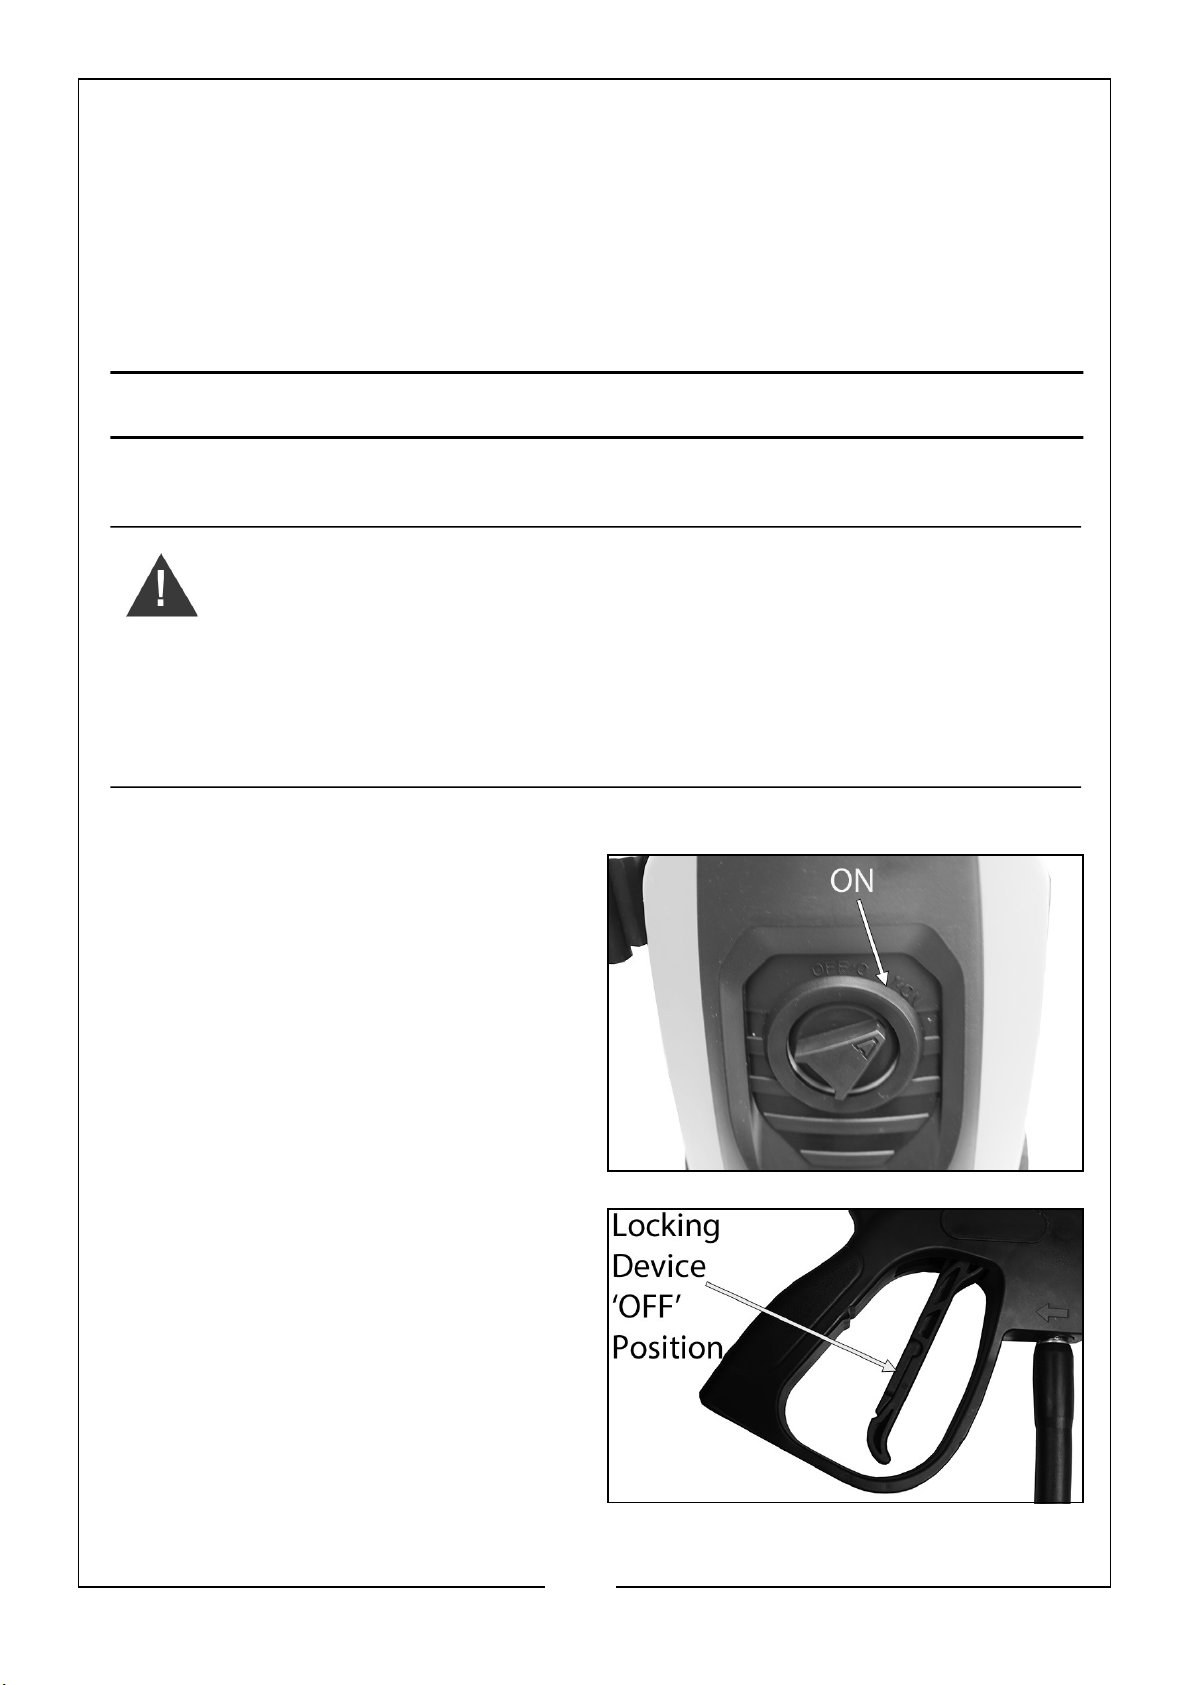
3. Turn the power switch to the ‘ON’
position.
4. Move the trigger locking device to the
‘OFF’ position.
• The pressure washer is now ready
for use.
5. Make sure that you have a firm
footing and are also holding the gun
and spray lance firmly.
• Expect the spray gun to 'kick'
when starting.
11
Parts & Service: 020 8988 7400 / E-mail: [email protected] or [email protected]
Page 12
6. Pull the trigger on the gun to start water flow.
• If you release the trigger the device will switch off again, the system remains
under high pressure.
• During longer breaks (more than 5 minutes), turn the pressure washer off. See
Shutting Down on page 14.
7. Once the machine has been turned off, release any residual pressure in the
system by turning off the water supply and operating the trigger before
disconnecting any hose or accessory.
CHANGE THE SPRAY PATTERN (NARROW JET/WIDE SPRAY)
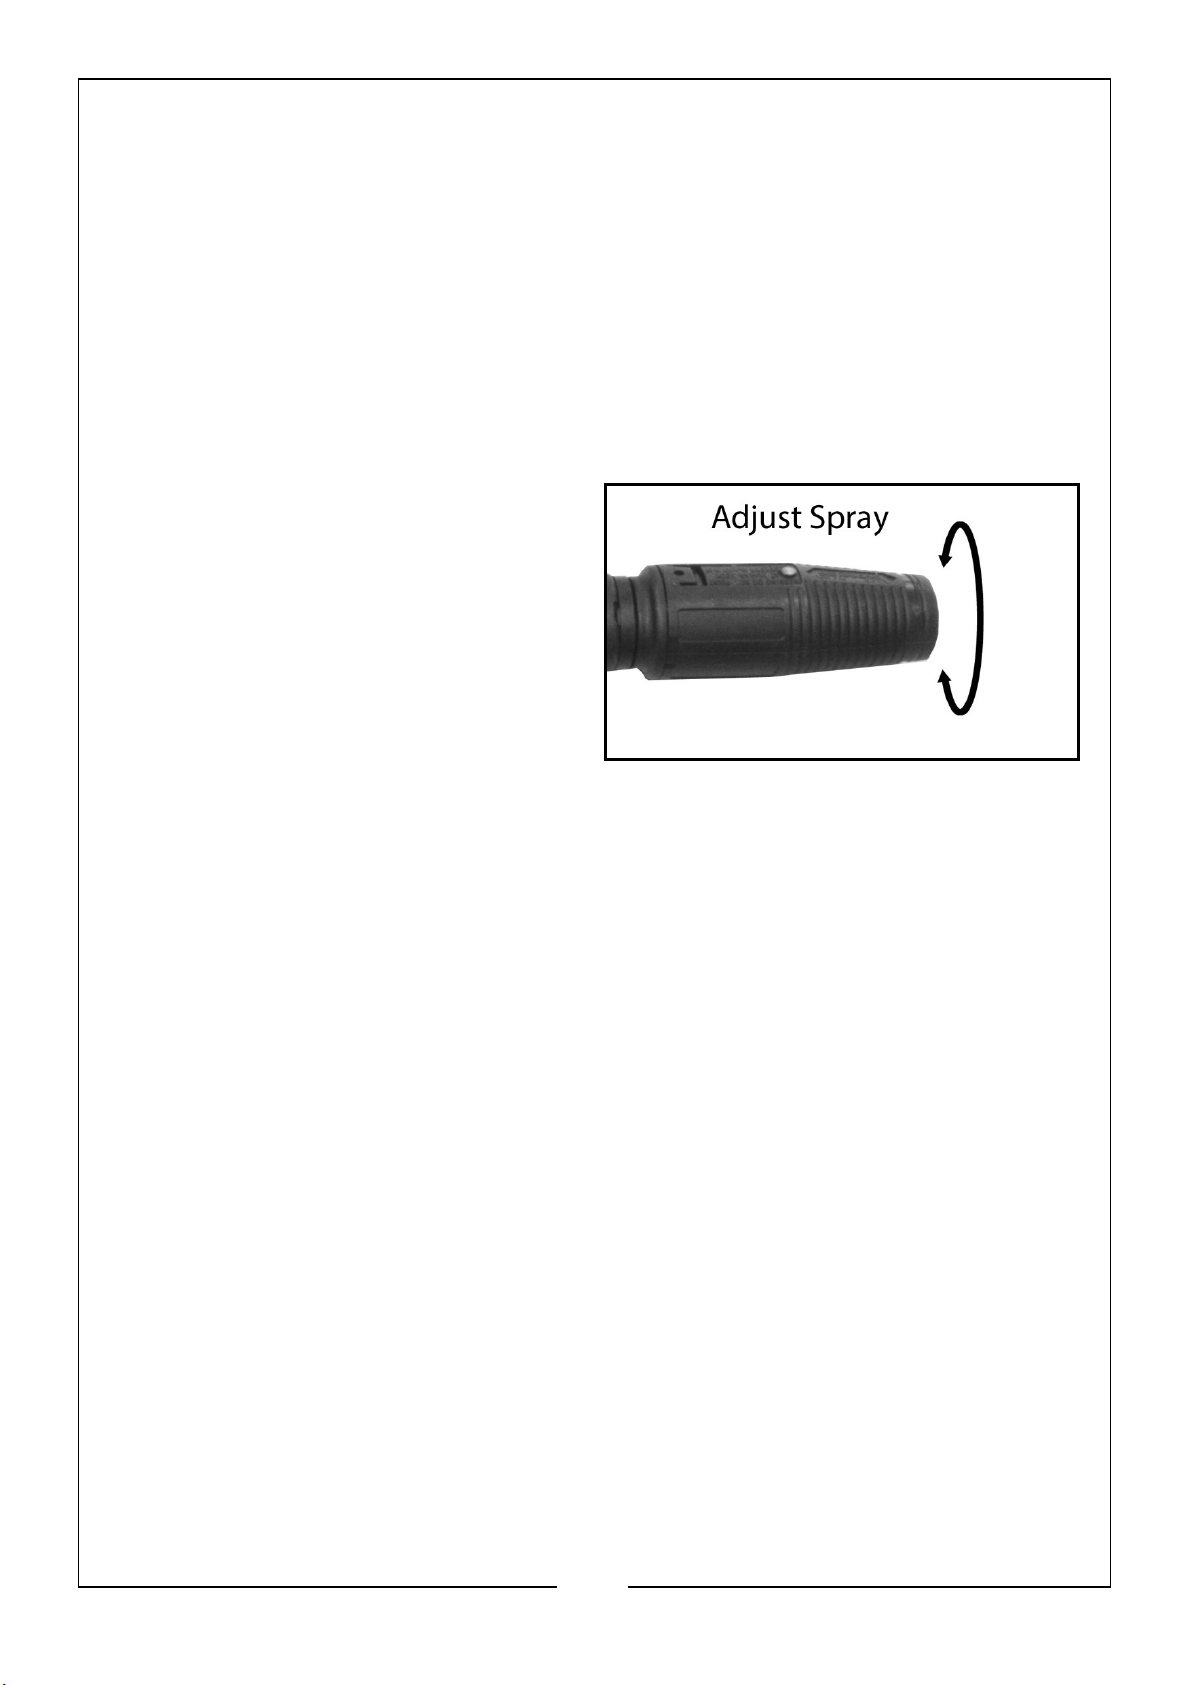
1. Hold the shaft of the lance in one
hand.
2. To vary the spray between narrow
and wide, turn the nozzle counterclockwise through a half-a-turn
(180°).
NOTE: DO NOT adjust the spray while
the gun is active. ALWAYS turn
the locking device to the ‘ON’
position or turn the washer off when adjusting the spray.
12
Parts & Service: 020 8988 7400 / E-mail: [email protected] or [email protected]
Page 13
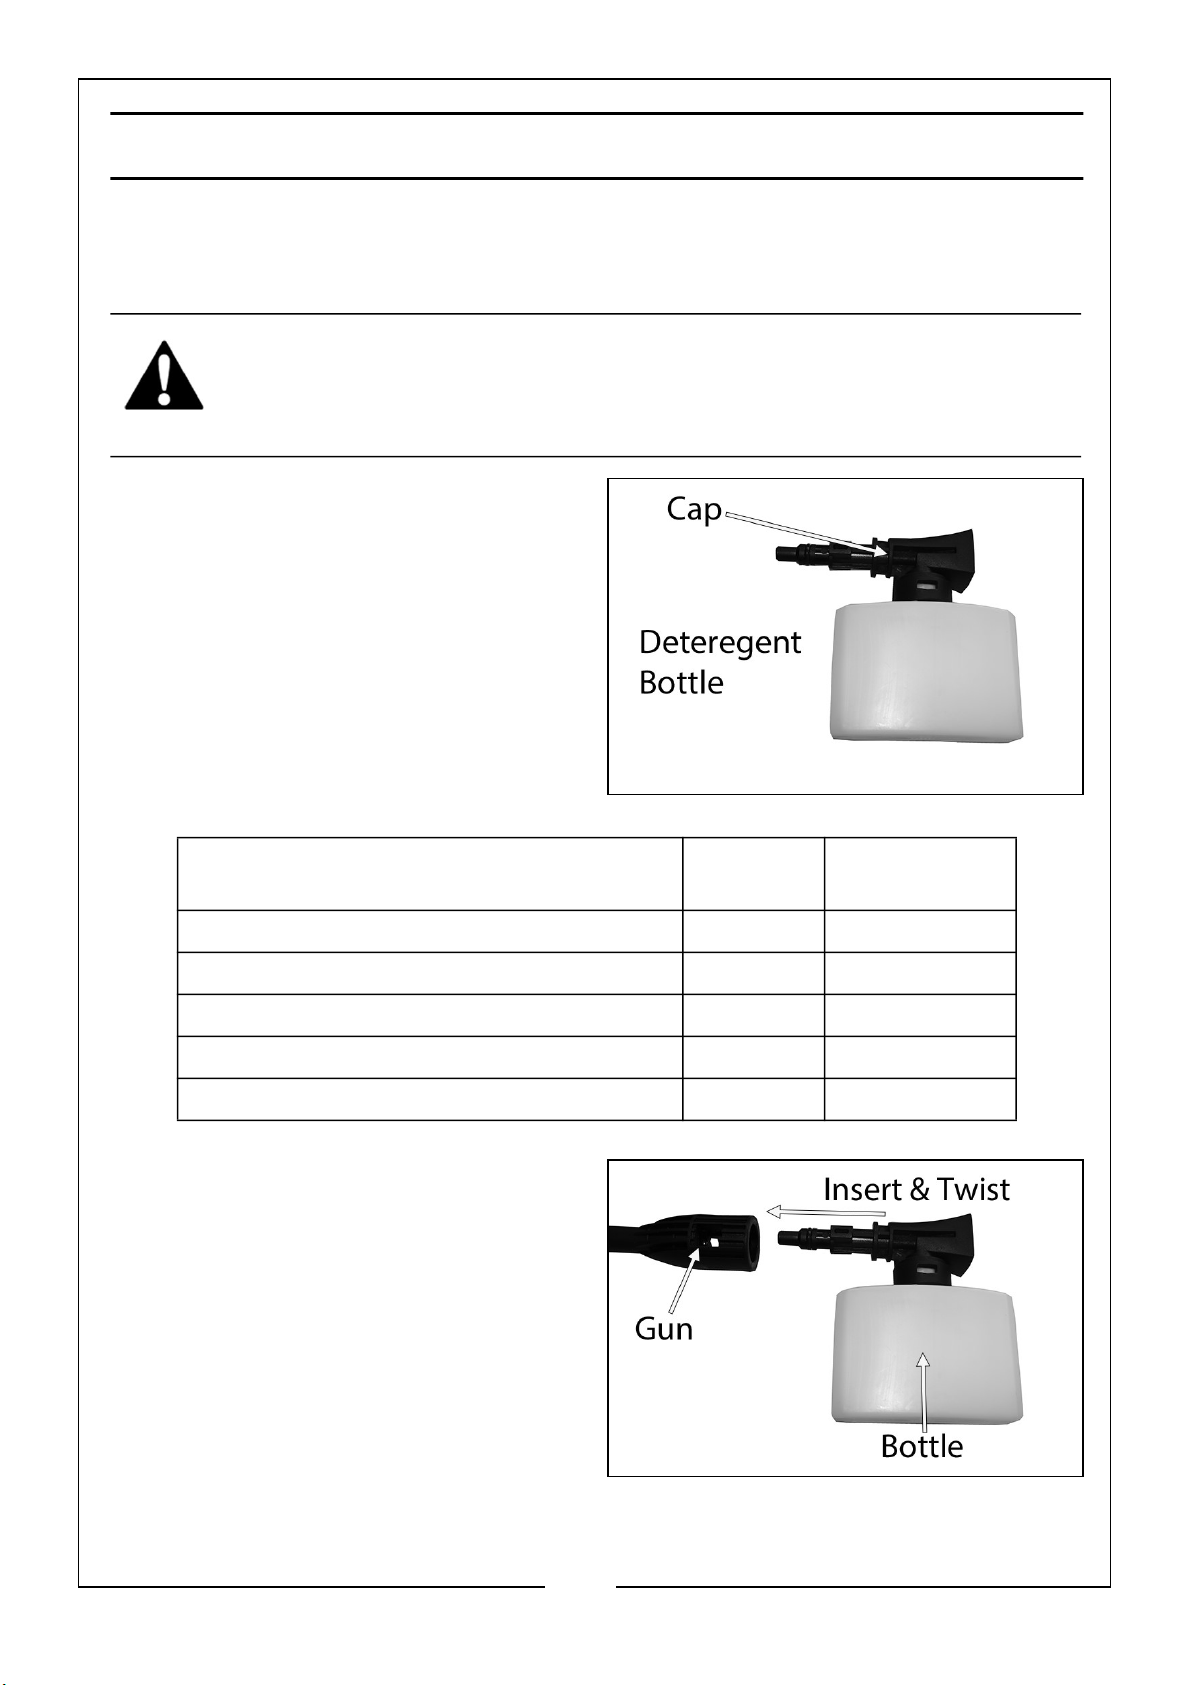
APPLYING DETERGENTS
To improve the cleaning performance, you can introduce chemical cleaning agents
(detergents) to the water jet using the detergent bottle. This is particularly useful
when washing cars, greasy engine parts, or removing oil spots on concrete etc.
CAUTION: IF YOUR EYES COME INTO CONTACT WITH ANY CLEANING
FLUIDS, RINSE THEM IMMEDIATELY WITH PLENTY OF FRESH CLEAN WATER
AND SEEK MEDICAL ADVICE IF REQUIRED.
Detergent application:
1. Remove the cap and fill the bottle
with a max. of 250ml of detergent.
• Only use detergents
recommended for use with
pressure washers such as the
CLARKE listed below, available
from your CLARKE dealer.
DESCRIPTION SIZE PART
Traffic Film Remover 5 Litre 3050821
Heavy Duty Snow Foam 5 Litre 3050807
Economy Snow Foam - Cherry Fragrance 5 Litre 3050805
Snow Foam - Cherry Fragrance 5 Litre 3050806
Wash & Wax Car Shampoo 2 Litre 3050817
2. Replace the cap.
3. Remove the lance section from the
gun and replace with the detergent
bottle by inserting the bottle into the
gun as shown and twist to lock in
place.
4. Use the pressure washer as normal.
NUMBER
13
Parts & Service: 020 8988 7400 / E-mail: [email protected] or [email protected]
Page 14
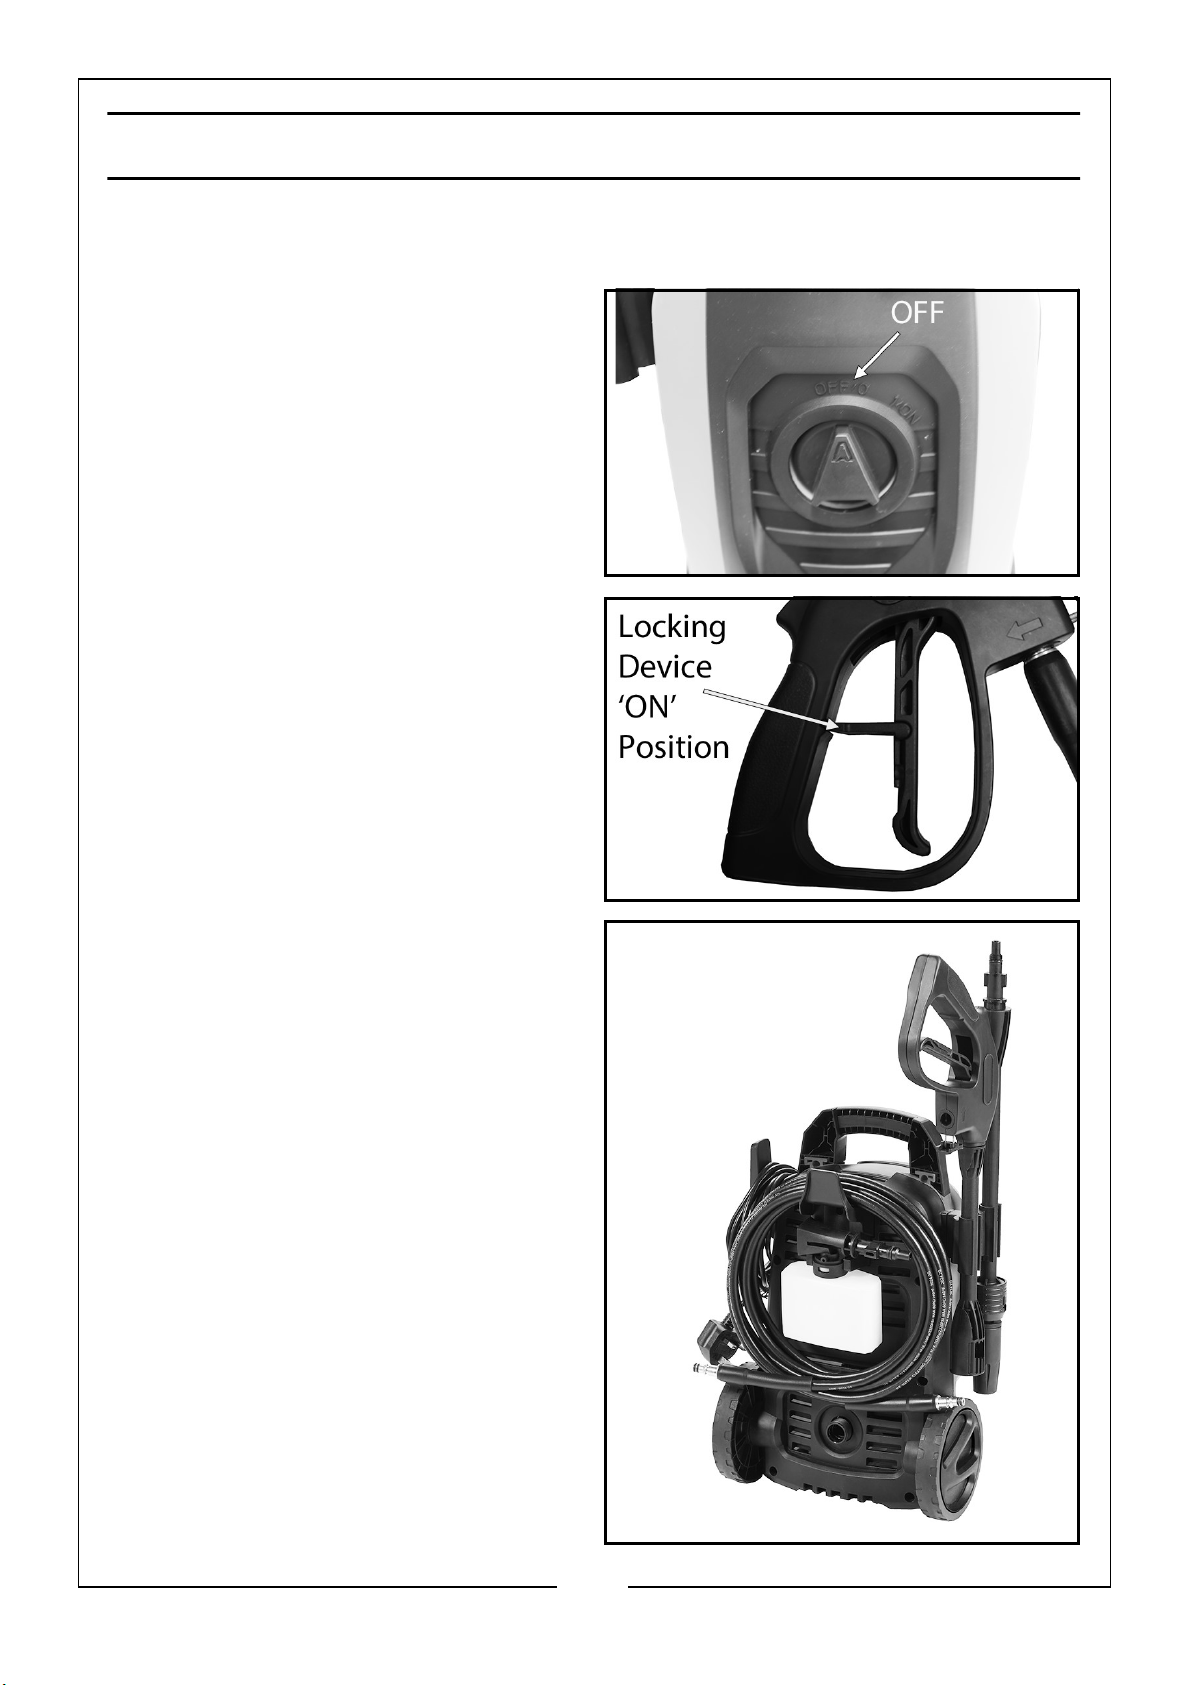
SHUTTING DOWN
When you have finished using the pressure washer, follow the procedure shown
below to switch off and disconnect the unit.
1. Set the power switch to the ‘OFF’
position.
2. Turn off the water supply at the tap.
3. Release the pressure in the machine
by pulling and hold the trigger until
no more water comes out of the
nozzle.
4. Engage the trigger lock.
5. Disconnect from the power supply.
6. Wind the hose onto the reel and put
the spray gun/lance into the holder
on the power washer.
STORAGE PROCEDURE
Disconnect from the water supply, and
ensure the system is completely drained
when not in use, see above.
Store in a cool dry location.
Avoid storing the power washer at
freezing temperatures.
Residual water in the high pressure
pump or hose assembly may cause
permanent damage to the
components if it freezes.
14
Parts & Service: 020 8988 7400 / E-mail: [email protected] or [email protected]
Page 15
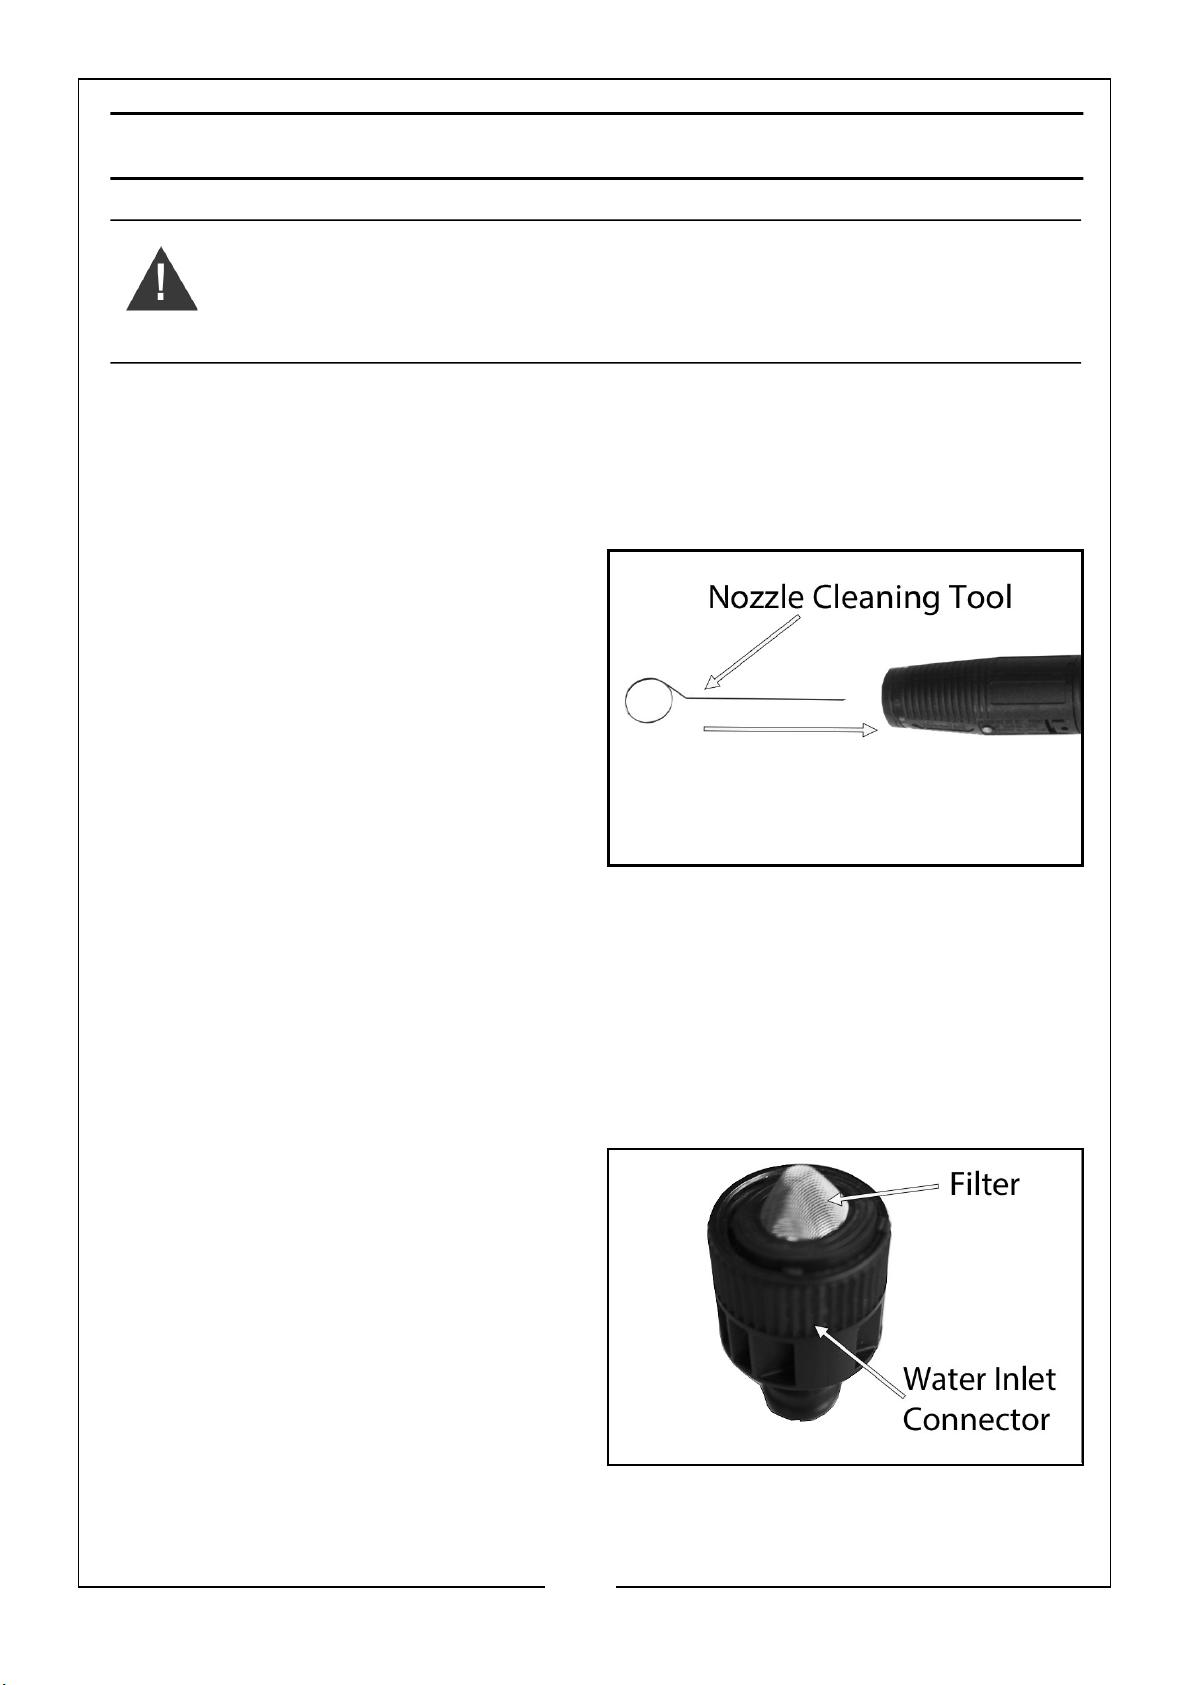
MAINTENANCE
WARNING: REMOVE THE PLUG FROM THE SOCKET-OUTLET BEFORE
CLEANING OR MAINTENANCE AND WHEN REPLACING PARTS
CLEANING THE NOZZLE
If the nozzle becomes partially clogged with foreign material such as dirt or limescale,
excessive pressure may develop and the pump pressure will pulsate. Clean the nozzle
immediately as follows:
1. Turn off the power washer and turn
off the water supply.
2. Pull the trigger to relieve any water
pressure.
3. Disconnect the lance from the spray
gun.
4. Remove any obstructions by directing
the water supply into the end of the
lance for 30 seconds to back flush
loose particles.
5. If flushing does not dislodge the obstruction, carefully use the nozzle cleaning
tool, to clear the nozzle.
6. Reconnect the lance to the gun and turn on the water supply.
CLEANING THE WATER INLET FILTER
This filter should be checked periodically and cleaned if necessary.
1. Remove the inlet connector from the
pressure washer and remove the
filter.
2. Clean the filter by flushing both sides
with water.
3. Replace the filter into the connector
and replace the connector onto the
water inlet.
NOTE: DO NOT operate the pressure
washer without the filter
installed.
15
Parts & Service: 020 8988 7400 / E-mail: [email protected] or [email protected]
Page 16
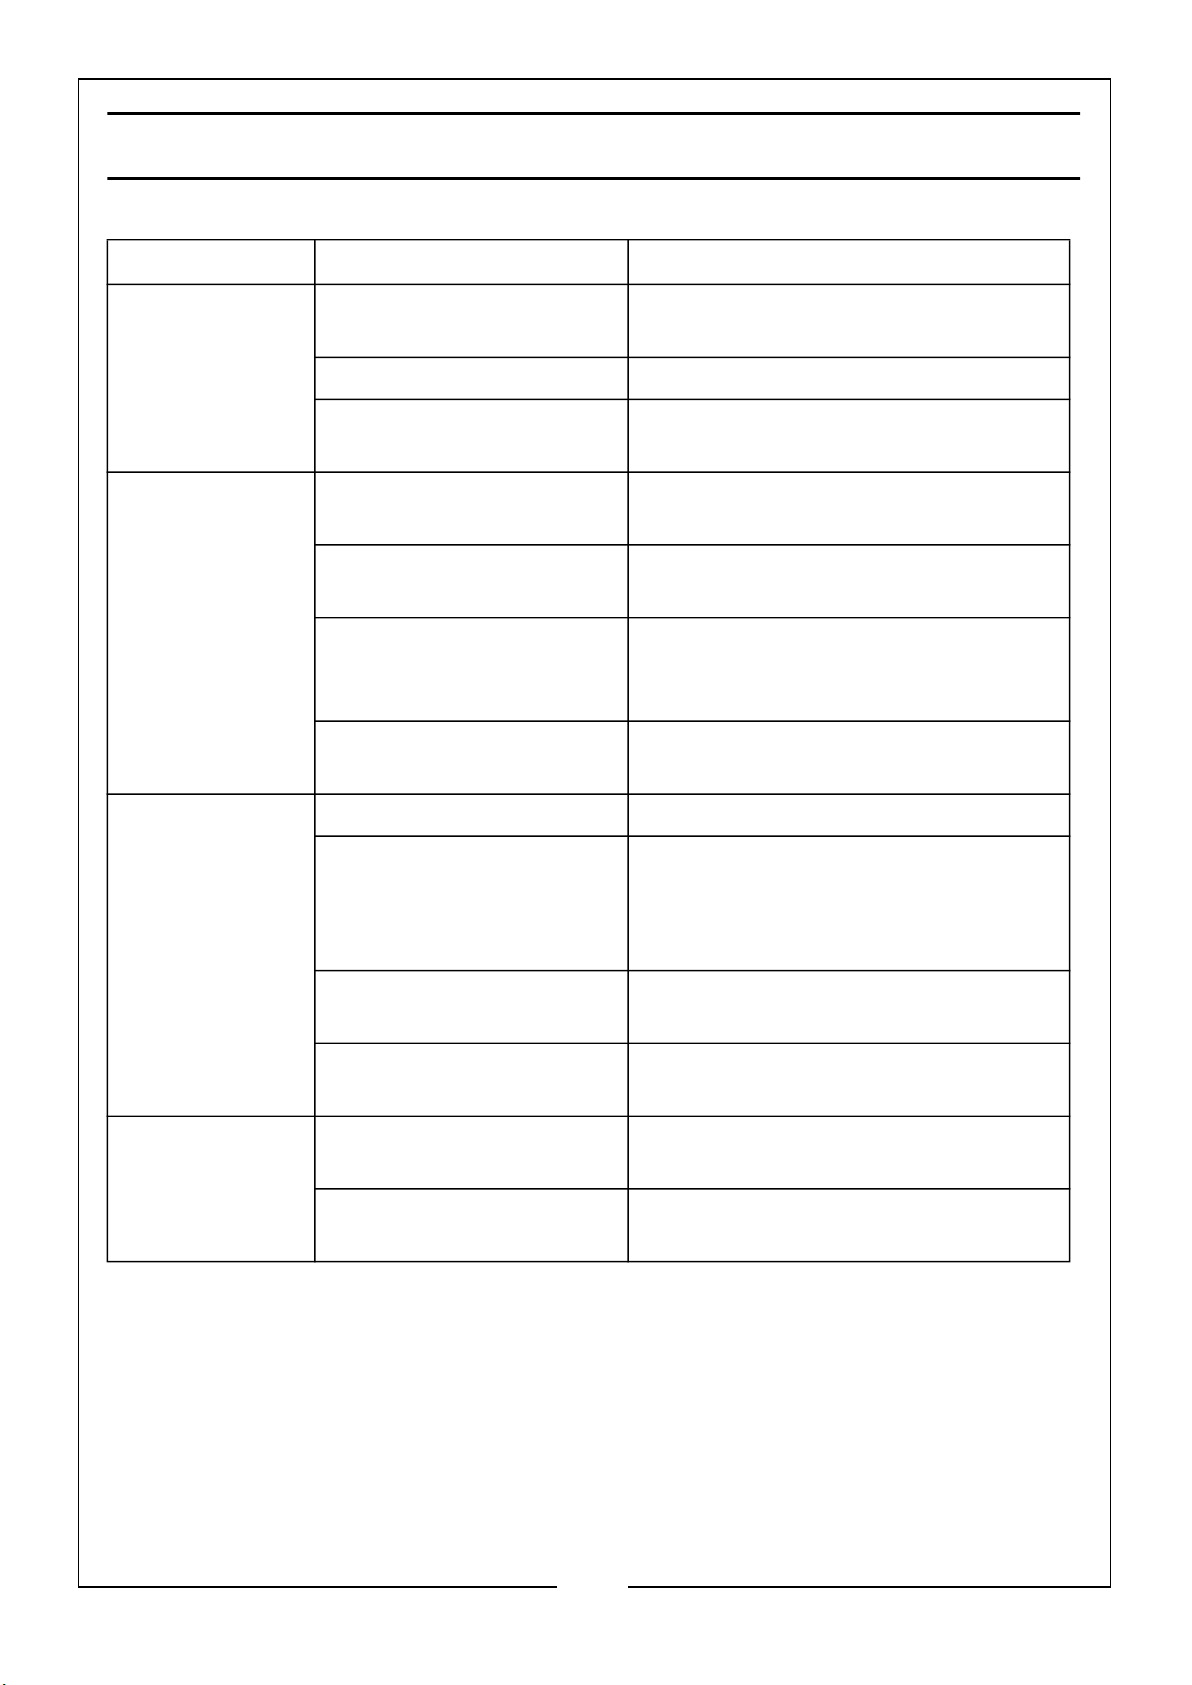
TROUBLESHOOTING
PROBLEM POSSIBLE CAUSE SOLUTION
The washer will
not start
Fluctuating
pressure
The washer
stops
The washer is not plugged inPlug the washer in
The plug fuse has blown Replace the plug fuse
Faulty extension cable (if
used)
The pump is drawing in air Check that hoses and connections are
Valves are dirty, worn or
sticking
The water supply is not
sufficient
Pump seals are worn Contact your nearest CLARKE service
The plug fuse has blown Replace the plug fuse
Incorrect mains voltage Unplug other appliances on the same
Try without extension cable or replace
extension cable
airtight
Contact your nearest CLARKE service
centre
Increase water pressure, check for
blockages and/or change to a larger
inlet hose
centre
circuit. Check that the mains voltage
corresponds to the specifications on
page 18
Fuse
blown
Thermal sensor activated Leave the washer to cool for 5
minutes
Partially blocked jet Clean the jet nozzle with the cleaning
tool. Rinse nozzle
Plug fuse too small Check that the plug fuse corresponds
to the specifications on page 18
Increase in the ampage Try using washer without an
extension cable if used
16
Parts & Service: 020 8988 7400 / E-mail: [email protected] or [email protected]
Page 17
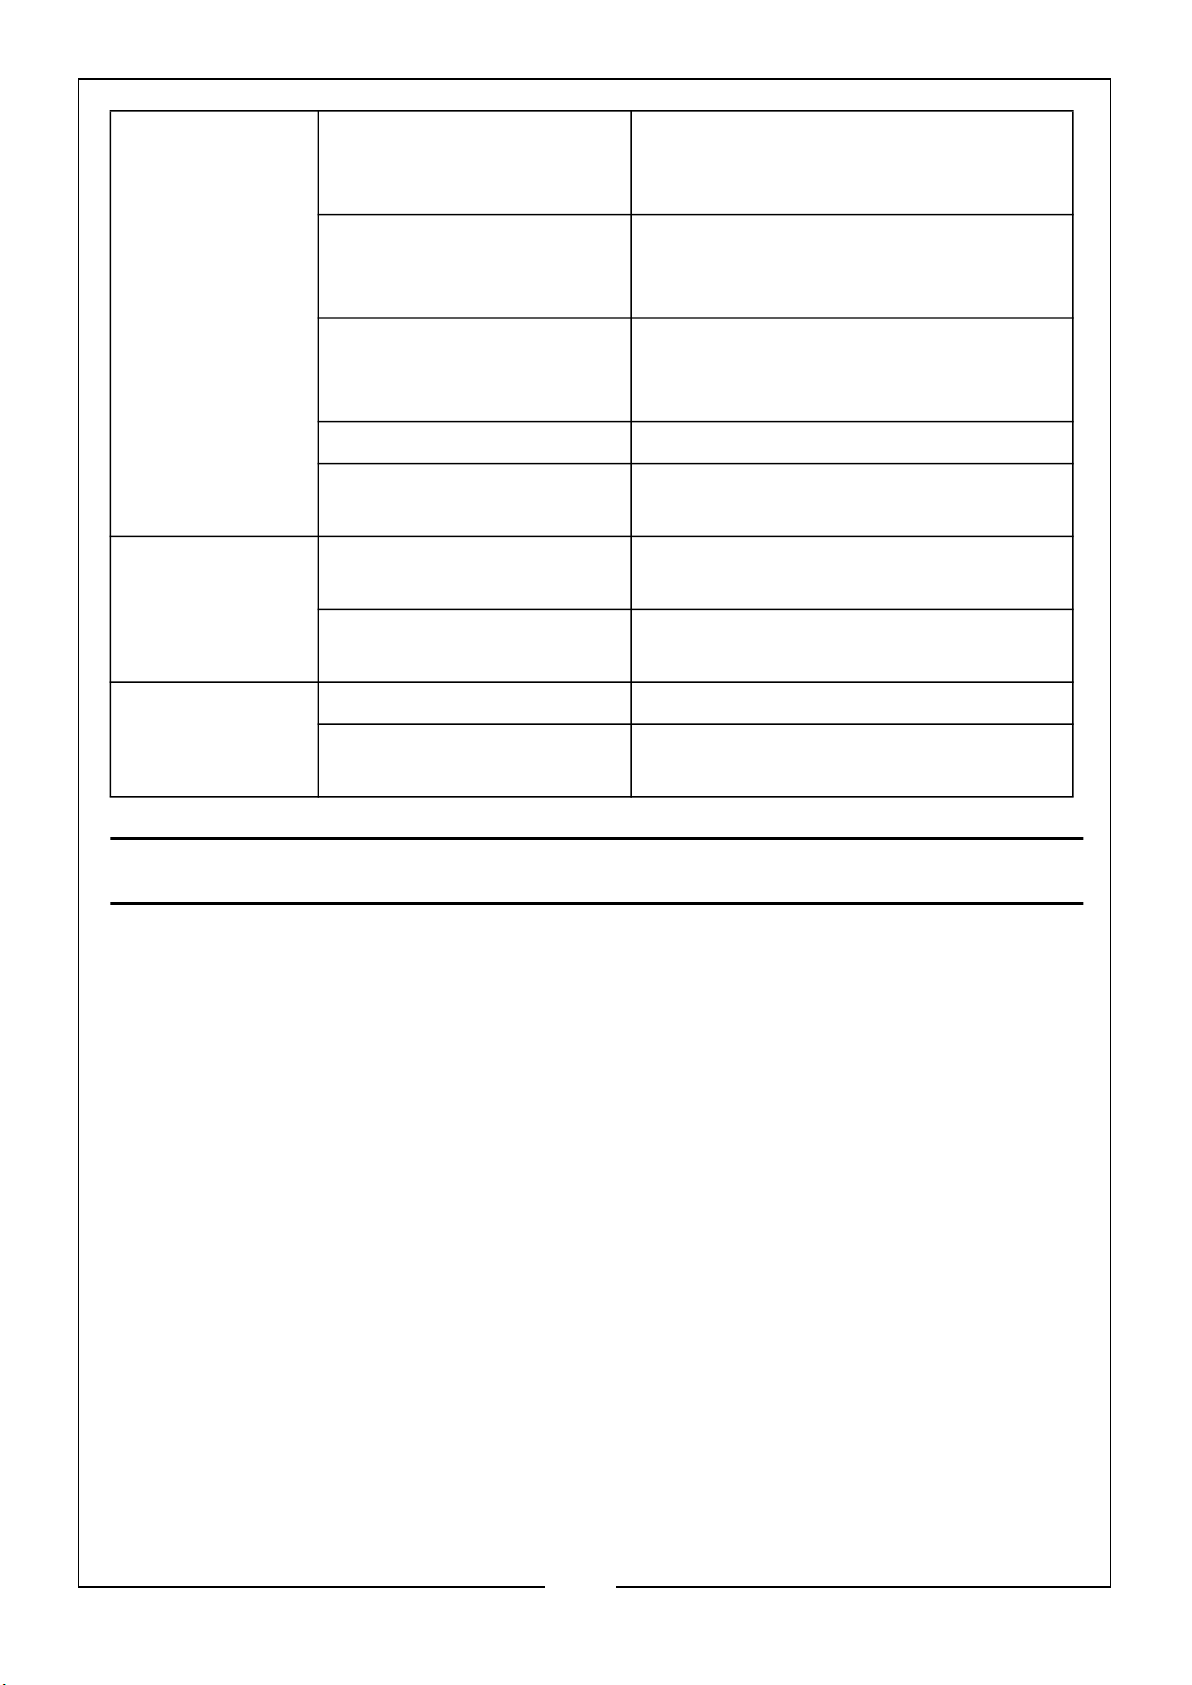
Pulsing washer Air in the inlet hose/pump Allow washer to run with open trigger
until regular working pressure
resumes
The washer
turns on and off
by itself
The washer is on
but no water
comes out
Inadequate supply of
water generated
Partially blocked jet Clean the jet nozzle with the cleaning
Water filter blocked Clean the inlet water filter
Folded hose Unfold any kinks that maybe in the
Pump fuse and/or trigger
out of order
No water supply Connect and/or check the inlet water
Water filter blocked Clean the inlet water filter
Blocked jet Clean the jet nozzle with the cleaning
Increase water pressure, check for
blockages and/or change to a large
inlet hose
tool. Rinse nozzle
inlet or outlet hoses
Contact your nearest CLARKE service
centre
supply
tool. Rinse nozzle
CLARKE POWER WASHER ACCESSORIES
The following accessories can be purchased from your local CLARKE supplier to be
used with this product:
• Turbo Nozzle, Part Number: 7310307
• 180 Degree Nozzle, Part Number: 7310308
• Drain Hose, Part Number: 7310309
• Small Patio Cleaner, Part Number: 7310311
• Big Patio Cleaner, Part Number: 7310312
• Pressure Brush, Part Number: 7310313
17
Parts & Service: 020 8988 7400 / E-mail: [email protected] or [email protected]
Page 18
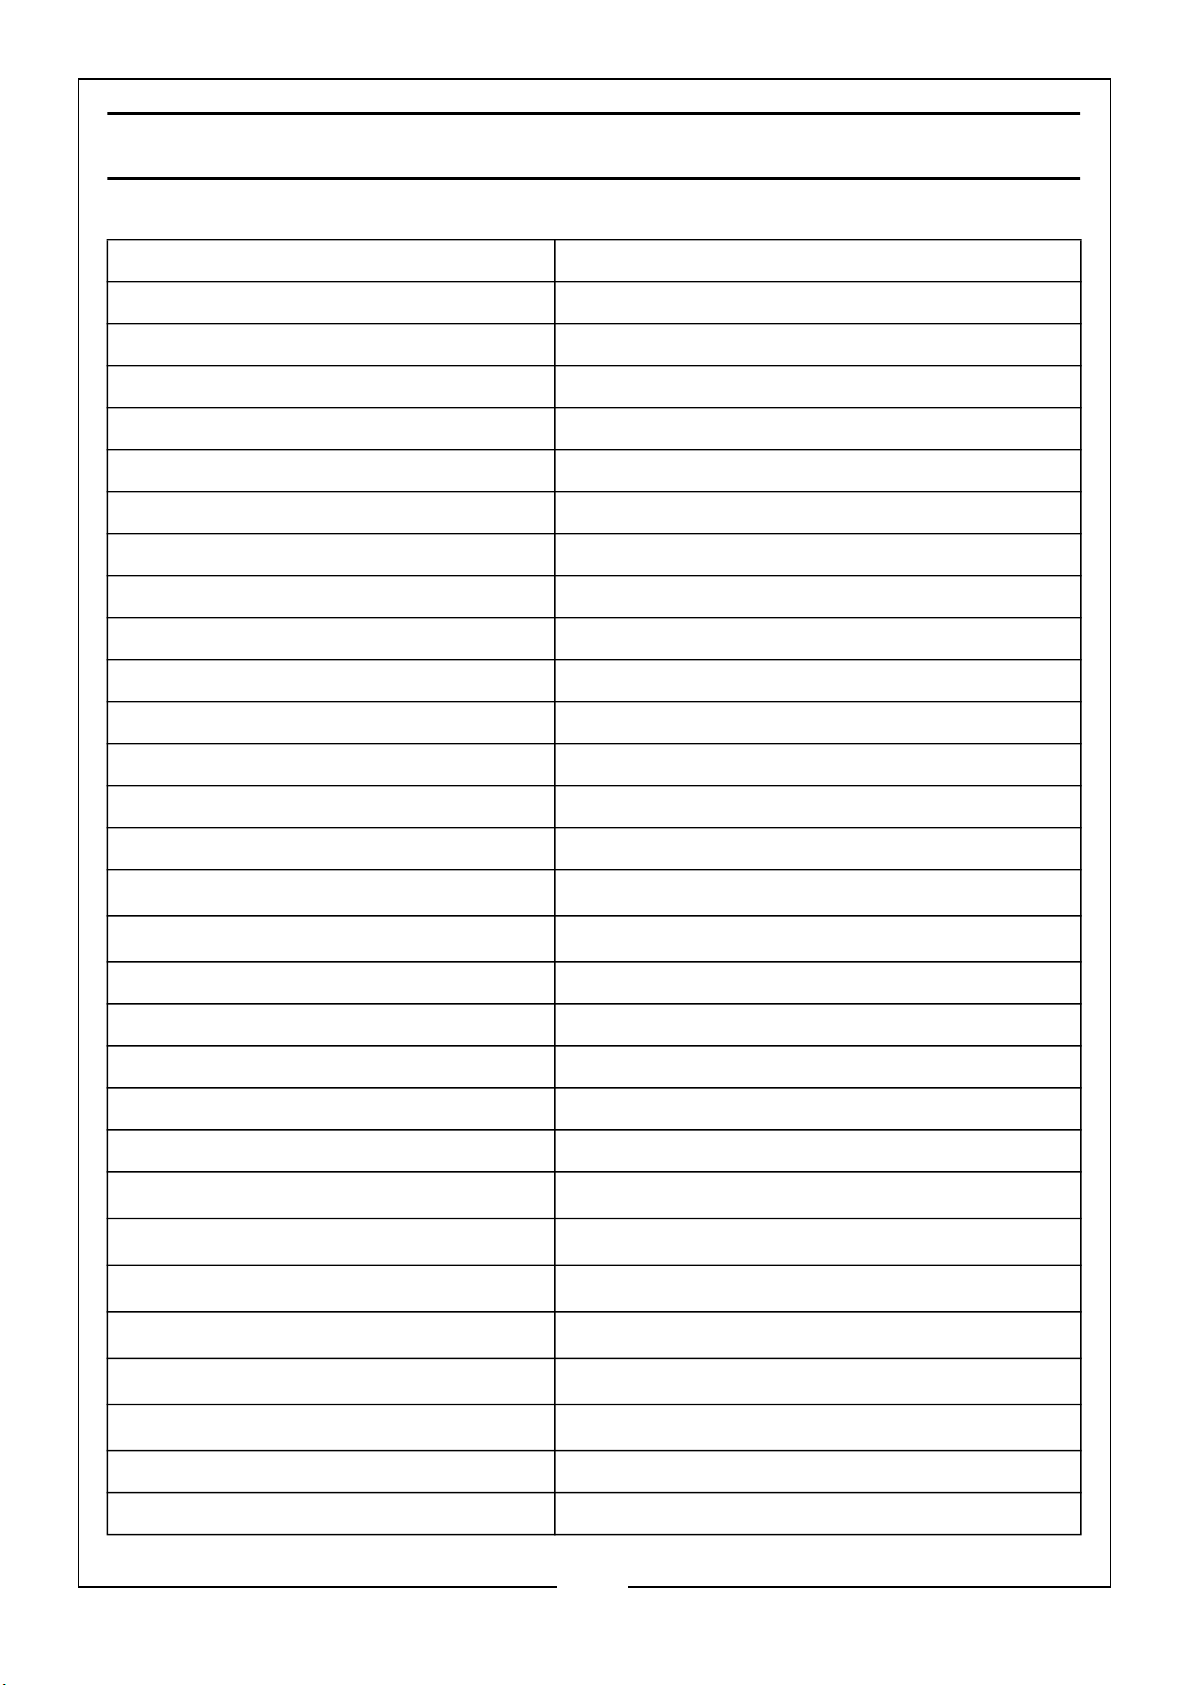
PRODUCT SPECIFICATIONS
Model Number JETSTAR 1850B
Part Number 7336015
Voltage and Frequency 230V/50Hz
Electrical Insulation Class II
Input Power @ Rated Load 1600W
Input Current @ Rated Load 5.7A
Plug Fuse Rating 13A
Duty Cycle S1 Continuous
IP Rating IPX5
Working Pressure (Outlet) 90bar / 1305psi
Maximum Working Pressure (Outlet) 135bar / 1958psi
Maximum Inlet Pressure 8bar / 116psi
Maximum Output Flow Rate 6.2 l/min / 372 l/hr
Rated Output Flow Rate 5 l/min / 300 l/hr
Water Type Clean Cold Water
Ambient Operating Temperature
Input Water Temperature
400C
10C - 400C
Water Supply Hose Diameter Suitable Snap Connector - 1/2” or 3/4” Hose
Water Supply Suction Depth Less Than 1m
Detergent Bottle Capacity 250ml
Total Gun & Lance Length 800mm
High Pressure Hose Length 5m
Sound Pressure Level (LPA) 78.4db
Measured Sound Power Level (LWA) 98.4dB
Guaranteed Sound Power Level (LWA) 98dB
Sound Uncertainty Factor (KPA) 0dB
Maximum Vibration
Uncertainty Factor K
1.15m/s
1.5m/s
2
2
Dimensions (D x W x H) 240mm x 290mm x 600mm
Weight 4.95kg
18
Parts & Service: 020 8988 7400 / E-mail: [email protected] or [email protected]
Page 19
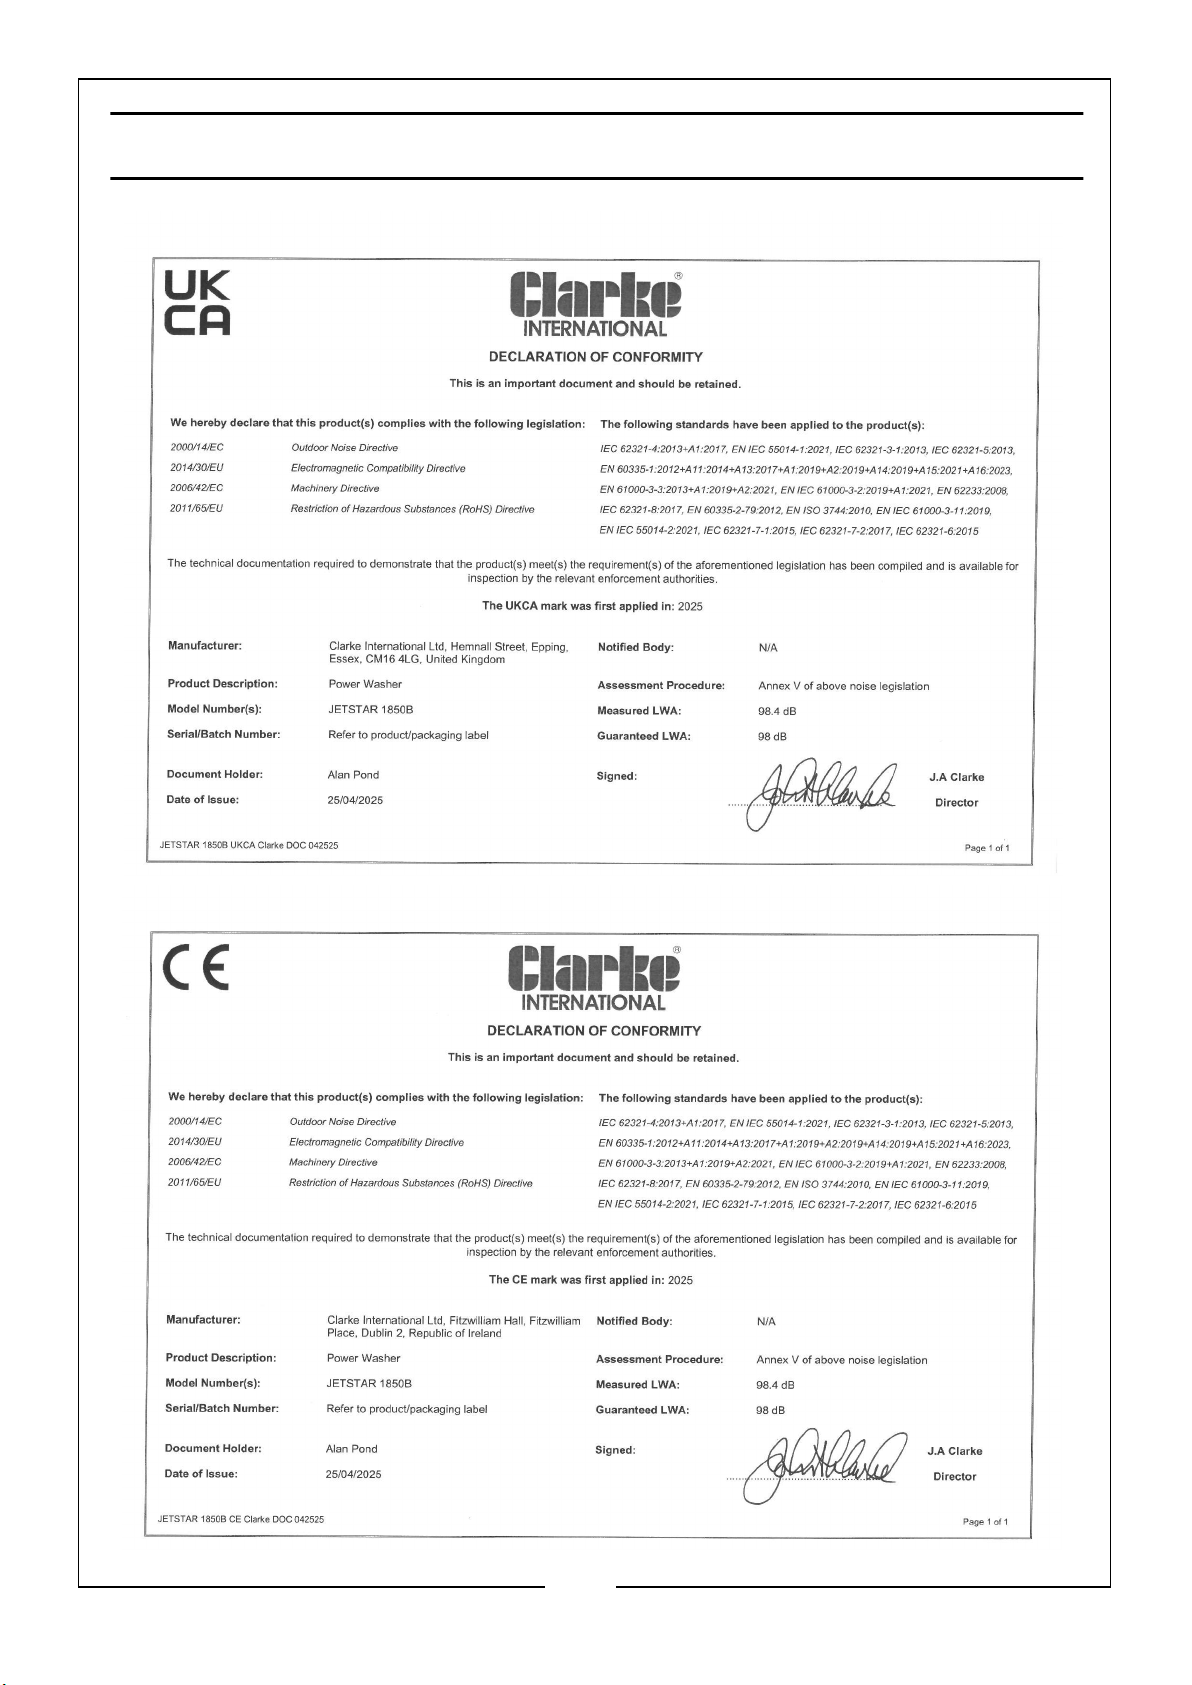
DECLARATION OF CONFORMITY
19
Parts & Service: 020 8988 7400 / E-mail: [email protected] or [email protected]
Page 20

 Loading...