

Page 1
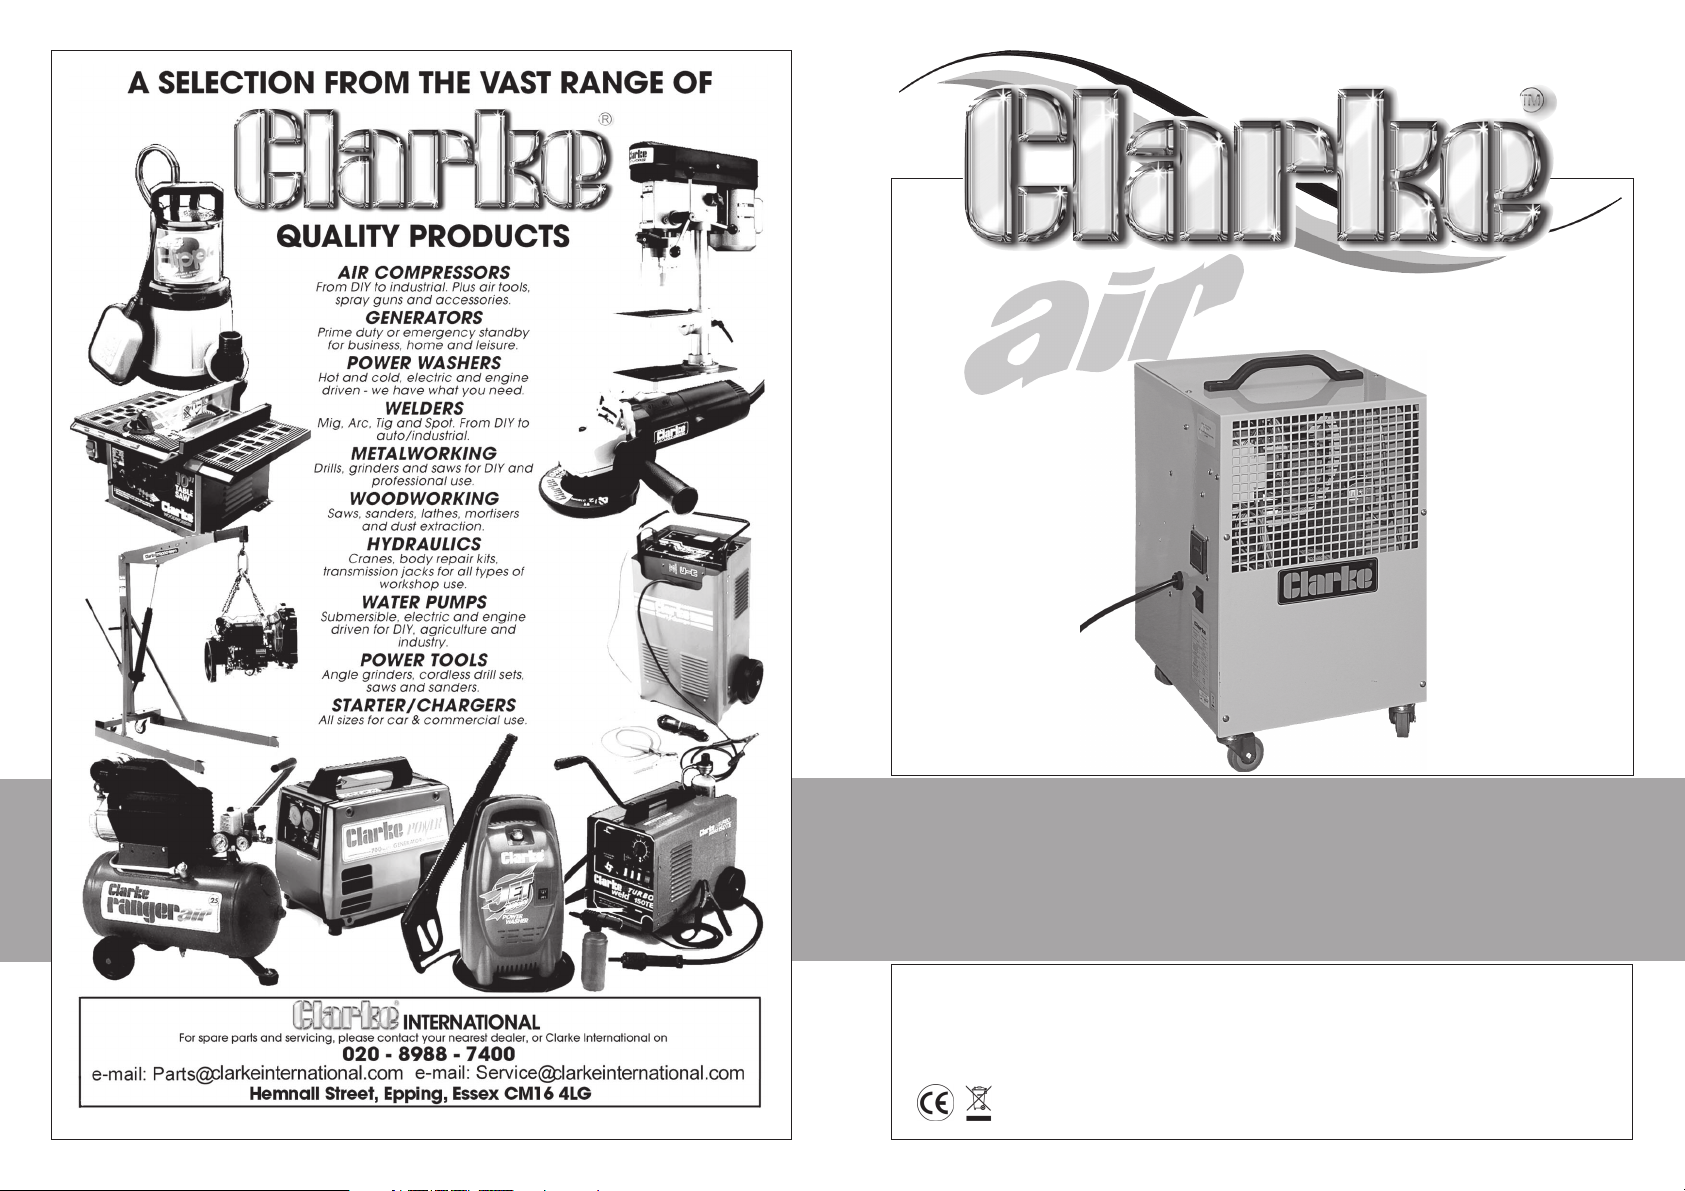
DEHUMIDIFIER
DEHUMIDIFIER
MODEL NO: DMD36
PART No: 6470640
OPERATION & MAINTENANCE
INSTRUCTIONS
0807
Page 2
2 11
Page 3
MAINTENANCE
WARNING
FAILURE TO CARRY OUT ROUTINE MAINTENANCE WILL AFFECT
THE MACHINE’S PERFORMANCE AND MAY RESULT IN
PREMATURE FAILURE. THIS COULD ALSO INVALIDATE THE
WARRANTY.
MAINTENANCE ACTIVITIES MUST ALWAYS BE
CARRIED OUT BY QUALIFIED PERSONNEL ONLY
ALWAYS disconnect the unit from the power supply before carrying out any maintenance
activities.
These dehumidifiers are fairly maintenance free, only requiring periodic cleaning. All internal
parts sealed and lubricated for the life of the unit.
The drip tray can be cleaned using a clean dry soft cloth, DO NOT use harmful chemicals or
cleaning agents. Simply lift the drip tray slightly to disengage it from the retaining lip then
pull it out.
The cooling coils require cleaning at least once a month, more often if the unit is used in
dusty environments. In order to do this, it is necessary to remove the top cover, complete
with handle.
Remove all 8 cover securing screws, and carefully pull off the cover.
Clean the inside of the unit by carefully blowing out any dust using compressed air at a low
pressure.
Pay particular attention to the fan blade and motor, ensure the motor spins freely.
Reassemble the unit in the reverse order.
IMPORTANT
When carrying out maintenance activities, precautions to ensure the safety of yourself and
that of others around you must be considered, i.e. choose a location where it is safe to use
compressed air to blow the unit out, and always wear safety glasses and ear defenders.
STORAGE
Switch OFF the power supply and disconnect from the main electrical supply by removing
the plug from the socket.
The unit should not be moved for at least 15 minutes after switching off.Always ensure the
drip tray is clean and dry before storing.
If the storage period is expected to be prolonged, remove the top cover as described
above, and blow out the coils and internal parts. Ensure the coils are clean and dry before
replacing the cover.
Ensure the unit is kept upright at all times.
10
Thank you for purchasing this CLARKE Dehumidifier.
Before attempting to use the machine, please read this manual thoroughly and follow the
instructions carefully. In doing so you will ensure the safety of yourself and that of others
around you, and you can look forward to the unit giving you long and satisfactory service.
CLARKE GUARANTEE
This CLARKE product is guaranteed against faulty manufacture for a period of 12 months from the date of purchase. Please keep your receipt as
proof of purchase.
This guarantee is invalid if the product is found to have been abused or
tampered with in any way, or not used for the purpose for which it was
intended.
Faulty goods should be returned to their place of purchase, no product
can be returned to us without prior permission.
This guarantee does not effect your statutory rights.
SPECIFICATIONS
Model No: ........................................................................................... DMD 36
Part No: ............................................................................................... 6470640
Voltage: ....................................................... 230 &110/115 Volt 1Phase 50Hz
Internal Fuse Rating: .................................................................................. 10A
Running Current: ...........................................1.2A (230v) & 2.5A (110/115v)
Refrigerant: .......................................................................... R134A (250grms)
Temperature Range: ...................................................................... 5º to 35ºC
Weight unpacked:................................................................................... 27Kg
Dimensions: ..................................... 550mm (H) x 320mm (W) x 400mm (D)
Max Motor Wattage When Running: ................................................... 275W
Max Extraction Rate - @ 38º, 100%RH: ................................ 28 litres (24 hrs)
Please note that the details and specifications contained herein, are correct at the time of going to print.
However, CLARKE International reserve the right to change specifications at any time without prior notice.
The DMD36 is equipped with AUTO-SENSING DUAL VOLTAGE SELECTION circuitry as standard.
The DMD36 is designed for INTERNAL USE ONLY.
Extension leads, if used, should be correctly rated for the inductive load, fully unwound,
loosely coiled and never run through water or over sharp edges. This applies equally to the
mains lead on the dehumidifier.
Do not dispose of with general household waste. It must be disposed of according to law, at a
properly recognised disposal facility
3
Page 4
SAFETY PRECAUTIONS
WARNING:
As with all machinery, there are certain hazards involved with their operation and
use. Exercising respect and caution will considerably lessen the risk of personal
injury. However, if normal safety precautions are overlooked or ignored, personal
injury to the operator or damage to property, may result.
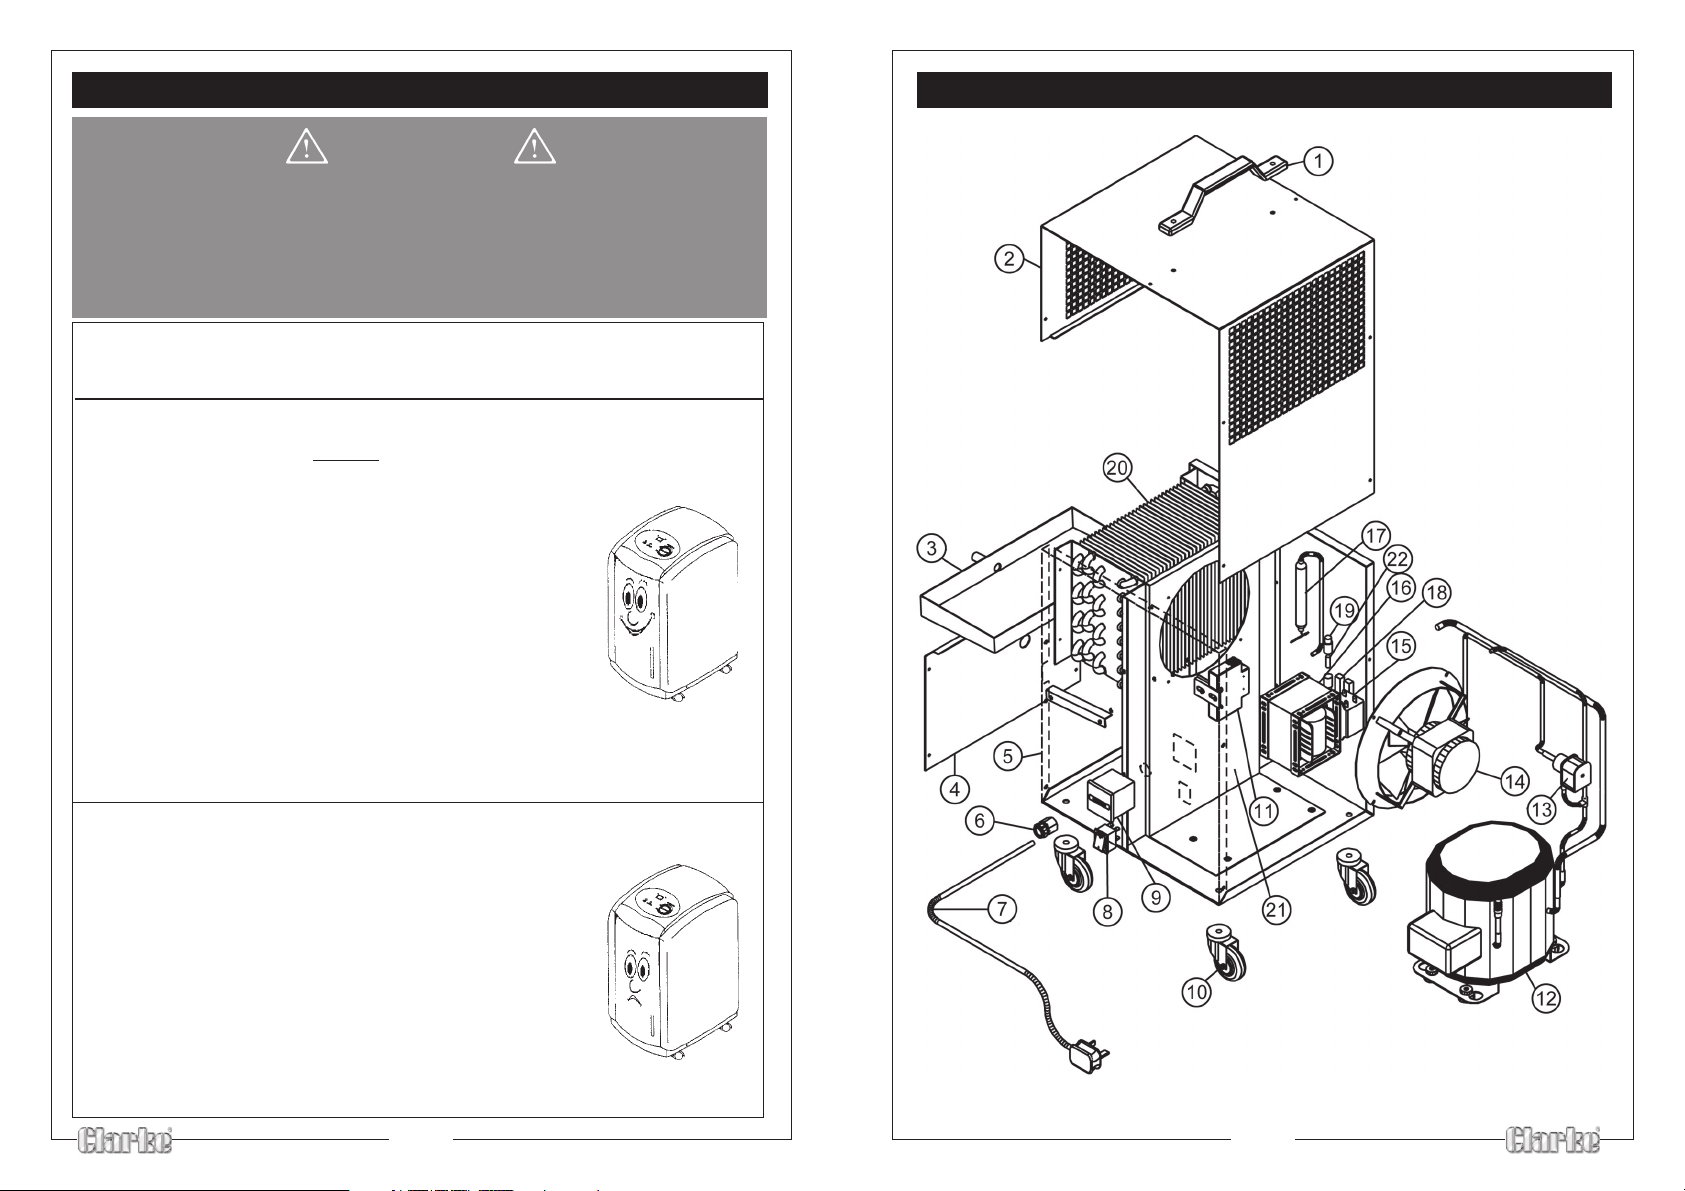
PARTS DIAGRAM
Care must be taken when handling water near electricity as there is risk of electric
WARNING!
Always
Always
Always
Always
Always
Always
Always
Never
Read these safety instructions before using the equipment.
transport, store and operate this equipment in an
upright position DO NOT lay the unit on its side.
leave the unit to stand for 15 minutes minimum before
switching on if it has been tilted or moved from an
upright position i.e. after transportation or cleaning.
allow a gap of 300mm around the unit to allow
air to circulate.
ensure that the air inlet and outlet areas are
clear.
remove the mains plug from the mains supply before
carrying out any maintenance.
switch off, unplug and drain any water from the
dehumidifier before moving.
switch the electrical supply off and disconnect from
the mains, when not in use.
use the unit near heaters or other sources of heat.
shock
Never
Never
Never
Never
Never
place anything on the top of this unit, and never
obstruct the air intake/exhaust grills.
pour or spray water on the unit.
use solvent cleaners or other flammable liquids
to clean the unit.
pull out the plug to stop or start the machine. Use
the ON/OFF switch on the side of the unit.
pull on the mains cable to pull the plug from the
socket or to move the machine.
4
9
Page 5
PARTS LIST
Item Part No Description Qty
1 ME050102 Handle 1
2 BW020353 Upper Case 1
3 BW020372 Drip Tray 1
4 BW020373 Front Panel 1
5 BW020350 Lower Case 1
6 ME040207 Cable Gland 1
7 EL020113 Mains Cable 1
8 EL030103 Push Button Switch 1
9 EL030411 Hour Clock 1
10 ME010215 Caster 1
11 EL030510 Timer 1
12 FR010104 Compressor 1
13 FR010404 Soenoid Coil 1
14 FA040204 Fan Motor Assembly 1
15 EL030209 Switching Relay 1
16 EL030608 Transformer 1
17 FR020302 Filter Drier 1
18 EL030906 Resistor 1
19 EL040101 Fuse Holder 1
20 FR030307 CD/DX Coil 1
21 BW020350 Chassis 1
22 EL010106 Fuse 1
ELECTRICAL CONNECTIONS
The DMD36 has AUTO SENSING DUAL VOLTAGE selection circuitry as standard, and can be
connected into a standard 16amp 110v, or 13amp 230v supply once the correct plug has
been fitted.
To reduce the risk of electric shock, it is recommended to use a suitable RCD (residual
current device.
230 Volt Mode
Connect the mains lead to a standard, 230 Volt (50Hz) electrical supply through an approved
13 amp BS 1363 plug, or a suitably fused isolator switch.
WARNING! THIS APPLIANCE MUST BE EARTHED
IMPORTANT: Wires in the mains lead are coloured in accordance with the following code:
Green & Yellow .......... Earth
Blue .............................. Neutral
Brown .......................... Live
As the colours of the flexible lead of this appliance may not correspond with the coloured
markings identifying terminals in your plug, or your mains supply, proceed as follows:
• Connect GREEN & YELLOW coloured cord to plug terminal marked with a
letter “E” or Earth symbol “ ” or coloured GREEN or GREEN & YELLOW.
• Connect BROWN cord to terminal marked with a letter “L” or coloured RED.
• Connect BLUE cord to terminal marked with a letter “N” or coloured BLACK.
Fuse Rating
The fuse in the plug must be replaced with one of the same rating (13amp) and this
replacement must be ASTA approved to BS1362.
110 Volt Mode
These models MUST be connected to a protected 110V supply, through a suitably approved
BS4343/IEC309-2 connector, . On no account must a 230V, 13amp (BS1363) plug be used.
NOTE: If a portable 110V transformer is used, make sure it has a rated capacity sufficient to
take the load of the unit.
PARTS & SERVICE TEL: 020 8988 7400
or e-mail as follows:
PARTS: [email protected]
SERVICE: [email protected]
8
In the event that the unit is hard wired into the electrical system, it must be carried out in
accordance with IEE regulations.
WARNING!
IF YOU ARE IN ANY DOUBT ABOUT ELECTRICAL CONNECTIONS, CONSULT A
QUALIFIED ELECTRICIAN.
NEVER ATTEMPT ELECTRICAL REPAIRS YOURSELF.
5
Page 6
INSTALLATION
TROUBLESHOOTING
Little installation is required other than siting the dehumidifier on a firm, flat, level
surface,connecting to the main electric supply and choosing the method of disposing of
collected water.
This equipment is designed to work in temperatures between 5ºC & 35ºC , Never operate in
temperatures below 5ºC or above 35ºC, if the temperature in the room rises above 35ºC,
switch the unit OFF. Failure to switch OFF could cause the compressor to overheat, resulting
in premature failure.
If used in temperatures below 5°, the coil may frost up and no water will be produced until
the defrost cycle commences.
NOTE: if using an extension lead, ensure it is correctly rated for the inductive load, fully
unwound and never run through water or over sharp edges.
OPERATION
Never attempt to use the dehumidifier for anything other than it’s intended purpose.
The DMD36 is fitted with an electronic hour run counter which is not resettable. Before
switching the dehumidifier ON, take a note of the hours run counter to assist with monitoring
the amount of time the unit is run.
After moving the dehumidifier into the location to be used, allow the unit to stand for 15
minutes before switching it on.
Ensure all doors and windows are closed and the area sealed where possible, this aids to
speed the dehumidification/drying process.
Plug the unit into the power supply and switch the supply ON.
Switch the unit ON by depressing the ON/OFF switch marked I/O, I= ON, O=OFF. The ON/
OFF switch is located next to the hour counter.
The dehumidifier is now running, allow a minimum of 10 mins for it to begin dehumidifying/
drying.
The water collected can be drained automatically using a suitable length of hose (not
supplied) connected to the outlet port, ensure the hose is kept below the outlet port for its
entire length, otherwise flooding of the unit will occur.
Alternatively the collected water can be drained into a suitable container (builders bucket
or similar). It is important to keep an eye on the water level in the bucket and empty
regularly to prevent it from overflowing.
6
If your dehumidifier fails to operate correctly, check the information below before contacting
your Clarke dealer for assistance.
PROBLEM PROBABLE CAUSE REMEDY
Unit fails to operate. Power failure. Check the unit is plugged into
Poor drying
performance.
Water leaking.
Compressor stops
running.
Dehumidifier in automatic
defrost mode.
Coils Dirty.
Air intake/exhaust grills
obstructed.
Temperature outside of
specified operating range.
Blocked drain hose.
Water receptacle full and
overflowing.
Drain hose higher than the
outlet port.
Unit has been moved without
draining the inner drip tray.
Unit iced up.
Input voltage too low. Check voltage.
Blown Internal Fuse due to
excess current or
temperature.
the correct power supply &
switched ON.
Check plug fuse. Replace if
necessary.
Check internal fuse (10amp).
Replace if necessary.
Normal ~ wait 15mins and
check drying again.
Clean coils, using compressed
air if available.
Remove obstruction, check
min clearance around unit,
re-site if necessary.
Check the environment
temperature ~ if too low,
switch unit OFF and add heat
to area.
If temp is too high, switch the
unit Off and wait for
Clear blockage.
Check level and empty if
required.
Adjust the hose level, check
the water flows.
Ensure the drip tray is empty
before moving the unit.
Dehumidifier run below min
temperature.
Switch the unit OFF, wait 15mins
before switching back ON.
THERMAL OVERLOAD
Should the unit become overloaded,the internal fuse will blow. Should this occur, determine
the cause and rectify before removing the main cover (see Maintenance on page 10)and
replacing the 10 Amp fuse. Push the fuse carrier in slightly and turn to gain access to the fuse
If the fuse blows repeatedly, consult your Clarke dealer for advice.
7
 Loading...