

Page 1
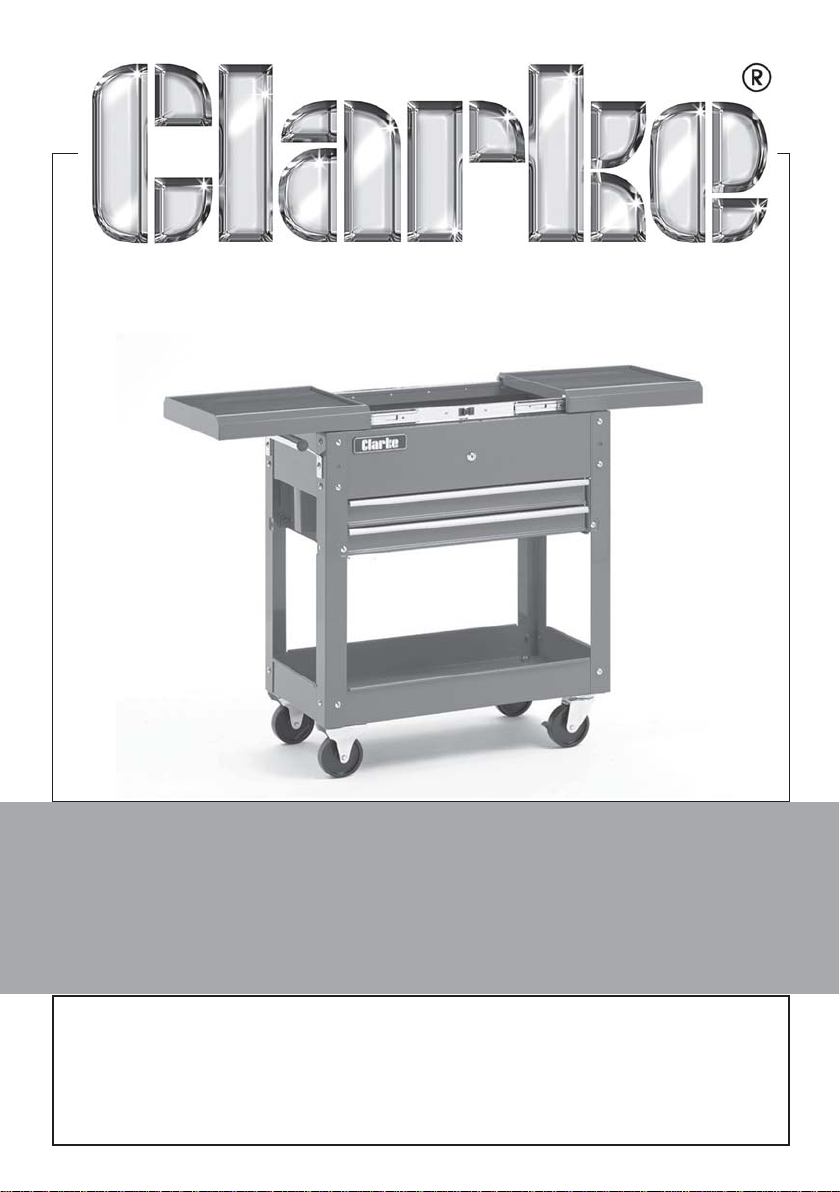
TOOL TROLLEY
Model No: CTT130
Part No: 7630625
ASSEMBLY
INSTRUCTIONS
GC12/11
Page 2
INTRODUCTION
Thank you for purchasing this CLARKE Tool Trolley.
Before attempting to assemble the trolley, be sure to read these instructions
thoroughly. In doing so you will ensure the safety of yourself and that of others
around you, and you can look forward to the trolley giving you long and
satisfactory service.
GUARANTEE
This CLARKE product is guaranteed against faulty manufacture for a period of
12 months from the date of purchase. Please keep your receipt as proof of
purchase. This guarantee is invalid if the product is found to have been
abused or tampered with in any way, or not used for its intended purpose.
Faulty goods should be returned to their place of purchase, no product can
be returned to us without prior permission. This guarantee does not effect
your statutory rights.
SPECIFICATIONS
erutaeF noitacificepS
thgieWtcudorPgk7.62
yticapaCdaoLdetaRlatoTgk031
)HxWxL(snoisnemiDmm038x073x507
neposdilpothtiwnapsllarevOmm0
tnemtrapmoCegarotSyarTpoTmm051x063x596
Parts & Service: 020 8988 7400/E-mail:[email protected] or [email protected]
021
2
Page 3
UNPACKING & OPERATION
Carefully remove the trolley components from the packaging and check for
any damage which may have occurred in transit.
Before assembling, please check contents against the following list of loose
items on page 4, and advise your Clarke dealer immediately if any parts are
missing. The keys to the top drawer are taped inside the unit.
TOOLS REQUIRED
• Screwdriver • 19 mm wrench
SAFETY PRECAUTIONS
• Do not leave the trolley unattended without the brakes being applied.
• Do not use on rough terrain. The trolley is designed for use on smooth level
flooring.
• Do not allow children to play with or ride on the trolley.
• Do not leave the trolley on any steep inclines.
• Do not use the trolley if any of the castors are damaged; have them
replaced immediately.
• Always ensure the load is favourably distributed, i.e. with heavy items on
the lower storage levels.
• Do not stack objects on an open drawer.
• Not following these instructions could result in the trolley falling over,
causing damage to the unit and/or serious personal injury. Always follow
the safety cautions & warnings given on page 7.
3
Parts & Service: 020 8988 7400/E-mail:[email protected] or [email protected]
Page 4
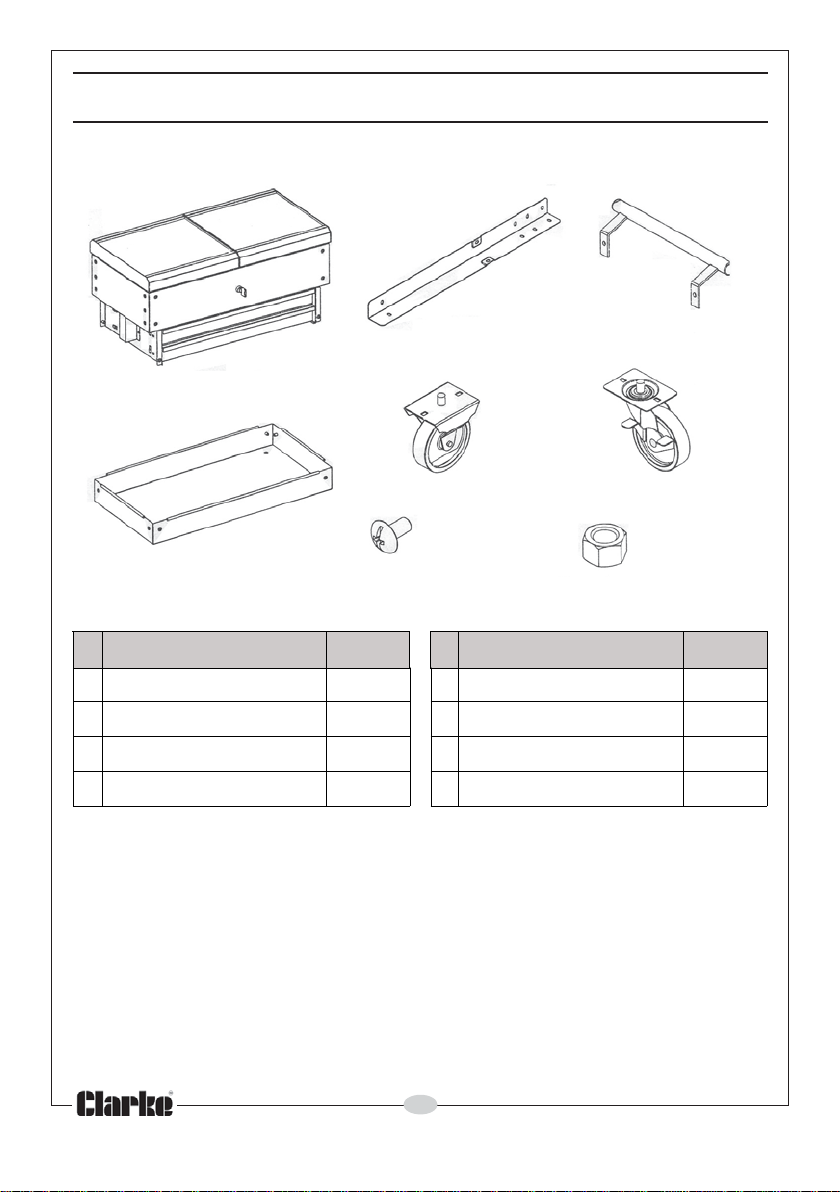
COMPONENT PARTS
B C
A
EF
DG H
noitpircseD ytQ noitpircseD ytQ
AylbmessAyarTreppU1EleehWrotsaCdexiF2
BgeL4FleehWgnikcoL/gnilleviwS2
CeldnaH1GswercS03
DyarTmottoB1HtuN4
4
Parts & Service: 020 8988 7400/E-mail:[email protected] or [email protected]
Page 5
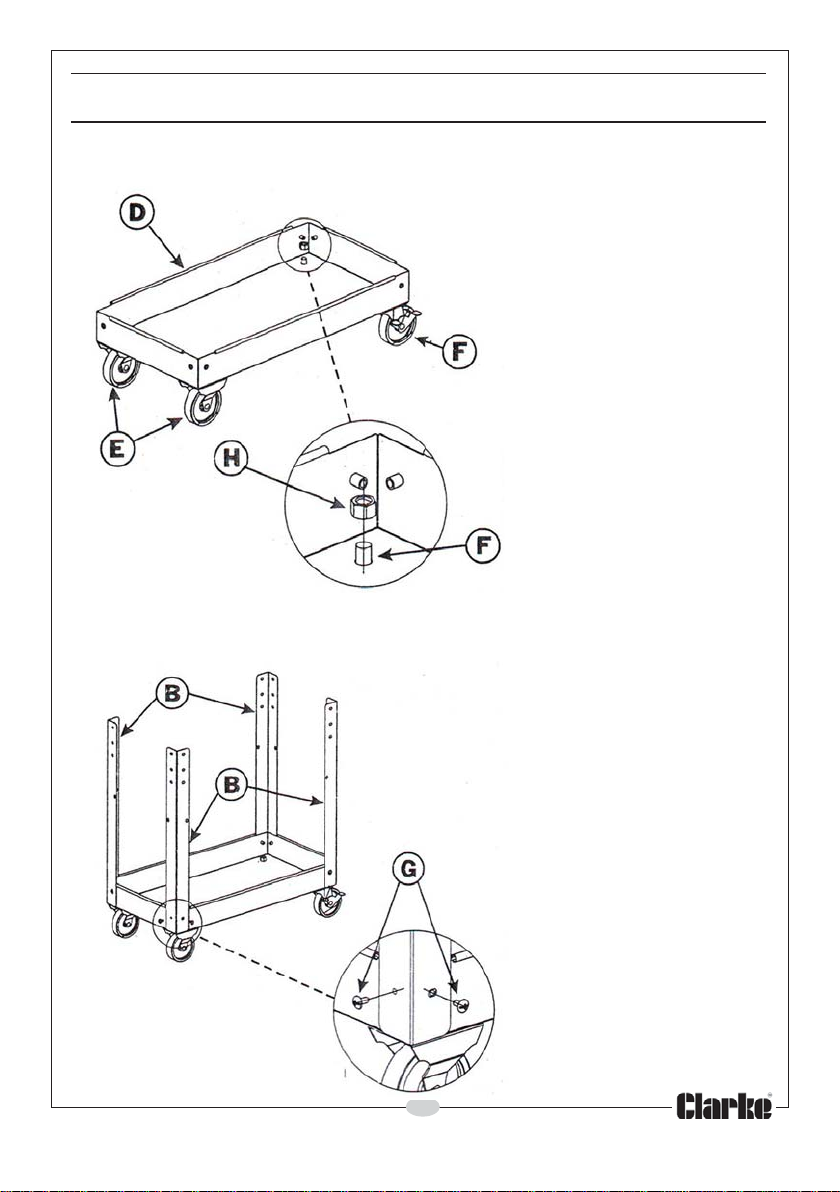
ASSEMBLY
STEP 1
Attach the wheels to the bottom
tray using 4 nuts and tighten
firmly.
NOTE: Make sure you attach the
same type of wheel (fixed/
swivelling) to the same end of
the tray. (i.e.use only E at one
end and F at the other)
STEP 2
Attach the legs to the bottom
tray using two screws per leg.
Only tighten to a snug fit at this
stage.
5
Parts & Service: 020 8988 7400/E-mail:[email protected] or [email protected]
Page 6
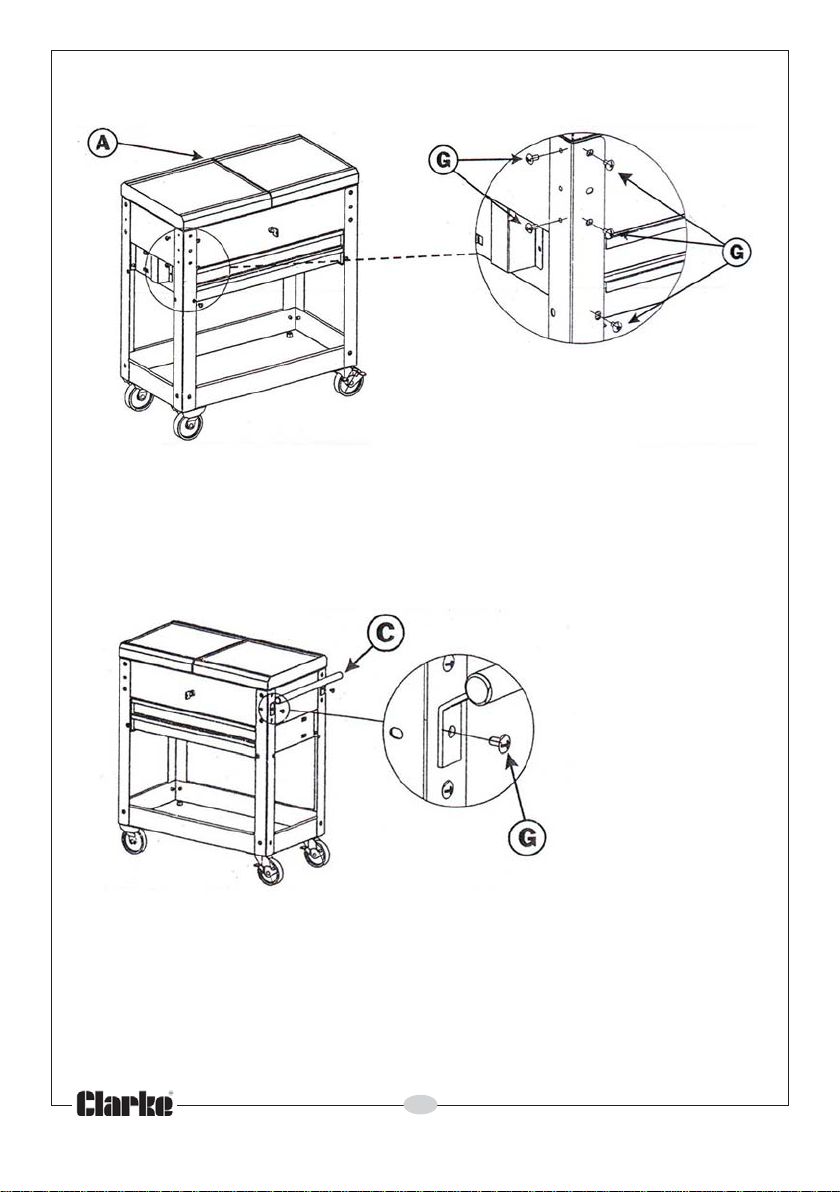
STEP 3
STEP 4
Turn the upper tray upside down on a soft,
smooth surface. Turn the bottom tray upside
down and attach all four legs. Firmly tighten
all the screws and turn the trolley upright.
The handle can be attached to
either side using two screws.
6
Parts & Service: 020 8988 7400/E-mail:[email protected] or [email protected]
Page 7
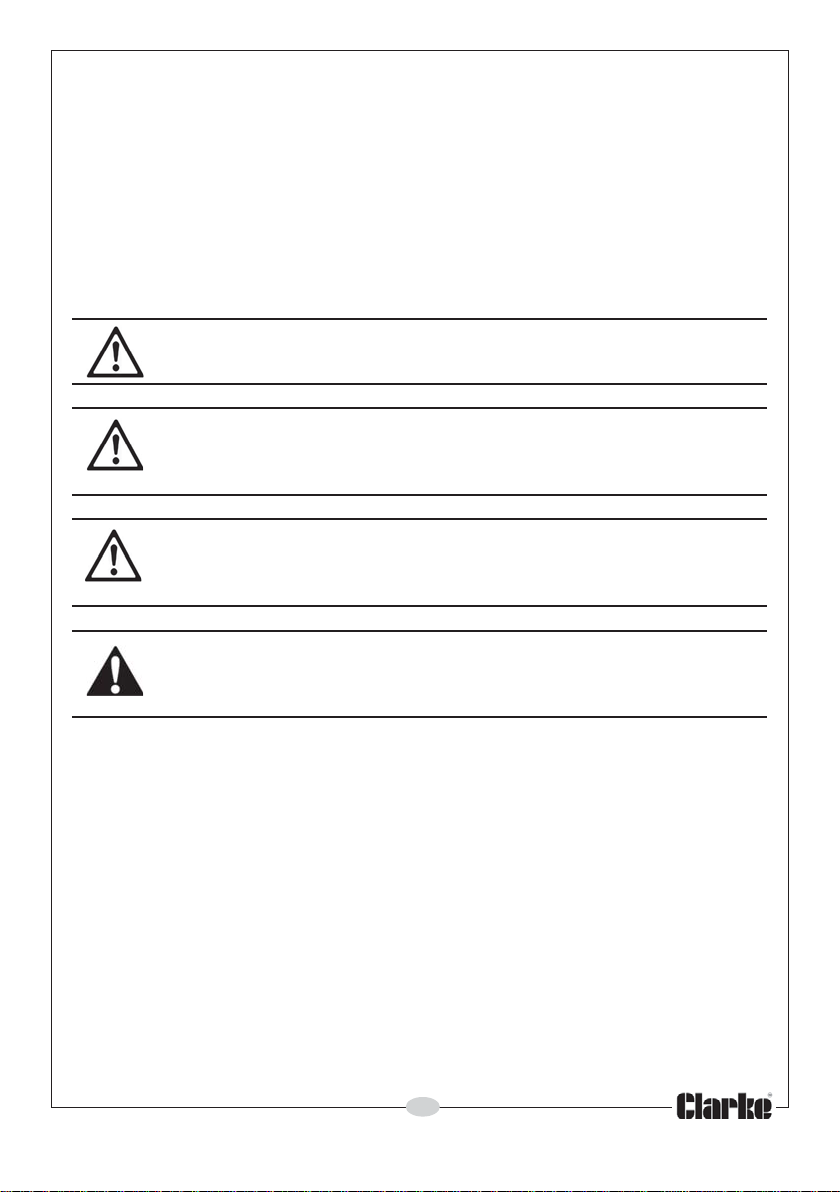
BEFORE USE
The sliding top sections must be open before the tool draws can be opened.
Close the sliding top sections before using the key provided to lock the
drawers. Only one drawer can be opened at a time.
DURING USE
Close the top trays before locking with the key provided. The draws are held
closed until the left-hand tray is opened. Always close the lid and the draws
before moving the trolley.
CAUTION: DO NOT PUT HEAVY OBJECTS ON THE EXTENDED TOP TRAYS
WHEN THEY ARE FULLY OPEN.
CAUTION: TAKE CARE OPENING A DRAWER IF HEAVY TOOLS ARE
STORED INSIDE AS THIS COULD CREATE A RISK OF THE UNIT TIPPING
OVER.
CAUTION: ALWAYS APPLY THE BRAKES ON EACH REAR CASTER WHEN
THE TOOL TROLLEY IS NOT BEING MOVED AROUND. TAKE EXTRA CARE
WHEN MOVING THE UNIT AROUND IF THE FLOOR SURFACE IS NOT FLAT.
WARNING: NEVER EXCEED THE MAX LOAD CAPACITY AS THIS COULD
DAMAGE THE UNIT OR CAUSE PERSONAL INJURY.
TOTAL TROLLEY LOAD = 130KG.
7
Parts & Service: 020 8988 7400/E-mail:[email protected] or [email protected]
Page 8
 Loading...