

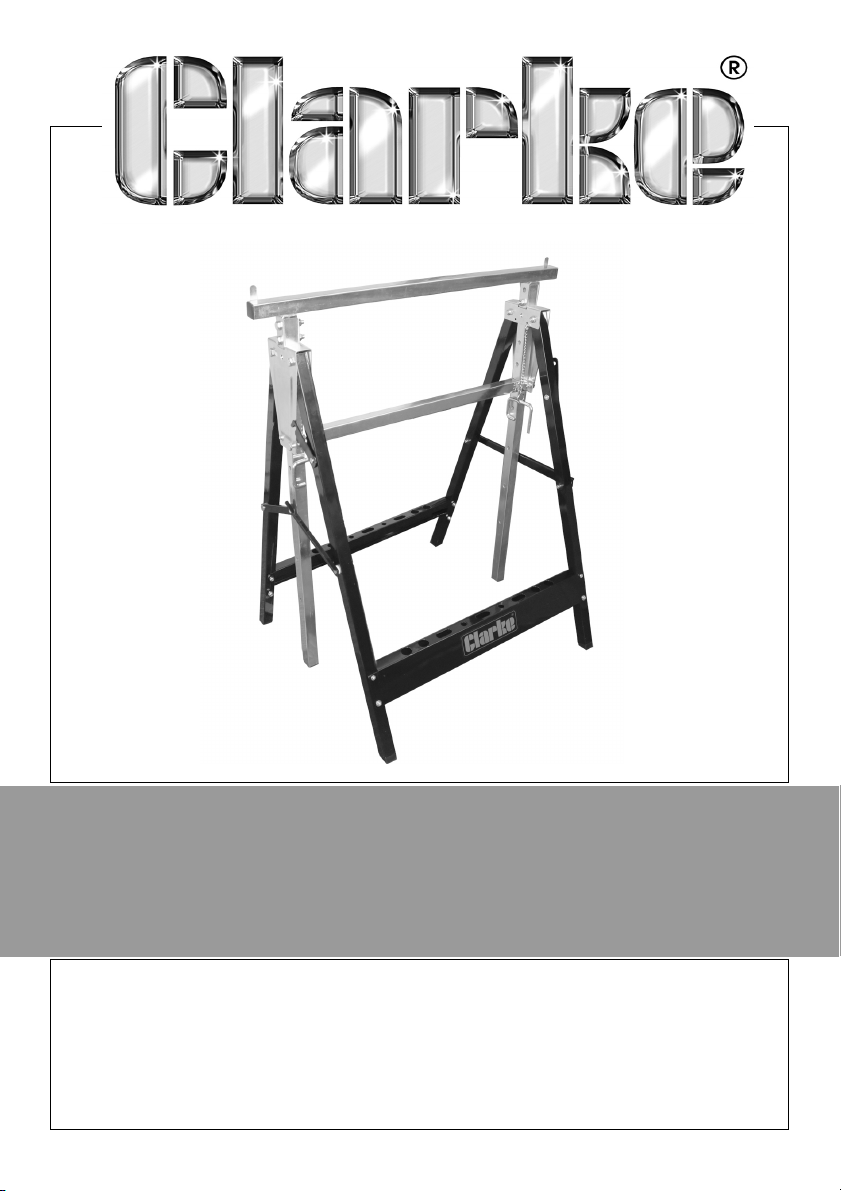
ADJUSTABLE TRESTLE
MODEL NO: CTA150
PART NO: 6600018
ASSEMBLY INSTRUCTIONS
ORIGINAL INSTRUCTIONS
LS0518 - ISS 2

INTRODUCTION
Thank you for selecting this Clarke Adjustable Trestle.
Read this manual before use. The safety precautions in this manual will help
you use the trestle safely.
GUARANTEE
This product is guaranteed against faulty manufacture for a period of 12
months from the date of purchase. Please keep your receipt which will be
required as proof of purchase.
This guarantee is invalid if the product is found to have been abused or
tampered with in any way, or not used for the purpose for which it was
intended.
Faulty goods should be returned to their place of purchase, no product can
be returned to us without prior permission.
This guarantee does not effect your statutory rights.
SAFETY PRECAUTIONS
1. This trestle has a capacity of 15O kg which must not be exceeded.
2. Do not stand on the cross members or use as a step ladder, as this could
cause severe damage. Do not stand on top of the trestle.
3. Take care when placing a load on the trestle, it should be placed gently so
that the strain is taken up gradually.
4. Do not mount power tools on the trestle.
5. Always check the trestle for damage before use.
6. Always ensure you are working on a firm, flat, stable surface.
2
Parts & Service: 020 8988 7400 / E-mail: Parts@clarkeinternational.com or Service@clarkeinternational.com

SPECIFICATIONS
Dimensions L x W x H 685 x 590 x 815-1310 mm
Maximum Load 150 kg
WHAT IS SUPPLIED
Number Description Qty Part number
1Legs (pair) 2
2 Lower Cross Brace 2
3 Upper Cross Brace 1
4Pivot Plate 2
5 Fixings Pack 1
6 Support Bar 1
7 Support Frame Upright 2
3
Parts & Service: 020 8988 7400 / E-mail: Parts@clarkeinternational.com or Service@clarkeinternational.com

ASSEMBLY
MAIN FRAME
1. Join both sets of legs together
with the upper cross brace.
2. Secure the upper cross brace.
• The small machine screw.
washer, spring washer and nut
must be installed towards the
front of the stand.
• The lug, washer, spring washer
and nut must be installed
toward the rear, on the same
side as the locking latch.
3. Fit the lower cross braces to the
front and rear as shown using the
nuts/bolts and washers provided.
4
Parts & Service: 020 8988 7400 / E-mail: Parts@clarkeinternational.com or Service@clarkeinternational.com

SUPPORT FRAME
1. Fit the 2 support frame uprights to
the support bar as shown.
2. Join them together using 1 bolt, 2
washers and a nut in each hole (4
holes in total).
3. Slide the support frame into the
main frame as shown.
5
Parts & Service: 020 8988 7400 / E-mail: Parts@clarkeinternational.com or Service@clarkeinternational.com

OPENING/CLOSING THE WORKBENCH
OPENING
1. Spread the front and rear legs.
2. Press down on the lower locking
bar (1) as shown.
3. Slide the locking latch over the lug
(2).
4. Test the stability of the stand by
rocking it before use.
SETTING THE SUPPORT HEIGHT
1. Raise the support bar to the
required height.
2. Insert the locking pin as shown on
both sides.
6
Parts & Service: 020 8988 7400 / E-mail: Parts@clarkeinternational.com or Service@clarkeinternational.com

7
Parts & Service: 020 8988 7400 / E-mail: Parts@clarkeinternational.com or Service@clarkeinternational.com

 Loading...