

Page 1
STORAGE BIN RACKS
Model No.CSR47 & CSR94
PART NO:4501630, 4501620
OPERATING & ASSEMBLY
INSTRUCTIONS
04/08
Page 2
INTRODUCTION
Thank you for purchasing this CLARKE Storage Bin Rack. Before attempting to assemble the
unit, please read this manual thoroughly and follow the instructions carefully.
GUARANTEE
This product is guaranteed against faulty manufacture for a period of 12 months from the date of
purchase. Please keep your receipt which will be required as proof of purchase.
This guarantee is invalid if the product is found to have been abused or tampered with in any
way, or not used for the purpose for which it was intended.
Faulty goods should be returned to their place of purchase, no product can be returned to us
without prior permission. This guarantee does not effect your statutory rights.
SPECIFICATION
ledoM dediselgnis74RSC dediselbuodeliboM49RSC
yticapacdaoL
HxWxLsnoisnemiDmm0511x082x049mm5421x005x049
thgieWgk32gk53
,llamsrofcp/sgk5.1
egralrofcp/sgk5.2
5.2
,llamsrofcp/sgk5.1
egralrofcp/sgk
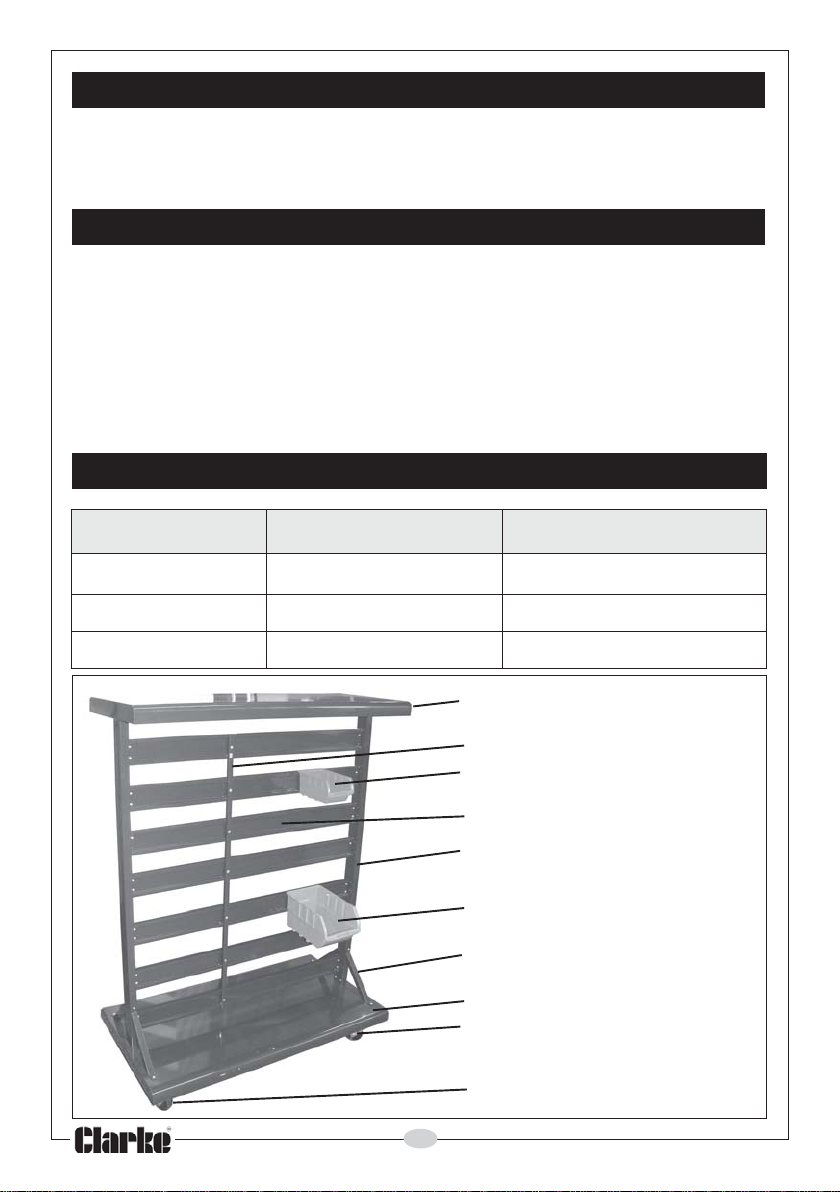
Top section
Back Strut
Small Bins (red)
Bin Support crossbar
Upright Support
Large Bins (blue)
Upright Supports
Base platform
Castor with brake (CSR94-mobile
unit only)
Castor without brake (CSR94-
mobile unit only)
2
Page 3
ASSEMBLY
Ppppp
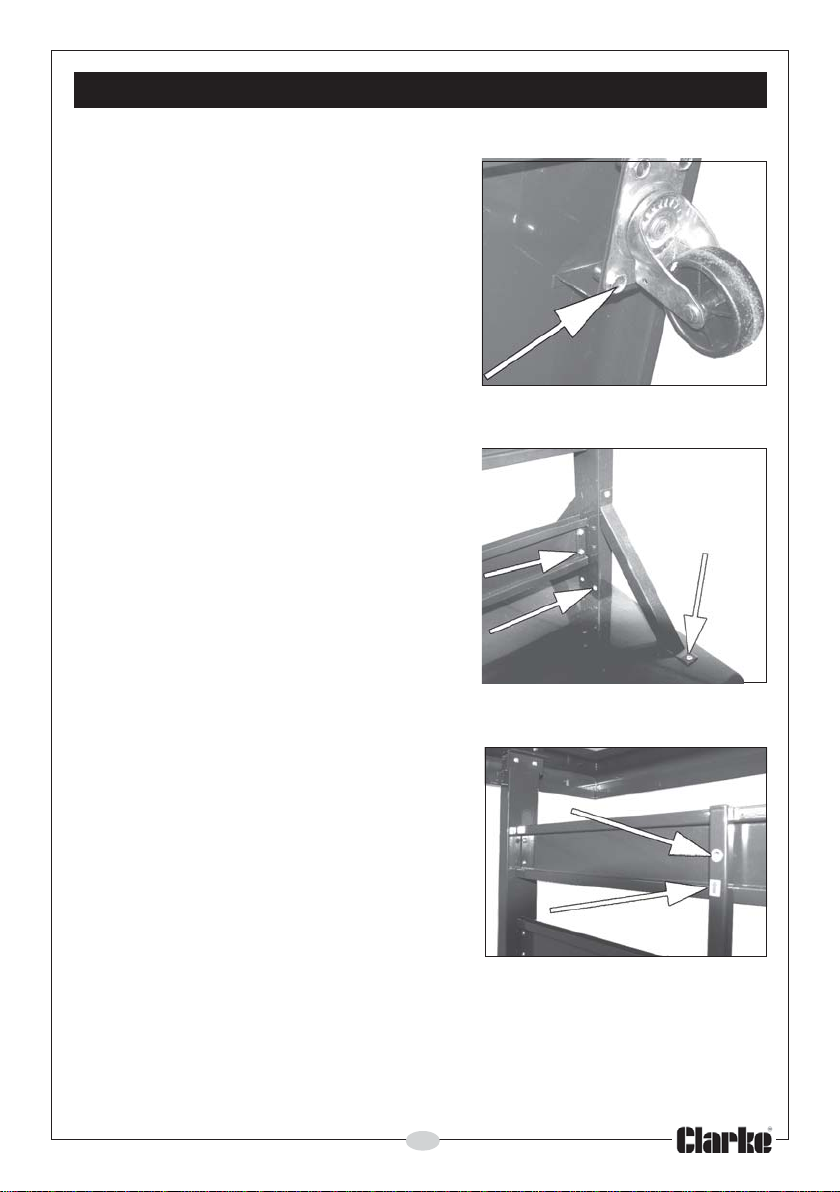
1. Turn the base on its back and attach the castors
using the hexagonal headed bolts supplied as
shown in Fig.1. (CSR94 mobile racks only)
2. Turn the base the right way up and engage the
foot operated brake on one pair of castors to hold
the unit steady. (CSR94 Mobile racks only)
Fig 1
3. Assemble the upright supports and the support
brackets as shown in Fig.2 using the cross-
headed screws supplied.
4. Connect the supporting bars to the upright
supports using the bolts and nuts supplied.
Note; Assemble all the parts loosely before
tightening all the bolts together.
5. Install the top shelf using two more pairs of
machine screws
6. Connect the back strut to each supporting bar with
the upper end shown by the arrow shown in Fig 3
using the remaining cross-headed screws.
6. Hang the storage bins by their lips from the top
edge of the supporting bars.
Your storage bin rack is now ready to use.
Fig 2
Fig 3
3
Page 4

 Loading...